Airing Out a New Apartment: A Practical VOC Schedule

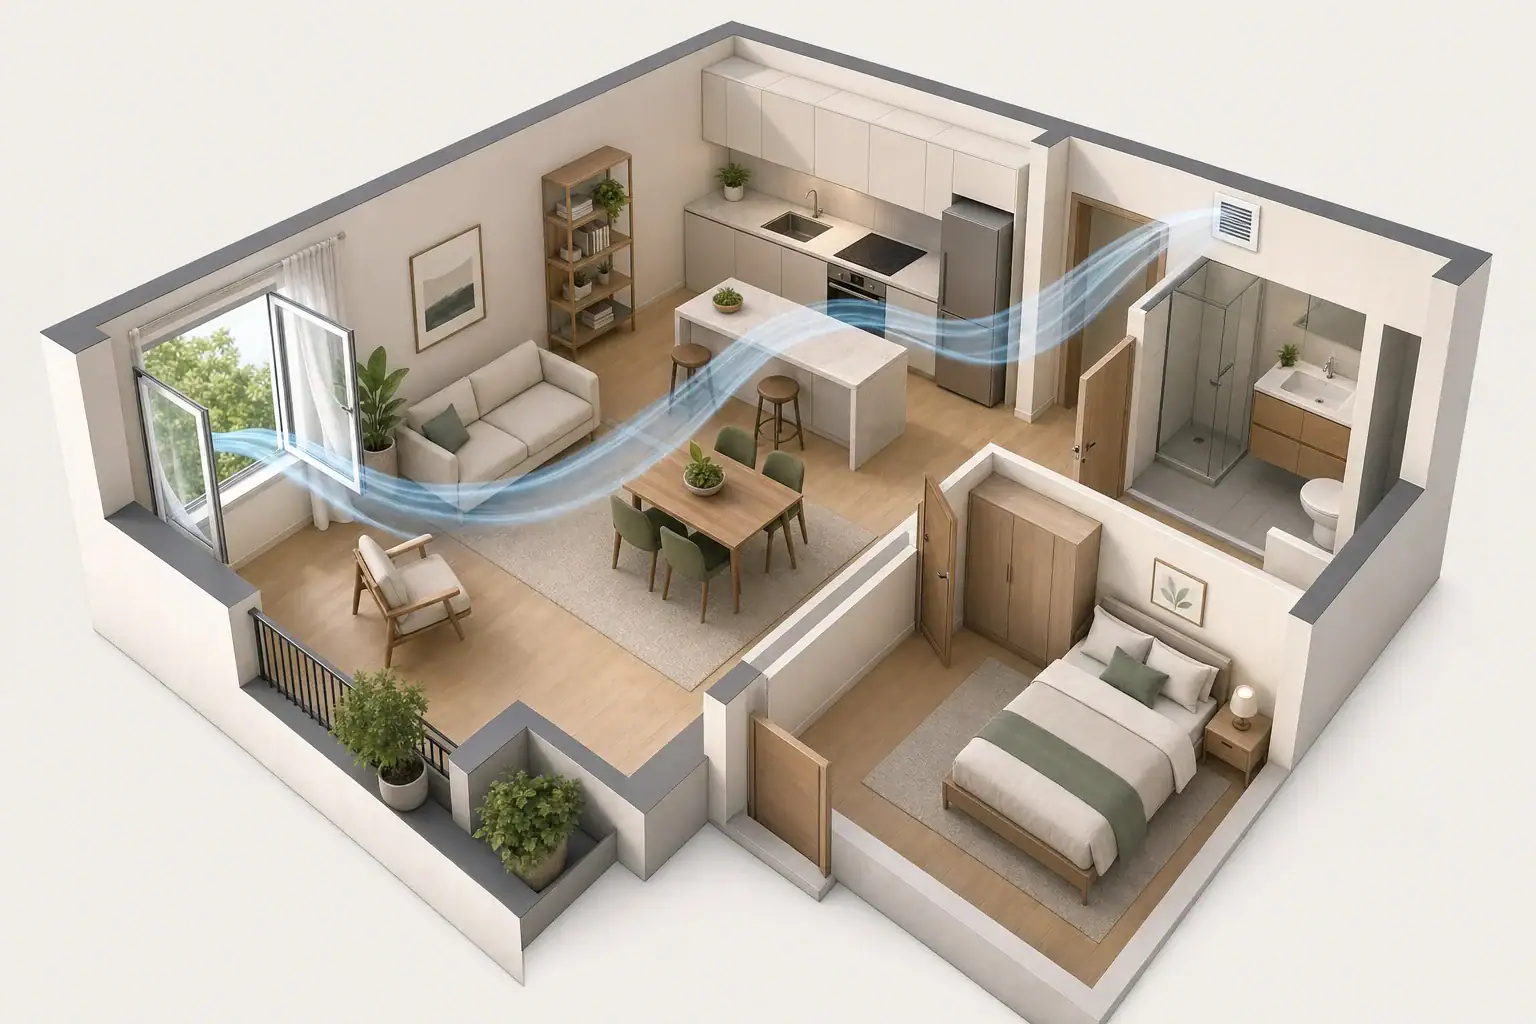
Open apartment window with gentle indoor airflow

Air out a new apartment intensively for the first 24 to 72 hours, then use shorter daily ventilation sessions for several weeks while odors and source emissions decline. There is no universal airing-out time because ventilation, weather, furnishings, finishes, and building age all affect the process. Source control and outdoor air exchange generally matter more than trying to cover odors with fragrances.

Quick answer

  • If outdoor conditions are suitable, create cross-ventilation for about 20 to 60 minutes at a time, two to four times during the first few days.
  • Continue one or two shorter daily sessions for roughly two to six weeks, adjusting according to odors, indoor trends, weather, and security.
  • Run kitchen and bathroom exhaust fans when appropriate, but confirm that they vent outdoors rather than merely recirculating air.
  • Remove packaging, construction dust, scented products, and other avoidable sources before relying on an air purifier.
  • Use particle filtration for dust and PM2.5; meaningful VOC and odor reduction requires substantial activated carbon or other suitable gas-phase media.

What airing out a new apartment actually does

New-apartment odors can come from paint, flooring, cabinets, adhesives, sealants, cleaning products, furniture, and packaging. Some of these materials release volatile organic compounds, or VOCs, into the air. Emission rates often decrease over time, although the pattern varies by material, temperature, humidity, and ventilation.

Ventilation replaces a portion of indoor air with outdoor air. This can dilute airborne VOCs and remove odors when outdoor air is cleaner and less odorous than indoor air. Opening one window may help, but opening windows or doors on opposite sides of the apartment usually produces faster air movement.

Odor is not a precise measure of VOC concentration or overall air quality. Some compounds are noticeable at low concentrations, while others have little odor. An apartment can also smell new because of materials that do not present a useful or measurable TVOC signal on a basic consumer monitor.

How to set a VOC and odor ventilation schedule

A practical schedule should account for the strength of the sources, the apartment layout, outdoor conditions, and how quickly air can move through the space. Treat time ranges as planning examples rather than official exposure limits.

Start with the highest-emission period

During the first 24 to 72 hours, ventilate as much as reasonably practical when outdoor conditions are favorable. Several 20- to 60-minute cross-ventilation sessions may be more manageable than leaving windows open continuously. Longer ventilation can be useful after fresh painting, flooring work, cabinet installation, or delivery of several new furnishings.

Reduce the schedule gradually

For the rest of the first two weeks, consider one or two ventilation sessions per day. From weeks three through six, ventilate as needed based on persistent odor, recent installation work, monitor trends, and comfort. Some materials decline quickly, while others release detectable odors intermittently for longer.

Estimate the effect of airflow

Air changes per hour, or ACH, describes how many room-equivalent volumes of air are replaced in one hour. Natural ventilation ACH varies widely because wind, temperature differences, window area, and apartment layout change constantly. A fully open cross-ventilation path may exchange air much faster than a slightly open window in a closed room, but neither setup guarantees a specific ACH without measurement.

Ventilation and source-control decision matrix

Example values for illustration.

Actions for common new-apartment conditions
Condition Primary action Planning note
Fresh paint or flooring odor Use cross-ventilation Begin with repeated 20- to 60-minute sessions
Visible packaging or protective film Remove the source Take cardboard, plastic, and foam outside promptly
Cooking or cleaning odor Use outdoor-vented exhaust Run during the activity and briefly afterward
Dust after construction Clean surfaces and filter particles VOC filtration alone will not remove settled dust
High outdoor smoke or PM2.5 Close windows temporarily Use particle filtration until outdoor air improves
Persistent cabinet or furniture odor Ventilate the source area Open empty drawers or doors when safe
Odor returns after windows close Continue source control Short-term dilution may not eliminate ongoing emissions

Common airing-out mistakes and troubleshooting cues

One common mistake is assuming that the central HVAC fan always brings in outdoor air. Many apartment systems primarily recirculate indoor air. Building documentation or property management may clarify whether a system includes a dedicated outdoor-air supply.

Other common problems include:

  • Opening only an interior door: Air needs a path to an outdoor opening or exhaust vent to leave the apartment.
  • Blocking airflow: Closed bedroom doors, heavy curtains, and furniture in front of vents can create poorly ventilated zones.
  • Using fragrance to mask an odor: Sprays, plug-ins, candles, and heavily scented cleaners introduce additional airborne compounds.
  • Ignoring outdoor conditions: Outdoor smoke, traffic pollution, pollen, extreme humidity, or nearby construction may make open-window ventilation temporarily counterproductive.
  • Expecting a thin carbon sheet to handle strong VOC sources: Small amounts of carbon may reduce some odors briefly but can saturate quickly.
  • Relying on odor alone: Odor intensity can change with temperature and humidity, and occupants may become accustomed to a smell.

If an odor is concentrated in one cabinet, closet, room, or newly installed surface, focus on that area. If it resembles gas, burning material, sewage, or another building-system problem, leave the immediate area when appropriate and contact property management, emergency services, or the relevant utility rather than treating it as an ordinary new-apartment odor.

A practical move-in ventilation checklist

Before unpacking

  • Inspect the apartment for active painting, damp materials, leaks, and unfinished work.
  • Remove cardboard, plastic wrap, foam, adhesive liners, and empty cleaning containers.
  • Vacuum with suitable particle filtration and damp-wipe hard surfaces to collect renovation dust.
  • Check that supply vents, return grilles, and exhaust grilles are not blocked.
  • Identify windows that can be opened safely and determine whether they create a cross-breeze.

During the first three days

  • Open windows on different sides of the apartment when weather, security, and outdoor air permit.
  • Use built-in bathroom and kitchen exhaust fans if they discharge outdoors.
  • Open empty cabinet doors and drawers for limited periods so trapped air can mix with ventilated room air.
  • Keep interior doors open when appropriate to prevent stagnant rooms.
  • Avoid bringing in many new scented products or furnishings at the same time.

During the following weeks

Shift from intensive airing to a repeatable routine. Ventilate after cleaning, cooking, furniture assembly, or other activities that introduce odors. If outdoor air is unsuitable during the day, use shorter sessions when local conditions improve, provided doing so is safe and does not conflict with building rules.

Schedules for different apartment situations

Recently renovated studio

A studio may ventilate relatively evenly because it has few closed rooms, but a single exterior window can limit crossflow. Begin with several daily sessions during the first three days. A window fan may improve directional airflow if it is allowed, securely installed, and used according to its instructions.

Two-bedroom apartment with new cabinets

Open interior doors and ventilate the kitchen directly when possible. Empty cabinet doors and drawers can be left open during supervised ventilation periods, then closed when needed for safety. Continue daily sessions for two weeks and reassess whether the odor is becoming weaker and slower to return.

High-rise apartment with sealed windows

Do not attempt to modify sealed windows, vents, or building safety systems. Use the building-provided ventilation, run outdoor-vented exhaust where available, and ask property management about normal fresh-air operation. Source removal and low-emission purchasing decisions become especially important when occupants cannot control window ventilation.

Apartment near smoke or heavy traffic

Time open-window ventilation for periods when outdoor particle conditions are better. A particle monitor or local outdoor air information can help identify trends. During poor outdoor conditions, close windows and use appropriately sized particle filtration, recognizing that a HEPA filter is not a substitute for gas-phase VOC media.

Purifiers, monitors, humidity, and safety

Air purifiers can complement ventilation, but filter type matters. HEPA filtration captures airborne particles such as dust and fine particulate matter; it does not directly remove gases. Activated carbon or another gas-phase medium is needed for VOCs and odors, and performance depends on media quantity, airflow, compound type, and saturation.

For particle planning, clean air delivery rate and room size can be used to estimate equivalent air changes. A simple planning formula is CADR divided by room volume, multiplied by 60. For example, a 150 cubic-feet-per-minute CADR in a 1,500-cubic-foot room provides an illustrative six equivalent air changes per hour for particles under idealized conditions. This calculation does not predict VOC removal unless the stated airflow and performance apply to gas filtration.

Consumer TVOC monitors are most useful for observing patterns, such as a rise after cleaning or a decline when windows open. Their readings can be influenced by humidity, alcohols, fragrances, and sensor design. They should not be treated as compound-specific safety instruments.

Keep indoor humidity generally around 30% to 50% when practical, while accounting for climate and building conditions. High temperature and humidity can increase emissions from some materials, while excessive humidity can also contribute to condensation and dampness.

Avoid devices that intentionally produce ozone. Ionization and some electronic air-cleaning features may create ozone or other byproducts, so check independent safety certification and understand whether the feature can be disabled. Enclosed UV-C components are mainly intended for biological control within equipment; they do not replace ventilation, particle filtration, or gas-phase media.

Maintenance and signs that the schedule should change

Ventilation plans should respond to changing conditions rather than follow a fixed calendar indefinitely. Increase ventilation temporarily after painting, furniture delivery, deep cleaning, or other source-producing activities. Reduce open-window time when outdoor smoke, excessive humidity, or strong outdoor odors enter the apartment.

Check HVAC filters according to building guidance, especially after renovation dust. Clean prefilters and replace purifier filters according to their condition and the manufacturer’s schedule. Carbon media may need attention when odors begin passing through quickly, although odor return can also mean that the indoor source is still active.

Track simple observations at the same time each day:

  • Whether the odor is weaker, unchanged, or stronger
  • How quickly the odor returns after windows close
  • Which room or object has the strongest odor
  • Whether TVOC or PM2.5 trends respond to ventilation
  • Whether outdoor air, humidity, or weather explains a temporary change

Document persistent problems with dates, locations, recent work, and photos of visible defects. Contact property management if odors remain intense, ventilation equipment does not operate, moisture is present, or building materials appear damaged. Specialized testing may be appropriate when a specific contaminant or building defect is suspected, but a general consumer TVOC reading cannot identify individual chemicals.

Monitor metrics for adjusting an airing-out schedule

Example values for illustration.

What common indoor air readings can and cannot indicate
Metric What it indicates Practical use
TVOC Broad sensor response to multiple gases Compare trends before and after ventilation
PM2.5 Fine airborne particle concentration Check whether outdoor particles enter through windows
Carbon dioxide Occupancy and ventilation trends Observe whether occupied rooms need more fresh air
Relative humidity Moisture level relative to temperature Balance ventilation with condensation and dryness concerns
Temperature Indoor thermal conditions Note whether warmth corresponds with stronger emissions
Carbon monoxide Combustion-related safety hazard Use listed alarms; do not substitute a general air monitor

Related guides:
Cross-Ventilation Setup: How to Move Air Through a Home Faster
Ventilation vs Air Purifier: When You Need One, the Other, or Both
Indoor Air Quality Monitors: What to Measure (PM2.5, CO2, VOCs, Humidity)
Window Ventilation Schedule: Morning vs Evening Air Quality Trade-Offs

Summary of the VOC and odor schedule

Start with intensive ventilation during the first 24 to 72 hours when outdoor conditions are suitable. Continue shorter daily sessions for roughly two to six weeks, then adjust according to source activity, odor trends, monitor patterns, outdoor air, and apartment rules.

Remove avoidable sources, clean renovation dust, and use outdoor-vented exhaust before depending on filtration. Choose particle and gas-phase filtration according to the pollutant involved, and avoid ozone-producing devices. Persistent, unusual, or building-related odors should be documented and addressed with property management or an appropriately qualified professional.

Frequently asked questions

How long should I air out a new apartment before moving in?

If conditions allow, use intensive ventilation for the first 24 to 72 hours, with repeated cross-ventilation sessions of about 20 to 60 minutes. Continue shorter daily sessions for roughly two to six weeks, especially after recent painting, flooring installation, cabinet work, or furniture delivery. The appropriate duration depends on source strength, airflow, outdoor air quality, and whether odors are declining.

Is opening one window enough to remove new-apartment odors?

Opening one window can provide some dilution, but it may produce limited airflow in a closed apartment. Opening windows or exterior openings on opposite sides of the space, when safe and permitted, usually creates more effective cross-ventilation. Interior doors may also need to remain open so air can move through bedrooms and other enclosed areas.

Should I keep windows open if outdoor air is smoky or polluted?

When outdoor smoke, heavy traffic pollution, or other strong outdoor odors are present, open-window ventilation may temporarily worsen indoor particle levels. Close windows during poor conditions and use appropriately sized particle filtration if available. Resume shorter ventilation sessions when local outdoor air conditions improve and it is safe to do so.

Can an air purifier remove VOCs from paint, cabinets, and new furniture?

A particle filter can capture dust and fine particles but does not directly remove VOC gases. VOC and odor reduction requires a suitable gas-phase medium, such as a substantial amount of activated carbon, and its effectiveness varies with the pollutant, airflow, and filter saturation. Removing packaging and other avoidable sources, along with ventilation, is generally more important than relying on a purifier alone.

What should I do if the new-apartment smell returns after I close the windows?

An odor that returns quickly may indicate an ongoing source such as cabinets, flooring, paint, furniture, cleaning products, or materials stored in a closet. Focus ventilation and source control on the strongest-smelling room or object, and open empty drawers or cabinet doors during supervised ventilation periods. Document persistent intense odors, moisture, damaged materials, or ventilation problems and report them to property management.
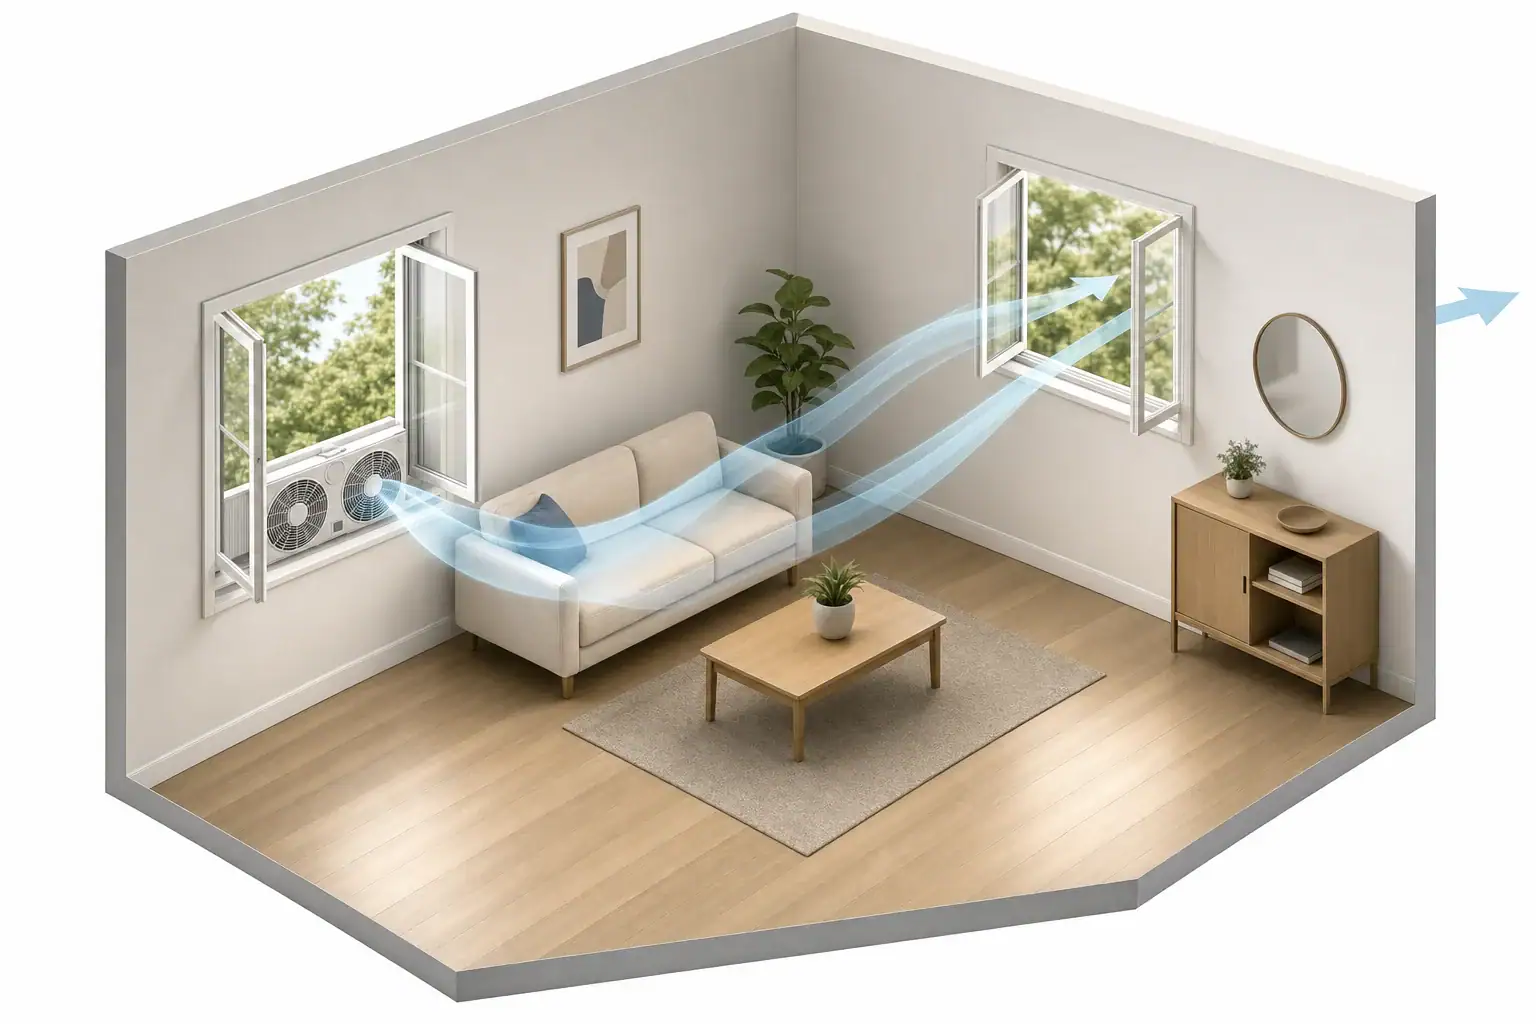
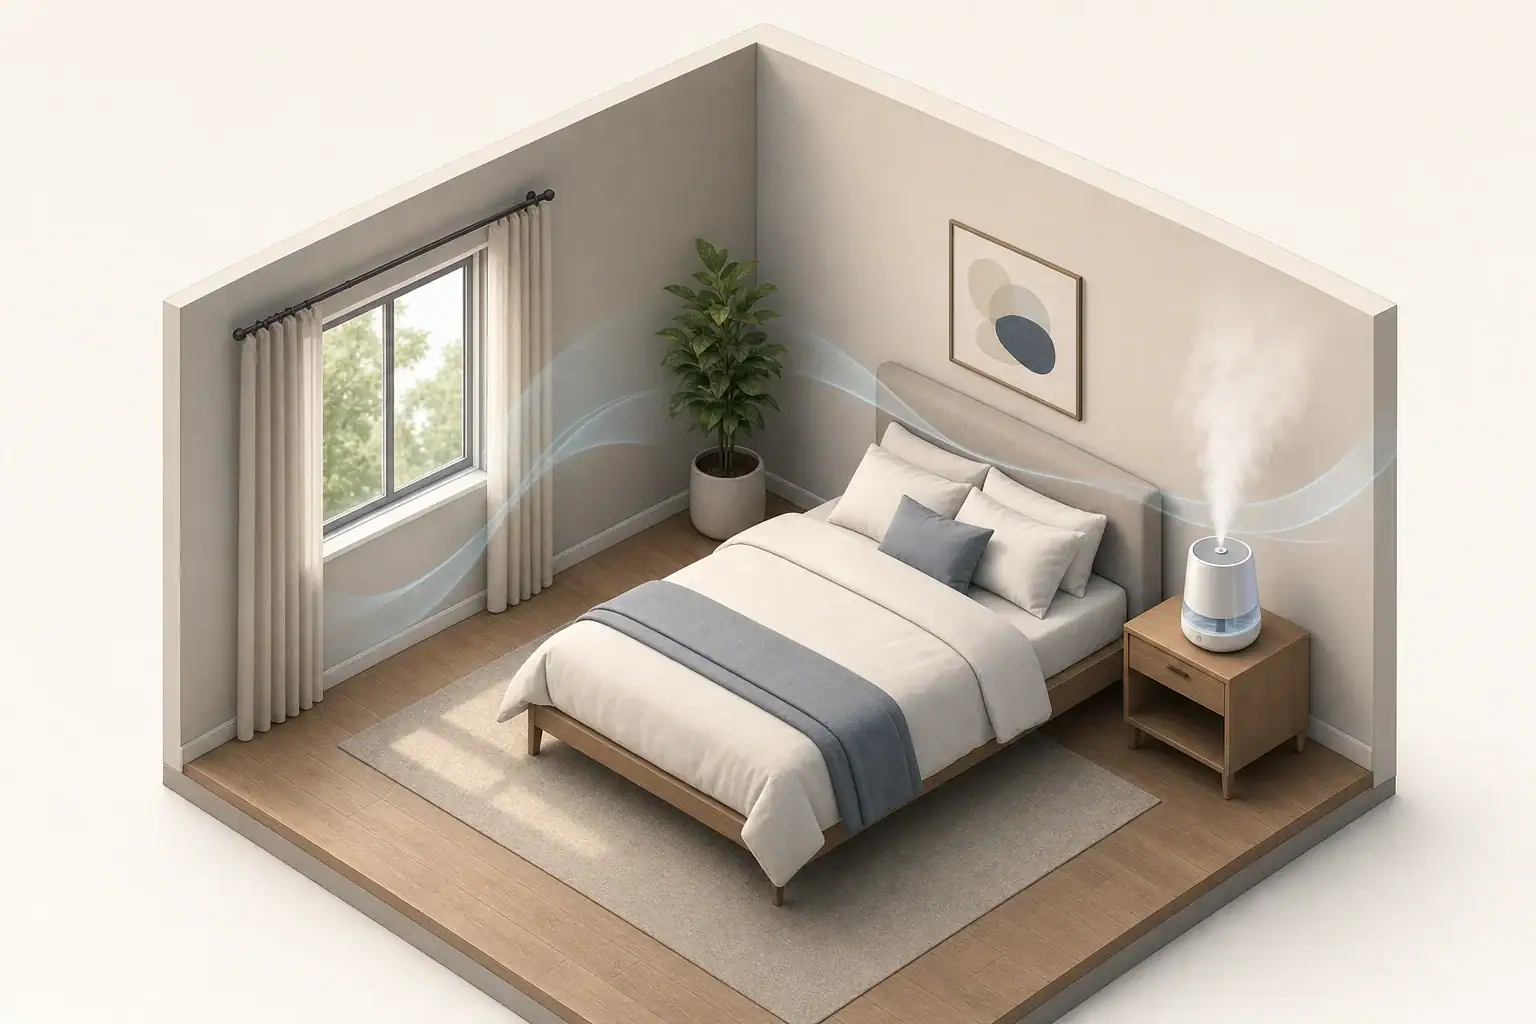
Window Fan Intake vs Exhaust Setup: What Works Better?

Window fan moving air through a minimal room

Use a window fan as exhaust to remove indoor heat, odors, or stale air, and use it as intake when the outdoor air is cleaner and more comfortable than the indoor air. In many homes, the most effective setup combines an exhaust fan on one side of the space with an open window or intake fan on the opposite side. Outdoor conditions, room layout, and fan placement all affect the result.

Quick answer

  • Choose exhaust near an indoor heat, moisture, or odor source, provided the fan is suitable for that location.
  • Choose intake on the cooler, cleaner, or quieter side of the home.
  • For cross-ventilation, place intake and exhaust openings on opposite sides when possible.
  • Estimate theoretical air changes per hour with ACH = fan CFM × 60 ÷ room volume; real airflow is usually lower.
  • For a short air purge, run the setup for about 15–30 minutes, then reassess indoor and outdoor conditions.

How Window Fan Intake and Exhaust Setups Work

A window fan changes the pressure and airflow pattern inside a room. In exhaust mode, the fan pushes indoor air outside. Replacement air then enters through other open windows, doors, vents, and building leaks.

In intake mode, the fan pulls outdoor air inside. Indoor air must leave elsewhere, so an open interior door or another window is important. Without a clear exit path, airflow can fall and the fan may mainly circulate air near the window.

When exhaust is usually more useful

Exhaust is generally the practical starting point when the main goal is to remove something generated indoors. Examples include accumulated heat, cooking odors, cleaning odors, or stuffiness. Source-specific exhaust equipment, such as a properly vented range hood or bathroom fan, is often more effective for moisture and contaminants produced in those areas.

When intake is usually more useful

Intake can help cool or refresh a room when outdoor air is favorable. It often works well at a shaded window during cooler evening or early-morning hours. It is less suitable when outdoor smoke, pollution, high humidity, or strong odors are present.

Window Fan Sizing and Airflow Planning

Window fan airflow is commonly expressed in cubic feet per minute, or CFM. A larger airflow rating does not guarantee better ventilation because screens, partially closed windows, wind, curtains, and pressure differences can reduce actual airflow.

To estimate room volume, multiply floor area by ceiling height. A 120-square-foot room with an 8-foot ceiling has a volume of 960 cubic feet. A theoretical 150 CFM of airflow would equal about 9.4 air changes per hour: 150 × 60 ÷ 960. This is an illustrative free-air estimate, not a guaranteed result in an installed window.

More airflow is not always necessary. A lower speed may provide enough ventilation with less noise, less draft, and lower energy use. The clearest sign of an effective setup is a defined path from the outdoor air entry point, through the occupied space, and out through the exhaust opening.

Window fan intake and exhaust comparison

Example values for illustration.

Choosing a setup for common ventilation goals
Goal or condition Suggested setup Placement note
Remove accumulated indoor heat Exhaust Place high or on the warmer side when practical
Bring in cooler evening air Intake Use a shaded, cleaner outdoor side
Create cross-ventilation Intake plus exhaust Use separated or opposite windows
Remove a localized odor Exhaust Place near the source without disrupting dedicated exhaust
Ventilate one room from another Exhaust at the destination window Keep the connecting door open
Outdoor air is smoky or polluted Keep fan off Close windows and use appropriate particle filtration indoors
Outdoor humidity is high Limit intake Compare indoor and outdoor moisture conditions

Common Setup Mistakes and Troubleshooting Cues

A common mistake is operating a fan without providing a return-air path. An exhaust fan needs a place for replacement air to enter, while an intake fan needs an opening through which indoor air can leave. Opening a second window several inches may make a noticeable difference.

Another mistake is placing intake and exhaust openings too close together. Air may take the shortest route between them and bypass much of the room. Greater separation usually creates a more useful sweep through the space.

Signs that airflow is restricted

  • The fan sounds strained or changes pitch after installation.
  • Curtains are pulled against the fan or block the opening.
  • Only the area immediately around the window feels different.
  • Indoor doors move or whistle because pressure differences are high.
  • Odors or heat remain even after the fan has run for a reasonable period.

Window screens can also reduce flow, especially when loaded with dust or pollen. Do not remove a screen if doing so would create an insect, fall, pet, or child-safety concern. Instead, keep it clean and account for the added resistance.

How to Set Up a Window Fan Step by Step

  1. Check outdoor conditions. Avoid bringing in air during smoke events, poor local air quality, high outdoor humidity, or strong nearby odors.
  2. Define the goal. Decide whether you are removing indoor air, bringing outdoor air in, or establishing cross-ventilation.
  3. Select the window. For intake, favor the cleaner, cooler, and quieter side. For exhaust, choose a location near the area being ventilated.
  4. Create an airflow path. Open a second window or interior door away from the fan. Keep furniture, blinds, and curtains out of the path.
  5. Secure the fan. Follow its installation instructions and use the supplied panels or supports. The unit should not shift when the window or nearby doors move.
  6. Start at a moderate speed. Increase speed only if more airflow is needed. High speed can add noise and drafts without improving the path through the room.
  7. Test direction. A light strip of tissue held safely away from moving blades can show whether air is entering or leaving at an opening.
  8. Reassess after 15–30 minutes. Check temperature, odor, humidity, noise, and outdoor conditions rather than leaving the setup unchanged automatically.

In a multiroom home, keep interior doors open along the intended route. If privacy requires closed doors, gaps around the door may not provide enough airflow for a high-output fan.

Window Fan Layout Examples for Homes and Apartments

Single bedroom with one usable window

Use intake when outdoor air is cooler and clean enough to bring inside. Keep the bedroom door open so air can move into the hall and leave through another opening. If the room is warmer than the rest of the home, exhaust can instead pull conditioned or cooler air from the hall into the bedroom.

Apartment with windows on one side

True cross-ventilation may be limited when all windows face the same direction. One fan can exhaust through a window while another nearby window serves as a passive inlet, but the openings should be separated as much as the layout allows. Wind direction may have a large effect.

House with opposite-facing windows

Place an intake fan on the cooler or cleaner side and an exhaust fan on the opposite side. Keep the route between them open. Using both fans at similar low or medium settings can provide steadier airflow than running one fan at maximum speed.

Two-story home during cooler evenings

An upper-floor exhaust fan can remove warmer air while lower-floor windows admit cooler outdoor air. This uses both fan pressure and the natural tendency of warm air to rise. Stair gates, doors, and the locations of combustion equipment must still be considered.

Safety, Outdoor Air Quality, and Building Considerations

A window fan does not filter outdoor air. It can bring in particles, pollen, vehicle exhaust, humidity, and odors along with fresh outdoor air. Check current local conditions and close windows when outdoor air is unsuitable. During smoke episodes, keeping windows closed and using an appropriately sized particle-filtering air cleaner is generally more useful than window ventilation.

Strong exhaust can depressurize a home. In buildings with fuel-burning furnaces, water heaters, fireplaces, or other combustion appliances, negative pressure may interfere with proper venting. Follow appliance and building guidance, keep required vents unobstructed, and use working carbon monoxide alarms as required for the home. Stop using the exhaust setup if combustion gases may be entering the living space and seek qualified assistance.

Protect the fan from rain unless its instructions specifically permit that exposure. Keep cords dry, avoid overloaded extension arrangements, and plug the fan into an appropriate outlet. Do not place an unsecured fan where it creates a fall risk or compromises a window guard.

A window fan does not generate ozone as part of ordinary mechanical fan operation. Additional ionizing or ozone-generating features are not necessary for ventilation, and intentional ozone generation should not be used in occupied residential spaces.

Noise, Energy Use, and Window Fan Maintenance

Noise depends on fan speed, blade design, window vibration, outdoor sound, and distance from the sleeping or working area. Running a larger fan at a lower setting can sometimes be quieter than running a smaller fan at maximum output, but installed performance varies.

To limit vibration, confirm that the fan and window panels are stable and that no hard parts are rattling against the frame. Do not improvise modifications that interfere with blade guards, electrical components, or the window’s safe operation.

Inspect the fan regularly during its operating season. Unplug it before cleaning, and follow its instructions for accessing guards or removable parts. Dust on blades and grilles can reduce airflow and contribute to imbalance. Clean nearby screens and window tracks as well.

Energy use can be estimated by multiplying wattage by hours of operation and dividing by 1,000 to obtain kilowatt-hours. For example, a 50-watt fan running for eight hours uses about 0.4 kilowatt-hours. Actual wattage depends on the fan and speed setting.

Illustrative window fan noise and placement planner

Example values for illustration.

Ways to balance ventilation and noise
Operating situation Noise consideration Placement or timing idea
Short air purge Higher speed may be acceptable Run about 15–30 minutes before quiet hours
Overnight intake Outdoor sounds may enter Use a quieter-facing window and low speed
Overnight exhaust Motor and frame vibration may be noticeable Secure panels and increase distance from the bed
Two-fan cross-ventilation Two low-speed fans may sound steadier Separate intake and exhaust across the home
Street-facing room Traffic noise may outweigh cooling benefits Ventilate before bedtime when practical
Home office Air rush can affect calls or concentration Use moderate speed and keep the fan off-axis

Related guides:
Window Ventilation Schedule: Morning vs Evening Air Quality Trade-Offs
Cross-Ventilation Setup: How to Move Air Through a Home Faster
Ventilating During Wildfire Smoke: When Keeping Windows Closed Is Better
Exhaust Fan Best Practices: Bathrooms and Kitchens That Actually Clear Air

Window Fan Intake vs Exhaust Takeaways

Exhaust is the usual choice for removing indoor heat, odors, and stale air, while intake is useful for bringing in cooler or cleaner outdoor air. The strongest general setup is a clear cross-ventilation path with separated intake and exhaust openings.

Fan ratings provide a planning estimate, but screens, wind, building leakage, and room layout determine real performance. Start at a moderate speed, provide a return-air path, and adjust based on indoor comfort and current outdoor conditions.

Keep the fan secured, clean, dry, and clear of curtains. Avoid window ventilation when outdoor smoke, pollution, or humidity would make indoor conditions less favorable, and use extra caution around combustion appliances and child-accessible windows.

Frequently asked questions

Is a window fan better on intake or exhaust for cooling a room?

Exhaust is often effective when the room contains built-up heat and there is a cooler place for replacement air to enter. Intake is usually better when outdoor air is cooler, cleaner, and comfortable enough to bring indoors. For the strongest whole-room cooling effect, use a separated intake opening and exhaust opening to create a clear airflow path.

Should a window fan blow in or out at night?

At night, use intake if the outdoor air is cooler and outdoor air quality is good. Use exhaust if the goal is to remove heat from an upper floor or warm room while cooler air enters through another open window. Keep windows closed when smoke, pollution, strong odors, or excessive humidity would worsen indoor conditions.

How far apart should intake and exhaust window fans be?

Place intake and exhaust openings as far apart as the home layout reasonably allows, ideally on opposite sides of the room or home. Greater separation helps air move through the occupied space instead of taking a short path between nearby windows. Keep interior doors open along the intended route to reduce airflow restriction.

Can one window fan provide cross-ventilation?

One window fan can support ventilation if another window, door, or opening provides a path for air to enter or leave. For example, an exhaust fan can pull air in through a separate open window. Two fans, with one set to intake and one to exhaust, can create a more defined and often stronger cross-ventilation path.

Why does my window fan not seem to move much air?

Restricted airflow often means there is no adequate return-air path, the screen is dirty, curtains are blocking the opening, or the intake and exhaust openings are too close together. Open a second window or interior door away from the fan and check that the fan panels and window opening are not obstructed. Wind direction and the fan’s installed airflow can also differ from its free-air CFM rating.

Is it safe to run a window fan in exhaust mode near a gas appliance?

Strong exhaust can lower indoor pressure and may interfere with the venting of fuel-burning appliances, such as some furnaces, water heaters, and fireplaces. Follow appliance and building guidance, keep required vents clear, and maintain working carbon monoxide alarms. Stop the exhaust setup and seek qualified help if combustion gases may be entering the living space.

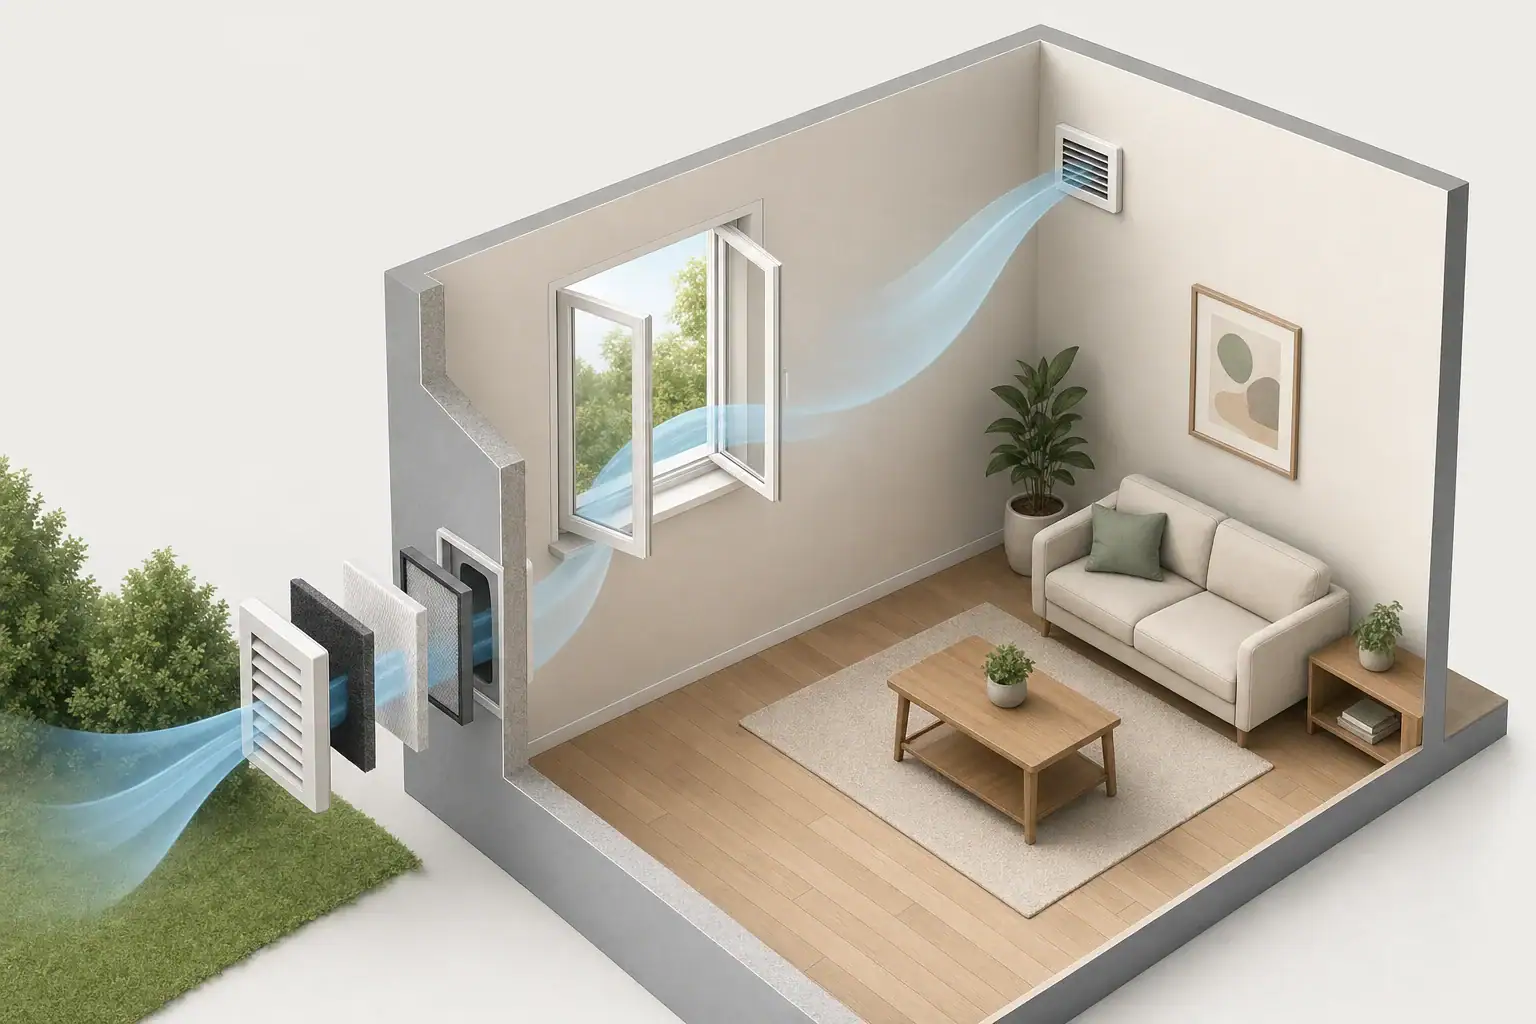
Fresh Air Intake Filters: What Matters for Your Home

Fresh air intake filter in a home ventilation scene

Outside air needs filtering at a fresh air intake when it regularly carries particles, smoke, pollen, insects, or debris into the home or ventilation equipment.

The right filter depends on the intake design, outdoor conditions, required airflow, and the equipment’s allowable resistance. Filtration should improve incoming air without restricting ventilation or unbalancing the system.

Quick answer

  • Use the filter type and size specified for the intake, ventilator, or HVAC equipment.
  • For many compatible residential systems, filters in the MERV 8–13 range provide a practical starting point for particle control.
  • Inspect a new installation monthly at first; many intake filters need attention every 1–6 months, depending on conditions.
  • Choose a filter with enough surface area to handle the intake airflow without excessive pressure drop.
  • Particle filters do not reliably remove most gases or odors; substantial activated carbon media may be needed for those concerns.

What a Fresh Air Intake Filter Does

A fresh air intake is an opening or duct that deliberately brings outdoor air into a home. It may serve a heat-recovery ventilator, energy-recovery ventilator, central HVAC system, dedicated supply fan, or passive wall inlet.

The intake filter intercepts material before it reaches occupied rooms or internal equipment. Depending on its efficiency, it may capture insects, lint, larger dust, pollen, fine particles, and some smoke particles. This can also help keep ducts, fans, heat-exchange cores, and coils cleaner.

A filter does not make all outdoor air contaminants disappear. Standard particle filters have limited ability to remove gases from vehicle exhaust, wildfire odors, solvents, or other volatile organic compounds. Activated carbon can adsorb some gases, but performance depends on the amount of carbon, contact time, contaminant, humidity, and replacement schedule.

Fresh air filtration is different from running a portable air purifier. An intake filter treats outdoor air as it enters, while a portable purifier repeatedly filters air already inside a room. Some homes benefit from both approaches, especially where outdoor conditions vary.

How to Choose Filter Efficiency and Airflow Capacity

Filter selection involves a tradeoff between particle efficiency and airflow resistance. A filter that captures smaller particles generally creates more resistance than a coarse screen, although media area, depth, construction, loading, and airflow speed also matter.

Understand MERV and HEPA ratings

MERV is commonly used to describe the particle-removal efficiency of HVAC filters. A higher rating generally means better capture of smaller particles. MERV 8–13 is a common practical range for residential equipment that is designed to accept those filters, but compatibility matters more than choosing the highest number.

HEPA filters provide higher particle efficiency than typical residential HVAC filters, but they can also require a purpose-built housing, strong seals, and a fan selected for the associated pressure drop. A filter labeled H13 or H14 should not be placed in a standard intake unless the complete system was designed for it. Filter-media efficiency alone does not account for air leaking around the frame.

Match the filter to the airflow

Intake airflow is usually stated in cubic feet per minute, or cfm. The filter and housing must be rated to pass the required cfm while staying within the equipment’s pressure limits. A small filter pushed to a high airflow can become restrictive and may load quickly.

Increasing filter surface area can reduce face velocity and resistance. Deep pleats or a larger filter cabinet may offer more usable media area, but changes to a ventilation system should be designed or approved by a qualified HVAC professional.

Check seals and bypass

Air follows the easiest path. Gaps around a filter can allow incoming air to bypass the media, reducing real-world performance even if the filter itself has a high rating. The filter should fit its designated rack correctly, with intact gaskets and the airflow direction oriented as specified.

Fresh air intake filter decision matrix

Example values for illustration.

Choosing filtration for common outdoor air concerns
Outdoor concern Practical starting point Important limitation
Insects and large debris Weather hood screen and coarse prefilter Limited fine-particle capture
General dust Compatible pleated particle filter Check airflow resistance
Pollen MERV 8–13 where supported Seal gaps around the frame
Fine particles or smoke Higher-efficiency compatible media May load quickly during heavy events
Traffic or smoke odors Particle filter plus substantial carbon media Carbon does not remove every gas
High outdoor humidity Ventilation with appropriate moisture control A particle filter does not dehumidify
Mixed or changing conditions Staged prefilter and final filter Each stage requires maintenance

Common Fresh Air Intake Filter Mistakes

Installing the highest-efficiency filter that physically fits is a common mistake. Filter thickness does not prove compatibility, and excessive resistance can reduce outdoor airflow, increase fan energy use, create noise, or unbalance a balanced ventilation system.

Another mistake is overlooking the outdoor intake location. An intake placed near a dryer vent, plumbing vent, garage opening, idling area, grill, or other exhaust source can draw pollutants toward the home. Required separation distances vary by system and local code, so intake placement should be evaluated before relying on filtration.

Other warning signs include:

  • Whistling, fluttering, or unusual fan noise after changing filters
  • Noticeably weaker airflow at ventilation supply grilles
  • A filter that collapses, bends, or pulls away from its frame
  • Dust tracks around the filter edge, suggesting bypass
  • A filter that becomes wet or develops persistent musty odors
  • Rapid loading caused by construction dust, wildfire smoke, or nearby landscaping

Do not solve low airflow by removing a filter that the equipment requires. Verify the correct filter, inspect for blockage, and have airflow or pressure measured if the cause is unclear.

Fresh Air Intake Filter Checklist

Begin by identifying the type of ventilation system. A passive wall inlet, central HVAC intake, and balanced heat-recovery ventilator have different airflow and filtration requirements. Review the equipment documentation before purchasing replacement media.

Before selecting a filter

  • Confirm the exact length, width, and thickness required by the filter rack.
  • Find the recommended filter class and maximum allowable pressure drop.
  • Identify whether the system uses one filter or separate outdoor-air and return-air filters.
  • Consider local sources such as pollen, road dust, seasonal smoke, or construction.
  • Check whether odor control is actually needed in addition to particle control.

During installation

  • Turn off the equipment using its normal controls when the manual requires it.
  • Install the filter in the marked airflow direction.
  • Make sure the frame sits squarely and the access panel closes fully.
  • Do not cut, fold, stack, or force filters into an incompatible rack.
  • Record the installation date in a maintenance log rather than on exposed equipment if markings are discouraged.

After installation

Confirm that the system runs normally and that supply airflow remains steady. If the filter creates new noise, pressure problems, or fault indications, return to the specified filter and arrange a professional assessment rather than modifying the fan or safety controls.

Real-World Home Ventilation Examples

House in a high-pollen area

A home with a balanced ventilator may use a coarse prefilter followed by a compatible pleated filter. The prefilter catches larger debris, while the final filter handles smaller particles. During peak pollen periods, monthly inspections can reveal whether the normal replacement schedule is adequate.

Home affected by seasonal wildfire smoke

Fine-particle filtration can reduce the amount of outdoor smoke particles entering through a mechanical intake. Filters may load faster during prolonged smoke events, so airflow and filter condition need closer attention. Odor may remain because particle media does not capture all smoke gases.

Apartment with passive wall vents

Small wall inlets often use simple pads or screens and may not support high-resistance filters. Blocking or overpacking these inlets can interfere with designed ventilation and building pressure. Renters should use approved replacement media and coordinate alterations with property management.

Urban home near traffic

A particle filter may reduce soot and road dust, while a properly designed carbon stage may help with some gaseous contaminants or odors. Thin carbon-coated pads have limited capacity and should not be treated as equivalent to a deep bed of carbon media.

Safety, Moisture, and Indoor Air Quality Considerations

Fresh air serves an important ventilation function. Restricting or closing an intake can allow carbon dioxide, moisture, odors, and indoor-generated pollutants to accumulate. A carbon dioxide monitor can help show broad ventilation patterns in occupied rooms, but it does not measure every pollutant or directly test filter performance.

Homes with fuel-burning appliances require additional care. Changing ventilation airflow or building pressure can affect combustion and exhaust behavior. A qualified professional should evaluate major intake changes, especially where natural-draft appliances, fireplaces, or powerful exhaust fans are present. Working carbon monoxide alarms should be maintained as required for the home.

Filters should remain dry. An intake hood must shed rain and snow, while the duct and cabinet should be installed to control condensation. Repeatedly wet filters can restrict airflow and support unwanted biological growth. Replacing the filter without correcting the moisture source is not a lasting solution.

Ionizers and ozone-generating devices are not substitutes for mechanical intake filtration. Ozone is a lung irritant and should not be intentionally generated in occupied residential spaces. UV-C may be used in purpose-designed HVAC applications for surface or coil management, but it does not replace particle filtration and requires safeguards against direct exposure and material damage.

Maintenance and Replacement Planning

There is no universal replacement interval for a fresh air intake filter. Outdoor particle levels, operating hours, filter area, efficiency, weather, nearby construction, and fan airflow all affect loading. The equipment manufacturer’s limit or a measured pressure-drop threshold is more useful than appearance alone.

For a new system or filter type, inspect monthly for the first season. That creates a local maintenance pattern. A lightly used intake in a clean setting may go several months between replacements, while smoke, pollen, or construction can shorten the interval substantially.

Clean reusable screens only as directed and let washable components dry completely before reinstalling them. Disposable media should not be vacuumed or washed unless it is specifically designed for that treatment, because cleaning can damage fibers without restoring full performance.

Maintenance costs should account for every filter stage, not just the final filter. Keeping one or two correctly sized replacements available can be practical during pollen or smoke seasons, provided they are stored sealed, flat, and dry.

Fresh air intake filter replacement planner

Example values for illustration.

General inspection and replacement starting points
Filter component Starting interval What can shorten it Maintenance note
Exterior insect screen Inspect every 1–3 months Leaves, insects, snow, lint Clear only by approved methods
Washable coarse prefilter Inspect monthly; clean as needed Dust, pollen, nearby vegetation Dry fully before reinstalling
Basic disposable intake filter About 1–3 months Continuous operation, dusty conditions Follow equipment instructions
Deep pleated particle filter About 3–6 months Smoke, high airflow, smaller filter area Use pressure drop when available
Higher-efficiency final filter About 3–12 months Heavy particle loading, prefilter failure Do not exceed the specified limit
Activated carbon stage About 1–6 months Strong odors, humidity, low carbon mass Replace when performance declines

Related guides:
ERV vs HRV: What They Do for Indoor Air Quality
Wildfire Smoke Indoors: Step-by-Step Plan to Lower PM2.5 Fast
MERV 13 vs HEPA: What the Numbers Mean for Indoor Air

Fresh Air Intake Filter Takeaways

A fresh air intake filter is useful when outdoor air brings particles or debris into a mechanical or passive ventilation opening. The filter must match the equipment, required airflow, housing size, and contaminants of concern.

For many homes, a compatible pleated particle filter, secure edge seal, and regular inspection provide a practical foundation. Higher efficiency is helpful only when the fan and filter housing can support it without excessive resistance.

Particle filtration, gas control, ventilation, and humidity management are separate functions. Treating them as parts of one indoor air quality plan makes it easier to choose appropriate equipment, recognize limitations, and maintain dependable airflow.

Frequently asked questions

What MERV rating should I use for a fresh air intake filter?

Use the filter rating specified or permitted by the intake, ventilator, or HVAC equipment manufacturer. MERV 8–13 is often a practical residential range where the system can handle the associated pressure drop. A higher MERV rating is not automatically better if it reduces required outdoor airflow or causes noise and system imbalance.

How often should a fresh air intake filter be changed?

Replacement timing depends on outdoor conditions, operating hours, filter area, and the filter’s pressure drop rather than on a single universal schedule. Inspect a new filter setup monthly during the first season, then adjust the schedule based on loading and equipment guidance. Smoke, pollen, construction dust, and nearby vegetation can require more frequent service.

Can a fresh air intake filter remove wildfire smoke and odors?

A compatible higher-efficiency particle filter can reduce some smoke particles entering through a mechanical intake. It will not reliably remove all smoke odors or gases, which may require a properly designed activated-carbon stage with enough media capacity. During smoke events, filters can load quickly, so airflow and filter condition should be checked more often.

Is it safe to install a HEPA filter on a fresh air intake?

A HEPA filter should only be used when the complete intake system is designed for its resistance, sealing requirements, and airflow needs. Installing one in a standard filter rack can excessively restrict ventilation and allow air to bypass the media around the frame. Consult the equipment documentation or a qualified HVAC professional before making that change.

Why is my fresh air intake filter wet or musty?

A wet or musty filter can result from rain entry, snow, condensation, or another moisture problem at the intake hood, duct, or filter cabinet. Replace the affected filter and correct the moisture source, because repeated wetting can restrict airflow and encourage unwanted biological growth. Do not reinstall washable media until it is fully dry.

Dehumidifier Size for Crawl Spaces Without Guessing

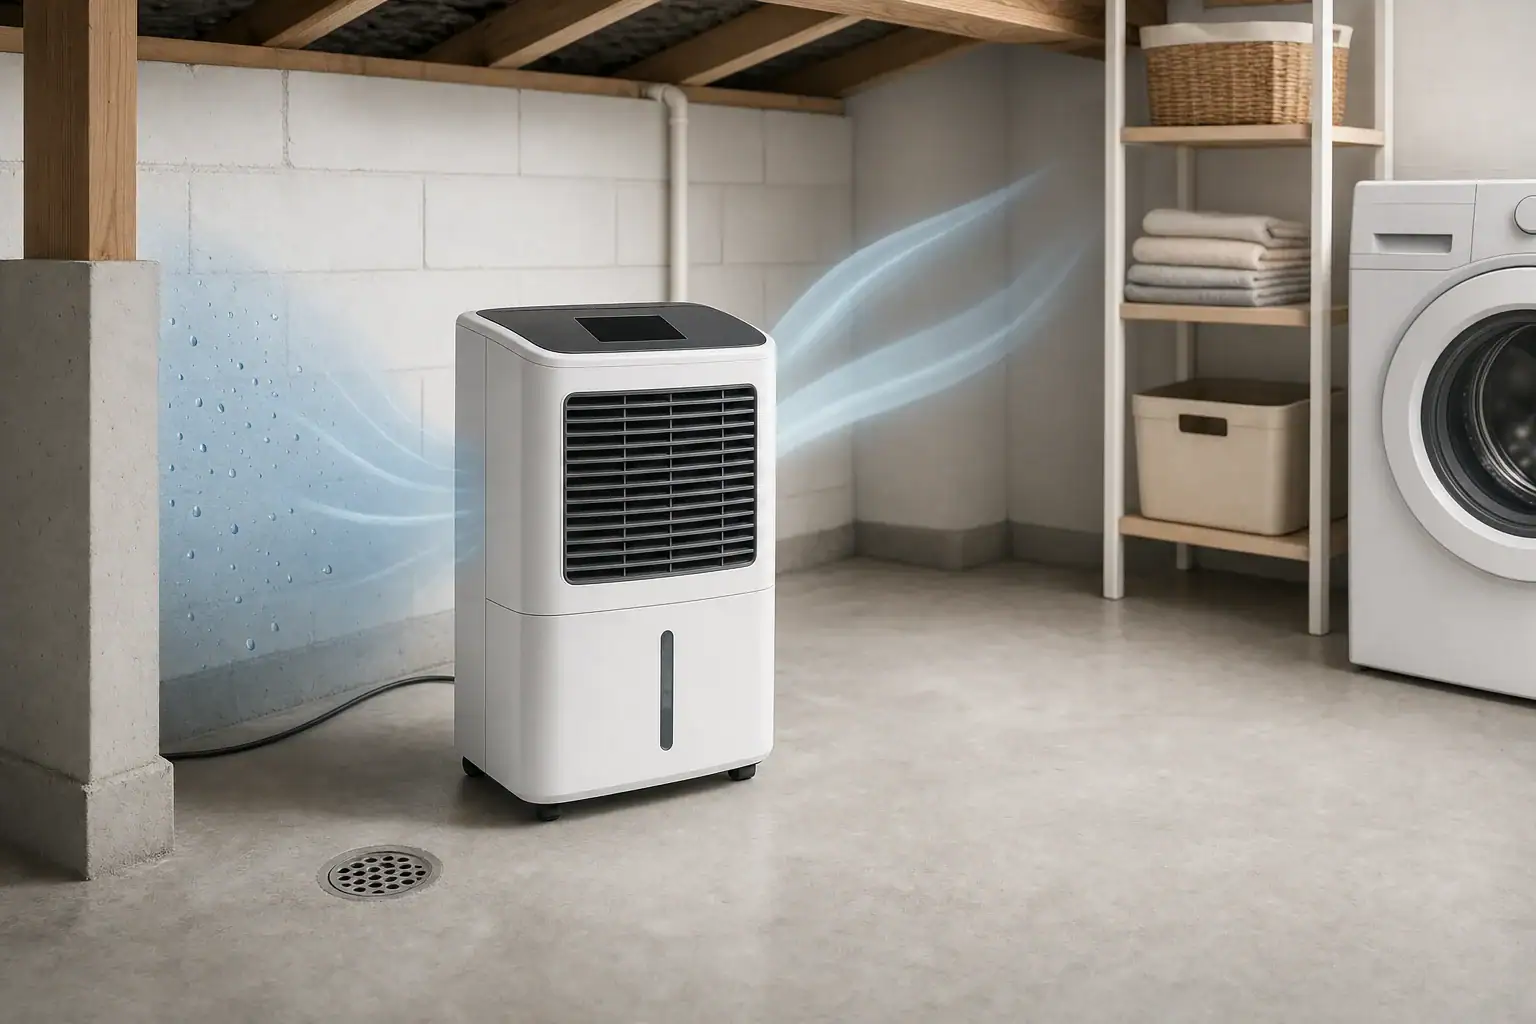
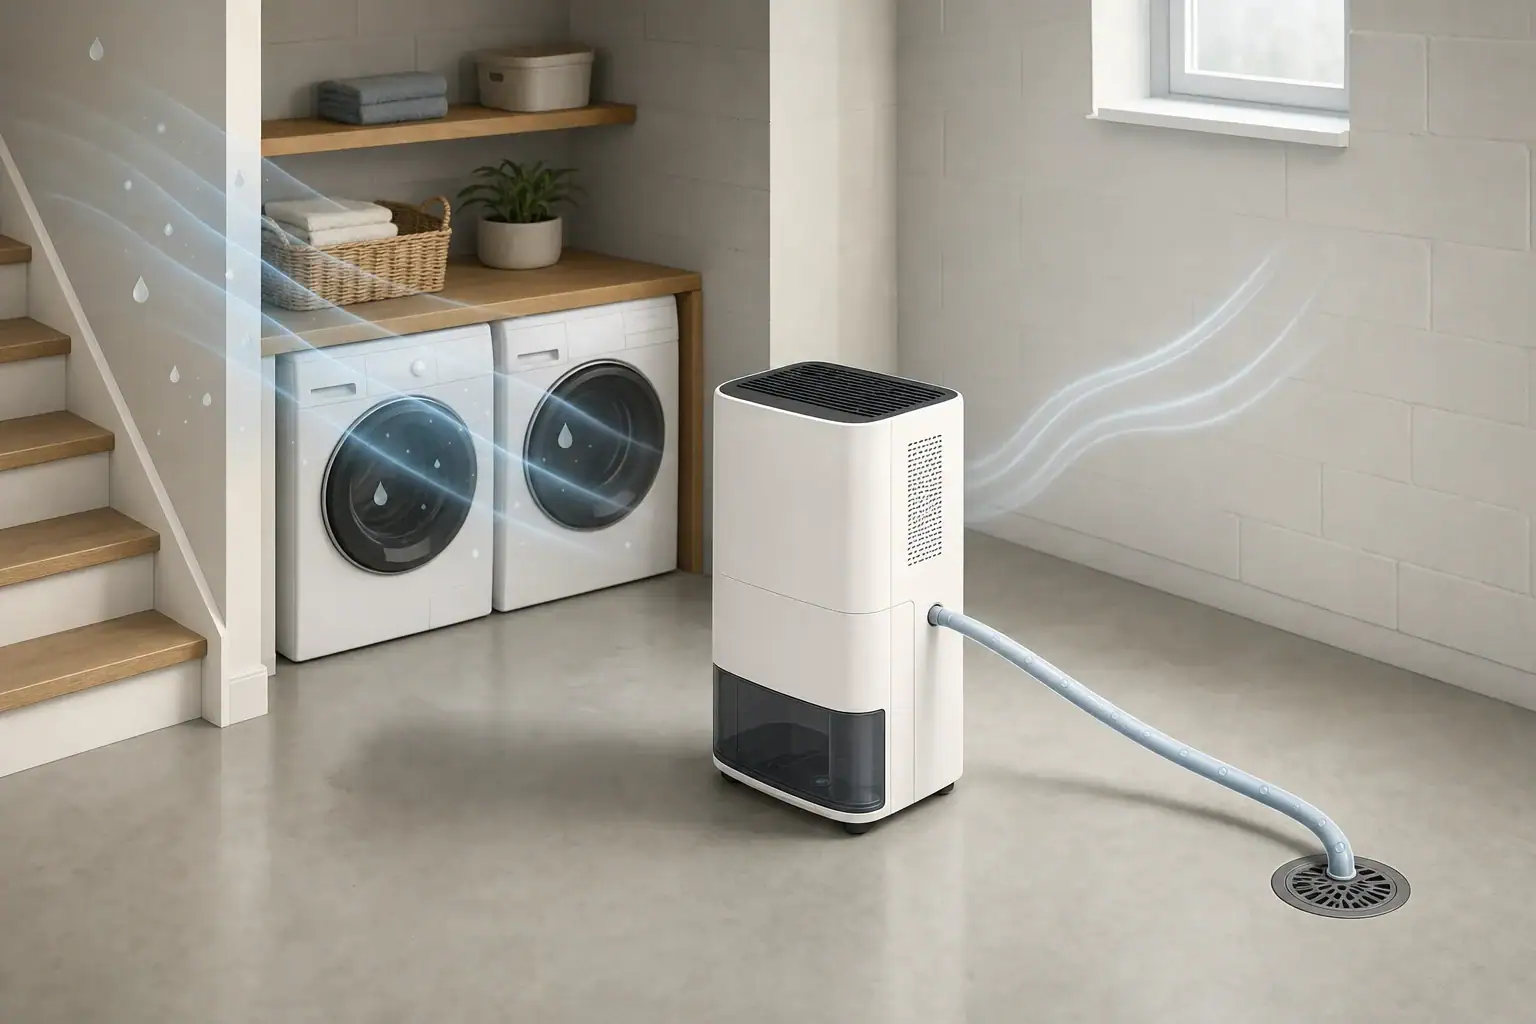
Dehumidifier with drainage in a clean utility space

A crawl-space dehumidifier should have enough pint-per-day capacity to hold the space near 45% to 55% relative humidity during typical damp conditions, with sizing based on area, moisture load, temperature, and drainage rather than square footage alone. Many residential crawl spaces fall within a general 50- to 90-pint-per-day range, but small dry spaces may need less and large or persistently wet spaces may require more. Water intrusion and exposed soil should be corrected before relying on equipment capacity.

Quick answer

  • Aim for approximately 45% to 55% relative humidity; consistent readings above 60% indicate that moisture control needs attention.
  • As broad planning guidance, consider about 30 to 50 pints per day for a small, mildly damp space and 50 to 90 or more pints per day for larger or wetter spaces.
  • Compare capacities under the same test standard because published pint ratings can use different temperature and humidity conditions.
  • Use continuous gravity drainage or a properly installed condensate pump instead of depending on manual bucket emptying.
  • Place the unit centrally when possible, leave the required intake and exhaust clearance, and avoid blocked airflow.

Why Crawl-Space Dehumidifier Size Matters

A dehumidifier removes water vapor from the air and collects it as liquid condensate. Its capacity is commonly stated as pints of water removed in 24 hours under specified test conditions. This rating is a measure of moisture-removal ability, not the size of the collection bucket.

An undersized unit may run continuously without reaching the selected humidity level. An unnecessarily large unit may reach the target quickly, but it can cost more initially and may cycle more often if its controls are not suited to the space. Proper sizing balances moisture removal, airflow, energy use, operating temperature, and expected seasonal conditions.

Crawl spaces differ from ordinary rooms because they may have exposed soil, foundation vents, cool surfaces, plumbing leaks, groundwater seepage, or outdoor air leakage. Correcting those moisture sources often makes a greater difference than adding capacity alone.

How to Estimate Capacity for a Crawl Space

Start with area and volume

Measure crawl-space length and width, then multiply them to find square footage. For irregular layouts, divide the space into rectangles and add their areas. Multiplying area by average height gives approximate volume in cubic feet.

For example, a 1,500-square-foot crawl space with an average height of 3 feet contains about 4,500 cubic feet. Height matters because a tall crawl space contains more air, although moisture entering from soil and walls may still be the dominant load.

Classify the moisture load

A mildly damp space may have elevated humidity during humid weather but no standing water or active leaks. A very damp space may have exposed soil, frequent condensation, wet masonry, or substantial outdoor air entry. These conditions call for source control and potentially greater dehumidification capacity.

As a general starting point, a small, enclosed, mildly damp crawl space may be served by roughly 30 to 50 pints per day. Medium spaces commonly start around 50 to 70 pints per day, while large or persistently damp spaces may need 70 to 90 pints per day or more. These are planning ranges, not guarantees.

Compare ratings carefully

Capacity changes with temperature and relative humidity. A unit tested in warm, very humid air can show a higher removal rate than the same unit tested under cooler, less humid conditions. Compare products using the same rating method and review performance information for the temperatures expected in the crawl space.

Crawl-space dehumidifier sizing checklist

Example values for illustration.

Factors that affect capacity planning
Condition Planning response Why it matters
Under 1,000 square feet and mildly damp Start around 30 to 50 pints per day Lower air volume and moisture load may need less capacity
1,000 to 2,000 square feet Consider roughly 50 to 70 pints per day Area, height, and leakage can shift the requirement
Over 2,000 square feet or very damp Consider 70 to 90 pints per day or more Large or wet spaces create a greater removal load
Cool operating conditions Check low-temperature performance Cold coils may collect frost and reduce removal
Open vents or major air leakage Seal or manage openings before upsizing Incoming humid air can overwhelm the equipment
Standing water or active leakage Correct drainage or plumbing first A dehumidifier is not a substitute for water control

Common Sizing Mistakes and Troubleshooting Cues

Choosing a unit only by square footage is a common mistake. Two equally sized crawl spaces can have very different moisture loads because of climate, soil conditions, foundation drainage, air leakage, and temperature.

  • Confusing bucket size with capacity: A small reservoir does not necessarily mean low daily moisture removal. Continuous drainage makes reservoir size less important.
  • Comparing unlike ratings: Pint ratings are meaningful only when their test conditions are comparable.
  • Ignoring exposed soil: Bare earth can release substantial moisture. A durable, sealed ground vapor barrier can reduce this load.
  • Setting humidity too low: A very low setting can increase runtime and energy use without providing a practical benefit. Approximately 45% to 55% is a common general target.
  • Overlooking airflow barriers: Foundation walls, stored materials, and narrow compartments can prevent dry air from reaching the entire space.
  • Treating bulk water with dehumidification: Roof runoff, plumbing leaks, groundwater, and standing water require direct correction.

If the unit runs continuously and humidity remains above the setting, inspect drainage, filter condition, coil frost, air clearance, and moisture sources. Also compare the dehumidifier’s own sensor with a separate hygrometer placed away from its outlet. Warm, dry discharge air can cause a nearby sensor to report a lower value than the rest of the crawl space.

Drainage and Placement Checklist

Plan for continuous drainage

A crawl-space unit can collect several gallons of water over a damp day, so manual emptying is usually impractical. Gravity drainage is the simplest option when a suitable discharge point is lower than the unit. The hose should slope continuously downward without kinks, loops, or low sections that trap water.

When gravity drainage is unavailable, a condensate pump can move water upward or across a longer distance. It should be rated for the expected lift and installed according to its instructions. Route discharge to an approved location where water will not return to the foundation, create erosion, or freeze in a hazardous area.

Choose a stable location

Place the dehumidifier on a firm, level, elevated support that is suitable for the environment. Keep the intake and exhaust openings clear according to the manufacturer’s specified distances. Do not press the unit against insulation, vapor barriers, stored items, or framing.

A central location often improves distribution. In a divided crawl space, position the unit near an opening between sections or use manufacturer-approved ducting when the equipment is designed for it. A small circulation fan may help with isolated pockets, but it does not add moisture-removal capacity.

  • Keep the unit accessible for filter changes, coil inspection, and drain cleaning.
  • Protect the cord, hose, and pump tubing from sharp edges and foot traffic.
  • Place an independent humidity sensor in a representative area, not directly in the discharge stream.
  • Check that doors, vents, and access panels match the intended moisture-control strategy.

Capacity Examples for Typical Crawl Spaces

Small encapsulated space

Consider an 800-square-foot crawl space with a 3-foot average height, a sealed ground liner, closed foundation vents, and no active leaks. If humidity is only moderately elevated in summer, a capacity near 30 to 50 pints per day may be a reasonable starting range. Actual performance still depends on climate and air leakage.

Medium space with seasonal humidity

A 1,500-square-foot crawl space with a 3-foot height and seasonal condensation may justify a starting range around 50 to 70 pints per day. Before selecting equipment, inspect gutters, downspouts, grading, plumbing, and the continuity of the ground vapor barrier. Reducing moisture entry may allow a smaller unit to maintain the target.

Large or compartmentalized space

A 2,500-square-foot crawl space with several foundation sections may need 70 to 90 pints per day or more. One centrally located unit may work if air can circulate freely. Otherwise, approved ducting or multiple independently controlled units may provide more even coverage.

For unusually wet spaces, calculate the load with help from a qualified moisture-control professional rather than adding capacity indefinitely. Persistent water can indicate drainage, plumbing, foundation, or site-grading issues that dehumidification alone cannot resolve.

Electrical, Temperature, and Equipment Safety

Use a properly grounded receptacle and follow applicable electrical codes, including ground-fault protection where required. Avoid extension cords and do not place plugs or connections where they may contact water. Electrical work in a damp or inaccessible area should be handled by a qualified professional.

Confirm the equipment’s listed operating-temperature range. Refrigerant dehumidifiers generally remove less water as temperatures fall, and frost can develop on the coil in cool conditions. Automatic defrost can help manage frost, but it does not make every unit suitable for every temperature.

Look for recognized electrical safety certification and compare energy-efficiency information using a consistent rating method. Dehumidification does not require ionization, ozone generation, or ultraviolet treatment. If a device includes additional air-treatment features, review them separately and avoid intentional ozone production in occupied homes.

Encapsulation or vent changes can affect radon behavior, soil gases, and combustion-air conditions. Homes with fuel-burning equipment in or near the crawl space may need evaluation before the enclosure strategy changes. Follow local requirements and equipment instructions.

Maintenance and Humidity Monitoring

Inspect the unit at least monthly during heavy-use periods. A dirty filter restricts airflow, lowers moisture removal, and can increase operating time. Clean or replace the filter according to its instructions rather than waiting for visible heavy buildup.

Check the drain hose for slime, sediment, kinks, and proper slope. Test a condensate pump and its safety switch periodically if one is used. Inspect the unit after outages because some controls may not automatically resume their previous setting.

Use a separate hygrometer to track conditions over time. Readings can vary by location, so measurements near a cool foundation wall may differ from those near the dehumidifier outlet. Trends over several days are generally more useful than a single reading.

Seasonal changes may require a different setting or inspection schedule. If humidity rises despite normal operation, check for a clogged filter, blocked airflow, drain backup, coil frost, new air leakage, plumbing problems, or exterior water near the foundation.

Crawl-space humidity and moisture quick plan

Example values for illustration.

Actions for common crawl-space conditions
Goal or condition Simple actions Tools Note
Maintain routine humidity control Set approximately 45% to 55% Dehumidifier and hygrometer Avoid unnecessarily low settings
Readings remain above 60% Check sizing, airflow, and moisture entry Independent hygrometer Review several days of readings
Exposed soil Install or repair a sealed ground barrier Durable vapor-control materials Follow local practices
Standing water Correct drainage, grading, or leaks Drainage assessment Do not rely on dehumidification alone
Uneven humidity Improve circulation between sections Multiple sensors Keep intake and exhaust clear
Frequent drain backup Clean and test the drain path Drain hose or condensate pump Keep discharge away from the foundation

Related guides:
How to Size a Dehumidifier (Sq Ft, Pints/Day, and Real-World Tips)
Dehumidifier Capacity Estimator: Room Dampness to Liters/Day
Drain Hose vs Bucket: Which Dehumidifier Setup Is Best?
Dehumidifier Ice Build-Up: Why Coils Freeze and What to Do
Crawl Space Humidity: Signs It Is Affecting Indoor Air

Summary of Crawl-Space Sizing Priorities

Choose crawl-space dehumidifier capacity by combining square footage, ceiling height, dampness, temperature, air leakage, and expected seasonal load. Rough planning ranges of 30 to 50, 50 to 70, and 70 to 90 or more pints per day can help narrow the options, but ratings must be compared under consistent test conditions.

Correct standing water, leaks, exposed soil, and exterior drainage problems before compensating with a larger unit. Provide continuous drainage, clear airflow, safe electrical service, and enough access for maintenance. After installation, verify performance with humidity readings from representative locations and adjust the moisture-control plan if the space consistently remains above 60% relative humidity.

Frequently asked questions

What size dehumidifier is needed for a 1,500-square-foot crawl space?

For a 1,500-square-foot crawl space, a unit rated around 50 to 70 pints per day is often a reasonable starting range. The correct capacity depends on average crawl-space height, outdoor humidity, exposed soil, air leakage, drainage conditions, and whether the space is encapsulated. A persistently damp or compartmentalized space may need more capacity or improved moisture control.

Should I size a crawl-space dehumidifier by square footage or cubic feet?

Square footage is useful for an initial estimate, but it should not be the only sizing factor. Cubic feet accounts for crawl-space height, while moisture sources such as wet soil, foundation leakage, open vents, and plumbing leaks can have an even greater effect on the required capacity. Use both dimensions along with observed humidity and dampness conditions.

What humidity level should a crawl-space dehumidifier be set to?

A setting between approximately 45% and 55% relative humidity is a common general target for crawl spaces. Setting the unit much lower can increase energy use and runtime without necessarily improving moisture control. If readings remain above 60% for several days, inspect the unit, airflow, drainage, and moisture sources.

Can a dehumidifier solve standing water in a crawl space?

No. A dehumidifier removes water vapor from air, but it is not designed to correct bulk water from groundwater, roof runoff, plumbing leaks, or poor grading. Resolve active leaks and drainage problems first, then use dehumidification to manage the remaining humidity load.

Why does my crawl-space dehumidifier run constantly but humidity stays high?

Continuous operation can indicate insufficient capacity, but it can also result from a clogged filter, blocked airflow, frost on the coil, a drain problem, or inaccurate humidity sensing. Check conditions with an independent hygrometer placed away from the unit’s discharge air. Also inspect for new water entry, exposed soil, open vents, and air leaks that may be adding moisture faster than the unit can remove it.

Dehumidifier for Indoor Laundry Drying: When It Helps

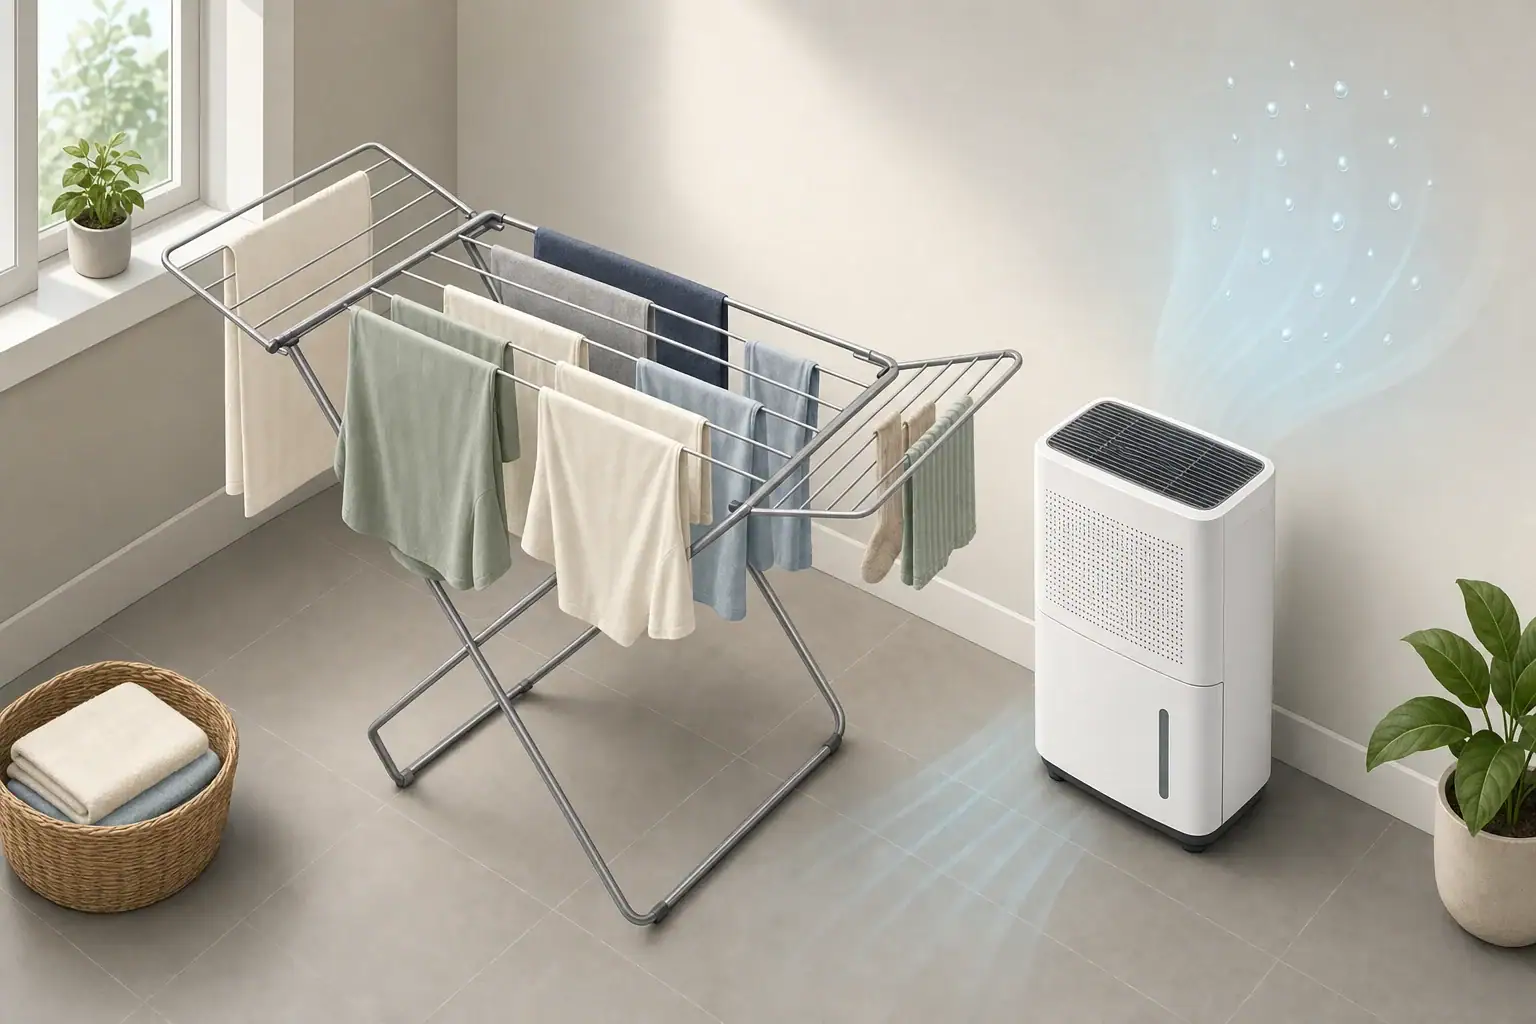
Dehumidifier beside laundry drying indoors on a rack

A dehumidifier helps dry laundry indoors when moisture is accumulating faster than ventilation can remove it.

It works by lowering the room’s relative humidity, allowing more water to evaporate from damp fabric. The benefit is usually greatest in a closed or partly closed room with limited ventilation, especially when indoor humidity would otherwise remain above about 60%.

How a dehumidifier helps laundry dry indoors

Wet laundry releases water vapor into the surrounding air. As relative humidity rises, evaporation slows because the air has less capacity to accept additional moisture. A dehumidifier removes some of that water vapor and returns drier air to the room, helping evaporation continue.

Air movement matters as much as humidity. A layer of damp air forms near fabric surfaces, so moving air across and between garments replaces it with drier room air. A dehumidifier provides some circulation, but a separate low-speed fan can improve distribution in larger rooms or around a crowded rack.

The appliance is most useful when line drying causes fogged windows, damp-feeling surfaces, persistent condensation, or room humidity above roughly 60%. It may offer little benefit when outdoor air is dry and an open window or exhaust fan can remove moisture efficiently.

A dehumidifier does not heat fabric as directly as a tumble dryer. Some models release modest waste heat into the room during operation, which can support evaporation, but their primary function is moisture removal.

Humidity targets and sizing logic for indoor laundry

A common general indoor target is about 30% to 50% relative humidity, although climate, season, and building construction affect what is practical. During laundry drying, maintaining approximately 40% to 50% can provide useful drying conditions without making the room unusually dry. Avoid treating a single reading as an absolute limit; monitor trends and look for condensation.

Estimate the moisture load

The water left in a washed load depends on fabric type, load size, and the washer’s final spin. One simple way to estimate it is to weigh the laundry immediately after washing and compare that with its dry weight. Each pound of weight difference represents approximately one pint of water.

For example, a load that is two pounds heavier when wet contains about two pints of water that must go somewhere. The dehumidifier will not necessarily collect all of it because some moisture may leave through ventilation or remain temporarily in room materials.

Interpret capacity ratings carefully

Dehumidifier capacity is commonly expressed in pints removed per day under specified test conditions. Actual removal may be lower in a cool room or once humidity falls. Instead of matching a rating directly to one laundry load, consider room size, starting humidity, temperature, frequency of washing, and whether the unit must also manage existing dampness.

A small laundry area with occasional loads may need less capacity than a basement where several loads dry each week. Compressor-based units also tend to remove less water as temperatures fall, while other dehumidification technologies may behave differently but can use substantial energy.

Decision matrix for indoor laundry moisture control

Example values for illustration.

Conditions and practical primary responses
Condition Primary response Reason
Room humidity below 50% Use spacing and airflow first The air may already have useful drying capacity
Humidity repeatedly above 60% Run a dehumidifier Active moisture removal can control accumulation
Outdoor air is cool and dry Consider ventilation Air exchange may remove moisture efficiently
Outdoor air is warm and humid Close windows and dehumidify Ventilation may add moisture instead of removing it
Large or tightly packed load Add airflow and increase spacing Moist air can remain trapped between fabrics
Cold basement or utility room Check the unit’s operating range Low temperatures can reduce performance

Common mistakes and troubleshooting cues

Running a dehumidifier with windows wide open is a common source of poor results. The unit may continuously process incoming air rather than lowering humidity around the laundry. An exception is when outdoor air is clearly drier than indoor air and ventilation is being used intentionally.

Another mistake is aiming the outlet directly at one garment from very close range. This can leave other parts of the rack in stagnant air. Position the unit far enough away for airflow to spread around the load, while maintaining the clearances specified in its instructions.

Watch for these troubleshooting cues:

  • Humidity does not fall: Close unnecessary openings, check whether the reservoir is full, inspect the filter, and confirm that the room is within the appliance’s temperature range.
  • Clothes remain damp in folds: Separate layers, turn heavy items, and leave gaps between garments.
  • Windows still collect condensation: Move the drying setup away from cold glass, increase moisture removal, or use controlled ventilation when outdoor conditions permit.
  • The unit cycles off too early: Check the humidity setting and compare its sensor with a separate monitor placed away from the outlet.
  • Ice appears on the coil: Stop and follow the manufacturer’s guidance; the room may be too cold or airflow may be restricted.

Humidity readings also vary by location. A monitor beside the dehumidifier outlet may show drier conditions than the air near the laundry. Place a separate monitor at about breathing height, away from windows, exterior walls, direct airflow, and wet garments.

Practical setup checklist for faster drying

Prepare the laundry and room

  • Use the washer’s appropriate high-spin option when suitable for the fabrics. Removing more water mechanically generally uses less room-conditioning energy than evaporating it indoors.
  • Shake out garments and hang them in a single layer where possible.
  • Leave several inches between bulky items and avoid placing wet fabric against walls.
  • Choose a room that can be partly isolated from the rest of the home.
  • Keep the rack away from cold windows and surfaces prone to condensation.

Position and operate the dehumidifier

  • Set the unit on a level, stable surface and maintain all required clearances.
  • Keep air inlets, outlets, curtains, and laundry separate so nothing blocks airflow.
  • Use a humidity setting around 45% to 50% as a reasonable starting point.
  • Direct general airflow across or around the rack rather than into a wall.
  • Use continuous drainage only when the hose can be installed exactly as instructed and routed to an appropriate drain.
  • Check the water reservoir before leaving the setup unattended.

Close the room door if doing so does not conflict with combustion-appliance safety or needed ventilation. Recheck humidity after an hour or two. If it is falling steadily and the clothes feel progressively drier, the arrangement is working as intended.

After the load dries, allow the dehumidifier to continue briefly if room humidity remains elevated. There is generally no need to keep it running once the room returns to its normal range.

Real-world indoor laundry drying examples

Small apartment bathroom

A drying rack in a bathroom may produce a sharp humidity increase because the room has little air volume. Closing the door and running a dehumidifier can be effective if the appliance is kept safely away from splashes. An operating exhaust fan may also work, but using both at full output can be inefficient because the fan continually replaces conditioned air.

Cool basement laundry area

A basement may begin with elevated humidity before laundry is added. In this case, the dehumidifier manages both the building’s background moisture and the laundry load. Check the appliance’s minimum operating temperature, and do not assume its rated daily capacity will be achieved in cool conditions.

Open-plan living area

In a large open space, moisture spreads through a much greater air volume. A portable dehumidifier near the rack may still help locally, but it can take longer to change the humidity of the whole area. Creating a safe, partly enclosed drying zone or choosing a smaller room is often more practical.

Dry winter day

If outdoor air has low absolute humidity, brief ventilation may remove moisture faster than active dehumidification. However, very cold outdoor air can cool nearby surfaces and increase heating demand. Use short, controlled ventilation rather than leaving windows open indefinitely.

Safety, ventilation, and energy considerations

Dehumidifiers combine electricity, moving air, collected water, and, in many models, a sealed refrigeration system. Use a properly grounded outlet, keep the cord and plug dry, and avoid extension cords unless the manufacturer explicitly permits one. Never modify the appliance, defeat reservoir switches, or open the refrigerant system.

Keep the unit outside zones where it could be splashed or knocked over. A bathroom or utility-room outlet may require ground-fault protection under applicable electrical rules. Follow local requirements and the appliance instructions.

Do not block combustion-air openings or isolate fuel-burning equipment in a way that changes safe ventilation. A dehumidifier removes water vapor but does not remove carbon dioxide, combustion gases, or general indoor pollutants. Normal ventilation remains necessary.

Ionization, ozone generation, and UV-C are not needed for laundry drying. If an appliance includes optional air-treatment functions, evaluate them separately and avoid features that intentionally produce ozone. Basic filtration may capture lint, but a dehumidifier is not a substitute for a properly sized air purifier.

For energy control, start with water removal in the washer, good garment spacing, and targeted room use. Run the dehumidifier only as long as needed to reach the selected humidity range, and use automatic humidity control when available.

Maintenance and ongoing moisture control

A clogged intake filter reduces airflow and can slow both water removal and laundry drying. Inspect the filter regularly and clean or replace it according to the appliance instructions. Homes with lint, dust, or pets may require more frequent attention.

Empty and rinse the reservoir before residue builds up. Let removable parts dry before reinstalling them. If continuous drainage is used, inspect the hose for kinks, buildup, leaks, and a reliable downward path where gravity drainage is required.

Keep the intake grille, outlet, and humidity sensor free of dust. Do not spray cleaners or water into the appliance. At the end of a season, clean and dry the unit before storage, and protect the cord and drainage components from damage.

Track ordinary operating behavior rather than relying only on drying time. Useful indicators include the room’s starting and ending humidity, the amount of water collected, load size, and how often the unit runs. A gradual decline in collection under similar conditions can point to a dirty filter, colder room, changed settings, or a maintenance issue.

Indoor laundry humidity quick plan

Example values for illustration.

Humidity conditions and practical actions
Goal or condition Simple action Tool or cue Note
Start a drying load Check room humidity Humidity monitor Use the reading as a baseline
Maintain useful drying conditions Target about 40% to 50% Dehumidistat Adjust for climate and comfort
Avoid prolonged dampness Keep humidity below about 60% Monitor trend Also watch for condensation
Improve slow drying Increase spacing and airflow Rack and fan Do not block appliance vents
Control operating time Stop after humidity stabilizes Automatic control or timer Follow unattended-use guidance
Protect performance Clean the filter and reservoir Maintenance schedule Frequency depends on use and dust

Related guides:
Basement Dehumidifier Guide: Targets, Drainage, and Energy Use
Dehumidifier Running Cost: How Much Electricity Will It Use?
Drain Hose vs Bucket: Which Dehumidifier Setup Is Best?
Dehumidifier in Winter: Does It Work in Cold Basements?

Key takeaways for drying laundry with a dehumidifier

A dehumidifier is most helpful when indoor laundry pushes relative humidity toward or above 60%, ventilation is limited, or outdoor air is too humid to provide effective drying. A target near 40% to 50%, combined with good garment spacing and steady airflow, is a practical starting point.

Choose capacity with the room, temperature, moisture load, and washing frequency in mind rather than relying on floor area alone. Monitor humidity trends, keep the appliance unobstructed, and maintain its filter, reservoir, and drain components. Ventilation is still needed for general indoor air quality, even when a dehumidifier is controlling laundry moisture.

Frequently asked questions

What humidity should I set a dehumidifier to for indoor laundry drying?

A setting around 45% to 50% relative humidity is a practical starting point for most indoor drying setups. The goal is generally to prevent humidity from remaining above about 60%, while allowing for normal variation caused by room temperature, climate, and the size of the load.

Should windows be closed when using a dehumidifier to dry clothes?

In most cases, keep windows and doors mostly closed so the dehumidifier can lower humidity in the drying area. Open-window ventilation can be preferable when outdoor air is genuinely drier than indoor air, but humid outdoor air may slow drying and increase the appliance’s workload.

Where should a dehumidifier be placed near a clothes drying rack?

Place it in the same room as the rack on a level surface, leaving the manufacturer-required clearance around the intake and outlet. Position it far enough from the clothes for airflow to circulate around the full rack rather than concentrating on one item or being blocked by fabric.

Why are clothes still damp after running a dehumidifier?

Slow drying often results from tightly packed garments, poor air circulation, a full water reservoir, or a dirty filter. Separate heavy items and folds, check that the unit is operating within its rated temperature range, and use gentle airflow across the rack if needed.

Can a dehumidifier dry laundry in a cold basement?

It can help, but performance depends on the appliance type and the room temperature. Many compressor-based dehumidifiers remove less moisture in cool conditions, so check the stated operating range and consider improving airflow or using a warmer drying space where practical.

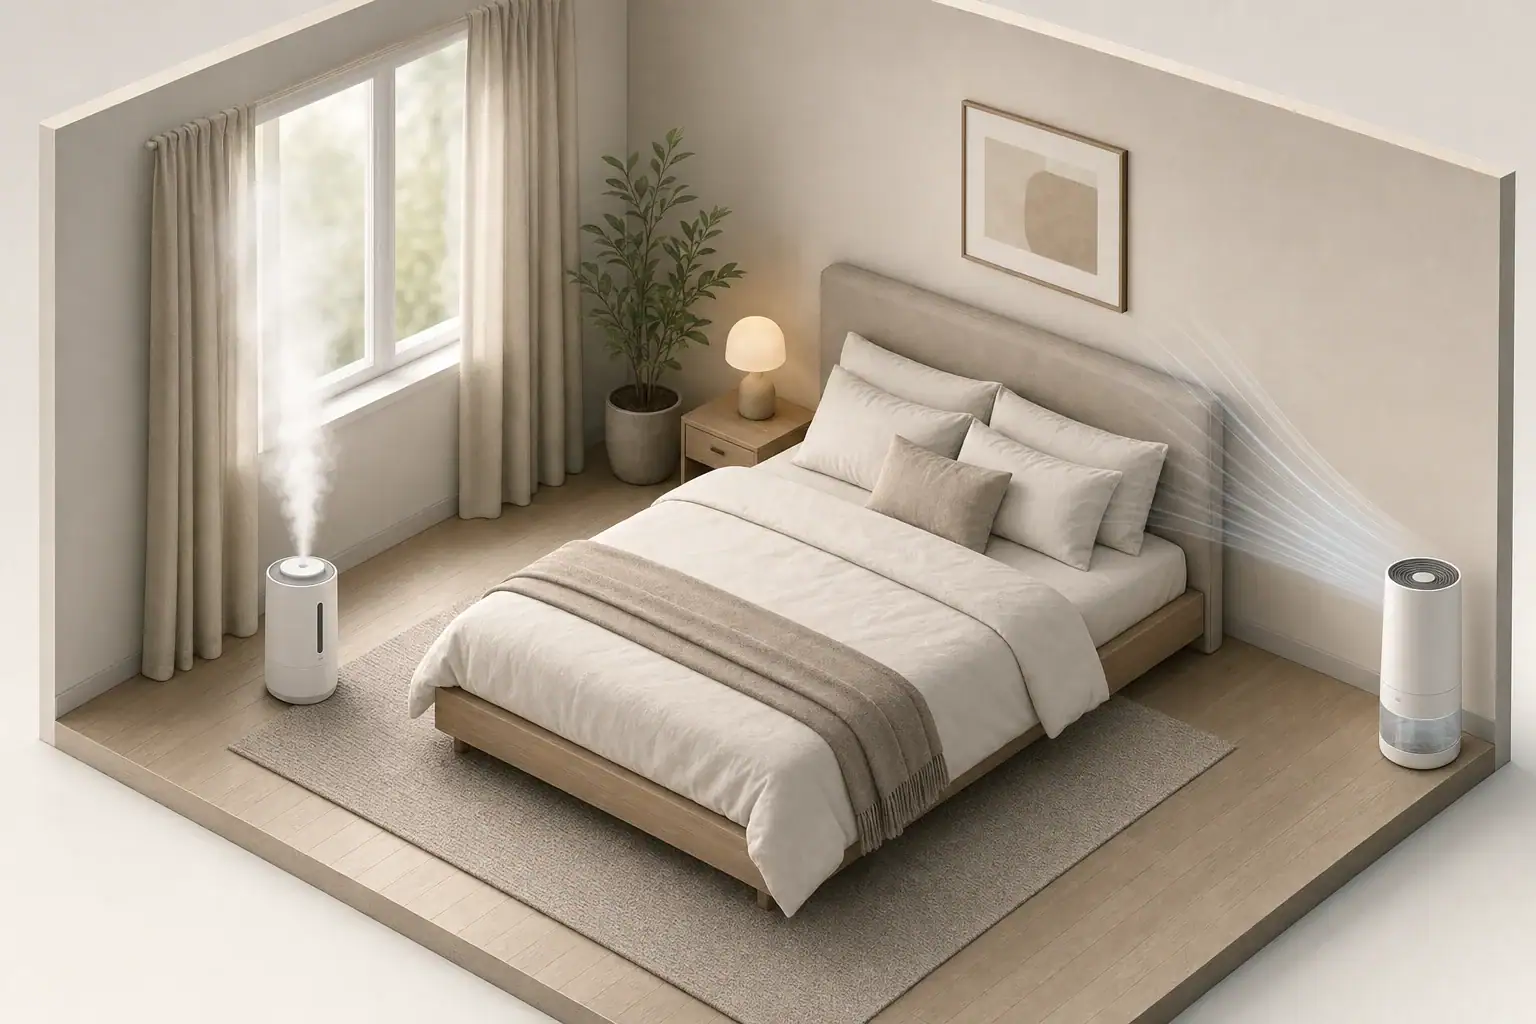
Dehumidifier in a Bedroom: Noise and Settings Explained

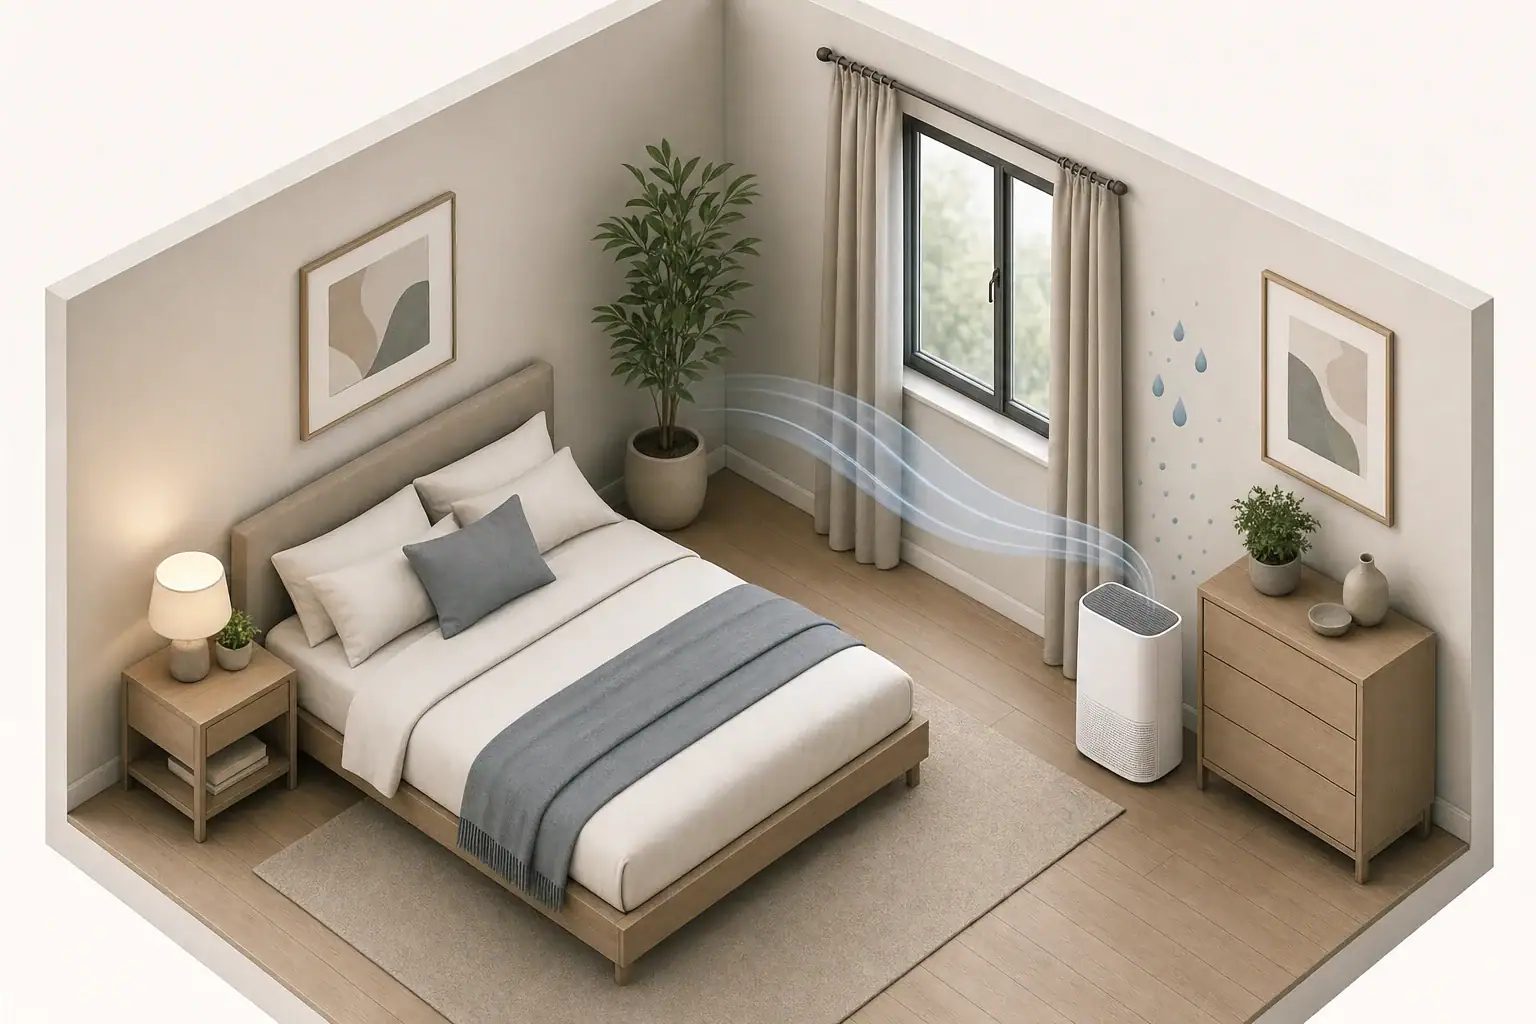
Dehumidifier operating quietly in a tidy bedroom

A dehumidifier can run in a bedroom at night if it maintains a comfortable humidity level without producing disruptive noise, drafts, heat, or light. For many rooms, automatic humidity control and a low fan setting provide a practical balance. Placement, capacity, and compressor cycling can matter as much as the published sound rating.

Quick answer

  • Aim for roughly 30% to 50% relative humidity, with 40% to 50% often serving as a practical bedroom target.
  • Use an automatic humidity setting rather than continuous operation unless the room has an ongoing moisture problem.
  • Sound around 40 dBA or lower may be easier for many people to tolerate, but personal sensitivity and sound character vary.
  • Keep the unit away from the bed and hard surfaces that can amplify vibration while maintaining the clearances required by its manual.
  • Empty and clean the water container regularly, or use an approved drain arrangement where appropriate.

Why bedroom humidity and dehumidifier noise matter

Relative humidity describes how much moisture the air holds compared with the maximum it could hold at the same temperature. Because warmer air can hold more moisture, the relative humidity reading may change when bedroom temperature changes overnight.

Humidity that remains above approximately 50% to 60% can contribute to condensation, musty odors, and conditions that support mold growth. Excessively dry air can also feel uncomfortable, so running a dehumidifier as low as possible is not the goal. A general indoor range of 30% to 50% is widely used for practical moisture management, although seasonal conditions and the building may influence the achievable level.

Noise affects bedroom suitability in several ways. A steady fan sound may be less noticeable than repeated compressor starts, beeps, rattles, or abrupt fan-speed changes. Bright control lights and warm exhaust air can also affect nighttime comfort even when average noise is modest.

How to choose capacity and understand night settings

Dehumidifier capacity is commonly expressed as the amount of water the appliance can remove in 24 hours under specified test conditions. Actual removal in a bedroom may be lower because temperature and humidity are usually less demanding than laboratory conditions.

Room area is only one sizing factor. Also consider ceiling height, dampness severity, outdoor humidity, air leakage, attached bathrooms, laundry drying, and whether the bedroom door stays open. A very small unit may run almost continuously, while a substantially oversized unit may create more noticeable on-and-off cycling.

Useful controls for overnight operation

  • Humidistat or target setting: Cycles the unit in response to measured relative humidity.
  • Low fan: Usually reduces airflow noise, although water removal may take longer.
  • Sleep or night mode: May dim lights, reduce fan speed, or limit control sounds. Functions vary, so check the manual.
  • Timer: Allows operation before bedtime or during a selected part of the night.
  • Continuous mode: Runs without maintaining a normal target and is generally better reserved for active dampness or supervised drying.

A separate humidity monitor can provide a useful comparison, but it may not match the dehumidifier exactly. Sensors in different parts of a room can differ by several percentage points because of airflow, temperature, and distance from the appliance.

Bedroom dehumidifier decision matrix. Example values for illustration.

Choosing an operating approach for common bedroom conditions
Bedroom condition Practical approach What to watch
Humidity around 40% to 50% Leave the unit off or use automatic control Confirm that humidity remains stable
Humidity repeatedly above 50% to 60% Set a moderate target and keep doors and windows closed Look for moisture sources or condensation
Brief humidity rise after bathing Use bathroom exhaust first, then reassess A bedroom unit may not address the source efficiently
Noise interrupts sleep Run the unit before bed or use low fan Check whether humidity rises again overnight
Unit runs continuously Check the target, room conditions, and capacity Open windows or air leakage may add moisture
Frequent short cycling Improve placement and compare sensor readings The unit may be oversized or sensing its own exhaust
Cold bedroom Check the appliance temperature rating Some compressor units lose effectiveness or frost in cool air

Common bedroom mistakes and troubleshooting cues

Placing a dehumidifier directly beside the bed can make ordinary fan and compressor sounds seem much louder. It may also direct warm, dry exhaust across the sleeper. Increase the distance where possible without blocking airflow or ignoring the manufacturer’s clearance requirements.

A corner is not automatically a quiet location. Lightweight furniture, hollow floors, walls, and hard surfaces can transmit or reflect vibration. Place the appliance upright on a stable, level floor rather than on a bed, thick rug, or unstable stand.

If the unit runs all night

Continuous operation does not always mean the appliance is defective. The target may be set too low, the room may exchange humid air with other spaces, or the capacity may be limited for the conditions. Check humidity with a separate monitor and inspect for open windows, an attached damp bathroom, wet clothing, or building moisture.

If the room feels warmer

Dehumidifiers release heat during normal operation. The temperature increase may be more noticeable in a small closed bedroom. Running the unit before bedtime, lowering the moisture load through ventilation when outdoor conditions permit, or placing the unit outside an open bedroom door may improve comfort, though the last option can reduce direct control of bedroom humidity.

If water removal suddenly falls

Lower humidity may simply mean less water is available to collect. Reduced airflow from a dirty filter, a blocked intake, cool room conditions, or a full container can also limit operation. Use the troubleshooting steps in the appliance manual rather than opening or modifying the refrigeration system.

How to set up a dehumidifier for quieter nights

Start by measuring humidity for several days, including overnight. This establishes whether moisture is persistent, seasonal, or limited to activities such as showering and indoor laundry drying.

  1. Choose a moderate target. Begin near 45% to 50% relative humidity rather than selecting the lowest available setting.
  2. Run the unit before bedtime. Operating it for a few hours before sleep may allow a lower fan setting or shorter overnight runtime.
  3. Position it carefully. Keep it several feet from the bed when space allows, with unobstructed intake and exhaust paths.
  4. Reduce vibration. Use a solid, level floor and confirm that the container, filter, and removable panels are seated correctly.
  5. Manage light and sounds safely. Use built-in display dimming or sleep functions. Do not cover controls or ventilation openings.
  6. Close unnecessary openings. A closed window prevents the unit from continually processing humid outdoor air. Whether to close the bedroom door depends on the intended treatment area and appliance sizing.

Published sound levels are useful for comparison only when test conditions are similar. A rating may reflect a particular fan speed and measurement distance. Tonal hum, vibration, compressor starts, and the acoustics of the room can make two units with similar ratings seem different.

Nighttime settings in real-world bedroom scenarios

Small bedroom with mildly elevated humidity

Suppose humidity reaches about 55% in the evening but falls after several hours of operation. A moderate target near 45% to 50%, low fan, and a pre-bedtime start may be sufficient. Continuous mode would usually remove more moisture than necessary for this example.

Bedroom connected to a frequently used bathroom

Moisture control should begin at the source. Run the bathroom exhaust fan during bathing and for an appropriate period afterward, keep the bedroom separated from the steam when practical, and then check bedroom humidity. A dehumidifier can manage remaining moisture but should not substitute for effective source ventilation.

Basement bedroom with persistent dampness

A basement room may receive moisture through air leakage, foundation materials, or adjacent spaces. The dehumidifier may need to serve a larger connected area rather than the bedroom alone. Persistent water entry, visible leaks, or recurring condensation calls for correction of the moisture source, not simply a lower humidity setting.

Noise-sensitive sleeper

Pre-dry the room in the evening and use a timer or automatic setting overnight. Moving the appliance farther away may help more than changing fan speed. If the unit must operate outside the bedroom, verify with a humidity monitor that airflow through the doorway is adequate.

Safety and indoor air quality considerations

Connect the appliance according to its manual, typically to a suitable grounded wall outlet. Avoid overloaded circuits, damaged cords, wet plugs, and extension arrangements not permitted by the manufacturer. Keep the appliance upright and allow the recommended settling time after transport before operation.

For continuous drainage, use only the supported hose or pump configuration. Route tubing so it cannot kink, leak onto flooring, or create a trip hazard. A gravity drain requires a continuous downward path. Collected condensate is not intended for drinking or food preparation.

Keep the unit where children and pets cannot tip it, pull on drainage tubing, or interfere with controls. Maintain clear airflow around curtains, bedding, and furniture. Do not cover the appliance to hide lights or reduce sound because covering it can obstruct cooling and airflow.

A dehumidifier controls moisture; it is not a substitute for particle filtration or ventilation. Optional ionization, ultraviolet, or other air-treatment features are separate from dehumidification and should be evaluated cautiously. Avoid devices designed to generate ozone in occupied bedrooms, and do not intentionally modify an appliance to create ozone or bypass safety controls.

Maintenance, cleaning, and operating cost planning

Routine maintenance supports airflow and limits odors. Check the washable air filter on the schedule in the manual and clean it more often in dusty rooms or homes with shedding pets. Let washable parts dry fully before reinstalling them.

Empty the bucket before it reaches the shutoff point if overnight interruption would be inconvenient. Wash the container periodically with the method recommended by the manufacturer, paying attention to corners and float mechanisms. Do not mix cleaning chemicals.

Inspect drainage hoses, connections, and nearby flooring for leaks. Dust intake and exhaust grilles gently without pushing debris into the appliance. Unplug the unit before cleaning unless its instructions specify a different safe procedure.

Energy use depends on wattage, runtime, fan setting, room conditions, and local electricity rates. An illustrative estimate uses wattage multiplied by operating hours and divided by 1,000 to find kilowatt-hours. For example, a 400-watt unit running six hours uses about 2.4 kilowatt-hours before cycling is considered; actual consumption may be lower or higher.

Night operation planning reference. Example values for illustration.

Noise and sleep planner for a bedroom dehumidifier
Setting or condition Noise consideration Placement or use tip Note
Low fan Usually reduces airflow sound Start earlier in the evening Moisture removal may take longer
High fan More airflow may mask compressor changes Use before bedtime if disruptive Can lower humidity faster
Automatic humidity Produces occasional starts and stops Set a moderate target Cycling frequency varies by moisture load
Continuous operation Creates sustained fan and compressor sound Reserve for active dampness when appropriate Monitor humidity to avoid over-drying
Timer operation Limits noise to selected hours Schedule operation before sleep Check overnight humidity afterward
Hard floor near a wall May amplify vibration or reflections Use a stable location with required clearance Do not block vents or place on bedding

Related guides:
Dehumidifier Auto Mode vs Continuous Mode: Which Setting to Use
Drain Hose vs Bucket: Which Dehumidifier Setup Is Best?
Dehumidifier Short Cycling: Causes and How to Fix It
Dehumidifier Energy Cost: What It Adds to Your Monthly Bill

Bedroom dehumidifier takeaways

A bedroom dehumidifier works most comfortably when it maintains a moderate humidity target without running harder or longer than necessary. Start near 45% to 50% relative humidity, confirm conditions with a separate monitor, and adjust based on seasonal moisture and personal comfort.

For quieter nights, prioritize automatic control, low fan speed, pre-bedtime operation, stable placement, and adequate distance from the bed. Address bathroom steam, leaks, condensation, and other moisture sources directly. Regular filter, bucket, and drain maintenance helps preserve airflow while reducing unexpected shutdowns, rattles, and odors.

Frequently asked questions

What humidity setting should I use for a dehumidifier in a bedroom at night?

A target of about 45% to 50% relative humidity is a practical starting point for many bedrooms. Adjust the setting based on a separate humidity monitor, comfort, condensation, and seasonal conditions rather than choosing the lowest setting available.

Is it safe to leave a dehumidifier running overnight in a bedroom?

It can be safe when the appliance is used according to its manual, connected to an appropriate grounded outlet, and kept clear of bedding, curtains, and furniture. Empty the bucket or use a manufacturer-approved drainage setup, and do not use damaged cords or unsupported extension arrangements.

How can I make a bedroom dehumidifier quieter while sleeping?

Use low fan speed or sleep mode if available, and run the unit for a few hours before bedtime to reduce the need for overnight operation. Place it on a stable, level floor several feet from the bed when possible, while preserving the clearances specified in the manual.

Why does my dehumidifier make the bedroom feel warmer?

Dehumidifiers release heat as part of normal operation, and the temperature rise can be more noticeable in a small closed room. Running it earlier in the evening, using automatic humidity control, or reducing moisture sources may limit the amount of overnight heat and runtime.

Should I run a dehumidifier continuously in a bedroom?

Continuous mode is usually unnecessary when the bedroom humidity is already within a moderate range. Automatic control is generally better for routine use because it cycles the unit based on the selected humidity target; continuous operation may be appropriate for persistent dampness or supervised drying.

Basement Dehumidifier Drain Hose Setup Without Guessing

Basement dehumidifier hose running toward a floor drain

Set up a basement dehumidifier drain hose with a continuous downhill path to a suitable drain, or use a condensate pump when gravity cannot move the water.

The hose should match the appliance outlet, remain free of kinks, and end where discharged water is permitted and unlikely to back up. The dehumidifier’s instructions and local plumbing rules take priority because drainage connections and allowed destinations vary.

Quick answer

  • Use gravity drainage only when the hose can run continuously downhill from the dehumidifier to the drain.
  • A practical slope target is about 1/4 inch of drop per foot where the layout permits, unless the appliance instructions specify otherwise.
  • Use a condensate pump when the destination is higher than the outlet or a reliable downhill route is unavailable.
  • Keep indoor relative humidity generally around 30% to 50%; many basements are managed near 40% to 50% as conditions allow.
  • Check the hose, drain, pump reservoir, and air filter at least monthly during frequent operation.

How continuous dehumidifier drainage works

A dehumidifier removes moisture from passing air and collects the resulting condensate. Portable units normally send that water to a removable bucket, a gravity-drain outlet, or an internal or external pump system.

Continuous drainage reduces bucket-emptying work, but it does not make the installation maintenance-free. Lint, sediment, biological buildup, hose movement, freezing, and drain backups can interrupt water flow.

The position of the drain outlet matters more than the top of the appliance. With gravity drainage, the entire hose route generally needs to stay below that outlet and descend toward the destination. A low floor drain is therefore easier to use than a laundry sink positioned above the machine.

Suitable destinations may include a floor drain, utility sink, condensate drain, or sump system, depending on the building and local requirements. Avoid assuming that any opening or exterior location is acceptable. Water should not create a walkway hazard, damage finishes, overload a small container, or flow toward the foundation.

Gravity drain hoses versus condensate pumps

When gravity is the simpler option

Gravity drainage has few mechanical parts. It works well when the dehumidifier can sit above a nearby drain and the hose can follow a smooth, consistently descending route.

For planning, a 12-foot run at a 1/4-inch-per-foot slope needs about 3 inches of total drop. This is an illustrative layout target rather than a universal appliance requirement. A steeper route is usually acceptable if the hose remains supported and does not pull on the connection.

When a pump is needed

A condensate pump collects water in a small reservoir and activates at a set level. It can move water upward to a sink, standpipe, or other approved destination. Some dehumidifiers include a pump; others can discharge into a separate pump designed for condensate.

Check the required vertical lift, often called head height, against the pump instructions. Horizontal distance, tubing diameter, bends, check valves, and elevation all affect performance, so maximum lift should not be treated as the ideal everyday target.

  • Choose gravity when a dependable downhill route is available.
  • Choose a pump when water must rise, cross an obstruction, or reach a distant approved drain.
  • Retain the bucket shutoff function when the appliance design uses it as backup protection.
Comparison of basement dehumidifier drainage options. Example values for illustration.
Gravity drainage and condensate pump decision matrix
Condition Gravity hose Condensate pump
Drain below outlet Usually suitable Usually unnecessary
Drain above outlet Not suitable Usually needed
Continuous downhill route Required Not required for the full run
Power requirement No additional power Requires a suitable power source
Moving parts None in the hose Pump, float, and possibly a check valve
Primary maintenance Inspect slope and clear buildup Clean reservoir and test operation
Power outage behavior Can continue if the unit operates Cannot pump without backup power

How to install a gravity drain hose

Start by turning off and unplugging the dehumidifier. Confirm that the model supports continuous gravity drainage, identify the correct outlet, and follow its instructions for removing any cap or adapter. Do not drill the cabinet, alter the drain pan, defeat a float switch, or force incompatible fittings.

  1. Select the destination. Confirm that the drain is open, permitted for condensate, and below the dehumidifier outlet.
  2. Choose the correct hose. Use the diameter and connection type specified for the appliance. A loose hose can leak, while a crushed or undersized hose can restrict flow.
  3. Plan the route. Keep it as short and direct as practical. Avoid loops, raised sections, tight bends, and long unsupported spans.
  4. Create a steady slope. Aim for continuous downward movement. Where feasible, about 1/4 inch of drop per foot is a useful planning target.
  5. Support the hose. Use non-damaging supports so the hose cannot sag into water-trapping pockets or shift when bumped.
  6. Secure the discharge end. Position it so it cannot jump out of a drain or become submerged in standing water.
  7. Test for leaks and flow. Operate the unit under humid conditions or use the manufacturer-approved test procedure. Inspect every connection and confirm that water reaches the destination.

Do not seal a hose into a drain in a way that conflicts with plumbing requirements. An appropriate air gap may be needed to reduce the chance of contaminated drain water being siphoned toward the appliance.

How to set up a condensate pump

Place an external condensate pump on a level, stable surface below the dehumidifier’s gravity outlet. Run a short, continuously descending inlet hose from the dehumidifier to the pump reservoir. The pump’s discharge tube can then rise toward the approved destination.

Use only tubing sizes, lift heights, and check-valve arrangements allowed by the pump instructions. A check valve may prevent water in the elevated discharge line from flowing back into the reservoir after each cycle, but it should not be added or removed contrary to the specified setup.

Connect the pump to a properly grounded receptacle that is appropriate for a potentially damp location. Keep plugs and connections away from pooled water. Extension cords and improvised adapters can introduce electrical and trip hazards and should be avoided unless expressly allowed by the equipment instructions and applicable codes.

Testing pump operation

Before relying on unattended drainage, test the system according to its instructions. Confirm that the float activates the pump, the reservoir empties, and the discharge line does not leak or detach. If the pump has an overflow safety switch compatible with the dehumidifier, use it only as directed rather than bypassing normal controls.

A pump should have enough capacity for the dehumidifier’s condensate output, but more capacity does not compensate for excessive lift or blocked tubing. Repeated short cycling, unusual noise, or a reservoir that remains full indicates that the setup needs attention.

Common drain hose mistakes and troubleshooting

Bucket fills despite a connected hose

The appliance may not be level, the hose may rise after leaving the outlet, or a cap or adapter may be installed incorrectly. Some units require the bucket to remain fully seated even during continuous drainage because it operates a safety switch.

Water leaks around the connection

Look for cross-threading, a missing specified washer, an incompatible hose, or tension pulling the fitting sideways. Hand-tightening is commonly appropriate for plastic fittings, but follow the instructions because excessive force can damage threads.

Water remains in a low spot

A sag creates a trap that can slow or stop gravity flow. Shorten the route, add support, or reposition the dehumidifier to restore a continuous slope. Simply raising the hose after the sag usually creates another obstruction.

Pump runs but water does not move

Possible causes include excessive lift, a kinked discharge tube, an obstructed check valve, air leakage at a connection, or a blocked outlet. Disconnect power before inspecting the reservoir or tubing. Replace damaged components rather than attempting unsafe internal repairs.

Drainage stops during cold weather

An exterior discharge line can freeze and send water back toward the appliance. Route condensate to an indoor approved drain where practical. If exterior discharge is allowed, its design must account for freezing temperatures, drainage direction, and local rules.

Basement layouts, examples, and safety considerations

Dehumidifier beside a floor drain

If the outlet is 8 inches above the drain opening and the hose run is 10 feet, there is generally enough elevation for a modest continuous slope. The hose still needs support so it does not sag behind stored items.

Dehumidifier draining to a utility sink

If the sink rim is higher than the drain outlet, gravity will not work. A condensate pump may lift water to the sink, provided its rated lift and installation instructions support the route. Secure the discharge tube so it cannot fall onto the floor.

Finished basement with no nearby drain

A pump can cover distance, but the tube should be protected from furniture, doors, foot traffic, and sharp edges. Concealing tubing inside walls or connecting it directly to plumbing may require code-compliant materials and professional work.

General safety checks

  • Keep the dehumidifier upright on a firm, level surface with the specified airflow clearance.
  • Use a grounded outlet and follow applicable requirements for ground-fault circuit protection in basement or damp locations.
  • Do not place electrical connections where drain backups or leaks could submerge them.
  • Do not bypass bucket switches, pump floats, overflow controls, or other safety features.
  • Confirm that floor drains and sump systems are functional before unattended operation.
  • Follow local rules for discharging condensate outdoors, into sanitary plumbing, or into a sump.

Maintenance and humidity control after installation

Inspect a frequently used drainage system about once a month and after moving the appliance. Verify that the hose still slopes correctly, fittings are dry, and the discharge destination is open. Homes with lint, sediment, or seasonal pest activity may require more frequent checks.

Clean the air filter at the interval specified by the appliance instructions. Restricted airflow can reduce moisture removal and may contribute to frost on coils. Clean the drain hose, bucket, or pump reservoir using only methods and solutions approved for those materials, then rinse as directed.

A separate hygrometer can help confirm conditions away from the unit. Many homes aim for 30% to 50% relative humidity, while a practical basement target is often around 40% to 50%. Readings vary with temperature and location, so avoid placing the sensor directly in the dehumidifier’s dry exhaust stream.

Drainage does not address the source of bulk water. Plumbing leaks, groundwater entry, foundation seepage, overflowing gutters, and wet materials need separate correction. A dehumidifier can manage moisture in the air, but it should not be used as a substitute for repairing active water intrusion.

Practical humidity and drainage planning examples. Example values for illustration.
Basement humidity and drainage quick plan
Goal or condition Simple action Check
Maintain typical indoor humidity Start within a 40% to 50% basement target Verify with a separate hygrometer
Gravity drainage Keep the full hose route descending Look for sags and standing water
Drain located above outlet Use a suitable condensate pump Confirm lift and tubing requirements
Frequent pump operation Inspect reservoir and discharge line Check for leaks or short cycling
Seasonal shutdown Drain, clean, and dry components Store the hose without sharp bends
Humidity remains elevated Check airflow, settings, and moisture sources Look for leaks or water entry

Related guides:How to Size a Dehumidifier (Sq Ft, Pints/Day, and Real-World Tips)Basement Dehumidifier Guide: Targets, Drainage, and Energy UseDehumidifier Running Cost: How Much Electricity Will It Use?

Basement dehumidifier drain setup summary

Use gravity drainage when the dehumidifier outlet is above an approved drain and the entire hose can maintain a continuous downward slope. A short, supported route with no kinks, loops, or submerged end is the most reliable arrangement.

Use a condensate pump when water must travel uphill. Confirm the pump’s lift capability, tubing requirements, electrical setup, and overflow protections before depending on it for unattended operation.

Whichever method is used, test the system, inspect it regularly, and keep the drain destination clear. Pair continuous drainage with reasonable humidity settings and correction of any active leaks or water entry.

Frequently asked questions

Does a dehumidifier drain hose need to slope downhill the entire way?

For gravity drainage, the hose should run continuously downhill from the dehumidifier outlet to the drain. Any rise, loop, or sag can trap water and may slow or stop drainage. If a downhill route is not possible, use a condensate pump rated for the required lift.

How much slope should a basement dehumidifier drain hose have?

About 1/4 inch of drop per foot is a practical planning target when the layout allows, but the appliance instructions control. The key requirement is a consistent downward path without low spots that hold water. Support the hose so stored items or foot traffic cannot create a sag later.

Can I drain a basement dehumidifier into a utility sink?

A utility sink can be a suitable destination when local rules permit it and the discharge is secured. Gravity drainage only works if the sink drain connection is below the dehumidifier outlet; a sink rim above the outlet requires a condensate pump. Avoid arrangements that could allow drain water to backflow or siphon toward the appliance.

Why is my dehumidifier bucket filling even though the drain hose is connected?

Common causes include a hose that rises or sags, a kink or blockage, an incorrect adapter, or an unlevel appliance. Some models also require the bucket to remain fully seated because it activates a safety switch. Check the manufacturer instructions before changing fittings or removing components.

How often should I check a dehumidifier drain hose and condensate pump?

Inspect the hose, fittings, and drain destination about monthly during frequent use and after moving the unit. For a pump setup, also check the reservoir, discharge tubing, and pump operation for leaks, buildup, or short cycling. More frequent checks may be needed where lint, sediment, or freezing conditions are concerns.

Running a Humidifier All Night: What Matters for Safe Use

Humidifier producing gentle mist beside a tidy bed

Running a humidifier all night can be appropriate when indoor air is dry, provided humidity stays controlled and the unit is cleaned and positioned correctly.

The main goal is not maximum moisture output but a stable, comfortable indoor relative humidity. A hygrometer, automatic humidistat, and consistent cleaning routine can help prevent excessive dampness, mineral residue, and contamination.

Quick answer

  • Aim for about 30%–50% relative humidity as general household guidance.
  • Reduce output if windows, walls, bedding, or nearby surfaces become damp.
  • Use an automatic humidity setting when available rather than continuous maximum output.
  • Place the unit on a stable, water-resistant surface away from bedding, walls, and electronics.
  • Empty, dry, and refill the tank regularly; follow the appliance instructions for deeper cleaning.

Can You Safely Run a Humidifier All Night?

A humidifier can generally operate overnight if it is designed for continuous use, remains in good condition, and has enough water to run without being overfilled. Automatic shutoff is useful because it stops operation when the tank is empty or improperly seated.

The more important question is whether the room needs moisture for the entire night. Indoor humidity can change as outdoor temperatures fall, heating equipment cycles, doors close, and people remain in the room. A setting that works at bedtime may create too much humidity by morning.

Use a separate digital hygrometer if the humidifier does not measure room humidity. Even units with built-in sensors can read the moist air immediately around the appliance rather than conditions near the bed or across the room.

Overnight operation may be unnecessary when relative humidity is already within a comfortable range. Humidifiers add moisture but do not remove particles, carbon dioxide, gases, or odors, and they are not substitutes for ventilation or air filtration.

Best Overnight Humidity and Output Settings

For many homes, 30%–50% relative humidity is a practical general range. The appropriate point within that range depends on outdoor temperature, insulation, window quality, room size, and how the space responds to added moisture.

In cold weather, some homes need to remain closer to 30%–40% to prevent condensation on windows and exterior walls. Condensation is a practical sign that moisture output is too high for the building conditions, even if a nearby monitor shows a seemingly acceptable reading.

Choose a target instead of a fixed mist level

If the humidifier has a humidistat or automatic mode, begin with a moderate target such as 40%. Check the room after several hours and again in the morning. Increase or decrease the setting gradually based on measured humidity and visible dampness.

Without automatic control, start on the lowest effective output. Room volume matters: a small closed bedroom can reach the target quickly, while a large or open room may distribute moisture into adjoining spaces. Tank capacity describes runtime, not how effectively the unit controls a particular room.

Measure away from the mist

Place the hygrometer several feet from the humidifier, away from the direct mist plume, heating vents, open windows, and exterior walls. This gives a more representative room reading. Allow time for the reading to stabilize before changing the output.

Overnight humidifier setting decision matrix

Example values for illustration.

Room conditions and practical setting responses
Observed condition Practical response Reason
Humidity below 30% Start with low or moderate output Add moisture gradually
Humidity around 30%–40% Use a low target-based setting May suit cold-weather conditions
Humidity around 40%–50% Maintain or pause output Avoid adding unnecessary moisture
Humidity above 50% Turn down or stop the unit Limit prolonged damp conditions
Window condensation appears Lower the target or runtime Surfaces may be colder than room air
Nearby furniture feels damp Move the unit and reduce output Mist may be settling before dispersing
Reading changes sharply near unit Relocate the hygrometer The sensor may be sampling the mist plume

Benefits of Overnight Humidifier Use

Heating systems and cold outdoor air can leave indoor spaces feeling dry. Controlled humidification may reduce dry-air discomfort involving the skin, lips, throat, or nasal passages, although individual experiences vary and a humidifier should not be treated as a medical device unless specifically designed and regulated for that purpose.

Moderate humidity can also reduce static electricity and help limit drying or shrinking in some wood furnishings and finishes. However, wood products have different care requirements, so room humidity should not be raised beyond a sensible household range solely to protect one item.

Running the unit overnight can provide steadier moisture than operating it briefly at bedtime. Automatic control is particularly helpful because it cycles the mist or fan rather than adding moisture continuously after the target has been reached.

These benefits depend on clean operation. A poorly maintained humidifier can release mineral particles or contaminated droplets, offsetting the practical advantages of adding moisture.

Risks and Troubleshooting Cues

The most common overnight problem is over-humidification. Prolonged dampness can support mold growth and dust mite activity, particularly on cool surfaces, around windows, behind furniture, and in poorly ventilated corners.

Watch for fogged windows, water droplets, musty odors, peeling finishes, damp textiles, or a room humidity reading that remains above 50%. These cues do not necessarily indicate a serious problem, but they mean the output, runtime, placement, or ventilation should be reviewed.

White dust from ultrasonic models

Some ultrasonic humidifiers can disperse dissolved minerals from tap water as fine residue commonly called white dust. Using distilled or appropriately demineralized water may reduce this residue. Demineralization cartridges, where specified by the manufacturer, require periodic replacement and do not eliminate the need for cleaning.

Microbial buildup and stagnant water

Water left standing in a tank or base can allow films and deposits to develop. Mist may then carry material from the reservoir into the room. Replacing water regularly, drying wet components, and cleaning on schedule are more reliable controls than adding unapproved chemicals or fragrances.

Noise and sleep disruption

Fans, bubbling water, indicator lights, and intermittent cycling can be noticeable in a quiet bedroom. A lower setting may reduce sound, but the unit still needs enough airflow around it. Do not cover vents or alter safety systems to make an appliance quieter.

Overnight Humidifier Placement and Setup Checklist

Good placement allows moisture to mix with room air before settling on surfaces. The ideal distance varies by mist direction and room airflow, so inspect the surrounding area after the first few hours of operation.

  • Set the humidifier on a level, stable, water-resistant surface.
  • Keep it away from the edge of furniture and outside the reach of children and pets.
  • Do not aim mist directly at a bed, wall, curtain, carpet, wood furniture, or electronic device.
  • Leave the air inlet and outlet unobstructed according to the operating instructions.
  • Keep the power cord away from walkways and standing water.
  • Fill the tank without exceeding its marked capacity, and seat it correctly.
  • Confirm that automatic shutoff works as intended.
  • Place a hygrometer in the occupied area but outside the direct mist path.
  • Check for damp surfaces and condensation the following morning.

Closing a bedroom door can make humidification more efficient, but it can also allow humidity and carbon dioxide to rise faster. A humidifier does not provide fresh air. Use appropriate ventilation based on the room, weather, outdoor air conditions, and household needs.

Settings for Common Bedroom Scenarios

Small bedroom with the door closed

Start on low output and monitor humidity because a small enclosed room can gain moisture quickly. Automatic cycling around a moderate target is generally preferable to continuous high mist. If the room reaches the target well before morning, use a timer or allow the humidistat to pause operation.

Large bedroom or open-plan area

Moisture may spread into hallways or adjoining rooms, making local control less predictable. Place the monitor near the occupied part of the room and avoid increasing output solely because a sensor beside an open doorway reads low. One appropriately placed unit may provide localized comfort without changing humidity throughout the entire floor.

Cold night with window condensation

Lower the target, reduce runtime, or stop the humidifier. Indoor air can be at a moderate relative humidity while cold glass falls below the dew point and collects water. Wipe up condensation and check window frames and nearby walls for persistent dampness.

Room already near 50% humidity

Leave the humidifier off unless conditions change. More mist is unlikely to provide a practical advantage and may create damp areas. If humidity remains elevated without humidifier use, investigate moisture sources and consider ventilation or dehumidification as appropriate.

Dry room without a humidity sensor

Use a separate hygrometer rather than estimating from how the air feels. Start with a short, low-output trial and check the room before committing to all-night operation. Sensations of dryness can have causes that a humidifier will not address.

Cleaning, Water, and Electrical Safety

Follow the appliance manual because cleaning intervals and compatible products vary by design. As a general routine, empty remaining water, rinse the tank and base, and allow components to dry regularly. Remove scale and disinfect only with methods approved for the unit, and never mix cleaning chemicals.

Distilled or demineralized water can limit mineral deposits, especially in ultrasonic models. Evaporative humidifiers may trap more minerals in a wick, but the wick then requires inspection and replacement. No water choice makes routine cleaning optional.

Warm-mist units heat water and can present a burn or scald risk if tipped or touched. They require especially careful placement around children and pets. Cool-mist units avoid heated water but still require stable placement and hygienic maintenance.

Plug the humidifier directly into a suitable outlet unless the instructions explicitly permit another arrangement. Keep plugs and cords dry, stop using damaged equipment, and do not bypass shutoffs, sensors, or other safety features.

Some combination appliances may include ionization or UV-C features. Humidification does not require ozone generation, and features intended to generate ozone should not be used in occupied rooms. Enclosed UV-C components do not replace physical cleaning; never modify housings or expose eyes or skin to an accessible UV-C source.

Humidity and maintenance quick plan

Example values for illustration.

Overnight goals, actions, tools, and reminders
Goal Simple action Useful tool Reminder
Keep humidity controlled Check bedtime and morning readings Digital hygrometer Measure away from mist
Avoid condensation Lower output on colder nights Visual surface check Inspect windows and exterior walls
Limit mineral residue Use lower-mineral water when practical Appropriate water supply Continue routine cleaning
Prevent stagnant water Empty and dry wet components Clean drying area Do not simply top off old water
Control scale Descale as instructed Approved cleaning materials Do not mix chemicals
Maintain steady output Inspect or replace consumable wicks Maintenance reminder Follow condition and manual guidance

Related guides:
Humidifier Safety: Bacteria Risk, Cleaning, and Safe Humidity Limits
How to Clean a Humidifier Properly (And How Often)
Best Humidity Level for Winter: Comfort vs Health vs Mold Risk
Ultrasonic vs Evaporative Humidifiers: Pros, Cons, and Which to Buy

Summary: A Practical All-Night Humidifier Routine

Running a humidifier all night is most practical when measured humidity is below the desired range and the appliance can maintain a stable target automatically. For general household use, aim for approximately 30%–50% relative humidity, with lower targets often needed during cold weather.

Begin with low or moderate output, measure humidity away from the mist, and inspect the room for condensation or damp surfaces. Reduce or stop output when humidity approaches the upper end of the range or moisture collects on windows, walls, bedding, or furniture.

Use stable placement, appropriate water, automatic shutoff, and a regular emptying and cleaning routine. These steps matter more than simply choosing an all-night runtime because safe, useful humidification depends on both moisture control and ongoing maintenance.

Frequently asked questions

Is it safe to sleep with a humidifier running all night?

It can be safe when the appliance is intended for continuous operation, is in good condition, and is used according to its instructions. Keep room humidity controlled, use stable placement away from bedding and electronics, and rely on automatic shutoff where available.

What humidity level should I use when running a humidifier all night?

For many homes, a relative humidity range of about 30%–50% is practical general guidance. In cold weather, a lower target such as 30%–40% may help limit condensation on windows and cold exterior surfaces.

Should I leave my bedroom door open when using a humidifier overnight?

A closed door can help a humidifier raise moisture levels in a small bedroom more quickly, so low output and monitoring are especially important. An open door may spread moisture into adjacent areas, but it does not replace appropriate ventilation or fresh-air needs.

Why are my windows wet after using a humidifier overnight?

Wet or fogged windows usually indicate that indoor moisture is condensing on cold glass because the humidity level or runtime is too high for the conditions. Lower the humidifier setting, shorten operation, or turn the unit off, then wipe away accumulated moisture and inspect nearby surfaces.

Do I need to empty a humidifier tank every day?

Regularly emptying remaining water, rinsing components, and allowing them to dry helps reduce stagnant-water films and mineral buildup. Follow the manufacturer’s instructions for the specific cleaning and disinfection schedule, and avoid simply topping off old water repeatedly.

Humidifier Placement in a Baby Room Without Guessing

Humidifier placed safely away from a baby crib

Place a baby-room humidifier on a stable, moisture-resistant surface several feet from the crib, aim for 30% to 50% relative humidity, and clean the unit according to its instructions. A distance of about 3 feet from the crib is a practical starting point, but the mist must not dampen bedding, walls, or furniture. Keep the device and cord out of a child’s reach and use a separate humidity gauge to prevent over-humidifying the room.

Quick answer

  • Aim for about 30% to 50% relative humidity as general indoor guidance.
  • Start with the humidifier at least 3 feet from the crib and adjust if nearby surfaces become damp.
  • Use a firm, level, moisture-resistant surface where the unit cannot be pulled down.
  • Keep mist away from the crib, walls, curtains, electronics, and the humidity monitor.
  • Empty and dry the tank regularly, and clean the humidifier on the manufacturer’s schedule.

Why humidifier placement matters in a baby room

A humidifier adds water vapor or fine water droplets to indoor air. Placement affects how evenly that moisture spreads and whether it settles on nearby materials before mixing into the room.

If the unit is too close to a crib, cool mist can dampen the mattress, sheets, sleepwear, or nearby wall. Persistent dampness can support unwanted microbial growth and may damage finishes or furniture. If the humidifier is hidden behind furniture or placed in a corner with little airflow, humidity may also become uneven.

The goal is not to direct mist toward the baby. Instead, position the unit so moisture can disperse into the room’s air while the sleeping area remains dry. The humidifier’s manual should take priority because outlet direction, required clearances, and approved surfaces vary by design.

How far a humidifier should be from the crib

There is no universal official distance that works for every room and humidifier. As a practical starting point, place the unit at least 3 feet from the crib. More distance may be necessary for a high-output ultrasonic unit, a small room, or a model that produces a visible plume.

Choose a stable surface that cannot tip or wobble. It should be high enough to discourage access as a child becomes mobile, but not positioned where the humidifier could fall into the crib. Route the cord directly to an appropriate outlet without creating a loop, trip hazard, or reachable section near the crib.

Keep the outlet clear of curtains, shelving, toys, and furniture. Do not place the unit under a shelf or directly against a wall unless the instructions specifically permit that arrangement. Check the wall, floor, furniture, and bedding after the humidifier has operated for an hour or two. Any cool, clammy, or visibly wet surface indicates that the unit should be moved, redirected, or turned down.

Baby-room humidifier placement checklist. Example values for illustration.
Placement factor and practical starting point
Placement factor Practical starting point What to check
Crib distance At least 3 feet Bedding remains completely dry
Wall clearance Follow the unit manual No condensation or damp finish
Surface Firm, level, and moisture-resistant No wobbling or blocked air intake
Mist direction Toward open room air No plume aimed at the crib
Cord location Outside the child’s reach No loops or trip hazards
Humidity monitor Away from the mist plume Reading represents the wider room

What humidity level to target

A relative humidity range of 30% to 50% is widely used as general indoor guidance. The appropriate point within that range depends on outdoor weather, room temperature, building construction, and whether condensation appears on cold surfaces.

Relative humidity changes with temperature. A room can show a higher percentage as it cools overnight even when the actual amount of moisture in the air has not increased. For that reason, check readings at different times rather than relying on one measurement.

How to measure room humidity

Use a separate digital hygrometer when possible. Place it near the general occupied area, but not beside the humidifier, over a heating vent, against an exterior wall, or in direct sunlight. A monitor in the mist plume may report an artificially high reading that does not represent the rest of the room.

Consumer humidity sensors can differ by several percentage points. Small variations are less important than the overall trend and physical signs in the room. If windows collect condensation or surfaces feel damp, reduce output even if the displayed reading appears to be within the intended range.

When to turn the humidifier down

  • Relative humidity stays above 50%.
  • Condensation forms on windows, walls, or other cool surfaces.
  • Bedding, curtains, carpeting, or furniture feels damp.
  • A musty odor develops or existing damp areas worsen.
  • The room feels noticeably clammy.

During very cold weather, a home may need to stay below 40% humidity to avoid window or wall condensation. The room’s physical conditions are more useful than treating one percentage as a rigid target.

Common placement mistakes and troubleshooting cues

Putting the humidifier next to the crib

Close placement does not necessarily provide better room humidity. It mainly increases the chance that mist will settle on bedding or that the device and cord will become reachable. Move the unit farther away and direct its outlet into unobstructed room air.

Placing it directly on carpet or soft fabric

A soft surface can make the unit unstable and may block an air intake. It can also conceal small spills. Use a firm surface approved by the manufacturer, and avoid towels or pads that obstruct the base or vents.

Running the unit continuously without measuring

Humidity can build gradually, particularly with the bedroom door closed. Use a hygrometer and lower the output or operating time as needed. An automatic humidistat can be helpful, but its sensor may not match conditions across the entire room.

Using hard tap water in a mist-producing unit

Some ultrasonic humidifiers can disperse minerals from tap water as fine white dust. Demineralized or distilled water may reduce mineral residue when the manual permits it. It does not eliminate the need for cleaning, and water handling recommendations can vary by humidifier type.

Ignoring hidden damp areas

Check behind the crib, under the humidifier stand, near exterior walls, and around windows. These cooler or poorly ventilated locations may show moisture before the center of the room does.

Practical setup examples for different baby rooms

Small nursery with a closed door

In a compact room, humidity can rise quickly. Start at the lowest useful output, keep the humidifier several feet from the crib, and measure humidity after the door has been closed for part of the normal sleep period. Avoid placing the unit between the crib and a wall where mist can become trapped.

Bedroom shared with an adult

Place the humidifier where its mist can mix into open room air without crossing either sleeping area at close range. A dresser or stable table may work if it is moisture-resistant, inaccessible to the child, and able to meet the manufacturer’s clearance requirements.

Room with forced-air heating

Do not place the humidifier directly beside or over a supply register. Moving air may distort the humidity reading, carry mist onto unexpected surfaces, or cause moisture to distribute unevenly. Position the hygrometer away from both the vent and humidifier.

Room with cold windows or exterior walls

Cold surfaces may develop condensation even when the center of the room has moderate humidity. Keep the humidifier away from the window, monitor the glass and frame, and use a lower target when outdoor temperatures fall.

Safety considerations for humidifier use

Cool-mist humidifiers avoid the hot water and steam associated with warm-mist units, making them a common choice around children. Regardless of type, keep the entire appliance, water reservoir, and power cord out of reach. Do not place the unit where it could fall into the crib or onto a person.

Plug the humidifier in according to its instructions. Avoid extension cords unless the manufacturer explicitly allows them, and keep plugs and outlets dry. Unplug the unit before filling, draining, moving, or cleaning it.

Do not add essential oils, fragrances, medications, disinfectants, or other substances to the tank unless the humidifier is specifically designed for that substance and its instructions allow it. Additives can damage some units or become dispersed into room air.

Ionizers and ozone-generating functions are not needed for humidity control. If a combined air-treatment device includes optional ionization, review its documentation and relevant safety certification information before use. UV-C components, where enclosed inside an appliance, do not replace routine tank and surface cleaning.

A humidifier also does not replace ventilation or correction of leaks and damp building materials. If a room has persistent moisture, visible water damage, or recurring musty odors, identify and correct the moisture source rather than adding more humidity.

Cleaning and maintaining a baby-room humidifier

Standing water and mineral deposits can create residue inside a humidifier. Regular emptying, drying, and cleaning limit buildup and help the unit operate as intended. Follow the model’s instructions because tanks, seals, wicks, and electronic bases require different handling.

Daily or each-use care

  • Unplug the unit before handling it.
  • Empty leftover water rather than repeatedly topping off the tank.
  • Rinse removable water-contact parts when the instructions permit.
  • Allow the tank and removable parts to air-dry before storage or refilling.
  • Wipe up spills and check the surface beneath the humidifier.

Routine cleaning

Many general public-health recommendations suggest cleaning portable humidifiers about every three days during regular use, while some manufacturers specify a different interval. Use the schedule and cleaning agents listed in the manual. Mineral scale may require a separate descaling process from disinfection.

Never mix cleaning chemicals. Use adequate ventilation, keep the child away from the cleaning area, and rinse treated surfaces thoroughly when instructed. Do not immerse the powered base unless the manual says that it is washable.

Filters, wicks, and storage

Replace disposable wicks, cartridges, or filters when they become hardened, discolored, damaged, or overdue under the manufacturer’s schedule. Before seasonal storage, clean and dry the unit completely. Store it without water so moisture is not trapped in the tank or base.

Humidity and maintenance quick plan. Example values for illustration.
Common goals, actions, and checks
Goal or cue Simple action Tool or check
Maintain comfortable humidity Aim for 30% to 50% Separate hygrometer
Prevent wet bedding Increase distance or lower output Touch-check nearby materials
Limit window condensation Reduce the humidity target Inspect glass and frames
Reduce mineral dust Use suitable low-mineral water Check the unit instructions
Control tank residue Empty, dry, and clean routinely Inspect water-contact surfaces
Prepare for storage Clean and dry all approved parts Store the tank empty

Related guides:
Humidifier for Baby’s Room: Safe Settings and Placement Tips
Humidifier Placement: Near Bed, Near Vent, or Center of Room?
How to Clean a Humidifier Properly (And How Often)
How to Stop Condensation on Windows (And Why It Matters for Mold)
Best Humidity Level for Winter: Comfort vs Health vs Mold Risk

Baby-room humidifier placement summary

Start with the humidifier at least 3 feet from the crib on a stable, moisture-resistant surface, while keeping the unit and cord inaccessible to the child. Direct mist into open room air rather than toward bedding, walls, curtains, windows, or electronics.

Use a hygrometer away from the mist plume and generally aim for 30% to 50% relative humidity. Reduce output whenever condensation, damp materials, or humidity above the intended range appears. Empty and dry the reservoir regularly, clean the unit on its recommended schedule, and inspect the surrounding room for moisture as part of normal upkeep.

Frequently asked questions

Can I put a humidifier on a dresser in a baby’s room?

A dresser can be an appropriate location if its top is firm, level, moisture-resistant, and stable enough to support the humidifier. The unit must remain out of the child’s reach, meet the clearance requirements in its manual, and be positioned so it cannot fall into or toward the crib. Check the dresser surface and nearby wall for moisture after use.

Should a humidifier run all night in a baby’s room?

A humidifier may run overnight if the room humidity stays in an appropriate range and nearby materials remain dry. Use a separate hygrometer and reduce the output, use a timer, or turn the unit off if humidity rises above the target range or condensation develops. A closed nursery door can allow humidity to build more quickly.

Where should the hygrometer go in relation to a baby-room humidifier?

Place the hygrometer in the general occupied area of the room, away from the humidifier’s mist plume. Keep it away from heating vents, direct sunlight, exterior walls, and windows, which can skew its reading. This helps the monitor reflect broader room conditions rather than the moisture immediately around the unit.

What should I do if the humidifier makes the nursery window wet?

Window condensation is a sign that the room air or nearby surface is too moist for current conditions. Lower the humidifier output or run time, move the unit away from the window, and reassess the humidity target, especially during cold weather. Also inspect nearby walls, furnishings, and bedding for dampness.

Is visible mist in a baby’s room a sign that the humidifier is too close?

Visible mist alone does not always mean the humidifier is incorrectly placed, but the plume should not be aimed at the crib, bedding, walls, or furniture. If mist settles on surfaces or leaves them cool and clammy, move the unit farther away, redirect the outlet, or reduce the output. Follow the humidifier manufacturer’s placement and clearance instructions.

Evaporative vs Ultrasonic Humidifier: What Is Safer?

Evaporative and ultrasonic humidifiers in a neutral bedroom

For most bedrooms, an evaporative humidifier is the safer default because it is less likely to over-humidify the room or disperse water minerals, although either type can be used safely with proper cleaning and humidity control. Ultrasonic models are often quieter, but they require closer attention to water quality and output. The safer choice ultimately depends on maintenance, bedroom conditions, and how consistently relative humidity is monitored.

Quick answer

  • Aim for about 30% to 50% relative humidity as general indoor guidance.
  • Reduce output if windows, walls, or bedding feel damp or develop condensation.
  • Evaporative models naturally slow moisture output as room humidity rises.
  • Ultrasonic models are usually quieter but can release minerals from tap water as white dust.
  • Empty and refill the tank daily, and clean the unit at least every few days or as directed by its instructions.

How Evaporative and Ultrasonic Humidifiers Work

Both types add water vapor to indoor air, but they use different mechanisms. That difference affects mineral release, noise, cleaning needs, and the chance of adding too much moisture.

Evaporative humidifiers

An evaporative unit draws water from a reservoir into a wick or similar absorbent material. A fan moves room air through the damp wick, allowing water to evaporate into the air.

Evaporation becomes less efficient as relative humidity rises, giving this design a degree of natural self-regulation. It can still make a room too humid if oversized or operated continuously, but rapid over-humidification is generally less likely.

The wick also retains many minerals found in tap water. Those minerals may create scale in the unit and shorten wick life, but they are less likely to become airborne as fine white dust.

Ultrasonic humidifiers

An ultrasonic unit vibrates a small diaphragm at high frequency to create tiny water droplets. These droplets leave the unit as a cool, visible mist and then evaporate into the room.

Because the unit aerosolizes reservoir water, dissolved minerals can travel with the mist. When the droplets evaporate, mineral residue may settle on furniture or remain suspended temporarily as fine particles. Contaminants in a poorly maintained tank may also be dispersed.

Ultrasonic operation is usually quieter because it does not require a large fan. However, its output does not naturally decline in the same way as evaporation, so a humidistat or separate humidity monitor is particularly useful.

Bedroom Humidity Targets and Sizing Logic

A practical indoor relative humidity target is approximately 30% to 50%. The right point within that range depends on outdoor temperature, building insulation, air leakage, and whether moisture collects on cold surfaces.

During cold weather, some bedrooms may need to stay closer to 30% to 40% to prevent window condensation. A reading near 50% does not guarantee that every surface is safe from dampness; poorly insulated windows and exterior walls can be colder than the room air.

Choose capacity using the bedroom’s floor area, ceiling height, and air leakage rather than floor area alone. A 150-square-foot room with an 8-foot ceiling contains about 1,200 cubic feet of air, while the same floor area with a 10-foot ceiling contains about 1,500 cubic feet. Frequent door opening, heating-system airflow, and dry outdoor air increase the moisture needed.

Start at a low output and check a separate hygrometer after several hours. Humidity changes gradually, and a humidifier placed close to the monitor can produce a reading that is not representative of the whole room.

General comparison of bedroom humidifier types. Example values for illustration.
Evaporative and ultrasonic humidifier comparison
Factor Evaporative Ultrasonic
Moisture method Fan moves air through a wet wick Vibration creates a fine mist
Humidity behavior Output tends to decline as humidity rises Output continues at the selected setting
Tap-water minerals Many remain in the wick or reservoir May become airborne as white dust
Operating sound Fan noise is usually noticeable Usually quieter, with possible water sounds
Routine replacement Wick may require periodic replacement Usually no wick, but mineral scale requires removal
Visible mist Usually none Common
Over-humidification control Some natural self-regulation More dependent on settings and monitoring

Safety Differences and Common Bedroom Mistakes

The main safety concerns are excessive humidity, microbial growth in standing water, mineral release, spills, and electrical placement. These issues are manageable and are not unique to one humidifier design.

Using untreated tap water in an ultrasonic unit

Tap water can contain calcium, magnesium, and other dissolved minerals. In an ultrasonic humidifier, these materials may appear as white residue on nearby surfaces. Distilled or demineralized water generally reduces this release. Water softened by ion exchange may still contain dissolved material and is not equivalent to distilled water.

Running the humidifier without measuring humidity

Room conditions can change overnight as outdoor temperatures fall, doors close, or heating cycles vary. Operating at maximum output without a humidity reading can create condensation and damp areas. A separate hygrometer positioned away from the mist stream provides a useful cross-check.

Leaving old water in the reservoir

Standing water can support biofilm and microbial growth. Adding fresh water on top of old water does not remove deposits from the tank. Emptying, rinsing, and refilling the reservoir daily is a better routine.

Directing mist at the bed or wall

Visible mist should dissipate into room air rather than land on bedding, curtains, electronics, wood furniture, or painted surfaces. Local dampness can occur even when the room’s average humidity reading appears acceptable.

Choosing unnecessary air-treatment features

A humidifier does not need an ionizer or ozone-generating function to add moisture. If a unit includes optional ionization, it can generally be left off. UV-C components, where present, do not replace tank cleaning, and their effectiveness depends on design, exposure time, and maintenance.

Practical Setup and Nightly Safety Checklist

Place the humidifier on a stable, water-resistant surface where it cannot be knocked over. Keep it out of walking paths and follow the appliance instructions for clearance from walls, furniture, and electrical equipment.

  • Use a nearby wall outlet rather than placing cords where they create a trip hazard.
  • Keep the unit out of reach of children and pets.
  • Do not place it directly on carpet, bedding, or unfinished wood.
  • Point ultrasonic mist into open room air, not toward a wall or sleeping area.
  • Position the hygrometer several feet from the humidifier and away from windows or heating vents.
  • Begin with the lowest practical output and adjust gradually.
  • Check windows and nearby surfaces for condensation each morning.

A built-in humidistat is useful, but its sensor may read the moist air immediately around the appliance. Comparing it with a separate monitor elsewhere in the room can reveal whether the overall space is actually within the target range.

Use only water additives specifically permitted by the appliance instructions. Essential oils, fragrances, inhalants, and disinfectants can damage components or become airborne when used in a unit not designed for them.

Which Type Fits Common Bedroom Scenarios?

For a very quiet sleeping environment

An ultrasonic humidifier often has the advantage because it lacks a conventional evaporative fan. A low setting may be adequate in a closed bedroom, but humidity should be monitored because the unit can continue producing mist after the desired level is reached.

For a home with hard tap water

An evaporative model may be simpler if distilled water is impractical. Minerals generally collect in the wick and reservoir rather than settling throughout the room. The tradeoff is more frequent wick replacement and scale removal.

For a cold or condensation-prone bedroom

An evaporative model’s self-limiting behavior can provide a useful margin, but it is not a substitute for monitoring. Use a lower target, inspect windows, and avoid placing furniture tightly against cold exterior walls where air circulation is limited.

For a small nursery or pet-accessible room

Cool-mist evaporative and ultrasonic units avoid the hot water and steam associated with warm-mist appliances. Regardless of type, secure the cord, prevent access to the reservoir, and place the unit where it cannot be tipped or climbed on.

For someone sensitive to fine particles

An evaporative model avoids most airborne mineral dust from humidification. An ultrasonic model can also be practical when consistently filled with distilled or appropriately demineralized water and kept clean.

Cleaning, Water Choice, and Ownership Costs

Maintenance has a greater effect on safe operation than the basic humidifier technology. Always follow the appliance’s cleaning directions, particularly because materials and approved cleaning agents vary.

As a general routine, empty and refill the tank daily. Clean water-contact surfaces about every three days, or more often if film, odor, or scale appears. Unplug the unit first, use the recommended cleaning method, rinse thoroughly, and allow components to dry when the humidifier is not in use.

Never mix household cleaning chemicals. In particular, bleach and ammonia must not be combined. Do not run cleaning solutions through the humidifier unless the instructions specifically direct that procedure.

Evaporative ownership costs commonly include replacement wicks. Wick life varies with mineral content, operating hours, and cleaning practices. A hardened, discolored, or persistently odorous wick may need replacement even if a suggested interval has not passed.

Ultrasonic units avoid wick costs but may make distilled water an ongoing expense. They also need regular descaling, especially around the vibrating diaphragm. Abrasive tools can damage that component, so cleaning should follow the supplied directions.

Before seasonal storage, drain, clean, and dry the unit completely. Store it without water and, for an evaporative model, avoid leaving a used damp wick inside.

Decision Guide for Safer Humidity Control

Choose an evaporative humidifier when natural output moderation, reduced mineral dispersion, and the option to use ordinary tap water are more important than near-silent operation. Account for fan noise and replacement-wick costs.

Choose an ultrasonic humidifier when low noise and compact operation are priorities and you are willing to use low-mineral water, monitor room humidity, and clean the tank consistently. Automatic shutoff and an adjustable humidistat are useful general safety features.

With either type, look for clear cleaning access, a stable reservoir, understandable controls, and electrical certification from a recognized independent testing organization. Stop using a unit that leaks, has a damaged cord, produces a persistent unusual odor, or cannot be cleaned adequately.

Practical humidity-control responses for common bedroom conditions. Example values for illustration.
Bedroom humidity and dampness quick plan
Goal or observation Simple action Useful tool Note
Room below about 30% Run at low output and recheck after several hours Separate hygrometer Allow time for the reading to stabilize
Maintain a general comfort range Target roughly 30% to 50% Humidistat and hygrometer Use the lower end in condensation-prone weather
Window condensation appears Reduce output or pause operation Visual inspection Cold surfaces can become damp before the whole room does
White dust appears Use distilled water or consider evaporation Water supply check Most relevant to ultrasonic models
Musty odor or film develops Stop, empty, and clean the unit Cleaning supplies approved by instructions Do not mask odors with fragrance
Humidity varies around the room Move the monitor away from mist and vents Portable hygrometer Compare readings from representative locations

Related guides:
Ultrasonic vs Evaporative Humidifiers: Pros, Cons, and Which to Buy
Humidifier White Dust: Causes, Health Concerns, and Fixes
Humidifier Safety: Bacteria Risk, Cleaning, and Safe Humidity Limits

Summary: Which Humidifier Is Safer?

An evaporative humidifier is generally the more forgiving bedroom choice because it limits mineral dispersion and tends to reduce output as humidity rises. It may be preferable when tap water is hard, white dust is a concern, or humidity is difficult to manage.

An ultrasonic humidifier can also be used safely and may be better suited to noise-sensitive bedrooms. It requires more careful water selection, output control, and cleaning because it turns reservoir water directly into fine droplets.

For either type, keep relative humidity around 30% to 50% as general guidance, use a separate hygrometer, respond promptly to condensation, replace standing water daily, and maintain the appliance according to its instructions.

Frequently asked questions

Is an evaporative or ultrasonic humidifier safer for a bedroom?

An evaporative humidifier is often the safer default for a bedroom because its moisture output naturally slows as room humidity rises and it releases fewer tap-water minerals into the air. An ultrasonic humidifier can also be used safely when it is cleaned consistently, filled with low-mineral water, and operated with a hygrometer.

Do ultrasonic humidifiers cause white dust?

Ultrasonic humidifiers can create white dust when dissolved minerals in tap water are carried out with the fine mist and settle after the droplets evaporate. Using distilled or appropriately demineralized water generally reduces this residue.

Can an evaporative humidifier make a room too humid?

Yes. Although evaporative output tends to decrease as relative humidity rises, an oversized unit or continuous operation can still raise humidity enough to cause condensation or damp surfaces. Use a separate hygrometer and reduce output if windows, walls, or nearby materials become damp.

What humidity level should a humidifier maintain in a bedroom?

A general indoor target is about 30% to 50% relative humidity. In cold weather or rooms prone to window condensation, a lower range of roughly 30% to 40% may be more appropriate.

How often should an ultrasonic or evaporative humidifier be cleaned?

Empty, rinse, and refill the reservoir daily rather than adding water to old water. Clean water-contact surfaces about every three days, or sooner if scale, film, or odor develops, following the appliance’s instructions for approved methods and cleaners.