
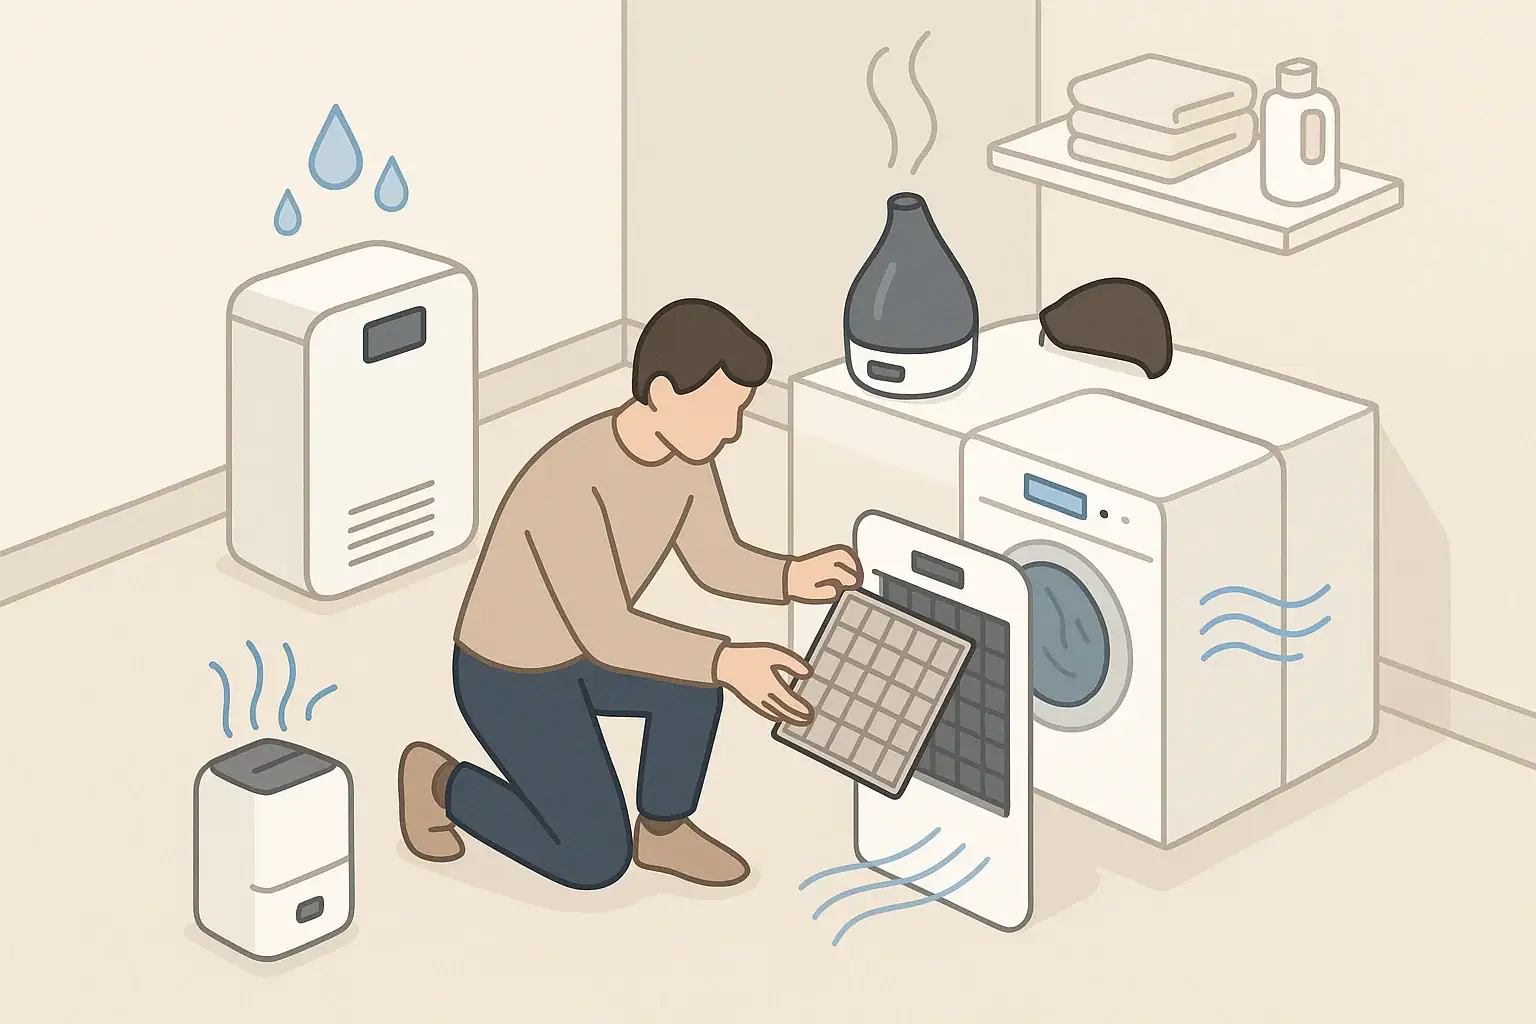
To store humidifiers and dehumidifiers off-season without mold, you need to fully clean, disinfect, dry, and open-vent them before packing in a breathable, dry place.
Both devices handle standing water and damp surfaces, which makes them easy places for mold and biofilm to grow if they are put away wet or dusty. Careful end-of-season cleaning, drying, and storage helps prevent odors, deposits, and mold spores from building up before you use them again.
- Target indoor humidity around 30–50% in most homes to limit mold growth.
- Always empty tanks and reservoirs completely before storage.
- Clean scale and residue with mild detergent and a non-abrasive brush.
- Disinfect water-contact parts, then air-dry 24–48 hours until fully dry.
- Store units in a cool, dry, ventilated area (not in damp basements).
- Inspect and quick-clean devices before using them again next season.
Why Off-Season Storage Matters for Mold Prevention
Humidifiers and dehumidifiers both collect or expose water as part of normal operation. When that water is left behind in reservoirs, hoses, wicks, or internal surfaces, it can support mold, mildew, and bacterial growth during storage. The first time you turn the unit back on, that buildup can release unpleasant odors and particles into your indoor air.
Off-season storage is especially important in climates with big seasonal humidity swings. Many people use humidifiers in dry winter months and dehumidifiers in damp spring and summer months. Each time you stop using a device for multiple weeks, you have a chance either to dry it thoroughly and keep it clean or to seal in moisture and spores.
Proper storage does not require specialized chemicals or tools. It mainly involves:
- Removing all standing water
- Cleaning away mineral deposits and visible residue
- Disinfecting surfaces that touch water
- Allowing enough time for complete drying
- Choosing a storage spot that stays dry and temperate
Key Concepts: How Humidifiers and Dehumidifiers Enable Mold
Understanding how each device handles water helps explain where mold and slime tend to appear.
Humidifiers: Water Mist and Mineral Deposits
Humidifiers add moisture to indoor air by turning water into mist or vapor. Their main mold and residue risks are:
- Water reservoirs and tanks that stay damp and may collect slimy biofilm.
- Wicks or filters that remain moist and trap minerals and organic material.
- Mineral scale from tap water that creates rough surfaces where microbes can cling.
- Fine internal passages that are hard to dry if water is left inside.
Because humidifiers intentionally add water to the air, storing them while still wet or dirty makes it easy for mold to establish itself during the off-season.
Dehumidifiers: Collected Condensate and Damp Coils
Dehumidifiers pull moisture from the air and collect it as liquid in a bucket or drain line. Their mold risk centers around:
- Condensate buckets or tanks that may be put away with residual water.
- Drain hoses that stay wet inside and can harbor slime and algae.
- Evaporator and condenser coils that remain damp after shutoff.
- Air filters that trap dust, which can hold moisture near surfaces.
Over time, a dehumidifier that is stored with a little water or heavy dust can develop musty odors, even if it is technically dry on the outside.
Example values for illustration.
| Task | Device type | Why it matters | Notes |
|---|---|---|---|
| Empty tanks and buckets | Humidifier & dehumidifier | Removes standing water that supports mold | Do this immediately after final use |
| Clean visible residue | Humidifier | Reduces mineral scale and biofilm surfaces | Use mild detergent and a soft brush |
| Disinfect water-contact parts | Humidifier & dehumidifier | Knocks down microbial load before storage | Rinse thoroughly afterward |
| Rinse and drain hoses | Dehumidifier | Helps clear slime and algae in lines | Hang to dry fully if removable |
| Air-dry 24–48 hours | Humidifier & dehumidifier | Allows hidden moisture to evaporate | Leave covers, tanks, and caps off |
| Cover loosely in storage | Humidifier & dehumidifier | Limits dust while allowing air exchange | Avoid sealing in plastic if items are not bone dry |
Common Mistakes That Lead to Moldy Devices
Most mold issues in stored humidifiers and dehumidifiers can be traced to a few repeatable habits rather than rare failures.
Storing While Still Wet Inside
Putting a device away immediately after its last run often means there is water film left on tanks, coils, wicks, and hoses. Even a thin layer of moisture can support microbial growth during weeks or months of storage.
Skipping the Final Deep Clean
Cleaning only when the unit starts to smell or looks dirty in the middle of the season is common. When the season ends, people sometimes simply unplug the unit and store it as-is. Any existing scale, slime, or dust then sits undisturbed and can worsen while the unit is not in use.
Sealing Devices in Airtight Plastic
Airtight plastic wraps or bags trap any remaining humidity, turning the inside into a still, moist environment. Without air circulation, surfaces dry very slowly, and any microbes left after cleaning may continue to multiply.
Storing in Damp Basements or Garages
Even a perfectly cleaned and dried device can become musty if it is stored for months in a space with persistently high humidity or visible dampness. Moist air can condense on cooler device surfaces, reintroducing water where mold spores can land and grow.
Reusing Disposable Parts Beyond Their Life
Some humidifiers use disposable wicks or filters. Reusing them season after season, or storing them damp, can lead to stubborn odors and visible discoloration. Even if you clean the rest of the device, these parts may remain a source of smell and debris.
Step-by-Step: Off-Season Storage for Humidifiers
The following process is general and should be adjusted based on the instructions that come with your specific device. Always defer to the manufacturer’s safety and cleaning guidance.
1. Power Down and Cool
- Unplug the humidifier and let it cool if it has warm or hot components.
- Move it to a sink, tub, or area where minor splashes are okay.
2. Empty the Reservoir Completely
- Remove the water tank and pour out all water.
- Drain any base reservoir that may hold additional water.
- Tip gently in different directions (as allowed) to remove trapped water.
3. Clean Away Mineral Deposits and Film
- Use a mild dish detergent and a soft brush or cloth to scrub the tank, base, and removable parts.
- For visible white scale from hard water, follow the product’s instructions; many allow a diluted acid cleaner such as a mild vinegar solution, but check the manual first.
- Rinse thoroughly so no cleaning solution remains.
4. Disinfect Water-Touching Surfaces
- Use a disinfecting step that is compatible with the materials in your unit. Some manuals specify diluted bleach or other solutions.
- Apply only as directed and never mix cleaning products.
- After the contact time recommended in the instructions, rinse well with clean water.
5. Handle Filters and Wicks
- If your humidifier uses disposable wicks or filters, consider replacing them at the start of the next season rather than storing them damp.
- If the manufacturer allows rinsing or reusing certain parts, rinse and then air-dry thoroughly.
- Discard any part that remains discolored, has persistent odor, or shows visible mold.
6. Air-Dry Open for 24–48 Hours
- Reassemble only enough to keep parts from warping; leave caps off tanks and lids slightly open.
- Place components on a clean, dry surface with good room airflow.
- Allow at least a full day for hidden moisture to evaporate. In cool or humid rooms, more time may be helpful.
7. Store in a Dry, Ventilated Space
- Choose a closet or interior room that generally stays dry and between about 40–80 °F.
- Cover the device loosely with a breathable cloth or leave it uncovered to allow air circulation.
- Avoid directly on concrete floors; use a shelf or pallet if needed.
Step-by-Step: Off-Season Storage for Dehumidifiers
Dehumidifiers require slightly different attention due to their coils, fans, and often heavier construction, but the general goals are the same: remove water, clean, disinfect, dry, and store dry.
1. Turn Off and Let the Coils Dry
- Switch the unit off according to its controls, then unplug it.
- If possible, leave it in place for a few hours with the bucket removed so remaining moisture on the coils can drip into the bucket compartment and evaporate.
2. Empty and Clean the Condensate Bucket
- Remove the water bucket and pour out any remaining water.
- Wash the bucket with mild detergent and warm water.
- Rinse thoroughly and leave it out of the unit to dry.
3. Flush and Dry Any Drain Hose
- If you use a continuous drain hose, disconnect it according to the instructions.
- Run clean water through the hose to loosen any slime or sediment.
- Hang the hose so both ends are open and water can drain and evaporate.
4. Clean the Air Filter and Grilles
- Remove the air filter and clean it as recommended (often vacuuming or rinsing).
- Allow it to dry completely before reinserting or storing.
- Wipe dust from intake and exhaust grilles with a dry or lightly damp cloth.
5. Wipe Internal Surfaces You Can Safely Reach
- If accessible without disassembly, lightly wipe the bucket compartment and any exposed plastic surfaces that may get damp.
- Do not open sealed panels or attempt to clean internal electrical or refrigeration components.
6. Optional Disinfection of Water-Contact Areas
- If the manufacturer allows, you may disinfect the bucket and drain fittings with an appropriate diluted solution.
- Rinse thoroughly and allow all treated parts to dry.
7. Final Drying and Storage
- Let the assembled unit sit with the bucket slightly ajar for at least 24 hours in a dry room.
- Once dry, insert the dry bucket and filter.
- Store in an upright position in a dry area away from direct moisture sources.
Real-World Scenarios: Where Mold Problems Show Up
These simplified examples show how storage choices influence mold and odor issues.
Winter Humidifier, Summer in the Closet
An apartment resident runs a tabletop humidifier in winter, then in spring simply empties the tank and puts it in a bedroom closet. The tank still has scale on the bottom and faint slime in corners. By fall, the device smells musty as soon as water is added, and grayish film appears in the tank after a few uses. A full cleaning and drying before storage would likely have prevented this buildup.
Basement Dehumidifier Retired for Winter
A homeowner uses a dehumidifier during humid months, then stores it in an unheated, slightly damp garage over winter. Even after being cleaned and emptied, the unit sits in high humidity, and condensation forms and evaporates repeatedly on the metal coils and surfaces. The following spring, the unit produces a noticeable musty smell when first started. Storing it in a drier, conditioned space would have lowered this risk.
Vacation Home Devices Used Only Part of the Year
In a vacation home that is closed for months, devices may sit unused in a closed-up building. If humidifiers and dehumidifiers are left with water in them when the home is locked, mold and biofilm have long uninterrupted periods to grow. In such settings, it is especially important to ensure all water is removed and parts are dry before the home is closed for the season.
Safety Considerations and What Not to Do
Mold prevention during storage should not compromise electrical or mechanical safety.
Avoid Unapproved Chemicals or Additives
- Do not add unapproved biocides, essential oils, or homemade mixtures to tanks or buckets unless the manufacturer clearly allows it.
- Some substances can damage plastics, seals, or internal parts over time.
Do Not Disassemble Beyond Instructions
- Avoid opening sealed compartments, bypassing safety switches, or modifying controls in the name of “deep cleaning.”
- Changes to internal components can create shock risks, leaks, or performance issues.
Respect Electrical Safety Around Water
- Always unplug the unit before cleaning, especially when using water or wet cloths.
- Keep electrical connections and control panels dry.
- If a unit has been stored in a flooded or heavily damp area, inspect carefully and consider professional evaluation before use.
Ionizers and UV-C Features
- Some devices include optional ionizing or UV-C components. Storage steps usually focus on the water path and filters rather than these features.
- Follow the manual for any lamps or elements that require periodic replacement; do not attempt to retrofit or upgrade these systems yourself.
Maintenance Planning: Keeping Devices Ready for Next Season
Good off-season storage is only one part of mold prevention; simple planning can make next-season setup easier and cleaner.
Track Filter and Wick Replacement
- Note the month and year when you last replaced wicks or filters.
- Store a replacement set nearby, clearly labeled, so you are not tempted to reuse heavily aged parts.
Quick Start-of-Season Inspection
- Before the first run each season, open the device and inspect tanks, buckets, wicks, and hoses.
- Look for discoloration, residue, or odor. If present, clean and disinfect again before use.
Aim for Moderation in Humidity Levels
- Keep indoor relative humidity roughly in the 30–50% range for general comfort and mold limitation, adjusting as needed for your climate.
- A simple humidity meter can help you avoid over-humidifying in winter or under-dehumidifying in summer.
Example values for illustration.
| Goal | Simple actions | Tools | Note |
|---|---|---|---|
| Limit mold in damp basement | Run dehumidifier in humid months; store it dry when not needed | Portable dehumidifier, basic humidity meter | Aim near 40–50% RH as a general comfort target |
| Reduce dry-air discomfort in winter | Use humidifier during very dry periods; stop if windows fog | Humidifier, room humidity meter | Try to keep above about 30% RH but below levels that cause condensation |
| Store devices between seasons | Clean, disinfect, dry 24–48 hours, then keep in dry room | Cleaning tools, breathable cover | Check for odor or residue before first use next season |
| Limit musty odors from stored units | Avoid damp storage spaces and airtight plastic wraps | Shelf in interior closet | Airflow helps surfaces stay dry during storage |
| Plan for filter changes | Note replacement dates and keep spares nearby | Notebook or simple reminder | Regular changes support cleaner operation and air |
Related guides: Best Indoor Humidity Level to Prevent Mold (With Seasonal Targets) • Air Purifier for Mold Spores: What Works and What Doesn’t • Basement Dampness 101: RH Targets, Dehumidifiers, and Ventilation
Summary: Simple Habits to Avoid Moldy Storage
To keep humidifiers and dehumidifiers from becoming mold sources during the off-season, treat the last day of use as a small project. Empty all water, clean away visible residue, disinfect water-contact surfaces as allowed, and then let everything air-dry for at least a full day before storage.
Store devices in a dry, ventilated space, ideally in the same part of the home where humidity is already controlled. When the next season arrives, a quick inspection and rinse are usually all you need before turning them back on. These simple habits help maintain cleaner equipment and support more comfortable indoor humidity levels year after year.
Frequently asked questions
How long should I air-dry a humidifier or dehumidifier before storing it?
Air-dry components for at least 24–48 hours in a well-ventilated room, leaving tanks, caps, and lids open so hidden moisture can evaporate. In cool or humid indoor conditions, extend drying time until all surfaces feel and look completely dry to the touch.
Can I wrap my device in airtight plastic for storage?
Only if the unit and all parts are completely bone-dry; otherwise airtight plastic traps residual moisture and promotes mold growth. A loose, breathable cover or cloth is usually safer because it limits dust while allowing air circulation.
Is diluted vinegar or bleach safe to use before storage?
Diluted vinegar can remove mineral scale, and diluted bleach is commonly recommended for disinfection if the manufacturer allows it. Always check the manual, follow recommended concentrations and contact times, never mix cleaners, and rinse thoroughly after treatment.
Should I remove filters or wicks before storing a humidifier?
Disposable wicks or filters should be replaced rather than stored if they are damp or aged; reusable filters should be cleaned and fully dried before storage. If a part shows discoloration, persistent odor, or visible mold, discard it and install a new one next season.
Where is the best place in my home to store these devices off-season?
Store units upright in a dry, ventilated interior space such as a closet or shelf that stays between roughly 40–80 °F. Avoid damp basements, unconditioned garages, or direct placement on concrete floors where ambient moisture can condense on components.
Recommended next:
- Air Purifier Maintenance Checklist: Filters, Sensors, and Cleaning
- When to Replace Carbon Filters (And How to Tell They’re Spent)
- How to Clean and Calibrate an Air Quality Monitor
- Air Purifier Maintenance Checklist: Monthly and Seasonal Tasks
- Filter Replacement Schedules: HEPA, Carbon, and Pre-Filters
- Cleaning Air Purifier Sensors and Intakes: What Not to Do
- More in Maintenance & Replacement →
- Clear sizing logic (room size → CADR/ACH)
- HEPA vs carbon explained for real use-cases
- Humidity + ventilation basics to reduce mold risk