To move air through a home faster, create a clear inlet and outlet path, use fans to push air toward the exhaust side, and open interior doors so air can travel across the space. Cross-ventilation works best when outdoor air quality, temperature, and humidity are reasonable for bringing air indoors. The goal is a controlled air exchange, not just opening every window at random.
Quick answer
- Use at least two openings on opposite or adjacent sides of the home: one for incoming air and one for outgoing air.
- Place one fan blowing outward in the exhaust window; add a second fan blowing inward only if the airflow path is clear.
- Open interior doors and reduce obstructions so air can move from inlet to outlet with fewer dead zones.
- For a short purge, 10–30 minutes is a practical starting range when outdoor conditions are acceptable.
- Check outdoor PM2.5, humidity, temperature, pollen, and smoke conditions before ventilating for long periods.
- If a room feels stagnant, try a smaller inlet opening and a stronger exhaust path to increase directional flow.
What Cross-Ventilation Means in a Home
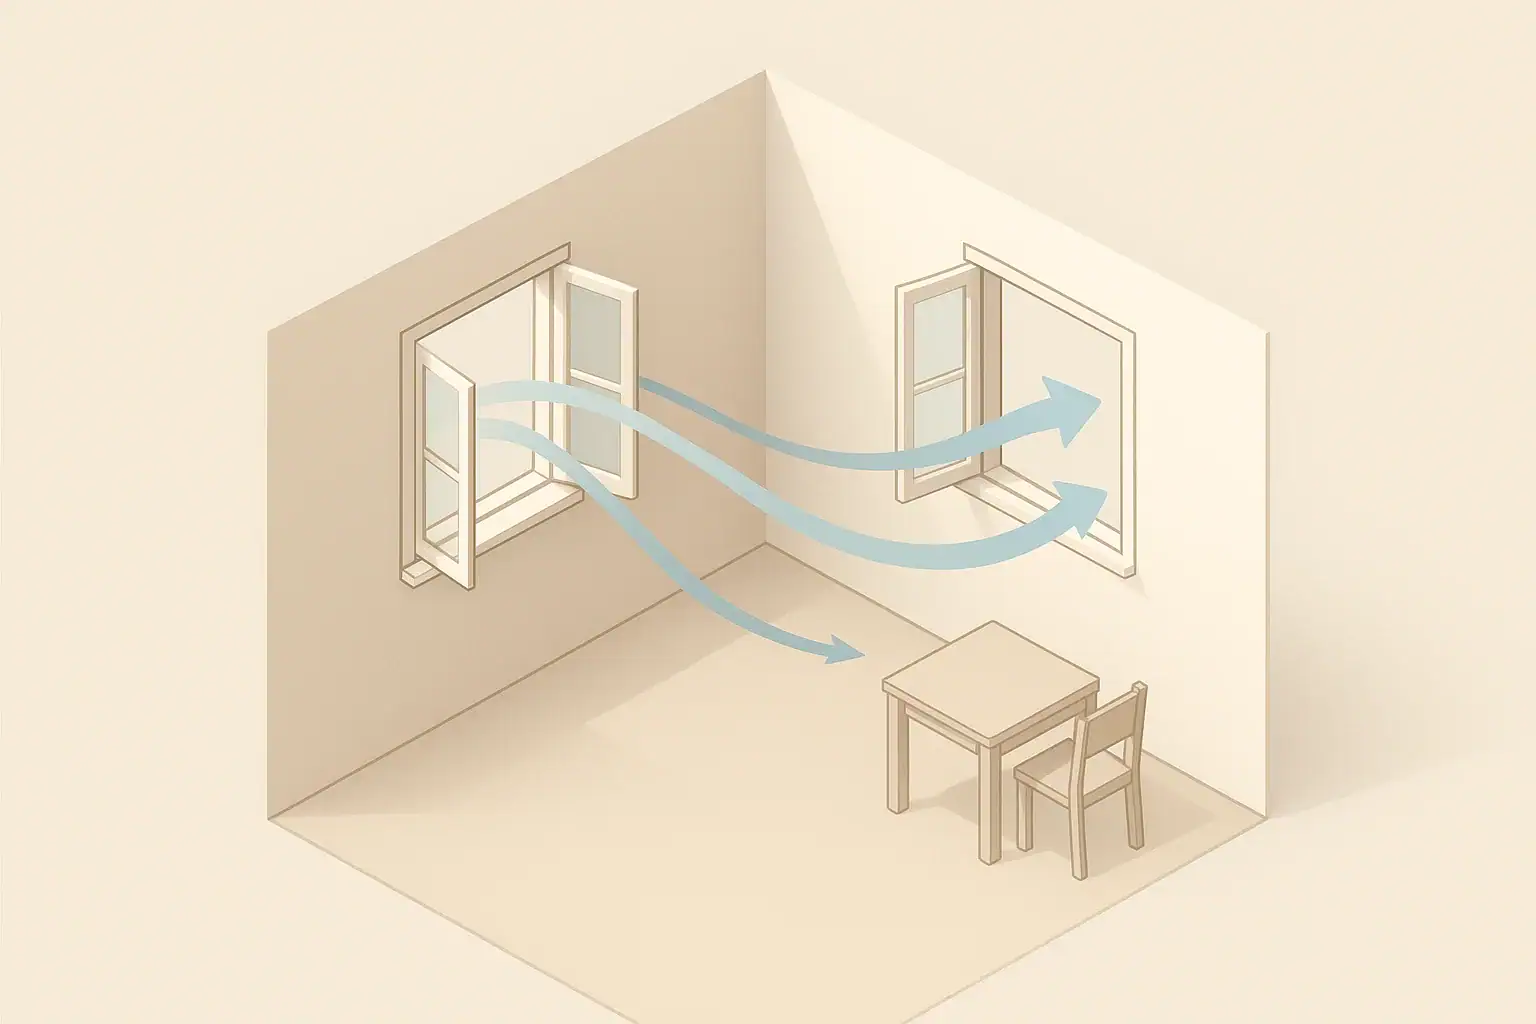
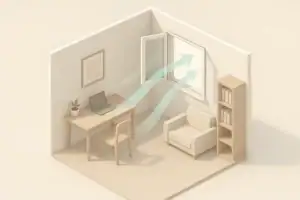
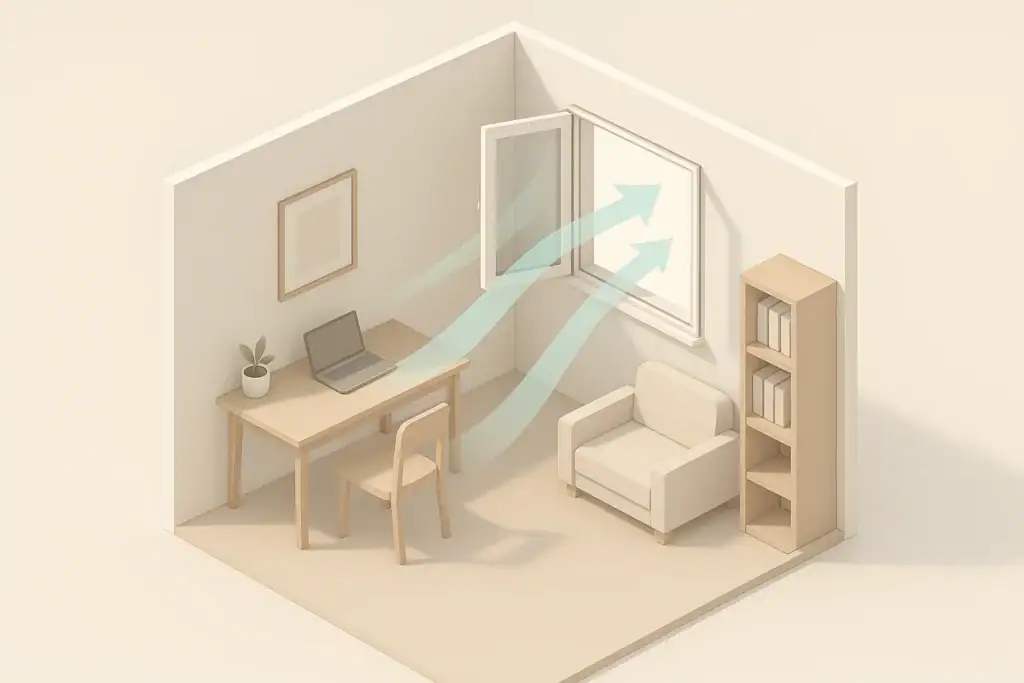
Cross-ventilation is the movement of outdoor air through a building from one opening to another. In a home, that usually means air enters through one window, door, or vent and exits through another opening across the room, down a hallway, or on a different side of the building.
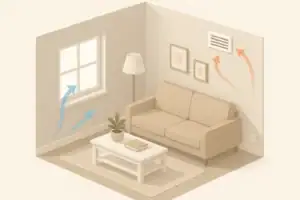
The setup matters because air follows the path of least resistance. If there is no clear exit, an open window may only stir air near that opening. If there is no clear inlet, an exhaust fan may pull air from cracks, gaps, or less useful areas instead of sweeping through the occupied room.
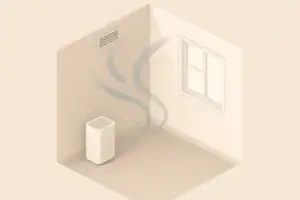
Cross-ventilation is different from filtration. Ventilation exchanges indoor air with outdoor air, while a portable air cleaner recirculates indoor air through filters. Both can be useful, but they solve different parts of an indoor air quality plan.
Airflow Basics: Inlets, Outlets, Fans, and Pressure
A faster cross-ventilation setup depends on four practical ideas: where air enters, where air leaves, how fans create pressure, and whether the path between openings is open enough.
Inlet and outlet placement
The inlet is where cleaner outdoor air comes in. The outlet is where indoor air leaves. For strong cross-flow, place them as far apart as practical, such as windows on opposite walls or an open window at one end of the home and an exhaust fan at the other.
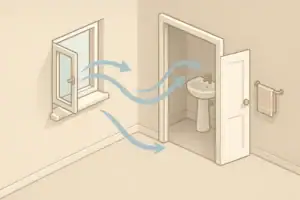
If windows are only on one side, cross-ventilation is harder, but not impossible. A fan can help create a push-pull effect, and an open interior door can connect the room to a hallway, stairwell, or another window in the home.
Fan direction
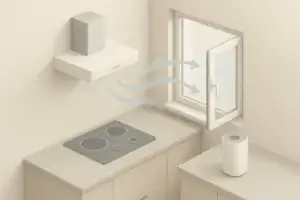
A common starting point is to place a fan in or near the outlet window blowing outward. This creates a slight negative pressure that pulls replacement air from the inlet side. In many layouts, one strong exhaust fan can be more useful than several fans blowing in different directions.
If you add a second fan, place it at the inlet blowing inward only when it reinforces the same airflow path. Avoid placing fans so they fight each other or create a circular loop in one room.
Simple timing targets
For a quick air purge, 10–30 minutes is a reasonable general range when outdoor conditions are suitable. Larger homes, closed-off rooms, weak wind, and complex layouts may need longer. Smaller rooms with a clear intake and exhaust path may respond faster.
| Task | Why it matters | Practical note |
|---|---|---|
| Choose an inlet window | Gives fresh replacement air a defined entry point | Use a window away from obvious outdoor pollutant sources when possible |
| Choose an outlet window | Creates a destination for indoor air to leave | Opposite sides of the home are usually better than same-wall openings |
| Use an exhaust fan | Helps pull air across rooms | Point the fan outward at the outlet side |
| Open interior doors | Reduces resistance between rooms | Door gaps alone may not move air quickly |
| Adjust opening size | Changes air speed and direction | A partly open inlet can sometimes create a stronger stream |
| Clear the path | Prevents stagnant pockets | Move tall furniture or curtains away from the airflow line |
| Check outdoor conditions | Ventilation brings outdoor air indoors | Pause during smoke, high dust, or uncomfortable humidity events |
How to Set Up Cross-Ventilation Step by Step
A good cross-ventilation setup is simple, but it should be intentional. Start with the rooms you most want to refresh, then build a path that moves air through those rooms and out of the home.
Step 1: Pick the air path
Stand in the area you want to ventilate and identify the best inlet and outlet. In a typical house, this might be a bedroom window as the inlet and a living room or kitchen window as the outlet. In an apartment, it may be a window and a balcony door, or a window and a hallway-facing entry door if building rules and safety allow it.
Think in terms of a line, not just openings. Air should be able to travel from one point to the other without being blocked by closed doors, heavy curtains, or room dividers.
Step 2: Set the outlet fan first
Place a fan facing outward at the outlet opening. If the fan sits in a window, reduce large gaps around it when practical so more air leaves through the fan instead of recirculating around the edges. Do not modify appliances, wiring, or building systems to force airflow.
If the fan cannot sit directly in the window, place it a short distance inside the room and aim it toward the outlet. This may be less efficient than a sealed window placement, but it can still improve directional flow.
Step 3: Open the inlet gradually
Open the inlet window partway first, then adjust. A fully open window is not always faster. Sometimes a smaller inlet creates a more focused stream that travels farther into the home.
You can use a lightweight tissue or a small strip of paper held safely near the doorway or hallway to see whether air is moving in the intended direction. Keep loose items away from fan blades.
Step 4: Balance nearby rooms
Open doors to rooms that need air exchange and close doors to rooms that do not need to be part of the path. This helps the fan spend more of its effort on the target area.
If one room remains stagnant, open its window briefly as a secondary inlet, then close it partway once air starts moving. Small adjustments often matter more than adding more fans.
Common Mistakes and Troubleshooting Cues
When cross-ventilation feels weak, the cause is usually a blocked path, poor fan direction, or outdoor conditions that are not helping. The following cues can help you adjust without overcomplicating the setup.
Mistake: Opening every window equally
Opening every window may feel intuitive, but it can dilute the airflow path. Air may enter and leave near the same side of the house instead of sweeping through the rooms that need ventilation.
Try defining one main inlet and one main outlet. Then add or reduce openings based on whether airflow improves.
Mistake: Fans blowing against each other
Two fans can help when they support the same path. They can also cancel each other out if one pushes air into a room while another pushes it back the opposite way.
Use smoke-free, non-hazardous visual cues such as a tissue movement test instead of guessing. The goal is steady direction from inlet to outlet.
Mistake: Ignoring closed interior doors
A closed door can stop most useful cross-flow. Even a mostly closed door can make a room feel still while the hallway ventilates well.
Open doors fully when you want whole-home movement. For privacy, a door stop or partial opening can help, though it will usually reduce flow compared with a fully open door.
Mistake: Ventilating at the wrong time
Outdoor air is not always the better air. During wildfire smoke, high outdoor PM2.5, heavy pollen, nearby construction dust, or very humid weather, it may be better to keep windows closed and rely more on filtration, dehumidification, or existing mechanical ventilation.
Real-World Cross-Ventilation Examples
Every home layout behaves differently. Use these examples as starting points, then adjust based on how air actually moves in your space.
Small apartment with windows on one side
Single-aspect apartments are challenging because there may not be a true opposite-side outlet. Start with one window as the main opening and place a fan blowing outward. Open the entry door only if it is safe, permitted, and does not create security or hallway air concerns.
If opening the entry door is not practical, use a fan inside the apartment to move air from the farthest room toward the window. This is not true cross-ventilation, but it can reduce stagnant zones.
Two-story home
Warm air tends to rise, so upper-floor openings can act as useful outlets during mild weather. Open a lower-level window on the cooler or cleaner side of the home and use an upper-level window or fan as the exhaust point.
Keep stairwell doors open if they are part of the intended path. Be mindful that temperature differences can create strong drafts, especially in shoulder seasons.
Open-plan living area
Open-plan rooms often ventilate faster than divided layouts because there are fewer walls and doors. Use a window or door at one end as the inlet and an exhaust fan at the opposite end.
Large open spaces may still have corners where air moves slowly. A small circulating fan aimed across the room, not directly at the exhaust fan, can help guide air out of those areas.
Safety, Comfort, and Outdoor Air Checks
Cross-ventilation should be used with normal home safety in mind. Secure windows, keep fans stable, and avoid running cords where people may trip. Do not place fans where they can fall from a window or get wet.
For homes with young children or pets, use window stops, screens, and fan guards as appropriate. A screen helps with insects and debris, but it is not a pollution filter and should not be treated as one.
Check outdoor air before extended ventilation
Before airing out a home for a long period, consider outdoor PM2.5, smoke, pollen, temperature, humidity, and nearby sources such as idling vehicles or construction. A short purge may be acceptable in many normal conditions, but longer ventilation is more useful when outdoor air is reasonably clean and comfortable.
Indoor relative humidity is commonly managed around the 30%–50% range for comfort, with prolonged levels above about 60% often treated as a dampness concern. If outdoor air is very humid, extended cross-ventilation can raise indoor humidity instead of improving comfort.
Use caution with add-on air technologies
Ventilation does not require ozone generators, intentionally produced ozone, or unverified air treatment devices. If a device uses ionization, UV-C, or other add-on technology, review safety information carefully and understand that these features are separate from basic air exchange.
Do not bypass safety switches, alter HVAC equipment, or modify exhaust appliances to increase airflow. For combustion appliances, fireplaces, or attached garages, be aware that strong exhaust can affect pressure relationships. If you have concerns, consult a qualified professional.
Maintenance and Tools That Support Faster Air Exchange
Cross-ventilation is mostly about openings and pressure, but basic maintenance can make the setup work better. Dirty screens, obstructed vents, and dusty fan blades can reduce airflow and spread debris around the room.
Clean window screens periodically, especially during pollen season or after dusty weather. Vacuum dust from fan grilles and blades according to the fan’s instructions. Make sure windows open smoothly enough to adjust them in small increments.
Simple monitoring can also help. A carbon dioxide monitor can show whether an occupied room is getting enough air exchange as a trend, especially during gatherings or overnight bedroom use. PM2.5 readings can help you decide whether outdoor air is suitable for ventilation at a given time.
Ventilation and filtration can work together. When outdoor air is not suitable, a properly sized portable air cleaner can recirculate indoor air through filters while windows stay closed. When outdoor air is suitable, ventilation can dilute indoor-generated odors and moisture while filtration continues to reduce particles indoors.
| Metric or cue | What it may indicate | Common pitfall | Action idea |
|---|---|---|---|
| CO2 trend | How much occupied air is building up | Treating one reading as a precise diagnosis | Ventilate when levels rise during occupancy, if outdoor air is suitable |
| PM2.5 | Fine particles indoors or outdoors | Opening windows during smoke or high outdoor particle events | Compare indoor and outdoor conditions before ventilating |
| Relative humidity | Moisture balance and dampness risk | Ventilating heavily with very humid outdoor air | Use shorter ventilation periods or dehumidification when needed |
| Temperature | Comfort and stack-effect potential | Assuming stronger drafts always mean better comfort | Ventilate during cooler or milder parts of the day |
| TVOC trend | Possible changes from odors, products, or activities | Expecting consumer sensors to identify exact chemicals | Ventilate after cooking, cleaning, or bringing in new materials when appropriate |
| Odor or stuffiness | A practical comfort cue | Masking odors instead of removing or diluting them | Use a short purge and address the source if it persists |
Related guides: Ventilation vs Air Purifier: When You Need One, the Other, or Both • How to Ventilate in Winter Without Freezing: Practical Strategies • Exhaust Fan Best Practices: Bathrooms and Kitchens That Actually Clear Air
Summary: The Practical Rules for Faster Cross-Ventilation
A fast cross-ventilation setup needs a defined inlet, a defined outlet, and an open route between them. In many homes, the simplest approach is one inlet window, one exhaust-side window fan, and open interior doors along the airflow path.
Use 10–30 minutes as a general starting range for a short purge, then adjust based on room size, layout, fan strength, wind, and outdoor conditions. If air movement is weak, avoid adding random openings first. Instead, improve the path, check fan direction, and adjust inlet size.
Ventilation is most useful when outdoor air is acceptable for bringing indoors. During smoke, high particle levels, uncomfortable humidity, or nearby pollution events, keeping windows closed and relying more on filtration or humidity control may be the better practical choice.
Frequently asked questions
What is the best window setup for cross ventilation at home?
The best setup usually uses two openings on different sides of the home, with one acting as the inlet and the other as the outlet. If possible, place them as far apart as practical so air can sweep through the room instead of looping near one window. An exhaust fan at the outlet side often improves the flow.
Should a fan blow in or out for cross ventilation?
In most homes, the most effective starting point is to place the fan blowing outward at the outlet opening. That helps create a pressure difference that pulls fresh air in from the other opening. A second fan can help if it supports the same airflow direction, but it should not oppose the main path.
How long should I ventilate a room to clear stale air?
A short purge of about 10–30 minutes is a practical starting range when outdoor air is suitable. Larger rooms, weaker wind, or more closed-off layouts may need longer. If the room still feels stagnant, focus on improving the airflow path rather than just leaving every window open.
What if my home only has windows on one side?
You can still improve airflow, but it will be harder to create true cross-ventilation. Use one window as the main opening and place a fan to push air outward, then open interior doors to connect nearby rooms. If a door or hallway can safely serve as part of the path, it may help move air farther through the home.
When should I avoid cross ventilation setup at home?
A cross ventilation setup at home is less useful when outdoor air contains smoke, high PM2.5, heavy pollen, or other nearby pollution sources. It can also be a poor choice during very humid weather if opening windows would make indoor conditions less comfortable. In those cases, filtration or humidity control may be the better option.
- Clear sizing logic (room size → CADR/ACH)
- HEPA vs carbon explained for real use-cases
- Humidity + ventilation basics to reduce mold risk


About this site
Home Air Quality Lab publishes practical, independent guides about indoor air quality—clear sizing, safer use, and real-world expectations.
Affiliate disclosure
Some links on this site may be affiliate links. If you buy through these links, we may earn a small commission at no extra cost to you. This helps support our content. Learn more.