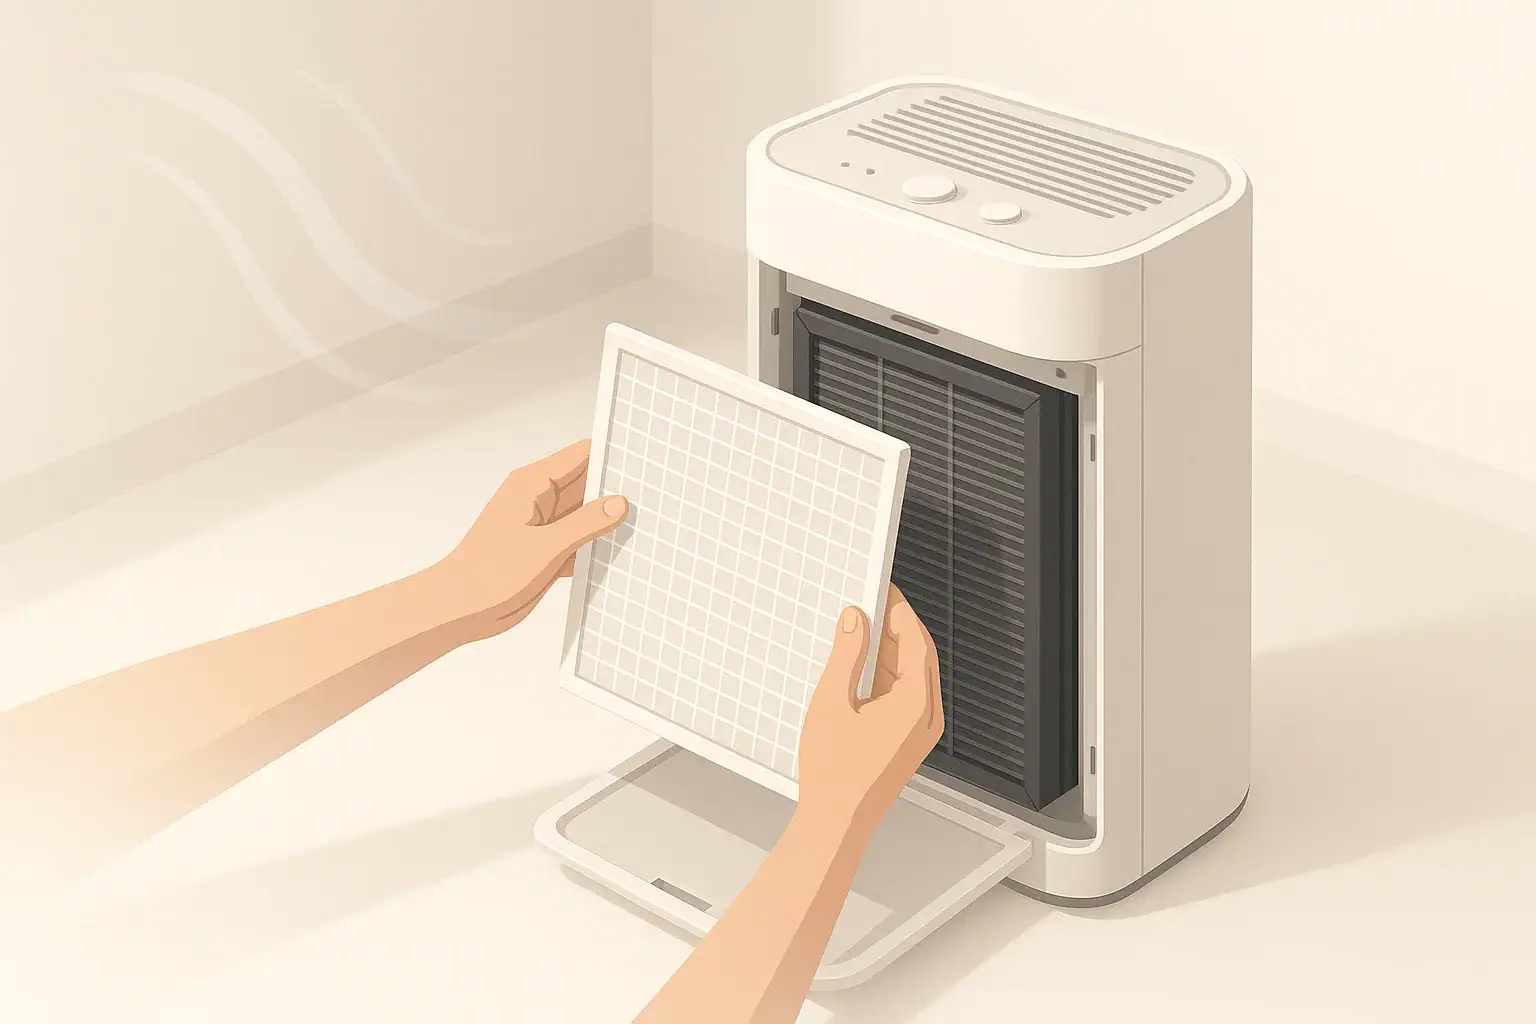
Pre-Filter Cleaning Schedule: A Simple Home Routine

Generic purifier pre-filter being removed for cleaning

Vacuum most air purifier pre-filters every 2 to 4 weeks, and wash only washable pre-filters about every 1 to 3 months or when visible buildup remains after vacuuming.

A pre-filter is the first layer that catches larger dust, lint, pet hair, and debris before air reaches the main filter. The right schedule depends on your home, how often the purifier runs, pets, dust levels, and whether the pre-filter is washable or vacuum-only.

Quick answer
  • Typical home: vacuum the pre-filter every 2 to 4 weeks.
  • Pets, heavy dust, or continuous use: check weekly and vacuum every 1 to 2 weeks.
  • Washable pre-filter: wash about every 1 to 3 months, only if the instructions allow it.
  • Drying target: let a washed pre-filter air-dry completely before reinstalling.
  • Main filter reminder: do not wash HEPA or carbon filters unless they are clearly labeled washable.

What the first-layer pre-filter does

The pre-filter is usually the outermost or first removable layer inside an air purifier. Its job is simple: catch larger particles before they load up the main particle filter or carbon layer.

Common material captured by a pre-filter includes lint, hair, dust clumps, textile fibers, and some larger household debris. This layer does not replace a HEPA-type filter, and it should not be treated as the main particle-capture stage.

Cleaning the first layer matters because airflow depends on open filter surface area. When the pre-filter is coated with debris, the purifier may move less air, run louder on higher settings, or need main filter replacements sooner.

Washable vs vacuum-only pre-filters

Some pre-filters are washable mesh or foam. Others are thin fabric, bonded to another filter, or designed only for light vacuuming. Before using water, confirm that the pre-filter is removable and labeled as washable in the product instructions.

If the pre-filter is attached to a HEPA or carbon filter, avoid washing it unless the full assembly is specifically designed for water. Water can damage filter media, reduce odor-adsorbing capacity, or leave moisture where it does not belong.

How often to vacuum or wash the pre-filter

For most homes, a practical pre-filter cleaning schedule starts with a quick visual check every 2 weeks. If the surface looks gray, fuzzy, or coated with pet hair, vacuum it. If it still looks clogged after vacuuming and the layer is washable, wash it according to the instructions.

A reasonable general schedule is:

  • Low-dust room: vacuum every 4 to 6 weeks.
  • Average bedroom or living room: vacuum every 2 to 4 weeks.
  • Pet household: vacuum every 1 to 2 weeks.
  • Smoke, renovation dust, or heavy debris period: inspect more often and clean as needed.
  • Washable pre-filter: wash about every 1 to 3 months, or sooner if vacuuming does not restore airflow.

These are general targets, not fixed rules. A purifier running 24 hours a day in a carpeted room will usually collect debris faster than one used occasionally in a low-traffic room with hard flooring.

Common pre-filter cleaning cues and schedule ranges. Example values for illustration.
Pre-filter cleaning checklist
Home conditionVacuum targetWash target if washableNotes
Low-dust room, occasional useEvery 4 to 6 weeksEvery 2 to 3 monthsCheck visually between cleanings
Typical bedroom or officeEvery 2 to 4 weeksEvery 1 to 3 monthsAdjust if airflow seems reduced
Pet hair or sheddingEvery 1 to 2 weeksEvery 1 to 2 monthsHair can mat across the first layer
High-traffic living areaEvery 1 to 3 weeksEvery 1 to 2 monthsLint and dust usually build faster
After cleaning, dusting, or vacuuming roomsInspect within a few daysOnly if neededSome stirred-up dust may collect quickly
Visible lint mat or gray coatingVacuum nowWash if allowed and still cloggedDo not wait for a calendar date

Signs your schedule needs adjustment

A calendar reminder is useful, but the pre-filter itself gives better feedback. If the layer looks clean and the purifier sounds normal, you may be able to keep the current schedule. If buildup returns quickly, shorten the interval.

Common cleaning cues

  • Visible fuzz or hair: the first layer is doing its job, but it is time to clear the surface.
  • Reduced airflow: air may feel weaker at the outlet on the same fan setting.
  • More fan noise: a restricted intake can make the unit work harder to move air.
  • Dust on the intake grille: buildup outside the filter often means buildup inside too.
  • Filter reminder light soon after reset: some reminders are time-based, but rapid buildup still deserves inspection.

Also consider room activities. Cooking PM2.5 spikes what to do, crafting, frequent laundry folding, indoor pets, candles, and open windows during pollen or dusty conditions can all increase how much material reaches the pre-filter.

How to vacuum or wash a pre-filter safely

Cleaning should be simple and low-force. The goal is to remove surface debris without tearing mesh, compressing foam, or pushing dust deeper into the filter assembly.

Basic vacuuming steps

  • Turn off and unplug the purifier before opening it.
  • Remove the front panel or cover as directed by the instructions.
  • Take out the pre-filter if it is designed to be removed.
  • Use a soft brush attachment or low-suction setting if available.
  • Vacuum the dusty side gently, working across the surface instead of scrubbing hard.
  • Wipe loose dust from the intake grille with a dry or slightly damp cloth, keeping moisture away from electronics.
  • Reinstall the dry pre-filter and close the purifier securely.

Basic washing steps for washable pre-filters

Wash only when the pre-filter is clearly washable. Use plain water unless the instructions allow mild soap. Avoid harsh cleaners, fragrances, solvents, bleach, or high heat.

  • Rinse from the cleaner side toward the dusty side when practical, helping debris leave the material.
  • Do not twist or wring foam or mesh aggressively.
  • Shake off excess water gently.
  • Air-dry completely before reinstalling.
  • Do not run the purifier with a damp pre-filter.

Drying time varies with material, room humidity, and airflow. If there is any doubt, wait longer. Reinstalling a damp layer can create odors, reduce performance, or expose internal parts to moisture.

Real-world schedule examples

The best pre-filter cleaning schedule is often based on a few weeks of observation. Start with a general interval, then adjust after you see how quickly buildup returns.

Bedroom purifier used nightly

For a bedroom purifier that runs during sleep, an air purifier noise for sleep 2 to 4 week vacuuming interval is a practical starting point. If bedding lint or carpet dust collects quickly, shorten the schedule to every 2 weeks.

Living room with pets

Pet hair can cover an intake screen faster than ordinary dust. In this situation, a weekly visual check and vacuuming every 1 to 2 weeks is often more realistic. During seasonal shedding, the interval may need to be shorter.

Home office with hard flooring

A home office with hard floors, low foot traffic, and no pets may need less frequent cleaning. A 4 week check is usually reasonable, with vacuuming when visible buildup appears.

Open-plan room

Open-plan areas move air through larger shared spaces, so the purifier may collect debris from cooking zones, entryways, textiles, and living areas. Check the pre-filter every 1 to 3 weeks until you know the pattern.

Safety and standards considerations

Pre-filter cleaning is routine maintenance, not a modification. Do not cut, tape, bypass, or add unapproved materials to the filter path. Changing the filter stack can affect airflow, sealing, and safe operation.

Do not use the purifier with missing filters unless the instructions specifically say a certain layer is optional. do you need a pre-filter A missing pre-filter can allow larger debris to load the main filter faster or settle inside the unit.

Be cautious with features such as ionizers, ozone-generating functions, or UV-C modules. Pre-filter cleaning does not require these features, and it should not involve opening sealed electrical or UV-C compartments. If a purifier includes optional electronic features, use them only as described by the manufacturer and avoid any setup intended to generate ozone intentionally.

If the purifier has a washable first layer and an electrical compartment nearby, keep water away from the unit body. Clean the removable filter separately, let it dry fully, and reinstall it only after the purifier is unplugged and stable.

Maintenance planning beyond the pre-filter

A clean pre-filter helps protect downstream filters, but it does not make them permanent. Particle filters, carbon filters, and combination cartridges still need replacement when loaded, damaged, or past their recommended service period.

It helps to keep three simple reminders: one for pre-filter checks, one for main filter replacement review, and one for cleaning the purifier exterior. A calendar reminder is enough for many households.

Costs also become easier to plan when pre-filter care is consistent. Vacuuming a pre-filter does not restore a full filter cartridge to new condition, but it can reduce avoidable early loading from hair and lint.

When replacing filters, check that the gasket or edge seal sits correctly. Even a clean filter may perform poorly if air bypasses the filter media through gaps around the frame.

Typical filter maintenance planning ranges for home air purifiers. Example values for illustration.
Filter replacement planner
Filter typeTypical interval rangeWhat changes itReminder
Washable pre-filterVacuum every 1 to 4 weeks; wash every 1 to 3 monthsPets, dust, runtime, room activityDry fully before reinstalling
Vacuum-only pre-filterVacuum every 2 to 4 weeksMaterial strength and dust loadReplace if torn or misshapen
HEPA-type particle filterOften reviewed around 6 to 12 monthsRuntime, dust, smoke, seal conditionDo not wash unless labeled washable
Activated carbon filterOften reviewed around 3 to 6 monthsOdors, gases, cooking, smoke exposureVacuuming does not renew carbon capacity
Combination cartridgeFollow the cartridge interval rangeMixed particle and odor loadingReplace as a complete unit if designed that way
Intake grille and exteriorWipe every 2 to 4 weeksHouse dust and room trafficKeep moisture out of openings

Related guides: Air Purifier Maintenance Checklist: Monthly and Seasonal TasksFilter Replacement Schedules: HEPA, Carbon, and Pre-FiltersCleaning Air Purifier Sensors and Intakes: What Not to Do

Frequently asked questions

How often should I follow a pre-filter cleaning schedule?

For most homes, vacuuming every 2 to 4 weeks is a practical starting point. Homes with pets, heavy dust, or continuous purifier use may need weekly checks and cleaning every 1 to 2 weeks. Washable pre-filters usually need washing less often, about every 1 to 3 months, if the manufacturer allows it.

Can I wash a pre-filter instead of vacuuming it?

Only if the pre-filter is clearly labeled washable. Vacuuming is the safer first step for many pre-filters, and washing is usually reserved for removable mesh or foam layers that the instructions say can get wet. Do not wash attached HEPA or carbon filters unless the full assembly is designed for water.

What are the signs that my pre-filter needs cleaning sooner?

Look for visible fuzz, pet hair, gray dust buildup, weaker airflow, or a louder fan at the same setting. If the purifier seems less effective or the intake grille looks dusty, the pre-filter likely needs attention sooner. Rapid buildup usually means the cleaning interval should be shortened.

How long should a washed pre-filter dry before reinstalling?

It should be completely dry before you put it back in the purifier. Drying time depends on the material, room humidity, and airflow, so there is no single universal time. If you are unsure, wait longer rather than reinstalling a damp filter.

Does a clean pre-filter replace the need to change the main filter?

No. The pre-filter helps catch larger debris and can slow down loading on the main filter, but it does not make the main filter permanent. HEPA-type and carbon filters still need to be replaced according to the manufacturer’s guidance or when performance drops.

Summary takeaways

A practical pre-filter cleaning schedule is simple: inspect regularly, vacuum when buildup appears, and wash only washable pre-filters when vacuuming is not enough. For many homes, that means vacuuming every 2 to 4 weeks.

Homes with pets, heavy dust, continuous purifier use, or high-traffic rooms often need shorter intervals, such as every 1 to 2 weeks. Low-dust rooms may be able to stretch closer to 4 to 6 weeks between cleanings.

The most important safety points are to unplug the purifier, avoid washing non-washable filters, let washable layers dry completely, and keep the filter stack correctly seated. With a steady routine, the first layer can keep doing its basic job: catching larger debris before it reaches the main filters.

VOC Readings After Cleaning Explained Without Guessing

Blank air quality monitor in a clean room

VOC readings after cleaning spike because many cleaning products release volatile organic compounds into indoor air, and the increase can last from minutes to several hours, sometimes longer when ventilation is limited. If you are comparing devices, it helps to understand how VOC sensors explained before treating one reading as final.

A TVOC number on a home air quality monitor is best treated as a trend signal, not a precise safety verdict. The practical response is usually simple: dilute the air with outdoor air, reduce sources, and give surfaces time to dry and stop off-gassing.

Quick answer
  • Short spikes after routine cleaning often settle within about 30 minutes to 3 hours with good ventilation.
  • Heavy use of sprays, fragrances, solvents, or floor finishes may keep readings elevated for 6 to 24 hours or more.
  • Open windows or use exhaust ventilation when outdoor conditions are reasonable, aiming for noticeable air exchange during and after cleaning.
  • Activated carbon can help reduce some VOCs and odors, while HEPA filters mainly target particles, not gases.
  • Use TVOC monitors for patterns and timing; consumer readings are not equivalent to laboratory chemical testing.

What VOC readings after cleaning mean

VOC stands for volatile organic compound. These are carbon-containing chemicals that can evaporate into the air at normal indoor temperatures. In homes, VOCs can come from cleaning products, fragrances, paints, adhesives, new furnishings, gas combustion, personal care products, and stored chemicals.

After cleaning, a home monitor may show a TVOC increase. TVOC means total volatile organic compounds, but it does not identify each compound. It is a combined signal based on how the sensor responds to a mix of gases in the room.

This matters because the number can move quickly when a source is introduced. A surface spray, disinfecting wipe, degreaser, glass cleaner, carpet cleaner, polish, or fragranced product can release vapors while it is being used and while the remaining film dries.

The reading may also change when air movement changes. Opening a window can dilute VOCs, but it can also move vapors from one area to another before they clear. A brief jump is not unusual and does not automatically mean something is wrong with the monitor or the room.

Why VOC readings spike after cleaning

Cleaning changes indoor air in several ways at once. Some products contain solvents that help dissolve grease or carry active ingredients across a surface. Some contain fragrance compounds that are designed to evaporate slowly. Some create vapors as they dry.

Spray products can also place tiny droplets into the air. Those droplets may partly evaporate, adding to a VOC reading and sometimes to particle readings as well. Wipes and liquids usually create less airborne mist than sprays, but they can still release vapor as treated surfaces dry.

The size of the spike depends on several practical factors:

  • Amount used: More product generally means more material available to evaporate.
  • Room volume: A small bathroom can show a sharper spike than a large living room.
  • Ventilation: Exhaust fans, open windows, and outdoor air exchange usually shorten the event.
  • Surface area: Floors, counters, showers, and fabrics can hold residue while it dries.
  • Product type: Solvent-heavy, scented, or specialty cleaners may linger longer than simple diluted cleaners.
  • Temperature and humidity: Warmer conditions can increase evaporation; damp surfaces can extend drying time.

Because these conditions vary, there is no single normal TVOC value after cleaning. The more useful question is whether the reading drops steadily after the source is removed and fresh air is introduced.

Common reasons VOC readings rise after cleaning and practical responses. Example values for illustration.
Cleaning-related VOC spike guide
SituationLikely reasonPractical response
Spray cleaner used in a small bathroomMist and fast evaporation in a small air volumeRun exhaust, close the product, and ventilate for 30 to 60 minutes
Fragranced cleaner used on floorsLarge wet surface area drying slowlyIncrease airflow and wait until floors are fully dry
Reading rises hours after cleaningResidue, fabrics, trash, or stored products still off-gassingRemove rags and trash, close containers, and air out the area
TVOC jumps when windows openAir movement stirs or redistributes vaporsWatch the trend for 15 to 30 minutes rather than one instant reading
Odor remains but TVOC is lowerOdor threshold and sensor response do not always matchContinue moderate ventilation and check for remaining sources
HEPA purifier runs but TVOC stays highHEPA targets particles, not most gasesUse ventilation and consider adequate carbon filtration for gas reduction

How long VOC spikes can last

For routine household cleaning, many VOC spikes are short-lived. If a small amount of product is used in a room with reasonable air exchange, the monitor may start dropping within minutes and return near its earlier baseline within about 30 minutes to 3 hours.

Longer events are also common. Cleaning a whole home, mopping floors, using scented products, treating carpets or upholstery, or cleaning in a closed room can keep readings elevated for 6 to 24 hours. Some specialty products, such as certain polishes, adhesive removers, or finishes, can take longer because they leave a film or interact with porous materials.

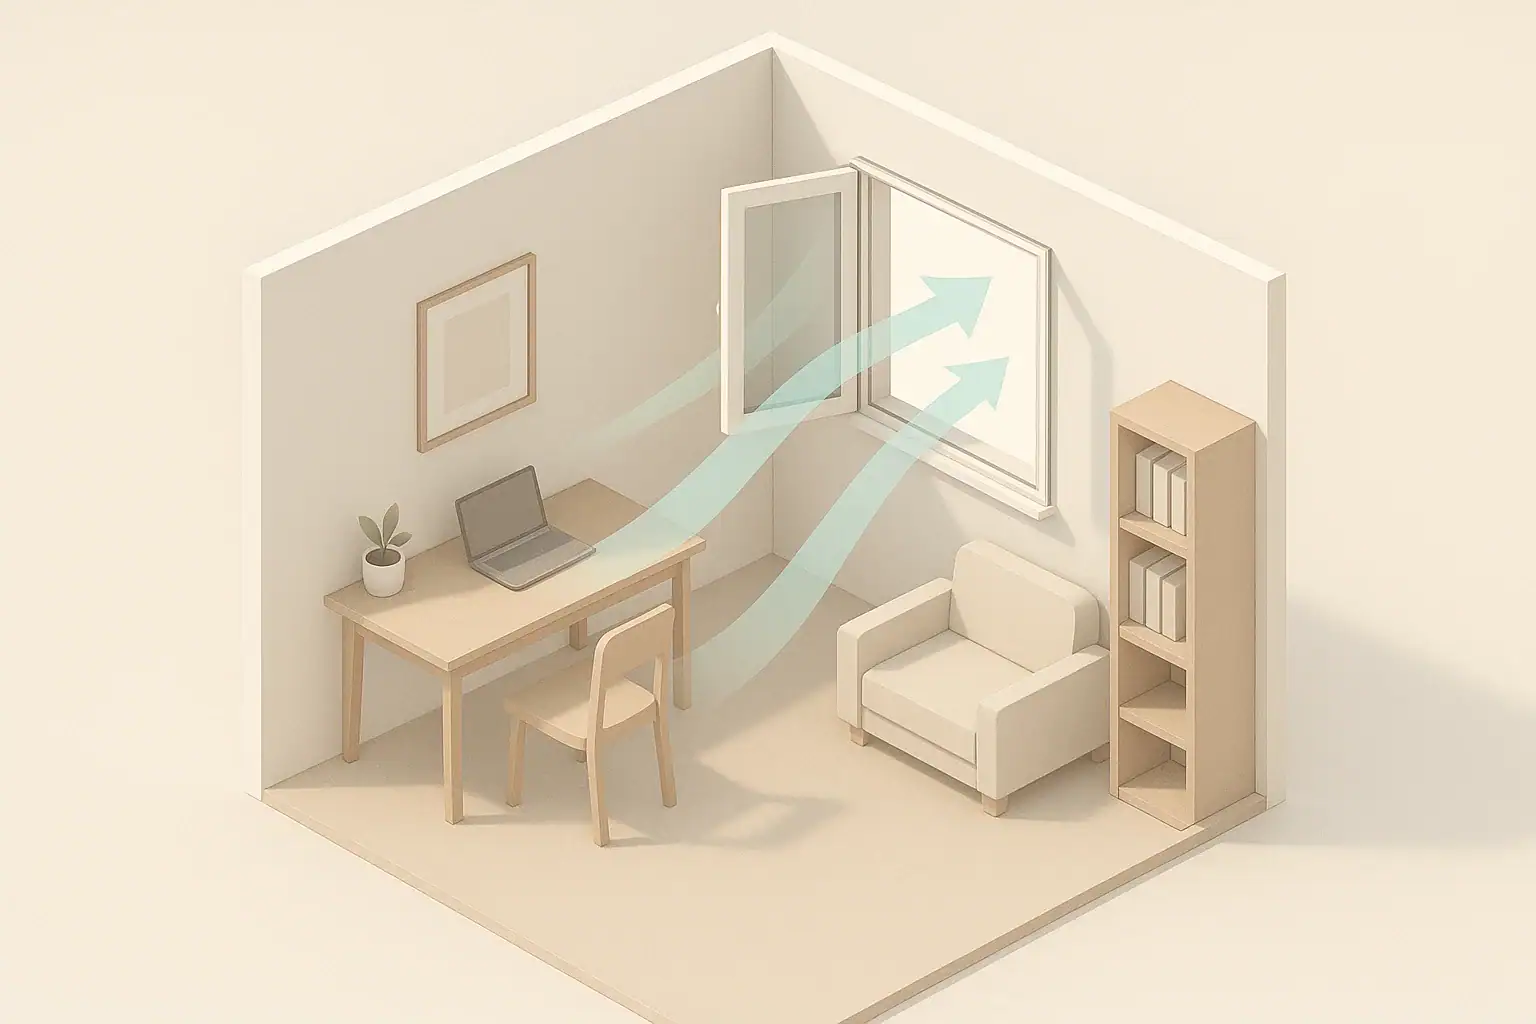
Ventilation is the main difference between a brief reading and a lingering one. A window cracked open in calm weather may exchange air slowly. Cross-ventilation, a kitchen or bathroom exhaust fan, or a central system bringing in outdoor air can lower readings faster, when outdoor air quality and weather make that reasonable.

The best benchmark is your own baseline. Note the usual TVOC range before cleaning, then watch how long it takes to return close to that range after the product is put away and the room is aired out.

How to read a TVOC monitor during and after cleaning

Most home TVOC monitors use small gas sensors that estimate a broad chemical signal. They are useful for spotting patterns, comparing rooms, and seeing whether actions such as opening a window help. They are not designed to identify individual chemicals or confirm compliance with workplace or laboratory standards. If you are choosing equipment more broadly, this fits into the bigger picture of indoor air quality monitors.

Watch the trend, not only the number

A single TVOC reading can be misleading. Sensors may respond differently to alcohols, fragrances, cooking vapors, personal care products, combustion byproducts, and humidity changes. A rising line during cleaning, followed by a steady decline after ventilation, is usually more informative than the peak number alone.

Give the sensor time to stabilize

Some monitors need time to adjust after being moved, powered on, or exposed to a strong source. If the display changes sharply, keep it in one location and observe the pattern for at least 15 to 30 minutes before making assumptions.

Compare rooms carefully

A monitor near a freshly cleaned counter will behave differently from one across the room. For practical tracking, place the monitor in the breathing zone of the room, away from direct spray, open windows, exhaust grilles, and purifier outlets.

Common mistakes that keep readings elevated

When TVOC levels remain higher than expected, the cause is often still in the home. The first step is source control, not complicated equipment changes.

  • Leaving containers open: Even a partly open cap can release vapors into a cabinet or room.
  • Keeping used rags indoors: Wipes, paper towels, mop heads, and cloths may continue releasing odor and VOCs.
  • Cleaning in a closed room: Bathrooms, laundry areas, and interior rooms may have limited dilution.
  • Using more product than needed: Extra liquid can extend drying time without improving routine cleaning.
  • Mixing products: Combining cleaners can create unwanted reactions and should be avoided unless a label specifically directs it.
  • Relying on HEPA alone: A particle filter can be valuable for dust and PM2.5, but it is not the main tool for VOC removal.

If readings do not fall after ventilation and source removal, look beyond the cleaning event. Recent painting, new furniture, stored solvents, pest products, fuel-burning appliances, or attached garage air can also influence TVOC readings.

Practical steps to lower VOC readings after cleaning

The most effective plan is to reduce the source, dilute the air, and avoid adding new VOCs while the room clears.

Before cleaning

  • Choose the least intensive product that fits the task.
  • Read and follow product label directions for use and ventilation.
  • Open a nearby window or turn on an exhaust fan when conditions allow.
  • Move air out of the room rather than only circulating it within the room.

During cleaning

  • Use the recommended amount instead of oversaturating surfaces.
  • Spray onto a cloth when suitable, rather than spraying broadly into the air.
  • Keep containers closed when not actively using them.
  • Protect the monitor from direct spray so the reading reflects room air, not droplets on the sensor.

After cleaning

  • Remove used wipes, towels, and trash from the room.
  • Rinse or air out mop heads and cloths according to care instructions.
  • Keep ventilation running until odors and readings trend downward.
  • Use a purifier with a meaningful amount of activated carbon filters if gas and odor reduction is a main goal.

Air purifiers can support the process, but they do not replace ventilation. A HEPA filter is designed for particles. Activated carbon and similar sorbent media are used for many gases and odors, but their capacity is finite and depends on the amount of media, airflow, humidity, and the chemicals present.

Real-world examples of post-cleaning VOC patterns

In a small bathroom, a disinfecting spray or glass cleaner may cause a quick TVOC jump because the room has little air volume. Running the exhaust fan and leaving the door partly open can help the reading fall steadily once surfaces are dry.

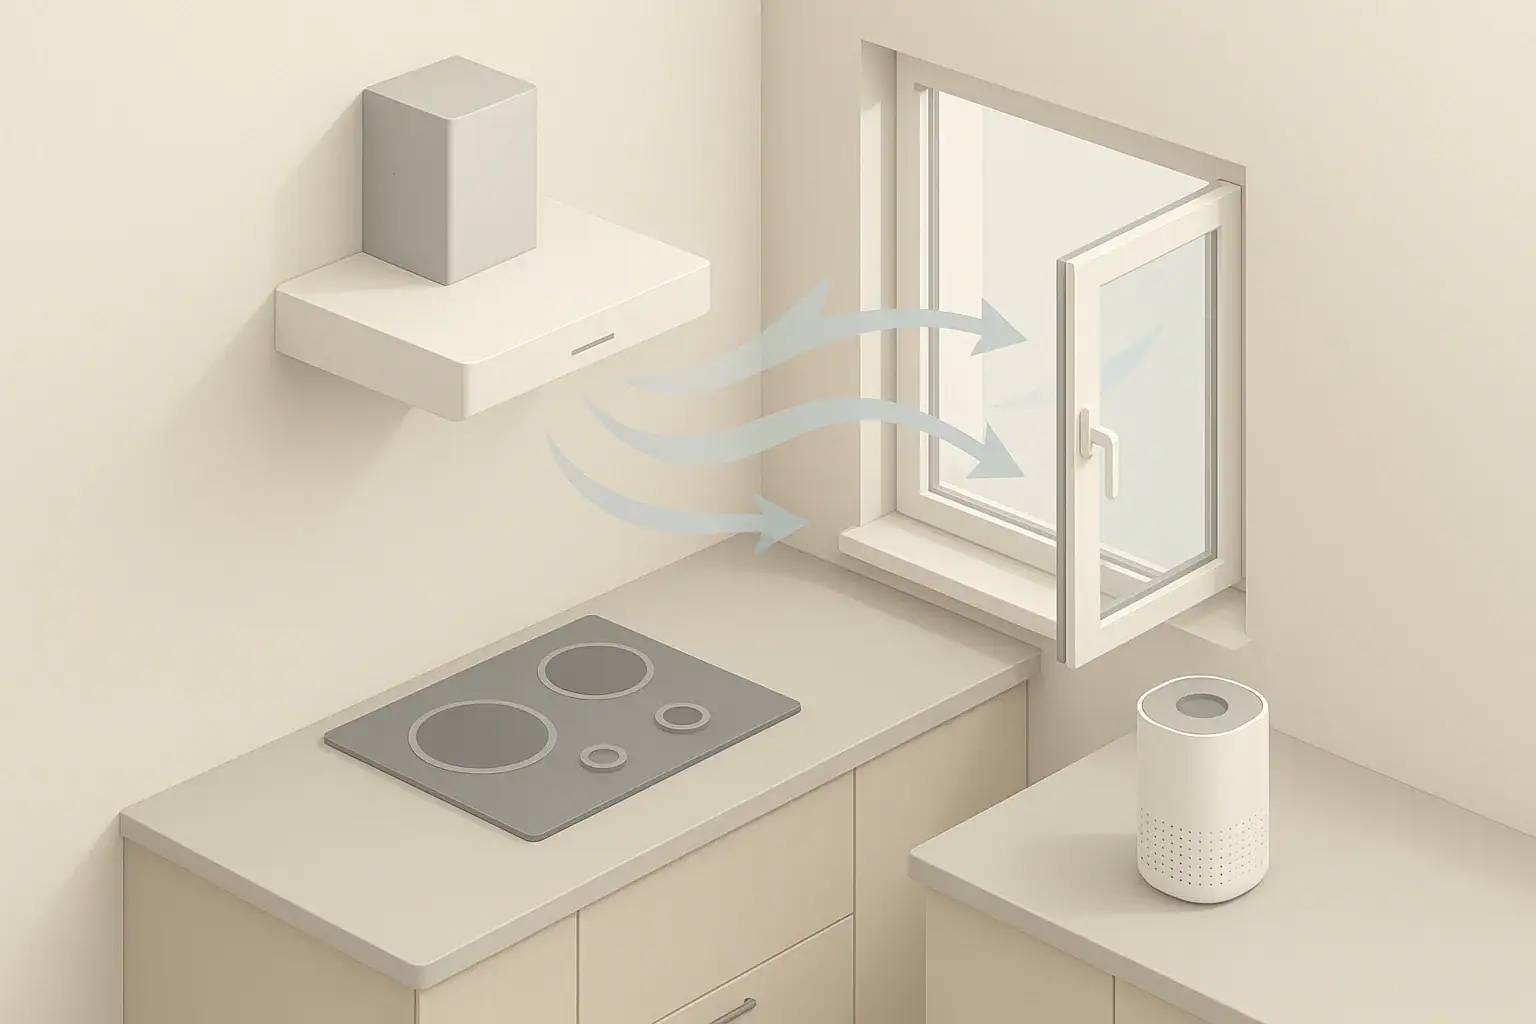
In a kitchen, a degreaser used on counters, a stovetop, and cabinet fronts can create a broader but moderate spike. If the range hood exhausts outdoors, running it during and after cleaning may shorten the event. If it recirculates indoors, it may help with some particles and grease but will not provide the same dilution as outdoor exhaust.

In an open-plan living area, mopping a large floor may create a lower peak than a bathroom but last longer because more surface area is drying. Cross-ventilation can be useful when outdoor air is acceptable.

In a bedroom, fragranced sprays, fabric refreshers, or carpet treatments can linger in textiles. A monitor may show a slow decline rather than a sharp drop. Removing the source, increasing air exchange, and allowing fabrics to dry fully are the practical priorities.

Safety considerations for cleaners and air devices

Use cleaning products according to their labels, including any directions about gloves, dilution, contact time, and ventilation. Do not mix cleaning products unless the label specifically instructs you to do so. In particular, mixing bleach with ammonia or acids can produce irritating gases and should be avoided.

Be cautious with air-cleaning features that intentionally add reactive compounds to the room. Air purifier vs ozone generator is a comparison worth understanding before using any device that claims to “freshen” air with reactive output. Ionizers, plasma features, and UV-C systems should be evaluated carefully because performance and byproducts can vary by design, maintenance, and operating conditions.

For most homes, the lowest-risk sequence is straightforward: use fewer sources, ventilate when practical, filter particles with a well-sealed particle filter, and use properly maintained carbon media when gas and odor reduction is a priority.

Home monitor metrics that can change after cleaning. Example values for illustration.
Monitor metrics guide after cleaning
MetricWhat it may indicateCommon pitfallAction idea
TVOCBroad gas response from cleaners, fragrances, solvents, or other sourcesTreating it as a precise chemical testTrack the trend before, during, and after ventilation
PM2.5Fine particles from sprays, dust disturbance, cooking, or outdoor airAssuming every spike is VOC-relatedUse particle filtration and reduce aerosolized cleaning methods
CO2Occupancy and ventilation patternUsing it as a direct VOC measurementUse it to judge whether fresh air exchange may be limited
HumidityMoisture from mopping, bathroom cleaning, or damp clothsIgnoring slow drying surfacesVentilate or dehumidify to support normal drying
TemperatureConditions that can affect evaporation and comfortComparing readings across very different conditionsInterpret TVOC changes alongside heat and humidity
OdorHuman perception of some compounds at low levelsExpecting odor and TVOC to always matchLook for remaining sources and continue moderate ventilation

Related guides: VOC Sensors Explained: Why Readings Vary and How to Use Them SafelyActivated Carbon Filters Explained: VOCs, Odors, and What They Can’t DoIndoor Air Quality Monitors: What to Measure (PM2.5, CO2, VOCs, Humidity)Ventilation vs Air Purifier: When You Need One, the Other, or Both

Frequently asked questions

How long do VOC readings after cleaning usually stay elevated?

For routine cleaning, VOC readings after cleaning often fall within about 30 minutes to 3 hours when ventilation is good. Heavier cleaning, fragranced products, or closed rooms can keep readings elevated for 6 to 24 hours or longer. The trend matters more than one peak value.

Why does my TVOC monitor spike even when I only used a little cleaner?

Even a small amount of cleaner can release enough vapor to trigger a spike, especially in a small room. Spray products, fragrances, and solvent-based ingredients can cause a noticeable response because TVOC sensors react to a broad mix of gases. Humidity, temperature, and air movement can also affect the reading.

Does opening windows always lower VOC readings after cleaning?

Opening windows often helps by diluting indoor air, but the effect depends on outdoor conditions and air movement. If air exchange is weak or outdoor air is also polluted, the reading may fall slowly or fluctuate. Cross-ventilation and exhaust fans usually work better than a single open window alone.

Will a HEPA filter reduce VOC readings after cleaning?

HEPA filters mainly remove particles, not most gases. That means they can help with spray mist or dust, but they usually do not solve a VOC problem by themselves. For gases and odors, ventilation and sufficient activated carbon are more relevant.

When should I worry about VOC readings after cleaning?

A temporary increase after normal cleaning is common, but a reading that stays high after source removal and ventilation suggests something is still off-gassing. Check for open containers, damp rags, fragranced products, or another indoor source such as paint, solvents, or fuel-burning appliances. If symptoms are significant or you suspect a hazardous product exposure, follow the product label and seek appropriate local guidance.

Summary takeaways

VOC readings after cleaning commonly rise because cleaners, fragrances, solvents, and drying residues release vapors into indoor air. Many routine spikes settle within 30 minutes to 3 hours with good ventilation, while heavy cleaning, large wet surfaces, closed rooms, or specialty products can last 6 to 24 hours or longer.

Use a TVOC monitor as a pattern tool. A steady decline after source removal and ventilation is usually more useful than the peak number by itself. If readings stay elevated, check for open containers, used cleaning cloths, damp surfaces, fragranced products, stored chemicals, or other sources unrelated to the cleaning task.

The practical approach is calm and simple: use only what the task requires, ventilate during and after cleaning when outdoor conditions allow, remove used materials promptly, and understand the difference between particle filtration and gas adsorption. These steps help you interpret the reading without guessing and respond in a measured way.

High CO2 With Windows Closed: What Matters and What to Do

Blank air quality monitor near a closed window

High CO2 readings with windows closed usually mean the room is not getting enough fresh outdoor air for the number of people and the time spent inside.

CO2 is a normal result of breathing, and indoor levels rise when outdoor air exchange is limited. A high reading is not solved by a standard air purifier, because particle and carbon filters do not remove meaningful amounts of carbon dioxide. The practical response is to confirm the monitor is reading reasonably, then improve air exchange in a controlled way.

Quick answer

  • Outdoor CO2 is often roughly 400 to 450 ppm; occupied rooms commonly run higher.
  • As general guidance, 600 to 1000 ppm is often manageable, while repeated readings above about 1000 to 1500 ppm suggest more ventilation may be useful.
  • If CO2 climbs steadily with windows closed, reduce occupancy, shorten door-closed time, or add fresh-air ventilation when practical.
  • Place the monitor away from faces, vents, windows, and direct sunlight; allow 10 to 20 minutes for trends to settle after changes.
  • HEPA, carbon, UV-C, and ionizer features are not practical CO2 removal tools for homes.

What high CO2 readings mean indoors

Carbon dioxide is measured in parts per million, usually shown as ppm on a home air quality monitor. People and pets exhale CO2 continuously, so a closed bedroom, office, nursery, or media room can rise noticeably during use.

CO2 is most useful as a ventilation clue. It tells you whether the indoor air is being diluted with enough outdoor air for the current occupancy and schedule. It does not identify dust, smoke, mold, odors, or chemical vapors by itself.

For many homes, the important pattern is the trend. A room that starts near outdoor background and slowly rises over several hours is behaving differently from a room that jumps quickly because someone is breathing close to the sensor. Looking at both the number and the timeline helps avoid overreacting to a single snapshot.

Why CO2 rises faster with windows closed

With windows closed, fresh air depends on leakage through the building shell, mechanical ventilation if present, and any HVAC system that intentionally brings in outdoor air. Many forced-air heating and cooling systems mostly recirculate indoor air. Running the fan can mix rooms, but it may not add fresh air unless the system has an outdoor-air intake.

CO2 rises faster when the room has more people, smaller volume, lower natural leakage, or long door-closed periods. A small bedroom with two people sleeping for eight hours can climb much higher than a large open living area with the same two people for one hour.

A simple way to think about room volume

Room volume is floor area multiplied by ceiling height. A 120-square-foot bedroom with an 8-foot ceiling has about 960 cubic feet of air. A larger 300-square-foot living room with the same ceiling has about 2400 cubic feet, so the same breathing load is diluted into more air.

Air changes per hour, often shortened to ACH, describes how many times a room’s air volume is replaced or diluted in one hour. Higher air exchange generally lowers CO2 faster, but the best method depends on weather, outdoor air quality, noise, security, and the home’s ventilation setup.

CO2 troubleshooting cues for closed-window rooms. Example values for illustration.
Closed-window CO2 reading cues
Reading or patternLikely meaningPractical next step
Near outdoor background before useRoom has had time to resetUse this as a baseline for the day
600 to 1000 ppm while occupiedCommon occupied-room rangeWatch the trend and comfort level
Above about 1000 to 1500 ppm repeatedlyVentilation may not match occupancyIncrease fresh air or reduce door-closed time
Fast spike when someone stands nearbyBreath plume may be reaching the sensorMove the monitor away from faces
High in one room onlyRoom may be isolated or undersuppliedOpen an interior door or improve air path
High throughout the homeWhole-home air exchange may be lowCheck ventilation settings or seek HVAC guidance
Reading never drops after airing outSensor placement or calibration issue possibleTest outdoors briefly and review monitor instructions

Check the monitor before changing the room

Before making major changes, confirm that the reading is plausible. Consumer CO2 monitors vary, and placement can strongly affect a number. A monitor placed on a nightstand next to someone sleeping may show a higher value than the center of the room because it is sampling exhaled breath before it mixes.

Place the monitor at breathing-zone height when possible, but not directly beside a person’s face. Keep it away from supply vents, return grilles, open windows, humidifier mist, cooking steam, and strong sunlight. A stable shelf, desk, or dresser often works better than the floor.

Many home monitors use automatic baseline correction. This feature assumes the sensor sees relatively fresh air at times. If a room is occupied around the clock or rarely aired out, the baseline may drift. Check the manual for the device’s recommended reset or calibration approach rather than guessing.

Quick troubleshooting checklist for closed rooms

Start with the easiest, lowest-cost adjustments. The goal is not to keep every room at outdoor CO2 levels every hour. The goal is to keep ventilation reasonably matched to how the room is used.

  • Open a door first. If the room is closed off, opening an interior door can help the room share air with a larger volume.
  • Use short airing periods. Opening a window for 5 to 15 minutes can drop CO2 quickly when outdoor conditions are acceptable.
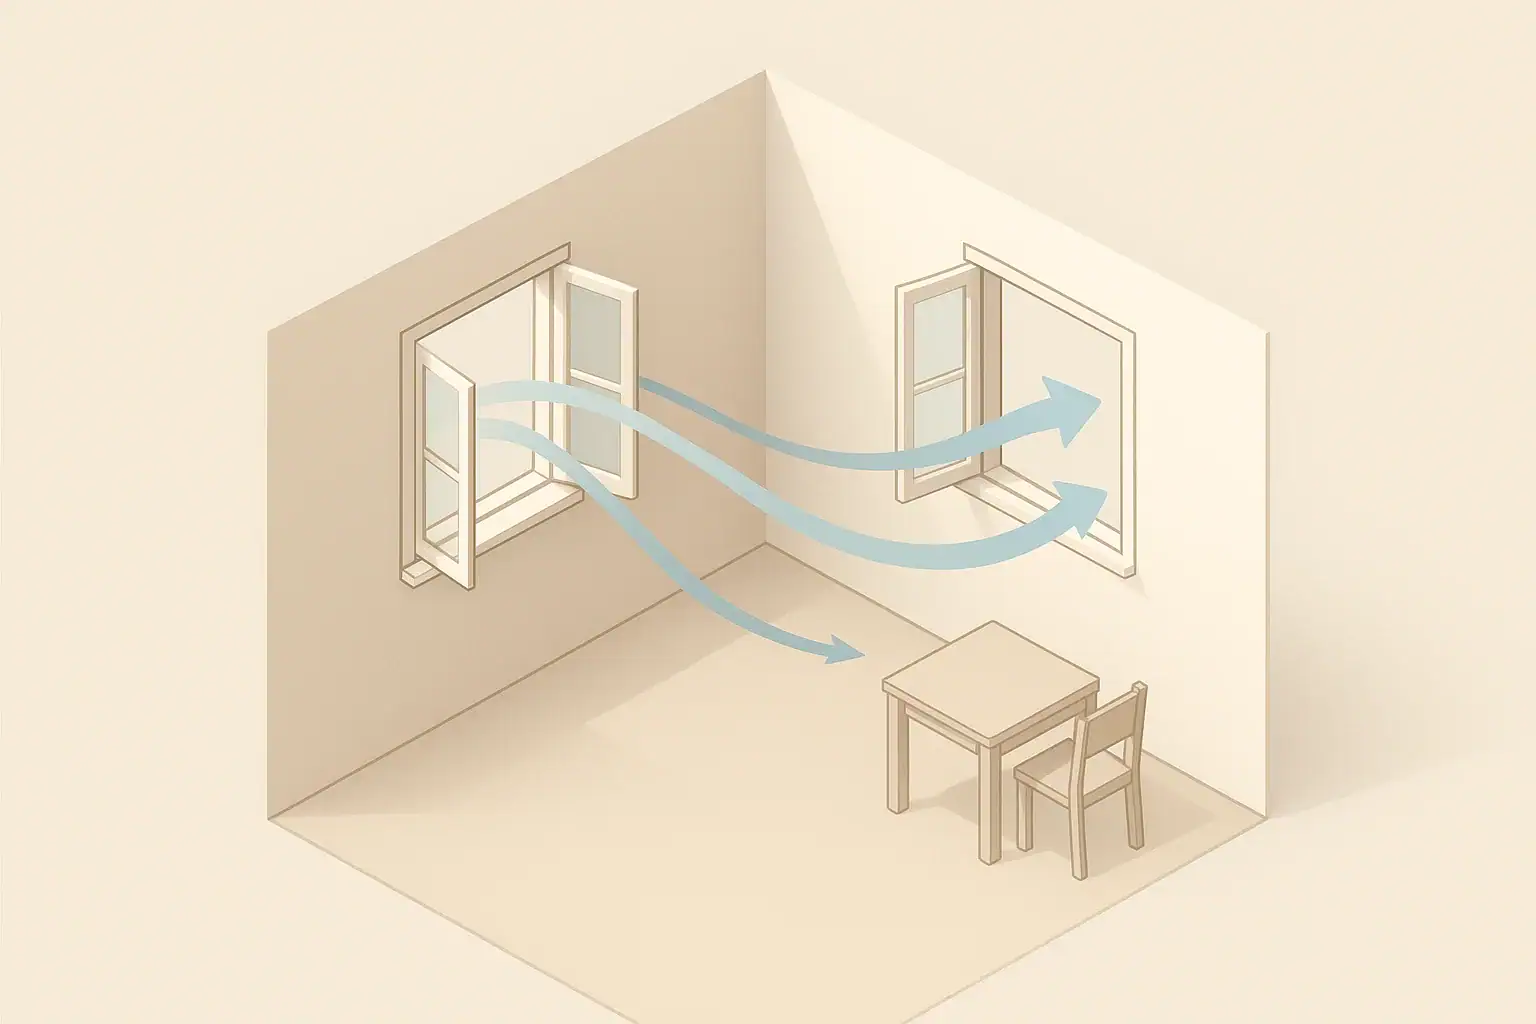
  • Create a path for air. Cross-ventilation works better when air can enter one opening and leave another.
  • Run exhaust fans selectively. Kitchen and bath exhaust fans can remove indoor air, but they need replacement air from somewhere.
  • Check HVAC fan behavior. Circulation may even out readings between rooms, but it is not the same as outdoor air ventilation.
  • Adjust occupancy or schedule. Longer meetings, workouts, gaming sessions, or shared sleeping arrangements raise CO2 faster in small rooms.

If outdoor air quality is poor because of smoke, heavy traffic, pollen, or weather extremes, balance CO2 management with particle filtration, comfort, and safety. In those conditions, shorter ventilation bursts or mechanical ventilation with appropriate filtration may be preferable to leaving windows open for long periods.

Common home scenarios and what to try

Bedroom readings rise overnight

Bedrooms often produce the highest closed-window readings because people stay in them for many hours. Try leaving the bedroom door partly open, using a transom or transfer path if available, or airing out the room before sleep and after waking. If privacy or noise requires a closed door, a planned ventilation strategy may be needed.

Home office readings climb during calls

Small offices can rise during long work sessions, especially with the door closed. Open the door between calls, take breaks in a larger area, or crack a window briefly when outdoor conditions allow. If the room has a supply vent but no return path, leaving the door open slightly may improve mixing.

Apartment readings stay high

Apartments can have limited control over building ventilation. Check whether bathroom and kitchen exhaust fans work as intended, avoid blocking under-door gaps that serve as air pathways, and use windows or trickle vents if provided and appropriate. If readings remain high across the unit, document the trend and ask building management about ventilation operation.

Open-plan living area looks fine but bedrooms do not

Open areas have more air volume and often connect to more leakage paths. Bedrooms are smaller and frequently isolated. Compare readings with doors open and closed to see whether the issue is room isolation rather than the whole home.

Safety and device considerations

It is important to distinguish CO2 from carbon monoxide, or CO. CO2 is carbon dioxide, a ventilation indicator in this context. CO is carbon monoxide, a separate combustion safety hazard that requires working CO alarms and prompt attention if an alarm sounds.

Combustion appliances, fireplaces, attached garages, and gas cooking can affect indoor air in different ways. Do not modify appliances, block vents, or bypass safety systems to change air readings. If you suspect a combustion or venting problem, use appropriate alarms and contact a qualified professional.

Air purifiers are useful for particles when properly sized and placed, and activated carbon can help with some odors and gaseous pollutants depending on filter design. However, typical home HEPA and carbon filters do not reduce CO2 in a meaningful way. UV-C, ionizers, and ozone-generating approaches should not be used as CO2 fixes. Ozone can be an indoor pollutant, and any device feature that intentionally produces ozone deserves caution.

Upkeep for steadier readings

CO2 troubleshooting is partly about habits. A room that is aired out once may rise again if the same conditions return. Use the monitor to learn the pattern: when levels rise, how quickly they fall, and which changes make the biggest difference.

Keep HVAC filters replaced on a reasonable schedule so airflow is not restricted, but remember that filter replacement does not create fresh air by itself. Clean supply and return grilles gently when dusty, keep furniture from blocking airflow, and make sure interior doors do not fully seal rooms unless the system was designed for that.

For monitors, keep the sensor in a consistent location long enough to compare days. Moving it constantly makes trends harder to interpret. If the device has a calibration routine, follow the manufacturer’s instructions and avoid exposing the sensor to unusual conditions that could skew readings.

How common air quality metrics relate to closed-window troubleshooting. Example values for illustration.
Monitor metrics guide
MetricWhat it indicatesCommon pitfallAction idea
CO2Fresh-air dilution during occupancyTreating it as a particle readingImprove ventilation or air mixing
PM2.5Fine particles from smoke, cooking, dust, or outdoor airAssuming low CO2 means low particlesUse filtration and source control
TVOCBroad signal for some gases and odorsReading it as a precise chemical testVentilate and reduce sources when practical
Relative humidityMoisture balance and comfortIgnoring seasonal changesAim for a generally moderate indoor range
TemperatureComfort and ventilation tradeoffsClosing all air paths to save heat or coolingUse short, planned ventilation when needed
Trend over timeHow the room responds to useReacting to one brief spikeCompare patterns before and after changes

Related guides: CO2 Monitors for Homes: What Good Numbers Look Like and Why They MatterCO2 in Bedrooms: What Levels Mean and How to Improve Air ExchangeVentilation vs Air Purifier: When You Need One, the Other, or Both

Summary: practical takeaways

High CO2 with windows closed usually points to limited fresh-air exchange, not a failure of an air purifier or a need for a special filter. Start by checking monitor placement, looking at trends, and comparing door-open and door-closed conditions.

For most homes, the most practical fixes are simple: open an interior door, use short window airing periods when outdoor conditions are suitable, improve air paths, and understand whether the HVAC system brings in outdoor air or only recirculates indoor air. If high readings are persistent throughout the home or linked to combustion equipment concerns, use appropriate alarms and seek qualified help rather than modifying equipment yourself.

Frequently asked questions

Why is my CO2 high only when the windows are closed?

When windows are closed, the room relies on leakage, mechanical ventilation, or HVAC outdoor air intake to bring in fresh air. If those pathways are limited for the number of people in the room, CO2 accumulates more quickly. Opening a door or providing a controlled path for outdoor air usually lowers the reading.

What CO2 level is considered too high in a home?

There is no single universal cutoff for every room and situation, but repeated readings above about 1000 to 1500 ppm often suggest ventilation is not keeping up well. Many occupied rooms spend time in the 600 to 1000 ppm range. The trend, room size, occupancy, and comfort matter as much as the number itself.

Will an air purifier lower high CO2 with windows closed?

Typical HEPA and carbon air purifiers do not remove meaningful amounts of carbon dioxide. They can help with particles or some odors, but they do not replace outdoor air ventilation. To lower CO2, you generally need more fresh-air exchange or fewer occupants in the space.

How can I tell if my CO2 monitor is giving a real reading?

Check whether the monitor is away from faces, windows, vents, sunlight, and humidifier mist. Compare the reading outdoors briefly if the device instructions allow it, and look for a realistic rise and fall over time rather than a single sudden spike. If the monitor has a calibration or reset function, follow the manufacturer’s guidance.

Does opening a door help with high CO2 if I cannot open a window?

Yes, opening an interior door can help the room exchange air with a larger part of the home, which may lower CO2 more slowly than direct outdoor ventilation. It works best when the rest of the home has better air exchange than the closed room. The effect can be modest, but it is often better than keeping the room fully sealed.

Is high CO2 the same as carbon monoxide?

No, they are different gases with different risks. CO2 is carbon dioxide and is mainly used here as a ventilation indicator, while carbon monoxide is a toxic combustion gas that needs a working CO alarm. If you suspect carbon monoxide, treat it as an urgent safety issue.

Humidity Sensor Accuracy: Why Cheap Hygrometers Disagree

Blank air quality monitor on a tidy desk

Cheap hygrometers disagree because their humidity sensors have limited accuracy, drift over time, respond at different speeds, and are affected by placement and temperature. Relative humidity is not a fixed room value; it changes when air temperature changes, even if the actual moisture in the air stays nearly the same. A small mismatch is normal, but a large or persistent mismatch is a sign to check sensor quality, location, and calibration.

Quick answer
  • For general home use, many people aim for about 30% to 50% indoor relative humidity, with below about 60% used as a practical dampness-control goal.
  • A 2 to 3 percentage-point difference between hygrometers is common; 5 to 10 points needs closer checking before you act on the reading.
  • Compare devices side by side for at least 30 to 60 minutes away from vents, windows, sunlight, kitchens, bathrooms, humidifiers, and dehumidifiers.
  • Use trends and repeated readings instead of reacting to one number, especially after showers, cooking, window opening, or HVAC cycles.
  • If a monitor allows a humidity offset, adjust it only after a careful comparison, not after a single surprising reading.

What humidity sensor accuracy means

Humidity sensor accuracy describes how close a device is expected to be to the true relative humidity under stated test conditions. In consumer hygrometers, accuracy is usually expressed in percentage points of relative humidity, often written as plus or minus a few %RH.

For example, a sensor with an accuracy of plus or minus 3%RH could read 47% when the reference condition is 50%RH, and that may still be within its stated tolerance. This is different from saying it is 3 percent of the reading. It is usually a percentage-point range on the relative humidity scale.

Resolution is not the same as accuracy. A display that changes in 1% steps may look precise, but that does not mean the sensor is accurate to 1%. Some inexpensive units display a tidy whole number while the underlying sensor may be several points off.

Accuracy claims also depend on conditions. A sensor may perform best around normal room temperatures and mid-range humidity, then become less reliable at very low or very high humidity. If the product does not list accuracy, temperature range, or calibration information, treat the number as a helpful estimate rather than a laboratory reference.

How temperature and location change readings

Relative humidity is tied to temperature. Warmer air can hold more water vapor, so the same amount of moisture can show a lower relative humidity in a warm corner and a higher relative humidity near a cool window or exterior wall.

This is one reason two hygrometers in the same room can disagree even when both are working as intended. A device on a sunny shelf, near an HVAC supply register, or close to a humidifier may be measuring a small microclimate rather than the average room condition.

Response time matters too. Some sensors update quickly, while others take longer to adjust after being moved. If you place two hygrometers side by side, one may reach the new condition in minutes while another may keep drifting for an hour.

Enclosure design also matters. A sensor hidden behind a tight plastic case may respond more slowly than a sensor with better airflow around it. Dust, fingerprints, and blocked vents can also reduce consistency over time.

Common causes of hygrometer disagreement. Example values for illustration.
Why two humidity readings may not match
CauseWhat it changesPractical cue
Sensor toleranceBaseline accuracyA few points apart can be normal
Temperature differenceRelative humidity calculationCool surfaces often read higher
Slow response timeReadings after moving the unitWait before comparing devices
Placement near airflowLocal room conditionsAvoid vents and open windows
Sensor driftLong-term agreementOlder devices may need offset checking
Display roundingVisible number on screenOne unit may round up or down
Blocked sensor openingsAir reaching the sensorKeep vents clean and uncovered

Why cheap hygrometers often disagree

Lower-cost hygrometers can be useful, but they are usually built for general awareness rather than precise measurement. The sensor, enclosure, factory calibration, and quality control all affect how closely one unit matches another.

Inexpensive devices may use sensors with wider tolerances. They may also receive less individual calibration at the factory. Two units from the same shelf can therefore have different starting points even before they are used in a home.

Some cheap hygrometers also use simple software smoothing. One display may average readings over time so the number changes slowly. Another may show quick changes. When the room humidity is moving, those two displays can look inconsistent even if their sensors eventually settle near the same value.

Battery condition can matter for some devices. A low battery may not always cause a clear failure; it can sometimes cause slow updates, dim displays, or unstable readings. Replacing batteries is a sensible first step when an older hygrometer starts behaving differently.

Age is another factor. Humidity sensors can drift because of dust, film, chemical exposure, high humidity events, or normal aging. A bathroom, kitchen, basement, workshop, or laundry area may expose a sensor to conditions that shorten its reliable life compared with a bedroom or living room.

How to compare hygrometers at home

A practical comparison is often enough for home decisions. The goal is not to create a certified calibration lab; it is to find out whether one device is clearly out of line and whether your readings are dependable enough for routine choices.

Start with a side-by-side check

Place the hygrometers next to each other on an interior table or shelf. Keep them away from direct sun, vents, exterior walls, bathrooms, kitchens, plants, aquariums, humidifiers, and dehumidifiers. Leave space around the sensor openings so room air can reach each unit.

Let them sit for 30 to 60 minutes before judging. If one device has been stored in a drawer, moved from another room, or exposed to a different temperature, give it longer. Then note the readings and repeat at another time of day.

If the devices are consistently within a few points, they are likely close enough for general home monitoring. If one is consistently 8 or 10 points away from the others, it may be poorly calibrated, drifting, or affected by its case design.

Use offset settings carefully

Some monitors let you apply a humidity offset. This can be useful, but it should be based on repeated comparisons. Do not adjust a device just because it disagrees once during a fast-changing period, such as after a shower, cooking, or turning on a humidifier.

If you use a basic salt-check method, keep expectations modest. A sealed-container salt check can create a known high-humidity reference when done carefully, but it is not the same as professional calibration. Keep electronics away from liquid water and salt residue, allow enough time to stabilize, and use the result as a reasonableness check rather than an absolute certificate.

Placement tips for useful humidity readings

Good placement often improves humidity sensor usefulness more than buying another inexpensive unit. For general room monitoring, place the hygrometer where it represents the air people actually spend time in, not a corner with unusual airflow.

An interior wall or open shelf at about typical breathing height is often a reasonable starting point. Avoid placing the sensor directly on the floor, on a windowsill, above a radiator, beside a supply vent, or next to a humidifier mist stream.

In bedrooms, do not bury the monitor behind curtains, books, pillows, or electronics that give off heat. In basements, avoid placing it directly against a cool foundation wall if you want an average room reading. If the concern is a specific damp corner, use a second reading there and compare it with the center of the room.

Kitchens, bathrooms, and laundry areas have short humidity spikes. A monitor in these rooms may show high readings during normal activities, then drop as ventilation and air mixing catch up. The length of the spike is often more useful than the peak number alone.

How to use humidity readings for home decisions

Humidity readings are most helpful when paired with practical targets. For many homes, a range around 30% to 50% relative humidity is used for comfort and routine moisture control. In damp-prone areas, staying below about 60% is a common practical goal because sustained dampness supports musty odors and surface moisture problems.

These are general home guidance ranges, not medical limits. Your best range may vary with climate, building insulation, window condensation, ventilation, and season. In cold weather, a home may need a lower indoor humidity level to reduce window condensation. In a humid summer climate, dehumidification and air conditioning may be more important.

Before turning equipment on or off, look for patterns. If all monitors show that humidity rises every evening and stays high overnight, ventilation or dehumidification may be worth evaluating. If one monitor reports high humidity while others in the same room do not, investigate placement first.

A hygrometer can also help with humidifier use. If a humidifier raises a nearby reading quickly but the rest of the room stays lower, the unit may be too close to the sensor or airflow may be poor. Move the sensor away from the direct mist path before assuming the whole room is at that level.

For dehumidifiers, measure away from the exhaust airflow. The air leaving a dehumidifier can be warmer and drier than the room average, so a monitor right beside it may understate the room humidity.

Sensor features, safety, and upkeep

Humidity sensors need simple care. Keep openings clear of dust, avoid splashing or condensation on the device, and replace batteries when readings become erratic. If a monitor has a removable cover, clean only according to the instructions and avoid liquids unless the manufacturer specifically allows them.

Smart monitors may provide graphs, alerts, or combined readings such as temperature, particulate matter, carbon dioxide, or total volatile organic compounds. These extra metrics can be useful for observing patterns, but each sensor type has its own limitations. Do not assume that a device with more measurements has a more accurate humidity sensor.

Some indoor air quality devices are paired with air purifiers, humidifiers, dehumidifiers, fans, or HVAC controls. Use those features conservatively and check that the sensor location represents the room you want to control. A controller placed too close to an air outlet can cycle equipment based on a local condition instead of the whole room.

Humidity sensors do not generate ozone. However, if a monitor is combined with an air cleaner that includes ionization, plasma features, or ultraviolet components, follow the product instructions and safety labeling. For occupied homes, many users prefer air-cleaning approaches that do not intentionally produce ozone, and ozone generators should not be used as a routine indoor air quality tool.

Plan to recheck important hygrometers periodically. A simple seasonal comparison against another trusted unit can reveal drift. For a basement, nursery, storage space, or room with moisture concerns, writing down a few readings over time is more useful than relying on memory.

Simple humidity action plan for common home goals. Example values for illustration.
Humidity readings and practical next steps
GoalSimple actionsToolsNote
General comfort rangeWatch for stable readings around 30% to 50%Room hygrometerSeason and climate matter
Reduce damp conditionsKeep sustained readings below about 60%Dehumidifier, ventilationFocus on long duration, not one spike
Check a suspicious readingCompare devices side by sideTwo or more hygrometersWait 30 to 60 minutes or longer
Control humidifier useMeasure away from direct mistHygrometer, humidifier controlA nearby sensor may read too high
Evaluate bathroom humidityTrack how quickly readings fall after useFan, timer, hygrometerRecovery time is useful information
Monitor basementsCompare center-room and wall-area readingsHygrometer, dehumidifierCool surfaces can read higher

Related guides: Where to Place an Air Quality Monitor: Height, Distance, and RoomsIndoor Air Quality Monitors: What to Measure (PM2.5, CO2, VOCs, Humidity)How to Clean and Calibrate an Air Quality Monitor

Summary: what to remember about humidity sensor accuracy

Cheap hygrometers disagree for ordinary reasons: sensor tolerance, calibration differences, temperature effects, slow response, placement, aging, and display rounding. A small difference is usually not a problem for everyday home use.

For practical decisions, compare devices in the same location, give them time to stabilize, and look for repeated patterns. Treat readings around 30% to 50% as a common comfort-oriented range and sustained readings above about 60% as a cue to review moisture control, ventilation, or dehumidification.

The most useful hygrometer is not always the one with the most exact-looking display. It is the one placed well, checked occasionally, and interpreted calmly in context with the room, season, and equipment you are using.

Frequently asked questions

How accurate are cheap hygrometers usually?

Many low-cost hygrometers are only accurate within a few percentage points under good conditions, and some can be farther off. A 2 to 3 point difference between devices is often normal, while larger gaps suggest one unit should be checked more carefully.

Why do two hygrometers in the same room show different readings?

They may differ because of sensor tolerance, temperature differences, response speed, rounding, or placement in slightly different microclimates. A device near a vent, window, humidifier, or exterior wall can read differently from one in the center of the room.

How do I compare two hygrometers at home?

Place them side by side in a neutral location away from direct sun, vents, and moisture sources. Let them stabilize for 30 to 60 minutes or longer, then compare the readings more than once.

Is a 5% humidity difference a problem?

It depends on the situation, but 5 points is enough to pay attention to if you are making moisture-control decisions. For routine home monitoring, it may still be acceptable, but repeated checks can show whether one device is drifting or being influenced by placement.

What humidity range is commonly used for home comfort?

Many people use about 30% to 50% relative humidity as a general indoor comfort range. In damp-prone spaces, staying below about 60% is often used as a practical goal to reduce moisture-related problems.

Do humidity sensors need calibration?

Some do, especially if they support an offset setting or have drifted over time. Even if a device cannot be professionally calibrated, comparing it against a trusted reference or another stable unit can help you decide whether its readings are still useful.

Air Quality Monitor False Alarms Explained Without Guessing

Blank air quality monitor on a desk

Air quality monitor false alarms usually happen when a sensor reacts to humidity, aerosols, cooking particles, or gradual sensor drift rather than a lasting indoor air problem.

Most home monitors are useful for spotting trends, but they are not laboratory instruments. A sudden spike can be real for the sensor and still be temporary, expected, or caused by a nearby activity.

Quick answer

  • Keep indoor relative humidity around 30% to 50% when practical; readings above about 60% can make some particle sensors overreact.
  • Expect short PM or TVOC spikes from cooking, sprays, candles, and cleaning products; many settle within 15 to 60 minutes with ventilation.
  • Use trends over several hours or days instead of one number to judge whether a problem is persistent.
  • Place monitors away from steam, supply vents, direct sun, stoves, humidifiers, and air purifier outlets.
  • Check calibration or fresh-air reset guidance when CO2 or TVOC readings drift and do not return toward typical background levels.

What a false alarm on an air quality monitor means

A false alarm does not always mean the monitor is broken. It often means the device detected something that affects its sensor but the reading was easy to misinterpret.

For example, a shower can raise humidity and cause an optical particle sensor to report high PM2.5. A cooking event can create real fine particles, but the spike may be brief and local rather than a whole-home issue. A cleaning spray can trigger a TVOC sensor even when the product was used normally and the room is being aired out.

Home air quality monitors are best used as trend tools. They can help you notice patterns, such as repeated cooking spikes, stale air in an occupied bedroom, or a humidity problem in a basement. They are less reliable as a reason to react to every single alert.

How common home sensors react to air and moisture

Understanding the sensor type helps explain many air quality monitor false alarms. Different metrics come from different sensing methods, and each method has limits. Indoor Air Quality Monitors usually combine several measurements, but each one needs to be read in context.

PM2.5 and particle readings

Most consumer particle monitors use optical sensors. They shine light through air and estimate particle levels based on how light scatters. Smoke, cooking aerosol, dust, and fine mist can all scatter light. High humidity can also change how particles behave by making them swell or by adding tiny droplets.

TVOC readings

Many home TVOC sensors are broad screening sensors, not compound-specific analyzers. They can respond to cleaning products, air fresheners, personal care products, new materials, alcohol-based sprays, temperature changes, and humidity shifts. A TVOC reading is usually better treated as a general signal than as a precise list of chemicals. VOC Sensors Explained can help you understand why these numbers vary so much.

CO2 readings

CO2 is commonly measured with an infrared sensor. CO2 rises when people occupy a room with limited ventilation. A practical home target is often to keep occupied spaces under about 1,000 ppm when reasonable, while recognizing that outdoor air is commonly around 400 to 500 ppm and indoor conditions vary.

Because each metric has a different meaning, the right response depends on what changed, where the monitor sits, and what happened in the room just before the alert.

Common false alarm cues by trigger

Example values for illustration.

Monitor spike patterns and practical first checks
Trigger or patternLikely metric affectedWhy it happensPractical check
Shower, humidifier, or steam nearbyPM2.5Moist air and droplets can scatter lightMove the monitor away and recheck after humidity falls
Pan frying, roasting, or toastingPM2.5 and sometimes TVOCCooking creates particles and vaporsUse kitchen exhaust or window ventilation during the event
Cleaning spray or fragranceTVOCBroad VOC sensors respond to many vaporsVentilate and see whether the reading trends down
Many people in a closed roomCO2Exhaled air accumulates with low air exchangeOpen a door, window, or use ventilation if available
Spike only beside an air purifier outletPM or airflow-related readingsFast airflow may affect samplingPlace the monitor in breathing-zone room air
High readings with no recent activityAny metricPossible drift, placement issue, or ongoing sourceCompare another location and review recent changes
Reading never returns near baselineCO2 or TVOCSensor drift or calibration issue is possibleFollow the device reset or calibration instructions

Humidity: why damp air can raise particle readings

Humidity is one of the most common reasons a particle reading looks worse than the room feels. Optical particle sensors do not identify particles by chemistry. They estimate based on light scattering, so water droplets and moisture-swollen particles can look like more pollution to the sensor.

As general home guidance, a relative humidity range of about 30% to 50% is often comfortable and practical. Readings consistently above about 60% can support dampness problems and can also make monitor data harder to interpret. Very low humidity can create comfort issues and may increase static dust movement, so the goal is balance rather than chasing the lowest number. If you are trying to keep levels in range, Best Indoor Humidity Level to Prevent Mold gives a useful target framework.

If PM2.5 jumps after a shower, humidifier use, boiling water, or damp cleaning, wait until the humidity drops before assuming the particle reading represents smoke or dust. If the monitor has both PM and humidity metrics, compare them on the same timeline. A PM spike that closely follows a humidity spike is a strong troubleshooting clue.

Sprays, candles, and cleaning products: short spikes are common

Sprays and scented products are frequent causes of TVOC alerts. This includes disinfecting sprays, glass cleaners, room sprays, hair spray, perfumes, solvents, and some freshly opened household products. The monitor may be detecting a real vapor increase, but that does not automatically mean there is a long-term issue.

Particle readings can also rise after aerosol sprays because tiny droplets remain suspended for a short time. Candles and incense can increase particles as combustion products enter the air. The monitor may alert quickly because it is close to the source or because the room has limited ventilation.

A calm response is to reduce the source when possible, ventilate as appropriate, and watch whether the reading declines. For many short events, the trend matters more than the peak. If a TVOC alert happens every time a particular product is used, that is useful information for product choice, storage, and ventilation habits. For broader background on this sensor type, see VOC Monitor Limitations.

Cooking and ventilation: reading the pattern

Cooking is not exactly a false alarm because it can create real airborne particles and vapors. However, cooking alerts are often misread as a general whole-home failure when they may be a predictable, localized event.

High-heat cooking, frying, searing, toasting, and oven spills can raise PM2.5. Gas cooking can also affect combustion-related pollutants, and separate carbon monoxide alarms should be installed and maintained according to local code and manufacturer instructions. An air quality monitor is not a substitute for required fuel-burning safety alarms.

Use the monitor to compare patterns. If PM rises sharply during cooking and returns toward baseline after exhaust or fresh air ventilation, the system is showing a normal event pattern. If PM remains elevated for hours, consider whether filters, kitchen exhaust use, outdoor air conditions, or room airflow are affecting recovery. If you want a deeper comparison of cleanup tools, Ventilation vs Air Purifier explains when airflow changes matter more than filtration.

Sensor drift and placement: when the monitor itself is the issue

Sensor drift means a sensor’s baseline changes over time. Drift can happen with age, contamination, temperature and humidity cycles, or repeated exposure to strong vapors. It is especially important for TVOC and some CO2 sensors that rely on baseline assumptions or automatic calibration routines.

Placement problems that look like alarms

Location can make a good monitor behave badly. Avoid placing the device right next to humidifiers, stoves, sinks, bathrooms, open windows, supply vents, return grilles, air purifier outlets, or dusty floor corners. Direct sunlight and heat sources can also affect readings. Where to Place an Air Quality Monitor covers the practical spacing rules.

A practical location is usually a stable surface at about breathing height, away from walls and direct airflow. For bedrooms, a dresser or nightstand away from a humidifier or open window can provide more useful trend data than a spot beside a vent.

When to suspect drift

Suspect drift when readings stay high or low for days with no matching activity, when a CO2 reading does not drop after extended fresh-air exposure, or when a TVOC baseline keeps climbing without a clear source. Check the device manual for calibration, reset, sensor life, and cleaning guidance. Do not blow compressed air into sensors unless the manufacturer specifically allows it, because it can damage parts or force debris inside. Regular upkeep helps, and How to Clean and Calibrate an Air Quality Monitor is a good reference point.

Troubleshooting checklist for calm, repeatable readings

When an alert happens, use a repeatable process instead of reacting to the number alone. The goal is to separate a short, expected spike from a persistent pattern that needs attention.

  • Note the time and activity. Cooking, showering, cleaning, vaping, candles, and sprays are common causes of sudden spikes.
  • Check humidity. If relative humidity is above about 60%, interpret PM readings cautiously and reduce moisture where practical.
  • Move the monitor briefly. Compare a central room location with the original location to identify placement bias.
  • Ventilate and watch recovery. A falling trend after opening a window, using exhaust, or improving airflow suggests an event-based spike.
  • Compare metrics. PM plus humidity suggests moisture influence; CO2 plus occupancy suggests ventilation; TVOC plus product use suggests vapors.
  • Review maintenance. Dust on monitor vents, old filters in air cleaners, and clogged exhaust screens can affect both readings and recovery.
  • Look for repeat patterns. A single alert is less informative than the same spike happening under the same conditions several times.

If your monitor offers alert thresholds, set them to match how you use the room rather than choosing the most sensitive setting by default. Overly sensitive alerts can create nuisance notifications and make normal household activity seem unusual.

Home monitor metrics and what to do first

Example values for illustration.

Monitor metrics guide for common home readings
MetricWhat it indicatesCommon pitfallsAction idea
PM2.5Fine particles from smoke, cooking, dust, or aerosolsHumidity and mist can inflate optical readingsCheck humidity and recent activities before reacting
PM10Larger dust and debris particlesWalking, vacuuming, and floor dust can cause brief jumpsImprove cleaning routine and keep monitor off the floor
TVOCBroad signal for mixed vaporsNot compound-specific and sensitive to humidityVentilate after product use and watch the downward trend
CO2Ventilation relative to occupancyPlacement near people can read higher than room averageIncrease air exchange when occupied readings stay elevated
Relative humidityMoisture level in indoor airLocal steam sources can skew the room readingAim for about 30% to 50% when practical
TemperatureThermal condition near the monitorSun, electronics, and vents can bias the sensorPlace away from heat sources and direct airflow

Related guides: Indoor Air Quality Monitors: What to Measure (PM2.5, CO2, VOCs, Humidity)Where to Place an Air Quality Monitor: Height, Distance, and RoomsHow to Clean and Calibrate an Air Quality Monitor

Frequently asked questions

Why does my air quality monitor alarm when the room does not smell bad?

Many monitors react to humidity, aerosols, or other compounds before a person notices a strong odor. Optical particle sensors can respond to steam or mist, and TVOC sensors can react to low-level vapors from everyday products. A reading can be technically real for the sensor even when the room does not feel polluted.

How can I tell if a spike is a false alarm or a real air problem?

Look at what happened just before the spike, how long it lasts, and whether the reading falls after ventilation. Short spikes after cooking, showering, spraying products, or opening a humidifier are often expected. A persistent rise with no clear trigger is more worth investigating.

Can high humidity cause false PM2.5 readings?

Yes. Optical particle sensors can overread in damp air because water droplets and moisture-swollen particles scatter light. If PM rises while humidity also rises, that is a strong sign the sensor is reacting to moisture rather than a lasting particle source.

What placement mistakes most often create air quality monitor false alarms?

Common mistakes include placing a monitor next to a humidifier, stove, bathroom, open window, supply vent, or air purifier outlet. Heat and direct sunlight can also bias readings. A stable spot at breathing height, away from direct airflow, usually gives more meaningful data.

When should I suspect sensor drift instead of a temporary event?

Suspect drift when readings stay elevated or depressed for days without any matching activity, or when CO2 or TVOC values do not return toward typical background levels. Repeatedly odd readings across normal conditions also point to calibration or sensor aging. Check the user manual for reset or recalibration steps.

Do I need to react immediately to every alert from a home monitor?

No. Home air quality monitors are best used to spot patterns, not to treat every alert as an emergency. If the reading improves quickly and the trigger is obvious, the event may be normal and temporary.

Summary: practical takeaways

Air quality monitor false alarms are usually a data interpretation problem, not a reason to panic. Humidity, sprays, cooking, airflow, and sensor drift can all create alerts that need context.

Start by matching the spike to recent activity, humidity, placement, and recovery time. Use general targets such as 30% to 50% relative humidity when practical, reasonable ventilation during occupancy, and trend comparisons over time. Keep the monitor clean, placed in stable room air, and calibrated or reset according to its instructions.

The most useful monitor is one that helps you recognize patterns. When you treat alerts as prompts to investigate rather than final answers, the readings become easier to use for everyday indoor air quality decisions.

Bathroom Door Open or Closed After Shower: What Dries Faster

Isometric bathroom ventilation airflow scene

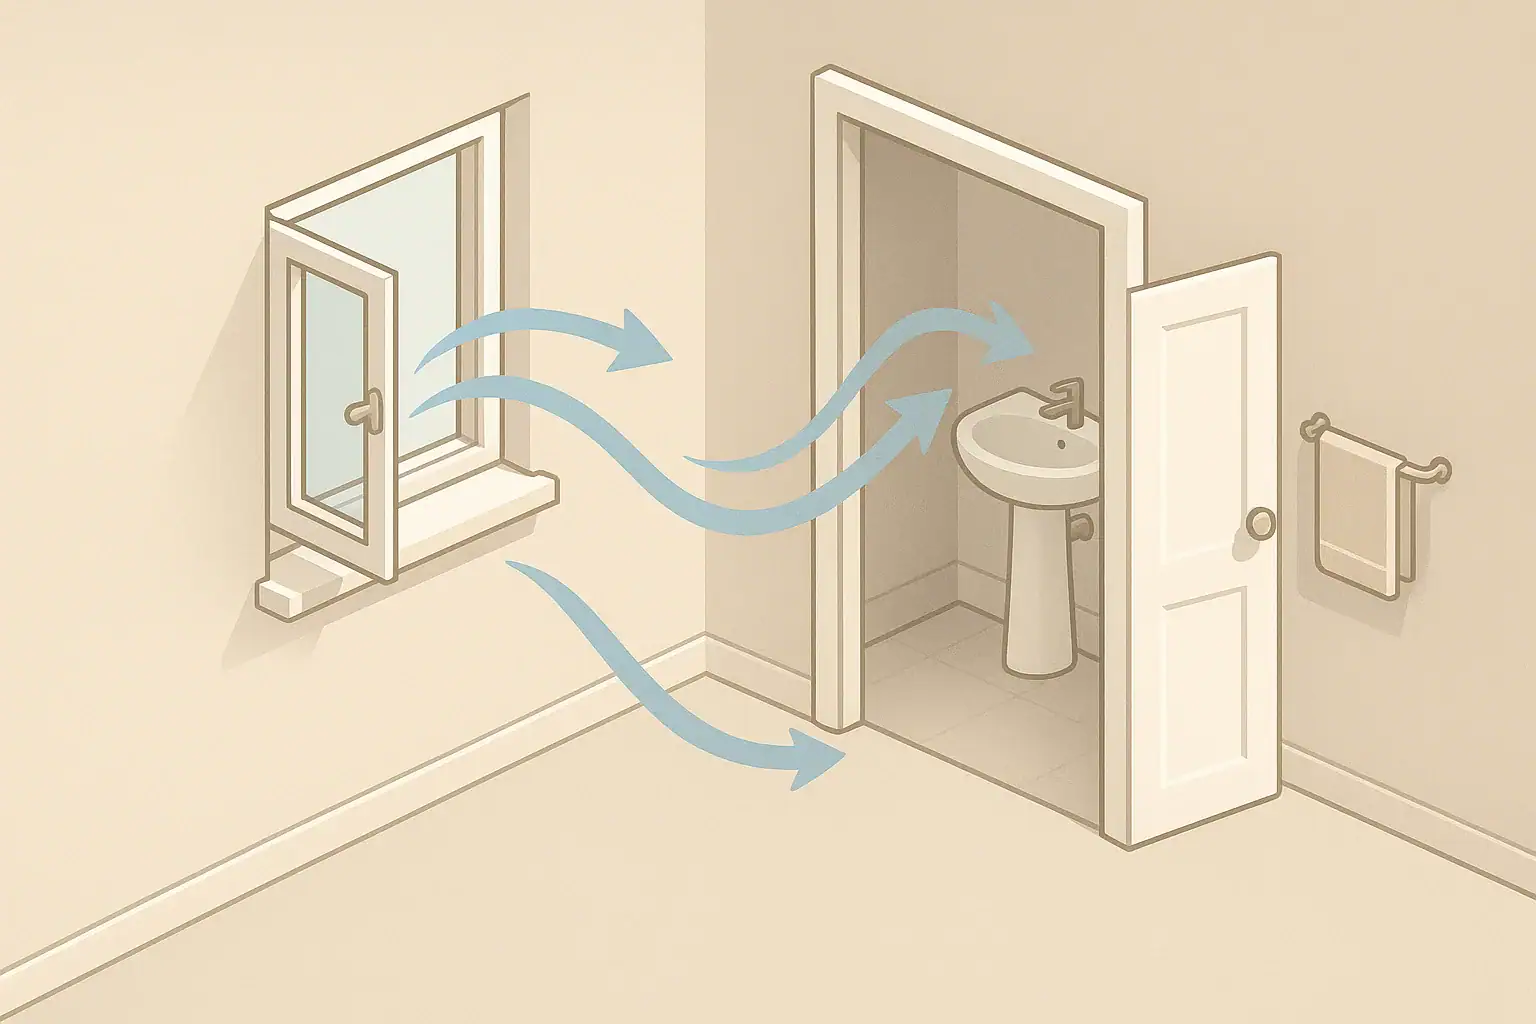
A bathroom usually dries faster after a shower with the exhaust fan running and the door open or cracked, because replacement air can enter and help carry moisture out.

The best door position depends on your fan, bathroom layout, and the humidity in the rest of the home. A fully closed door can slow drying if the fan cannot pull in enough makeup air, while a fully open door without a fan can let moisture drift into nearby rooms.

Quick answer

  • Fastest common setup: run the exhaust fan and leave the door open several inches, or fully open if nearby rooms are dry.
  • Humidity target: aim for indoor relative humidity below about 60%, with many homes more comfortable around 30% to 50% seasonally.
  • Fan timing: run the bath fan during the shower and for about 20 to 30 minutes afterward; longer if mirrors, walls, or towels stay damp.
  • If no fan: open a window when outdoor conditions are dry enough, and leave the door open to improve air movement.
  • Watch the recovery time: if humidity stays high for more than 45 to 60 minutes, improve ventilation, airflow, or dehumidification.

Why Bathroom Door Position Matters After a Shower

A hot shower adds a large amount of water vapor to a small room in a short time. Some of that moisture stays in the air. Some lands on mirrors, tile, painted walls, grout, curtains, bath mats, and towels.

Drying happens when that moisture moves from wet surfaces into the air and then leaves the bathroom. Door position affects both parts of that process. It changes how easily drier air can enter and how easily humid air can leave.

For indoor air quality, the goal is not to make the bathroom bone-dry instantly. The practical goal is to reduce lingering dampness so surfaces dry within a reasonable time and the bathroom does not stay humid for hours.

The Drying Logic: Moisture, Airflow, and Makeup Air

Bathroom drying is mostly about airflow and humidity difference. Air that is already humid cannot absorb much more moisture. Drier air can pick up moisture from wet surfaces more effectively.

How an exhaust fan changes the answer

An exhaust fan removes humid air from the bathroom and sends it outdoors if it is properly ducted. For the fan to work well, replacement air has to enter the bathroom from somewhere. This replacement air is called makeup air.

If the door is fully closed and there is only a small gap under it, the fan may move less air than expected. In that case, cracking the door or leaving it open can improve airflow and speed drying.

When a closed door can make sense

A closed door can help contain steam while you shower, which may make the room feel warmer and reduce moisture movement into hallways. After the shower, however, a closed door is usually best only if the bathroom still has enough airflow through an undercut door, transfer grille, open window, or another designed air path.

If your mirror stays fogged for a long time with the fan running and the door closed, the fan may not be getting enough replacement air.

Door and ventilation choices after a shower. Example values for illustration.
Bathroom drying decision matrix
SituationDoor positionMain actionWhat to watch
Fan works well and vents outdoorsOpen or crackedRun fan during and after showerMirror clears and surfaces dry steadily
Fan is weak with closed doorCracked openAllow makeup air into bathroomLess fog and faster humidity drop
No exhaust fanOpenUse window if outdoor air is suitableMoisture should not linger in nearby rooms
Rest of home is very humidPartly closedUse fan, window, or dehumidifier strategyDrying may be slower overall
Small interior bathroomCracked openMaximize fan airflow pathTowels and corners should dry between uses
Cold or wet outdoor weatherOpen or cracked indoorsRely on exhaust fan before opening windowsAvoid bringing in damp outdoor air

Door Open vs Closed: What Usually Dries Faster

In most homes, the fastest drying setup is fan on plus door open or cracked. The open door gives the fan an easier air path. Humid air exits through the fan, and drier household air replaces it.

Door fully closed with the fan on can still work if the bathroom door has a generous undercut or the room has another transfer-air path. But if the fan sound changes sharply when the door shuts, or the bathroom stays steamy, airflow may be restricted.

Door open with no fan is mixed. It may dry the bathroom surfaces faster by increasing air mixing, but it can also move moisture into the hallway, bedroom, or closet area. That may be fine in a dry home with good whole-home ventilation. It is less helpful if nearby rooms already feel damp.

A simple rule

Use the exhaust fan first, then adjust the door to help the fan breathe. If the fan is on, crack or open the door after the shower. If there is no fan, use the best available combination of window ventilation, open door, and general air movement.

Practical Checklist for Drying a Bathroom Faster

You can usually improve drying without complicated equipment. Small habits matter because bathrooms repeatedly get wet.

  • Turn the exhaust fan on before or at the start of the shower.
  • Leave the fan running after the shower for about 20 to 30 minutes.
  • Open or crack the door after showering unless you are intentionally using a window and keeping moisture isolated.
  • Spread out towels so air can reach both sides.
  • Pull shower curtains or doors partly open so surfaces can dry.
  • Squeegee glass, tile, or smooth walls if they hold visible water.
  • Keep bath mats from staying wet against the floor.
  • Use a basic humidity monitor if you are unsure how long the room stays damp.

A useful target is recovery, not perfection. If the bathroom returns below roughly 60% relative humidity within about 30 to 60 minutes, that is generally a better sign than a room that stays humid for hours.

Real-World Examples: What to Do in Common Bathrooms

Small bathroom with a working fan

Run the fan during the shower and leave the door cracked or open afterward. This is the most common answer for apartments, condos, and smaller houses. If the bathroom air clears quickly, no extra step may be needed.

Bathroom with no exhaust fan but a window

Open the window when outdoor air is cooler or drier than the bathroom air, and leave the door open enough to avoid trapping humidity. In humid weather, a window may not help much. In that case, air movement and whole-home humidity control become more important.

Bathroom connected to a bedroom or closet

Use the fan and crack the bathroom door after the shower, but avoid pushing a large steam cloud directly into a closet. Keep closet doors closed while the bathroom clears, and let towels dry in a location with good airflow.

Shared bathroom with back-to-back showers

Leave the fan running between showers and after the final shower. Open the door between uses when privacy is not needed. Repeated showers can keep surfaces wet longer than one shower, even if each shower seems short.

Indoor Air Quality and Safety Basics

Moisture control is part of basic indoor air quality. Damp materials take longer to dry when air movement is poor, and persistent dampness can support musty odors and surface growth over time. The practical response is steady ventilation, drying, and cleaning rather than panic.

Bath fans should exhaust outdoors, not into an attic, wall cavity, or crawl space. If you are unsure where a fan vents, a qualified professional can inspect it. Avoid modifying electrical fixtures, fan wiring, or ducting unless you are trained to do so and local code allows it.

For bathrooms, ozone generators are not a moisture solution and should not be used to intentionally generate ozone indoors. Ionizers and UV-C devices are also not substitutes for removing moisture at the source. The basics remain ventilation, airflow, surface drying, and humidity control.

Use caution with portable appliances in or near bathrooms. Keep cords, plugs, fans, and dehumidifiers away from wet areas, and follow general electrical safety instructions for damp locations.

Maintenance and Troubleshooting Cues

If the right door position does not seem to help, the problem may be maintenance or airflow restriction. A dusty grille can reduce fan performance. A kinked, long, blocked, or poorly routed duct can also limit exhaust.

Listen and observe. A fan that is loud is not always moving much air. A quiet fan may also be ineffective if the duct is blocked. The clearest practical signs are whether steam clears, the mirror unfogs, and damp surfaces dry.

  • Clean the fan grille periodically so lint and dust do not block airflow.
  • Check that the fan damper, if visible and accessible, is not stuck closed.
  • Look for condensation on walls, ceilings, window frames, or cabinets.
  • Replace or wash shower curtains and liners as needed to reduce residue buildup.
  • Wash bath mats and let them dry fully between uses.
  • Consider a timer switch or humidity-sensing control installed by a qualified person if the fan is often turned off too soon.

A low-cost humidity monitor can help you compare door positions. Put it outside direct splash zones and watch how long the bathroom takes to return to the home’s usual humidity range after a shower.

Humidity and drying quick plan for bathrooms. Example values for illustration.
Bathroom humidity and dampness quick plan
GoalSimple actionsHelpful toolNote
Clear steam quicklyRun fan and crack doorTimerStart fan before humidity peaks
Keep humidity from lingeringRun fan 20 to 30 minutes after useHumidity monitorExtend time if surfaces stay wet
Dry towels fasterSpread towels on bars or hooks with spaceExtra towel barA folded wet towel dries slowly
Reduce wet surfacesSqueegee glass or tileSqueegeeLess standing water means faster recovery
Manage no-fan bathroomsUse window and open door when suitablePortable circulation fan outside wet zonesDo not place electrical items near water
Check progressCompare humidity before and after showerBasic humidity monitorBelow about 60% is a common practical target

Related guides: Bathroom Mold Prevention: Exhaust Fan Timing and Humidity ControlExhaust Fan Best Practices: Bathrooms and Kitchens That Actually Clear AirBest Indoor Humidity Level to Prevent Mold (With Seasonal Targets)

Frequently asked questions

Should the bathroom door be open or closed after a shower?

In most homes, the bathroom door dries the room faster when it is open or cracked and the exhaust fan is running. That setup gives humid air a path out and lets drier air replace it. A fully closed door can slow drying if the fan cannot get enough makeup air.

Does leaving the bathroom door open help prevent mold?

Leaving the door open can help the room dry faster, but mold prevention depends on overall moisture control, not the door alone. The most important factors are running the fan, drying wet surfaces, and keeping humidity from staying high for long periods. If the room remains damp for hours, ventilation likely needs improvement.

Is it better to keep the door closed while showering?

A closed door can help keep steam inside the bathroom while you shower, which may keep nearby rooms drier. After the shower, however, opening or cracking the door usually helps the bathroom dry faster if the fan is on. The best choice depends on whether the fan has enough replacement air.

How long should I leave the fan on after a shower?

A common guideline is to run the fan for about 20 to 30 minutes after showering. If mirrors, walls, towels, or the air still feel damp, longer runtime may be needed. The main goal is for the bathroom to return to a normal humidity range within about 30 to 60 minutes.

What if my bathroom has no exhaust fan?

If there is no fan, open a window when outdoor air is dry enough and leave the door open enough to improve air movement. In humid weather, a window may not help much, so whole-home ventilation or a dehumidifier may matter more. The key is to avoid trapping moisture in the room.

Why does my mirror stay fogged when the door is closed?

A fogged mirror after showering can mean the bathroom is not removing humid air fast enough. If the fan sounds weak or changes noticeably when the door closes, it may not be getting enough makeup air. Cracking the door, cleaning the fan grille, or checking for duct problems can help.

Summary: The Simple Rule for Most Bathrooms

For most homes, leave the bathroom door open or cracked after a shower and run the exhaust fan. This usually dries the room faster than keeping the door fully closed because the fan gets the replacement air it needs.

Keep the door more closed only when you have a good reason, such as preventing steam from moving into a closet or when a window is handling ventilation well. Even then, the bathroom still needs an air path.

The practical target is simple: clear visible steam, dry surfaces, and bring humidity back down within about 30 to 60 minutes. If that does not happen, focus on fan runtime, airflow path, towel drying, and basic maintenance before assuming the door position alone is the problem.

Kitchen Ventilation Without a Range Hood What Works

Isometric kitchen window ventilation with abstract airflow
Kitchen ventilation without a range hood is possible by combining source control, temporary exhaust through a window, cross-ventilation, and portable filtration, while recognizing that none captures cooking pollutants as well as a properly ducted hood. The goal is to move moisture, heat, odors, and airborne particles away from the cooking area before they spread through the home. A no-hood setup usually works best when several small habits are used together instead of relying on one device.
Quick answer
  • Use a window exhaust fan or open window during cooking and for about 10 to 20 minutes afterward when outdoor conditions allow.
  • Create cross-ventilation by opening a second window or door 1 to 3 inches on the opposite side of the space when practical.
  • For particles from frying, searing, or smoke-prone cooking, use a portable HEPA air cleaner sized for the kitchen or adjacent open area.
  • Activated carbon can help reduce some cooking odors, but it is not a substitute for exhausting humid or combustion-related air outdoors.
  • Keep indoor relative humidity roughly in the 30% to 50% range when possible to limit dampness from cooking steam.
  • If cooking with gas, use working carbon monoxide alarms and follow appliance ventilation requirements.

Why kitchen ventilation matters when there is no hood

Cooking adds more than smells to indoor air. It can produce moisture, grease aerosols, fine particles, and heat. Gas cooking can also add combustion byproducts, while electric cooking can still create particles and odors from food, oils, and high-temperature cooking.

A range hood works well because it captures air close to the source. Without one, the strategy changes from source capture to dilution, exhaust, filtration, and cooking adjustments. That means you are trying to reduce buildup and spread, not perfectly capture everything at the pan.

This is especially important in small apartments, open-plan homes, and tight modern buildings where kitchen air can move quickly into living and sleeping areas. The most practical approach is to choose methods that fit your layout, weather, lease rules, and cooking style.

Key concepts for no-hood kitchen ventilation

Before choosing an alternative, it helps to separate three concepts: exhaust, supply air, and filtration. Exhaust removes indoor air to the outdoors. Supply air replaces what leaves. Filtration cleans some airborne pollutants but does not remove heat, moisture, or all gases.

Exhaust is usually the first priority

If you can safely move kitchen air outdoors with a window fan, through-wall exhaust fan, or existing nearby bathroom fan, that air is actually leaving the home. This is different from a recirculating device, which passes air through filters and sends it back indoors.

For everyday cooking, a practical target is to start ventilation before the pan gets hot, keep it running during cooking, and continue for 10 to 20 minutes after cooking. Longer may be useful after frying, broiling, or strong odors.

Makeup air keeps airflow moving

An exhaust fan needs replacement air. If the home is very tight, a fan may perform poorly unless another opening allows air in. A small opening in a window or door on the other side of the kitchen can make a noticeable difference.

In cold, hot, humid, smoky, or high-pollen outdoor conditions, balance is important. Short bursts of ventilation may be better than leaving windows open for long periods.

Filtration helps with particles, not moisture

A portable air cleaner with a mechanical particle filter can reduce airborne particles that escape the cooking area. It is most useful for smoke-prone cooking, open-plan spaces, or kitchens near living areas.

Activated carbon can help with some odors and gases, but performance depends on carbon amount, airflow, and saturation. A thin carbon prefilter may reduce mild smells but should not be expected to handle heavy cooking odors for long.

Practical comparison of no-hood kitchen ventilation options. Example values for illustration.
No-hood kitchen ventilation alternatives
OptionWorks best forLimitsPractical note
Open window near stoveQuick dilution of heat, steam, and odorDepends on weather and wind directionOpen before cooking and keep open briefly afterward
Window fan exhausting outwardRemoving kitchen air outdoorsNeeds safe placement and replacement airPair with a small inlet opening elsewhere
Cross-ventilationMoving air through the homeCan spread odors if airflow path is poorTry to pull air away from living areas
Portable HEPA air cleanerReducing airborne particlesDoes not remove moisture or heatPlace near but not beside the stove
Activated carbon filtrationMild odor controlCarbon becomes saturated over timeUse with ventilation rather than alone
Nearby bath or utility exhaust fanSupplemental exhaustMay be far from the cooking sourceRun during and after cooking if it vents outdoors
Cooking method changesReducing emissions at the sourceRequires habit changesUse lids, lower heat, and avoid overheating oils

Common mistakes and troubleshooting cues

A common mistake is using a fan in the wrong direction. A fan blowing into the kitchen from a window can push cooking air deeper into the home. For ventilation, the fan usually works better exhausting outward, with replacement air entering from another opening.

Another mistake is placing a portable air cleaner too close to the stove. Grease, heat, and splatter can damage filters or create a safety concern. Keep the unit out of the cooking zone, away from water, and where air can circulate around the intake and outlet.

If odors linger for hours, the space may need more exhaust time, better cross-flow, or carbon replacement. If condensation forms on windows or cabinets during cooking, moisture is not leaving quickly enough. Use lids, reduce boiling time when possible, and increase short-term exhaust.

If a fan seems weak, check whether the incoming air path is blocked. Interior doors, closed windows, and tight weatherstripping can reduce airflow. Opening a second window slightly can improve the fan’s ability to move air.

Practical checklist for cooking without a hood

The best routine starts before the first smoke or steam appears. A few minutes of preparation can reduce buildup and make cleanup easier.

Before cooking

  • Open a nearby window if outdoor air is acceptable.
  • Place a window fan to exhaust outward if the design allows safe use.
  • Open a second window or interior path slightly to provide makeup air.
  • Turn on a nearby exhaust fan that vents outdoors, such as a bathroom or utility fan.
  • Move portable air cleaners away from splatter and heat, but close enough to serve the kitchen or adjacent room.

During cooking

  • Use lids when boiling or simmering to reduce steam.
  • Choose lower heat when practical, especially with oils.
  • Avoid heating empty pans or oils past the point where they smoke.
  • Use back burners if a window or exhaust path pulls air away from the cook.
  • Keep interior doors arranged so airflow moves toward the exhaust point, not toward bedrooms.

After cooking

  • Keep ventilation running for 10 to 20 minutes, or longer for heavy odors.
  • Wipe greasy surfaces after they cool to reduce lingering odors.
  • Check for condensation on windows, walls, or cabinets.
  • Empty trash or compost that contains strong-smelling food scraps.

Real-world setups for apartments and houses

Different homes need different no-hood strategies. The right setup depends on where the windows are, how the kitchen connects to other rooms, and whether there is an outdoor-vented fan nearby.

Small apartment with one kitchen window

A window fan exhausting outward can be the main tool. Slightly opening a living room window or entry path can provide makeup air. A compact portable air cleaner may help in the adjacent living area, especially after frying or high-heat cooking.

Open-plan home with kitchen and living room combined

Open plans dilute air into a larger space, but odors and particles can travel farther. Use short, controlled cross-ventilation. Place an air cleaner in the shared area where it can circulate air without being exposed to grease or splatter.

Interior kitchen with no window

If the kitchen has no window, look for a nearby exhaust fan that vents outdoors. A bathroom fan down a hallway may help some, but it is not equivalent to a hood. In this layout, source control matters more: use lids, avoid smoke-prone methods when possible, and run a properly sized air cleaner in the closest practical location.

Cold or humid weather

When outdoor conditions are uncomfortable, use shorter ventilation periods. Five to ten minutes of stronger exhaust during the highest-emission part of cooking may be more practical than a long window-opening session. Afterward, monitor humidity and condensation rather than relying on smell alone.

Safety and standards to keep in mind

Do not modify cooking appliances, block required vents, or bypass safety systems to create airflow. If you are considering a permanent fan, wall penetration, or ductwork, follow local building rules and use qualified help where appropriate.

Gas cooking deserves extra attention because combustion appliances have specific ventilation and safety requirements. Keep carbon monoxide alarms installed according to local guidance and manufacturer instructions. If an alarm sounds, follow the alarm instructions and leave the area as directed.

Be cautious with air cleaning features that intentionally generate ozone. Ozone is not needed for kitchen ventilation and can be an indoor air irritant. Ionizers and UV-C features should be evaluated carefully by their safety listings, maintenance requirements, and whether they can be disabled if not wanted.

Portable fans should be kept away from water, hot burners, and unstable surfaces. Extension cords should not be used in a way that creates trip, heat, or overload risks. Grease buildup on fan blades or grilles can reduce performance and should be cleaned regularly when the device is unplugged.

Maintenance and upkeep for a no-hood setup

No-hood kitchen ventilation depends on clean, working equipment. A dusty fan, clogged air filter, or saturated carbon filter can make the setup less effective and noisier.

Clean window fan grilles and blades as grease and dust accumulate. In kitchens with frequent frying, this may be needed more often than in other rooms. Always unplug portable fans before cleaning and let nearby cooking surfaces cool first.

For portable air cleaners, follow the filter replacement schedule, but adjust based on cooking frequency and particle load. Heavy cooking, smoke events, pets, and dusty homes can shorten filter life. A filter that looks loaded, smells persistent, or reduces airflow may need attention sooner.

Carbon filters require realistic expectations. Once saturated, they can stop reducing odors effectively. If odor control is a priority, plan for recurring replacement costs and confirm that the device has enough carbon media to be useful for your needs.

Common indoor air measurements that can help guide kitchen ventilation. Example values for illustration.
Monitor metrics for no-hood cooking
MetricWhat it can indicateCommon pitfallAction idea
PM2.5Fine particles from smoke-prone cookingSpikes can be brief and location-dependentVentilate and run particle filtration during and after cooking
CO2General ventilation and occupancy buildupNot a direct cooking pollution measurementUse as a clue that fresh air exchange may be low
TVOCBroad changes in gases and odorsReadings vary by sensor and are not compound-specificLook for trends rather than exact interpretation
Relative humiditySteam and moisture buildupRoom readings may lag behind cooking peaksUse lids, exhaust moisture, and watch for condensation
TemperatureHeat buildup from cookingComfort changes do not show all pollutantsUse short exhaust bursts if the kitchen overheats
Odor observationLingering cooking smellsNose fatigue can make odors less noticeableIncrease post-cooking exhaust time or replace carbon

Related guides: Do Air Purifiers Help With Cooking Smoke and Grease Particles?Activated Carbon Filters Explained: VOCs, Odors, and What They Can’t DoVentilation vs Air Purifier: When You Need One, the Other, or Both

Frequently asked questions

What is the best way to ventilate a kitchen without a range hood?

The most effective no-hood setup is usually outdoor exhaust, such as a window fan blowing air out, paired with a small opening elsewhere for makeup air. Cross-ventilation and a portable HEPA air cleaner can help, but they work best as supporting measures rather than stand-alone solutions.

Can a portable air purifier replace a range hood?

No. A portable air purifier can reduce airborne particles and sometimes odors, but it does not remove heat, moisture, or all cooking-related gases. It is best used alongside ventilation that moves air outdoors when possible.

Should a kitchen window fan blow air in or out during cooking?

For ventilation, it generally works better to blow air out of the kitchen rather than into it. Exhausting outward helps remove heat, steam, and pollutants, while a second opening can bring replacement air in from another part of the home.

How long should I run ventilation after cooking?

A common practical range is 10 to 20 minutes after cooking, with longer times after frying, broiling, or heavy smoke. If odors or condensation remain, extend the ventilation period until the air clears and moisture is reduced.

What can I do if my kitchen has no window at all?

Use any nearby fan that vents outdoors if available, and focus more on source control by using lids, lower heat, and avoiding smoke-prone cooking methods when possible. A properly sized portable air cleaner can help with particles in the nearby space, but it will not solve moisture or combustion exhaust by itself.

Is activated carbon enough for cooking odors?

Activated carbon can help reduce some odors, especially when the filter has enough carbon and is replaced regularly. However, it does not remove humidity and is not a substitute for exhaust ventilation when cooking produces a lot of steam or combustion byproducts.

Summary takeaways

Kitchen ventilation without a range hood is a practical balancing act. The strongest approach is to reduce emissions at the stove, exhaust air outdoors when possible, provide makeup air, and use filtration for particles that escape into the room.

A window fan exhausting outward, short cross-ventilation periods, lids on pots, lower cooking temperatures, and a properly placed portable air cleaner can work together. None is a perfect replacement for a ducted hood, but a consistent routine can make everyday cooking air easier to manage.

Focus on airflow direction, safe equipment placement, humidity control, and regular maintenance. These basics are usually more useful than complicated setups, especially in apartments or homes where adding a permanent range hood is not realistic.

Ventilating During Wildfire Smoke: What Works Better

Isometric room with window airflow and purifier

During wildfire smoke, keeping windows and exterior doors closed is usually better when outdoor PM2.5 or visible smoke levels are higher than indoor levels.

Ventilation is normally useful for diluting indoor pollutants, but wildfire smoke changes the balance. The practical goal is to limit smoky outdoor air, reduce indoor particle sources, and use filtration until outdoor air improves.

Quick answer
  • Keep windows closed when outdoor smoke is visible, smells strong, or outdoor PM2.5 is higher than indoors.
  • Use recirculation where available, and use a high-efficiency HVAC filter such as MERV 13 only if the system can handle it.
  • For a cleaner room, portable filtration is commonly planned around about 4 to 6 air changes per hour, with higher airflow if noise and comfort allow.
  • Ventilate briefly only when outdoor PM2.5 has dropped and is lower than indoors; start with 10 to 20 minutes and recheck conditions.
  • Avoid adding indoor particles from smoking, candles, frying, fireplaces, and unnecessary exhaust fan use during smoke events.

What Ventilating During Wildfire Smoke Means

Ventilation means exchanging indoor air with outdoor air. In routine conditions, this can reduce carbon dioxide, odors, moisture, and pollutants generated indoors. During wildfire smoke, however, outdoor air may contain elevated fine particles that can enter through open windows, doors, vents, and building leaks.

The main concern for home decisions is PM2.5, a category of fine particles small enough to remain suspended in air. Smoke also contains gases and odors, but particle control is usually the first practical target for a home plan.

The decision is not simply open or closed forever. It is a timing question: close up when outdoor air is smoky, filter indoor air while closed, then ventilate when outdoor air becomes cleaner than indoor air.

Key Concepts: PM2.5, Air Exchange, and Filtration

PM2.5 readings from a local air quality source or a home monitor can help guide decisions. Consumer monitors are not laboratory instruments, but they can show trends, such as whether opening a window raises or lowers indoor particle levels.

Outdoor air is not always the cleaning tool

Opening windows works only when outdoor air is cleaner than indoor air for the pollutant you are trying to reduce. During wildfire smoke, outdoor air may be the main source of particles, so open-window ventilation can make the indoor situation worse. For a broader comparison of when to use each approach, see Ventilation vs Air Purifier: When You Need One, the Other, or Both.

Filtration and ventilation do different jobs

Filtration removes particles from air that passes through a filter. Ventilation replaces indoor air with outdoor air. When outdoor air is smoky, filtration usually becomes the preferred tool for particle control, while ventilation is delayed or reduced. If you are planning portable cleanup for smoke, Best Air Purifiers for Wildfire Smoke: What Specs Matter Most covers the main specs to look for.

Simple ACH planning

Air changes per hour, or ACH, estimates how many times a room volume is processed in one hour. For portable air cleaners, a common planning range for a cleaner room is about 4 to 6 ACH, assuming the unit airflow is realistic for the selected fan speed. Large rooms, open floor plans, and high ceilings need more airflow than small bedrooms.

For HVAC systems, the filter rating and system design matter. A higher-rated filter can help capture more fine particles, but using a filter that is too restrictive for the equipment may reduce airflow. If unsure, use the filter rating recommended for the system and prioritize a well-sealed filter fit with no visible bypass gaps. A simple sizing reference like How to Choose the Right Air Purifier for Your Room Size can also help match airflow to the room.

Decision guide for ventilation choices during smoke. Example values for illustration.
Smoke ventilation decision matrix
SituationBetter first stepWhy it mattersNotes
Outdoor PM2.5 is higher than indoorsKeep windows closedOutdoor air is the particle sourceRun filtration and monitor trends
Outdoor air has improved and is lower than indoorsVentilate brieflyCleaner outdoor air can dilute indoor buildupTry 10 to 20 minutes, then recheck
Indoor air feels stale but outdoor air is smokyUse filtration and reduce sourcesOpening windows may raise particle levelsUse filtered mechanical ventilation if already available
Cooking or frying is plannedReduce the activity or use local controlCooking can add particles indoorsWatch exhaust use because it can pull air in through leaks
Leaky apartment or older homeCreate one cleaner roomWhole-home control may be harderClose doors and run a suitable purifier continuously
Smoke odor remains after outdoor air clearsCombine ventilation and carbon filtrationParticles and odors behave differentlyCarbon helps with some odors but has limited capacity

Common Mistakes That Let Smoke Indoors

One common mistake is opening windows because the home feels stuffy without checking outdoor conditions. Stale air and smoky air are different problems, and the solution that helps one can worsen the other.

Another mistake is relying on odor alone. Smoke smell can be noticeable even when particle levels are falling, and some people stop smelling smoke after being around it for a while. A PM2.5 monitor, local air quality map, or both can provide a more consistent signal.

Exhaust fans also deserve attention. Bathroom fans, kitchen range hoods, clothes dryers, and whole-house exhaust systems remove indoor air. The replacement air has to come from somewhere, often through cracks, doors, vents, or other leaks. During smoke events, unnecessary exhaust can pull smoky air inside. If you need a refresher on this effect, Exhaust Fan Best Practices: Bathrooms and Kitchens That Actually Clear Air is a useful companion guide.

Filter bypass is another overlooked issue. A good filter helps only if air goes through it rather than around it. Loose-fitting filters, bent frames, dirty filter slots, or missing access covers can reduce practical performance.

Practical Home Checklist for Smoky Days

A calm plan is easier to follow if it is simple. The following steps focus on reducing smoke entry, limiting indoor particle sources, and using the equipment already present in many homes.

Before or early in a smoke event

  • Close windows, exterior doors, fireplace dampers, and other intentional openings when smoke arrives.
  • Set central air systems to recirculate when that option is available.
  • Install a clean HVAC filter with the highest compatible rating recommended for the system.
  • Choose one room, often a bedroom or living room, as a cleaner room if whole-home control is difficult.
  • Place a portable air cleaner where airflow is not blocked by curtains, furniture, or walls.

While conditions are smoky

  • Run filtration continuously at the highest comfortable fan setting.
  • Keep interior doors closed for the cleaner room if the purifier is sized for that room only.
  • Limit candles, incense, smoking, wood burning, aerosol use, and high-heat cooking.
  • Use exhaust fans only when needed for moisture, cooking safety, or odor control.
  • Track PM2.5 trends indoors and outdoors when possible.

When outdoor air improves

Ventilation can become useful again when outdoor particle levels are consistently lower than indoors. Open a few windows for a short period, use cross-ventilation if conditions allow, and watch whether indoor PM2.5 falls or rises. If indoor levels rise, close up and return to filtration.

Real-World Examples: Apartment, House, and Cleaner Room

In an apartment, residents may have limited control over shared ventilation, corridor air, or window sealing. A practical approach is to close windows, minimize door opening to smoky corridors, and operate a portable purifier in the room used most often. If hallway odors enter under the door, a simple temporary draft barrier may reduce uncontrolled air movement without modifying building systems.

In a single-family house with central forced air, the main decision is often whether to run the fan. Recirculating air through a clean, compatible filter can help distribute filtration. However, systems that intentionally bring in outdoor air may need to be set according to manufacturer controls or normal operating instructions. The homeowner should not disable safety controls or make unapproved appliance modifications.

In an open-plan home, a small purifier may not effectively cover the combined living, kitchen, and dining area. It may be more practical to create a cleaner sleeping room with the door closed. This reduces the air volume that must be filtered and makes airflow planning easier.

After smoke clears outdoors, a home may still have indoor PM2.5 from infiltration and indoor sources. This is the time when ventilation is most useful. Open windows when outdoor readings are favorable, run filtration at the same time if available, and close the windows again if smoke returns.

Safety and Standards: Avoid Ozone and Use Caution With Add-Ons

For smoke particles, mechanical filtration is the most straightforward home approach. Filters do not intentionally create ozone, and they can be selected and maintained without adding reactive byproducts to indoor air.

Devices marketed with ionizers, plasma, or other electronic air-cleaning features vary in design. Some may produce ozone or other byproducts, especially if misused or poorly maintained. If using a device with optional electronic features, review the documentation and consider leaving those features off when the goal is simple particle filtration. For more on that trade-off, see Air Purifier vs Ozone Generator: Safety, Effectiveness, and Myths.

UV-C systems are generally aimed at biological contaminants on surfaces or inside equipment, not at removing wildfire smoke particles from room air. They require careful design to avoid exposure and material damage. They should not be treated as a substitute for particle filtration during smoke events.

Combustion safety also matters. Do not run generators, grills, camp stoves, or fuel-burning equipment indoors or near open windows and air intakes. Do not block required combustion air openings or alter appliances in an attempt to stop smoke entry.

Maintenance and Upkeep During Smoke Season

Wildfire smoke can load filters faster than ordinary dust. A filter that normally lasts months may need earlier replacement after repeated smoke days. The right interval depends on hours of use, particle levels, airflow, filter size, and the amount of dust and pet hair in the home.

Check filters visually and follow the equipment instructions. A darkened filter is not automatically failed, but noticeable dust loading, reduced airflow, unusual fan noise, or a rising indoor PM2.5 trend can be cues to inspect or replace it.

Prefilters are useful because they catch larger dust and hair before the main filter. If the prefilter is washable, let it dry completely before reinstalling. A damp filter or filter area can create odor and maintenance problems.

Activated carbon can help reduce some smoke odors and gases, but it has limited capacity and is not the same as a particle filter. Once carbon is saturated, it no longer controls odors well. For smoke season planning, carbon is best treated as a useful addition, not a substitute for HEPA or high-efficiency particle filtration. A deeper comparison is available in Activated Carbon Filters Explained: VOCs, Odors, and What They Can’t Do.

Filter and upkeep planner for smoke season. Example values for illustration.
Filter replacement planner
ItemTypical interval rangeWhat can shorten itReminder
Portable purifier prefilterEvery 2 to 4 weeks during heavy usePet hair, dust, long fan run timeClean or replace as instructed
Main particle filterAbout 6 to 12 monthsRepeated smoke events and high airflowWatch airflow and PM2.5 trends
HVAC pleated filterAbout 1 to 3 monthsContinuous fan use and smoky periodsUse only compatible ratings
Activated carbon filterAbout 3 to 6 monthsPersistent odors and gas exposureReplace when odor control drops
Washable mesh screenMonthly during useDusty rooms and petsDry fully before reinstalling
Air monitor inlet areaMonthly light cleaningDust buildup near sensorsFollow the monitor instructions

Related guides: Wildfire Smoke Indoors: Step-by-Step Plan to Lower PM2.5 FastIndoor Air Quality Monitors: What to Measure (PM2.5, CO2, VOCs, Humidity)Portable Air Purifier vs HVAC Filtration: What Helps More in Homes?

Frequently asked questions

Should I ventilate during wildfire smoke if my house feels hot or stuffy?

Not if outdoor PM2.5 is higher than indoor levels or visible smoke is present. In that case, opening windows may bring in more fine particles than it removes. A better first step is usually to keep the home closed and use filtration until outdoor air improves.

When is it safe to open windows after smoke passes?

Ventilation is most useful when outdoor PM2.5 is consistently lower than indoor PM2.5. A short test of 10 to 20 minutes can help you see whether indoor levels fall or rise. If indoor PM2.5 rises, close the windows and return to filtration.

Is a portable air cleaner enough, or do I still need ventilation?

A portable air cleaner can help reduce particles in a room, but it does not replace ventilation for stale air, moisture, or indoor gases. During smoke events, filtration usually comes first and ventilation is delayed until the outside air is cleaner. In practice, many homes use both at different times.

Does using exhaust fans during wildfire smoke make indoor air worse?

It can, because exhaust fans remove indoor air and replacement air often enters through leaks, cracks, and openings. During smoky periods, use exhaust only when needed for safety, moisture control, or cooking. Avoid unnecessary exhaust if your goal is to keep smoke out.

What indoor sources should I avoid while ventilating during wildfire smoke?

Avoid activities that add particles, such as smoking, candles, incense, frying, and wood burning. These sources can make indoor air dirty even when outdoor air improves. Reducing indoor particle sources makes filtration and later ventilation more effective.

How much airflow does a cleaner room need during smoke?

A common planning target is about 4 to 6 air changes per hour for a cleaner room, assuming the purifier airflow is realistic for the space. Larger rooms, open layouts, and high ceilings need more airflow to achieve the same effect. Noise, placement, and filter bypass can all affect real-world performance.

Summary: When Closed Windows Are the Better Choice

Keeping windows closed is usually the better choice when wildfire smoke makes outdoor PM2.5 higher than indoor PM2.5. In that situation, open-window ventilation can bring in more of the pollutant you are trying to reduce.

The practical approach is to close up during smoky periods, run appropriate filtration, reduce indoor particle sources, and avoid unnecessary exhaust that may pull outdoor air through leaks. A cleaner room can be more realistic than whole-home control in apartments, leaky homes, and open-plan spaces.

Ventilation becomes helpful again when outdoor air is cleaner than indoor air. Use short ventilation periods, check PM2.5 trends when possible, and return to filtration if smoke levels rise. This balanced approach keeps ventilation useful without assuming outdoor air is always the safer option.

Cross-Ventilation Setup: How to Move Air Through a Home Faster

Open windows showing airflow through a tidy room

To move air through a home faster, create a clear inlet and outlet path, use fans to push air toward the exhaust side, and open interior doors so air can travel across the space. Cross-ventilation works best when outdoor air quality, temperature, and humidity are reasonable for bringing air indoors. The goal is a controlled air exchange, not just opening every window at random.

Quick answer

  • Use at least two openings on opposite or adjacent sides of the home: one for incoming air and one for outgoing air.
  • Place one fan blowing outward in the exhaust window; add a second fan blowing inward only if the airflow path is clear.
  • Open interior doors and reduce obstructions so air can move from inlet to outlet with fewer dead zones.
  • For a short purge, 10–30 minutes is a practical starting range when outdoor conditions are acceptable.
  • Check outdoor PM2.5, humidity, temperature, pollen, and smoke conditions before ventilating for long periods.
  • If a room feels stagnant, try a smaller inlet opening and a stronger exhaust path to increase directional flow.

What Cross-Ventilation Means in a Home

Cross-ventilation is the movement of outdoor air through a building from one opening to another. In a home, that usually means air enters through one window, door, or vent and exits through another opening across the room, down a hallway, or on a different side of the building.

The setup matters because air follows the path of least resistance. If there is no clear exit, an open window may only stir air near that opening. If there is no clear inlet, an exhaust fan may pull air from cracks, gaps, or less useful areas instead of sweeping through the occupied room.

Cross-ventilation is different from filtration. Ventilation exchanges indoor air with outdoor air, while a portable air cleaner recirculates indoor air through filters. Both can be useful, but they solve different parts of an indoor air quality plan.

Airflow Basics: Inlets, Outlets, Fans, and Pressure

A faster cross-ventilation setup depends on four practical ideas: where air enters, where air leaves, how fans create pressure, and whether the path between openings is open enough.

Inlet and outlet placement

The inlet is where cleaner outdoor air comes in. The outlet is where indoor air leaves. For strong cross-flow, place them as far apart as practical, such as windows on opposite walls or an open window at one end of the home and an exhaust fan at the other.

If windows are only on one side, cross-ventilation is harder, but not impossible. A fan can help create a push-pull effect, and an open interior door can connect the room to a hallway, stairwell, or another window in the home.

Fan direction

A common starting point is to place a fan in or near the outlet window blowing outward. This creates a slight negative pressure that pulls replacement air from the inlet side. In many layouts, one strong exhaust fan can be more useful than several fans blowing in different directions.

If you add a second fan, place it at the inlet blowing inward only when it reinforces the same airflow path. Avoid placing fans so they fight each other or create a circular loop in one room.

Simple timing targets

For a quick air purge, 10–30 minutes is a reasonable general range when outdoor conditions are suitable. Larger homes, closed-off rooms, weak wind, and complex layouts may need longer. Smaller rooms with a clear intake and exhaust path may respond faster.

Cross-ventilation setup checklist. Example values for illustration.
Tasks that help move air through a home faster
TaskWhy it mattersPractical note
Choose an inlet windowGives fresh replacement air a defined entry pointUse a window away from obvious outdoor pollutant sources when possible
Choose an outlet windowCreates a destination for indoor air to leaveOpposite sides of the home are usually better than same-wall openings
Use an exhaust fanHelps pull air across roomsPoint the fan outward at the outlet side
Open interior doorsReduces resistance between roomsDoor gaps alone may not move air quickly
Adjust opening sizeChanges air speed and directionA partly open inlet can sometimes create a stronger stream
Clear the pathPrevents stagnant pocketsMove tall furniture or curtains away from the airflow line
Check outdoor conditionsVentilation brings outdoor air indoorsPause during smoke, high dust, or uncomfortable humidity events

How to Set Up Cross-Ventilation Step by Step

A good cross-ventilation setup is simple, but it should be intentional. Start with the rooms you most want to refresh, then build a path that moves air through those rooms and out of the home.

Step 1: Pick the air path

Stand in the area you want to ventilate and identify the best inlet and outlet. In a typical house, this might be a bedroom window as the inlet and a living room or kitchen window as the outlet. In an apartment, it may be a window and a balcony door, or a window and a hallway-facing entry door if building rules and safety allow it.

Think in terms of a line, not just openings. Air should be able to travel from one point to the other without being blocked by closed doors, heavy curtains, or room dividers.

Step 2: Set the outlet fan first

Place a fan facing outward at the outlet opening. If the fan sits in a window, reduce large gaps around it when practical so more air leaves through the fan instead of recirculating around the edges. Do not modify appliances, wiring, or building systems to force airflow.

If the fan cannot sit directly in the window, place it a short distance inside the room and aim it toward the outlet. This may be less efficient than a sealed window placement, but it can still improve directional flow.

Step 3: Open the inlet gradually

Open the inlet window partway first, then adjust. A fully open window is not always faster. Sometimes a smaller inlet creates a more focused stream that travels farther into the home.

You can use a lightweight tissue or a small strip of paper held safely near the doorway or hallway to see whether air is moving in the intended direction. Keep loose items away from fan blades.

Step 4: Balance nearby rooms

Open doors to rooms that need air exchange and close doors to rooms that do not need to be part of the path. This helps the fan spend more of its effort on the target area.

If one room remains stagnant, open its window briefly as a secondary inlet, then close it partway once air starts moving. Small adjustments often matter more than adding more fans.

Common Mistakes and Troubleshooting Cues

When cross-ventilation feels weak, the cause is usually a blocked path, poor fan direction, or outdoor conditions that are not helping. The following cues can help you adjust without overcomplicating the setup.

Mistake: Opening every window equally

Opening every window may feel intuitive, but it can dilute the airflow path. Air may enter and leave near the same side of the house instead of sweeping through the rooms that need ventilation.

Try defining one main inlet and one main outlet. Then add or reduce openings based on whether airflow improves.

Mistake: Fans blowing against each other

Two fans can help when they support the same path. They can also cancel each other out if one pushes air into a room while another pushes it back the opposite way.

Use smoke-free, non-hazardous visual cues such as a tissue movement test instead of guessing. The goal is steady direction from inlet to outlet.

Mistake: Ignoring closed interior doors

A closed door can stop most useful cross-flow. Even a mostly closed door can make a room feel still while the hallway ventilates well.

Open doors fully when you want whole-home movement. For privacy, a door stop or partial opening can help, though it will usually reduce flow compared with a fully open door.

Mistake: Ventilating at the wrong time

Outdoor air is not always the better air. During wildfire smoke, high outdoor PM2.5, heavy pollen, nearby construction dust, or very humid weather, it may be better to keep windows closed and rely more on filtration, dehumidification, or existing mechanical ventilation.

Real-World Cross-Ventilation Examples

Every home layout behaves differently. Use these examples as starting points, then adjust based on how air actually moves in your space.

Small apartment with windows on one side

Single-aspect apartments are challenging because there may not be a true opposite-side outlet. Start with one window as the main opening and place a fan blowing outward. Open the entry door only if it is safe, permitted, and does not create security or hallway air concerns.

If opening the entry door is not practical, use a fan inside the apartment to move air from the farthest room toward the window. This is not true cross-ventilation, but it can reduce stagnant zones.

Two-story home

Warm air tends to rise, so upper-floor openings can act as useful outlets during mild weather. Open a lower-level window on the cooler or cleaner side of the home and use an upper-level window or fan as the exhaust point.

Keep stairwell doors open if they are part of the intended path. Be mindful that temperature differences can create strong drafts, especially in shoulder seasons.

Open-plan living area

Open-plan rooms often ventilate faster than divided layouts because there are fewer walls and doors. Use a window or door at one end as the inlet and an exhaust fan at the opposite end.

Large open spaces may still have corners where air moves slowly. A small circulating fan aimed across the room, not directly at the exhaust fan, can help guide air out of those areas.

Safety, Comfort, and Outdoor Air Checks

Cross-ventilation should be used with normal home safety in mind. Secure windows, keep fans stable, and avoid running cords where people may trip. Do not place fans where they can fall from a window or get wet.

For homes with young children or pets, use window stops, screens, and fan guards as appropriate. A screen helps with insects and debris, but it is not a pollution filter and should not be treated as one.

Check outdoor air before extended ventilation

Before airing out a home for a long period, consider outdoor PM2.5, smoke, pollen, temperature, humidity, and nearby sources such as idling vehicles or construction. A short purge may be acceptable in many normal conditions, but longer ventilation is more useful when outdoor air is reasonably clean and comfortable.

Indoor relative humidity is commonly managed around the 30%–50% range for comfort, with prolonged levels above about 60% often treated as a dampness concern. If outdoor air is very humid, extended cross-ventilation can raise indoor humidity instead of improving comfort.

Use caution with add-on air technologies

Ventilation does not require ozone generators, intentionally produced ozone, or unverified air treatment devices. If a device uses ionization, UV-C, or other add-on technology, review safety information carefully and understand that these features are separate from basic air exchange.

Do not bypass safety switches, alter HVAC equipment, or modify exhaust appliances to increase airflow. For combustion appliances, fireplaces, or attached garages, be aware that strong exhaust can affect pressure relationships. If you have concerns, consult a qualified professional.

Maintenance and Tools That Support Faster Air Exchange

Cross-ventilation is mostly about openings and pressure, but basic maintenance can make the setup work better. Dirty screens, obstructed vents, and dusty fan blades can reduce airflow and spread debris around the room.

Clean window screens periodically, especially during pollen season or after dusty weather. Vacuum dust from fan grilles and blades according to the fan’s instructions. Make sure windows open smoothly enough to adjust them in small increments.

Simple monitoring can also help. A carbon dioxide monitor can show whether an occupied room is getting enough air exchange as a trend, especially during gatherings or overnight bedroom use. PM2.5 readings can help you decide whether outdoor air is suitable for ventilation at a given time.

Ventilation and filtration can work together. When outdoor air is not suitable, a properly sized portable air cleaner can recirculate indoor air through filters while windows stay closed. When outdoor air is suitable, ventilation can dilute indoor-generated odors and moisture while filtration continues to reduce particles indoors.

Monitor cues for ventilation decisions. Example values for illustration.
Common indoor air metrics and practical action ideas
Metric or cueWhat it may indicateCommon pitfallAction idea
CO2 trendHow much occupied air is building upTreating one reading as a precise diagnosisVentilate when levels rise during occupancy, if outdoor air is suitable
PM2.5Fine particles indoors or outdoorsOpening windows during smoke or high outdoor particle eventsCompare indoor and outdoor conditions before ventilating
Relative humidityMoisture balance and dampness riskVentilating heavily with very humid outdoor airUse shorter ventilation periods or dehumidification when needed
TemperatureComfort and stack-effect potentialAssuming stronger drafts always mean better comfortVentilate during cooler or milder parts of the day
TVOC trendPossible changes from odors, products, or activitiesExpecting consumer sensors to identify exact chemicalsVentilate after cooking, cleaning, or bringing in new materials when appropriate
Odor or stuffinessA practical comfort cueMasking odors instead of removing or diluting themUse a short purge and address the source if it persists

Related guides: Ventilation vs Air Purifier: When You Need One, the Other, or BothHow to Ventilate in Winter Without Freezing: Practical StrategiesExhaust Fan Best Practices: Bathrooms and Kitchens That Actually Clear Air

Summary: The Practical Rules for Faster Cross-Ventilation

A fast cross-ventilation setup needs a defined inlet, a defined outlet, and an open route between them. In many homes, the simplest approach is one inlet window, one exhaust-side window fan, and open interior doors along the airflow path.

Use 10–30 minutes as a general starting range for a short purge, then adjust based on room size, layout, fan strength, wind, and outdoor conditions. If air movement is weak, avoid adding random openings first. Instead, improve the path, check fan direction, and adjust inlet size.

Ventilation is most useful when outdoor air is acceptable for bringing indoors. During smoke, high particle levels, uncomfortable humidity, or nearby pollution events, keeping windows closed and relying more on filtration or humidity control may be the better practical choice.

Frequently asked questions

What is the best window setup for cross ventilation at home?

The best setup usually uses two openings on different sides of the home, with one acting as the inlet and the other as the outlet. If possible, place them as far apart as practical so air can sweep through the room instead of looping near one window. An exhaust fan at the outlet side often improves the flow.

Should a fan blow in or out for cross ventilation?

In most homes, the most effective starting point is to place the fan blowing outward at the outlet opening. That helps create a pressure difference that pulls fresh air in from the other opening. A second fan can help if it supports the same airflow direction, but it should not oppose the main path.

How long should I ventilate a room to clear stale air?

A short purge of about 10–30 minutes is a practical starting range when outdoor air is suitable. Larger rooms, weaker wind, or more closed-off layouts may need longer. If the room still feels stagnant, focus on improving the airflow path rather than just leaving every window open.

What if my home only has windows on one side?

You can still improve airflow, but it will be harder to create true cross-ventilation. Use one window as the main opening and place a fan to push air outward, then open interior doors to connect nearby rooms. If a door or hallway can safely serve as part of the path, it may help move air farther through the home.

When should I avoid cross ventilation setup at home?

A cross ventilation setup at home is less useful when outdoor air contains smoke, high PM2.5, heavy pollen, or other nearby pollution sources. It can also be a poor choice during very humid weather if opening windows would make indoor conditions less comfortable. In those cases, filtration or humidity control may be the better option.

Morning vs Evening Window Ventilation What Works Better

Open window with abstract indoor airflow

Morning window ventilation is often better for cooler, lower-ozone air, while evening ventilation can work better after heat and indoor buildup, so the best schedule depends on outdoor PM2.5, ozone, pollen, humidity, and temperature.

A useful window ventilation schedule is not simply morning or evening every day. It is a short, intentional air exchange routine that changes with season, weather, outdoor air quality, and what is happening inside the home. The goal is to bring in outdoor air when it is likely to help comfort and dilution without adding avoidable particles, moisture, heat, or odors.

Quick answer
  • Use outdoor air quality as the first check: avoid opening windows when local PM2.5, smoke, or ozone levels are elevated.
  • For many homes, a 5 to 20 minute window flush is enough to reduce stale air without overcooling or overheating the space.
  • Morning often works well in warm seasons because outdoor temperatures are lower and ozone is typically lower than late afternoon.
  • Evening can be useful after cooking, cleaning, gatherings, or a warm day, but check humidity, pollen, smoke, and nearby traffic conditions.
  • If indoor humidity is already above about 60%, be cautious with window ventilation during damp weather.
  • Use CO2, PM2.5, and humidity readings as practical cues when available; no single reading tells the whole story.

What a Window Ventilation Schedule Actually Means

A window ventilation schedule is a planned routine for opening windows to exchange indoor and outdoor air. It can be as simple as opening two windows for 10 minutes after breakfast, or as conditional as opening windows only when outdoor PM2.5 is low and indoor CO2 is rising.

Ventilation matters because indoor air can accumulate moisture, carbon dioxide from occupancy, cooking particles, odors, and gases from normal household activities. Opening windows dilutes these indoor pollutants, but it also brings in outdoor air. That outdoor air may contain pollen, smoke, traffic particles, humidity, or heat.

The practical trade-off is timing. Morning and evening often have different outdoor conditions. Temperature, ozone, pollen release, rush-hour traffic, wind direction, and neighborhood activity can all affect the value of opening a window.

Morning vs Evening Air Quality Trade-Offs

Morning ventilation is often favored when the day will become hot, sunny, or high in ozone. Ground-level ozone generally builds during sunny afternoons, so early hours can be a better time to bring in outdoor air. Morning air may also be cooler, which can help reduce indoor heat before windows are closed for the day.

Evening ventilation can be useful after the home has been occupied all day. It may help clear cooking odors, reduce stuffiness, and release accumulated heat. However, evening conditions can vary. In some areas, traffic emissions, wildfire smoke layers, damp air, or pollen can make evening window opening less useful.

Key factors to compare

  • Outdoor PM2.5: Fine particles from smoke, combustion, dust, and traffic can enter through open windows.
  • Ozone: Often higher on sunny afternoons and early evenings in many regions, especially during warm months.
  • Pollen: Patterns vary by plant type, weather, and location; wind and storms can change conditions quickly.
  • Humidity: Damp outdoor air can raise indoor humidity, especially in bathrooms, basements, and poorly ventilated rooms.
  • Temperature: Cooler outdoor air can help with comfort, but hot or cold air can increase energy demand.
  • Indoor activity: Cooking, cleaning, hobbies, guests, and pets can make a short flush more useful.
Table 1: Morning and evening ventilation decision matrix. Example values for illustration.
Window ventilation timing trade-offs
ConditionMorning may work better whenEvening may work better whenPractical note
Warm sunny dayOutdoor air is cool before heat buildsOutdoor air cools after sunsetCheck ozone before long evening airing
High indoor CO2Bedrooms feel stale after sleepLiving areas feel stuffy after occupancyUse a brief cross-breeze if outdoor air is acceptable
Cooking odorsBreakfast cooking needs a quick flushDinner cooking creates lingering odorsUse local kitchen exhaust first when available
Outdoor smoke or high PM2.5Not ideal if levels are elevatedNot ideal if levels are elevatedKeep windows closed and use filtration if available
Damp weatherMay be acceptable if humidity is moderateCan raise indoor humidity overnightBe cautious if indoor humidity is near or above 60%
Nearby trafficAvoid peak commute windows near busy roadsAvoid evening congestion near busy roadsOpen windows away from the road if possible
Allergy-friendly routineMay be useful after checking local pollenMay be useful if pollen is lower locallyPatterns vary; rely on local readings and comfort cues

Simple Checks Before Opening Windows

The most practical schedule starts with a quick outdoor and indoor check. This does not require complicated equipment, although a basic indoor monitor can make the decision easier.

Outdoor checks

  • Look at local PM2.5 or smoke conditions before opening windows.
  • Check ozone forecasts in warm, sunny weather, especially from afternoon into early evening.
  • Consider pollen reports if pollen affects household comfort.
  • Notice immediate surroundings: traffic, lawn equipment, construction, outdoor grilling, or nearby fires.
  • Compare outdoor temperature and humidity with indoor comfort goals.

Indoor checks

  • If CO2 is elevated in an occupied room, a short window flush may help dilute stale air.
  • If PM2.5 rises during cooking, use kitchen exhaust and consider a brief opening only if outdoor air is clean.
  • If indoor humidity is above about 60%, avoid bringing in damp outdoor air unless it is drier outside.
  • If the room is already comfortable and outdoor air is poor, keeping windows closed may be the better choice.

Numbers from consumer monitors should be treated as practical signals, not exact laboratory measurements. Trends are often more useful than a single reading.

How to Build a Practical Daily Window Routine

A good schedule is short, repeatable, and adjustable. In many homes, the best approach is a brief morning or evening flush rather than leaving windows open for hours.

Use the short flush method

Open windows for about 5 to 20 minutes when outdoor conditions are favorable. If the home layout allows it, open windows on opposite sides to create cross-ventilation. Interior doors can be opened to improve air movement between rooms.

After the flush, close windows and let filtration, heating, cooling, or dehumidification maintain indoor conditions. This approach limits the time that outdoor particles, moisture, and temperature swings can enter.

Match timing to season

  • Spring: Check pollen and wind. Short openings may be better than long airing sessions.
  • Summer: Morning is often useful before heat and ozone build. Evening may help if outdoor air has cooled and pollutant levels are acceptable.
  • Fall: Watch for wildfire smoke, leaf dust, and temperature swings.
  • Winter: Use brief ventilation bursts to reduce stuffiness without major heat loss.

Common Mistakes and Troubleshooting Cues

The most common mistake is assuming fresh air is always better. Outdoor air can be very helpful, but only when its quality and moisture level make sense for the home.

  • Leaving windows open during high PM2.5: Smoke and fine particles can enter quickly and may take time to clear.
  • Airing during humid evenings: Moist air can raise indoor humidity overnight, especially in bedrooms and basements.
  • Opening only one small window: This may provide little air exchange unless there is wind or a pressure difference.
  • Ignoring source control: Ventilation helps dilute pollutants, but it does not replace range hoods, bathroom fans, or good storage practices for household chemicals.
  • Depending only on smell: Some pollutants and humidity issues may not have a strong odor.

If a room still feels stale after a 10 minute flush, try improving the airflow path. Open a second window, open interior doors, or use an exhaust fan already designed for household ventilation. If outdoor air is poor, keep windows closed and rely on filtration and source control instead.

Real-World Morning and Evening Examples

Different homes need different schedules. The examples below are general planning scenarios, not fixed rules.

Bedroom after sleeping

A bedroom may have higher CO2 in the morning after people have slept with doors or windows closed. If outdoor air is acceptable, opening windows for 10 minutes after waking can be a simple way to refresh the room. In cold weather, even 5 minutes may be enough to noticeably reduce stuffiness.

Open-plan living area after dinner

Cooking can raise particles, odors, and moisture in an open-plan space. Use the kitchen exhaust fan during cooking if available. After cooking, an evening window flush can help if cooking odors, outdoor PM2.5, humidity, and ozone are reasonable.

Apartment near a busy road

Traffic exposure can change by hour and window location. A window facing a courtyard or side street may be more practical than one facing heavy traffic. Avoiding peak commute times can be more important than choosing morning or evening generally.

Home during wildfire smoke season

When smoke is present, window ventilation is usually not the right tool. Keep windows closed, reduce indoor particle sources where practical, and use appropriately sized filtration if available. Resume short ventilation only when outdoor particle levels improve.

Safety, Standards, and Sensible Limits

Window ventilation should be used with basic safety and building considerations in mind. Keep windows secure, use screens where appropriate, and avoid opening windows that create fall or entry risks.

Do not use window ventilation as a substitute for properly installed and maintained combustion appliance venting. If a home has fuel-burning appliances, fireplaces, or attached garages, follow applicable safety guidance and use carbon monoxide alarms as required or recommended by local codes.

Be cautious with devices that intentionally generate ozone. Ozone is a lung irritant and should not be generated indoors as an air cleaning strategy. Ionizers and UV-C features should be evaluated carefully and used only as intended by the manufacturer; they do not replace source control, ventilation, filtration, or moisture management.

For bathroom and kitchen moisture, use exhaust fans that are already installed and intended for that purpose. Do not modify appliances, block vents, or bypass safety controls to change airflow.

Maintenance, Monitoring, and Weekly Upkeep

A window schedule works best when paired with routine upkeep. Clean window tracks and screens periodically so airflow is not blocked by dust or debris. Check that exhaust fans move air and are not clogged with lint or visible buildup.

If using portable air filtration, replace filters based on the device instructions and actual conditions. Homes with pets, smoke events, heavy cooking, or high dust may load filters faster. A clogged filter can reduce airflow and make the system less effective for general particle reduction.

Monitoring can help refine the schedule. CO2 can indicate occupancy-related ventilation needs. PM2.5 helps show when particles rise indoors or enter from outdoors. Relative humidity helps guide whether opening windows will support or undermine moisture control.

Table 2: Basic monitor metrics for window ventilation decisions. Example values for illustration.
Monitor metrics guide
MetricWhat it indicatesCommon pitfallAction idea
CO2Occupancy and ventilation balanceTreating one number as exactUse trends to decide when to flush air
PM2.5Fine particle levels indoors or outdoorsOpening windows when outdoor particles are highKeep windows closed during smoke or high particle periods
Relative humidityMoisture level in indoor airAiring during damp weather without checking humidityAim for a generally comfortable indoor range, often about 30% to 50%
TVOCPossible gases from products or activitiesAssuming readings identify a specific chemicalVentilate when outdoor air is suitable and reduce sources
TemperatureComfort and energy trade-offLeaving windows open too long in extreme weatherUse brief openings during very hot or cold periods
Outdoor AQI sourceRegional pollution conditionsIgnoring very local sources like traffic or grillingCombine reports with what you observe near the home

Related guides: Indoor Air Quality Monitors: What to Measure (PM2.5, CO2, VOCs, Humidity)Ventilation vs Air Purifier: When You Need One, the Other, or BothHow to Ventilate in Winter Without Freezing: Practical Strategies

Summary Takeaways for Morning vs Evening Ventilation

Morning vs evening window ventilation is not a fixed rule. Morning often has advantages for cooler air and lower ozone, while evening can help clear heat, odors, and occupancy-related stuffiness after the day. The better choice is the time when outdoor air is cleaner, drier if needed, and comfortable enough for a short exchange.

Use a simple decision sequence: check outdoor PM2.5, ozone, pollen, humidity, and temperature; consider indoor CO2, odors, particles, and moisture; then open windows briefly if the trade-off is favorable. A 5 to 20 minute cross-ventilation period is often more practical than leaving windows open without a plan.

When outdoor air quality is poor, skip the window flush and focus on source control, exhaust fans, and filtration. When outdoor air is favorable, a consistent morning or evening routine can be a low-cost part of a balanced home air quality plan.

Frequently asked questions

Is morning or evening better for window ventilation in most homes?

Morning is often better in warm weather because outdoor temperatures are usually lower and ozone levels are often lower than later in the day. Evening can be better after a hot day or after indoor activities that created odors, moisture, or stuffiness. The best choice depends on local outdoor air quality and indoor conditions.

How long should I open windows for a quick air exchange?

For many homes, 5 to 20 minutes is enough for a short flush when outdoor air is acceptable. Cross-ventilation with windows on opposite sides of the home can improve airflow and reduce the time needed. Leaving windows open for much longer is not always better if outdoor air quality is poor or the weather is extreme.

Should I avoid window ventilation when ozone is high?

Yes, if local ozone is elevated, it is usually better to keep windows closed and ventilate at another time. Ozone often rises on sunny afternoons and into early evening during warm months. Morning is often the safer time if you want outdoor air and ozone is lower then.

Does evening ventilation increase indoor humidity?

It can, especially in damp weather or in homes that already have humidity issues. Bringing in humid evening air may raise indoor relative humidity overnight, which can make bedrooms, basements, and bathrooms feel less comfortable. If indoor humidity is already near or above 60%, be cautious with evening window opening.

What should I check before deciding between morning vs evening window ventilation?

Check outdoor PM2.5, ozone, pollen, humidity, and temperature first. Then consider indoor CO2, odors, cooking particles, and moisture levels. If outdoor air is clean and conditions are comfortable, either morning or evening may work well depending on whether you want cooler air or want to clear buildup from the day.