
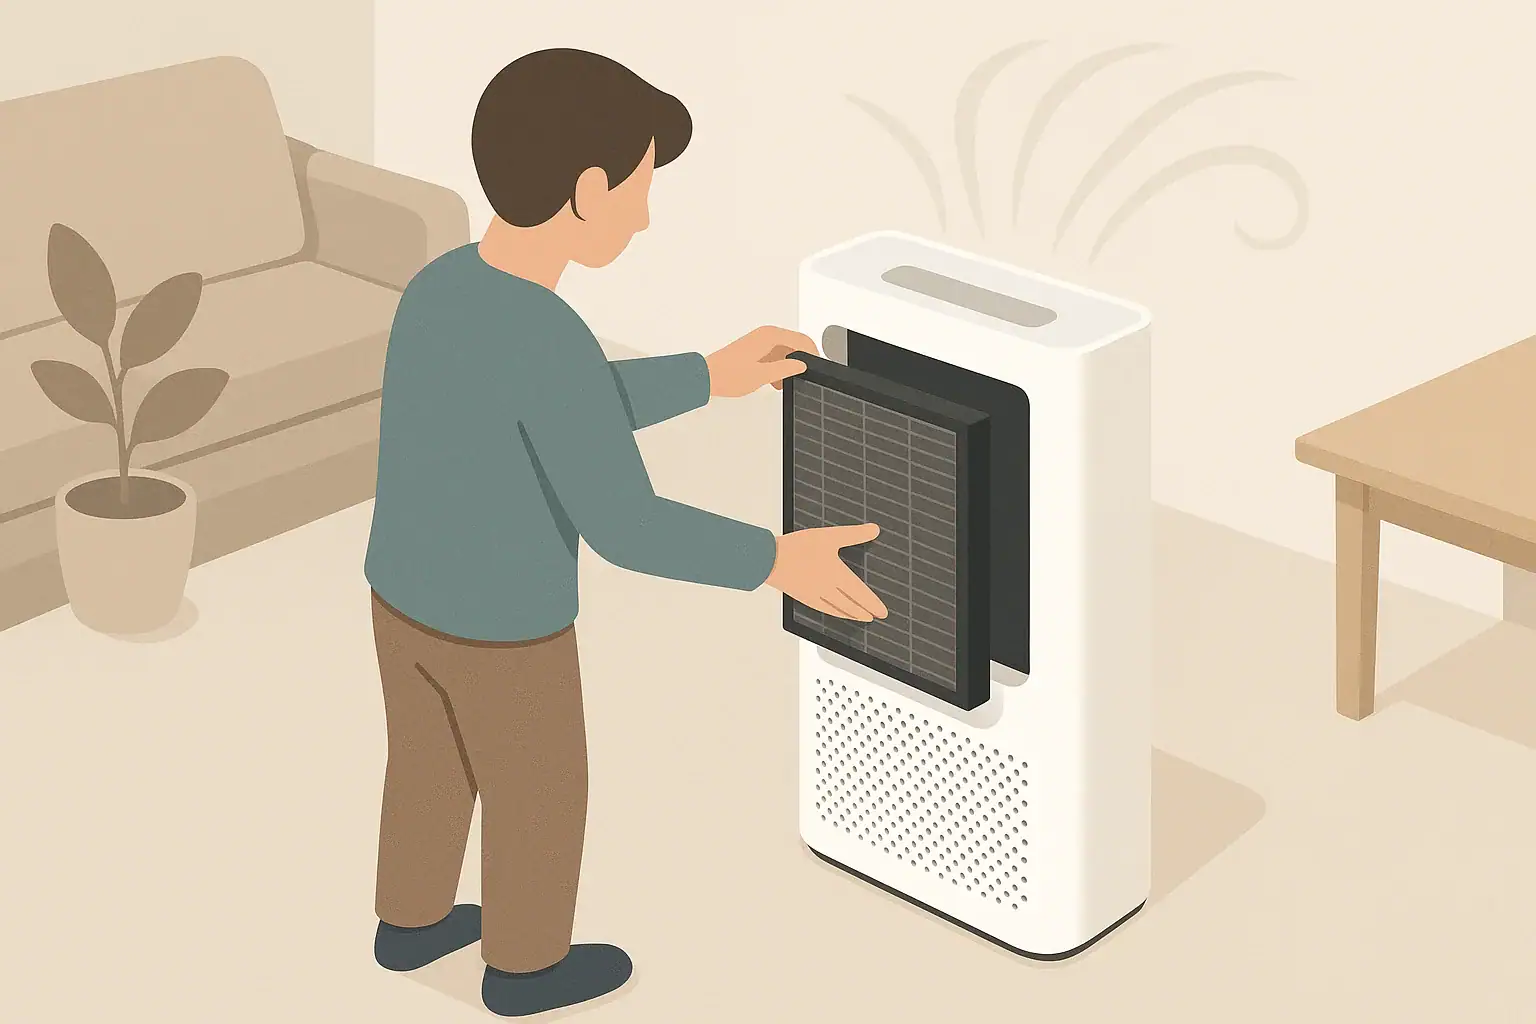
An effective air purifier maintenance checklist tells you exactly when to clean, inspect, and replace filters so the unit keeps cleaning your air instead of just making noise. By following a simple routine, you protect airflow, reduce dust, and avoid running clogged filters that waste energy. This applies to most home air cleaners, whether you use them for allergies, smoke, or general indoor air quality.
Below you will find a practical schedule for pre-filters, HEPA and carbon filters, sensor care, and exterior cleaning, along with common mistakes to avoid. Use this as a starting point, then adjust based on your room size, pollution levels, and how many hours per day the purifier runs. Always check your specific manual for model-specific instructions and safety notes.
Why an Air Purifier Maintenance Checklist Matters
Air purifiers work by pulling room air through one or more filters, trapping particles and sometimes odors and gases. When filters are clean and air can move freely, the purifier can cycle the room air as designed. When filters are overloaded, blocked, or installed incorrectly, performance drops quickly even if the fan sounds normal.
A clear air purifier maintenance checklist helps you:
- Keep airflow strong: Clean filters and open vents allow the unit to process more air per hour.
- Stabilize indoor dust levels: Regular pre-filter cleaning reduces dust settling on furniture and floors.
- Control energy use and noise: A clogged filter forces the fan to work harder, which can increase power draw and sound levels.
- Plan filter costs: Knowing approximate replacement intervals lets you budget for cartridges and avoid surprise expenses.
- Extend appliance life: A well-maintained fan motor and clean airflow path put less stress on internal parts.
Think of maintenance as part of owning an air purifier, similar to changing HVAC filters or cleaning a clothes dryer lint trap. A few minutes each month usually prevents bigger problems later.
Core Filter and Sensor Tasks in Your Checklist
Most home air purifiers share the same core components: a pre-filter, a main particle filter (often HEPA or HEPA-type), an optional activated carbon layer, and sometimes built-in sensors. Each piece has a specific job and its own maintenance needs.
Typical filter stack and care tasks:
- Pre-filter: Captures hair, lint, and coarse dust. Usually cleaned every 2–4 weeks by vacuuming or rinsing if the manual allows.
- Main particle filter: Traps fine particles like dust, smoke particles, and pollen-sized particles. Often replaced every 6–12 months, with visual checks every 1–3 months.
- Activated carbon or odor filter: Adsorbs certain odors and gases. Commonly replaced every 3–6 months, or sooner in heavy-odor environments.
- Built-in sensors (if present): Monitor particles or gases to drive auto mode. Typically dusted every 2–3 months so readings stay responsive.
Because actual lifespans vary, it helps to compare your home conditions to typical use. The table below summarizes baseline intervals and what might push you toward the shorter or longer end of the range.
| Component | Typical baseline interval | Shortens interval | Lets you stretch interval |
|---|---|---|---|
| Washable pre-filter | Clean every 2–4 weeks | Multiple pets, visible lint, heavy carpet dust | Hard flooring, minimal shedding, light dust |
| Main particle filter (HEPA or similar) | Replace every 6–12 months | Wildfire smoke events, frequent high fan use | Short daily runtime, low outdoor pollution |
| Carbon / odor filter | Replace every 3–6 months | Frequent cooking, strong indoor odors, solvents | Low odor load, good kitchen and bathroom ventilation |
| Built-in particle or VOC sensor | Dust every 2–3 months | Dusty rooms, placement near floor or vents | Elevated placement, regular room dusting |
Example values for illustration.
Pre-Filter: First Line of Defense
The pre-filter is your easiest and most frequent task. It sits at the intake and catches larger debris before it reaches finer filters.
- Inspect: Every 2–4 weeks. Look for visible gray film, hair mats, or lint.
- Clean: Light vacuuming with a brush attachment is usually safe. If the manual allows rinsing, wash gently with lukewarm water and let it dry completely before reinstalling.
- Replace: If the pre-filter tears, warps, or no longer comes clean, replace it even if the schedule suggests it should last longer.
Keeping the pre-filter clear often has the biggest impact on day-to-day airflow and fan noise.
Main Particle Filter (HEPA or HEPA-Type)
The main particle filter captures the fine particles that affect allergies and haze. It loads more slowly than the pre-filter but is critical to overall performance.
- Inspect: Every 1–3 months. Look for darkened pleats, caked dust, or uneven discoloration.
- Replace: Commonly every 6–12 months of typical use. Heavy smoke, construction dust, or long daily runtimes may require earlier replacement.
- Handling: Avoid washing or aggressive vacuuming unless the manual explicitly says it is allowed. Moisture and rough handling can damage fine fibers.
Activated Carbon and Odor Filters
Carbon and other sorbent filters do not usually look obviously dirty when they are spent. Instead, you notice a gradual return of odors.
- Inspect: Every 1–3 months for physical damage, sagging, or loose granules.
- Replace: Often every 3–6 months. In homes with frequent cooking, strong pet or smoke odors, or solvent use, expect the shorter end of the range.
- Do not wash: Water and detergents typically ruin the adsorption structure and can make the filter ineffective.
Filter Indicators and Timers
Many purifiers use run-time-based reminders. They estimate filter life from hours of operation and fan speed rather than measuring actual dust loading.
- Treat indicator lights as prompts to inspect, not absolute rules.
- Combine reminder lights with visual checks and airflow changes.
- After installing new filters, reset the indicator according to the manual so future reminders stay accurate.
Sensor Care and Auto Mode
Built-in sensors help auto mode respond to real-time changes in particles or gases. Dust on the sensor inlet can cause sluggish or incorrect readings.
- Find the inlet: Look for a small slot or vent on the side or back separate from the main intake.
- Clean: With the unit unplugged, gently dust around the inlet with a soft brush or dry cotton swab every few months.
- Watch behavior: If readings never change, or the fan never ramps up during obvious pollution events, the sensor or its inlet may need attention.
Real-World Maintenance Examples
How often you follow each step in your air purifier maintenance checklist depends on how and where you use the device. These scenarios show how you might adjust the baseline schedule.
Example 1: Allergy Relief in a Bedroom
In a bedroom used mainly at night with doors and windows closed, dust and pollen loads are often moderate.
- Run time: 8–10 hours per night on a low or medium setting.
- Pre-filter: Quick vacuum once a month; more often during peak pollen season.
- Main filter: Visual check every 3 months; likely replacement around 9–12 months.
- Carbon filter (if present): Replace every 4–6 months if odors are mild.
- Sensor: Dust the inlet twice a year if the unit has auto mode.
Example 2: Open-Plan Living Room With Pets
A purifier in a large living space with dogs or cats often sees more hair, dander, and tracked-in dust.
- Run time: 10–16 hours per day, varying fan speed.
- Pre-filter: Check every 2 weeks; clean whenever you see hair mats or visible gray film.
- Main filter: Inspect every 1–2 months; replacement closer to 6–9 months is common.
- Carbon filter: Replace every 3–4 months if pet odors linger.
- Sensor: Dust every 2–3 months to keep auto mode responsive.
Example 3: Small Apartment During Smoke Season
In regions with wildfire smoke or frequent outdoor burning, filters can load rapidly during certain months.
- Run time: Often 24 hours per day on medium or high during smoke events.
- Pre-filter: Clean weekly while outdoor smoke is heavy.
- Main filter: Inspect monthly; replacement may be needed at 3–6 months instead of 6–12.
- Carbon filter: Replace every 2–3 months during active smoke periods to manage odor.
- Sensor: Dust more often if the purifier sits near open windows or doors.
Example 4: Light-Duty Office or Study
A purifier in a home office with limited foot traffic and no pets may need less frequent service.
- Run time: 6–8 hours per weekday on low.
- Pre-filter: Clean every 4–6 weeks as needed.
- Main filter: Replacement may be closer to the 12-month mark.
- Carbon filter: Replace every 6 months or when coffee and lunch odors linger longer than before.
- Sensor: Light dusting once or twice a year.
| Scenario | Pre-filter care | Main filter replacement | Carbon filter replacement |
|---|---|---|---|
| Bedroom allergy use | Vacuum monthly; more often in pollen season | About every 9–12 months | Every 4–6 months if odors are mild |
| Living room with pets | Vacuum every 2 weeks | About every 6–9 months | Every 3–4 months |
| Smoke season use | Clean weekly during heavy smoke | About every 3–6 months | Every 2–3 months |
| Light-duty office | Clean every 4–6 weeks | About every 10–12 months | About every 6 months |
Example values for illustration.
Common Maintenance Mistakes and Troubleshooting Cues
Even a good air purifier maintenance checklist can go off track if a few key details are missed. Recognizing early warning signs helps you fix issues before performance drops too far.
Frequent Mistakes That Reduce Performance
- Running with missing filters: Some users remove a clogged filter and run the unit temporarily without it. This can pull dust into internal parts and does not clean the air.
- Stacking filters in the wrong order: Reinstalling a carbon pad in front of the pre-filter, or flipping a directional filter, can restrict airflow or allow bypass.
- Ignoring damaged gaskets: Cracked or compressed seals around the filter frame allow unfiltered air to leak around the edges.
- Washing non-washable filters: Attempting to rinse a non-washable main filter can collapse fibers, reduce efficiency, and promote mold if it never fully dries.
- Blocking intakes and outlets: Placing the purifier tight against walls, curtains, or furniture can severely cut effective airflow.
Performance Clues That Point to Maintenance Needs
Watch and listen for these changes as part of routine troubleshooting:
- Increased fan noise at the same setting: Often indicates restricted airflow from a dirty pre-filter or main filter.
- Weaker airflow from the outlet: With unchanged fan speed, this usually means filters are loaded or incorrectly seated.
- Persistent odors: If smells linger longer than they used to, the carbon filter may be exhausted even if it looks normal.
- Dust settling faster on nearby surfaces: Can signal that the main filter is saturated or that air is bypassing around filters.
- Auto mode behaving oddly: If the fan never ramps up during cooking or cleaning, the sensor may be dusty or malfunctioning.
Simple Troubleshooting Steps
- Confirm the unit is on the intended fan setting and not in a special mode that limits speed.
- Turn off and unplug the purifier before opening panels or handling filters.
- Remove each filter in order, check for arrows or orientation markings, and reinstall according to the manual.
- Clean or replace the pre-filter, then recheck airflow and noise.
- Inspect the main and carbon filters for heavy loading or damage; replace if in doubt, especially if they are beyond the recommended interval.
- Dust the sensor inlet gently and observe whether auto mode behavior improves over the next day or two.
Safety Basics for Air Purifier Cleaning and Filter Changes
Most air purifier maintenance tasks are straightforward, but following a few high-level safety steps protects both you and the appliance.
Electrical and Handling Safety
- Always unplug before opening: Turn the unit off and disconnect it from the outlet before removing covers, grilles, or filters.
- Let moving parts stop: Wait for the fan to come to a complete stop before reaching near the intake or outlet.
- Check the cord: During seasonal checks, inspect the cord and plug for cuts, frays, or heat damage. Discontinue use if you see issues.
- Use gentle force: Do not pry panels with sharp tools; use the designated latches or handles to avoid cracking plastic housings.
Dust, Allergens, and Odor Safety
- Avoid shaking filters indoors: Shaking or tapping loaded filters can release dust back into the room.
- Consider a mask and gloves: If you are sensitive to dust, smoke, or pet dander, simple personal protection can reduce irritation during filter changes.
- Bag used filters: Place spent filters directly into a trash bag, seal it, and dispose of it according to local waste rules.
Cleaning Product Safety
- Use mild cleaners sparingly: For exterior surfaces, a slightly damp cloth with mild soap is usually enough. Avoid strong solvents or abrasive pads.
- Never spray directly into vents: Apply any cleaner to the cloth, not into grilles, controls, or sensor inlets.
- Keep moisture away from electronics: Do not allow water to drip into control panels, seams, or the power inlet.
Children, Pets, and Placement Safety
- Place the purifier where children and pets cannot easily tip it over or block the vents with toys or bedding.
- Use stable, level surfaces and avoid stacking the purifier on unstable furniture.
- Route the power cord to minimize tripping hazards and avoid pinching under doors or furniture.
Long-Term Care, Storage, and Budget Planning
Beyond day-to-day cleaning, long-term care keeps your air purifier reliable over multiple years and helps you plan for filter costs.
Seasonal and Annual Checkups
- Inspect the housing for cracks, warping, or loose panels that could affect seals.
- Verify that all latches and filter doors close securely without gaps.
- Confirm that fan speeds change smoothly and that any display or indicator lights function as expected.
- Review the manual annually to see if there are any model-specific service notes you may have overlooked.
Storing an Air Purifier You Use Seasonally
If you only use the purifier during allergy or smoke seasons, short-term storage can help preserve filters and electronics.
- Before storage: Clean the pre-filter, wipe exterior surfaces, and consider replacing heavily used carbon filters so odors do not concentrate inside the unit.
- Remove or keep filters installed: Follow the manual; some models prefer filters to remain installed to protect internal surfaces, while others allow removal and separate storage in sealed bags.
- Choose a dry location: Store in a cool, dry area away from direct sunlight and high humidity to reduce risk of mold or warping.
- Cover lightly: A breathable cover or cloth can keep dust off without trapping moisture.
Planning Filter Replacement Costs
Filter costs are a significant part of owning an air purifier. A simple planner helps avoid surprises.
- Write the installation date on each new filter with a permanent marker.
- Note expected replacement month based on your typical intervals.
- Group maintenance for multiple purifiers on the same weekend to streamline tasks and ordering.
- Track how long your first set of filters actually lasts; adjust your calendar and budget based on real experience.
Coordinating With Other Indoor Air Strategies
- Pair purifier maintenance with changing HVAC filters to keep whole-home airflow clean.
- Use kitchen and bathroom exhaust fans to reduce the load on carbon filters from cooking and moisture-related odors.
- Manage humidity so filters and internal surfaces stay dry and less hospitable to mold growth.
Putting It All Together: Practical Takeaways and Specs to Watch
Once your air purifier maintenance checklist is in place, most tasks become quick habits that fit into regular cleaning routines. The goal is consistent airflow, predictable filter costs, and reliable sensor feedback.
Key Takeaways for Everyday Use
- Clean or vacuum the pre-filter regularly; it has the biggest day-to-day effect on airflow and noise.
- Inspect the main particle filter every few months and replace it within the recommended 6–12 month window, sooner in heavy-use conditions.
- Use odor return, not just appearance, to judge carbon filter replacement timing.
- Keep intakes and outlets clear of walls, curtains, and furniture so the purifier can move air as designed.
- Dust sensor inlets periodically so auto mode remains responsive to real changes in air quality.
Specs and Features to Look For When Maintenance Matters
If you are comparing air purifiers with long-term maintenance in mind, certain specifications and design details can make upkeep easier and more cost-effective.
- Filter accessibility: Front or top-loading filter doors that open without tools make routine checks simpler.
- Clear filter labeling: Arrows or markings showing airflow direction and installation order reduce mistakes after cleaning.
- Separate pre-filter layer: A distinct, washable pre-filter can significantly extend the life of more expensive main filters.
- Available replacement filters: Filters that are easy to source and sold individually or in multi-packs support long-term use.
- Filter life indicators: Time-based or usage-based reminders help you stay on schedule, especially if you run the unit many hours per day.
- Sensor access: A clearly marked sensor inlet or removable dust cover simplifies periodic cleaning.
- Published maintenance guidance: Manuals that specify cleaning methods and intervals reduce guesswork and help you avoid damaging filters.
By combining a realistic maintenance checklist with thoughtful product choices, you can keep your air purifier working efficiently for years while keeping indoor air cleaner and more comfortable.
Frequently asked questions
Which air purifier specifications and features most reduce upkeep and ongoing filter costs?
Look for easy filter access (front or top loading), a separate washable pre-filter to trap large debris, clear installation markings, and widely available replacement filters sold individually or in multi-packs. Filter life indicators and easily accessible sensor inlets also simplify routine care and help you avoid unnecessary replacements.
Is it safe to run an air purifier if a filter is missing or installed incorrectly?
Running a purifier without a required filter or with filters installed improperly can allow unfiltered air and dust into internal components, reduce cleaning effectiveness, and potentially damage the fan or motor. Always reinstall filters in the correct order and orientation before operating the unit.
What are the key safety steps before opening or disassembling an air purifier?
Unplug the unit and wait for any moving parts to stop before opening panels or removing filters. Use gentle hand force on latches, avoid spraying liquids into vents, and consider gloves and a mask if you are sensitive to dust when handling spent filters.
How can I tell when a carbon or odor filter needs replacing if it doesn’t look dirty?
Carbon and sorbent filters often show performance loss as a gradual return of odors rather than visible dirt. Use odor persistence, heavy cooking or smoke events, and the manufacturer’s recommended intervals to decide when to replace the filter.
Can I wash or vacuum a HEPA/main particle filter to make it last longer?
Most true HEPA filters should not be washed because moisture and scrubbing can damage the fine fibers and reduce efficiency; aggressive vacuuming is also risky unless the manual specifically permits it. Follow the manufacturer’s guidance and replace the filter when visual loading or performance indicates it’s spent.
How should I maintain built-in sensors so auto mode gives accurate readings?
Periodically dust around the sensor inlet with a soft brush or dry cotton swab while the unit is unplugged, and avoid placing the purifier immediately next to floors or vents that constantly blow dust into the inlet. If auto responses remain sluggish after cleaning, inspect placement and consider professional service if the sensor appears faulty.
- Clear sizing logic (room size → CADR/ACH)
- HEPA vs carbon explained for real use-cases
- Humidity + ventilation basics to reduce mold risk