Distilled vs Tap Water in Humidifiers: What Matters

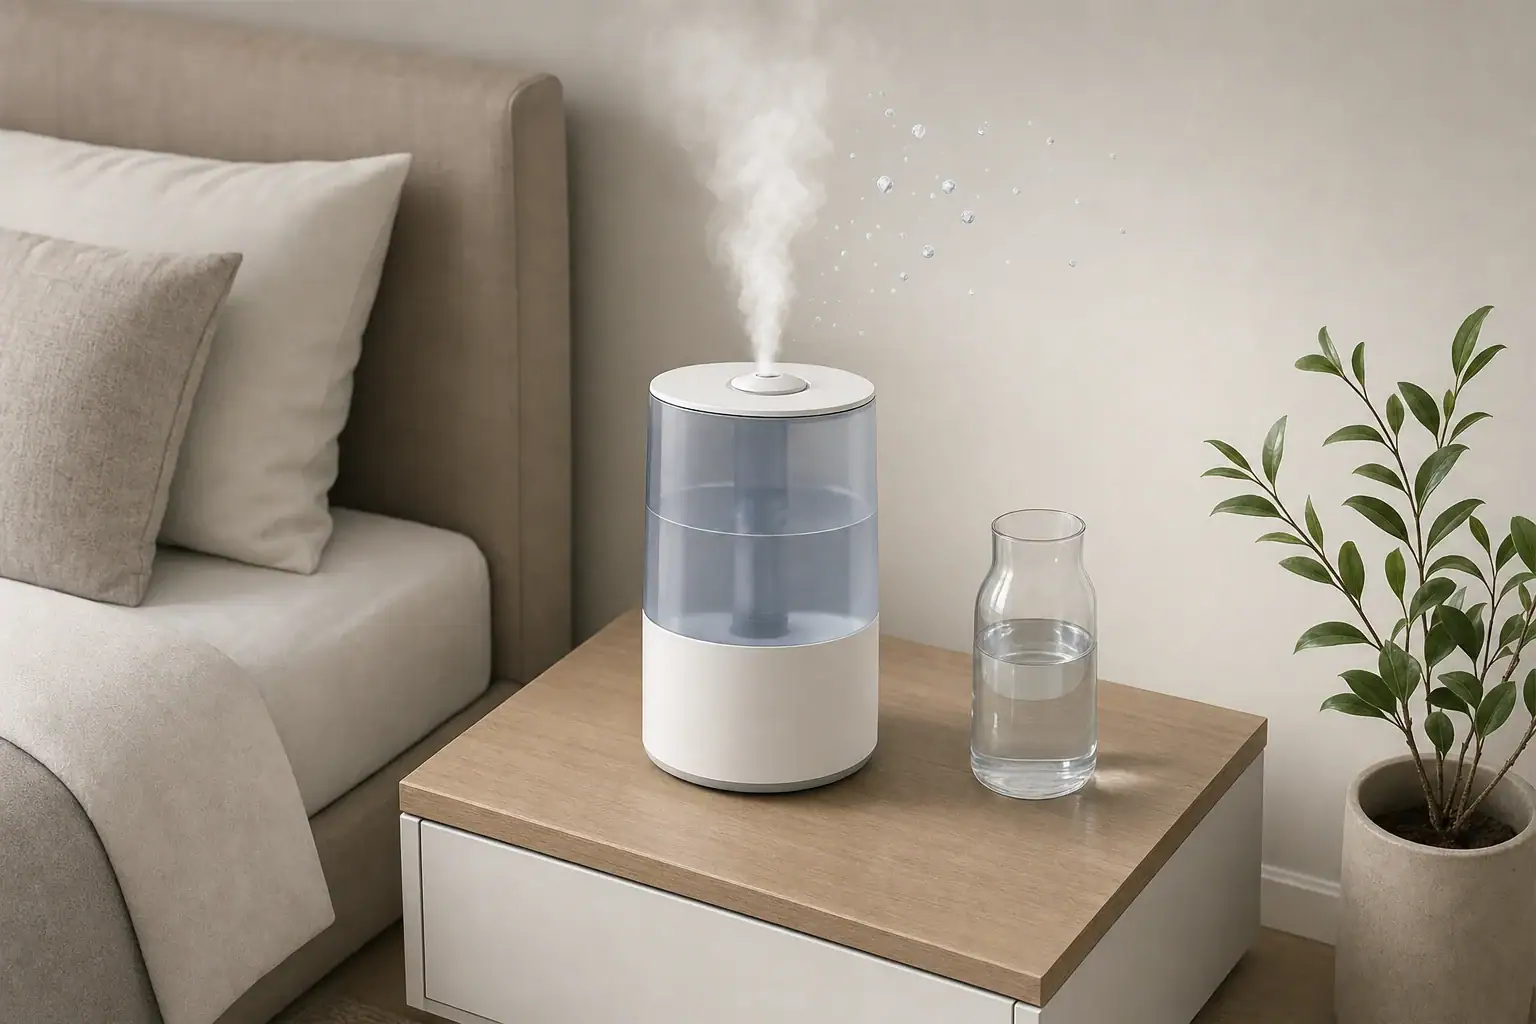
Humidifier producing gentle mist in a neutral bedroom

Distilled water is generally the better choice for humidifiers because it contains far fewer dissolved minerals than tap water, reducing white dust and mineral buildup.

Tap water may still be acceptable when the humidifier instructions permit it, especially in evaporative models, but maintenance needs may increase. The practical choice depends on water hardness, humidifier type, operating time, and how often the unit is cleaned.

Quick answer

  • Use distilled or low-mineral water to minimize white dust, especially in ultrasonic humidifiers.
  • Aim for roughly 30% to 50% indoor relative humidity as general guidance.
  • Reduce output if humidity exceeds 50% or condensation appears on windows and nearby surfaces.
  • Empty, rinse, and refill the tank daily when the humidifier is in regular use.
  • Clean the unit about every three days, or according to its instructions and visible buildup.

Distilled Water vs Tap Water: The Main Difference

Tap water usually contains naturally occurring dissolved minerals, including calcium and magnesium. The amount varies by local water source and treatment system. Water with a higher concentration of these minerals is commonly described as hard water.

Distilled water is made by turning water into vapor and condensing that vapor back into liquid. This process removes most dissolved minerals. It does not mean that an opened container remains sterile, so clean handling and routine humidifier maintenance are still necessary.

The difference matters because a humidifier does not always leave minerals behind in the tank. Some designs can disperse tiny mineral particles along with water droplets. After the droplets evaporate, the dry particles may settle on furniture, electronics, floors, and other surfaces as white dust.

Filtered water is not automatically equivalent to distilled water. Common pitcher, faucet, and refrigerator filters may improve taste or reduce selected substances without removing most dissolved minerals. Reverse-osmosis and demineralization systems can reduce mineral content substantially, but their results depend on system condition and water quality.

How Humidifiers Create White Dust and Scale

White dust is most closely associated with ultrasonic humidifiers. These units use rapid vibration to produce a fine mist from the water in the reservoir. If the water contains minerals, some of those minerals can travel into the room with the mist.

The amount of dust depends on several factors:

  • Water hardness: More dissolved mineral content generally means greater white-dust potential.
  • Daily water use: A unit that disperses one gallon per day introduces more water-derived material than one using a fraction of that amount.
  • Operating time and output: Long runtimes and high mist settings can increase deposits.
  • Room airflow: Fans, supply vents, and open doors can spread fine residue beyond the immediate area.
  • Cleaning frequency: Existing scale can make surfaces harder to clean and can interfere with normal operation.

Scale is different from airborne white dust. Scale is the chalky or crusty material left inside the tank, base, heating chamber, or wick area as water evaporates. Distilled water reduces both problems, although small deposits can still develop from contamination, residual water, or incomplete mineral removal.

Comparison of common water choices for humidifiers

Example values for illustration.

Water type, white-dust potential, and maintenance considerations
Water choice Mineral level White-dust potential Practical note
Distilled water Very low Low Usually the simplest option for limiting residue
Tap water Varies by location Low to high Hard water can create substantial dust and scale
Basic filtered water Often similar to tap water Varies Many filters do not remove dissolved minerals
Reverse-osmosis water Generally low Generally low Performance depends on membrane condition
Demineralized water Low Low Check the label and appliance instructions
Softened water Minerals altered, not eliminated Still possible May add sodium or potassium to the water

How Humidifier Type Changes the Water Choice

Ultrasonic humidifiers

Ultrasonic units have the strongest reason to use distilled or similarly low-mineral water. Because they mechanically create droplets from reservoir water, minerals and contaminants in that water can also become airborne. A demineralization cartridge may reduce residue, but its effectiveness and replacement interval depend on water hardness and usage.

Evaporative humidifiers

Evaporative models draw water through a wick while a fan moves air across the wet material. Many minerals remain in the wick rather than entering the room, so visible white dust is usually less common. However, tap water can shorten wick life by leaving stiff, discolored, or crusty deposits.

Distilled water may reduce wick buildup, but it does not eliminate the need to inspect and replace the wick. A permanently wet or heavily scaled wick can lose output and develop odors.

Warm-mist and steam humidifiers

Warm-mist units heat water before releasing moisture. Minerals are generally left behind in the heating chamber, where they form scale instead of widespread white dust. Hard tap water may therefore require more frequent descaling.

These appliances also introduce a burn risk from hot water or steam. They should be placed on a stable surface away from children, pets, bedding, curtains, and traffic paths.

How to Choose Water Without Guessing

Start with the humidifier’s instructions. Some units are designed for tap water, while others specifically recommend distilled or demineralized water. Follow any restrictions concerning water additives, cartridges, cleaning agents, or acceptable water sources.

If the instructions allow several options, use this practical checklist:

  • Choose distilled water if an ultrasonic unit produces visible white residue.
  • Consider low-mineral water if local tap water is hard or scale forms within a few days.
  • Continue with tap water if the appliance permits it, residue is minimal, and routine cleaning remains manageable.
  • Do not assume softened water is mineral-free. Conventional softeners exchange hardness minerals for sodium or potassium rather than removing all dissolved material.
  • Avoid unapproved additives. Essential oils, fragrances, disinfectants, and inhalation products can damage a unit or release substances it was not designed to disperse.

Cost and convenience also matter. A humidifier using half a gallon each night would require about 15 gallons over 30 nights. That example can help a household compare the recurring cost of purchased distilled water with the cleaning time and replacement parts associated with tap water.

Water sold as purified may be processed by distillation, reverse osmosis, deionization, or another method. Check the stated treatment method rather than relying only on the word purified.

Troubleshooting White Dust, Scale, and Low Output

White powder appears around the room

First, confirm whether the humidifier is ultrasonic. Switch to distilled or verified low-mineral water, wipe nearby surfaces with a damp cloth, and clean the reservoir and base. If the model uses a demineralization cartridge, inspect or replace it according to its instructions.

Air purifiers may capture some airborne particles, but they do not address the source. Changing the water or humidification method is the more direct way to control mineral dust.

Crust forms inside the base

Scale indicates that water is evaporating and leaving minerals behind. Unplug the appliance and follow its descaling procedure. A manufacturer-approved soak may loosen deposits, but cleaning solutions should never be mixed unless the instructions explicitly call for it.

The humidifier runs but output falls

Reduced output can result from a scaled ultrasonic plate, coated heating element, clogged wick, blocked air intake, or incorrect assembly. Clean accessible components as directed. Replace consumable wicks or cartridges rather than scraping, modifying, or bypassing them.

There is a musty or stale odor

Odor often signals standing water, residue, or a saturated wick. Empty the tank, clean and dry the unit, and replace a wick that remains odorous after approved maintenance. Distilled water limits minerals but does not prevent microbial growth in neglected water.

Practical Water Choices in Common Home Scenarios

Bedroom with an ultrasonic humidifier

Distilled water is generally the practical choice when the unit runs near furniture, electronics, or dark surfaces where white dust is easy to see. Keep the mist outlet away from bedding, walls, and the sleeper’s face. Use a separate humidity meter if the built-in control does not reflect conditions across the room.

Living room with an evaporative humidifier

Tap water may be workable because the wick captures much of the mineral residue. Inspect the wick weekly during frequent use. If it becomes rigid quickly or output declines, lower-mineral water may reduce replacement frequency.

Home with very hard tap water

Hard water can create rapid deposits in any humidifier type. Distilled, reverse-osmosis, or appropriately demineralized water can simplify upkeep. If tap water is used, expect more frequent descaling and potentially shorter wick or cartridge life.

Occasional use during dry weather

For short, intermittent operation, either permitted water choice may be reasonable. The important step is not leaving unused water in the tank between sessions. Empty, rinse, and dry the appliance before storage.

Safe Humidity and Maintenance Planning

Water choice cannot compensate for excessive humidification. A general indoor target is about 30% to 50% relative humidity, although the comfortable and practical level varies with outdoor temperature, building construction, and room conditions.

During cold weather, condensation on windows or exterior walls may appear before the room reaches 50%. Treat condensation as a cue to reduce output, improve air circulation, or operate the humidifier for fewer hours. Damp surfaces should not remain wet.

For regular maintenance:

  • Unplug the appliance before cleaning or moving it.
  • Empty stagnant water and refill with fresh water daily during use.
  • Rinse the tank and wipe accessible wet surfaces as directed.
  • Clean approximately every three days, or more often if film or scale appears.
  • Use only cleaning and descaling methods approved for the unit.
  • Rinse thoroughly so cleaning residue is not dispersed into the room.
  • Let components dry before extended storage.
  • Inspect cords, plugs, seals, wicks, and cartridges for wear.

Place the humidifier on a stable, water-resistant surface with clearance around the air intake and mist outlet. Do not direct mist toward outlets, power strips, electronics, walls, wood furniture, or fabrics. Avoid extension cords unless the appliance instructions and applicable electrical guidance specifically allow them.

Humidifiers do not normally need ionization, ozone generation, or ultraviolet features to add moisture. Do not modify a unit or bypass its safety controls. Any optional feature should be used only as instructed, and it does not replace cleaning or humidity monitoring.

Humidity and maintenance quick plan

Example values for illustration.

Common humidity goals, actions, and warning cues
Goal or cue Simple action Useful tool Maintenance note
Room below 30% Increase output gradually Humidity meter Recheck after conditions stabilize
Room at 30% to 50% Maintain or reduce runtime Humidity meter Continue daily water changes
Room above 50% Lower output or turn unit off Humidity meter Check nearby surfaces for dampness
Window condensation Reduce humidity and improve airflow Visual inspection Dry wet surfaces promptly
White dust Use distilled or low-mineral water Damp cleaning cloth Clean the tank and base
Visible scale or film Descale using approved instructions Cleaning supplies Increase cleaning frequency if needed

Related guides:
Best Indoor Humidity Level to Prevent Mold (With Seasonal Targets)
How to Clean a Humidifier Properly (And How Often)
Humidifier Placement: Near Bed, Near Vent, or Center of Room?
Humidifier Safety: Bacteria Risk, Cleaning, and Safe Humidity Limits

Key Takeaways

Distilled water is usually the most straightforward choice for reducing white dust and mineral scale, particularly in ultrasonic humidifiers. Tap water can be practical in some evaporative or warm-mist models when the instructions allow it, but harder water generally increases cleaning and part-replacement needs.

Whichever water is used, keep indoor relative humidity around 30% to 50% as general guidance and lower the setting if condensation or damp surfaces appear. Fresh water, regular cleaning, correct placement, and timely wick or cartridge replacement matter more than water choice alone.

Frequently asked questions

Is distilled water necessary for an ultrasonic humidifier?

Distilled water is not always required if the appliance instructions allow tap water, but it is usually the best option for ultrasonic humidifiers. Ultrasonic models can disperse dissolved minerals with the mist, which may create white dust and buildup. Low-mineral water can reduce those issues and simplify cleaning.

Can I use filtered water instead of distilled water in a humidifier?

It depends on the type of filter. Many basic pitcher, faucet, and refrigerator filters do not remove enough dissolved minerals to prevent white dust or scale. Water processed by reverse osmosis or demineralization may be a suitable lower-mineral alternative when the humidifier instructions permit it.

Why does tap water leave white dust around my humidifier?

White dust is usually dried mineral residue from the water, especially calcium and magnesium. It is most common with ultrasonic humidifiers because they create a fine mist directly from reservoir water. Switching to distilled or verified low-mineral water can reduce the residue.

Is softened water safe to use in a humidifier?

Softened water is not necessarily mineral-free because conventional water softeners typically exchange hardness minerals for sodium or potassium. It may still leave residue or contribute to buildup, depending on the water and humidifier type. Follow the appliance instructions and consider distilled or demineralized water if deposits are a recurring problem.

How often should I clean a humidifier when using tap water?

Empty, rinse, and refill the tank with fresh water daily during regular use. Clean the unit about every three days, or more often if scale, film, odor, or reduced output appears. Hard tap water may require more frequent descaling and wick or cartridge replacement.
Bedroom Humidity Too High at Night: Practical Fixes

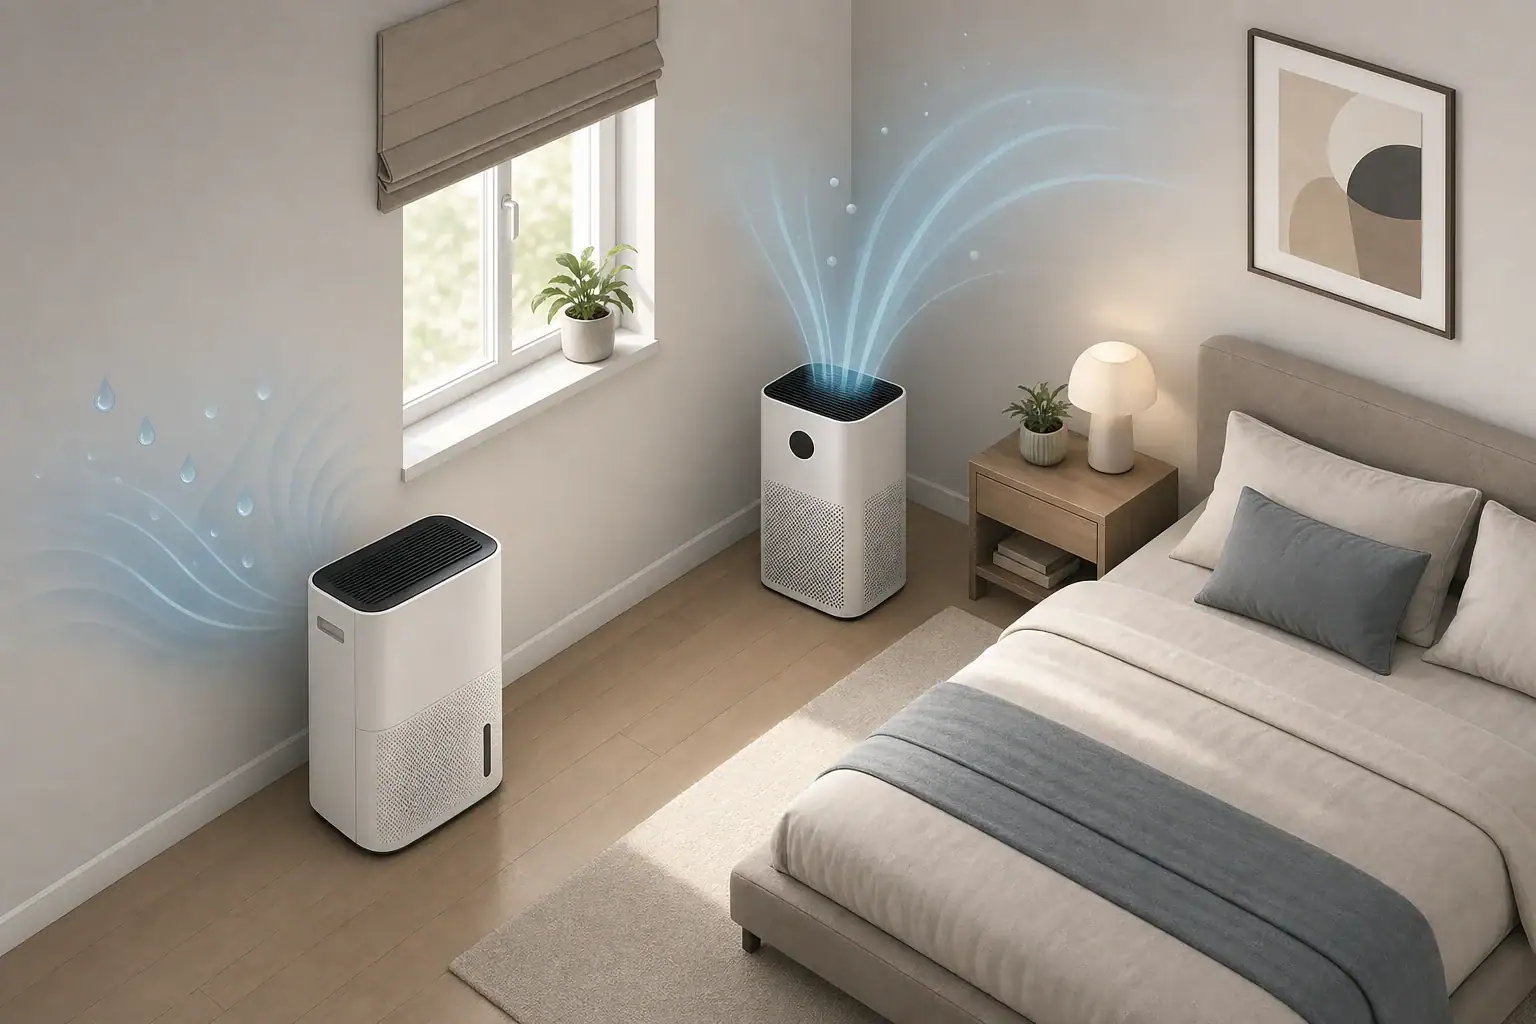
Dehumidifier controlling moisture in a tidy bedroom

Bedroom humidity that is too high at night usually results from moisture released by occupants, limited ventilation, damp materials, or humid outdoor air entering as the room cools. Relative humidity can also rise overnight even without added moisture because cooler air has a lower moisture-holding capacity. Measuring conditions over several nights can help distinguish a temporary increase from a persistent dampness problem.

Quick answer

  • A general indoor target is about 30% to 50% relative humidity, adjusted for comfort, climate, and condensation risk.
  • Readings that remain above 60% deserve attention, especially if windows, walls, or fabrics stay damp.
  • Measure near the sleeping area, away from windows, vents, exterior walls, and direct humidifier output.
  • Use ventilation when outdoor air is drier; use air conditioning or a dehumidifier when ventilation would bring in more moisture.
  • Address leaks, wet materials, blocked vents, and indoor moisture sources rather than relying only on portable equipment.

Why bedroom humidity rises at night

Relative humidity, or RH, describes how much water vapor is in the air compared with the maximum the air could hold at the same temperature. Because that maximum changes with temperature, RH often increases when a bedroom becomes cooler overnight.

Sleeping occupants also add moisture through breathing and normal perspiration. In a small room with a closed door and little outdoor-air exchange, that moisture can accumulate. Two people generally create a larger overnight increase than one person under otherwise similar conditions.

High nighttime humidity is not automatically evidence of a major building problem. A brief rise may reflect normal occupancy and cooling. Persistent dampness, recurring condensation, musty odors, peeling finishes, or visible moisture staining are stronger clues that the room or building needs further investigation.

Why prolonged dampness matters

Materials such as drywall paper, wood, dust, carpet, and fabric can retain moisture. Keeping these surfaces dry helps limit conditions that support mold growth and material deterioration. Surface temperature matters as much as room RH because cold windows and exterior corners may collect condensation before the center of the room feels damp.

How to measure nighttime bedroom humidity

Use a basic digital humidity monitor that records minimum and maximum values, or a data-logging monitor that shows the overnight pattern. Consumer sensors have some measurement uncertainty, so trends and repeated readings are usually more useful than reacting to a single percentage point.

Place the monitor roughly at breathing-zone height in an open location. Keep it away from an open window, supply vent, bathroom door, exterior wall, direct sunlight, and moisture-producing device. These locations may measure a local pocket rather than average bedroom conditions.

Use temperature and humidity together

Record both temperature and RH before bedtime, during the night if logging is available, and after waking. If temperature falls while RH rises, cooling may explain part of the increase. If both temperature and RH remain elevated, an indoor moisture source or humid outdoor air may be contributing.

A practical general target is approximately 30% to 50% RH. Conditions below that range may feel dry to some occupants, while sustained readings above roughly 60% increase the likelihood that cooler surfaces or absorbent materials will remain damp. Climate, season, construction, and surface temperatures affect the appropriate target.

Choosing a response to high nighttime bedroom humidity

Example values for illustration.

Humidity troubleshooting decision matrix
Observation Likely factor Practical response
RH rises as temperature falls Overnight cooling Maintain steadier temperature and check cold surfaces
RH rises mainly with the door closed Limited air exchange Improve safe ventilation or air circulation
RH stays high during humid weather Moist outdoor air Keep windows closed and use cooling or dehumidification
Window condensation appears Cold glass and elevated indoor moisture Lower moisture, improve airflow, and wipe surfaces dry
Humidity is high near one wall Cold area, leak, or damp material Inspect the location and correct the moisture source
Humidity rises after showering Bathroom moisture migration Use bathroom exhaust and keep moisture from spreading

Common causes and troubleshooting mistakes

Closed rooms with limited ventilation

A tightly closed bedroom can retain moisture from occupants. A closed door may also restrict circulation from a central heating or cooling system, particularly if the room lacks an effective return-air path. However, opening a window is useful only when outdoor conditions are favorable and doing so is safe.

Humidifiers set too high

A humidifier can raise RH beyond the intended range, especially in a small bedroom or when its output is directed toward a wall, window, bedding, or monitor. Reduce output or stop use if condensation develops. Follow the appliance instructions for cleaning and water handling.

Moisture arriving from nearby spaces

Showers, cooking, indoor clothes drying, plumbing leaks, damp basements, and poorly vented laundry equipment can affect bedrooms. Moisture may move through open doors, hallways, wall cavities, or a shared HVAC system.

Misreading local sensor conditions

A monitor on a cold windowsill may report higher RH than one in the center of the room. A monitor beside a supply vent or dehumidifier may report unusually low values. Before buying equipment, compare readings at two reasonable locations and allow the sensor time to stabilize.

Another common mistake is expecting an air purifier to lower humidity. Particle filters and activated carbon filters address airborne contaminants, not water vapor. Some equipment may move air around the room, but circulation alone does not remove moisture.

Practical fixes for high bedroom humidity at night

Control moisture at its source

  • Run bathroom exhaust during showers and for an appropriate period afterward, following local guidance and fan instructions.
  • Vent cooking moisture with an outdoor-vented range hood when available.
  • Avoid drying wet clothing or towels in the bedroom.
  • Repair plumbing, roof, window, or foundation leaks promptly.
  • Dry condensation and wet materials rather than allowing moisture to soak into finishes.
  • Check that clothes dryers and other moisture-producing appliances vent as designed.

Use ventilation selectively

Opening a window or increasing mechanical ventilation can help when outdoor air contains less moisture than indoor air. Outdoor RH alone can be misleading because cool air at high RH may still contain less total moisture than warm indoor air. Dew point or absolute humidity provides a better comparison when available.

During hot, humid weather, open windows may make the problem worse. In that situation, keeping windows closed while using properly operating air conditioning or dehumidification is generally more effective.

Use a dehumidifier when needed

A portable dehumidifier can remove water vapor when passive measures are insufficient. Choose a unit intended for the room conditions, provide the clearances specified by its manufacturer, and use a safe drainage arrangement. Keep doors and windows closed while it operates unless the instructions state otherwise.

Dehumidifiers release some heat into the room and create noise, so placement may require compromise. Running the unit before bedtime or outside the bedroom with the door open may help in some layouts, provided moisture can move effectively toward the unit.

What different nighttime patterns can mean

Small bedroom with two sleepers

Suppose RH begins near 45% and reaches 58% by morning while the door and windows remain closed. If the increase occurs mainly on occupied nights, limited air exchange is a reasonable first possibility. Improving safe ventilation, leaving the door partly open when appropriate, or operating whole-home ventilation may reduce the rise.

Air-conditioned bedroom in a humid climate

A room may feel cool while RH remains above 60%. An oversized or rapidly cycling cooling system can lower temperature without operating long enough to remove as much moisture as expected. Basic steps include confirming that windows are closed, filters are maintained, airflow is unobstructed, and the system is draining normally. System sizing or mechanical problems should be evaluated by a qualified professional.

Cold-weather window condensation

A bedroom at 45% RH may still develop condensation on very cold glass. The immediate issue is the low surface temperature, not necessarily an extreme room reading. Lowering indoor humidity moderately, improving air movement around the window, opening heavy curtains, and addressing window or insulation defects can help.

One damp corner despite normal room readings

A cold bridge, hidden leak, blocked airflow, or furniture placed tightly against an exterior wall may create a local damp area. Move furniture slightly away from the wall, inspect for staining or moisture, and seek qualified building assessment if dampness returns.

Equipment use and safety considerations

Plug dehumidifiers and humidifiers directly into a suitable outlet unless the manufacturer explicitly permits another arrangement. Keep cords and equipment away from water, bedding, curtains, and walking paths. Do not modify drainage, electrical components, fans, or safety controls.

Clean water reservoirs, coils, grilles, and filters according to the appliance instructions. A full reservoir, clogged filter, blocked intake, frozen coil, or poor drainage can reduce moisture removal. Stop using equipment that leaks, has damaged wiring, or operates abnormally.

Ionizers, ozone generators, and ultraviolet devices are not humidity-control tools. Intentionally generating ozone is unnecessary for moisture management and can add an unwanted indoor pollutant. A dehumidifier, air conditioner, source repair, or suitable ventilation directly addresses excess water vapor.

If visible mold covers a large area, dampness repeatedly returns, sewage or contaminated water is involved, or moisture appears to be inside walls or ceilings, consider qualified inspection and remediation. Renters can document dates, readings, photographs, and maintenance requests when reporting a persistent building issue.

Maintenance and an overnight humidity checklist

Track readings for several nights after making one change at a time. Note occupancy, door and window position, outdoor conditions, showering, laundry, heating or cooling operation, and any equipment use. This makes it easier to identify which action has a meaningful effect.

Inspect window frames, exterior corners, closets, areas behind furniture, and the underside of mattresses periodically. Keep furniture slightly separated from cold exterior walls where practical, and avoid packing closets so tightly that air cannot circulate.

Maintain exhaust fans, HVAC filters, condensate drains, and portable humidity-control equipment on a regular schedule. Replacement and cleaning intervals depend on operating time, dust levels, water quality, and manufacturer instructions rather than a single universal calendar.

Quick plan for managing nighttime bedroom humidity

Example values for illustration.

Humidity and dampness action plan
Goal Simple actions Tool or check Note
Verify the pattern Log temperature and RH overnight Humidity monitor Compare several nights
Stay near a general target Aim for about 30% to 50% RH Monitor and controls Adjust for season and condensation
Reduce bathroom moisture Use exhaust and contain steam Exhaust fan check Confirm outdoor venting where possible
Limit humid outdoor air Close windows during muggy weather Outdoor dew point comparison Outdoor RH alone may mislead
Remove excess water vapor Use cooling or dehumidification Dehumidifier or HVAC Keep intake and outlet clear
Prevent local damp spots Improve airflow and dry condensation Surface inspection Check behind furniture and curtains
Address recurring moisture Find leaks or building defects Qualified inspection Source correction comes first

Related guides:
How to Stop Condensation on Windows (And Why It Matters for Mold)
Bathroom Mold Prevention: Exhaust Fan Timing and Humidity Control
Best Humidity Level for Winter: Comfort vs Health vs Mold Risk
Dehumidifier Sizing: Liters/Day, Room Type, and Dampness Levels

Key takeaways for a drier bedroom

High bedroom humidity at night is commonly caused by occupant moisture, overnight cooling, restricted ventilation, humid outdoor air, or a nearby moisture source. Start by measuring both temperature and RH in a representative location over several nights.

Use approximately 30% to 50% RH as general guidance rather than a rigid rule, and investigate readings that remain above 60%, recurring condensation, or persistently damp materials. Control leaks and moisture sources first, ventilate when outdoor air is genuinely drier, and use air conditioning or dehumidification when mechanical moisture removal is more appropriate.

Check local cold spots as well as the room average. A normal reading in the center of the bedroom does not rule out condensation behind furniture, around windows, or on poorly insulated exterior surfaces.

Frequently asked questions

Why is my bedroom humidity higher in the morning than at bedtime?

Bedroom humidity can rise overnight because occupants release moisture through breathing and perspiration while the room has limited air exchange. A falling room temperature also raises relative humidity even if the amount of water vapor in the air changes very little. Logging both temperature and humidity over several nights helps identify whether cooling, occupancy, or another moisture source is the main factor.

Should I sleep with the bedroom door open to reduce humidity?

Leaving the door partly open can improve air circulation and allow moisture to move out of a closed bedroom, especially when the home has conditioned or mechanically ventilated air. It is not always necessary or suitable for every household, and it may not help if the surrounding air is also humid. Compare overnight readings with the door open and closed to see whether it makes a meaningful difference.

Is 60% humidity in a bedroom at night too high?

A brief reading near 60% is not automatically a serious problem, particularly if it occurs as the room cools. However, readings that stay above about 60% or occur with condensation, musty odors, or damp surfaces deserve attention. Lower moisture sources first and check cold surfaces such as windows, exterior corners, and areas behind furniture.

Should I open a window when bedroom humidity is too high at night?

Open a window only when outdoor air contains less total moisture than the bedroom air and doing so is safe. Outdoor relative humidity alone can be misleading, since cool outdoor air may show a high RH while still containing less moisture than warmer indoor air. During warm, muggy weather, keeping windows closed and using air conditioning or dehumidification is usually more effective.

Why does my bedroom window have condensation when the humidity monitor seems normal?

Condensation forms when a surface is cold enough for nearby air to reach its dew point, so very cold glass can collect moisture even when the center of the room has a moderate RH reading. Improve airflow around the window, open heavy curtains, wipe away moisture, and lower indoor humidity modestly if practical. Recurring condensation may also indicate window, insulation, or air-leakage issues that need investigation.

Mold Smell in HVAC Vents: What Matters and What to Do

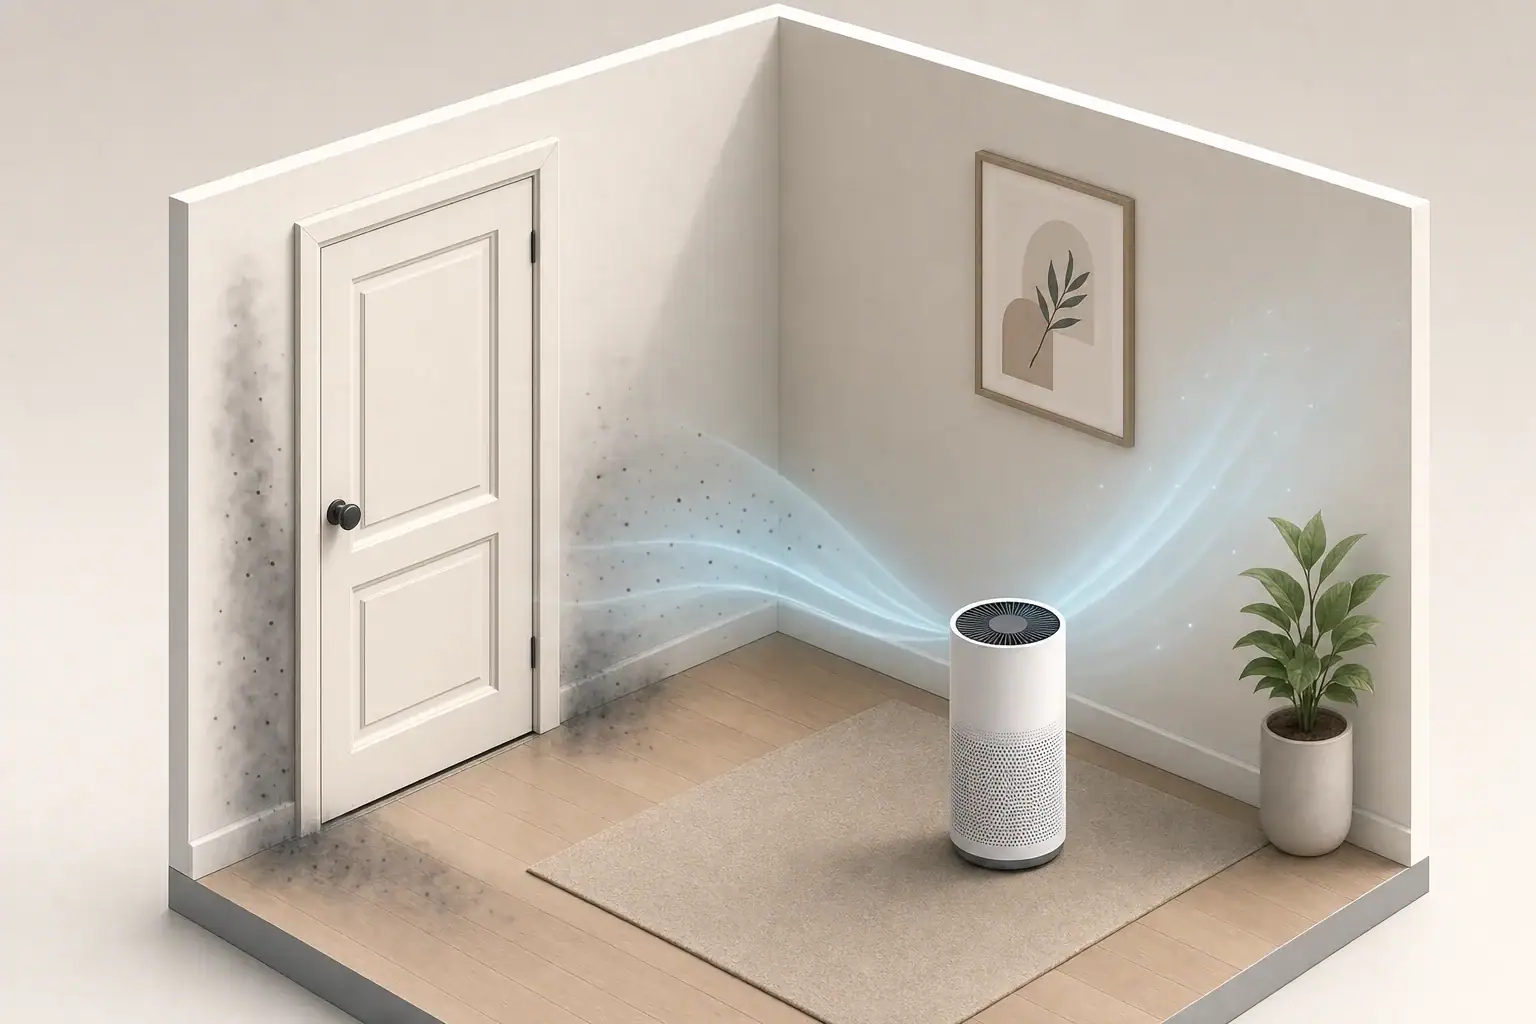
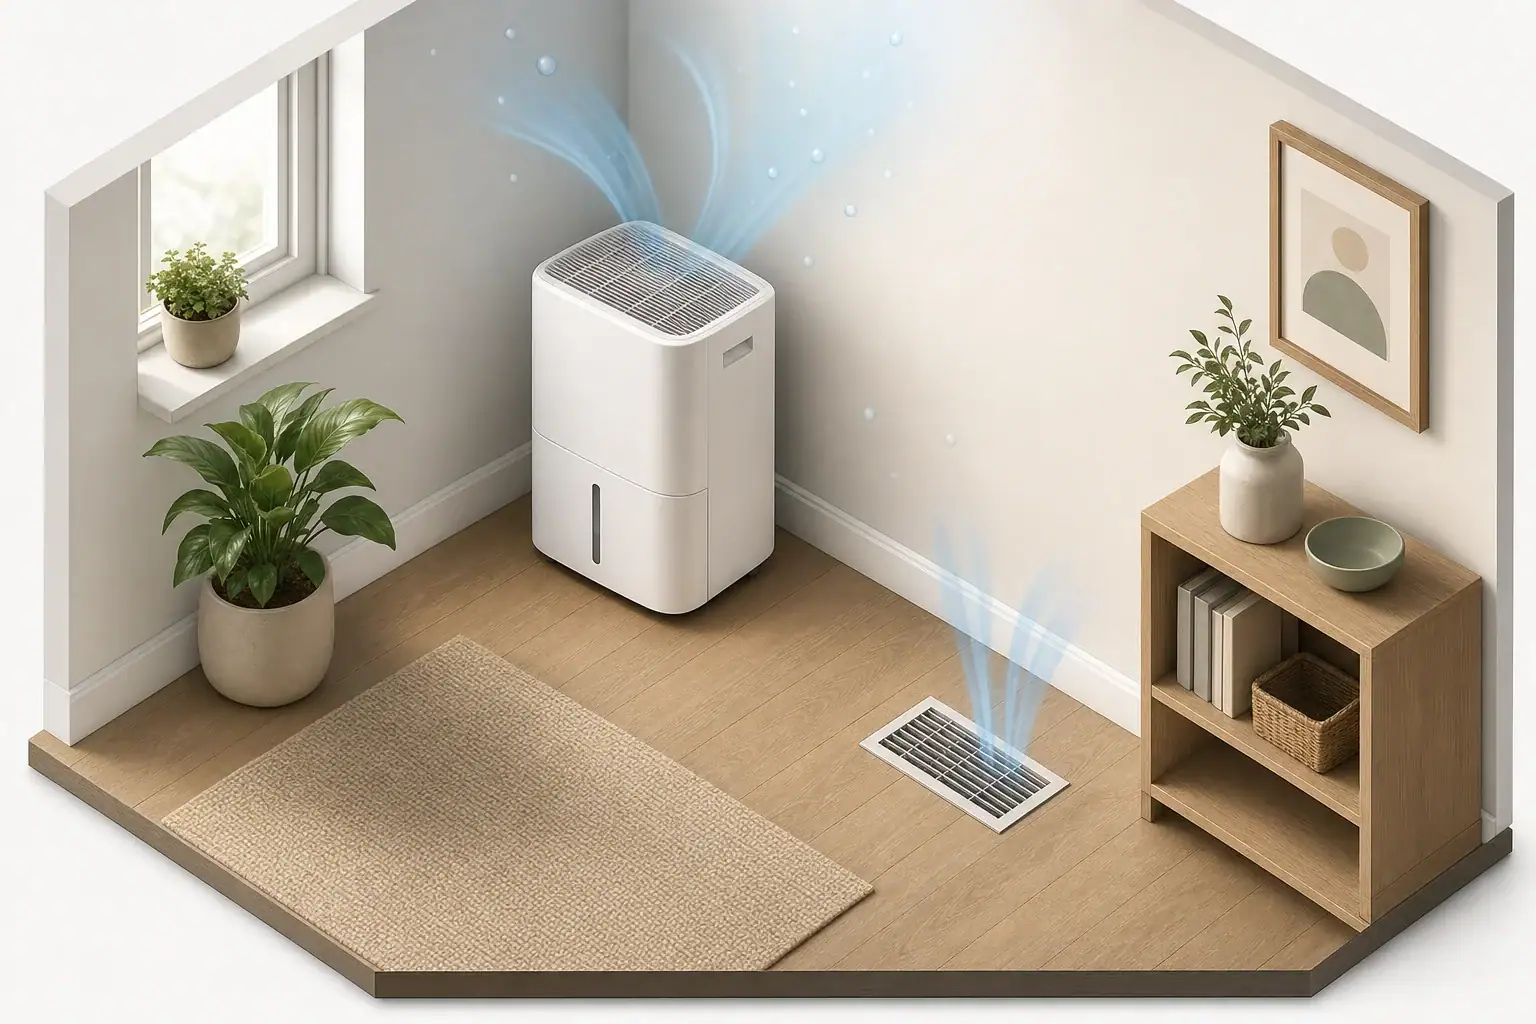
Dehumidifier beside HVAC vent in a tidy room

A mold smell in HVAC vents usually points to moisture and organic buildup somewhere near the filter, evaporator coil, drain system, ductwork, or surrounding room.

The odor alone does not confirm that mold is present, and replacing the filter may not solve a moisture problem. A practical response is to check accessible components, control indoor humidity, observe when and where the smell appears, and involve a qualified professional when the source is hidden or persistent.

Quick answer

  • Aim for indoor relative humidity around 30% to 50% when practical, and generally keep it below 60%.
  • Replace a damp, visibly soiled, or overdue HVAC filter with a correctly sized filter that the system can accommodate.
  • Check accessible drain pans, condensate lines, supply registers, and the area around the indoor unit for standing water or damp material.
  • Run the system normally and note whether the odor occurs during cooling, heating, fan-only operation, or only in one room.
  • Call an HVAC or moisture-remediation professional if water keeps returning, contamination appears extensive, or inspection requires opening equipment or ducts.

What a Mold Smell From HVAC Vents Can Mean

A musty, earthy, or damp odor is commonly associated with microbial growth, but smell cannot identify a specific organism or location. Wet dust, damp insulation, a clogged condensate drain, stagnant water, or debris near a register can create a similar odor.

The timing and distribution of the smell provide useful clues. An odor from most supply vents when cooling begins may point toward a shared component such as the evaporator coil, blower compartment, filter area, or supply plenum. An odor limited to one vent is more likely to involve a nearby duct section, register, wall cavity, or room-level moisture source.

Return vents can also draw odors from basements, crawl spaces, utility closets, attics, or damp furnishings. In that case, the HVAC system may be distributing an odor rather than producing it.

How Filters and Condensation Affect HVAC Odors

What the filter can and cannot do

A central HVAC filter captures airborne particles before they enter the equipment. It can reduce dust accumulation, but a standard particle filter does not correct standing water, high indoor humidity, wet insulation, or existing growth on internal surfaces.

Filter efficiency is often described with a MERV rating. Higher-efficiency filters can capture smaller particles, but they may also increase airflow resistance. Use a filter size and efficiency level permitted by the equipment manufacturer or recommended by an HVAC professional. Poor fit is another concern: gaps around a filter allow air and dust to bypass the media.

Activated carbon may temporarily reduce some odors, but thin carbon layers have limited capacity. Carbon does not remove the moisture source and should not be treated as a substitute for cleaning or drainage repairs.

Why cooling systems produce water

During cooling, warm indoor air passes over a cold evaporator coil. Water vapor condenses on the coil and should flow into a drain pan and out through a condensate line. Problems can develop when the pan holds water, the drain is restricted, the coil is dirty, or airflow is too low.

Condensation may also form on ducts or registers when cold surfaces meet warm, humid air. Missing insulation, air leakage, or persistently high indoor humidity can make this more likely.

Decision matrix for common HVAC odor clues

Example values for illustration.

Odor clue and practical next step
Observation Possible area to check Practical response
Odor begins with cooling Coil, drain pan, or condensate line Inspect accessible drainage areas and arrange service if water remains
Odor comes from every supply vent Shared air handler or main duct Check the filter and indoor unit area
Odor comes from one vent Local register, duct, or room Inspect the register and nearby materials
Filter is damp Water intrusion or condensation Replace the filter and identify the moisture source
Humidity stays above 60% Whole-home moisture conditions Reduce moisture and assess ventilation or dehumidification
Odor appears with fan-only mode Ducts, filter area, or blower section Note its duration and request inspection if persistent
Odor remains when HVAC is off Room, wall cavity, crawl space, or drain Look beyond the HVAC system for damp materials

Common Sources and Troubleshooting Cues

A clogged condensate line is a frequent moisture-related problem. Water may collect in the drain pan, trigger a safety switch, leak near the indoor unit, or dampen adjacent materials. Drain configurations differ, so avoid dismantling components or pouring chemicals into a system unless the equipment instructions specifically allow it.

A dirty evaporator coil can hold dust and moisture. Some systems develop a temporary odor when cooling starts after an idle period, sometimes informally called dirty sock odor. Because the coil and blower may be difficult or unsafe to access, internal cleaning is generally a professional task.

Other possible sources include:

  • A filter installed incorrectly, overdue for replacement, or too small for its slot
  • Wet duct liner or insulation following a roof, plumbing, or condensate leak
  • Condensation on uninsulated ducts in an attic, basement, or crawl space
  • A dirty supply register or return grille exposed to room moisture
  • A disconnected or leaky return duct drawing air from a damp area
  • Household sources such as wet carpet, stored cardboard, drains, or damp furniture

Not every unpleasant vent odor is mold-related. Sewer gas, overheating electrical components, smoke, pests, and decomposing debris can produce distinct smells. A burning, hot-plastic, fuel, or strong electrical odor warrants shutting the system off when safe and obtaining prompt professional help.

What to Do When HVAC Vents Smell Musty

Start with safe, accessible checks

  1. Record the pattern. Note which vents smell, the operating mode, recent weather, and how long the odor lasts.
  2. Check the filter. Turn the system off before opening the designated filter access. Replace a wet, damaged, visibly dirty, or overdue filter with the correct dimensions and airflow orientation.
  3. Look around the indoor unit. Without removing service panels, check for water, staining, damp insulation, corrosion, or a full auxiliary pan.
  4. Inspect registers and grilles. Use a flashlight to look for surface dust, moisture, or nearby damp building material. Clean removable grilles with mild detergent and dry them fully before reinstalling.
  5. Measure humidity. Place a basic hygrometer away from vents, windows, and direct sunlight. Compare readings at different times over several days.
  6. Check room-level sources. Look beneath rugs, around windows, under sinks, and near exterior walls for dampness.

Do not spray fragrance, disinfectant, bleach, or biocide into vents. These substances may not reach the source, can expose occupants to vapors, and may damage system materials. Painting or sealing over damp contamination without correcting the water problem can also allow it to return.

Control moisture without disrupting the system

Use kitchen and bathroom exhaust fans that vent outdoors, repair plumbing or exterior leaks, and avoid drying large amounts of laundry indoors when humidity is already high. A portable or whole-home dehumidifier may help where climate and building conditions keep relative humidity elevated, but it must be sized, drained, and maintained appropriately.

A continuously running HVAC fan is not always helpful. After cooling stops, fan-only operation can re-evaporate water remaining on the coil in some systems. Follow the equipment instructions or ask a technician about appropriate fan settings for the installation.

Real-World HVAC Odor Scenarios

Odor appears only on humid summer days

This pattern suggests condensation or high indoor moisture. Check humidity, condensate drainage, duct insulation, and whether doors or windows are bringing in humid outdoor air. Oversized cooling equipment can also run short cycles and remove less moisture, which requires professional assessment rather than a simple filter change.

One bedroom vent smells musty

Remove and clean the accessible register, then inspect the surrounding ceiling, floor, or wall for staining. If other vents are unaffected, a local duct leak, damp building cavity, or room source is more likely than contamination throughout the system.

The odor started after a filter change

Confirm that the filter is the correct size, fully seated, dry, and installed in the indicated airflow direction. Packaging left on the filter, gaps around the frame, or a filter that restricts airflow can cause problems. If the odor continues, the timing may be coincidental and the coil or drainage system may need inspection.

The smell returns soon after cleaning

Recurring odor usually means the moisture source was not corrected or that an inaccessible material remains damp. Repeatedly wiping a register will not address a leaking drain, wet duct liner, or moisture inside a wall cavity.

When to Call an HVAC or Mold Professional

Professional help is appropriate when the inspection requires opening equipment cabinets, removing ducts, accessing electrical components, or working in an attic or crawl space. HVAC technicians can evaluate airflow, temperature differences, coil cleanliness, drainage, duct leakage, and equipment operation.

Consider a qualified moisture or mold-remediation professional when visible growth covers a substantial area, porous duct liner or building material is wet, or contamination follows flooding or sewage. If renting, document the odor, visible moisture, humidity readings, and dates before contacting the property manager.

Arrange prompt service when any of these conditions appears:

  • Water repeatedly collects around the air handler or ceiling vents
  • The condensate safety switch frequently shuts the system down
  • Insulation, drywall, or duct liner remains wet
  • The odor persists after filter replacement and basic moisture correction
  • Multiple rooms develop staining or visible growth
  • Access requires disturbing suspected contamination or damaged insulation
  • There is a burning, electrical, fuel, or sewage-like odor

Be cautious with add-on air treatments

Particle filtration, ultraviolet equipment, ionizers, and ozone-generating devices do not repair leaks or remove standing water. UV-C may help limit growth on illuminated coil surfaces when properly designed and professionally installed, but effectiveness depends on placement, intensity, exposure time, and maintenance.

Avoid equipment intended to generate ozone in occupied spaces. Some electronic air cleaners may produce ozone as a byproduct, so review independent safety certification and operating information. Any add-on device should be compatible with the HVAC system and should not replace source control.

Filter, Humidity, and Drainage Maintenance

Check the HVAC filter monthly at first, especially during heavy cooling or heating seasons. Replacement intervals vary with filter depth, household dust, pets, renovation activity, smoke, operating time, and system design. A common range may be about one to three months for thinner filters and longer for some deeper media filters, but condition and equipment guidance matter more than the calendar alone.

Keep return grilles and supply registers unobstructed. Blocking airflow with furniture or closing many supply registers can alter system pressure and contribute to comfort or condensation problems. Outdoor equipment also needs suitable clearance, although internal service should be left to trained personnel.

Track indoor humidity along with visible conditions. A single reading is less informative than a pattern. If humidity consistently approaches or exceeds 60%, investigate moisture entry, exhaust ventilation, dehumidification, and cooling-system performance.

Annual HVAC service can include inspection of the coil, blower, condensate pan, drain, electrical components, and temperature performance. Ask what will be inspected and whether cleaning is actually needed; routine duct cleaning is not automatically necessary in every home.

Humidity and mold-prevention quick plan

Example values for illustration.

Moisture-control goals and actions
Goal Simple action Tool or cue Note
Track indoor moisture Measure in occupied areas Basic hygrometer Check trends over several days
Maintain a practical range Aim for about 30% to 50% RH Humidity readings Climate and season affect what is achievable
Avoid prolonged high humidity Generally keep RH below 60% Exhaust or dehumidification Investigate persistent elevated readings
Limit bathroom moisture Run an outdoor-vented exhaust fan Dry mirrors and surfaces Continue briefly after bathing
Protect HVAC airflow Check the filter regularly Correctly fitted replacement Do not exceed system requirements
Prevent standing water Watch the indoor unit area Drain pan and leak cues Recurring water needs service
Confirm a lasting fix Recheck odor and humidity Dated notes Look for improvement across operating cycles

Related guides:
Air Purifier for Mold Spores: What Works and What Doesn’t
How to Stop Condensation on Windows (And Why It Matters for Mold)
Bathroom Mold Prevention: Exhaust Fan Timing and Humidity Control
Crawl Space Humidity: Signs It Is Affecting Indoor Air

Key Takeaways

A mold smell in HVAC vents is a troubleshooting clue, not proof that the entire duct system is contaminated. Filters can reduce dust and airborne particles, but they cannot correct condensation, leaks, standing water, or damp porous materials.

Begin with the filter, humidity readings, visible drainage areas, registers, and room-level moisture sources. Note whether the smell is isolated or system-wide and whether it changes with cooling, heating, or fan operation.

Keeping relative humidity around 30% to 50% when practical, maintaining drainage, and using a correctly fitted filter can reduce conditions that support recurring odors. Call a qualified professional when water returns, the source is inaccessible, contamination appears extensive, or the odor suggests an electrical, fuel, or sewage problem.

Frequently asked questions

Does a mold smell in HVAC vents mean there is mold in the ductwork?

No. A musty odor can come from mold or other moisture-related sources, including wet dust, a dirty evaporator coil, standing condensate, damp insulation, or a room that the return system is drawing from. The smell alone cannot identify the material or location, so checking the odor pattern and accessible moisture sources is more useful than assuming the ducts are contaminated.

Why does my HVAC smell musty only when the air conditioner starts?

An odor that starts during cooling can be related to condensation around the evaporator coil, drain pan, or condensate line. Dust and moisture on internal components can also produce an odor after the system has been idle. If water is visible, drainage is restricted, or the smell persists, a qualified HVAC technician can inspect components that are not safely accessible.

Can changing the HVAC filter get rid of a mold smell?

Replacing a damp, dirty, damaged, or incorrectly fitted filter may reduce odors and prevent dust from bypassing the filter area. However, a new filter will not fix a clogged drain, wet duct material, high indoor humidity, or growth on an internal coil. If the odor returns soon after replacement, look for an ongoing moisture source.

What indoor humidity level helps prevent musty HVAC odors?

When practical, aim for indoor relative humidity of about 30% to 50% and generally keep it below 60%. Use a hygrometer to track readings over several days rather than relying on one measurement. Persistent high humidity may call for better exhaust ventilation, moisture repairs, dehumidification, or an HVAC performance assessment.

Should I spray bleach or disinfectant into HVAC vents that smell moldy?

No. Spraying bleach, disinfectants, fragrances, or biocides into vents may expose occupants to vapors, damage system materials, and fail to reach the actual source. The more reliable approach is to identify and correct moisture, clean only accessible removable grilles as appropriate, and seek professional help for internal equipment or hidden contamination.

Under-Sink Musty Smell: What Matters and What to Do

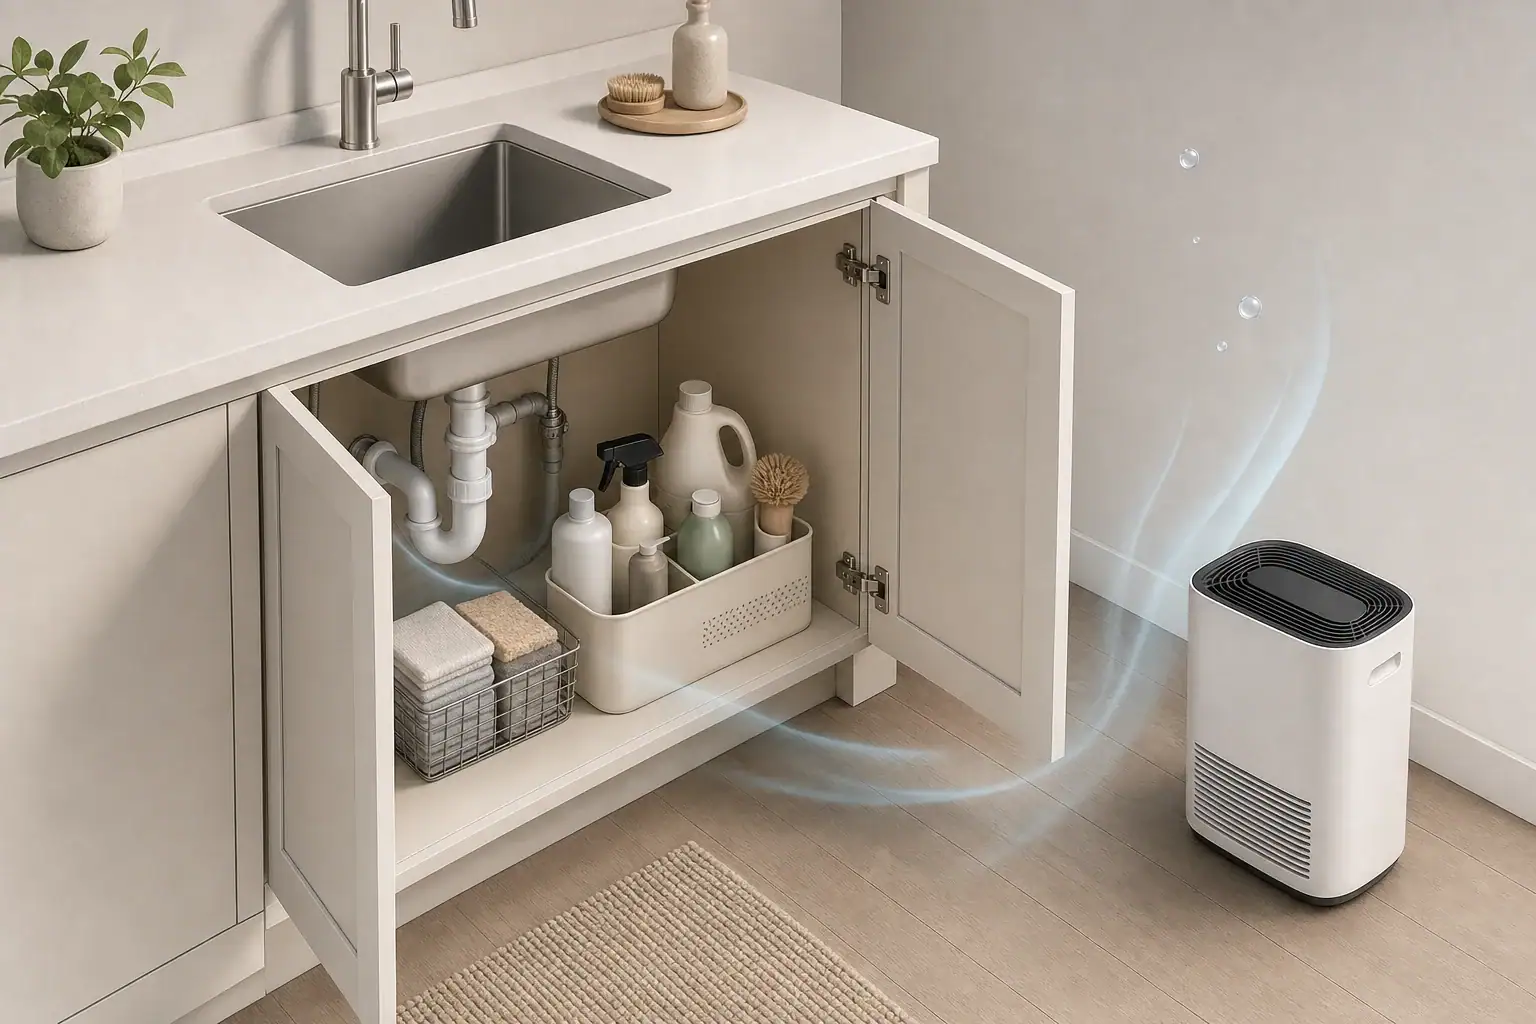
Open under-sink cabinet with subtle humidity control

An under-sink musty smell usually means moisture is lingering from a leak, condensation, a damp item, or poor airflow.

The source may be a slow plumbing leak, wet cabinet material, an old spill, or microbial growth on a persistently damp surface. Finding and stopping the moisture matters more than masking the odor.

Quick answer

  • Inspect supply lines, shutoff valves, drains, seals, and the cabinet base while water is running.
  • Aim for indoor relative humidity around 30% to 50% when practical and generally below 60%.
  • Dry wet materials within about 24 to 48 hours to limit further dampness and growth.
  • Use dry paper towels to reveal slow drips that may be difficult to see.
  • Consider professional help for extensive damage, contaminated water, or visible growth covering more than about 10 square feet.

What an Under-Sink Musty Smell Usually Means

A musty odor is commonly associated with materials that have stayed damp long enough to support mold or bacterial growth. Under a sink, moisture can soak into particleboard, plywood, drywall, paper products, shelf liners, or stored cloths. The odor may remain even after the surface appears dry because moisture can persist inside porous material.

Not every unpleasant cabinet odor is mold-related. A sour or stale smell may come from a wet sponge, old cleaning residue, a trash container, or a forgotten spill. A sewer-like odor is different and can indicate a drain, trap, disposal, overflow channel, or venting problem rather than damp cabinet material.

Odor alone cannot identify the exact source or determine the type of growth present. Use it as a prompt to inspect for moisture, staining, softened material, corrosion, and plumbing defects.

How to Find the Leak or Moisture Source

Empty the cabinet before inspecting it. Remove shelf liners, paper products, towels, and containers so the cabinet floor and back wall are visible. Check stored items for dampness or residue before returning them.

Inspect with the plumbing dry

Start by drying all accessible pipes, fittings, valves, and cabinet surfaces. Place clean, dry paper towels beneath likely drip points. Moisture marks on the paper can reveal a slow leak without requiring plumbing disassembly.

Look at the faucet supply lines, shutoff valves, filter connections, sprayer hose, drain basket, garbage disposal connection if present, dishwasher hose, P-trap, and joints in the drainpipe. Also check where the faucet and sink rim meet the countertop.

Test while water is running

Run cold water, hot water, and then a full basin drain test while observing the plumbing. Some supply leaks appear only when a valve is open, while drain leaks may appear only when a large volume of water passes through the pipe.

Condensation is another possibility. Cold supply pipes can collect moisture in warm, humid conditions. Unlike a fitting leak, condensation often forms across a wider section of pipe and may vary with weather or indoor humidity.

Under-sink moisture source decision matrix

Example values for illustration.

Clues, likely sources, and practical first actions
Observation Likely source First action
Drip near a valve or supply line Pressurized plumbing leak Stop using the affected fixture if needed and arrange repair
Water appears during draining Drain fitting, trap, or seal Observe the joint and have the connection corrected
Moisture along much of a cold pipe Condensation Lower room humidity and improve air circulation
Dry plumbing but a wet cabinet base Old spill, sink rim leak, or hidden seepage Remove stored items and trace staining upward
Musty shelf liner or cloth Damp stored material Discard or wash it and dry the cabinet
Sewer-like odor without dampness Drain, trap, overflow, or vent issue Check drain use and request plumbing evaluation if persistent
Swollen or crumbling cabinet panel Repeated or prolonged wetting Stop the moisture and assess whether replacement is needed

Common Troubleshooting Mistakes

Covering the odor with fragrance does not address the moisture source. Scented products may temporarily compete with the smell while allowing the cabinet, wall, or flooring to remain damp.

Another common mistake is checking the cabinet only when the plumbing is not in use. Intermittent leaks may require running the faucet, filling the sink, draining it, and operating connected fixtures such as a dishwasher. Do not leave the test unattended.

A dry cabinet surface does not always mean the problem has ended. Particleboard can retain water along cut edges, fastener holes, seams, and the wall behind the cabinet. Watch for swelling, delamination, dark staining, peeling finishes, or recurring odor after the doors have been closed.

Air purifiers also have a limited role. A particle filter may capture some airborne particles, and activated carbon may reduce certain odors temporarily, but neither stops a leak nor dries wet cabinet material. An air purifier should not be treated as the primary fix for dampness.

Under-Sink Leak, Mold, and Ventilation Checklist

Stop active water

  • Identify whether the water comes from a supply connection, drain, sink seal, appliance hose, spill, or condensation.
  • Avoid using the fixture if continued use causes water to spread.
  • Use the local shutoff valve only if it operates normally and can be reached safely.
  • Arrange plumbing repair when a fitting, valve, hose, or drain component is defective.

Remove wet contents

Take everything out of the cabinet. Dispose of saturated cardboard, paper shelf liners, and other low-value porous items that cannot be fully cleaned and dried. Wash reusable containers and allow them to dry before storage.

Clean accessible surfaces

For a small area on a hard, nonporous surface, use water and a mild detergent, following the surface manufacturer’s care instructions. Avoid mixing cleaning products. In particular, never combine bleach with ammonia, acids, or other cleaners because hazardous fumes can result.

Routine bleaching is not a substitute for moisture control. Porous material that is swollen, crumbling, deeply stained, or persistently odorous may need to be removed and replaced after the leak is corrected.

Dry the cabinet

Wipe up standing water and keep the doors open during the drying period. A room fan can increase airflow if it can be positioned safely away from water. A dehumidifier in the surrounding room may help when relative humidity is elevated; follow its clearance, drainage, and electrical instructions rather than placing it in a cramped cabinet.

A practical goal is to dry affected materials within roughly 24 to 48 hours. Thick or enclosed materials may take longer and may require moisture assessment or removal.

Real-World Under-Sink Odor Scenarios

The odor returns after the cabinet is cleaned

If the smell disappears with the doors open but returns after they are closed, moisture may remain in the cabinet base, back panel, wall cavity, or stored contents. Recheck humidity and plumbing over several use cycles. A new liner should not be installed until the underlying panel is fully dry.

The cabinet is dry, but the drain smells

A drain odor may be mistaken for a musty cabinet. Run water into infrequently used drains to refill the trap. Clean removable sink strainers and accessible overflow areas according to the fixture instructions. Persistent sewer-like odor, gurgling, or repeated trap problems should be evaluated by a plumber.

Cold pipes drip on humid days

Widespread moisture on a cold pipe suggests condensation, especially when indoor relative humidity is high. Use kitchen and bathroom exhaust fans that vent outdoors, address sources of excess moisture, and consider room dehumidification. Pipe insulation may be appropriate in some settings, but installation should follow applicable plumbing and building requirements.

The cabinet floor is swollen

Swelling usually indicates that a wood-based panel absorbed water. Drying may stop further damage, but it will not necessarily restore the panel’s shape or strength. Replacement can be appropriate if the material is soft, unstable, or cannot be cleaned.

Safety and When to Get Professional Help

Do not touch wet outlets, wiring, disposals, dishwashers, or other electrical equipment. If water has reached electrical components, avoid the area and contact a qualified electrician or appropriate service professional. Do not work in standing water around energized equipment.

Professional assessment is sensible when the moisture source is hidden, water damage extends into a wall or floor, the cabinet repeatedly becomes wet, or the visible affected area is extensive. A commonly used general threshold for considering professional mold remediation is an area larger than about 10 square feet, although smaller problems can also require help when access or contamination complicates cleanup.

Water from sewage, drain backups, or other contaminated sources requires different precautions from a clean supply-line leak. Avoid direct contact and obtain appropriate cleanup assistance.

Do not use an ozone generator to treat a musty smell in an occupied home. Ozone can irritate the respiratory system and does not correct the leak or remove damaged material. Ionizers and ultraviolet devices are also not replacements for plumbing repair, physical cleaning, drying, and humidity control.

Preventing the Musty Smell From Returning

Inspect the cabinet periodically rather than waiting for an odor. A quick check every month or two, and after plumbing or appliance work, can reveal water marks, corrosion, loose containers, or damp liners early. Test the cabinet again after unusually heavy sink or dishwasher use.

Keep only dry, necessary items under the sink. Avoid packing products tightly around pipes because crowded storage can hide leaks and restrict visual inspection. Use a removable, washable tray to make small drips easier to notice, but do not let a tray conceal ongoing water accumulation.

For general indoor comfort and dampness control, aim for relative humidity around 30% to 50% when practical. Conditions vary by climate and season, but sustained levels above about 60% can make condensation and dampness more likely. A basic humidity monitor can help identify patterns, although placement near a wet pipe or exterior wall may not represent the whole room.

Cabinet doors can be left open temporarily during drying. They should not need to remain open permanently when the plumbing is sound and room humidity is controlled. Do not cut holes, alter cabinetry, or modify an appliance solely to address odor without considering building, fire, pest, and moisture implications.

Humidity and mold prevention quick plan

Example values for illustration.

Practical goals and actions for an under-sink cabinet
Goal Simple actions Useful tool Note
Find active drips Dry fittings and place paper beneath them Paper towel and flashlight Test during supply and drain use
Limit indoor dampness Target roughly 30% to 50% relative humidity Humidity monitor Season and climate affect what is practical
Avoid prolonged high humidity Use exhaust ventilation or room dehumidification Exhaust fan or dehumidifier Generally try to remain below 60%
Dry a recent leak Remove wet items and increase safe airflow Fan and absorbent cloths Aim for about 24 to 48 hours
Track recurrence Recheck after several sink and dishwasher cycles Removable drip tray Do not let the tray hide an ongoing leak
Manage damaged material Assess swollen or persistently odorous panels Moisture assessment if needed Some porous materials require replacement

Related guides:
Air Purifier vs Dehumidifier: Which One Solves Musty Air?
How to Size a Dehumidifier (Sq Ft, Pints/Day, and Real-World Tips)
Musty Smell in Closets: Moisture Sources and Simple Remedies

Summary of the Under-Sink Musty Smell Checklist

Start by emptying the cabinet, drying the plumbing, and checking supply lines, valves, drains, seals, appliance hoses, and cold-pipe condensation. Test while water is running because many leaks are intermittent.

Correct the moisture source before cleaning and drying the cabinet. Remove saturated porous items, keep the area safely ventilated during drying, and monitor room humidity with a general target of about 30% to 50% when practical.

If the odor returns, material remains wet, damage extends beyond the cabinet, or water has contacted electrical components or contains contamination, obtain qualified help rather than relying on fragrance, filtration, or repeated surface cleaning.

Frequently asked questions

Why does my under-sink cabinet smell musty even when I cannot see a leak?

A hidden slow leak, old spill, condensation, or damp cabinet material can cause an under-sink musty smell without visible standing water. Dry the plumbing and cabinet surfaces, then use paper towels beneath fittings and test the sink while running water and draining a full basin. Also check shelf liners, stored cloths, cabinet seams, and the back wall for retained moisture or staining.

How can I tell whether the moisture under my sink is condensation or a plumbing leak?

Condensation usually appears across a broad area of a cold pipe and may be worse on warm, humid days. A plumbing leak is more likely to form at a valve, fitting, hose, or drain joint and may appear only while water is flowing or draining. Dry the area first so new moisture is easier to trace.

Will cleaning the cabinet remove an under-sink musty smell?

Cleaning can remove residue and surface odor, but it will not solve the problem if moisture remains or returns. Stop the leak or condensation first, remove wet porous items, and dry the cabinet thoroughly. Swollen, crumbling, or persistently odorous particleboard may need replacement after the moisture source is corrected.

How long should I dry an under-sink cabinet after a leak?

A practical goal is to dry recently wet materials within about 24 to 48 hours. Keep cabinet doors open, remove wet contents, wipe up water, and increase safe airflow in the room. Thick wood-based panels, wall cavities, and enclosed spaces can take longer and may need professional assessment if they remain damp.

When should I call a plumber or water-damage professional for a musty smell under the sink?

Contact a plumber when you find an active leak, recurring drain leak, sewer-like odor, gurgling, or a suspected hidden plumbing problem. Seek qualified water-damage or remediation help when damage extends into walls or floors, water is contaminated, electrical components got wet, or visible growth is extensive. Professional evaluation is also sensible when the odor returns despite correcting obvious moisture sources and drying the cabinet.

Window Condensation Explained: Mold Risk and What Matters

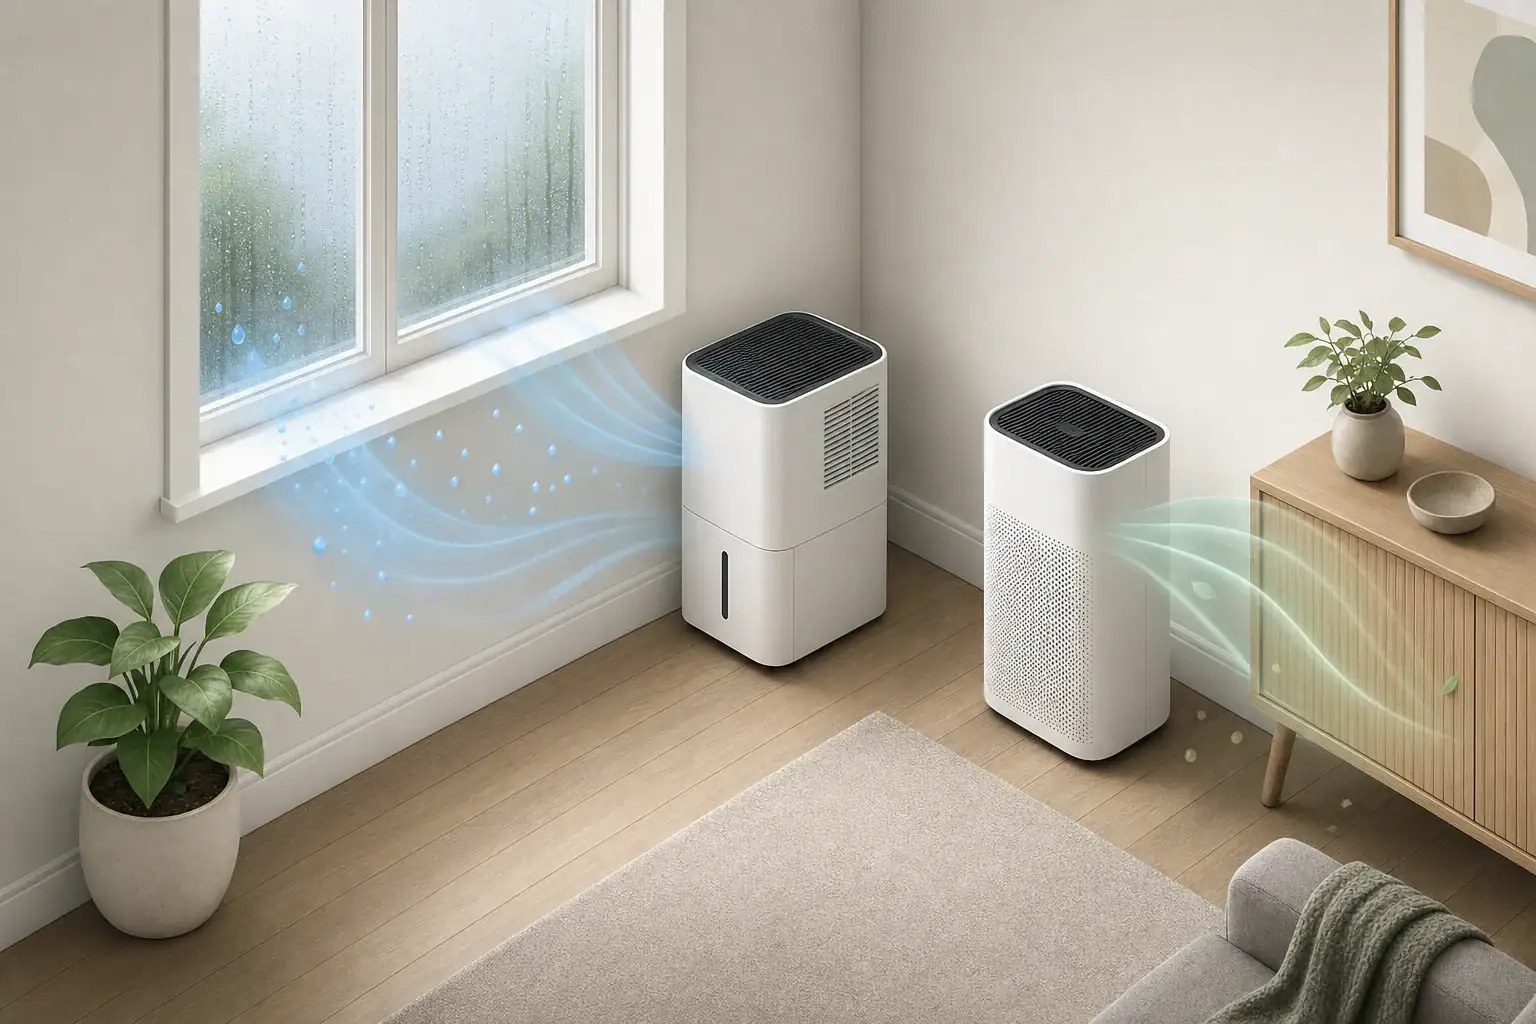
Dehumidifier and purifier beside a lightly condensed window

Window condensation usually means warm, moisture-laden indoor air is contacting glass or frames that are cold enough for water to form, which can increase mold risk if surfaces stay damp.

Occasional moisture does not prove that mold is present, but repeated or persistent condensation is a useful humidity and ventilation warning. The practical response is to dry the area, identify the moisture source, and keep indoor humidity appropriate for outdoor conditions.

Quick answer

  • Aim for roughly 30% to 50% indoor relative humidity as general guidance, while keeping it below 60% for extended periods.
  • During cold weather, some homes may need humidity closer to 30% to 40% to prevent window condensation.
  • Wipe wet glass and frames promptly, then check curtains, sills, seals, and nearby walls for lingering dampness.
  • Use kitchen and bathroom exhaust fans, improve air circulation, and address leaks before relying on air-cleaning equipment.
  • A dehumidifier removes moisture; an air purifier may capture some airborne particles but does not dry surfaces or correct the moisture source.

What Window Condensation Means for Indoor Air

Condensation forms when a surface temperature falls below the dew point of nearby air. The dew point is the temperature at which air can no longer hold its existing amount of water vapor, causing liquid water to collect on a cooler surface.

Windows often show the problem first because glass, metal spacers, and frames can be colder than surrounding walls. Condensation may appear along the bottom edge, around frame corners, or across most of the pane during very cold weather.

Interior condensation commonly points to one or more of the following:

  • Indoor relative humidity is high for the outdoor temperature.
  • Cold glass or poorly insulated frames create a low surface temperature.
  • Indoor air is not circulating across the window.
  • Moisture from cooking, bathing, laundry, plants, or occupants is accumulating faster than ventilation removes it.
  • A leak or building-envelope problem is adding moisture near the window.

Condensation between sealed panes is different. It can indicate failure of the insulated glass seal rather than excessive room humidity. Exterior condensation on the outside face of an efficient window can also occur under certain weather conditions and does not necessarily signal an indoor moisture problem.

How Humidity, Dew Point, and Surface Temperature Interact

Relative humidity, or RH, describes how much water vapor air contains compared with the maximum it could hold at the same temperature. Because warm air can hold more moisture than cold air, RH changes when air temperature changes even if no water is added or removed.

For example, indoor air at about 70°F and 50% RH has a dew point near 50°F. If part of a window falls below that temperature, condensation can develop there. This is an illustrative calculation; actual surface temperatures vary across panes, frames, and corners.

A general indoor target of 30% to 50% RH works for many homes. In a cold climate, however, 50% RH may be too high for some windows. Lowering humidity toward 30% to 40% during cold spells may reduce condensation, while extremely low humidity can feel uncomfortable and may affect wood furnishings.

Measure RH in the occupied room rather than directly on a wet sill, beside a humidifier, or in the airflow from a supply vent. A basic hygrometer is most useful for observing trends. Consumer sensors can differ, so sustained patterns matter more than a single reading.

Window condensation troubleshooting matrix

Example values for illustration.

Common observations and practical responses
Observation Likely factor First response
Moisture after showers Short humidity spike Run the bathroom exhaust fan and dry the sill
Moisture after cooking Steam and limited exhaust Use a vented range hood and cover pots
Condensation most mornings Overnight moisture and cold glass Check bedroom RH and improve circulation
Only one window is affected Local cold spot, seal, or leak Inspect the frame, weatherstripping, and wall
Water between panes Insulated glass seal failure Seek window assessment rather than dehumidifying alone
Several windows stay wet Whole-home moisture load Increase ventilation or use suitable dehumidification

Common Causes and Troubleshooting Clues

Everyday moisture production

Cooking without effective exhaust, long showers, drying clothes indoors, and unvented fuel-burning appliances can add substantial moisture. Many houseplants or an uncovered aquarium can also contribute, although their effect depends on room size and ventilation.

Compare the timing of condensation with daily activities. If it appears mainly after bathing or cooking and clears quickly, source control and local exhaust may be enough. If it remains for hours, the overall moisture load may be too high.

Restricted airflow near the glass

Closed blinds, heavy curtains, furniture, and deep window coverings can trap cooler, humid air against glass. Open coverings periodically and leave space for room air to move. Avoid directing a humidifier toward a window or exterior wall.

Leaks and building defects

Rain entry, damaged flashing, plumbing leaks, and failed caulk can resemble condensation. Warning clues include staining that worsens after rain, soft materials, peeling finishes, or moisture on walls when the glass itself is dry.

Do not assume all water near a window comes from indoor humidity. Persistent localized dampness should be investigated because reducing room RH will not repair a leak.

How to Reduce Condensation and Mold Risk

Begin with moisture control rather than trying to treat airborne symptoms alone. A practical sequence is to dry, measure, ventilate, dehumidify if necessary, and inspect for defects.

  • Dry wet surfaces promptly: Wipe glass, frames, and sills with a clean cloth. Dry nearby fabrics rather than leaving them against the window.
  • Use exhaust at the source: Operate bathroom fans during bathing and for a period afterward. Use a kitchen hood that exhausts outdoors when producing steam.
  • Track humidity: Check RH at different times for several days, including mornings, after showers, and during cooking.
  • Increase circulation: Open curtains or blinds, move furniture away from cold exterior walls, and keep supply and return vents unobstructed.
  • Adjust humidification: Reduce or stop humidifier use when windows become wet. Follow appliance cleaning instructions to prevent residue buildup.
  • Use dehumidification when needed: Choose equipment suitable for the space, keep doors and windows appropriately closed while it runs, and drain or empty collected water safely.
  • Repair water entry: Correct failed seals, flashing, roof issues, plumbing leaks, or drainage problems rather than repeatedly drying the same area.

Ventilation decisions should account for outdoor conditions. Opening windows can help when outdoor air is drier, but it may add moisture during humid weather. In cold conditions, brief ventilation can lower indoor moisture, although energy use and comfort should be considered.

Real-World Window Condensation Examples

Bedroom windows wet in the morning

Two occupants sleep with the door closed, blinds shut, and no active ventilation. Moisture from breathing accumulates while the glass cools overnight. Useful steps include measuring morning RH, opening the blinds enough for airflow, checking that HVAC registers are open, and using appropriate ventilation or dehumidification.

Kitchen window fogs during meal preparation

Boiling water produces a temporary moisture spike. Covering pots, using the outdoor-vented range hood, and continuing exhaust briefly after cooking can limit accumulation. A short-lived fog that clears is less concerning than water that remains on wood trim.

One corner repeatedly develops dark spotting

A cold frame corner may collect water while the rest of the window looks dry. Clean and dry the area, verify that curtains are not trapping moisture, and inspect for gaps or leaks. Recurrence despite moderate room RH may justify an assessment of the window or surrounding construction.

Basement windows remain damp in summer

Warm outdoor air entering a cool basement can raise RH and condense on cold materials. Leaving windows open may make the problem worse. Monitoring RH and using controlled dehumidification often provides a clearer response than ventilation based only on outdoor temperature.

Purifiers, Dehumidifiers, and Ventilation Have Different Roles

A dehumidifier directly removes water vapor and is generally the relevant device when indoor RH remains high. It does not repair leaks, and its effectiveness depends on capacity, room conditions, drainage, and airflow.

Ventilation replaces indoor air with outdoor air. Local exhaust is especially useful for bathrooms and kitchens because it removes moisture near the source. Whole-home or apartment ventilation results depend on the system design and whether outdoor air is actually drier than indoor air.

A particle air purifier may capture some airborne dust and mold-related particles when properly sized and operated, but it cannot remove moisture from a sill or stop growth on damp material. HEPA filtration addresses particles, while activated carbon is intended for certain gases and odors; neither substitutes for moisture control.

Portable units marketed with ionization or similar electronic features require caution because some technologies can produce ozone. Ozone is not needed to manage condensation and should not be intentionally generated in occupied spaces. UV-C systems also do not dry building materials, and performance depends on exposure, design, and safety controls.

Cleaning, Monitoring, and Ongoing Maintenance

Inspect windows regularly during cold spells and humid seasons. Look at the lower frame, tracks, locks, nearby drywall, and the back of curtains. Dust and debris can hold moisture, so clean tracks and drainage paths according to the window manufacturer’s care guidance.

For a small amount of surface growth on a cleanable, nonporous material, use an appropriate household cleaning method, dry the surface completely, and correct the moisture source. Never mix cleaning chemicals. Porous materials such as saturated drywall, insulation, or some fabrics may be difficult to clean fully and may require removal.

Extensive growth, repeated water damage, contaminated HVAC components, sewage exposure, or an unclear moisture source may warrant professional assessment. An affected area of roughly 10 square feet is often used as a general planning point for considering additional guidance, but conditions and material types matter.

Maintain dehumidifiers, exhaust fans, HVAC filters, and air purifiers according to their instructions. Dirty filters and blocked grilles reduce airflow. If using a condensate hose or pump, inspect it for kinks, leaks, and proper drainage rather than assuming the system is operating correctly.

Humidity and mold prevention quick plan

Example values for illustration.

Goals, actions, and monitoring ideas
Goal Simple actions Tool or check Note
Keep general humidity moderate Target about 30% to 50% RH Room hygrometer Cold weather may require a lower target
Control shower moisture Use exhaust and keep the door positioned for airflow Bathroom fan check Confirm that the fan exhausts properly
Control cooking steam Cover pots and use outdoor exhaust Range hood airflow check Recirculating hoods do not remove water vapor outdoors
Dry recurring window moisture Wipe surfaces and open coverings Daily visual inspection Investigate if moisture returns frequently
Manage humid rooms Use suitable dehumidification RH trend over several days Keep the reservoir and drain clean
Find hidden water entry Compare dampness with rain and plumbing use Frame and wall inspection Repair the source rather than masking it

Related guides:
Best Indoor Humidity Level to Prevent Mold (With Seasonal Targets)
How to Stop Condensation on Windows (And Why It Matters for Mold)
How to Size a Dehumidifier (Sq Ft, Pints/Day, and Real-World Tips)
Ventilation vs Air Purifier: When You Need One, the Other, or Both

Window Condensation and Mold Risk Takeaways

Window condensation is an early indicator that indoor moisture, cold surfaces, and airflow are out of balance. It is not automatic proof of mold, but repeated wetting can create suitable conditions for growth on dust, paint, wood, drywall, fabrics, and other materials.

Use indoor RH as a practical trend rather than an absolute rule. Roughly 30% to 50% RH is common general guidance, but colder weather and less efficient windows may require lower humidity to keep surfaces dry.

Prompt drying, source exhaust, appropriate ventilation, dehumidification, and leak repair address the underlying conditions. Air purification can support particle control, but it should remain secondary to keeping materials dry and correcting persistent moisture sources.

Frequently asked questions

Does window condensation mean there is mold in my home?

No. Condensation alone does not confirm mold, but repeated dampness can create conditions that allow mold to grow on dust, paint, wood, drywall, fabrics, or other materials. Wipe moisture promptly and inspect the sill, frame, curtains, and nearby wall for recurring dampness or visible growth.

What indoor humidity level helps prevent window condensation?

For many homes, roughly 30% to 50% relative humidity is general guidance, with humidity kept below 60% for extended periods. During cold weather, some homes need levels closer to 30% to 40% because colder glass and frames reach the dew point more easily. The best target is one that keeps window surfaces dry while maintaining reasonable comfort.

Why are my bedroom windows wet every morning?

Moisture from breathing can build up overnight, especially when the bedroom door is closed, blinds are shut, and air circulation is limited. Cold nighttime temperatures can lower the inner glass surface below the dew point. Check morning humidity, open coverings enough for airflow, and verify that heating and ventilation registers are not blocked.

Is condensation between window panes caused by high indoor humidity?

Usually, no. Moisture or fogging between sealed panes can indicate a failed insulated-glass seal, allowing moisture into the space between the panes. Reducing indoor humidity may still help ordinary interior condensation, but it generally will not correct a failed window seal.

Will an air purifier stop mold caused by window condensation?

An air purifier may capture some airborne particles, but it does not remove water vapor, dry a wet sill, or repair a leak. Controlling window condensation requires moisture management, such as exhaust ventilation, appropriate dehumidification, better airflow, prompt drying, and repair of water entry. Air cleaning should be secondary to correcting the damp conditions.

Wildfire Smoke Through Doors: What Works to Seal It

Doorway smoke particles fading beside a portable air purifier

To limit wildfire smoke seeping through doors, close adjustable gaps with intact weatherstripping and a door sweep, then use correctly sized particle filtration in a designated clean-air room.

Temporary sealing can help during a smoke event, but it should never block an exit, interfere with a fire-rated door, or eliminate combustion air required by fuel-burning equipment. Filtration remains important because no occupied home is completely airtight.

Quick answer

  • Inspect the top, sides, and bottom of exterior doors; replace compressed or missing weatherstripping and adjust the sweep so it contacts the threshold without preventing closure.
  • During smoky periods, keep exterior doors and windows closed when practical and set compatible central HVAC systems to recirculate.
  • For a clean-air room, use a general planning target of about 4–6 air changes per hour, recognizing that leakage, layout, and purifier speed affect results.
  • Estimate required smoke CADR with: room area × ceiling height × target ACH ÷ 60.
  • Use a portable PM2.5 monitor, if available, to compare indoor conditions over time rather than relying only on odor or visible haze.

Why Wildfire Smoke Enters Around Doors

Wildfire smoke contains fine particles and gases that can move indoors through open doors, gaps in the building enclosure, mechanical ventilation, and normal air leakage. A door does not need to have an obvious crack for smoke to pass through. Small gaps around the jamb, threshold, mail slot, or attached-garage entry can create a continuous leakage path.

Air pressure determines the direction of leakage. Exhaust fans, clothes dryers, fireplaces, and some HVAC configurations can depressurize a home, drawing outdoor air inward through door gaps. Wind can also push smoke against one side of a building and through available openings.

Odor is not a reliable measurement of particle concentration. Some smoke gases are noticeable at low levels, while fine particles may remain elevated even after the smell has faded. A PM2.5 monitor can provide a more consistent trend, although consumer monitors are best used for relative changes rather than laboratory-grade accuracy.

Find Door Leaks and Plan a Clean-Air Room

Begin with a visual and physical inspection while the outdoor air is relatively clear. Look for daylight around the door, loose weatherstripping, a sweep that misses the threshold, or a latch that does not pull the door evenly against its seals. A thin sheet of paper closed in different parts of the frame can reveal areas with weak compression; it should meet noticeable resistance when pulled.

Choose one room as the primary clean-air space when whole-home control is difficult. A bedroom or living area with few exterior openings, a closable door, and enough electrical capacity for a purifier is often practical. The room should still allow normal entry and emergency exit.

Calculate filtration from the room volume rather than floor area alone. For example, a 12-by-15-foot room with an 8-foot ceiling contains 1,440 cubic feet. At a planning target of 5 ACH, the calculation is 1,440 × 5 ÷ 60, or about 120 cubic feet per minute of smoke CADR. This is an illustrative target, not a guarantee of a particular indoor reading.

Example values for illustration.

Door leak and smoke-control decision matrix
Observation Likely path or issue Practical response
Daylight at door sides Missing or compressed weatherstripping Replace with correctly sized door weatherstripping
Gap below the door Worn sweep or uneven threshold Adjust or replace the sweep without impairing closure
Smoke rises when exhaust runs Home depressurization Limit optional exhaust use during smoky periods
One room stays cleaner Smaller enclosed volume Use it as the clean-air room
Particle readings remain elevated Insufficient filtration or ongoing leakage Increase purifier speed and recheck openings
Odor remains but particles fall Smoke gases or absorbed odors Use ventilation later when outdoor air improves

Quick Door-Sealing Checklist for Smoke Events

Use durable seals for recurring leakage

Adhesive-backed or kerf-mounted weatherstripping can close gaps along the top and sides of a typical exterior door. The material should compress when the door latches but should not require excessive force. A sweep or door-bottom seal should meet the threshold across the full width.

Check the threshold, hinges, and latch alignment before adding an unusually thick seal. A misaligned door may leak because it does not sit squarely in the frame. Basic adjustment or professional repair may provide a better result than stacking multiple layers of weatherstripping.

Use temporary measures carefully

For an infrequently used secondary exterior door, removable sealing tape may reduce leakage during a short smoke event. Test it on a small area because adhesives can damage paint and finishes. Do not tape a required exit, a door that residents may need, or any opening that must remain operable under local safety rules.

A rolled towel at the bottom of a door is only a temporary measure. It can shift, create a trip hazard, and provide an inconsistent seal. It should not replace a properly fitted sweep.

Control how often the door opens

Each opening exchanges a substantial amount of air. Combine trips when practical, keep keys and deliveries organized, and close the door promptly without slamming it. In multifamily buildings, keep corridor and stairwell doors operating as designed; they may be part of the building’s fire and pressure-control system.

Size and Place Filtration for a Cleaner Room

Particle filtration addresses the fine particles associated with smoke. A portable purifier should publish a smoke CADR or another clearly stated particle-delivery rate. CADR represents cleaned airflow, so both filter efficiency and airflow matter.

A general clean-air-room target of 4–6 ACH is often practical during smoke events. Higher rates may lower particles faster, but noise, drafts, energy use, and room leakage affect what is sustainable. If the purifier will normally run on a quieter medium setting, size it for adequate delivery at that setting rather than relying only on its maximum rating.

Place the purifier in the occupied room with several inches of clearance around air intakes and outlets. Avoid pushing it behind furniture or directly into curtains. Near-door placement can intercept some incoming particles, but the unit should not obstruct the doorway or create a tripping hazard. In larger or open-plan areas, two distributed units may mix air more evenly than one unit placed in a remote corner. Proper air purifier placement can help avoid obstructed airflow.

A well-sealed HEPA-grade particle filter can capture smoke particles as air passes through it. Labels such as H13 or H14 describe filter-media classifications in certain test frameworks, but whole-device airflow and leakage also matter. A highly efficient filter in a poorly sealed housing may allow bypass around the media.

Activated carbon can reduce some odors and gases, but thin carbon sheets have limited capacity. Carbon performance varies with the amount and type of media, airflow, humidity, and specific compounds. Particle filtration should remain the primary focus for PM2.5 control.

Common Mistakes and Troubleshooting Cues

  • Sealing only the visible bottom gap: Smoke may also enter around the sides, top, lockset, utility penetrations, or nearby windows.
  • Running optional exhaust equipment: Kitchen and bathroom exhaust fans can increase inward leakage. Use them when needed for cooking or moisture, but avoid unnecessary operation during heavy outdoor smoke.
  • Using a purifier that is too small: A unit may move air without providing enough clean airflow for the room volume. Recalculate CADR using ceiling height and target ACH.
  • Operating only on the lowest setting: Quiet mode may provide much less clean airflow. Compare PM2.5 trends at different usable speeds.
  • Blocking purifier airflow: Furniture, walls, curtains, and clutter can restrict intake or recirculate cleaned air over a short path.
  • Opening windows because the room smells stale: Check outdoor smoke conditions first. Carbon dioxide may rise in a closed occupied room, but outdoor-air ventilation is best timed for periods when outside air is cleaner.
  • Assuming a dirty filter works better: Some particle filters collect efficiently as they load, but airflow can decline. Reduced airflow lowers the amount of cleaned air delivered.

If indoor PM2.5 remains high, check whether a door or window is ajar, whether the purifier filter is installed correctly, and whether the HVAC fan is introducing outdoor air. Also consider attached garages, fireplace dampers, range hoods, and other pressure-related pathways. Make only user-accessible changes described by the equipment or building instructions.

Examples for Apartments, Bedrooms, and Open Plans

Apartment with a smoky corridor

If smoke odor or particles appear strongest at the entry door, inspect its perimeter seals and ask building management about damaged weatherstripping or pressure problems. Do not alter a fire-rated apartment door or prevent it from self-closing. Place filtration inside the apartment without blocking the entry path.

Bedroom used as a clean-air room

Close the bedroom door, run a suitably sized purifier continuously, and minimize traffic. For a 150-square-foot room with an 8-foot ceiling, 5 ACH corresponds to about 100 cfm of clean airflow. Actual performance will depend on leakage, furnishings, purifier setting, and filter condition.

Open-plan living area

Use the volume of all connected space when doors cannot isolate the target area. A 600-square-foot open plan with a 9-foot ceiling contains 5,400 cubic feet and would require about 450 cfm for 5 ACH. Multiple units may be more practical and can improve air distribution.

House with central HVAC

If the system supports it, use a well-fitting particle filter such as MERV 13 or the highest efficiency recommended by the equipment manufacturer. Confirm that the filter fits without gaps. Set the system to recirculate where possible, but do not modify ducts, disable outdoor-air requirements, or install a filter that exceeds the system’s airflow capability.

Safety, Filter Maintenance, and Ongoing Checks

Do not seal doors or vents that supply required combustion air to fuel-burning appliances. Maintain working carbon monoxide alarms according to local requirements and their instructions. If sealing changes are extensive, or if a home has naturally vented combustion equipment, consult a qualified building or HVAC professional.

Avoid intentionally ozone-generating air cleaners. Ozone can react with indoor materials and is not needed for particle filtration. Ionization and some electronic cleaning features may have variable performance; if used, look for clear emissions testing and an option to disable the feature. UV-C is not a substitute for particle filtration and should remain enclosed to prevent direct exposure.

Inspect filters more often during prolonged smoke because loading may accelerate. Follow the device instructions and replace a filter when indicated by time, visible loading, persistent odor, damage, or reduced airflow. A timer light is a reminder, not a direct measurement of filter condition.

Vacuum nearby floors with a sealed, particle-filtered vacuum when practical, and damp-dust hard surfaces after outdoor conditions improve. Clean reusable prefilters only as directed and let them dry completely before reinstalling them. Never wash a filter unless it is specifically designed for washing.

Example values for illustration.

Filter inspection and replacement planner
Filter type Example check or service interval What may shorten it
Washable prefilter Check every 2–4 weeks Pets, dust, and continuous operation
Disposable prefilter Check monthly Heavy smoke or visible debris
Portable particle filter Inspect every 1–3 months; replacement often 6–12 months Prolonged smoke and high fan speeds
Thin carbon sheet Check about every 1–3 months Persistent odors and high humidity
Deep carbon filter Review about every 3–6 months High gas exposure and continuous use
Central HVAC filter Check monthly; replace per system guidance Continuous fan use and smoke loading

Related guides:
Wildfire Smoke Indoors: Step-by-Step Plan to Lower PM2.5 Fast
Best Air Purifiers for Wildfire Smoke: What Specs Matter Most
CADR Calculator: Room Size + Ceiling Height + ACH Target
Filter Replacement Schedules: HEPA, Carbon, and Pre-Filters

Frequently asked questions

What is the best way to stop wildfire smoke seeping through the bottom of a door?

Install or adjust a door sweep so it contacts the threshold across the full width while allowing the door to close and latch normally. Also inspect the side and top weatherstripping, since smoke can bypass a bottom seal through gaps around the frame. A towel can offer limited short-term help at a secondary door, but it is not a durable or consistent seal.

Can I tape around my exterior door during a wildfire smoke event?

Removable sealing tape may reduce leakage around an infrequently used secondary exterior door for a short period. Do not tape a required exit, a door that occupants may need to use, or a fire-rated door, and test tape first because it can damage finishes. Temporary tape should not replace correctly fitted weatherstripping and a door sweep.

Why does smoke enter around my door when the door looks closed?

Small gaps at the jamb, threshold, lockset, or door bottom can allow smoky outdoor air indoors even when daylight is not obvious. Wind and negative indoor pressure from exhaust fans, dryers, fireplaces, or some HVAC settings can increase inward leakage. Check seal compression with a paper test and limit optional exhaust use during heavy smoke when practical.

Should I run an air purifier if I have sealed my doors against wildfire smoke?

Yes. Door sealing reduces one pathway, but occupied homes still have air leakage through other openings and may receive particles when doors are opened. Use particle filtration sized for the room volume; a planning target of roughly 4–6 air changes per hour is often used for a clean-air room.

Is it safe to seal an apartment entry door to keep wildfire smoke out?

Do not alter a fire-rated apartment entry door, interfere with its self-closing function, or block the entry route. Report damaged weatherstripping or suspected building pressure problems to property management. A portable particle purifier placed inside the apartment can reduce indoor particles without changing the door’s required safety function.

Summary of the Sealing and Filtration Plan

Start by closing durable leakage paths around the door with correctly fitted weatherstripping and a sweep. Keep exits usable, preserve required combustion air, and avoid altering fire-rated or building-managed doors.

Pair sealing with particle filtration sized to the occupied volume. A planning range of 4–6 ACH, calculated from room volume and smoke CADR, provides a practical starting point. Run the purifier at a sustainable speed, monitor PM2.5 trends when possible, and inspect filters more frequently during extended smoke events.

PM2.5 After Frying Food: What Matters and What to Do

Kitchen ventilation and purifier reducing airborne cooking particles

Frying food can cause a rapid indoor PM2.5 spike, and the most effective response is to capture the cooking plume, ventilate outdoors, and filter the remaining particles. The size and duration of the increase depend on cooking temperature, oil, food moisture, ventilation, and room layout. A particle monitor can help confirm when air quality is returning toward its normal baseline.

Quick answer

  • Start an outdoor-venting range hood about 1–2 minutes before frying and use the highest practical setting.
  • Keep the hood or other exhaust ventilation running for roughly 10–30 minutes afterward, or until monitor readings trend toward the pre-cooking baseline.
  • If outdoor air is suitable, create cross-ventilation with two openings rather than relying on one slightly open window.
  • For supplemental particle filtration, about 4–6 equivalent air changes per hour is a practical planning range during cooking cleanup.
  • Keep a portable purifier out of the direct greasy plume, with clear space around its intake and outlet.

Why frying food causes PM2.5 spikes

PM2.5 refers to airborne particles with aerodynamic diameters of 2.5 micrometers or smaller. Frying can produce particles through heated oil, aerosolized food material, browning, and smoke from overheated ingredients or residue. Some larger oil droplets may also remain suspended before settling on nearby surfaces.

Particle production usually increases as cooking temperatures rise. Visible smoke is an obvious sign of high emissions, but a pan can release fine particles without producing a visible cloud. Searing, stir-frying, shallow frying, and deep frying may all cause measurable increases.

The cooking appliance also matters. Electric cooking can generate particles from food and oil. Gas burners add combustion-related pollutants, including nitrogen dioxide and carbon monoxide, which a basic PM2.5 sensor does not measure. A low PM2.5 reading therefore does not confirm that every cooking-related pollutant is low.

Open-plan rooms can dilute the initial plume across a larger volume, but they also allow particles to spread farther. In a small closed kitchen, the monitor may show a sharper increase because the same emission is concentrated in less air.

How to measure the spike and estimate cleanup airflow

A consumer PM2.5 monitor is most useful for comparing trends in the same location. Note the reading before cooking, watch the peak, and track how long it takes to approach the earlier baseline. Exact readings can vary with sensor design, placement, humidity, and airborne oil droplets.

Place the monitor away from direct steam, splatter, and the immediate range-hood airflow. A location several feet from the stove at breathing-zone height usually provides a more representative room trend than a monitor placed beside the pan. Keep its location consistent when comparing meals or ventilation methods.

Using ACH and CADR as planning tools

Air changes per hour, or ACH, describes how many room volumes are moved or cleaned in one hour. For a portable particle purifier, a simple estimate is:

Required CADR in cubic feet per minute = room volume × target ACH ÷ 60

For example, a 200-square-foot room with an 8-foot ceiling has a volume of 1,600 cubic feet. At 5 ACH, the illustrative clean-air target is about 133 cubic feet per minute. This calculation estimates particle filtration, not odor or gas removal.

Outdoor exhaust and portable filtration serve different purposes. Exhaust can remove particles, moisture, odors, and some gaseous pollutants at the source. A particle filter recirculates indoor air and primarily addresses particles. Using both can be helpful when frying produces a substantial spike.

Choosing an air-quality response after frying

Example values for illustration.

Decision matrix for cooking particle control
Situation Primary action Supplemental action
Outdoor-venting hood available Run it before, during, and after frying Use particle filtration for residual PM2.5
Recirculating hood only Use it to capture some grease Open windows when outdoor air is suitable
No range hood Use controlled cross-ventilation Run a suitably sized particle purifier
Outdoor PM2.5 is elevated Limit window ventilation Emphasize filtration and source control
Small enclosed kitchen Close doors to limit particle spread Exhaust directly outdoors if possible
Open-plan cooking area Capture the plume early Size filtration for the connected space

Common ventilation and monitoring mistakes

Waiting until smoke is visible is a common mistake. Starting the hood before the pan heats establishes airflow before emissions begin. The hood should remain on throughout cooking, even if the noise encourages use of a lower setting.

Another mistake is assuming every range hood exhausts outdoors. Recirculating models pass air through grease and sometimes carbon filters before returning it to the room. They can reduce grease deposition and some odors, but they do not provide the same pollutant removal as outdoor exhaust.

Opening one window may have limited effect if there is no clear airflow path. A second opening on another side of the room or home can improve air movement. However, wind direction, outdoor temperature, outdoor pollution, and building pressure can change the result.

Monitor placement can also create misleading readings. Steam and concentrated oil droplets close to the pan may produce an unusually high response. Conversely, placing the sensor directly beside a purifier outlet may make the entire room appear cleaner than it is.

  • Do not block purifier intakes with furniture, curtains, or walls.
  • Do not place a purifier where hot oil or water can splash into it.
  • Do not treat odor disappearance as proof that particle levels have returned to baseline.
  • Do not assume a central HVAC fan replaces outdoor kitchen exhaust.

Ventilation steps before, during, and after frying

Before cooking

  • Check whether outdoor air is suitable for window ventilation.
  • Turn on the outdoor-venting hood about 1–2 minutes before heating the pan.
  • Use rear burners when practical because many hoods capture the rear plume more effectively.
  • Confirm that hood filters are installed and not heavily coated with grease.
  • Turn on supplemental particle filtration and select a higher practical airflow setting.

While frying

  • Use the lowest temperature that produces the intended cooking result.
  • Avoid allowing oil, crumbs, or residue to smoke.
  • Keep pans under the hood’s capture area.
  • Use a lid or splatter screen when appropriate for the recipe and safe cooking practice.
  • Keep interior doors closed if doing so limits particle movement without interfering with required airflow.

After cooking

  • Move the pan off the hot burner and turn off the appliance.
  • Continue exhaust ventilation for roughly 10–30 minutes as general guidance.
  • Keep the purifier at a higher setting until PM2.5 trends toward its earlier level.
  • Wipe settled grease from safe, cool surfaces so it is not repeatedly heated.
  • If readings stay elevated, check for a continuing source before simply increasing fan speed.

Cleanup time is not fixed. A small meal under effective exhaust may clear quickly, while high-temperature frying in an open-plan home may take longer. The monitor trend is generally more useful than a universal timer.

Real-world frying and ventilation examples

Apartment with a recirculating hood

In an apartment without outdoor kitchen exhaust, start the recirculating hood to capture some grease and create cross-ventilation when outdoor conditions permit. Position a portable purifier outside the immediate splatter zone so room air can circulate through it. Closing bedroom doors can reduce particle movement into sleeping areas.

House with an outdoor-venting range hood

Start the hood before preheating and use a setting that consistently captures the visible or inferred plume. If the room monitor still rises sharply, use a higher fan setting, cook on a rear burner when practical, or reduce the heat. Continue ventilation after the burner is off.

Open-plan kitchen and living room

For purifier sizing, include the connected area through which air moves freely rather than counting only the kitchen floor space. A unit sized for a small kitchen may provide too few equivalent air changes once particles spread through a much larger living area.

Cold, hot, or smoky outdoor conditions

Opening windows is not always the preferred option. During outdoor smoke, elevated outdoor PM2.5, or temperature extremes, emphasize source capture and indoor particle filtration. Brief ventilation may still be useful in some situations, but compare indoor and outdoor conditions rather than assuming outside air is cleaner.

Safety limits of purifiers and cooking controls

A mechanical particle filter can reduce airborne cooking particles, but it does not replace a range hood that vents outdoors. Standard particle filters are not designed to remove carbon monoxide or nitrogen dioxide. Activated carbon may reduce some odors and gases, but effectiveness depends on carbon quantity, contact time, airflow, and the specific compound.

Homes with fuel-burning appliances should have appropriate carbon monoxide alarms installed and maintained according to applicable safety guidance. A general air-quality monitor or PM2.5 sensor is not a substitute for a listed carbon monoxide alarm.

Ionizers, electrostatic features, and some plasma-based devices require caution because certain designs can generate ozone. Ozone is not needed for routine cooking-particle control. Mechanical filtration that does not intentionally produce ozone is the simpler option for general home use.

UV-C systems are mainly intended to inactivate certain microorganisms under suitable exposure conditions. They do not physically remove grease particles, PM2.5, carbon monoxide, or cooking odors. Enclosed designs also require proper construction to prevent direct exposure and limit unintended ozone production.

Never modify a range hood, stove, vent, purifier, alarm, or building exhaust system to increase airflow. Follow appliance instructions and building requirements, and use qualified help for ventilation or combustion-appliance concerns.

Maintenance that supports effective particle removal

Grease buildup can reduce hood airflow and increase odors when residue is reheated. Clean reusable metal grease filters at the interval specified for the appliance, with more frequent attention when frying is common. Replace disposable hood filters rather than washing them unless their instructions explicitly allow cleaning.

Portable purifier prefilters can collect dust, hair, and some larger cooking residue. Inspect them regularly and clean them only by an approved method. A heavily loaded prefilter or particle filter can restrict airflow, which reduces the amount of clean air delivered to the room.

Filter replacement schedules are starting points rather than guarantees. Frying frequency, fan speed, household dust, pets, wildfire smoke, and operating hours all affect filter loading. A persistent airflow decline, filter indicator, visible loading, or odor breakthrough may justify inspection.

Particle monitors also need basic upkeep. Keep sensor openings free of dust and grease, and avoid household sprays near the device. If readings become unusually slow or inconsistent, move the monitor to clean indoor air and follow its approved cleaning or reset procedure.

Monitor readings to review after cooking

Example values for illustration.

Indoor monitor metrics and practical interpretation
Metric What it indicates Common pitfall Action idea
PM2.5 Fine-particle trend Steam or oil droplets can affect readings Track the decline toward baseline
PM10 Larger airborne-particle trend Does not identify the particle source Check cooking and cleaning activities
CO2 Occupancy and general ventilation proxy Does not measure cooking PM2.5 Use as supporting ventilation context
TVOC Broad sensor response to some gases Readings are not compound-specific Compare trends rather than exact identity
Relative humidity Moisture level and steam influence High humidity may affect particle sensors Interpret short cooking peaks cautiously
Carbon monoxide alarm Dedicated combustion safety warning A PM monitor cannot replace it Maintain and respond per alarm guidance

Related guides:
Cooking PM2.5 Spikes: What to Do Before, During, and After Cooking
Exhaust Fan Best Practices: Bathrooms and Kitchens That Actually Clear Air
Do Air Purifiers Help With Cooking Smoke and Grease Particles?
Air Purifier Sizing for Open Floor Plans: A Step-by-Step Method

Key takeaways for clearing PM2.5 after frying

Control cooking particles as close to the source as possible. Start outdoor exhaust before frying, keep the pan under the hood, avoid unnecessary smoking, and continue ventilation after cooking ends.

Use a PM2.5 monitor to evaluate trends rather than treating one reading as a complete assessment. If supplemental filtration is needed, size it for the connected room volume and aim for roughly 4–6 equivalent air changes per hour as a practical cleanup range.

Ventilation decisions should also account for outdoor air quality. When outdoor particle levels are elevated, source capture and indoor filtration may be preferable to wide-open windows. Maintain hood filters, purifier filters, monitors, and carbon monoxide alarms so each device can perform its intended role.

Frequently asked questions

How long does PM2.5 stay elevated after frying food?

PM2.5 may decline within minutes or remain elevated for much longer, depending on the amount of frying, room size, exhaust performance, and filtration. Continue using outdoor exhaust for roughly 10–30 minutes as general guidance, then use monitor trends to judge whether readings are approaching the pre-cooking baseline.

Should I open windows after frying food to lower PM2.5?

Opening windows can help when outdoor air is cleaner than indoor air and there is a clear airflow path through the home. Cross-ventilation with two openings is generally more effective than one slightly open window, but windows may be less helpful during wildfire smoke, high outdoor PM2.5, or severe weather.

Does a recirculating range hood remove PM2.5 from frying?

A recirculating hood may capture some grease and reduce some odors, but it does not remove air from the home in the way an outdoor-venting hood does. For frying-related PM2.5, combine it with suitable window ventilation when conditions allow and a properly sized mechanical particle purifier.

Where should a portable air purifier go after frying food?

Place the purifier away from direct heat, splatter, steam, and the concentrated greasy plume from the pan. Leave clear space around the intake and outlet so it can circulate room air effectively, and avoid placing it immediately beside a PM monitor because that can create an unrepresentative reading.

Why is my PM2.5 monitor still high after the frying pan is off?

Particles can remain suspended and continue mixing through connected rooms after cooking stops, especially in open-plan spaces or where airflow is limited. The monitor may also respond to steam and airborne oil droplets, so review the trend over time and check for continuing sources such as a hot pan, smoking residue, or inadequate exhaust.

How to Clean Fireplace Ash Without Resuspending Dust

Fireplace ash particles fading near an air purifier

Clean fireplace ash without re-suspending fine dust by letting it cool completely, removing it slowly with suitable tools, and damp-wiping escaped residue instead of dry sweeping.

Fireplace ash contains particles light enough to become airborne when disturbed by a broom, an unsuitable vacuum, or strong airflow. A controlled cleanup limits how much dust spreads into the room and through the home’s ventilation system.

Quick answer

  • Wait until the ash is completely cold; depending on the fire and appliance instructions, this may require several days.
  • Allow airborne dust to settle for about 30–60 minutes before cleaning nearby surfaces.
  • Use a metal shovel, a covered metal container, or a vacuum specifically designed for cold ash with fine-particle filtration.
  • Pause nearby fans and forced-air circulation during cleanup when it is safe and practical to do so.
  • Damp-wipe hard surfaces and launder washable fabrics rather than dry dusting them.
  • Run a properly sized particle air purifier during and after cleaning without aiming its exhaust directly at the hearth.

Why Fireplace Ash Dust Becomes Airborne

Wood ash is a mixture of mineral residue, small pieces of charcoal, and particles produced during combustion. The finest fraction can behave like other indoor particle pollution: it remains suspended for a time, travels with air currents, and settles on floors, furniture, and fabrics.

Visible gray ash is only part of the cleanup issue. Smaller particles may be difficult to see, especially after they spread beyond the hearth. Soot is different from loose ash because it may be oily or strongly attached to surfaces, but both can smear or become airborne when cleaned with the wrong method.

Common sources of re-suspension include:

  • Pouring or dropping ash into an open container
  • Using a dry broom, feather duster, or compressed air
  • Vacuuming with a machine that leaks around its filter or housing
  • Running a ceiling fan or HVAC blower across the work area
  • Shaking rugs, fireplace screens, or cleaning cloths indoors
  • Walking through tracked ash before cleaning it

The goal is not to make the room completely motionless. It is to avoid strong, direct airflow while capturing ash as close to the source as possible.

How to Prepare the Room and Cleaning Tools

Confirm that the fireplace is inactive and the ash is fully cold before beginning. Embers can remain insulated beneath an apparently cool surface, so follow the fireplace or stove instructions and local fire-safety guidance. Never use an ordinary household vacuum on warm ash.

Gather tools before opening the fireplace doors or moving the screen. Useful supplies include a small metal shovel, a metal container with a fitted lid, damp microfiber cloths, disposable bags for cold residue, and a vacuum specifically rated for cold ash. If a vacuum is used, a well-sealed body and an appropriate fine-particle filter help reduce exhaust leakage.

Move easily contaminated items, such as throw pillows and toys, away from the hearth. Close interior doors where practical, but do not block required ventilation or alter the fireplace. Temporarily stop portable fans and forced-air circulation only when doing so is safe for the home and weather conditions.

Low-dust fireplace cleanup preparation checklist

Example values for illustration.

Tasks to complete before ash removal
Check Why it matters Practical note
Ash is fully cold Reduces fire risk Follow appliance guidance; waiting several days may be appropriate
Fans are paused Limits particle movement Do not interrupt required ventilation
Metal container is ready Contains ash and possible hidden embers Use a fitted lid
Correct vacuum is available Limits leakage and equipment damage Use only equipment rated for cold ash
Damp cloths are prepared Capture settled residue They should be damp, not dripping
Nearby fabrics are moved Reduces secondary cleanup Do not shake dusty fabrics indoors
Disposal location is planned Avoids carrying open ash through rooms Keep the route short and clear

Common Ash-Cleaning Mistakes and Troubleshooting Cues

Dry sweeping is one of the most common mistakes. A broom may collect larger debris while pushing fine particles into the air. Compressed air and forceful brushing create an even stronger plume and should not be used for indoor ash cleanup.

An ordinary vacuum can also worsen the problem. Fine ash may pass through a coarse filter, leak around a poorly seated filter, or escape from the exhaust. Stop vacuuming if a visible haze appears, the exhaust smells dusty, or a particle monitor rises sharply and remains elevated. Check the filter, seals, hose connections, and collection chamber outdoors after the equipment has been switched off.

A little moisture helps capture dust on room surfaces, but pouring water into the firebox is not a general cleanup method. Wet ash can form a difficult paste and may affect masonry or metal surfaces. Follow the fireplace’s care instructions for the firebox itself.

Do not interpret every brief monitor increase as a precise measure of ash exposure. Consumer PM2.5 sensors can respond to cooking aerosols, humidity, and other particles. Trends before, during, and after cleanup are generally more useful than a single reading.

Step-by-Step Method for Low-Dust Ash Removal

1. Let particles settle

After the last fire, keep the fireplace undisturbed until everything is fully cold. If ash was recently stirred or spilled, leave the room calm for roughly 30–60 minutes so larger airborne particles can settle before surface cleaning.

2. Remove larger ash slowly

Open fireplace doors or move the screen gently. Slide a metal shovel beneath the ash rather than scooping forcefully from above. Transfer small amounts into a metal container positioned close to the hearth. Lower the shovel into the container before tipping it to reduce the drop distance.

Do not fill the container to the rim. Close its lid before carrying it through the home, and keep it outside on a noncombustible surface away from structures and combustible materials according to local guidance.

3. Capture remaining fine residue

If the appliance instructions allow vacuum cleaning, use equipment designed for cold ash. Move the nozzle slowly and keep it close to the surface. Avoid scraping aggressively or waving the nozzle above loose material.

For ash that escaped onto a hard floor, lift larger particles first and then wipe with a slightly damp disposable or washable cloth. Work from the outer edge of the affected area toward the center. Rinse or replace the cloth when it becomes loaded rather than continuing to spread residue.

4. Clean surrounding surfaces from high to low

Damp-wipe the mantel, nearby hard furniture, baseboards, and finally the floor. Use the surface manufacturer’s instructions for stone, brick, wood, or metal finishes. Wash removable fireplace tools outdoors or in an appropriate utility area without sending ash into living spaces.

5. Restore normal airflow

Once loose ash is contained and surfaces are clean, restore HVAC operation and normal ventilation. A particle air purifier can continue operating for several air changes. As general guidance, 30–60 minutes on a higher setting may help after a small cleanup, while a larger spill may require longer.

Practical Cleanup Examples for Different Situations

Routine removal from an enclosed fireplace

For a small amount of cold ash behind fireplace doors, place the covered metal container beside the hearth, shovel slowly, and clean the remaining film with an approved ash vacuum or damp cloth. Keep the doors closed between shovel loads if the room is drafty.

Ash spilled onto a hard floor

Stop foot traffic and turn off airflow aimed across the spill. Pick up larger material with a metal scoop, then use damp cloths in overlapping passes. Avoid a wet mop at first because it can spread gray residue across a larger area.

Ash on carpet or upholstery

Do not rub the area or apply water immediately. Carefully lift loose debris and use a suitable, well-filtered vacuum if the material’s care instructions permit it. Embedded soot or a large spill may require a qualified cleaning service because aggressive household cleaning can set stains or spread particles.

A larger visible dust plume

Leave the area calm and allow particles to settle. Close doors to unaffected rooms where practical, then clean hard surfaces from high to low. Replace or clean any nearby filters that show unusual ash loading, following their instructions.

Ventilation, Air Purifiers, and Safety Considerations

Ventilation can dilute indoor particles, but timing matters. Opening a window may help after ash is contained if outdoor air quality and weather are suitable. During shoveling, a strong cross-draft can pull ash into the room, so avoid placing a fan in a way that blows across the fireplace.

A portable purifier with a particle filter can supplement source control. Choose a clean-air delivery rate appropriate for the room and place the unit where it can circulate room air without directing exhaust at the hearth. Activated carbon may help with some odors, but it is not a substitute for particle filtration or proper fireplace venting.

Ionizers and other electronic air-cleaning features are not necessary for ash removal. Some devices can produce ozone as a byproduct, so ozone-generating equipment should not be used in occupied indoor spaces. Ultraviolet systems do not capture ash particles and should not be treated as a replacement for filtration and careful cleaning.

A properly installed carbon monoxide alarm remains important in homes with fuel-burning appliances, but it does not measure ash or PM2.5. Smoke, unusual odors, visible backdrafting, or repeated soot deposits can indicate a fireplace or chimney problem that calls for qualified inspection rather than additional room cleaning.

For unavoidable dusty work, a properly fitted particulate respirator can reduce the amount of dust inhaled. Follow the respirator instructions, and keep children and pets away from the cleanup area until surfaces are clean.

Filter Maintenance, Disposal, and Ongoing Prevention

Fine ash can load filters faster than ordinary household dust. Inspect the ash vacuum filter, portable purifier prefilter, and nearby HVAC return filter after a noticeable spill or dusty cleanup. Do not strike or shake loaded filters indoors.

Clean reusable components only as directed. A filter labeled washable may need complete drying before reinstallation, while many fine-particle filters should not be washed. Replace damaged, warped, persistently odorous, or visibly overloaded filters even if the usual replacement date has not arrived.

Bag disposable cold ash securely before final disposal, following local waste requirements. Keep the covered metal ash container outside and away from combustible materials until there is no possibility of heat or embers. Do not place uncertain ash directly into a combustible trash container.

To reduce future spread, maintain fireplace door seals and screens according to the appliance instructions, arrange tools within easy reach, and use a washable hearth mat where appropriate. Chimney and vent inspections should follow applicable appliance guidance and local safety practices.

General filter and cleaning-material planning after ash cleanup

Example values for illustration.

Illustrative inspection and replacement intervals
Item Example interval What may shorten it Reminder
Purifier prefilter Inspect every 2–4 weeks Frequent fireplace use or visible ash Clean only as directed
Purifier particle filter About 6–12 months Heavy particle loading or long daily runtime Use condition indicators and instructions
Activated carbon filter About 3–6 months Persistent smoke odors or high airflow Carbon life varies widely
Ash vacuum filter Inspect after each use Fine or compacted ash Service outdoors when fully cold
HVAC filter Inspect every 1–3 months Dusty cleanup or continuous fan use Use a filter compatible with the system
Washable cloths After each cleanup Visible gray loading Launder separately when practical

Related guides:
Wood Stove and Fireplace Particles: Keeping Indoor Air Safer
Vacuuming and Dust Clouds: Why PM Rises and How to Reduce It
Air Purifier Placement: Where to Put It for Best Results
Air Purifier Maintenance Checklist: Filters, Sensors, and Cleaning

Summary of Low-Dust Fireplace Ash Cleaning

The main controls are patience, gentle handling, suitable containment, and damp surface cleaning. Let ash become fully cold, minimize drafts, transfer it in small amounts to a covered metal container, and avoid dry sweeping or compressed air.

Use only a vacuum intended for cold ash, with its filter and seals correctly installed. Clean escaped residue from high surfaces to low surfaces, inspect nearby filters afterward, and restore ventilation once the source is contained.

If ash repeatedly enters the room, soot accumulates unusually quickly, or the fireplace appears to backdraft, pause use and arrange an appropriate inspection. Cleaning can remove deposited particles, but it cannot correct a venting or appliance problem.

Frequently asked questions

How long should fireplace ash cool before I remove it?

Ash should be completely cold before removal, which can take several days because embers may remain insulated below the surface. Follow the appliance manufacturer’s instructions and local fire-safety guidance, and treat ash as potentially hot if there is any uncertainty.

Can I use a regular household vacuum to clean fireplace ash dust?

No. Fine ash can pass through inadequate filters, leak from poorly sealed vacuums, damage the machine, or create dusty exhaust. Use only a vacuum specifically intended for fully cold ash and fitted with the recommended filter.

What is the best way to clean ash that spilled on a hardwood or tile floor?

First stop foot traffic and turn off fans or airflow blowing across the spill. Lift larger ash carefully with a scoop, then wipe from the outer edge toward the center using a slightly damp cloth; avoid dry sweeping and heavily wet mopping at the start.

Should I turn off my HVAC system while cleaning fireplace ash?

Pausing forced-air circulation can help prevent fine ash from traveling through the room or entering return vents when it is safe and practical. Do not disable ventilation that is required for safe operation of the home or fireplace, and restore normal airflow after the ash is contained and surfaces are cleaned.

How do I dispose of cold fireplace ash safely?

Place cold ash in a covered metal container and keep it outdoors on a noncombustible surface away from structures and combustible materials. Follow local disposal requirements, and do not put ash into a combustible trash container until there is no possibility of hidden heat or embers.

Vacuuming and Indoor PM2.5: What Matters During Cleaning

Vacuum and purifier with airborne particle dots

Vacuuming can temporarily raise indoor PM2.5 because the machine, moving air, and foot traffic disturb settled dust and release some fine particles into the room. The size of the increase depends on the vacuum’s filtration and seals, the amount of accumulated dust, the flooring, and how the room is ventilated or filtered. A short spike does not necessarily mean the vacuum is malfunctioning, but a large or persistent increase is worth investigating.

Quick answer

  • Check the room’s normal PM2.5 level for 10–15 minutes before cleaning so you have a useful baseline.
  • Run suitable particle filtration during vacuuming and for roughly 30–60 minutes afterward; recovery may take longer in dusty or poorly ventilated rooms.
  • If using an air purifier, about 3–5 air changes per hour is a practical general planning range for supplemental particle removal during cleaning.
  • Vacuum slowly, avoid repeated fast passes, and work from cleaner areas toward dirtier areas.
  • Inspect the bag or bin, filters, seals, and hose when readings remain elevated or visible dust escapes.

Why vacuuming can make indoor PM2.5 rise

Household dust is a mixture of fibers, skin flakes, tracked-in soil, combustion particles, pollen fragments, and other materials. Much of it settles on floors and furnishings, but walking and cleaning can return some of those particles to the air.

A vacuum creates strong local airflow at the floor. The nozzle collects material directly beneath it, while air moving around the nozzle can disturb nearby dust. The operator’s steps, the vacuum’s wheels, and movement of furniture add further disturbance.

Some particles may also leave through the exhaust. This is more likely when a filter is missing, overloaded, damaged, poorly fitted, or not designed to capture fine particles. Leaks around the dust compartment, hose connections, or filter housing can bypass the filter media even when the filter itself is efficient.

Hard floors can produce a noticeable spike when a fast-moving floor head pushes fine dust ahead of it. Carpet may hold more dust below the visible surface, and agitation from a rotating brush can release particles before they are captured.

What a PM2.5 monitor is measuring during cleaning

PM2.5 refers to airborne particulate matter with an aerodynamic diameter of approximately 2.5 micrometers or smaller. These fine particles can remain suspended longer than large lint, hair, and visible dust.

Most consumer monitors estimate PM2.5 with an optical sensor. The sensor measures light scattered by particles passing through a small chamber and converts that signal into an estimated mass concentration, usually displayed in micrograms per cubic meter. It does not directly weigh every particle.

Cleaning can produce particles with different sizes, shapes, and optical properties, so the reading should be treated as an estimate. High humidity, aerosol sprays, steam, cooking emissions, and a monitor placed directly in the vacuum exhaust can also affect the result.

How to measure a cleaning spike consistently

  • Place the monitor about 3–6 feet from the main cleaning path rather than beside the exhaust or directly on the floor.
  • Record a 10–15 minute baseline under normal room conditions.
  • Note the reading during cleaning, immediately afterward, and at 15-minute intervals during recovery.
  • Repeat the test in the same location and under similar ventilation conditions if comparing cleaning methods.
Checklist for interpreting a PM2.5 increase while vacuuming. Example values for illustration.
Vacuuming PM2.5 troubleshooting checklist
Observation Possible explanation Practical check
Brief rise near the floor Settled dust was disturbed Use slower passes and allow filtration time
Sharp rise near the exhaust Fine particles or a localized sensor effect Move the monitor away and inspect exhaust filtration
Dust visible around the body Bag, bin, seal, or connection leak Stop and inspect parts according to the appliance instructions
Readings stay high for over an hour Heavy dust load or limited particle removal Check ventilation, purifier airflow, and filter condition
Rise occurs only on carpet Brush agitation is releasing embedded dust Reduce speed and adjust the floor setting if provided
Rise occurs after emptying Collected dust escaped from the bin or bag Empty outdoors when practical and clean the surrounding area

Common reasons dust spikes are unusually large

A high reading during one cleaning session may reflect the room, the vacuum, the monitor, or another particle source. Looking for a repeatable pattern is more useful than reacting to a single peak.

Overfilled bags and bins

Airflow and collection performance can decline as a bag or bin fills. Dust can also collect around gaskets and mating surfaces, preventing the compartment from closing cleanly. Empty or replace the container before it reaches the appliance’s stated limit.

Dirty, damaged, or incorrectly installed filters

A filter that is clogged may reduce airflow, while a torn or poorly seated filter may allow bypass. Use only the cleaning or replacement method specified for that filter. A filter labeled washable should be completely dry before reinstallation.

Leaks in the air path

Cracked hoses, loose connections, worn gaskets, and an improperly closed compartment can release dust before it reaches the final filter. Do not tape over vents or alter the appliance. Replace damaged parts or arrange appropriate servicing.

Cleaning techniques that redistribute dust

Fast passes, dry sweeping before vacuuming, shaking rugs indoors, and directing exhaust toward dusty surfaces can all increase airborne particles. Scented powders and carpet treatments may create additional particles or interfere with monitor readings.

Other sources occurring at the same time

Cooking, candles, fireplaces, outdoor smoke, humidifier mineral dust, and aerosol products can raise PM2.5 independently of vacuuming. Check nearby activities and outdoor conditions before assigning the entire change to the vacuum.

How to vacuum with a smaller particle spike

The goal is to capture settled material while limiting unnecessary agitation and providing a path for remaining airborne particles to leave the room or reach a filter.

Before cleaning

  • Remove small objects and move light furniture carefully rather than dragging it across dusty flooring.
  • Check that the bag or bin has capacity and that filters and covers are installed correctly.
  • Close doors to untreated rooms if you want to contain disturbed dust in the cleaning area.
  • Start an appropriately sized air purifier before vacuuming so room airflow is already established.
  • Use outdoor ventilation when outside air is suitable and the opening will not introduce smoke, heavy pollution, or excessive humidity.

While vacuuming

  • Move the floor head slowly enough to collect material rather than pushing it into the air.
  • Use overlapping passes in heavily used areas without repeatedly scrubbing the same spot at high speed.
  • Select the intended floor or brush setting when the appliance provides one.
  • Keep the exhaust pointed away from uncleaned surfaces where practical.
  • Avoid shaking attachments or removing a full bag or bin inside the occupied room.

After cleaning

Allow the purifier or ventilation strategy to continue for 30–60 minutes as a starting point. The appropriate duration depends on room size, airflow, dust load, and the measured recovery pattern. Damp-wiping hard surfaces afterward can collect dust that resettles without launching it into the air again.

Using filtration and ventilation during vacuuming

A vacuum’s internal filter and a room air purifier perform different jobs. The vacuum collects material from surfaces, while the purifier removes a portion of the particles that become airborne.

For particle control, purifier airflow is commonly expressed as clean air delivery rate, or CADR. A simple planning calculation is:

Required CADR in cubic feet per minute ≈ room volume in cubic feet × desired air changes per hour ÷ 60.

For example, a 200-square-foot room with an 8-foot ceiling has a volume of 1,600 cubic feet. Planning for 4 air changes per hour would require about 107 cubic feet per minute of clean air delivery under simplified conditions. Open doors, connected spaces, furniture, filter loading, and lower fan settings can change actual performance.

Place the purifier where its intake and outlet are not blocked. Several feet of clearance from the vacuum exhaust helps prevent the purifier from simply recirculating one concentrated plume. In an open-plan home, use the volume of the connected space rather than the nominal floor area of one zone.

Ventilation can dilute indoor particles, but it is not always the right choice. Keep windows closed when outdoor smoke or particle pollution is elevated. Mechanical exhaust may also depressurize a home, so combustion appliances and installed ventilation systems should always be operated according to their safety instructions.

Real-world vacuuming and PM2.5 examples

Carpeted bedroom

A monitor rises soon after the rotating brush starts and returns toward baseline within 30–45 minutes while a purifier operates. This pattern is consistent with temporary resuspension. Slower passes, regular vacuum maintenance, and continued post-cleaning filtration may reduce the peak and recovery time.

Hard-floor living area

The reading increases when the floor head moves quickly across visible dust. Reducing speed and using a floor-appropriate setting helps the nozzle capture dust rather than push it. Damp-wiping remaining fine dust after vacuuming can further limit resuspension.

Persistent rise after every use

PM2.5 stays elevated for more than an hour, and the increase is strongest near the vacuum body. Check the bag or bin seal, hose joints, filter fit, and exhaust area. Repeating the observation with the monitor farther away can distinguish a room-wide increase from a highly localized plume.

Spike during bin emptying

The room remains stable while vacuuming but rises when the dust container is opened. Emptying the container outdoors, when practical, can keep this release out of the living area. Follow the manufacturer’s handling directions and avoid compressing collected dust.

Monitor limits, maintenance, and equipment safety

PM2.5 monitors are most useful for identifying trends: the normal baseline, the size of the cleaning peak, and the time required to return toward baseline. Two consumer monitors may report different numbers because of sensor design, calibration, airflow, particle composition, and humidity.

Keep the monitor’s air openings unobstructed and clean it only as directed. Do not place it inside a vacuum exhaust stream or purifier outlet. A location near normal breathing height and away from walls generally gives a more representative room reading.

Maintain the vacuum on a predictable schedule. Check the dust container before use, inspect filters and seals periodically, remove wrapped hair from the floor head, and examine hoses for obstructions or damage. Replacement timing should follow the appliance instructions because filter area, dust load, and operating hours vary.

If supplemental air cleaning is used, mechanical particle filtration is the relevant feature for vacuuming dust. Activated carbon is intended mainly for certain gases and odors and does not replace a particle filter.

Ionizers and some electronic air-cleaning features require additional consideration because certain designs may produce ozone as a byproduct. Ozone is not needed to remove vacuuming dust. Avoid intentionally ozone-generating devices in occupied indoor spaces, and do not modify or bypass appliance safety systems. UV-C features, where present, do not replace particle capture and should remain enclosed as designed.

Monitor readings to review before, during, and after cleaning. Example values for illustration.
Indoor monitor metrics during vacuuming
Metric or observation What it can indicate Common pitfall Action idea
10–15 minute PM2.5 baseline Normal pre-cleaning conditions Measuring immediately after cooking Wait for a stable period
Cleaning peak Maximum estimated particle increase Monitor placed beside the exhaust Measure several feet from the vacuum
15-minute recovery reading Early removal or settling trend Changing windows or fan settings Keep test conditions consistent
30–60 minute recovery How quickly the room approaches baseline Ignoring connected rooms Account for the full open space
Humidity reading Potential optical sensor interference Mist or steam near the monitor Move away from moisture sources
Repeated session pattern Whether the spike is consistent Drawing conclusions from one event Compare several similar cleanings

Related guides:
PM2.5 Explained: What the Numbers Mean and What’s a Safe Level Indoors
How to Choose the Right Air Purifier for Your Room Size
Where to Place an Air Quality Monitor: Height, Distance, and Rooms
Air Purifier Dust Test: How to Track PM2.5 Before and After Changes

Summary of practical takeaways

A temporary indoor PM2.5 rise during vacuuming usually reflects disturbed settled dust, local airflow, and the capture efficiency of the complete vacuum system. Filter labels alone do not determine whole-machine performance because seals, airflow, maintenance, and installation also matter.

  • Measure a stable baseline before cleaning and track recovery rather than focusing only on the highest number.
  • Use slow, controlled passes and avoid cleaning actions that unnecessarily scatter dust.
  • Inspect bags, bins, filters, hoses, and seals when spikes are large, localized near the vacuum, or slow to clear.
  • Use appropriately sized mechanical air filtration or suitable outdoor ventilation during and after cleaning.
  • Keep monitor placement and room conditions consistent when comparing results.

The most useful benchmark is the pattern in the same room over time. A smaller peak and a steady return toward the usual baseline suggest that cleaning technique, equipment maintenance, and room-level particle removal are working together effectively.

Frequently asked questions

Is it normal for PM2.5 to rise while vacuuming?

Yes. Vacuuming, foot traffic, and brush agitation can resuspend settled fine dust, causing a temporary increase in an indoor PM2.5 reading. A short-lived rise that returns toward the usual baseline after cleaning is generally different from a persistent or visibly dusty exhaust plume.

How long should PM2.5 stay elevated after vacuuming?

Recovery time varies with the room’s dust load, air exchange, filtration, connected spaces, and cleaning method. With suitable particle filtration or outdoor air conditions, readings may begin returning toward baseline within 30–60 minutes, but a larger or poorly ventilated space can take longer.

Where should I place a PM2.5 monitor when testing a vacuum?

Place the monitor roughly 3–6 feet from the main cleaning path and away from direct exhaust, purifier outlets, walls, and the floor. Record a stable 10–15 minute baseline before cleaning, then use the same placement and ventilation conditions for repeat comparisons.

Why does my PM2.5 reading rise more when vacuuming carpet?

Carpet can retain dust below the visible surface, and a rotating brush may release some particles before the nozzle captures them. Use the intended carpet setting, make slower controlled passes, and check the vacuum’s bag or bin, filters, and seals if the rise is repeatedly large.

Should I run an air purifier while vacuuming?

A properly sized mechanical particle air purifier can help remove particles that become airborne during cleaning. Run it during vacuuming and afterward, while keeping its intake and outlet clear and positioning it several feet from the vacuum exhaust when practical.

Does a PM2.5 spike mean my vacuum filter is failing?

Not necessarily, because even a well-maintained vacuum can disturb settled dust. A strong increase near the vacuum body or exhaust, visible dust release, or consistently slow recovery can justify checking the filter installation, bag or bin seal, hose connections, and other air-path components according to the appliance instructions.

HVAC Filter Upgrade for Allergies: What Matters Most

Bedroom HVAC filter upgrade with gentle airflow

For allergy-focused particle control, upgrade to the highest-MERV HVAC filter your system can support without unacceptable airflow loss—often MERV 11 to 13, although equipment limits and pressure drop matter. A higher rating can improve capture of smaller airborne particles, but MERV alone does not show how a filter will behave in a particular system. Filter dimensions, installation, blower performance, duct design, and accumulated dust all affect the result.

Quick answer

  • MERV 11 to 13 is a practical target range for many homes when the HVAC system supports it.
  • Check the equipment manual or filter cabinet specifications before increasing filtration resistance.
  • Match the exact filter dimensions and prevent gaps that allow air to bypass the filter.
  • Inspect a new higher-MERV filter after about two to four weeks, then establish a replacement schedule based on loading.
  • If airflow becomes weak, rooms become uneven, or the system cycles abnormally, return to a suitable filter and consult an HVAC professional.

What an HVAC Filter Upgrade Means for Allergies

An HVAC filter captures particles carried through the return-air system. These particles may include household dust, pollen, fibers, pet-related debris, and a portion of smaller airborne particles. Reducing recirculating particles may support a cleaner indoor environment, but filtration does not diagnose, treat, or eliminate allergies.

The filter works only while the HVAC fan is moving air. A high-rated filter provides limited benefit when the system rarely runs, when air bypasses the filter frame, or when pollutants are generated faster than the system can remove them.

Filtration is also only one part of indoor air quality management. Source control, routine cleaning, moisture management, and appropriate outdoor-air ventilation remain important. A portable particle air cleaner may provide additional room-level filtration where central HVAC runtime or duct coverage is limited.

How MERV Ratings and Airflow Trade-Offs Work

MERV, or Minimum Efficiency Reporting Value, is a rating from 1 through 16 under a standardized test method. In general, a higher MERV rating indicates better capture across specified particle-size ranges. MERV does not directly state total household dust removal, filter life, energy use, or airflow in a specific home.

Why a higher MERV rating can restrict airflow

Air must pass through the filter media, creating resistance known as pressure drop. A filter with more media area may provide higher efficiency with less resistance than a thinner filter with the same MERV rating. For that reason, MERV ratings should not be used as pressure-drop ratings.

Resistance also rises as dust accumulates. If the system cannot overcome that resistance, delivered airflow may decline. Possible operational signs include reduced air from supply registers, longer heating or cooling cycles, uneven room temperatures, a frequently tripping temperature limit, or an indoor coil that becomes too cold. These signs can have other causes, so professional evaluation may be needed.

Filter depth, area, and fit

A deeper pleated filter often has more media surface area than a one-inch filter, but it can be used only in a cabinet designed for that depth. Do not force a thicker filter into an incompatible slot or alter the cabinet. The printed nominal size may also differ slightly from the actual dimensions, so compare the existing filter and cabinet requirements carefully.

General comparison of residential MERV ranges

Example values for illustration.

MERV range, particle capture, and airflow considerations
MERV range General role Airflow consideration
1–4 Basic equipment protection and larger debris Usually low resistance but limited fine-particle capture
5–8 Improved capture of larger household particles Common starting range for basic residential systems
9–10 Intermediate particle filtration Check system compatibility and filter specifications
11–12 Greater capture across smaller particle ranges Often practical when the system has adequate airflow capacity
13 Stronger fine-particle filtration within the MERV scale A common upgrade target when supported by the equipment
14–16 High-efficiency filtration Often requires equipment designed for higher resistance

Common HVAC Filter Upgrade Mistakes

The most common mistake is choosing a filter solely by its MERV number. Two filters with the same rating can have different pressure drops because of media area, construction, depth, and face velocity. When available, compare the manufacturer’s clean-filter pressure-drop data at an airflow rate relevant to the system.

Other avoidable problems include:

  • Using the wrong dimensions: A filter that is too small may leave bypass gaps, while an oversized filter may bend or fail to seat correctly.
  • Installing it backward: The airflow arrow should point toward the blower or air-handling equipment.
  • Stacking filters: Placing filters together can add resistance and is not a substitute for a properly designed filtration cabinet.
  • Covering every register: Adding filter material at supply or return grilles can disrupt system airflow unless the system was designed for it.
  • Ignoring multiple returns: Every designated filter location needs the correct filter and replacement schedule.
  • Waiting for visible dirt: Fine-particle loading may increase resistance before a filter looks heavily coated.

Air leakage around the frame is another common weakness. Air follows the easiest path, so even a highly efficient filter underperforms when a significant portion of return air passes around it. Use only the cabinet’s intended retaining mechanism or a manufacturer-approved gasket arrangement; do not block access panels or safety components.

Practical Checklist for Choosing a Higher-MERV Filter

Begin with the HVAC equipment documentation rather than assuming that a particular rating will work. Some manuals specify a maximum filter resistance, an approved filter type, or a minimum filter area instead of a maximum MERV value.

  1. Identify every filter location. Check return grilles, filter cabinets, and air-handler access points without opening service compartments.
  2. Record exact dimensions. Note both the nominal size and actual measured size of the current filter.
  3. Find the supported filtration guidance. Review the equipment or filter-cabinet documentation. If it is unclear, ask a qualified HVAC professional.
  4. Move up gradually. For example, a home using MERV 8 might test MERV 11 before considering MERV 13.
  5. Confirm a tight fit. The filter should seat evenly without being crushed, bowed, or forced.
  6. Mark the installation date. Inspect the filter early because household conditions can change replacement needs.
  7. Observe system operation. Note airflow, room comfort, unusual cycling, noise, and energy-use changes.
  8. Measure when needed. A technician can measure static pressure and airflow rather than relying on subjective register airflow alone.

If the existing filter slot cannot support the desired filtration level, a portable air cleaner sized for the occupied room may be more practical than overloading the central system. Central equipment modifications should be designed and completed by a qualified professional.

Real-World Filter Upgrade Examples

One-inch return filter in an older system

A homeowner using a one-inch MERV 8 filter wants better particle capture. Moving first to MERV 11, confirming a close fit, and monitoring operation is a cautious approach. Jumping directly to a dense high-efficiency filter may create more resistance than the blower and duct system can handle.

Deep media cabinet in a newer system

A system with a properly sized four- or five-inch media cabinet may accommodate a MERV 13 filter with a manageable pressure drop. Cabinet depth alone does not guarantee compatibility, however. The equipment guidance and filter’s airflow data still matter.

Bedrooms with limited central airflow

If bedroom doors are closed and return-air pathways are limited, central filtration may not move enough room air to provide the desired particle reduction. Correcting airflow problems requires professional assessment. A properly sized portable particle air cleaner can supplement central filtration without changing HVAC components.

Homes with pets or seasonal pollen

Higher particle loads can shorten useful filter life. During heavy pollen periods or when several pets are present, checking the filter more frequently is more useful than relying on a fixed calendar interval. Cleaning floors and textiles can also reduce the amount of material reaching the filter.

Safety and Standards Considerations

Conventional mechanical HVAC filters capture particles without intentionally producing ozone. MERV ratings describe particle-filtration performance; they do not rate gas removal, odor control, ozone production, or biological treatment.

Ionizers and some electronic air-cleaning devices may generate ozone as a byproduct. Ozone can irritate the respiratory system and should not be intentionally generated in occupied residential spaces. If considering an electronic device, review independent safety certification and emissions information rather than relying on general air-cleaning claims.

UV-C equipment is different from a particle filter. Properly designed systems may be used for specific HVAC applications, but performance depends on lamp intensity, exposure time, placement, and maintenance. Installation should address eye and skin exposure, electrical safety, material compatibility, and lamp disposal. UV-C does not replace particle filtration or moisture control.

Do not defeat access-panel switches, alter blower settings, cut filter cabinets, or modify combustion equipment to accommodate a filter. Restricted airflow can affect heating and cooling operation, so repeated limit trips, icing, burning odors, or unusual equipment behavior warrant prompt professional service.

Filter Maintenance and Replacement Planning

There is no universal replacement interval. Filter depth, media area, fan runtime, outdoor air conditions, pets, occupancy, renovation dust, and indoor particle sources all affect loading. A calendar reminder is useful, but inspection and system behavior should guide the final decision.

Check a newly upgraded filter after two to four weeks. If it remains lightly loaded and airflow is normal, extend the next inspection interval. Replace it sooner if it is damaged, damp, heavily loaded, or associated with a noticeable airflow decline.

Turn the HVAC system off at the normal control before changing a filter so loose dust is not pulled into the cabinet. Insert the replacement in the indicated airflow direction and reinstall the access cover correctly. Avoid vacuuming or washing disposable filters unless their instructions specifically identify them as reusable.

Illustrative HVAC filter inspection and replacement planner

Example values for illustration.

Filter format and example planning intervals
Filter or condition Example interval What may shorten it
Basic flat filter Inspect monthly; often replace in 30–60 days Long fan runtime, dust, or pets
One-inch pleated filter Inspect monthly; often replace in 30–90 days Higher MERV, smoke, or heavy particle loads
Two-inch pleated filter Inspect every 1–2 months; often replace in 2–4 months High occupancy or frequent system use
Four- or five-inch media filter Inspect every 2–3 months; often replace in 6–12 months Smaller cabinet area or unusually high loading
Heavy pollen or wildfire-smoke period Inspect every 2–4 weeks during the event Outdoor air infiltration and continuous fan use
Renovation or construction dust Inspect weekly during active work Dust escaping containment or entering returns

Related guides:
Portable Air Purifier vs HVAC Filtration: What Helps More in Homes?
MERV 13 vs HEPA: What the Numbers Mean for Indoor Air
UV-C vs HEPA Filters: What Each Can and Can’t Do Indoors
Pollen Season Indoor Plan: Filters, Ventilation Timing, and Cleaning

Key Takeaways for Balancing MERV and Airflow

An HVAC filter upgrade for allergies should balance particle capture, system compatibility, and ongoing maintenance. MERV 11 to 13 is a useful general target for many residential situations, but the correct choice is the highest efficient filter the specific system can support without problematic airflow loss.

Confirm filter dimensions, equipment guidance, installation direction, and frame sealing before focusing on the rating alone. Inspect the new filter early and watch for operational changes. When compatibility is uncertain, static-pressure and airflow measurements from a qualified HVAC professional provide better guidance than guesswork.

Frequently asked questions

What MERV rating is best for allergies in a home HVAC system?

MERV 11 to 13 is often a practical allergy-focused range when the HVAC equipment can support it without excessive airflow restriction. The best choice depends on the filter cabinet, media area, blower capacity, duct system, and the filter’s pressure-drop data rather than the MERV number alone.

Can a MERV 13 filter damage an older HVAC system?

A MERV 13 filter is not automatically harmful, but a restrictive one-inch filter may reduce airflow in a system with limited capacity. Check the equipment or filter-cabinet guidance, confirm the filter fits correctly, and have a technician assess static pressure if airflow or comfort changes after the upgrade.

How often should I replace a higher-MERV HVAC filter for allergies?

Inspect a newly installed higher-MERV filter after two to four weeks, then adjust the schedule based on loading and system operation. Heavy pollen, pets, smoke, renovation dust, long fan runtime, and a shallow filter can require more frequent replacement than a calendar-only schedule suggests.

Does a deeper HVAC filter improve allergy particle capture without reducing airflow?

A deeper filter often has more media surface area, which can reduce resistance compared with a one-inch filter of the same MERV rating. It must be installed only in a cabinet designed for that depth; do not force a thicker filter into an existing slot or modify the cabinet.

Will an HVAC filter upgrade remove allergens from every room?

Central filtration only captures particles that reach the return system while the HVAC fan is operating. Rooms with closed doors, limited return-air pathways, or low central airflow may benefit from a properly sized portable particle air cleaner in addition to suitable central filtration.