Dehumidifier vs Ventilation: Which Basement Fix Comes First

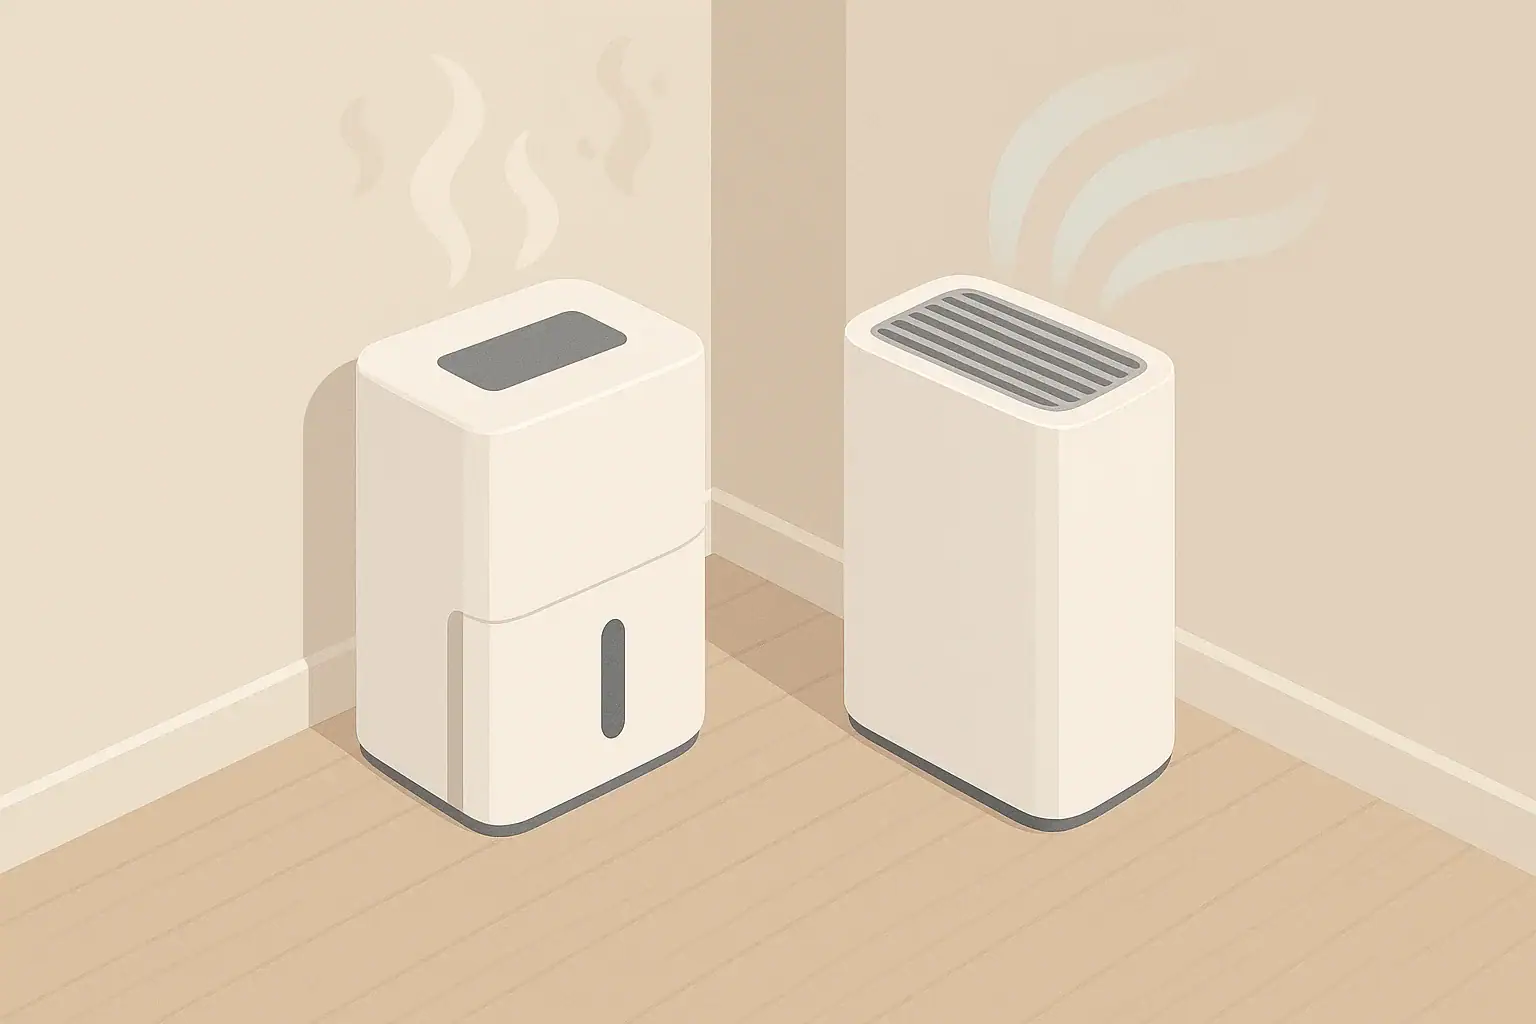
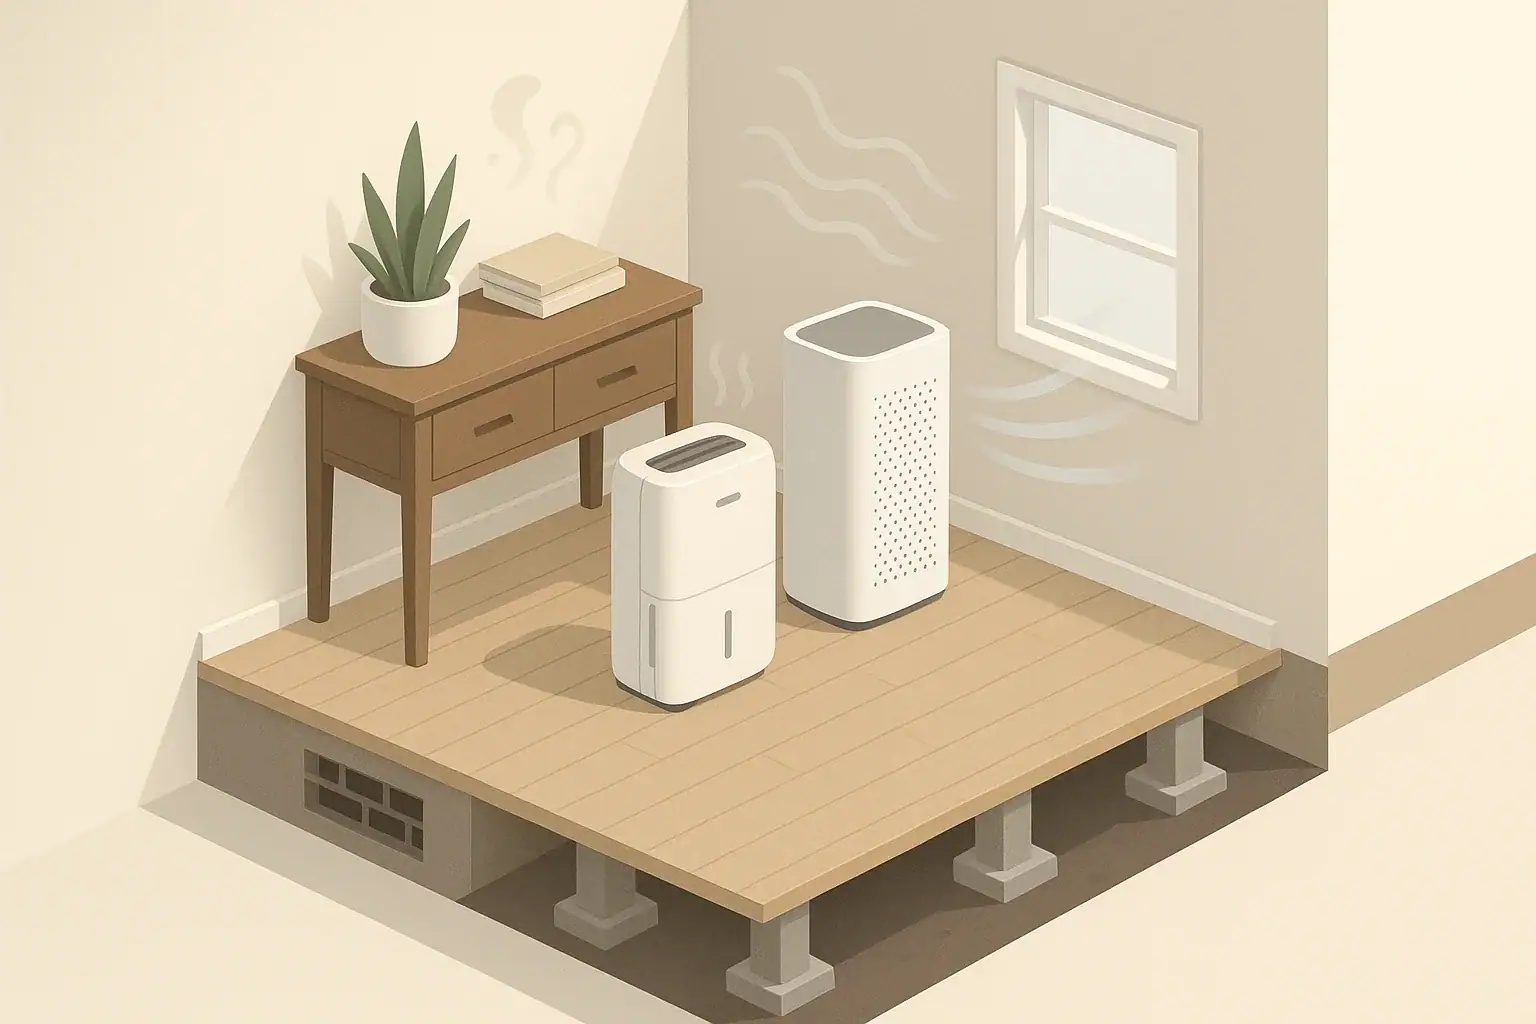
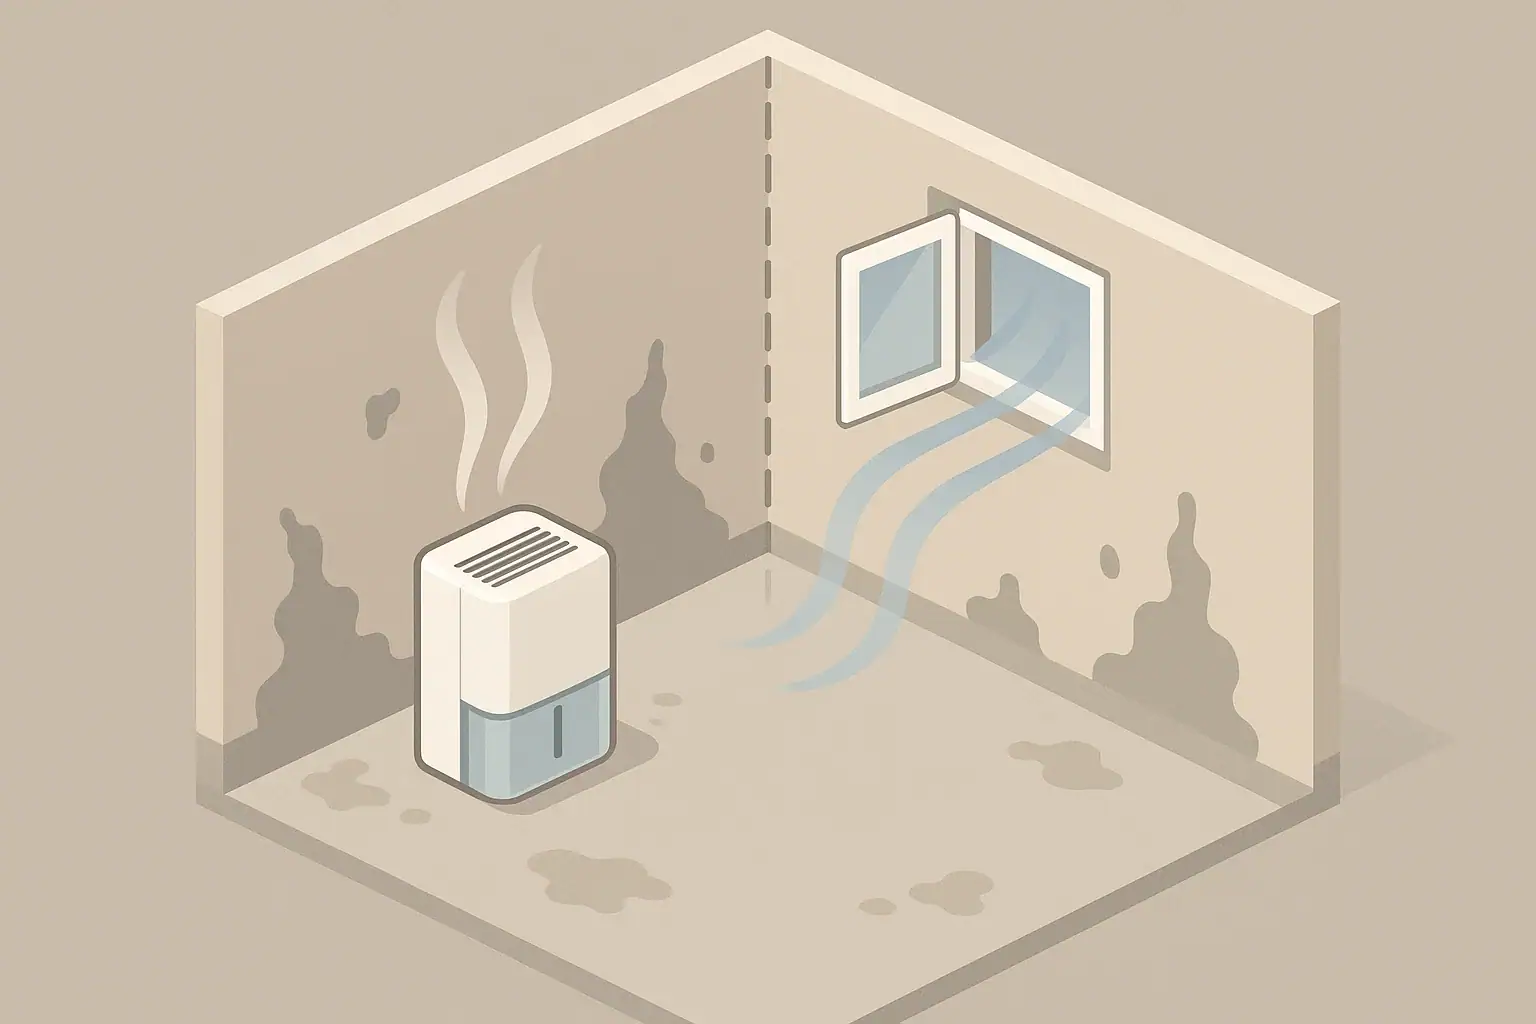
Dehumidifier and ventilation scene in a basement

For most damp basements, fix bulk water and obvious ventilation problems first, then use a dehumidifier to keep relative humidity in a practical indoor range. A dehumidifier can control humid basement air, but it cannot solve seepage, poor drainage, or air leaks by itself. Ventilation can help when outdoor air is drier than indoor air, but it can also add moisture during humid weather.

Quick answer

  • Aim for about 30% to 50% indoor relative humidity as general comfort guidance; try to stay below 60% in damp-prone spaces.
  • Fix liquid water first: leaks, seepage, clogged gutters, grading, or condensation on cold surfaces.
  • Ventilate when outdoor air is drier than basement air; avoid bringing in warm, humid air that raises moisture levels.
  • Use a dehumidifier when humidity remains high after water control and basic air exchange are addressed.
  • Track results with a simple hygrometer placed away from vents, windows, and the dehumidifier outlet.

Why Damp Basements Need Both Moisture Control and Air Exchange

A damp basement is usually not caused by one thing. Moisture can enter as liquid water, water vapor through foundation materials, humid outdoor air, condensation on cool surfaces, or damp items stored indoors. Because the sources vary, the first fix depends on how moisture is getting in.

Dehumidification and ventilation solve different parts of the problem. A dehumidifier removes moisture from indoor air and collects it as water or drains it away. Ventilation replaces some indoor air with outdoor air, which may dilute odors and moisture if the incoming air is actually drier.

The order matters because using the wrong tool first can waste energy and hide the real cause. Running a dehumidifier against an active leak, for example, is like mopping while the faucet is still on. Opening windows during a humid summer afternoon can make the basement wetter, not drier.

Dehumidifier vs Ventilation: What Each One Actually Does

A dehumidifier is an indoor moisture-removal device. It is most useful when the basement air is damp because of normal vapor movement, stored moisture, seasonal humidity, or limited drying. It is also useful when a basement is mostly closed up and humidity stays high for long periods.

Ventilation is air exchange. It may be natural, such as opening windows when conditions are right, or mechanical, such as a code-compliant exhaust or fresh-air system. Ventilation helps most when stale or moist indoor air can be replaced with outdoor air that has a lower moisture load.

The key comparison is not simply air movement versus water removal. It is whether the outside air will help dry the basement. Relative humidity alone can be misleading because warm air can hold more moisture than cool air. In practical terms, if outdoor air feels muggy or causes surfaces to sweat, it is unlikely to be a good drying source.

Dehumidifier vs ventilation decision cues for damp basements

Example values for illustration.

Which fix usually comes first
Basement conditionFirst priorityWhy it matters
Visible seepage or puddlesWater source repairAir equipment cannot correct active liquid water entry
Humidity above about 60%Dehumidification after source checksHigh indoor RH supports dampness and must be lowered
Stale air but RH is controlledVentilation reviewAir exchange may improve freshness without over-drying
Outdoor air is cool and dryTimed ventilationDrier outdoor air can help remove indoor moisture
Outdoor air is warm and humidLimit ventilation; dehumidifyHumid incoming air can raise basement moisture
Cold walls or pipes sweatingCondensation controlSurface temperature and humidity must both be addressed
Musty storage areasDeclutter, dry, then monitorCardboard and fabrics can hold moisture and odors

Simple Sizing and Target Numbers for a Basement

For general indoor comfort, many homes aim for about 30% to 50% relative humidity. In basements, a common practical goal is to keep RH below 60% and often closer to 45% to 50% during damp seasons. These are general targets, not a guarantee against mold or a substitute for repairing water intrusion.

Measure before choosing a fix. Place a hygrometer in the main basement area, not directly beside a window, supply register, dehumidifier outlet, laundry appliance, or exterior door. Check readings at different times of day and after rain, laundry use, or window opening.

How to think about dehumidifier capacity

Dehumidifier sizing depends on basement square footage, moisture load, temperature, and how often water enters. Larger or wetter basements need more moisture-removal capacity than small, moderately damp spaces. If the basement is cool, performance can drop compared with warmer test conditions, so drainage and source control become even more important.

Continuous drainage is often worth planning if the unit will run daily. A collection bucket works, but it requires regular emptying and can stop the unit when full. Any drain setup should follow the product instructions and local safety expectations, without bypassing built-in controls.

How to think about ventilation amount

Basement ventilation should be intentional. Randomly propping open a window may help on a dry fall day and hurt on a humid summer day. A better approach is to compare indoor humidity trends against outdoor conditions and ventilate during favorable periods.

If the basement includes combustion appliances, attached garages, or radon mitigation systems, ventilation changes can affect pressure relationships. In those cases, it is wise to use qualified help rather than guessing with fans or exhaust changes.

Common Mistakes That Keep Basements Damp

One common mistake is buying a dehumidifier before checking for liquid water. Damp walls, wet floor edges, efflorescence, or water after storms point to moisture entry that should be corrected at the source. Typical first checks include gutters, downspouts, grading, foundation cracks, window wells, and plumbing leaks.

Another mistake is assuming more ventilation is always better. Ventilation dries only when the incoming air has less moisture than the basement air. In many U.S. climates, summer outdoor air can be too humid for basement drying, especially when it meets cool concrete or cool plumbing.

Storage habits also matter. Cardboard boxes, rugs, upholstered furniture, and packed shelving can trap moisture against walls and floors. Leaving air gaps around stored items helps surfaces dry and makes moisture problems easier to see early.

Finally, some people rely on scent products to mask damp odors. Odor coverups do not remove moisture or correct the source. A calmer and more useful approach is to locate damp materials, dry them, clean appropriate surfaces, and keep humidity under control.

What to Fix First: A Practical Basement Checklist

Start with visible water. If there are puddles, active seepage, wet drywall, recurring carpet dampness, or plumbing leaks, address those before relying on air equipment. Dehumidifiers and ventilation are support tools, not waterproofing systems.

Next, look outside. Clean gutters, extend downspouts away from the foundation where appropriate, and check whether soil slopes toward the house. These are basic observations, not a substitute for professional drainage work when water entry is persistent.

Then review indoor moisture sources. Unvented drying racks, frequent laundry, open sump pits, damp stored items, and poorly sealed crawlspace connections can all add moisture. If a bathroom or laundry area is in the basement, confirm that exhaust is routed outdoors and used during moisture-producing activities.

After source checks, decide how to use ventilation. Open windows or bring in outdoor air only when it helps the moisture balance. When outdoor conditions are humid, keep the basement more closed and use dehumidification to control RH.

Finally, set up monitoring. A hygrometer gives faster feedback than smell or feel. If RH drops into the target range and stays there, the strategy is likely working. If readings remain high despite continuous operation, there may be an unresolved moisture source, undersized equipment, poor air circulation, or a very large connected space.

Real-World Examples: Which Choice Comes First

Basement gets wet after heavy rain

The first fix is not ventilation or dehumidification. The priority is finding why water enters after storms. Check drainage, downspouts, grading, foundation openings, window wells, and sump operation if present. A dehumidifier can help dry residual moisture after the water source is controlled.

Basement is dry but smells stale

If RH is already around the target range and there is no visible dampness, ventilation may come first. The goal is controlled air exchange, not simply more fan use. Short periods of outdoor air on dry days may help, while humid outdoor air may not.

Basement RH stays around 65% in summer

If there is no obvious leak, a dehumidifier often becomes the main tool. Keep windows closed during muggy weather, improve air circulation around stored items, and use the dehumidifier to bring RH down toward a more practical range. If the unit runs constantly without progress, reassess the moisture source and equipment capacity.

Condensation forms on pipes or concrete

Condensation suggests warm, moist air is contacting a cold surface. The first step is reducing indoor humidity and limiting humid air entry. Insulating appropriate cold-water pipes or improving surface conditions may also help, but work should be done safely and in line with building practices.

Safety, Maintenance, and Upkeep for Basement Air Quality

Basements can include electrical outlets, sump pumps, floor drains, combustion appliances, and laundry equipment, so moisture control should be done with safety in mind. Keep dehumidifiers on stable surfaces, follow clearance instructions, and avoid extension cords unless the product instructions and electrical safety guidance allow them. Do not bypass bucket switches, grounding, safety controls, or drain protections.

Drain hoses should be checked for clogs, kinks, and secure placement. A blocked hose can stop drainage or send water where it does not belong. If draining to a sump or floor drain, keep the area clean and periodically confirm that water is flowing as intended.

Filters and coils need routine care. Many dehumidifiers have washable intake filters that collect dust and lint. A clogged filter can reduce airflow and make the unit work harder. Clean according to the product instructions, especially during high-use seasons.

Ventilation equipment also needs upkeep. Exhaust grilles, intake screens, and ducts can collect dust or debris. If a fan becomes noisy, weak, or intermittent, inspect accessible grilles and consider professional evaluation for the mechanical components.

Be cautious with add-on air treatment features such as ionizers, ozone generators, or UV-C devices. Ozone should not be intentionally generated in occupied indoor spaces for routine air cleaning. UV-C and ionization systems vary widely and should be evaluated carefully for safety, maintenance, and whether they address the actual basement moisture problem.

Basement dampness quick plan for moisture control

Example values for illustration.

Goals, tools, and practical notes
GoalSimple actionsToolsNote
Confirm dampnessMeasure RH for several daysHygrometerTrack after rain and during humid weather
Stop liquid waterCheck leaks, drainage, and wet areasFlashlight, maintenance checklistRepair sources before relying on air equipment
Reduce high RHRun dehumidifier as neededDehumidifier, drain optionAim for a consistent practical range
Use ventilation wiselyVentilate during drier outdoor conditionsWindows, fans, approved ventilationAvoid adding humid outdoor air
Improve circulationMove storage away from wallsShelving, clear floor spaceAir gaps help surfaces dry
Maintain equipmentClean filters and check drainsVacuum, mild cleaning suppliesFollow product instructions

Related guides: Basement Dampness 101: RH Targets, Dehumidifiers, and VentilationBasement Dehumidifier Guide: Targets, Drainage, and Energy UseHow to Ventilate in Winter Without Freezing: Practical Strategies

Frequently asked questions

Should I buy a dehumidifier before checking basement ventilation?

Not usually. First check for leaks, seepage, drainage problems, and whether outdoor air is actually helping or adding moisture. If the basement is still humid after those issues are addressed, a dehumidifier is often the next step.

When does ventilation help more than a dehumidifier in a basement?

Ventilation helps when the outdoor air is drier than the basement air and can reduce humidity without bringing in extra moisture. It is more useful during cool, dry weather and less useful on warm, humid days. If outdoor air makes surfaces feel damp or sweaty, ventilation is usually not the better first choice.

What humidity level should a basement stay below?

A practical goal for many basements is to stay below 60% relative humidity, with 45% to 50% often being more comfortable when conditions allow. General indoor comfort guidance is usually around 30% to 50%. The best target can vary by climate, temperature, and whether the basement has moisture-prone materials.

Can opening basement windows make dampness worse?

Yes. If the outdoor air is warm and humid, opening windows can raise basement moisture instead of lowering it. Window ventilation is most useful only when outdoor conditions are drier than the indoor basement air.

Why does my basement still feel damp even with a dehumidifier running?

The unit may be undersized, the basement may have an unresolved water source, or humid air may still be entering from outside. Cool basement temperatures can also reduce dehumidifier performance. Check for hidden leaks, drainage issues, and whether the air is circulating well around the space.

What should I fix first if my basement has musty odors but no standing water?

Start by measuring humidity and checking for hidden damp materials, condensation, and small leaks. Musty odors often come from moisture in carpet, cardboard, wood, or stored items even when there is no visible puddle. Once the source is found, dry the area and then decide whether ventilation or dehumidification is needed.

Summary: Choosing the First Fix Without Guessing

The first fix for a damp basement is source control: stop liquid water, reduce obvious moisture entry, and correct basic drainage or leak problems. After that, choose between ventilation and dehumidification based on measured humidity and outdoor conditions.

Ventilation comes first when the basement needs air exchange and outdoor air is drier than indoor air. A dehumidifier comes first when indoor RH remains high, outdoor air is humid, or the basement needs steady moisture removal. In many homes, the long-term answer is not one or the other, but a sequence: stop water, ventilate when it helps, dehumidify when needed, and monitor results.

Use simple targets, steady observation, and routine maintenance. That approach avoids guessing and keeps the focus on practical basement moisture control rather than one-size-fits-all equipment choices.

Musty Smell After Rain: What Matters and What to Check

Dehumidifier and purifier in a tidy room corner

A musty smell after rain usually means moisture is entering, lingering, or raising indoor humidity enough for damp materials and microbial odors to become noticeable. Rain can reveal small leaks, condensation spots, high relative humidity, or damp porous materials such as carpet, drywall, wood, insulation, or stored cardboard. The goal is to find where moisture is coming from, dry affected materials promptly, and keep indoor humidity in a reasonable range.

Quick answer
  • Aim for indoor relative humidity around 30% to 50% in normal conditions, and try to avoid long periods above 60%.
  • Check likely wet zones first: basements, crawl spaces, window trim, exterior walls, attic access, under sinks, and around HVAC equipment.
  • Dry clearly wet materials within 24 to 48 hours when practical, using ventilation, dehumidification, and safe removal of water sources.
  • Use bathroom and kitchen exhaust fans during moisture events and for about 20 to 30 minutes afterward when possible.
  • If the odor appears only when the HVAC runs, inspect the filter, return area, condensate pan, drain line, and nearby ductwork for moisture cues.

Why a Musty Smell Shows Up After Rain

A musty odor is often described as earthy, stale, damp, or similar to wet cardboard. After rain, that smell may become stronger because moisture changes how building materials, dust, and settled organic matter release odors into indoor air.

The odor does not automatically mean there is a large mold problem. It does mean the home has a moisture clue worth investigating. The source may be a small exterior leak, damp foundation area, poorly ventilated room, condensation on cool surfaces, or wet items stored indoors.

Rain also affects air pressure around a home. Wind-driven rain, saturated soil, and temperature shifts can push damp air through gaps, rim joists, crawl spaces, basements, window frames, and attic bypasses. In apartments, the source may be a shared wall, balcony door, roof line, bathroom exhaust path, or nearby mechanical room.

Moisture Basics: Humidity, Condensation, and Airflow

Relative humidity is the amount of water vapor in air compared with what that air can hold at the same temperature. Warmer air can hold more moisture, so a room may feel fine during the day and develop condensation when surfaces cool at night.

General indoor comfort guidance is often around 30% to 50% relative humidity. Short-term changes happen, especially during rainy weather, cooking, bathing, or laundry. The concern is sustained dampness, visible condensation, or repeated odors in the same area.

How condensation adds to musty odors

Condensation forms when moist air touches a surface that is cool enough for water vapor to become liquid. Common locations include window glass, metal frames, poorly insulated exterior corners, basement walls, cold water pipes, and supply ducts in humid spaces.

Why airflow matters

Airflow helps carry moisture away from surfaces. Still air behind furniture, inside closets, under beds, or in storage areas can stay damp longer after rain. A room can have acceptable average humidity while one hidden corner remains persistently damp.

That is why troubleshooting should combine humidity readings with direct inspection. A small hygrometer can show the room trend, but your nose, touch, and visual cues help locate the actual moisture path.

Moisture troubleshooting cues after rain. Example values for illustration.
Checklist for common musty odor clues
ClueWhat it may suggestPractical check
Odor strongest near exterior wallWind-driven rain, flashing gap, or cold-wall condensationInspect trim, paint, outlets, and baseboards after rain
Odor starts in basementGround moisture, floor drain, foundation seepage, or stored damp itemsCheck corners, sill plates, cardboard boxes, and floor edges
Odor appears when HVAC runsDamp filter area, condensate issue, or duct moistureCheck filter condition, return grille, drain pan, and nearby stains
Odor near windowsCondensation, failed caulk, or water collecting in tracksLook for soft trim, peeling paint, and damp sills
Odor inside closetLow airflow and damp stored fabrics or shoesCreate space from walls and inspect stored items
Odor near plumbing wallLeak that becomes noticeable during humid weatherCheck under sinks, behind toilets, and nearby cabinets
Whole-home odor during rainHigh indoor humidity, crawl space air, or ventilation imbalanceCompare humidity readings across rooms and levels

Common Sources to Check First

Start with the areas most likely to get wet from rain or hold moisture after rain. The pattern of the smell is usually more useful than the strength of the smell alone.

Basements and crawl spaces

Basements often have cooler surfaces and more contact with ground moisture. Look for damp concrete, water lines on walls, rust marks, efflorescence, musty stored items, or a dehumidifier bucket that fills quickly after storms. In crawl spaces, damp soil, disconnected vapor barriers, and standing water can affect rooms above.

Windows, doors, and exterior trim

Rain can enter through worn sealant, clogged tracks, poorly sloped sills, or gaps around frames. Check after wind-driven rain, not only during light rain. Look for staining, soft wood, bubbling paint, swollen trim, or a damp smell in curtains and blinds.

Attics and roof-adjacent areas

Roof leaks may not drip visibly into living space. They can wet insulation, framing, or ceiling materials, then release odor as the area warms. Check attic access points, ceiling stains, bath fan duct areas, and areas below roof valleys or penetrations when it is safe to do so.

HVAC and duct areas

Air conditioning removes moisture as it cools air, but condensate has to drain correctly. A clogged drain, dirty pan, wet filter area, or poorly sealed return space can contribute to stale or damp odors. If checking equipment requires opening service panels or handling electrical components, use a qualified professional.

Moisture Troubleshooting Checklist

Use a calm, step-by-step approach. The goal is to separate temporary rainy-day dampness from a recurring moisture source.

Step 1: Map the odor

  • Walk through the home shortly after rain and again 12 to 24 hours later.
  • Note where the odor is strongest and whether it changes when doors are closed.
  • Compare upper floors, lower floors, closets, and rooms along exterior walls.
  • Check whether the smell appears only when fans or HVAC equipment run.

Step 2: Measure humidity

  • Place a basic hygrometer in the affected room for several days.
  • Compare readings with a main living area and a drier room.
  • Watch for sustained readings above about 60%, especially in enclosed spaces.
  • Remember that one room reading may miss damp wall cavities or hidden materials.

Step 3: Inspect likely wet materials

  • Touch baseboards, carpet edges, and window trim with a clean, dry hand.
  • Look for discoloration, swelling, peeling paint, or damp dust patterns.
  • Move stored items away from walls to inspect behind them.
  • Remove or isolate wet cardboard, fabric, and paper items, since they hold odor easily.

Step 4: Dry and ventilate safely

  • Wipe up visible water and address the water entry point first.
  • Use exhaust fans, open windows when outdoor conditions are drier, or use a dehumidifier in damp rooms.
  • Keep furniture slightly away from cold or exterior walls to improve airflow.
  • Avoid using ozone-generating devices for odor removal, because ozone can create indoor air quality concerns.

These examples show how the same symptom can have different causes. They are general scenarios, not diagnostic rules.

Basement smell after heavy rain

A finished basement smells musty the morning after storms. Humidity reads 64% near the floor, while the living room reads 48%. Boxes are stored against an exterior wall, and the carpet edge feels cool and slightly damp. The practical first moves are to move storage off the wall, run dehumidification, inspect the foundation wall and floor edge, and look outside for drainage or grading issues.

Bedroom odor near windows

A bedroom smells stale after windy rain, but only near one window. The sill track contains water, paint near the lower trim is lifting, and curtains smell damp. This points to a window-specific moisture path or condensation problem rather than a whole-home air quality issue. A good next step is to review condensation on windows and check whether the problem matches a recurring cold-surface pattern.

Musty smell when air conditioning starts

The home smells damp for a few minutes when cooling begins after a rainy day. The odor is strongest at supply registers, and the filter has not been changed recently. Possible contributors include a dirty filter, damp drain pan, slow condensate drainage, or moisture in nearby duct surfaces. Routine filter replacement and professional HVAC inspection may be appropriate if the smell persists, and how often should you replace a HEPA filter can help set a maintenance schedule for filtration-related odor control.

Safety, Standards, and When to Get Help

Moisture troubleshooting should not involve bypassing electrical, HVAC, or appliance safety systems. If water is near electrical outlets, breaker panels, wiring, or powered equipment, avoid contact and use qualified help.

For air cleaning, a portable air purifier with a particle filter may reduce airborne dust and some particles, while an activated carbon layer may help with some odors for a limited time. However, filtration does not fix a moisture source. If materials stay damp, the smell can return even with air cleaning. If you are comparing options, air purifier vs dehumidifier for musty air explains why moisture control usually comes first.

Be cautious with ionizers, ozone generators, and UV-C devices. Ozone should not be intentionally generated in occupied indoor spaces for odor control. UV-C and ionization features vary widely and should be considered only with careful review of safety information and maintenance requirements.

Get professional help when you see repeated water entry, soft drywall, widespread staining, sewage-related moisture, persistent HVAC drain problems, wet insulation, or odors that keep returning after drying and basic repairs. Renters may need to document dates, photos, humidity readings, and affected areas for property management.

Maintenance and Follow-Up Prevention Plan

Once the immediate odor improves, prevention is mostly about keeping water out, moving moisture out, and reducing materials that hold dampness.

Routine home checks

  • Clean gutters and downspout outlets as part of normal exterior maintenance.
  • Keep soil and mulch from covering siding or weep areas.
  • Check window tracks and door thresholds after wind-driven rain.
  • Replace HVAC filters on a schedule that fits system use, dust load, and filter type.
  • Use bathroom, laundry, and kitchen ventilation during moisture-producing activities.
  • Keep storage in basements and closets slightly elevated and away from exterior walls.

How dehumidifiers and purifiers fit in

A dehumidifier addresses moisture in the air. An air purifier addresses airborne particles and, with enough activated carbon, some odor compounds. They solve different parts of the problem. For a musty smell after rain, moisture control is usually the first priority, while filtration can support general air quality during and after cleanup.

Humidity and dampness quick plan. Example values for illustration.
Moisture prevention plan for rainy periods
GoalSimple actionsHelpful toolNote
Keep room humidity moderateTarget about 30% to 50% relative humidity when practicalHygrometerShort spikes can happen during storms or showers
Reduce sustained dampnessAct if rooms stay above about 60% for long periodsDehumidifierUse drainage or empty the bucket regularly
Dry wet materialsRemove standing water and increase drying airflowFan and dehumidifierAddress the leak source before relying on drying alone
Limit hidden condensationPull furniture and boxes slightly away from exterior wallsFlashlightCheck behind items after rainy weather
Control bathroom moistureRun exhaust during use and roughly 20 to 30 minutes afterExhaust fanClean dusty fan grilles for better airflow
Track recurring patternsRecord dates, weather, odor location, and humidityNotebook or basic logPatterns help separate leaks from general humidity

Related guides: Best Indoor Humidity Level to Prevent Mold (With Seasonal Targets)How to Stop Condensation on Windows (And Why It Matters for Mold)Basement Dehumidifier Guide: Targets, Drainage, and Energy UseBathroom Mold Prevention: Exhaust Fan Timing and Humidity Control

Summary: What to Do Next

A musty smell after rain is a moisture troubleshooting cue, not a reason to panic. Start by mapping where the odor is strongest, measuring humidity, and checking basements, windows, exterior walls, closets, and HVAC areas.

Use general humidity targets around 30% to 50% when practical, and avoid letting damp areas stay above about 60% for long periods. Dry wet materials promptly, improve airflow in closed-off spaces, and remove items that hold moisture and odor.

If the smell keeps returning in the same place, focus on finding the water source rather than covering the odor. Air purifiers, carbon filters, fans, and dehumidifiers can be useful tools, but durable improvement usually comes from moisture control, safe repairs, and consistent maintenance.

Frequently asked questions

Why does my home smell musty after rain even if I do not see water?

Moisture can enter through small leaks, damp crawl spaces, basement seepage, or condensation on cool surfaces without leaving obvious standing water. Porous materials such as drywall, carpet, insulation, and cardboard can hold that moisture and release odor later. The smell often appears before visible damage becomes easy to spot.

What humidity level is most likely to cause a musty smell after rain?

A sustained indoor relative humidity above about 60% increases the chance of damp odors and condensation problems. Many homes feel more comfortable in the 30% to 50% range when practical. Short spikes during storms, cooking, or showers are common, but repeated high readings in one area should be checked.

Which rooms should I check first when the odor gets worse after rain?

Start with basements, crawl spaces, window areas, exterior walls, closets, and rooms near attic or roof penetrations. Also check under sinks and around HVAC equipment if the smell changes when heating or cooling runs. These areas are more likely to trap moisture or show the first signs of a leak.

How long can wet materials stay damp before the smell becomes a bigger problem?

As a practical rule, wet materials should be dried as soon as possible, ideally within 24 to 48 hours when conditions allow. The longer materials stay damp, the more likely odors, staining, and microbial growth become an issue. Hidden materials may need longer drying if the moisture source is corrected and airflow is improved.

Will an air purifier remove a musty smell after rain?

An air purifier may reduce some airborne particles and, if it includes activated carbon, may help with some odor for a limited time. It does not fix a wet material or stop moisture from entering the home. If the odor keeps coming back, moisture control and repairs are more important than filtration alone.

When should I call a professional about a musty smell after rain?

Get professional help if the odor returns in the same area, if you see soft drywall, staining, wet insulation, or repeated water entry, or if HVAC drainage problems are involved. You should also use qualified help if water is near electrical equipment or if sewage-related moisture is suspected. Persistent odors usually mean the moisture source has not been fully addressed.

Crawl Space Humidity: Signs It Is Affecting Indoor Air

Dehumidifier and purifier near a tidy crawl space

Crawl space humidity can affect indoor air when damp air, odors, particles, or mold-related materials move upward into living spaces through gaps, floor openings, and normal air pressure differences.

A damp crawl space does not automatically mean poor indoor air, but it is a common hidden moisture source in many U.S. homes. The most useful approach is to look for patterns: humidity readings, odors, visible dampness, floor-level changes, and whether symptoms improve when moisture is controlled.

What Crawl Space Humidity Means for Indoor Air

A crawl space is not part of the main living area, but it is often connected to it through small openings. Plumbing holes, wiring penetrations, gaps around ducts, rim joists, and unsealed floor assemblies can allow air to move between the crawl space and rooms above.

Humidity matters because damp materials can support odors, microbial growth on organic surfaces, corrosion, wood movement, and insulation problems. These conditions can change how a home smells and feels, and they may contribute to dustiness or comfort issues. This is different from assuming a medical cause; the practical concern is moisture control and cleaner air movement.

In many homes, air pressure pulls some crawl space air upward. This is often called stack effect. Warm air leaving the top of the house can draw replacement air from lower areas, including basements and crawl spaces. Leaky return ducts, exhaust fans, clothes dryers, and wind can also influence the direction and amount of air movement.

How Moisture Moves from the Crawl Space Into the House

Crawl space moisture usually comes from more than one source. The most common sources include exposed soil, poor exterior drainage, foundation vents during humid weather, plumbing leaks, condensation on cool surfaces, and duct leakage. The fix depends on which of these sources is active.

Relative humidity versus water intrusion

Relative humidity is the amount of moisture in the air compared with what that air can hold at its temperature. A crawl space can have high relative humidity even without visible standing water. Warm outdoor air entering a cooler crawl space can also raise relative humidity and cause condensation.

Water intrusion is different. It includes liquid water from leaks, rain, groundwater, or drainage problems. If there is standing water, wet wood, or repeated puddling, that should be handled as a source problem rather than simply as an air quality issue.

Simple measuring logic

Use at least one hygrometer in the crawl space and one in the living area above it. Check readings at the same time for several days. If the crawl space is consistently above about 60% relative humidity and the rooms above are also elevated, the crawl space may be part of the indoor humidity picture.

Numbers are most useful when paired with observations. A 65% reading after heavy rain means something different from 65% every day during mild weather. Track temperature, humidity, odors, and weather conditions together.

Crawl space humidity decision matrix. Example values for illustration.
Moisture clues and practical next steps
What you noticeLikely moisture pathwayPractical next step
Musty odor strongest near floor vents or baseboardsAir leakage from the crawl spaceCheck duct openings, floor penetrations, and return leaks
Indoor humidity stays above 60%Moisture source plus limited dryingCompare crawl space and indoor readings over several days
Visible ground moisture or bare soilGround vapor releaseInspect vapor barrier coverage and seams
Condensation on pipes or duct surfacesWarm humid air meeting cool surfacesLook for ventilation, insulation, and air sealing issues
Cupping or slight movement in wood flooringMoisture imbalance below the floorCheck subfloor and crawl space humidity conditions
Damp or sagging insulationCondensation, leaks, or air movementFind the moisture source before replacing insulation
Puddles after rainDrainage or groundwater entryReview grading, gutters, downspouts, and foundation drainage

Signs Crawl Space Humidity May Be Affecting Indoor Air

The clearest signs are those that appear near the floor, return pathways, or rooms directly above the crawl space. One sign by itself may not prove the crawl space is the source, but several signs together make it worth investigating.

Odors that return after cleaning

A persistent musty or earthy odor can come from damp wood, soil, insulation, or stored materials. If the smell is strongest near floor registers, closets, utility chases, or first-floor rooms, crawl space air movement may be involved.

Humidity that does not match indoor activities

Cooking, bathing, laundry, and humidifiers can raise indoor humidity. If indoor humidity remains high even when those sources are controlled, look below the floor. A crawl space with high humidity can act like a steady moisture reservoir.

Floor and material changes

Wood flooring may cup, crown, or feel slightly different when moisture below the floor is higher than moisture above it. Paint, baseboards, and trim near the floor may also show subtle swelling or staining. These changes deserve careful moisture checks before cosmetic repair.

Dust and particle concerns

Damp crawl spaces can disturb insulation, degrade materials, and allow soil particles to move through leaks. A room air purifier may reduce airborne particles in the living area, but it will not remove the moisture source below the home.

What to Check Before You Choose a Fix

Start outside. Many crawl space humidity problems begin with roof water and surface water. Gutters, downspouts, grading, and splash patterns can move large amounts of moisture toward or away from the foundation.

Next, check the crawl space itself. Look for bare soil, torn vapor barriers, missing coverage at piers, wet insulation, disconnected ducts, plumbing leaks, and signs of pest damage. Do not disturb suspect materials unnecessarily; the goal is to observe and document before deciding what work is needed.

Then look at the air boundary between the crawl space and the house. Common leakage points include plumbing penetrations, tub openings, electrical holes, duct boots, and gaps around framing. Air sealing is often part of crawl space moisture and indoor air planning, especially when odors move upward.

Practical Steps to Lower Crawl Space Humidity

The best moisture plan reduces sources first, then manages air and drying. Equipment can help, but it should not be the only strategy if water is entering from outside or vapor is rising from exposed soil.

Control liquid water first

  • Extend downspouts away from the foundation where practical.
  • Keep gutters clear enough to prevent overflow near the house.
  • Maintain grading so surface water drains away from the foundation.
  • Repair plumbing leaks promptly.
  • Address standing water before relying on a dehumidifier.

Control ground vapor

A ground vapor barrier helps limit moisture released from soil. In simple terms, more complete coverage generally performs better than partial coverage. Seams, edges, piers, and wall transitions are common weak points, so installation quality matters.

Decide between vented and sealed strategies carefully

Some older crawl spaces rely on foundation vents. In humid climates or seasons, vents can bring outdoor moisture into a cooler crawl space. Sealed or encapsulated crawl spaces may use a dedicated dehumidifier or conditioned air strategy, but details should match local climate, building codes, combustion safety, drainage, and pest inspection needs.

Use dehumidification as moisture management, not a cure-all

A crawl space dehumidifier can help maintain a steadier humidity range after water sources and vapor pathways are addressed. It should drain safely, be accessible for maintenance, and be sized for the conditions. Avoid setting humidity extremely low; overly dry wood can also move and shrink.

Real-World Scenarios and What They Usually Mean

Different homes show crawl space humidity in different ways. These examples are general, but they show how to connect signs with practical next steps.

Scenario 1: Musty first-floor odor after summer rain

This pattern often points to wet soil, surface water near the foundation, or humid outdoor air entering the crawl space. Check gutter discharge, grading, vent behavior, and whether the vapor barrier is intact. Measure crawl space humidity for several days after rain.

Scenario 2: High indoor humidity with no visible crawl space water

High relative humidity without puddles can still be important. Bare soil, open vents, and air leaks can release moisture slowly. Compare indoor and crawl space readings, and look for condensation on ducts, pipes, or framing.

Scenario 3: Wood floor cupping over a crawl space

Floor movement can happen when moisture is higher below the wood than above it. Before sanding or replacing flooring, check subfloor moisture, crawl space humidity, drainage, and whether insulation is trapping dampness against the floor assembly.

Scenario 4: A room air purifier helps dust but not odor

A purifier with a particle filter may reduce suspended dust in a room, and activated carbon may help with some odors for a limited time. However, if crawl space dampness is the source, source control is still needed. Filtration is most useful as a living-area support measure, not a substitute for moisture repair.

Safety, Standards, and Cautions

Moisture work should not create new safety problems. If the crawl space contains fuel-burning equipment, open combustion appliances, or connected ducts, changes to air sealing and ventilation should be evaluated carefully. Pressure changes can affect how appliances draft, so professional guidance may be appropriate.

Avoid ozone-generating devices for crawl space odor control. Ozone can react with materials and is not a routine moisture solution. Ionizers and UV-C systems should also be considered cautiously and only within their intended use; they do not replace drainage, vapor control, drying, or cleaning.

If you find widespread growth, sewage contamination, structural decay, damaged asbestos-containing materials, or electrical hazards, stop and seek qualified help. The calm goal is to correct the source safely, not to disturb materials in a way that spreads debris.

Maintenance and Monitoring Plan

After the crawl space is improved, maintenance keeps it from becoming a hidden problem again. A simple seasonal routine is usually more valuable than one-time attention.

  • Check humidity readings during humid weather, after heavy rain, and during heating season.
  • Inspect the vapor barrier for tears, gaps, pulled seams, or animal damage.
  • Confirm that drains, pumps, or dehumidifier hoses are clear and discharging correctly.
  • Look for new plumbing leaks, duct condensation, or wet insulation.
  • Replace or clean accessible filters according to the equipment type and conditions.
  • Keep stored items off bare soil and away from foundation walls when possible.

For living spaces, continue to manage normal indoor sources. Bathroom exhaust, kitchen ventilation, laundry drying practices, and proper humidifier use all influence indoor humidity. A crawl space may be one part of the picture, not the only one.

Humidity and dampness quick plan. Example values for illustration.
General goals and practical tools
GoalSimple actionsToolsNote
Keep living areas comfortableTrack indoor humidity and reduce excess moisture sourcesRoom hygrometer or air monitorA general range is about 30% to 50%
Limit crawl space dampnessAddress drainage, ground vapor, and air leaksCrawl space hygrometerTry to stay below 60% when practical
Reduce ground vaporMaintain continuous vapor barrier coverageVisual inspection and tape-compatible repairsEdges and seams matter
Control water entryReview grading, gutters, and downspoutsExterior inspection after rainFix water sources before equipment sizing
Support dryingUse dehumidification where appropriateDedicated crawl space dehumidifierSetpoints near the mid-range are common
Reduce room particlesUse filtration in occupied rooms if neededProperly sized air purifierFiltration does not remove moisture sources
Catch changes earlySchedule seasonal inspectionsChecklist and humidity logLook for patterns, not one reading

Related guides: Best Indoor Humidity Level to Prevent Mold (With Seasonal Targets)Basement Dehumidifier Guide: Targets, Drainage, and Energy UseAir Purifier vs Dehumidifier: Which One Solves Musty Air?

Frequently asked questions

How do I know if crawl space humidity is affecting indoor air?

Common signs include musty odors near floors, indoor humidity that stays high without an obvious source, and wood floor or trim changes above the crawl space. The clearest check is to compare crawl space and indoor humidity readings over several days while also noting weather and odors.

What humidity level should a crawl space stay below?

A practical goal for many crawl spaces is to stay below about 60% relative humidity. Many professionals try to keep it closer to the mid-40% to mid-50% range when conditions allow, because that reduces the chance of condensation and damp materials.

Can a crawl space have a humidity problem even if there is no standing water?

Yes. Exposed soil, humid outdoor air, air leaks, and condensation can raise relative humidity without visible puddles. High humidity alone can still create odors, moisture damage, and indoor air complaints over time.

Will a dehumidifier fix crawl space humidity indoor air problems by itself?

A dehumidifier can help control moisture, but it does not fix the source of the problem. Drainage issues, ground vapor, plumbing leaks, and air leakage should be addressed first so the equipment is supporting the solution rather than compensating for ongoing water entry.

What should I check first if my house smells musty near the floor?

Start with exterior drainage, gutters, and downspouts, then inspect the crawl space for wet soil, torn vapor barrier, damp insulation, and plumbing leaks. Also check floor penetrations and return leaks, since air can move from the crawl space into rooms above.

Summary: Practical Takeaways

Crawl space humidity can affect indoor air when moisture, odors, or particles move from the crawl space into living areas. The strongest clues are persistent musty odors, elevated indoor humidity, damp crawl space materials, condensation, floor changes, and readings that show the crawl space staying above about 60% relative humidity.

Start with source control: drainage, leaks, ground vapor, and air sealing. Then consider dehumidification, ventilation strategy, and room filtration as supporting tools. Measure over time, keep records, and choose fixes that match the home’s climate, construction, and safety needs.

Indoor PM2.5 Spikes at Night Explained: What Works

Bedroom purifier reducing abstract particle dots

Indoor PM2.5 spikes at night usually come from evening particle sources, reduced ventilation, poor purifier placement or sizing, outdoor pollution entering the home, or monitoring artifacts.

A nighttime spike does not always mean something unusual is happening. PM2.5 can rise after cooking, candle use, vacuuming, fireplace use, open windows during smoky or polluted periods, or simply because air moves less while people sleep and doors are closed.

Quick answer

  • Compare nighttime readings with your normal clean baseline; repeated jumps of about 5–10 µg/m³ or more are worth investigating.
  • For bedrooms, a common planning target is roughly 4–5 air changes per hour from a well-sealed HEPA-style purifier, when noise is acceptable.
  • Reduce evening sources first: avoid candles, incense, smoking, and heavy late cooking without exhaust.
  • Use kitchen exhaust during cooking and for about 20–30 minutes afterward when possible.
  • Keep indoor relative humidity roughly 30–50% for general comfort and dust control, but do not rely on humidity to remove PM2.5.
  • If outdoor air is clean, short ventilation can help; if outdoor PM2.5 is high, close windows and focus on filtration.

What Nighttime PM2.5 Spikes Mean

PM2.5 refers to fine particles that are about 2.5 micrometers or smaller in diameter. These particles can come from combustion, cooking aerosols, smoke, some dust sources, and outdoor air that leaks indoors. A monitor reports the estimated particle mass in the air, often in micrograms per cubic meter.

A nighttime spike means the monitor sees a particle increase during the evening or overnight compared with the room’s usual level. The important point is the pattern, not one isolated number. A brief increase after cooking is different from a steady rise that lasts all night.

For home troubleshooting, look for timing, location, and repeatability. If the spike begins at 7 p.m. most nights, the cause may be an evening activity. If it appears only when windows are open, outdoor air may be the driver. If it happens only in one bedroom with the door closed, airflow and filtration may be the main issue.

How PM2.5 Builds Up Overnight

Nighttime PM2.5 often rises because particles are added faster than they are removed. Removal happens through ventilation, filtration, deposition on surfaces, and dilution with cleaner air. When doors and windows close for sleep, ventilation may drop, and the room can become more isolated from the rest of the home.

A purifier can help only if enough air passes through its filter and returns to the room without major bypass. This is why air changes per hour matter. As a general planning idea, a bedroom purifier that provides about 4–5 equivalent air changes per hour can reduce particles more effectively than a small unit running quietly in a large room.

Placement also matters. A purifier blocked by curtains, tucked tightly behind furniture, or placed far from the main sleeping area may clean less of the room’s air. Closed doors can help the purifier focus on one room, but they also reduce whole-home air mixing.

Table 1: Nighttime PM2.5 decision clues. Example values for illustration.
Common nighttime patterns and first checks
PatternLikely driverFirst practical check
Spike starts after dinnerCooking particlesUse exhaust and run filtration before bedtime
Spike follows candle or incense useCombustion particlesRemove the source and compare the next night
Bedroom rises after the door closesLow room air exchangeCheck purifier size, speed, and placement
All rooms rise at the same timeOutdoor air or whole-home sourceCompare with outdoor conditions and windows
Reading jumps when humidifier runsMist or sensor responseUse clean water and compare with humidifier off
Spike appears during vacuumingResuspended dustVentilate or filter during and after cleaning
Only one monitor shows a spikeDevice location or sensor issueMove the monitor and repeat the test

Common Causes of Indoor PM2.5 Spikes at Night

Cooking and kitchen carryover

Cooking is one of the most common evening sources of fine particles. Frying, searing, broiling, toasting, and high-heat cooking can produce particles that linger after the meal. If the kitchen is open to a living area or hallway, particles can drift into bedrooms later.

Use a range hood that exhausts outdoors when available. If the hood recirculates instead of exhausting outdoors, it may help with some grease and odor depending on filtration, but it does not replace ventilation. Running a portable purifier near the kitchen after cooking can also help reduce carryover.

Candles, incense, fireplaces, and smoking

Anything that burns can add fine particles. Candles and incense particulate pollution, wood fires, and smoking materials can all create noticeable PM2.5 increases indoors. Even short use may show up on a sensitive monitor.

The simplest fix is source control: reduce or avoid indoor combustion where possible. If a fireplace is used, follow normal safety practices, keep the flue functioning as intended, and avoid making any appliance modifications.

Outdoor pollution entering at night

Outdoor PM2.5 can enter through open windows, gaps around doors, leaky envelopes, or ventilation systems. This is more likely during wildfire smoke events, heavy traffic periods, temperature inversions, or nearby outdoor burning.

When outdoor PM2.5 is elevated, closing windows and using filtration is usually more practical than increasing ventilation. When outdoor air is cleaner than indoor air, short ventilation periods may help dilute indoor particles and other stale-air indicators.

Troubleshooting Cues From a Monitor

A home particulate monitor is most useful when it shows trends. Place it away from direct purifier exhaust, open windows, stovetops, humidifier mist, and bathroom steam. If it sits in a direct stream of clean or dirty air, it may not represent the room.

Use a simple log for a few nights. Note cooking time, window position, candle use, cleaning, humidifier use, purifier speed, and door position. If a spike repeats under the same conditions, you have a stronger clue.

Also watch how fast the level falls. A rapid drop after the purifier is turned up suggests the unit is doing meaningful particle removal. A slow decline may point to continued sources, poor placement, undersizing, a dirty filter, or outdoor infiltration.

Practical Fixes for Lower Overnight PM2.5

Start filtration before bedtime

Do not wait until a bedroom reading is already high. Running a purifier at a higher setting for 30–60 minutes before sleep can lower the starting point. Then use the highest overnight fan setting that is comfortable for noise.

Improve purifier placement

Place the purifier where air can enter and exit freely. Leave several inches of clearance around intakes and outlets, and avoid pushing the unit into a corner if that blocks airflow. In a bedroom, a location near the breathing zone but not blowing directly at your face is often practical.

Control evening sources

Source control usually works better than trying to clean up after every spike. Practical steps include cooking with lids when appropriate, using exhaust, avoiding indoor burning, and choosing cleaning routines that do not stir large amounts of dust right before bed.

Use ventilation selectively

Ventilation is helpful when outdoor air is cleaner than indoor air. Open windows briefly, use bath or kitchen exhaust where appropriate, or use a mechanical ventilation system as designed. If outdoor air quality is poor, prioritize closed windows and filtration instead.

Real-World Nighttime Scenarios

The open-plan dinner spike

A household cooks at 6:30 p.m., and the living room monitor peaks around 8 p.m. Bedrooms rise later, even though no source is present there. This pattern suggests kitchen particles are spreading through the home.

Useful steps include running exhaust during cooking, continuing it briefly afterward, and starting purifiers in the living area and bedrooms before bedtime. Closing bedroom doors after the bedroom air is cleaner may help maintain lower levels overnight.

The closed-bedroom rise

A bedroom starts the night low, then slowly rises after the door closes. There are no candles, no cooking nearby, and outdoor air is moderate. This can happen when the purifier is too small, running too quietly, or placed where airflow is blocked.

Try a higher fan setting before sleep, reposition the unit, and compare the door open versus closed. If the room is large or has high ceilings, the purifier may need more clean air delivery for the space. For sizing help, see air purifier room size.

Some optical particle sensors may respond to mist droplets or high humidity. If a spike occurs only when a humidifier runs, compare readings with the humidifier off, then again with it placed farther from the monitor.

Use the humidifier as directed, clean it regularly, and avoid over-humidifying. A general indoor relative humidity range of about 30–50% is commonly used for comfort and dampness control. If the device seems to be the issue, review humidifier white dust.

Safety, Ventilation, and Device Considerations

For particle removal, mechanical filtration is the main practical tool in most homes. A well-sealed HEPA-style filter captures fine particles as air passes through it. Activated carbon is different: it is mainly used for some gases and odors, not as the primary PM2.5 solution.

Be cautious with devices that intentionally generate ozone. Ozone is not needed for routine particle control in occupied homes. Ionizers, plasma features, and UV-C add-on technologies vary widely, so review the device information carefully and consider whether the particle filtration performance is clear without relying on those features.

Do not modify fuel-burning appliances, vents, exhaust systems, or safety controls to address PM2.5. If a fireplace, stove, furnace, or water heater seems to be contributing to indoor air issues, use qualified service support rather than attempting changes yourself.

Maintenance and Targets to Review Over Time

A purifier that worked well at first can lose effectiveness if the filter is loaded, the prefilter is dusty, or airflow paths are blocked. Check the owner’s instructions for filter intervals, but also adjust based on use. Homes with pets, heavy cooking, smoke exposure, or continuous operation may need more frequent attention.

Clean washable prefilters when the instructions allow it, and replace disposable filters instead of trying to wash them. Keep monitors clean according to their instructions, and avoid placing them where steam, mist, or direct airflow can distort readings. For upkeep, see air purifier maintenance checklist.

For tracking, choose a simple target that is realistic for your home. Many households aim to keep overnight PM2.5 close to their clean indoor baseline and investigate repeated rises above that baseline. The goal is steady improvement, not chasing every short-lived fluctuation.

Table 2: Monitor metrics to compare with PM2.5 at night. Example values for illustration.
Nighttime air quality metrics and action ideas
MetricWhat it can indicateCommon pitfallAction idea
PM2.5Fine particle trendReacting to one brief spikeLook for repeated timing patterns
CO2Ventilation and occupancy trendTreating it as a particle readingUse ventilation when outdoor air is clean
TVOCGeneral gas sensor responseAssuming it identifies one chemicalReduce sources and add fresh air when practical
Relative humidityMoisture comfort rangeUsing humidity to judge particlesAim roughly for 30–50% indoors
TemperatureComfort and airflow behaviorIgnoring closed-room changesCompare door open and closed
Purifier fan settingAirflow through the filterRunning too low for the roomPre-clean on higher speed before sleep

Related guides: PM2.5 Explained: What the Numbers Mean and What’s a Safe Level IndoorsHow to Choose the Right Air Purifier for Your Room SizeAir Purifier Placement: Where to Put It for Best ResultsDo Air Purifiers Help With Cooking Smoke and Grease Particles?

Summary: Calm Steps for Nighttime PM2.5 Control

Indoor PM2.5 spikes at night are usually solvable with basic troubleshooting. Start by identifying the timing, then compare it with cooking, combustion, outdoor air, cleaning, humidifier use, door position, and purifier operation.

Use source control first, then filtration sized for the room, then selective ventilation when outdoor air is favorable. Keep the purifier unblocked, maintain filters, and use monitor trends rather than single readings to guide changes.

If the pattern continues after simple fixes, focus on the most likely remaining variables: outdoor infiltration, undersized filtration, dirty filters, or a specific source that occurs in the evening. A steady, practical approach is usually enough to reduce repeated nighttime spikes.

Frequently asked questions

What usually causes indoor PM2.5 spikes at night?

Common causes include evening cooking, candles, incense, fireplaces, smoking, and outdoor pollution entering through windows or leaks. A spike can also happen when ventilation drops overnight and particles accumulate faster than they are removed. In some cases, the reading is influenced by humidifier mist or monitor placement rather than a true particle increase.

How can I tell if the spike is from cooking or from outdoor air?

Cooking spikes usually start soon after food preparation and may be strongest near the kitchen before spreading through the home. Outdoor-air spikes are more likely when windows are open or when the whole home rises at the same time, especially during smoke, inversions, or heavy traffic periods. Comparing the timing with your activities and outdoor conditions is often the fastest clue.

Will a purifier stop indoor PM2.5 spikes at night?

A purifier can reduce night spikes if it is sized well for the room, placed correctly, and run long enough before and during sleep. It works best when nearby particle sources are also controlled, because ongoing emissions can overwhelm a small or poorly positioned unit. A clean filter and unblocked airflow are also important.

Should I open windows at night to lower PM2.5?

Open windows help only when outdoor air is cleaner than indoor air. If outdoor PM2.5 is elevated from smoke, traffic, or burning, opening windows can make indoor levels worse. When outdoor air is clean, brief ventilation can help dilute indoor particles before bedtime.

Can a humidifier cause false PM2.5 readings?

Yes, some optical sensors can react to water droplets or high humidity and briefly report a higher PM2.5 reading. If the spike appears only when the humidifier is on, test again with the unit off or farther from the monitor. Using clean water and avoiding excessive humidity can also reduce the chance of misleading readings.

What is a good overnight target for PM2.5?

A practical goal is to keep overnight PM2.5 close to your normal clean indoor baseline and investigate repeated rises above it. Many households treat recurring jumps of about 5–10 µg/m³ or more as a useful signal to look for sources or airflow issues. The best target depends on your home, but steady improvement matters more than chasing every brief fluctuation.

Air Purifier Dust Test: Track PM2.5 Without Guessing

Air purifier reducing abstract indoor particle dots

You can run an air purifier dust test by logging PM2.5 with an air quality monitor before and after one controlled change, then comparing similar time windows.

The goal is not to prove a perfect number; it is to see whether changes such as purifier placement, fan speed, filter replacement, cleaning, or ventilation affect measured particles in your room. PM2.5 readings can be noisy, so use repeated measurements and note what happened in the room.

Quick answer
  • Log a baseline for at least 24 hours when possible; 48 hours is better if daily routines vary.
  • Change one thing at a time, such as fan speed, purifier location, filter age, window opening, or cleaning method.
  • Compare the same time windows, such as evening to evening, instead of comparing unrelated moments.
  • For many homes, a practical comfort-oriented aim is lower and steadier PM2.5, often single digits to low teens in micrograms per cubic meter when outdoor air is also clean.
  • A repeated 20% to 50% drop under similar conditions can be a useful sign that the change is helping, but results depend on room size, sources, airflow, and outdoor air.
  • Keep notes on cooking, candles, vacuuming, open windows, humidity, and outdoor smoke because these can change readings quickly.

What an air purifier dust test measures

An air purifier dust test is a simple before-and-after comparison using a particle monitor. In most home testing, the main number to track is PM2.5, which means airborne particles with an aerodynamic diameter of about 2.5 micrometers or smaller.

PM2.5 is not the same as visible dust on furniture. Larger dust can settle on surfaces quickly, while fine particles can stay suspended longer and move with room air. A purifier with a particle filter can reduce suspended particles when it is sized, placed, and operated well for the room.

Home monitors estimate PM2.5 using optical sensors. They are useful for trends and comparisons, but they are not laboratory instruments. Treat the number as a practical signal, especially when the same monitor is used in the same place before and after a change.

Key PM2.5 concepts before you test

Use the same monitor in the same location

Consistency matters more than perfection. Place the monitor in the breathing zone of the room, away from direct purifier airflow, open windows, steam, and cooking bursts. A side table, desk, or shelf away from a wall can work well.

Understand what changes PM2.5 indoors

PM2.5 can rise from cooking, smoke, candles, incense, some cleaning activities, outdoor air, dust disturbance, and fine particles tracked in from outside. It can drop when particles settle, when ventilation removes them, or when a purifier captures them.

Plan around CADR and air changes

Clean air delivery rate, often shortened to CADR, is a general sizing concept for particle filtration. A higher CADR can clean a given room faster, assuming the air can circulate to the purifier. Air changes per hour, or ACH, estimates how many times the room air volume is cleaned in one hour.

A simple planning formula is: room volume in cubic feet multiplied by desired ACH, then divided by 60, equals an approximate clean air delivery target in cubic feet per minute. For example, a 150-square-foot room with an 8-foot ceiling has about 1,200 cubic feet of air. At 5 ACH, the planning target would be about 100 cubic feet per minute of clean air delivery. This is an illustration, not a guarantee, because furniture, door position, filter loading, and fan setting affect performance.

Table 1. Air purifier dust test setup checklist

Example values for illustration.

Steps for creating a fair before-and-after PM2.5 comparison
TaskWhy it mattersPractical note
Record a baselineShows the normal pattern before changesUse 24 to 48 hours when possible
Keep monitor placement fixedReduces sensor location biasAvoid direct purifier exhaust
Change one variableMakes results easier to interpretTest fan speed, placement, or filter age separately
Match time windowsDaily routines affect particlesCompare similar hours on similar days
Log particle sourcesSpikes may come from activitiesNote cooking, candles, cleaning, and outdoor smoke
Use averages and peaksBoth steadiness and spikes matterReview hourly averages if the monitor provides them
Repeat after changesOne test can be an outlierLook for a repeated direction of change

Common mistakes that distort before-and-after results

The most common mistake is changing too many things at once. If you replace a filter, move the purifier, open a window, and vacuum on the same day, you may see a cleaner reading but not know which step mattered.

Another mistake is testing only for a few minutes. PM2.5 changes quickly near a source, but room-level results take time to stabilize. A short test can be useful for seeing a cooking spike or a purifier response, but it is not enough to understand a whole-room pattern.

Direct airflow can also mislead the monitor. If the purifier outlet blows toward the sensor, the reading can look lower than the rest of the room. If the sensor is near a carpet being disturbed, it can look higher than the general room air.

Humidity can affect some optical particle sensors. Very humid air, steam, or water droplets can be interpreted as particles by some monitors. For routine testing, try to keep indoor relative humidity in a typical comfort range, often around 30% to 50%, and avoid placing the monitor near showers, humidifiers, or boiling water.

How to run an air purifier dust test step by step

Step 1: Pick one room and one question

Choose a specific question, such as whether higher fan speed lowers evening PM2.5 in the bedroom, or whether moving the purifier away from a corner improves particle reduction in a living room. A clear question keeps the test focused.

Step 2: Create a baseline

Run the room as usual and log readings. If your monitor exports data, save hourly averages. If it only shows live readings, write down several readings during the day and note activities that may affect particles.

Step 3: Make one change

Examples include moving the purifier several feet away from a wall, increasing fan speed during cooking, closing a bedroom door at night, replacing an overdue particle filter, or reducing an indoor particle source. Avoid making several changes at the same time.

Step 4: Compare similar periods

Compare before and after readings for the same type of time window. For example, compare two nights with the door position and fan setting noted, or compare two dinner periods with similar cooking patterns.

Step 5: Look for direction and consistency

A single spike is less useful than a repeated pattern. Review whether the average PM2.5 is lower, whether peaks are shorter, and whether the room returns to a lower level faster after activity. If the change is small or inconsistent, repeat the test or look for uncontrolled variables.

Real-world PM2.5 testing examples

Bedroom night test

A bedroom test might compare two nights with the purifier on a low setting versus two nights on a medium setting. Keep the door position, monitor location, and bedding routine the same. If the medium setting repeatedly produces lower overnight averages without unacceptable noise, that setting may be more practical for that room.

Open-plan living area after cooking

Cooking can create a short PM2.5 spike, especially when using high heat. A practical test might compare using kitchen exhaust plus a purifier in the nearby living area against the same cooking routine without the purifier. Focus on how high the spike gets and how long it takes to return near the earlier background level.

Filter replacement check

If a purifier has been running for months, compare readings before and after replacing the particle filter, while leaving placement and fan speed unchanged. A clogged filter can reduce airflow, but results vary by filter load, room conditions, and use pattern.

Placement check in a cluttered room

A purifier blocked by furniture may move less room air. Test the same unit in a more open location while keeping the monitor away from the direct outlet. Improvement may appear as faster recovery after a particle event rather than a dramatic change in the daily average.

Safety and standards to keep in mind

For a dust and PM2.5 test, the safest focus is mechanical particle filtration and sensible airflow. A well-sealed particle filter and adequate room circulation are usually the core factors to evaluate.

Some air cleaning devices include ionizers, plasma features, or other electronic add-ons. These features are often marketed for particles or odors, but they should be considered carefully because some technologies can produce ozone or other byproducts under certain conditions. If a device has an optional ionizing function, check whether it can be turned off and review independent safety information.

UV-C is sometimes used inside equipment to affect microbes on internal surfaces, but it does not replace particle filtration for a PM2.5 dust test. Home users should not modify devices, bypass interlocks, or expose eyes or skin to UV-C sources.

Ozone should not be intentionally generated for occupied indoor air cleaning. For home PM2.5 tracking, use ozone-free strategies such as source control, ventilation when outdoor air is acceptable, and properly maintained filtration.

Maintenance and data upkeep for better testing

Good data depends on both the purifier and the monitor. Keep the purifier intake and outlet clear, clean prefilters according to the manufacturer instructions, and replace filters within the recommended range or sooner if airflow drops noticeably in a dusty space.

Monitors also need basic care. Keep the sensor opening free of dust buildup, avoid spraying cleaners near it, and let it sit in one place long enough to stabilize. If your monitor offers calibration or reset instructions, follow the manufacturer guidance rather than guessing.

Cost planning is part of realistic testing. A purifier that only performs well on a setting too loud for daily use may not deliver the same results in normal life. Track the fan setting you actually use, because low-speed operation can provide much less clean airflow than higher-speed operation.

Table 2. Monitor metrics guide for PM2.5 testing

Example values for illustration.

Common home monitor metrics and how to use them during a purifier dust test
MetricWhat it indicatesCommon pitfallAction idea
PM2.5Fine particle trend in the roomShort spikes can dominate attentionCompare averages and recovery time
PM10Larger airborne particle trendCan vary with movement and dust disturbanceNote vacuuming, sweeping, and foot traffic
CO2Ventilation and occupancy patternNot a particle measurementUse it to understand air exchange context
TVOCGeneral sensor response to some gasesConsumer sensors are broad and non-specificUse source notes and ventilation context
Relative humidityMoisture level affecting comfort and sensorsSteam may distort particle readingsPlace monitor away from humidifiers and showers
TemperatureRoom condition during the testMay change with windows or HVAC cyclesLog major changes when comparing days

Related guides: PM2.5 Indoors: Common Sources and the Fastest FixesWhere to Place an Air Quality Monitor: Height, Distance, and RoomsAir Purifier Placement: Where to Put It for Best Results

Frequently asked questions

How long should I run an air purifier dust test before comparing results?

A baseline of at least 24 hours is usually better than a short test, and 48 hours is even more useful if your daily routine changes. Shorter tests can show immediate effects, but they are easier to distort with cooking, cleaning, or open windows.

What is the best PM2.5 number to watch during a dust test?

PM2.5 is generally the most useful metric because it reflects fine airborne particles that a purifier is meant to reduce. For comparison, focus on the average level, the size of spikes, and how quickly the room returns to a lower level after an event.

Why does my monitor show a lower reading near the purifier?

A monitor placed in the purifier’s direct airflow can read artificially low because it is sampling air that has just passed through the filter. Place the sensor in a more neutral part of the room, away from the outlet, so it reflects room air more fairly.

Can humidity affect an air purifier dust test?

Yes, some optical sensors can react to steam, mist, or very humid air as if they were particles. For cleaner comparisons, keep the monitor away from showers, humidifiers, and boiling water, and try to test in a normal indoor comfort range.

What change is most worth testing first?

The best first test is usually the change most likely to affect particles in your room, such as fan speed, purifier placement, filter replacement, or controlling a cooking source. Change only one variable at a time so you can tell what actually improved the reading.

Summary: what to watch in your dust test

An air purifier dust test works best when it is simple, repeated, and controlled. Use one monitor, one room, one main question, and one change at a time.

Track PM2.5 before and after the change, but also write down the context: cooking, cleaning, windows, outdoor air, fan setting, filter age, and room use. Look for lower averages, shorter peaks, and faster recovery after particle events rather than relying on one perfect reading.

If results are unclear, extend the baseline, repeat the test, or improve the setup by moving the monitor away from direct airflow and keeping the purifier unobstructed. The practical goal is not a laboratory measurement; it is a calmer, more consistent way to understand what actually changes indoor particle levels in your home.

Fine Dust After Construction: Cleaning Order and Air Purifier Use

Air purifier reducing fine dust in a clean room

Fine dust after construction should be cleaned from the top down with dry dust removal first, damp wiping second, floor cleaning last, and air purifier use running during and after cleanup to reduce airborne particles.

Construction and remodeling dust can settle repeatedly because fine particles are easily stirred up by footsteps, fans, and vacuum exhaust. A calm, ordered approach works better than cleaning the most visible mess first. The goal is to remove dust from surfaces, limit resuspension, and keep air moving through effective filtration.

Quick answer
  • Start with source control: remove debris, bag dust-producing waste, and avoid sweeping dry powder into the air.
  • Clean high to low: ceilings, trim, shelves, walls, counters, then floors.
  • Use a vacuum with a HEPA filter when possible, followed by lightly damp microfiber wiping.
  • Run a portable air purifier with a particle filter continuously during cleanup and for 24 to 48 hours afterward as general guidance.
  • For planning, aim for roughly 4 to 6 air changes per hour in the cleanup room when using a portable purifier, if noise and room layout allow.

Why fine dust after construction acts differently than ordinary dust

Construction dust is a mix of materials. Depending on the project, it may include drywall sanding dust, sawdust, joint compound residue, masonry dust, insulation fibers, paint preparation dust, and tracked-in soil. The exact mix matters less for routine cleanup than the fact that many particles are small, dry, and easy to disturb.

Ordinary household dust often contains lint, skin flakes, pet dander, soil, and fibers that collect over time. Construction dust is usually more concentrated and may settle in a short period across horizontal and vertical surfaces. It can also enter closets, vents, drawers, and gaps if the work zone was not well contained.

Fine dust is frustrating because a room can look clean and then appear dusty again the next day. That does not always mean cleaning failed. It often means particles remained on upper surfaces, inside fabrics, on ledges, or in the air long enough to resettle.

Key concepts: particle size, cleaning order, and air purifier sizing

The most useful idea is simple: disturb less dust than you remove. Dry sweeping, aggressive feather dusting, and blowing air across dusty surfaces can spread particles faster than they capture them. Controlled removal is the priority.

Top-down cleaning matters

Cleaning should start above eye level and end at the floor. Dust from ceiling fans, light fixtures, trim, cabinet tops, door frames, and upper shelves will fall or be pulled downward during cleaning. If floors are cleaned first, they may need to be cleaned again.

HEPA filtration and CADR basics

A portable air purifier can help capture airborne particles when it uses a mechanical particle filter and is sized for the room. CADR, or clean air delivery rate, is a common planning number for how much filtered air the unit can deliver. Higher CADR generally supports faster particle removal in a given room, assuming the purifier is operating properly and air can circulate.

A practical planning formula is: room volume in cubic feet multiplied by the target air changes per hour, divided by 60. For example, a 12 by 15 foot room with an 8 foot ceiling is 1,440 cubic feet. At 5 air changes per hour, the rough CADR target is 120 cubic feet per minute. This is an example for planning, not a guarantee of room performance.

Construction dust cleanup sequence. Example values for illustration.
Task order for fine dust cleanup
OrderTaskWhy it mattersPractical note
1Remove debris and coveringsReduces the main dust sourcesBag waste before carrying it through clean rooms
2Run particle filtrationCaptures dust stirred up during workPlace purifier in the cleanup area with open airflow
3Vacuum high surfacesPrevents dust from falling laterUse soft brush tools where suitable
4Wipe walls, trim, and ledgesRemoves fine residue from vertical areasUse lightly damp microfiber, not dripping wet cloths
5Clean counters and shelvesCaptures settled dust at working heightRinse or replace cloths often
6Vacuum floors slowlyRemoves heavier settled particlesUse a HEPA-filtered vacuum when available
7Damp mop hard floorsPicks up residue left after vacuumingChange mop water frequently
8Repeat after settlingAddresses remaining fine particlesA second light pass after 24 hours is common

Common mistakes that make construction dust linger

The biggest mistake is dry sweeping fine powder. A broom can push visible debris into a pile, but it also sends smaller particles into the air. If sweeping is necessary for larger debris, use slow movements and follow with vacuuming and damp wiping.

Another mistake is using a household vacuum that leaks fine dust from the exhaust or around the filter housing. A vacuum without good filtration can collect coarse debris while redistributing finer particles. If fine dust appears in the air behind the vacuum, stop and change methods.

Running a ceiling fan during cleanup can also work against you. Fans can be useful later for comfort, but during dust removal they may spread particles to clean areas. Use controlled ventilation or filtration instead of stirring air randomly.

Cleaning fabrics too late can also lead to recurring dust. Upholstered furniture, curtains, rugs, bedding, and open closets can hold construction residue. If the room was exposed during sanding or demolition, include fabric vacuuming or laundering in the cleanup plan where appropriate.

Step-by-step cleaning order for fine construction dust

1. Contain the area before you start

Close doors to rooms that do not need cleanup. If there is visible dust near the work zone, avoid carrying tools, cords, and drop cloths through the rest of the home without wiping or bagging them. Remove protective plastic carefully by folding dusty sides inward.

2. Remove large debris without spreading powder

Pick up scraps, packaging, wood pieces, and coverings before detailed cleaning. Use heavy-duty bags for dusty material. Do not shake tarps, rugs, or cloths indoors.

3. Vacuum before damp wiping

For dry fine dust, vacuuming first usually works better than wiping first. A damp cloth can turn heavy drywall dust into streaks or paste. Vacuum slowly, especially around baseboards, corners, door tracks, window sills, and cabinet edges.

4. Damp wipe with frequent cloth changes

After dry removal, use lightly damp microfiber cloths on hard surfaces. The cloth should pick up residue without leaving water behind. Rinse often, fold to a clean side, or replace the cloth when it looks loaded.

5. Finish floors last

Vacuum hard floors and carpets slowly. For hard floors, damp mop after vacuuming. For carpet, multiple slow vacuum passes may be needed. If dust was heavy, consider cleaning the same floor again after particles settle.

How to use an air purifier during and after construction cleanup

An air purifier is not a substitute for removing dust from surfaces, but it can reduce airborne particles created during cleanup. It works best when paired with source removal, careful vacuuming, and damp wiping.

Placement during cleanup

Place the purifier in or near the dustiest room, not behind furniture or inside a closet. Keep the air intake and outlet clear by at least a small open space on all sides, following the product instructions. If the room is open-plan, place the purifier where airflow can circulate through the main area instead of trapping it in a corner.

Runtime and speed

Run the purifier before cleaning if fine dust is visible in the air, during cleaning if it does not interfere with work, and afterward while dust continues to settle. A practical general range is 24 to 48 hours after cleanup for a recently renovated room. Higher fan speeds usually filter air faster, while lower speeds may be more comfortable for noise.

When ventilation helps

Ventilation can help when outdoor conditions are suitable. Opening windows may dilute indoor particles and odors, but it can also bring in outdoor dust, pollen, smoke, humidity, or cold air. If outdoor air quality is poor or the project involves a dusty neighborhood, filtration may be the better short-term choice.

Real-world examples for common home projects

Drywall sanding in one bedroom

Drywall sanding creates a fine powder that settles broadly. Close the door, clean high surfaces first, vacuum trim and outlets, wipe walls lightly, and clean floors last. Run a purifier in the bedroom with the door mostly closed if the room can still get enough air circulation through the purifier.

Kitchen cabinet installation

Cabinet work often creates sawdust and packaging debris. Remove larger debris first, vacuum inside cabinets before loading dishes, wipe shelves with a damp cloth, and run a purifier in the kitchen or adjacent open area. Pay attention to toe kicks, drawer slides, and the tops of upper cabinets.

Floor refinishing or tile work

Floor projects can spread dust to baseboards, lower walls, vents, and nearby rooms. Clean from the perimeter inward and avoid turning on fans that push dust across newly cleaned surfaces. For hard flooring, a second damp mop after settling can help remove remaining residue.

Apartment renovation next door

If dust enters from a hallway or shared wall area, focus on entry points. Use a doormat, wipe thresholds, keep windows closed when dust is outside, and run a purifier in the room where dust is noticeable. Report building-level dust intrusion through normal property channels if needed.

Safety, standards, and special dust situations

Routine cleanup is different from handling hazardous materials. If a project may involve lead-based paint, asbestos-containing materials, significant mold contamination, or silica-generating work, follow applicable local requirements and consider qualified professionals. Older homes and certain demolition tasks deserve extra caution before disturbing materials.

For air purifiers, choose mechanical particle filtration for dust control. HEPA-type descriptions can vary, so look for clear particle filtration information and a CADR that fits the room. A good cabinet seal also matters because air that leaks around the filter is not being filtered as intended.

Be cautious with ozone generators. Ozone should not be intentionally generated in occupied indoor spaces for routine dust cleanup. Ionizers, plasma features, and UV-C features should be evaluated carefully and used only according to manufacturer instructions. For fine construction dust, the central need is particle capture, not added reactive chemistry.

Respiratory comfort varies from person to person. If someone in the home is sensitive to dust, keep them away from the cleanup area when practical, reduce dust disturbance, and prioritize filtration and containment. This is a comfort-oriented strategy, not a medical treatment.

Maintenance and upkeep after the cleanup

Construction cleanup can load filters faster than normal use. Check the purifier prefilter, main filter, and vacuum filter after the dusty work is complete. A filter that looks heavily coated may reduce airflow even if the calendar replacement date has not arrived.

Washable prefilters should be cleaned only as directed and fully dried before reuse. Disposable filters should not be washed unless the instructions specifically say they are washable. For vacuums, empty canisters or bags carefully and avoid shaking dusty filters indoors.

Continue light maintenance for several days. Wipe horizontal surfaces again, vacuum entryways, and check window tracks, closet shelves, and baseboards. If fine dust keeps returning, look for an ongoing source such as an unsealed work area, dusty HVAC return, untreated fabric, or dust tracked in from another room.

Filter upkeep after construction cleanup. Example values for illustration.
Filter replacement planner for dusty cleanup periods
Filter typeTypical interval rangeWhat can shorten itReminder
Purifier prefilterEvery 2 to 4 weeks during dusty periodsVisible coating, pet hair, heavy debrisClean or replace as instructed
Main particle filterSeveral months to about a yearConstruction dust, high fan use, open-plan roomsCheck sooner after renovation work
Activated carbon filterAbout 3 to 6 months in many usesOdors, VOC sources, frequent cooking smokeCarbon helps odors more than dust
Vacuum bag or binWhen partly full or after heavy dustDrywall powder, sawdust, sanding residueEmpty outdoors or carefully when practical
Vacuum HEPA filterBased on instructionsFine powder loading and reduced suctionDo not wash unless labeled washable
HVAC return filterOften 1 to 3 monthsRenovation nearby, high system runtimeUse a filter compatible with the system

Related guides: How to Choose the Right Air Purifier for Your Room SizeAir Purifier Placement: Where to Put It for Best ResultsDo You Need a Pre-Filter? Extending HEPA Life and Reducing Costs

Frequently asked questions

What is the best cleaning order for fine dust after construction?

The best order is usually high to low: remove debris first, then clean ceilings, trim, shelves, walls, counters, and floors last. Dry removal and vacuuming should come before damp wiping because wet cloths can turn fine dust into paste or streaks. A final light pass after the dust has settled is often needed.

Should I vacuum or wet mop first after construction?

Vacuum first for dry fine dust, then use lightly damp wiping or mopping. This reduces the chance of spreading powder across surfaces or creating muddy residue. For hard floors, vacuuming before damp mopping usually gives the cleanest result.

How long should I run an air purifier after construction cleanup?

A common general guideline is to run the purifier during cleanup and for 24 to 48 hours afterward. If the room was heavily dusty or particles keep resettling, longer runtime may help. The purifier works best when the room has enough airflow and the filter is sized appropriately.

Where should I place an air purifier during dust cleanup?

Place it in or near the room with the most dust, not hidden behind furniture or inside a closet. Keep the intake and outlet unobstructed so air can circulate through the room. In open areas, place it where it can move air through the main space instead of a corner.

Why does fine dust keep coming back after I clean?

Fine dust can resettle from upper surfaces, fabric, vents, or places that were disturbed during cleaning. It can also return if the room was cleaned with dry sweeping, poor filtration, or strong air movement that lifted particles back into the air. Checking hidden ledges, filters, and soft furnishings often helps find the source.

Summary: the practical cleanup order

Fine dust after construction is easiest to manage when the process is orderly. Remove debris first, clean from high to low, vacuum before damp wiping, and finish with floors. Expect a second light cleaning pass after particles settle.

Use an air purifier as support, not as the only cleanup tool. Place it in the affected room, keep airflow paths open, and run it during and after cleaning when practical. For general planning, a room-sized purifier targeting roughly 4 to 6 air changes per hour can be a useful benchmark.

Finally, check filters sooner than usual. Construction dust can load purifier, vacuum, and HVAC filters quickly. A clean filter path, careful surface cleaning, and calm repeatable steps are usually more effective than aggressive sweeping or random air movement.

Dust From Busy Roads Explained: What Works Indoors

Air purifier reducing road dust particles indoors

Dust from busy roads gets indoors mainly through window and door gaps, open ventilation paths, tracked-in grit, and air that carries fine particles through leaks.

Homes near high-traffic streets often collect a mix of outdoor dust, tire and brake wear particles, soil, pollen, soot, and everyday indoor dust. You usually cannot remove every pathway, but you can reduce entry, capture particles, and keep floors and entry areas from becoming reservoirs.

Quick answer
  • For rooms near traffic, aim for practical particle control: close the most exposed windows during heavy traffic and use filtration during those periods.
  • For portable purifiers, a common planning target is about 4 to 5 air changes per hour in the room, using CADR matched to room size.
  • For central HVAC, consider MERV 11 to 13 filters if the system can handle them; do not force a filter your system is not designed to use.
  • Use a two-mat entry setup and a no-shoes or indoor-shoes habit to reduce tracked-in grit.
  • Check filters and window seals more often in high-dust locations, especially during dry, windy, or construction-heavy periods.

Why road dust matters indoors

Road dust is not one single material. It can include soil particles, vehicle-related particles, pollen, fragments from pavement, and fine combustion-related particles from traffic and nearby activity. Some of it is visible as gray film on sills and floors, while some is small enough to stay suspended in room air for longer periods.

The practical indoor-air question is not whether the home can be made perfectly sealed or dust-free. It is how much dust can be kept out, how much can be captured once indoors, and how often settled dust is removed before it is stirred back into the air.

Location matters. A bedroom facing a six-lane road, a ground-floor apartment near a bus stop, or a home downwind of a busy intersection may need different habits than a similar room on the back side of the building.

How window gaps, pressure, and particle size affect dust

Dust enters through both obvious openings and small leakage paths. Open windows, unsealed window frames, door sweeps with gaps, mail slots, bathroom fans, kitchen exhaust use, and pressure differences between indoors and outdoors can all influence airflow direction.

Window gaps and air leakage

If a room feels drafty near the road-facing window, outdoor air may be entering even when the window is closed. Dust on the inside sill, dark streaks around frames, or a noticeable line of grit near the baseboard can be clues that air is bypassing the intended seal.

Weatherstripping, properly installed door sweeps, and sealing visible gaps around trim can reduce dust entry. For renters, removable draft stoppers, tension-seal products, and careful use of curtains or shades may help without permanent changes. Any sealing plan should preserve required ventilation and should not interfere with combustion appliances or safety systems.

Particle size and removal methods

Larger particles settle on floors, window sills, and shelves. Fine particles can remain suspended longer and are more likely to be captured by effective particle filters when air is moved through them. This is why both source control and filtration matter: mats and cleaning handle settled grit, while air filtration helps with airborne particles.

For a portable air purifier, CADR is the main sizing number. A simple planning approach is to choose a unit and speed setting that can deliver roughly 4 to 5 air changes per hour for the room where it will run. For an 8-foot ceiling, a rough CADR estimate for 4.8 air changes per hour is about two-thirds of the room area in square feet. For example, a 180-square-foot bedroom would call for about 120 cfm of particle CADR at the setting you expect to use.

Dust entry and control checklist. Example values for illustration.
Common road-dust pathways and practical responses
Pathway or issueWhy it mattersPractical response
Road-facing window gapsSmall leaks can pull outdoor air and dust indoorsInspect seals, use weatherstripping, and clean tracks
Open windows during traffic peaksFresh air can also carry outdoor particlesVentilate from a lower-traffic side when possible
Entryway gritShoes and wheels bring particles insideUse outdoor and indoor mats; remove shoes
Undersized purifierLow airflow may not turn over room air enoughPlan CADR for the actual room and speed used
Loose filter fitAir can bypass filter mediaCheck that filters sit squarely in their frame
Dry dust on hard floorsWalking can resuspend settled dustDamp mop or use a well-filtered vacuum

Common mistakes and troubleshooting cues

A common mistake is focusing only on filter grade while ignoring airflow. A highly efficient filter that does not move enough air in the room may provide less practical particle reduction than a correctly sized purifier running at a steady, tolerable speed.

Another mistake is sealing one obvious gap while leaving frequent entry habits unchanged. If shoes, strollers, pet paws, or delivery traffic bring in dust daily, the entry area can keep feeding particles into the home even when windows are improved.

Watch for patterns rather than single events. Dust that returns quickly to one sill may point to a local gap. A gray trail near the front door may point to tracked-in material. Dust that rises after vacuuming may suggest poor vacuum filtration, an overfull bag or bin, or aggressive dry sweeping.

  • If dust is worst on the road-facing side, prioritize that room first.
  • If dust is worst at floor level, improve mats, shoe habits, and cleaning technique.
  • If fine dust appears throughout the home, review HVAC filter fit, purifier sizing, and ventilation timing.
  • If odors are the main concern, particle filters alone may not address them; activated carbon may help with some gases and odors but has capacity limits.

Practical steps for windows, filters, and entryways

Window and door habits

Use windows strategically. If traffic is heaviest at commuting times, consider ventilating during lower-traffic periods or through windows that face a courtyard, side yard, or less busy street. When outdoor air is smoky, dusty, or visibly polluted, keeping windows closed and using filtration is usually the more practical choice.

Inspect window tracks and seals seasonally. Clean the tracks first, because grit can prevent a window from closing tightly. Replace worn weatherstripping where appropriate, and use draft blockers for doors with visible daylight underneath.

Filtration choices

For airborne road dust, particle filtration is the main tool. A true HEPA-style portable purifier can capture a high fraction of fine particles that pass through the filter media, but room performance also depends on airflow, placement, fan speed, and leakage around the filter. Keep the purifier several inches from walls and avoid blocking the intake or outlet.

For central systems, MERV 11 to 13 is a common practical range for better particle capture when the HVAC system supports it. Higher resistance filters can reduce airflow in some systems, so follow the equipment instructions or ask a qualified HVAC professional if unsure.

Entryway habits

A simple entry setup can make a visible difference. Use a coarse outdoor mat to scrape soles and a washable indoor mat to catch finer material. Store shoes near the door, and consider indoor-only footwear if removing shoes is practical for your household.

For pets, a towel near the entrance can reduce dust from paws after walks near busy roads. For bicycles, strollers, or carts, wiping wheels before rolling them far into the home can reduce grit on floors.

Real-world examples for different homes

Apartment facing a busy avenue: The most exposed bedroom window collects dust every few days. A practical plan is to keep that window closed during rush hours, seal obvious drafts with renter-friendly materials, run a correctly sized purifier in the bedroom, and ventilate from a less exposed window when conditions are better.

Single-family home near an intersection: Dust shows up near the front door and living room rug. The first priorities are two-stage mats, shoe storage, better vacuum filtration, and checking the front door sweep. A purifier in the main living area may help with airborne particles, but it will not replace floor-level dust control.

Open-plan home: A small purifier in one corner may not serve the entire open area effectively. Instead, size filtration for the combined connected space or use multiple units in zones where people spend the most time. Keep airflow paths open so clean air can mix.

Home with central HVAC: If the system runs often, a well-fitted higher-MERV filter can help reduce circulating particles. If the system runs only occasionally, a portable purifier in the main room or bedroom may provide more consistent room-level filtration.

Safety and standards to keep in mind

Use filtration methods that do not intentionally generate ozone. Ozone is a lung irritant and is not needed for routine dust control in occupied homes. If a device includes ionization or other electronic features, review the instructions and available safety information, and consider using mechanical filtration alone if the feature is optional.

UV-C lights are sometimes discussed for air systems, but they are not a primary dust-control tool. They require careful design and shielding, and they should not be treated as a substitute for particle filtration, adequate airflow, or cleaning.

Do not seal a home so tightly that required ventilation is lost. Be especially cautious in homes with gas appliances, fireplaces, attached garages, or combustion equipment. Keep carbon monoxide alarms installed according to local code and manufacturer instructions.

For comfort-oriented planning, use monitors as trend tools rather than absolute verdicts. A PM2.5 reading that rises when a road-facing window is open can help confirm timing and pathway issues, but consumer monitors vary in accuracy and need clean sensors and stable placement.

Maintenance plan for homes near busy roads

Dust control works best as a routine. In high-traffic locations, filters and surfaces may load faster than they would in a quieter area. Check rather than guess: a filter that looks dark, clogged, or bowed may need attention sooner than the calendar suggests.

For floors, avoid habits that push dust back into the air. Damp mop hard surfaces when suitable for the flooring. Use a vacuum with good filtration and maintain it by emptying bins, replacing bags, washing washable prefilters only when instructed, and checking for worn seals.

For portable purifiers, keep the intake and outlet clear. Clean washable prefilters if the unit has them, and replace main filters on the schedule recommended for the device or sooner if airflow drops noticeably. For HVAC filters, write the installation date on the filter frame and check it monthly until you know how quickly it loads in your home.

Filter replacement planner for road-dust homes. Example values for illustration.
Typical filter checks and replacement ranges
Filter or surfaceTypical interval rangeWhat can shorten itReminder
Portable purifier prefilterEvery 2 to 4 weeks for cleaning or inspectionPets, open windows, nearby constructionFollow instructions for washable parts
Portable main particle filterAbout 6 to 12 monthsHeavy dust, high fan use, smoke eventsReplace if airflow drops or alert appears
Activated carbon filterAbout 3 to 6 monthsOdors, cooking, high outdoor gasesCarbon capacity is limited
HVAC filterAbout 1 to 3 months for many homesLong runtimes, dust, pets, remodelingUse only ratings the system supports
Entry matsWeekly shakeout or wash as neededRain, grit, frequent visitorsKeep a dry spare if possible
Window tracks and sillsMonthly to seasonallyRoad-facing exposure, dry weatherClean before evaluating seals

Frequently asked questions

Why does dust from busy roads get indoors even when windows are closed?

Outdoor dust can enter through small leaks around windows, doors, vents, and other gaps in the building envelope. Indoor pressure changes from exhaust fans or HVAC operation can also pull outdoor air inside. Close-fitting seals and filtration help, but no home is completely airtight.

What is the best way to reduce dust from busy roads indoors in a bedroom?

For a bedroom, the most effective starting points are sealing obvious drafts, keeping the room closed during traffic peaks, and running a correctly sized portable purifier. A two-mat entry routine and shoe removal also help because dust tracked through the home can re-enter the room. If the room faces the road, prioritize it before less exposed areas.

Is a HEPA purifier enough to stop road dust from building up?

A HEPA-style purifier can reduce airborne particles, but it does not stop dust that enters through gaps or gets tracked in on shoes and wheels. It works best when paired with source control, such as better seals, window timing, and entryway cleaning. For many homes, that combination is more effective than filtration alone.

What filter level should I use in central HVAC for road dust?

MERV 11 to 13 is often a practical range for particle capture in homes, provided the HVAC system can handle the added resistance. A filter that is too restrictive can reduce airflow and sometimes cause problems. Follow the equipment guidance or get professional advice if you are unsure.

How often should I clean or replace filters in a dusty home near traffic?

High-dust locations usually require more frequent checks than quieter homes. Portable purifier prefilters may need inspection or cleaning every 2 to 4 weeks, while HVAC filters often need monthly checks and replacement every 1 to 3 months depending on conditions. Replace sooner if airflow drops, the filter looks loaded, or the device indicates attention is needed.

Will opening windows help or hurt when road dust is the problem?

It can do either, depending on timing and outdoor conditions. Opening windows during lighter traffic or from a less exposed side can help ventilation, but opening them during heavy traffic or dusty conditions can increase indoor particle levels. When outdoor air is visibly polluted, keeping windows closed and using filtration is usually the better choice.


Related guides: How to Choose the Right Air Purifier for Your Room SizeAir Purifier Placement: Where to Put It for Best ResultsHow to Reduce Dust in Your Home

Summary takeaways

Road dust control is a combination of entry prevention, particle filtration, and steady cleaning habits. Window and door gaps matter because they create direct pathways for outdoor particles. Entryways matter because larger particles are physically carried indoors and later spread through daily movement.

For most homes near busy roads, the practical starting points are simple: improve the most exposed seals, ventilate at lower-dust times when possible, size particle filtration for the room, use mats and shoe habits, and maintain filters before they become overloaded.

The goal is not a perfectly dust-free home. A calmer and more realistic goal is to reduce the main pathways, keep airflow through effective filters, and prevent settled dust from building up where people walk, sleep, and spend time.

Dorm Room Allergy Setup: What Works in Small Rooms

Calm dorm bedroom with purifier and clean linens

A good dorm room allergy setup combines right-sized HEPA filtration, steady cleaning, clutter control, and simple humidity awareness in a small space.

Dorm rooms are compact, shared, and often hard to ventilate consistently, so small changes can make a noticeable difference in dust, particles, odors, and general comfort. The goal is not to make medical promises, but to reduce common indoor triggers and keep the room easier to maintain.

Quick answer

  • Choose a purifier with a particle CADR that can support about 4–5 air changes per hour for the room volume, as general small-room guidance.
  • Use a true HEPA-style particle filter for dust, pollen, and fine particles; add activated carbon if odors are a concern.
  • Keep indoor relative humidity roughly 30%–50% when possible to support comfort and reduce dampness issues.
  • Place the purifier with open space around the intake and outlet, not under a bed, behind a chair, or tight against laundry piles.
  • Use a simple weekly cleaning routine: wash bedding, vacuum or sweep, wipe hard surfaces, and remove clutter that traps dust.

Why dorm rooms need a small-room allergy setup

Dorm rooms are different from many bedrooms at home because they compress sleeping, studying, storage, laundry, and eating into one small area. That means dust, fabric fibers, outdoor particles, food odors, and humidity from daily routines can build up quickly.

Many dorm rooms also have limited control over central heating, cooling, and ventilation. Windows may open only partway, filters in building systems may not be accessible, and roommates may have different cleaning habits. A practical setup focuses on what students can usually control: filtration, placement, cleaning, humidity awareness, and reducing dust reservoirs.

Allergy-friendly dorm planning is best viewed as source reduction plus air cleaning. Source reduction means keeping dust, damp items, and clutter from accumulating. Air cleaning means using a properly sized purifier to capture airborne particles as room air circulates through the filter.

Size dorm room filtration without guessing

The most useful sizing number for an air purifier is clean air delivery rate, commonly called CADR. CADR is usually listed in cubic feet per minute and indicates how much filtered air the unit can deliver for a particle type under test conditions. In real rooms, placement, filter condition, fan speed, and furniture can affect results.

A practical way to think about sizing is air changes per hour, or ACH. ACH estimates how many times per hour the room’s air volume could pass through the purifier. A common planning target for small rooms is about 4–5 ACH for particles, when noise and budget allow.

Use this simple formula for a general estimate:

  • Room volume = floor area in square feet × ceiling height in feet.
  • Needed CADR = room volume × target ACH ÷ 60.
  • Example: a 120-square-foot dorm room with an 8-foot ceiling is about 960 cubic feet. For 5 ACH, the estimated CADR is 960 × 5 ÷ 60, or about 80 cfm.

For shared rooms, open closets, high ceilings, or heavy clutter, choose a margin above the exact estimate if possible. It is often better to run a purifier on a quieter medium setting continuously than to rely on a loud high setting that will not be used.

HEPA and carbon roles

A true HEPA-style particle filter is intended for particles such as dust, pollen, and fine particulate matter. Activated carbon is different: it is used for some gases and odors, but its usefulness depends on the amount of carbon, airflow, contact time, and the specific compound. Carbon does not replace particle filtration.

Dorm room filtration and cleaning setup checklist. Example values for illustration.
Small-room setup decisions
TaskWhy it mattersPractical note
Estimate room volumeHelps size filtration to the actual spaceUse floor area times ceiling height
Plan for 4–5 ACHGives a general particle-filtration targetUse as guidance, not a guarantee
Choose HEPA-style filtrationTargets common airborne particlesCheck that the filter fits tightly in the unit
Add carbon if neededCan help with some odorsMore carbon generally lasts longer than a thin sheet
Leave airflow spaceReduces intake or outlet blockageAvoid tucking the purifier behind furniture
Control clutterLimits surfaces that collect dustUse closed bins when practical
Track filter changesMaintains airflow and performanceWrite the install date on a calendar

Placement and airflow mistakes to avoid

Even a correctly sized purifier can underperform if air cannot move through it. Dorm rooms make this easy to overlook because floor space is limited and storage often spills into walkways.

Place the purifier where air can enter and exit freely. A common choice is near the sleeping area but not blowing directly at your face if that feels uncomfortable. Keep it away from curtains, bedding, backpacks, and laundry baskets that could block airflow.

Avoid placing a purifier under a lofted bed if the intake or outlet is crowded. If the room has a mini-fridge, microwave, or heat source, do not place the purifier where heat or moisture can affect it. Keep cords routed safely so they do not create a tripping hazard.

Windows are useful at times, but open-window ventilation can also bring in outdoor pollen, smoke, traffic particles, or humid air depending on conditions. If outdoor air quality is poor or pollen is high, running the purifier with windows closed may be more practical. If the room feels stale and outdoor conditions are acceptable, short ventilation periods can help exchange indoor air. air purifier placement

Dorm room cleaning checklist for lower dust load

Cleaning matters because filtration works best when it is paired with reducing dust sources. The goal is a routine that can fit into student life without requiring commercial equipment or complicated steps.

Daily or near-daily habits

  • Put dirty laundry in a closed hamper or washable bag instead of open piles.
  • Keep shoes near the door or in a tray to reduce tracked-in dust and grit.
  • Throw away food packaging and take out trash before odors build.
  • Keep the purifier running during normal occupancy if noise and rules allow.

Weekly checklist

  • Wash sheets and pillowcases, following fabric care instructions.
  • Vacuum rugs or sweep hard floors, especially under the bed and desk.
  • Wipe desks, shelves, windowsills, and electronics surfaces with a slightly damp cloth.
  • Shake or launder washable throw blankets as needed.
  • Check that purifier vents are not covered by dust, papers, or clothing.

Monthly checklist

  • Inspect the purifier prefilter if the unit has one and clean it as directed by the manual.
  • Look behind furniture for dust clumps, damp items, or forgotten food.
  • Review filter life and order replacements before the filter is past due.
  • Declutter papers and fabric storage that no longer needs to stay in the room.

Use cleaning products carefully in a dorm room. Strongly scented sprays may add odors or irritating vapors for some people. A damp microfiber cloth, fragrance-free basic cleaner, or campus-approved cleaning method is often enough for routine dust removal.

Real-world dorm setup examples

Different dorm rooms need different priorities. The examples below are general planning scenarios, not product recommendations.

Small single room

In an 80–110 square-foot single room, one properly sized purifier can usually serve the main sleeping and study area if airflow is not blocked. Place it where it can pull from the open room, not inside a closet-like corner. Continuous low or medium operation is often more practical than occasional high-speed use.

Shared double room

In a shared room, the best setup depends on layout and roommate preferences. One larger unit may work if it can sit in open space, but two smaller units can sometimes improve coverage on each side of the room. Coordinate fan noise, placement, and filter maintenance so the setup remains usable.

Room with carpet or lots of fabric

Carpet, upholstered chairs, curtains, extra blankets, and fabric storage cubes can hold dust. Filtration helps with airborne particles, but cleaning and clutter control are especially important in these rooms. Vacuuming with a well-maintained vacuum and keeping textiles washable can reduce the dust reservoir.

Room that feels damp

If the room often feels damp or smells musty, focus first on moisture sources. Do not ignore leaks, condensation, or wet belongings. Report building moisture problems through campus housing channels, keep wet towels spread to dry where allowed, and consider a small humidity monitor with a blank or dimmable display if you want basic awareness. humidity monitor

Safety and standards for dorm air quality gear

Campus housing rules should come first. Many dorms restrict extension cords, appliances, candles, incense, and certain plug-in devices. Choose equipment that fits the rules and does not create tripping, heat, or electrical risks.

For air purifiers, prioritize mechanical filtration for particles. Be cautious with devices that intentionally produce ozone or advertise ionization as the main cleaning method. Ozone can be an indoor air pollutant, and it should not be generated intentionally in occupied rooms. air purifier vs ozone generator

UV-C features, when present in some devices, should be treated as enclosed components that are not user-serviceable unless the manual clearly says otherwise. Do not modify safety covers or look at exposed UV-C lamps. In a dorm context, simple mechanical filtration, good placement, and routine cleaning are usually the most straightforward approach.

If you use a portable humidifier, keep it clean and follow the instructions for water type and maintenance. Over-humidifying a small room can create condensation and damp surfaces. If humidity regularly stays above about 50%–60%, a humidifier is usually not the right tool.

Maintenance, filter changes, and cost planning

A dorm room setup works only if it is maintained. Filters load with dust over time, which can reduce airflow and increase noise. A clogged prefilter can also make the unit less effective at moving air through the main filter.

Check the manual for the recommended filter schedule, but adjust based on room conditions. Heavy dust, open windows, wildfire smoke events, nearby construction, pets in permitted housing, or frequent cooking odors can shorten filter life. A cleaner, low-dust room may allow normal intervals.

Plan the annual cost before buying any purifier. Replacement filters are part of the real cost of ownership. If a unit requires expensive or hard-to-find filters, students may be less likely to change them on time.

Noise is also a maintenance issue in practice. If the high setting is too loud for sleep or studying, make sure the unit can meet your needs at a lower setting. A purifier that runs consistently at a comfortable sound level is usually more useful than one that is frequently turned off. air purifier noise for sleep

Filter replacement planner for dorm rooms. Example values for illustration.
Typical maintenance intervals
Filter or partTypical interval rangeWhat can change itReminder
Washable prefilterEvery 2–4 weeksDust, lint, open windowsDry fully before reinstalling
Disposable prefilterEvery 1–3 monthsVisible dust loadingFollow the manual
HEPA-style main filterEvery 6–12 monthsSmoke, dust, long runtimeDo not vacuum if the manual says not to
Carbon filter sheetEvery 1–3 monthsOdors and airflowReplace when odors return
Heavier carbon filterEvery 3–6 monthsOdor load and carbon amountTiming varies widely
Exterior ventsMonthlyLint and fabric dustWipe gently with power off

Related guides: How to Choose the Right Air Purifier for Your Room SizeAir Purifier Placement: Where to Put It for Best ResultsActivated Carbon Filters Explained: VOCs, Odors, and What They Can’t DoBest Indoor Humidity Level to Prevent Mold (With Seasonal Targets)

Frequently asked questions

What size air purifier works best for a dorm room allergy setup?

A good target is a purifier that can support about 4–5 air changes per hour for the room volume, as a general small-room guideline. To estimate that, multiply floor area by ceiling height to get room volume, then match the CADR to the space. If the room is shared, cluttered, or has open storage, a little extra capacity can help.

Is HEPA filtration necessary in a dorm room?

For reducing airborne dust, pollen, and similar particles, a true HEPA-style filter is the most relevant choice. It is the main filtration feature to look for if the goal is particle reduction rather than odor control. Activated carbon can be added for odors, but it does not replace particle filtration.

Where should I place a purifier in a small dorm room?

Place it where air can move in and out freely, with space around the intake and outlet. Avoid tucking it under a bed, behind furniture, next to laundry piles, or against curtains that could block airflow. A spot near the sleeping area often works well if it is not blowing directly at your face.

How often should I clean a dorm room if I have allergies?

A simple routine is most effective: daily or near-daily clutter control, weekly bedding and floor cleaning, and monthly checks of the purifier and hard-to-see dust areas. The exact schedule can vary with carpet, fabric, roommate habits, and how much outdoor dust enters the room. Consistency matters more than deep cleaning only once in a while.

Can a humidifier help with dorm room allergies?

A humidifier may help comfort if the room is very dry, but it will not treat allergies directly. It should be kept clean, and indoor humidity generally should stay in a moderate range rather than becoming damp. If humidity is already elevated, adding moisture can make the room less comfortable and may increase dampness concerns.

How do I keep odors under control without making the room more irritating?

Start with trash removal, laundry control, and basic ventilation when outdoor air conditions allow. If odors remain a problem, activated carbon can help with some smells, but stronger scented sprays can irritate some people. In a small room, reducing the source is usually more effective than masking the odor.

Summary and takeaways

A dorm room allergy setup should be simple enough to maintain: right-sized particle filtration, open airflow, routine cleaning, and basic moisture control. Start by estimating room volume and choosing a purifier that can support a practical ACH target at a fan speed you will actually use.

Keep the purifier in open space, reduce dust reservoirs, wash bedding regularly, and avoid damp laundry or cluttered corners. Use carbon only as an odor-support feature, not as a substitute for HEPA-style particle filtration. For safety, avoid ozone-generating approaches and follow campus housing rules.

The most effective setup is usually the one that stays consistent all semester: clean surfaces, clear airflow, reasonable humidity, and filters changed on schedule.

Dog Allergy Home Setup: What Works and What Matters

Calm bedroom with purifier and clean linens

A dog allergy home setup uses layered controls—good filtration, routine washing, and clear room boundaries—to lower the amount of dog-related particles that build up indoors.

Dog allergens can come from dander, saliva, and dried skin particles, and they can attach to dust, fabrics, and floors. No single product or habit removes them completely, but a consistent setup can make the home easier to manage. The goal is practical exposure reduction, not a medical cure.

Quick answer

  • Use a true HEPA air purifier in priority rooms, sized for the room; a common planning target is about 4–5 air changes per hour for particle reduction.
  • Keep at least one lower-exposure room, often the main bedroom, off-limits to the dog if household comfort is a priority.
  • Wash dog bedding weekly and wash human bedding weekly if the dog enters the bedroom or rests on furniture.
  • Vacuum carpets and upholstery 1–2 times per week with a sealed vacuum and HEPA exhaust when possible.
  • Maintain indoor relative humidity around 30%–50% as general comfort guidance and to avoid adding dampness problems.

What a Dog Allergy Home Setup Is Trying to Control

A dog allergy home setup is not just about pet hair. Hair is visible and easy to blame, but many relevant particles are much smaller and can settle into textiles, dust, and soft surfaces. These particles may become airborne again when people walk, sit on furniture, make the bed, or vacuum.

The most practical home plan usually combines three ideas:

  • Capture airborne particles with well-sized mechanical filtration.
  • Remove settled material through washing, vacuuming, and surface cleaning.
  • Limit spread with room boundaries and fabric choices.

This layered approach matters because dog-related particles move through the home in several ways. They can ride on clothing, collect on bedding, and circulate through open-plan rooms. A purifier may help with airborne particles in the room where it runs, but it does not wash bedding, clean carpets, or keep allergens from being tracked into a bedroom.

Filters and Sizing: The Practical Basics

For dog allergy home planning, the main filter to understand is a true HEPA filter. HEPA filters are designed to capture very small particles, including dust and dander-sized particles, when air passes through the filter. The device also needs a good seal around the filter; otherwise, some air can bypass the media.

Activated carbon is different. Carbon is mainly used for some gases and odors, not for particle capture. It may help with general pet odors if there is enough carbon and air contact time, but it should not be treated as a substitute for HEPA filtration when the concern is airborne particles.

CADR and ACH in plain language

Clean air delivery rate, or CADR, is a practical way to compare how much filtered air a purifier can deliver. Air changes per hour, or ACH, estimates how many times the room’s air volume is filtered in one hour. For a priority room, many households use a planning target of about 4–5 ACH for particle control, recognizing that real-world results vary with layout, doors, fan speed, and airflow obstacles.

A simple planning approach is to size the purifier for the room where it will actually run, not for the whole house. Bedrooms, home offices, and living rooms often need separate planning because a portable purifier works best in the space where it is placed.

Dog allergy setup checklist by control type. Example values for illustration.
Core setup decisions for dog allergy home planning
Setup areaWhy it mattersPractical note
HEPA filtrationCaptures airborne particles passing through the unitSize for the actual room, not the entire home
Carbon filtrationTargets some odors and gasesUseful supplement, not a particle filter replacement
Bedroom boundaryCreates a lower-exposure sleeping areaMost effective when the door stays closed consistently
Dog beddingCollects hair, dust, and skin particlesChoose washable covers and clean on a schedule
FlooringCarpet can hold more settled materialUse washable rugs where practical
Vacuum exhaustPoor filtration can redistribute fine dustA sealed unit with HEPA exhaust is preferable
Humidity controlDampness can complicate indoor air qualityUse 30%–50% relative humidity as general guidance

Room Boundaries: Creating Lower-Exposure Zones

Room boundaries are often the most overlooked part of a dog allergy home setup. A boundary does not need to mean the dog is excluded from the whole home. It usually means selecting one or two areas where exposure is kept lower and the cleaning routine is tighter.

The main bedroom is a common choice because bedding has a large surface area and is used for many hours at a time. If the bedroom is the priority zone, keep the dog out, keep the door closed, and avoid storing dog toys, leashes, or pet blankets in that room. Running a properly sized HEPA purifier in the bedroom can support the boundary, but it works best when the source load is also reduced.

Boundary options that are easier to maintain

  • Use a washable dog bed in a defined area of the living room.
  • Keep dog blankets off human beds and bedroom chairs.
  • Use closed storage for clean linens.
  • Place a washable mat near entry points where the dog comes in from outdoors.
  • Choose one sofa or one section of a room as the dog-permitted zone instead of allowing all furniture.

Consistency matters more than strictness that nobody can maintain. A realistic boundary followed daily is usually more useful than a perfect plan that collapses after a week.

Washing and Cleaning Routines That Fit Real Homes

Washing removes material that filtration cannot reach once it has settled into fabric. The most important washable items are dog bedding, throw blankets, sofa covers, rugs, and human bedding if the dog has access to those areas.

As general guidance, wash dog bedding about once per week. Wash human sheets weekly, especially if the dog enters the bedroom or if clothing worn around the dog is placed on the bed. Use washable covers on dog beds and furniture cushions when possible because covers are easier to clean than bulky items.

Vacuuming and dusting

Vacuuming can help remove settled dust and hair, but the equipment and method matter. A vacuum with a sealed body and HEPA exhaust is preferable because it reduces the chance of fine dust blowing back into the room. Slow passes on carpet and upholstery are usually more effective than fast passes.

For hard floors, use a damp microfiber mop or cloth rather than dry sweeping, which can stir particles into the air. Dust high surfaces before floors so settled material is removed in the right order. If vacuuming seems to make the room feel dusty, check the vacuum filter, bag or bin seal, and exhaust filtration.

Common Mistakes and Troubleshooting Cues

One common mistake is buying a purifier that is too small for the room. A compact device may be suitable for a small bedroom but underpowered in a large open living area. Another common issue is running the purifier only on the lowest setting. Low fan speeds are quieter, but they also deliver less clean air.

Placement can also limit performance. Avoid pushing the purifier tightly against a wall, hiding it behind furniture, or placing it where curtains block intake or outlet airflow. A central, open location is usually better, while still keeping the unit away from tripping hazards.

Signs your setup may need adjustment

  • Dust or hair returns quickly after cleaning.
  • The bedroom boundary is inconsistent or the door is often left open.
  • Filters load faster than expected because of heavy shedding, high dust, or open windows.
  • Odor is the main concern, but the purifier has little or no carbon media.
  • The purifier is sized for a smaller room than the one where it is used.

Troubleshooting should start with simple checks: room size, filter condition, fan speed, airflow clearance, and whether source-control habits are realistic.

Real-World Setup Examples

A small apartment with one dog may benefit from a bedroom-first approach. In this scenario, the bedroom is kept dog-free, a HEPA purifier runs during sleeping hours and ideally more continuously, and dog bedding is washed weekly. The living area can use washable throws and a regular vacuuming schedule.

In a house with a large open-plan living room, one portable purifier may not cover the entire connected space well. The more practical approach may be to focus on the bedroom and the main seating area rather than trying to treat the full open floor plan with one device. Furniture boundaries and washable covers become more important in that layout.

For a household with carpets, cleaning frequency may need to be higher than in a home with hard flooring. A sealed vacuum with HEPA exhaust, slow vacuuming, and washable rugs can help reduce the amount of settled material that is stirred up during daily activity.

For a household where odor is also a concern, carbon can be considered as a supplement. Odor control also depends on washing dog beds, cleaning floors, bathing or grooming the dog according to appropriate care guidance, and managing dampness. Carbon alone will not solve odor if the source remains heavily loaded.

Safety and Standards Considerations

For allergy-oriented home setups, mechanical filtration is the simplest and most established approach. Look for clear language such as true HEPA for particle filtration, and pay attention to whether the filter housing appears designed to limit bypass. Terms like “HEPA-type” or “HEPA-like” are less specific and may not indicate the same filtration standard.

Ozone-generating devices should be approached cautiously and are not a good fit for routine occupied-home air cleaning. Ozone can react with indoor materials and is not necessary for a dog allergy home setup. Intentional ozone generation should not be used as a home comfort strategy.

Ionizers and UV-C features are sometimes included in air-cleaning products, but they should be evaluated carefully. If a device includes optional electronic features, review whether they can be turned off and whether the product provides clear ozone-related information. UV-C performance also depends on exposure time, lamp condition, and internal design, so it should not be assumed to replace filtration or cleaning.

Maintenance and Cost Planning

A dog-friendly home can load filters faster than a pet-free home. Shedding, dust, open windows, carpet, and purifier runtime all affect replacement timing. The manufacturer’s interval is a starting point, but visible dust buildup, reduced airflow, or persistent odor can indicate that maintenance is needed sooner.

Pre-filters are often the first line of defense for hair and larger dust. If the pre-filter is washable, let it dry fully before reinstalling it. If it is disposable, replace it as directed. Never run a purifier without its required filters in place, because that can allow dust into the fan area and reduce performance.

Plan for ongoing costs before choosing a device. The purchase price is only one part of ownership. Filter replacement frequency, energy use, noise tolerance, and the number of rooms needing coverage all affect the long-term setup.

Filter replacement planning for homes with dogs. Example values for illustration.
General filter maintenance planner
Filter or partTypical interval rangeWhat can change itReminder
Washable pre-filterEvery 2–4 weeksShedding, dust, high runtimeDry fully before reinstalling
Disposable pre-filterEvery 1–3 monthsHair load and visible dustCheck for blocked airflow
HEPA main filterEvery 6–12 monthsRoom dust, fan speed, hours usedFollow device instructions
Carbon filterEvery 3–6 monthsOdor load and carbon amountReplace when odors return
Vacuum HEPA filterEvery 6–12 monthsVacuum use and dust levelDo not wash unless labeled washable
Dog bed coverWeeklyOutdoor activity and sheddingUse a spare cover if helpful

Related guides: Pet Dander Allergy: Best Air Cleaner Setup and Habits That HelpAir Purifier Placement: Where to Put It for Best ResultsHow to Choose the Right Air Purifier for Your Room Size

Summary: Practical Takeaways

A workable dog allergy home setup is built from several modest controls rather than one dramatic fix. Start with the rooms that matter most, usually the bedroom and main seating area. Size HEPA filtration to the room, keep airflow pathways clear, and run the purifier long enough to matter.

Pair filtration with washing and boundaries. Weekly dog bedding, washable covers, damp dusting, and careful vacuuming reduce the settled material that purifiers cannot remove from fabric or floors. A consistent dog-free bedroom can create a lower-exposure zone without requiring the entire home to be pet-free.

Keep the plan calm and maintainable. Choose routines the household can repeat, replace filters on a realistic schedule, avoid ozone-based approaches, and adjust the setup as room use, shedding, seasons, and comfort needs change.

Frequently asked questions

What is the most important part of a dog allergy home setup?

The most important part is usually a layered approach: keep one lower-exposure room, use a properly sized true HEPA purifier, and wash dog bedding and fabrics regularly. These steps work together because no single measure removes allergens from every surface or from the air all the time.

Should a dog with allergies be kept out of the bedroom?

Keeping the dog out of the bedroom is often one of the most effective ways to reduce exposure in a home. The bedroom has long contact time with bedding and pillows, so a consistent room boundary can make the biggest difference for comfort during sleep.

Do I need a HEPA purifier in every room?

Not necessarily. Most homes get more benefit by prioritizing the rooms where people spend the most time, such as the bedroom or main living area. A portable purifier works best when it is sized for the room it actually serves.

How often should I wash dog bedding in an allergy-friendly home?

Weekly washing is a practical general target for dog bedding. If the dog sheds heavily, spends time outdoors, or uses blankets and cushions often, more frequent washing may help keep settled material lower.

Is vacuuming enough to control dog allergens?

Vacuuming helps, but it is usually not enough by itself. It works best when combined with filtration, washing, and room boundaries because allergens also collect in bedding, upholstery, and other fabrics that vacuuming cannot fully clean.

Do air purifiers remove dog allergens from carpets and furniture?

Air purifiers mainly clean the air that passes through them, so they do not directly remove allergens from carpets or furniture. They can help with airborne particles, but settled material still needs to be removed with washing, vacuuming, or cleaning.

Cat Allergy Bedroom Rules: What Works for Dander Control

Calm bedroom with purifier and clean linens

To keep cat dander out of your sleep zone, make the bedroom a cat-free area, reduce fabric dust reservoirs, filter the air, and clean on a consistent schedule. Cat allergy bedroom rules work best when they are simple enough to follow every day. The goal is not to create a sterile room, but to lower the amount of allergen that settles on bedding, floors, and soft surfaces where you spend many hours.

Quick answer

  • Keep the bedroom cat-free 24 hours a day, with the door closed whenever practical.
  • Use a properly sized HEPA air purifier and aim for about 4 to 5 air changes per hour as a general bedroom planning target.
  • Wash sheets and pillowcases weekly; wash blankets, duvet covers, and washable throws every 1 to 2 weeks if they collect dander.
  • Favor easy-clean surfaces: fewer fabric items, washable curtains, and minimal clutter near the bed.
  • Keep indoor relative humidity around 30% to 50% for general comfort and to discourage dampness.
  • Vacuum with a sealed HEPA-style system or damp-clean floors at least weekly, more often if dander is visible.

Why Cat Allergy Bedroom Rules Matter

The bedroom is a high-exposure room because bedding, pillows, rugs, curtains, and upholstered furniture can hold settled particles. Even if a cat does not sleep on the bed, dander can move into the room on clothing, air currents, and household dust.

Cat allergens are associated with tiny particles from skin flakes, saliva, and other residues. These particles can become airborne, settle onto surfaces, and then re-enter the air when bedding is moved, floors are walked on, or fabrics are shaken.

A practical bedroom plan focuses on source control, surface control, and air control. Source control keeps the cat and high-dander items out. Surface control makes the room easier to clean. Air control uses filtration and ventilation choices that fit the room.

How Cat Dander Moves and Settles in a Bedroom

Cat dander is small enough to travel beyond the room where the cat spends most of its time. It can attach to clothing, blankets, soft toys, and dust. Once inside the bedroom, it tends to collect in places that are hard to clean, such as under the bed, behind furniture, in carpet, and in layered bedding.

Airflow also matters. A supply vent, ceiling fan, portable fan, or open door can move particles around the room. This does not mean airflow is bad; it means airflow should support filtration rather than constantly stir dust from dirty surfaces.

Use a simple three-part control plan

  • Block entry: keep the cat, cat bedding, scratching posts, and litter dust out of the bedroom.
  • Reduce reservoirs: remove or wash fabrics that hold settled particles.
  • Capture particles: use a well-sealed HEPA air purifier sized for the bedroom.

These rules are easier to maintain when everyone in the home understands that the bedroom is treated differently from shared spaces.

Table 1: Bedroom dander control checklist. Example values for illustration.
Core bedroom rules and why they help
RuleWhy it mattersPractical note
Keep the cat outReduces direct dander deposits on bedding and floorsUse a closed door as the main rule
Wash bedding weeklyRemoves settled dust and dander from close-contact fabricsUse the warmest setting safe for the fabric
Use washable layersMakes cleaning easier and more consistentAvoid heavy decorative pillows if they are not washed
Limit carpet and rugsSoft flooring can hold settled particlesChoose small washable rugs if needed
Run a HEPA purifierCaptures airborne particles that pass through the unitSize it for the room and avoid blocked airflow
Damp-dust surfacesReduces dust becoming airborne during cleaningStart high, then clean floors last
Control humiditySupports comfort and discourages dampnessUse 30% to 50% relative humidity as a general range
Keep cat items elsewherePrevents concentrated allergen sources in the sleep zoneNo cat beds, toys, litter items, or grooming tools

Size the Sleep Zone and Filter the Air

A air purifier room size matters most when a purifier is sized for the actual room, placed where air can circulate, and operated long enough to process the room air repeatedly. The key planning ideas are room volume, CADR, and air changes per hour.

Use room volume, not just floor area

Room volume is floor area multiplied by ceiling height. A 12 by 14 foot bedroom with an 8 foot ceiling is about 1,344 cubic feet. A larger bedroom or a room with a vaulted ceiling needs more airflow to reach the same number of air changes.

Understand CADR and ACH

CADR, or clean air delivery rate, estimates how much filtered air a purifier can deliver for certain particle categories under test conditions. ACH, or air changes per hour, estimates how many times the room’s air volume is processed in one hour.

For a bedroom used as an allergy-sensitive sleep zone, a general planning target of about 4 to 5 ACH is often reasonable for comfort-focused particle reduction. This is not a medical guarantee; it is a practical sizing range that helps avoid underpowered filtration.

Place the purifier for open airflow

  • Leave several inches of open space around air intake and outlet areas.
  • Avoid pushing the unit tightly against curtains, bedding, or furniture.
  • Place it in the room where air can circulate, not inside a closet or under a desk.
  • Use a sleep setting only if it still provides useful airflow for the room.

Bedroom Cleaning Rules That Are Easy to Repeat

The best cleaning routine is one that happens consistently. Occasional deep cleaning can help, but weekly habits usually matter more for keeping dander from building up in the sleep zone.

Bedding and fabric rules

Sheets and pillowcases are the highest-priority fabrics because they are close to your breathing zone for many hours. Wash them weekly. Wash duvet covers, blankets, and washable comforters every 1 to 2 weeks when practical, especially if they are handled often or stored uncovered.

Use zippered pillow and mattress encasements if you want a simpler surface to clean. They do not remove allergen from the room, but they can reduce how much dust becomes embedded in pillows and mattresses.

Floor and surface rules

  • Damp-dust nightstands, dressers, windowsills, and headboards weekly.
  • Vacuum carpet slowly with a sealed HEPA-style vacuum if available.
  • For hard floors, use a damp mop or microfiber system instead of dry sweeping.
  • Clean under the bed at least every 1 to 2 weeks because dust collects there easily.

If cleaning stirs dust and causes discomfort, consider wearing a well-fitting mask during the task and leaving the room while the purifier runs afterward. Keep this as a comfort step rather than a substitute for routine cleaning.

Common Mistakes and Troubleshooting Cues

A bedroom can look clean while still holding allergen in fabrics and hidden dust. If the room feels dusty soon after cleaning, look for reservoirs and airflow problems before assuming the purifier is not working.

Mistake: allowing occasional cat visits

A brief visit can deposit dander on bedding and floors. If the bedroom is meant to be a lower-dander zone, the rule works best when it is consistent. Keep the door closed, and avoid storing cat toys or blankets inside the room.

Mistake: relying only on fragrance or odor control

Scents do not remove particles. Activated carbon can help with some odors and gases when there is enough carbon and air contact time, but cat dander control depends mainly on particle capture, cleaning, and source control.

Mistake: using a purifier with blocked airflow

A purifier tucked behind furniture may run quietly but clean less room air. If dust collects around intakes or the room still feels stale, check placement, fan speed, filter condition, and whether the unit is sized for the room volume.

Real-World Bedroom Setups

Different bedrooms need different rules. The same principles apply, but the details depend on flooring, room size, storage, and how often the door can stay closed.

Small apartment bedroom

In a small apartment, the cat may be nearby even if it is not allowed in the bedroom. Keep the bedroom door closed, place a washable mat outside the door if dust tracks in, and run the purifier in the bedroom with the door closed during sleep hours. Avoid using the bedroom as overflow storage for pet items.

Carpeted bedroom

Carpet can hold settled particles. Vacuum slowly and regularly, especially around the bed, along baseboards, and in corners. If replacing flooring is not realistic, reduce other fabric reservoirs such as heavy curtains, upholstered benches, and piles of decorative pillows.

Shared bedroom with different preferences

When one person is more sensitive to cat dander than another, simple shared rules help. Keep the bed cat-free, close the door, use washable bedding, and set purifier operation times that are predictable. The rules should be practical enough that both people can follow them without constant reminders.

Safety, Standards, and Upkeep

For a bedroom, choose air-cleaning approaches that emphasize mechanical filtration and safe operation. A true HEPA or HEPA-type mechanical filter captures particles as air passes through the filter media. Good sealing inside the unit also matters because air can bypass a filter if the fit is poor.

Ozone, ionizers, and UV-C

Avoid intentionally generating ozone in occupied indoor spaces. Ozone is a reactive gas and is not needed for routine cat dander control. Some devices include ionizers, plasma features, or UV-C lights; evaluate these cautiously and look for clear information about ozone emissions and safe use.

UV-C, when used inside enclosed equipment, is generally aimed at surfaces inside the device rather than removing dander from bedding or floors. It should not be viewed as a replacement for true HEPA vs HEPA type filtration, cleaning, and source control.

Filter and cleaning upkeep

Filter life depends on dust load, fan speed, room use, and whether the cat enters nearby spaces. A filter may need attention sooner in homes with multiple pets, carpet, open windows, or frequent dust. Follow the device manual for safe replacement steps and do not wash disposable filters unless the instructions clearly say they are washable.

Also plan for noise and energy use. A purifier that is too loud at the needed setting may be turned off, which reduces consistency. Many households prefer running a higher setting before bedtime and a quieter setting during sleep, as long as the room still receives meaningful airflow.

Table 2: Filter replacement planner for a cat-allergy bedroom. Example values for illustration.
General filter upkeep ranges
Filter or partTypical interval rangeWhat can shorten itReminder
Pre-filterEvery 2 to 4 weeks for cleaning if washable or removableVisible lint, hair, and dustLet washable parts dry fully before reinstalling
HEPA particle filterAbout 6 to 12 monthsHeavy dust, pets, high fan use, nearby smokeReplace if airflow drops or the manual indicates
Carbon filterAbout 3 to 6 monthsOdors, cooking gases, frequent open windowsCarbon is for odors and gases, not primary dander capture
HVAC return filterAbout 1 to 3 monthsHigh system use, dusty home, pet hairUse only ratings compatible with the HVAC system
Vacuum filterCheck monthly; replace as directedFine dust and frequent carpet cleaningA dirty vacuum filter can reduce suction
Humidifier or dehumidifier filterCheck every 2 to 4 weeks during useMineral buildup, damp conditions, dustClean tanks and parts according to instructions

Related guides: Pet Dander Allergy: Best Air Cleaner Setup and Habits That HelpHow to Choose the Right Air Purifier for Your Room SizeAir Purifier Placement: Where to Put It for Best Results

Summary: Practical Rules for a Lower-Dander Sleep Zone

Cat allergy bedroom rules are most effective when they combine a consistent cat-free boundary, washable bedding, fewer dust-holding fabrics, and properly sized HEPA filtration. Start with the easiest high-impact steps: keep the door closed, wash sheets weekly, clean floors and surfaces on a schedule, and run the purifier where airflow is not blocked.

Use numbers as planning tools, not promises. A general 4 to 5 ACH target, weekly bedding care, and 30% to 50% relative humidity range can help you build a practical routine. Maintain filters, avoid ozone-generating approaches, and adjust the plan based on what you can repeat consistently in your home.

Frequently asked questions

Should a cat ever be allowed in the bedroom if someone has cat allergies?

For the lowest dander exposure, the bedroom should stay cat-free all the time. Even brief visits can leave allergen on bedding, floors, and soft surfaces. Consistency matters more than occasional exceptions if the room is meant to be a sleep zone with reduced exposure.

How often should I wash bedding for cat allergy bedroom rules to work well?

Wash sheets and pillowcases weekly because they are closest to your face for many hours. Blankets, duvet covers, and washable throws usually need washing every 1 to 2 weeks if they collect dander. If you notice visible dust or symptoms worsen, increase the cleaning frequency.

What size air purifier do I need for a cat-allergy bedroom?

Choose a purifier based on room volume, not just floor size, and aim for about 4 to 5 air changes per hour as a practical planning target. The unit should be able to move enough filtered air for the entire bedroom while still allowing open airflow around it. A purifier that is too small may run quietly but provide limited benefit.

Do air purifiers remove cat dander from bedding and carpets?

Air purifiers mainly capture airborne particles that pass through the unit. They do not clean dander already embedded in bedding, carpet, or upholstery, so they work best alongside regular washing and vacuuming. Source control and surface cleaning are still necessary.

Is fragrance, ozone, or an ionizer enough to control cat allergens in a bedroom?

No. Fragrance only changes the smell, and ozone is not needed for routine cat dander control. Mechanical filtration, cleaning, and keeping the cat out of the room are the core rules that reduce exposure.

What is the easiest bedroom change to make first for cat dander control?

The simplest high-impact change is to keep the bedroom door closed and make the room cat-free. After that, wash bedding on a fixed schedule and add a properly sized HEPA purifier. These steps are easier to maintain than complex cleaning routines and usually give the best results for daily exposure reduction.