Pollen Through Windows: When to Ventilate or Filter

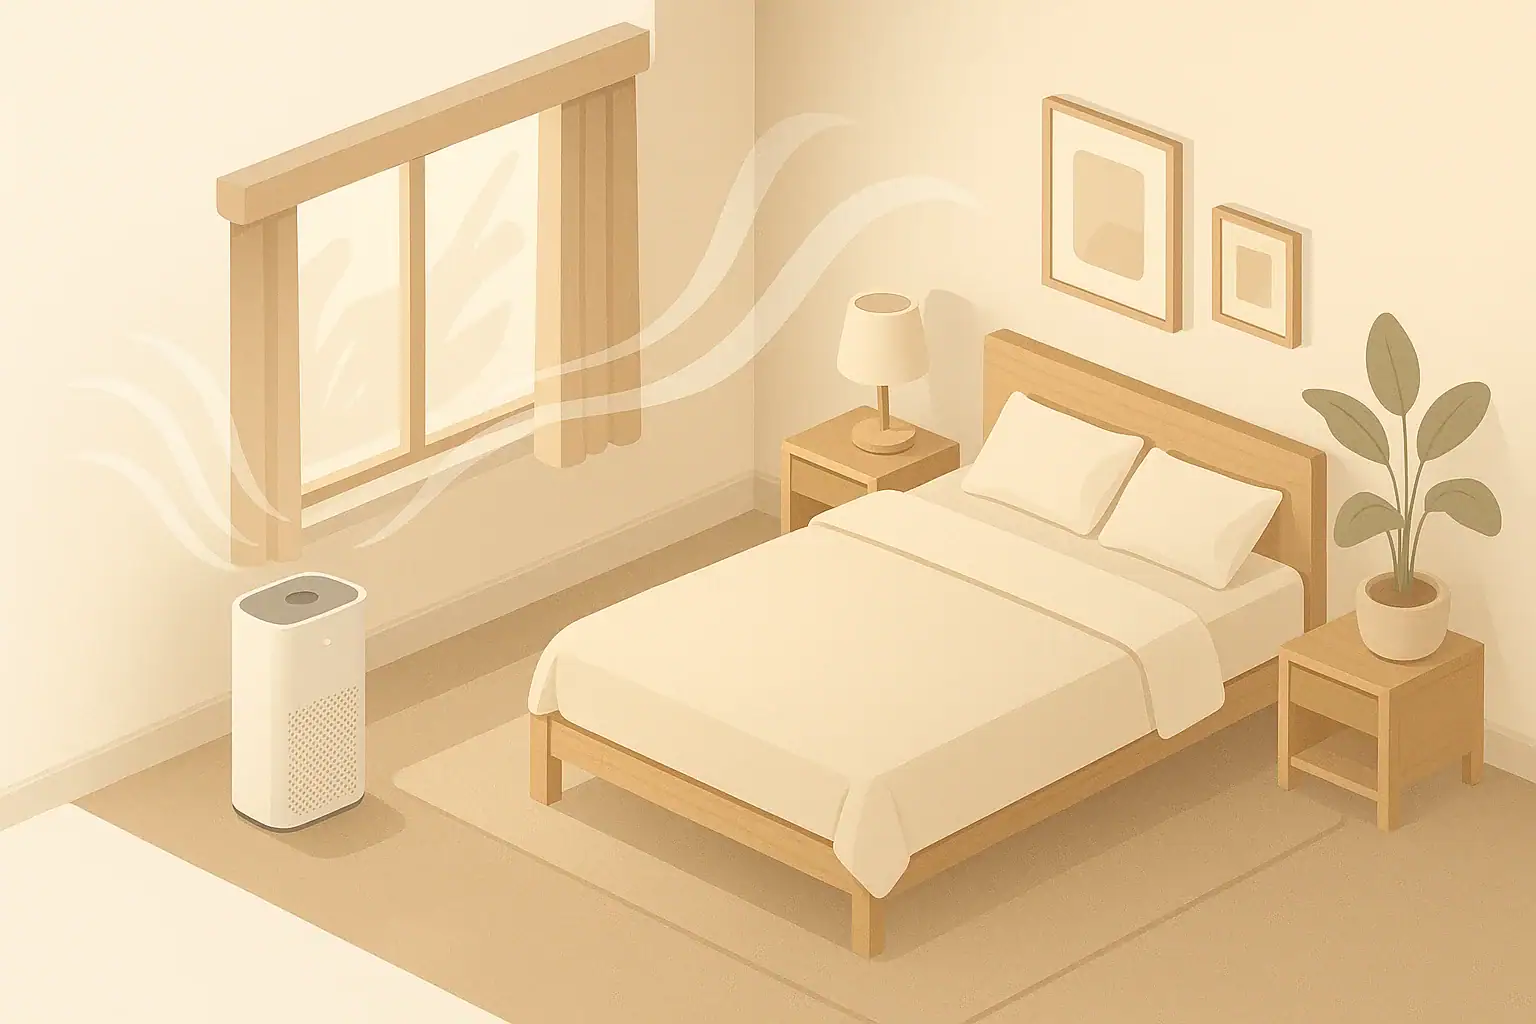
Bedroom air purifier near a closed window

When pollen is coming through windows, ventilate only during lower-pollen periods or when indoor air needs fresh air, and filter when outdoor pollen is elevated or wind is carrying pollen indoors.

Open windows can improve air exchange, but they can also bring in outdoor particles that settle on floors, bedding, curtains, and furniture. The practical goal is not to keep a home sealed at all times. It is to choose short, useful ventilation windows and rely on filtration when outdoor conditions are not favorable.

Quick answer

  • Check a local pollen forecast and outdoor conditions; keep windows mostly closed on high-pollen, dry, or windy periods.
  • Use short ventilation sessions, often about 5 to 20 minutes, when pollen is lower, such as after rain or during calm parts of the day.
  • If indoor air feels stale or a CO2 monitor is near or above about 1,000 ppm, consider brief ventilation plus active filtration instead of leaving windows open for hours.
  • For bedrooms and main living spaces, plan filtration around roughly 4 to 5 air changes per hour as a general comfort-oriented target.
  • Keep indoor relative humidity in a general range of about 30% to 50% to limit dampness while avoiding overly dry air.

Why pollen through windows matters indoors

Pollen is an outdoor biological particle released by trees, grasses, and weeds. It can enter a home through open windows, poorly sealed screens, doors, leaky building gaps, and clothing or pets. Once indoors, pollen can remain airborne for a while and then settle onto surfaces.

Unlike some very fine particles, many pollen grains are relatively large. That means they may not stay suspended as long as combustion particles or fine dust, but they can still be disturbed again by walking, making a bed, using a fan, or opening curtains. This is why both air movement and cleaning habits matter.

Ventilation is still important. Homes need air exchange to dilute indoor-generated pollutants, moisture, odors, and carbon dioxide from occupancy. The challenge is timing and control: bring in outdoor air when it helps, and reduce outdoor particle entry when conditions are not favorable.

How ventilation and filtration work together

Ventilation and filtration solve different problems. Ventilation replaces indoor air with outdoor air. Filtration removes particles from air that passes through a filter. In pollen season, the two are most useful when they are planned together rather than treated as opposites.

Use ventilation for dilution

Ventilation is useful when indoor air is stale, humid, or affected by everyday activities such as cooking, showering, cleaning, or hosting guests. Short, intentional ventilation can be more controlled than leaving windows open all day. A brief cross-breeze can exchange air quickly, especially when windows are opened on opposite sides of the home.

A CO2 monitor can help indicate ventilation need. CO2 is not a pollen measurement, but it can show when occupied rooms are not getting much fresh air. As a broad practical cue, many households use about 1,000 ppm as a point to consider more ventilation, especially in bedrooms, offices, or classrooms. This is a general comfort and air-exchange cue, not a medical threshold.

Use filtration for particle control

Filtration is useful when outdoor pollen is high, the weather is windy, or you want to clean recirculated indoor air without bringing in more outdoor particles. Portable air cleaners with mechanical particle filters can reduce airborne pollen in the room where they operate, provided they are sized and placed well.

A simple planning formula is: room volume multiplied by target air changes per hour, divided by 60, equals an approximate clean air delivery rate in cubic feet per minute. For example, a 200-square-foot room with an 8-foot ceiling has about 1,600 cubic feet of air. At 5 air changes per hour, it would need about 133 cubic feet per minute of clean air delivery as a general planning example.

Table 1: Choosing ventilation or filtration during pollen season. Example values for illustration.
Decision matrix for common pollen and indoor air situations
SituationBetter first moveWhy it helpsPractical note
Low pollen forecast and calm weatherVentilate brieflyBrings in fresh air with lower particle entry riskTry 5 to 20 minutes, then close windows
High pollen forecastFilter indoorsReduces reliance on outdoor air during peak pollenKeep windows and exterior doors closed when possible
Windy, dry conditionsFilter indoorsWind can carry and push pollen through openingsUse sealed windows rather than screens for control
After steady rainVentilate if comfortableRain can temporarily reduce airborne pollenWatch humidity and close windows if damp air builds up
CO2 near or above about 1,000 ppmVentilate briefly, then filterDilutes stale indoor air while limiting long exposureUse cross-ventilation if outdoor pollen is acceptable
Bedroom before sleepFilter and keep windows closedLimits new pollen on bedding overnightRun filtration before and during occupancy if noise is acceptable
Cooking moisture or odorsUse local exhaust and brief ventilationRemoves indoor-generated air contaminantsFilter afterward if outside pollen is high

Common mistakes that bring more pollen inside

The most common mistake is leaving windows cracked all day because the weather feels pleasant. Long open-window periods can allow pollen to accumulate indoors even if the air feels fresh. This is especially noticeable in rooms with fabric surfaces such as bedrooms, upholstered furniture, and rugs.

Another mistake is placing a fan in a window during high-pollen conditions. A fan can increase air exchange, but it may also pull pollen directly indoors. If you need ventilation, a short window opening during lower-pollen conditions is usually more controlled than hours of fan-assisted outdoor air.

Do not assume a window screen is a pollen filter. Screens are useful for insects and debris, but most standard screens are not designed to capture pollen effectively. They may slow airflow and catch some larger debris, but they should not be treated as a substitute for a rated air filter.

It is also easy to overtrust a particle monitor. Many household monitors focus on fine particles such as PM2.5. Pollen can be larger than the particles these sensors measure best, so a low PM2.5 reading does not always mean pollen is absent. Use monitors as context, not as the only decision tool.

Practical checklist for pollen-day ventilation

A simple routine can make pollen season easier to manage without turning the home into a sealed box. Start with outdoor conditions, then decide whether the home needs fresh air, filtration, or both.

Before opening windows

  • Check a local pollen forecast for the current day and the next few hours if available.
  • Look at the weather: wind, dry conditions, and nearby mowing or landscaping can increase particle movement.
  • Consider indoor cues such as stuffiness, cooking odors, moisture, or elevated CO2.
  • Choose the cleanest practical window path, away from visible dust, heavy traffic, or active yard work.

During ventilation

  • Open windows for a short period, commonly about 5 to 20 minutes.
  • Use cross-ventilation when outdoor conditions are favorable so air exchange happens quickly.
  • Avoid pulling air across dusty windowsills, old screens, or pollen-covered surfaces.
  • Close windows sooner if wind increases or indoor surfaces start collecting visible dust or pollen.

After closing windows

  • Run room filtration for a period after ventilation to capture particles that entered.
  • Wipe windowsills with a damp cloth if pollen is visible.
  • Keep bedroom doors closed if the bedroom is your priority clean-air space.
  • Vacuum with a well-sealed vacuum and appropriate filter when dust and pollen collect on floors.

Real-world examples for different homes

Apartment with windows on one side

Single-sided ventilation can be slower than cross-ventilation. In this case, open windows for a short period when outdoor pollen is lower, then close them and run filtration in the main room. If the apartment has a bathroom or kitchen exhaust fan that vents outdoors, it may help pull air through, but use it only as intended and avoid creating uncomfortable drafts.

House with bedrooms upstairs

Warm air often rises, and upper floors can become stuffy. During lower-pollen periods, a short whole-home airing may help, but bedrooms can be protected by closing their doors after ventilation and running room filtration. Avoid leaving bedroom windows open overnight during active pollen periods, because pollen can settle on bedding and soft furnishings.

Open-plan living area

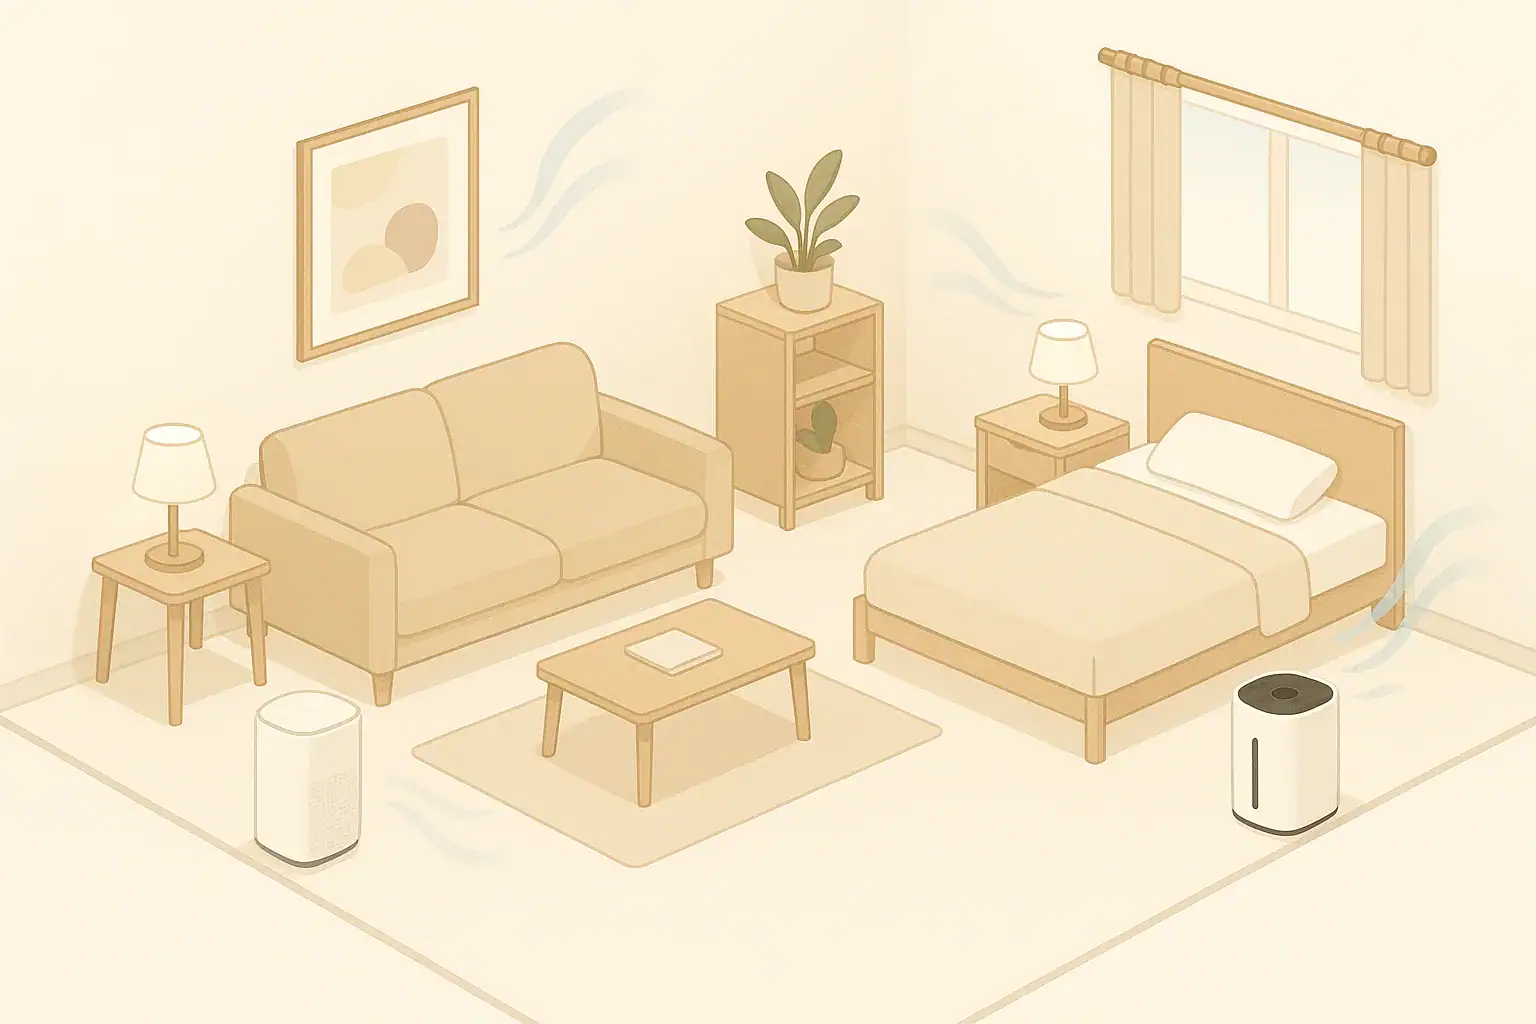
Open-plan rooms can require more filtration capacity because the air volume is larger. Instead of placing one small purifier in a far corner, use the room volume to estimate the clean air delivery needed. Keep the unit away from curtains and furniture so intake and outlet airflow are not blocked.

Home near grass, trees, or frequent yard work

Local sources can matter as much as regional forecasts. If mowing, leaf blowing, or tree pollen is obvious near the window, keep windows closed during and shortly after the activity. Ventilate from another side of the home if possible, or wait for calmer conditions.

Safety and technology notes

For pollen control, mechanical particle filtration is the main technology to understand. Filters described as true HEPA are designed to capture very small particles under standardized test conditions, and pollen is generally within the size range that mechanical filters can capture when air passes through the filter. Actual room results depend on airflow, fit, leakage, placement, and how long the unit runs.

Activated carbon is different. Carbon can help adsorb some gases and odors, but it is not the primary tool for pollen particles. A purifier may contain both particle and carbon filters, but the particle filter is the more relevant part for pollen.

Be cautious with technologies that intentionally generate ozone or reactive byproducts. Ozone is not needed for pollen control in occupied homes. If a device includes ionization, plasma, UV-C, or similar add-on features, review its safety information and certification details carefully. UV-C is more relevant to microbial inactivation inside controlled equipment than to removing pollen from room air, and it should not be viewed as a substitute for adequate filtration and ventilation.

Maintenance and monitoring that keep the plan working

A filtering strategy only works if air can move through the filter. Clogged filters reduce airflow and may lower effective cleaning. Check filters on a routine schedule, and shorten the interval during heavy pollen, dust, wildfire smoke, renovation dust, or high occupancy.

Placement also matters. Keep portable air cleaners several inches away from walls and furniture unless the manufacturer states otherwise. Do not hide them behind curtains or under desks where airflow is restricted. In a bedroom, a location with clear air circulation is usually more useful than a distant corner behind objects.

For central HVAC systems, use a filter rating that the system can handle. Higher-efficiency filters can capture more particles, but they may also add airflow resistance if the system is not designed for them. Follow equipment guidance and avoid modifications that bypass safety features or restrict airflow beyond the system design.

Monitoring can support decisions, but no single number tells the whole story. CO2 helps with ventilation timing, relative humidity helps with moisture balance, and particle readings can show fine-particle trends. Pollen forecasts and visual cues still matter because household PM sensors may not fully represent larger pollen grains.

Table 2: Filter replacement planning during pollen season. Example values for illustration.
General filter upkeep ranges and what can shorten them
Filter or componentTypical interval rangeWhat changes itReminder
Portable purifier particle filterAbout 6 to 12 monthsHeavy pollen, dust, smoke, long daily runtimeCheck sooner if airflow drops
Portable purifier prefilterEvery 2 to 4 weeks for cleaningPet hair, lint, open windows, visible dustClean gently according to instructions
Activated carbon filterAbout 3 to 6 monthsOdors, cooking, chemicals, high humidityCarbon is not the main pollen filter
HVAC return filterAbout 1 to 3 monthsSystem runtime, filter depth, dust loadUse a rating compatible with the system
Window tracks and sillsWeekly during active pollen periodsOpen windows, nearby trees, windUse damp wiping to avoid stirring particles
Bedding and soft surfacesWeekly or as practicalOpen windows, pets, outdoor clothingKeep bedroom windows closed on high-pollen days

Related guides: Pollen Season Indoor Plan: Filters, Ventilation Timing, and CleaningVentilation vs Air Purifier: When You Need One, the Other, or BothAir Purifier Placement: Where to Put It for Best Results

Summary: a simple rule for ventilation versus filtration

Use outdoor air when it solves an indoor air problem and outdoor pollen conditions are favorable. Use filtration when outdoor pollen is elevated, wind is moving particles, or you want to clean the air in a specific room without adding more outdoor particles.

A practical routine is to check the forecast, ventilate briefly during lower-pollen periods, close windows before pollen builds up indoors, and run appropriately sized filtration in the rooms you use most. Pay special attention to bedrooms, because settled pollen on bedding and fabrics can be difficult to remove once it accumulates.

The calm middle ground is usually best: do not leave windows open all season without a plan, but do not ignore ventilation needs either. Short, timed air exchange plus steady particle filtration is the most practical approach for many homes during pollen season.

Frequently asked questions

Can pollen coming through windows still be a problem if I only open them a little?

Yes. Even a partly open window can let pollen enter, especially on dry, windy, or high-pollen days. Short openings are usually easier to manage than leaving windows cracked for hours, but outdoor conditions still matter.

What is the best time of day to ventilate when pollen is coming through windows?

The best time is usually when the local pollen forecast is lower and the air is calmer, often after rain or during a cooler part of the day. The exact pattern depends on the plant type and region, so a local forecast is more useful than a universal schedule. Keep the ventilation period short and close windows once the indoor air has improved.

Do window screens stop pollen from coming through windows?

Standard window screens are not designed to filter pollen effectively. They can help with insects and larger debris, but pollen can still pass through or enter around the screen edges. If pollen control matters, use screens only as a supplement, not as your main defense.

Should I use a fan in the window if pollen is coming through windows?

A fan can move air, but it can also pull more pollen indoors when outdoor levels are high. If you need fresh air, brief cross-ventilation during a lower-pollen period is usually more controlled than running a fan in an open window for a long time. Filtration after ventilation can help reduce what entered.

How can I tell whether to ventilate or filter on a pollen day?

If outdoor pollen is low and indoor air feels stale, brief ventilation is often appropriate. If pollen is elevated, it is usually better to keep windows closed and run filtration indoors. If both are concerns, ventilate briefly and then filter the room afterward.

Does keeping windows closed all the time solve the pollen problem?

Not completely. Keeping windows closed reduces pollen entry, but some pollen can still come in through gaps, doors, clothing, and pets. Homes also need some air exchange, so the better approach is to combine short, timed ventilation with filtration when outdoor conditions are not favorable.

Garage VOCs Entering the Home: What Works Safely

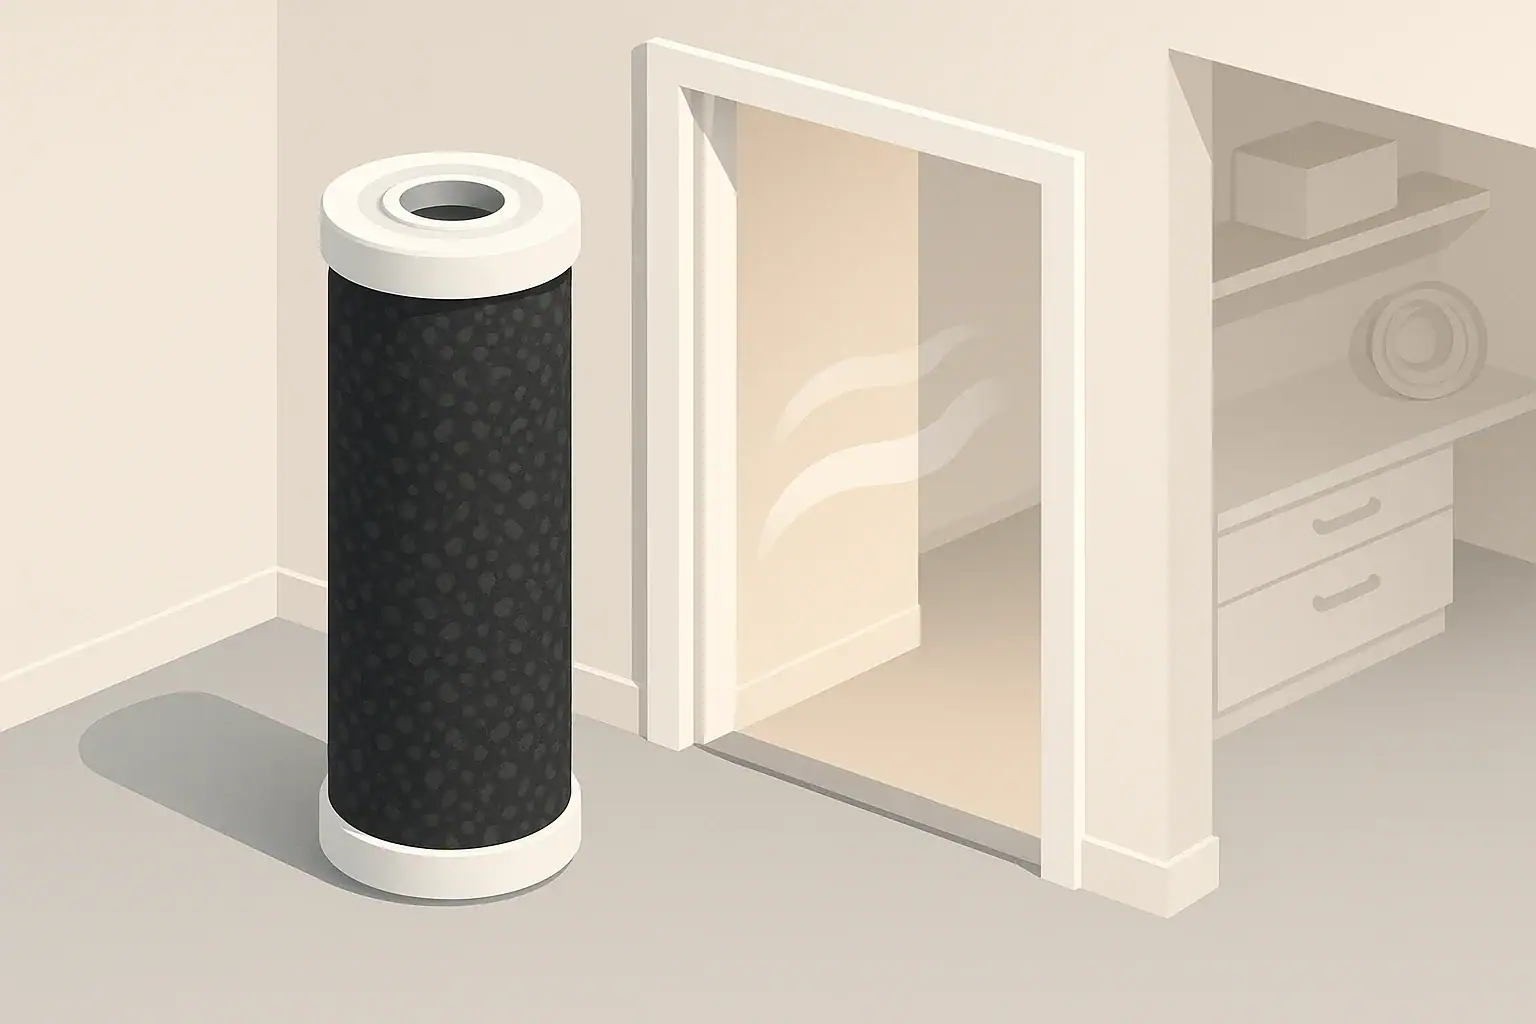
Carbon filter near an attached garage doorway

Garage VOCs can enter the home through leaks around the garage-to-house door, shared walls or ceilings, utility penetrations, and pressure differences that pull garage air indoors.

In an attached garage, vapors from fuel, solvents, paints, cleaners, pesticides, and some stored materials can mix with garage air. The practical goal is to reduce sources, seal the connection to the living space, ventilate the garage to the outdoors when needed, and use filtration in the home as a supporting step.

Quick answer

  • Keep the garage-to-house door well sealed: no visible light around the perimeter, a continuous door sweep, and a latch that pulls the door firmly closed.
  • Reduce sources first: store fuels, paints, and solvents in tightly closed containers, and avoid idling vehicles or running engines in the garage.
  • Ventilate the garage outdoors after fume-producing tasks; 15 to 60 minutes is a practical general range, depending on odor strength and airflow.
  • For nearby indoor rooms, a portable purifier can help with particles at about 4 to 5 air changes per hour; VOC control requires meaningful activated carbon or other sorbent media.
  • If garage odors appear when a dryer, range hood, or bath fan runs, pressure imbalance may be pulling garage air into the home.

What Garage VOCs Entering the Home Means

Volatile organic compounds, or VOCs, are carbon-containing chemicals that can evaporate into air at ordinary indoor temperatures. Garages often contain VOC sources because they are used for vehicles, tools, fuels, coatings, adhesives, and seasonal storage.

Not every garage odor means there is a serious problem, and many VOCs cannot be identified by smell alone. The useful approach is not to panic, but to treat the attached garage as a semi-outdoor space that should be separated from the living area as much as practical.

Garage air can move indoors even when the door stays closed. Air follows pressure differences. If the home is under slight negative pressure because exhaust fans are running, air may be drawn through small cracks and gaps from the garage side.

How Garage Air Moves Indoors

Most attached homes have multiple pathways between the garage and living space. The obvious path is the connecting door, but there may also be gaps at baseboards, plumbing penetrations, electrical boxes, attic hatches, ducts, and framing joints.

Pressure differences matter

A home can pull air from the garage when indoor exhaust is stronger than incoming replacement air. Common contributors include clothes dryers, kitchen range hoods, bath fans, fireplaces, and leaky return ducts. Wind and stack effect can also change pressure from hour to hour.

Door seals are a first line of separation

A garage-to-house door should close fully and seal evenly on all sides. Weatherstripping, a door sweep, and a properly adjusted threshold reduce air leakage. If the door is part of a required fire separation assembly, use compatible parts and avoid changes that interfere with its rating or self-closing function.

Filtration has limits with gases

HEPA filters are designed for particles such as dust and smoke particles, not VOC gases. Activated carbon and other sorbent media can adsorb some odors and VOCs, but capacity varies widely by media amount, airflow, humidity, and the specific chemical. Filtration is most useful after source control and air sealing.

Table 1: Practical control choices for garage VOC pathways. Example values for illustration.
Decision matrix for door sealing, ventilation, and filtration
SituationMost useful first stepWhy it mattersNotes
Odor strongest near garage doorImprove perimeter seals and sweepReduces direct air leakageCheck for visible light and uneven contact
Odor appears during dryer or range hood useCheck pressure and makeup airExhaust can pull garage air indoorsObserve patterns before making changes
Recent painting, fuel storage, or solvent useRemove or tightly close sourcesLess vapor is createdVentilate garage outdoors after use
Indoor dust or smoke particles near entryUse HEPA particle filtrationCaptures particles, not gasesSize for the room, not the whole house
Persistent mild odors indoorsAdd activated carbon filtrationAdsorbs some gaseous compoundsReplace media when odors return
Shared wall has gaps or penetrationsSeal accessible cracks with appropriate materialsLimits hidden air movementDo not block combustion air or alter appliances

Common Mistakes and Troubleshooting Cues

A common mistake is buying an air purifier before reducing garage sources. A purifier inside the home may improve the air in one room, but it does not stop vapors from leaving open containers or leaking around a door.

Another mistake is assuming that any carbon filter is automatically effective for VOCs. Thin deodorizing pads have limited capacity. A filter with more sorbent media generally lasts longer, but replacement timing still depends on actual loading and airflow. For more on that tradeoff, see Activated Carbon Filters Explained: VOCs, Odors, and What They Can’t Do.

Troubleshooting is easier when you look for patterns. Note when odors occur, which fans are running, whether the garage is warmer than the house, and whether the odor is stronger at floor level, near the door, or near utility penetrations.

  • Door cue: light visible around the closed door suggests an air leakage path.
  • Pressure cue: odors increase when exhaust appliances run.
  • Source cue: odors are strongest near stored fuel, paint, cleaners, or waste containers.
  • Filter cue: odors return soon after installing a carbon filter, suggesting high loading or limited carbon capacity.

Practical Checklist for Door Seals, Pressure, and Source Control

Start with the easiest actions that reduce the amount of vapor available to enter the home. Good storage habits often cost less and work better than trying to clean up contaminated air later.

Source control steps

  • Keep gasoline, solvents, paints, adhesives, and pesticides tightly closed.
  • Store high-odor materials away from the garage-to-house door when practical.
  • Dispose of unneeded chemicals through appropriate local household hazardous waste programs.
  • Do not idle vehicles, lawn equipment, or generators in the garage.
  • Let recently finished, painted, or glued items off-gas outdoors or in a well-ventilated non-living area when practical.

Door and wall air sealing steps

  • Inspect the door sweep, threshold, and side weatherstripping twice a year.
  • Confirm the door closes and latches without needing to be pushed hard.
  • Seal small, accessible gaps between the garage and living space with materials appropriate for the surface and fire-separation requirements.
  • Avoid cutting, drilling, or modifying rated doors, walls, or ceilings without understanding code and safety implications.

Ventilation and Filtration Options That Fit the Problem

Ventilation and filtration are different tools. Ventilation dilutes and removes garage air by exhausting it outdoors or bringing in outdoor air. Filtration passes indoor air through media that captures particles or adsorbs some gases.

Garage ventilation

Opening the overhead garage door briefly can help after a high-odor activity, but it may not be appropriate in all weather or security situations. A dedicated garage exhaust strategy can be useful when it vents directly outdoors and does not discharge into an attic, crawlspace, or living area.

If a powered fan is considered, sizing and installation should account for garage volume, makeup air, backdrafting concerns, and local code. This is especially important where combustion appliances are nearby. Do not modify appliances, flues, or safety systems to create airflow.

Indoor filtration

For rooms adjacent to the garage, a portable air cleaner can help reduce particles if it is sized for the room. CADR planning is usually based on room volume and desired air changes per hour. For general particle reduction, many homeowners use a planning range around 4 to 5 ACH for a bedroom or living area. If you need help matching purifier output to room size, this guide on How to Choose the Right Air Purifier for Your Room Size is a good next step.

For VOCs and odors, look for the concept rather than a label alone: a sealed airflow path, enough activated carbon or sorbent media to matter, and a maintenance plan. Carbon media can become saturated, and high humidity can reduce performance for some compounds.

Real-World Examples

Example 1: Odor near a mudroom door

A homeowner notices a fuel-like odor near the interior garage door after mowing. The likely first steps are to close the fuel container tightly, move it farther from the house entry, inspect the door sweep, and ventilate the garage outdoors after refueling equipment.

Example 2: Odor when the clothes dryer runs

If the odor appears mainly when the dryer is on, the home may be drawing replacement air from the garage. The practical response is to inspect door seals, identify other leakage paths, and consider whether the home has adequate makeup air for exhaust appliances.

Example 3: Stored paint and hobby materials

Paints, stains, adhesives, and cleaners can release odors even when they are not being used, especially if lids are damaged. Reducing inventory, sealing containers, and using a lidded storage bin can lower the vapor load. A carbon-equipped purifier in the adjacent room may help with remaining mild odors, but it should not be the only control.

Safety, Standards, and Technology Cautions

Attached garages are often part of a home’s fire and air separation strategy. Doors, walls, and ceilings between the garage and living area may need to meet local code requirements. When repairs involve rated doors, penetrations, or large gaps, it is sensible to use compatible materials and qualified help when needed.

Be cautious with devices marketed for odor removal by producing ozone or reactive ions. Ozone is a lung irritant and should not be intentionally generated in occupied spaces. Ionizers and UV-C features should be evaluated carefully, including whether they produce ozone, whether air actually passes through the treatment zone, and what maintenance is required.

Low-cost TVOC sensors can be useful for spotting trends, but they are not laboratory instruments and do not identify individual chemicals. Treat TVOC readings as screening information, not as a precise safety limit. If a strong or unusual odor is sudden, persistent, or associated with a fuel spill, leave the area and follow appropriate safety guidance.

Maintenance Planner for Seals, Filters, and Storage

Garage VOC control works best as a routine, not a one-time project. Materials age, door seals compress, containers rust, and filters load over time. A simple maintenance schedule helps keep the garage-to-home boundary working as intended.

Check the garage after seasonal changes because temperature swings can affect door alignment and storage conditions. Also review the setup after adding a new exhaust fan, dryer, range hood, or large air-moving appliance that could change pressure indoors.

Table 2: Typical upkeep intervals for garage VOC control. Example values for illustration.
Filter replacement and maintenance planner
ItemTypical interval rangeWhat changes itReminder
Door sweep and weatherstrippingInspect every 6 monthsDoor use, temperature, settlingReplace if cracked, loose, or uneven
Threshold and latch alignmentInspect every 6 to 12 monthsSeasonal movement, wearDoor should close firmly without gaps
Stored fuels and solventsReview every 3 to 6 monthsHobby use, yard equipment, spillsRemove unneeded or leaking containers
Garage ventilation pathCheck seasonallyDust, blocked vents, fan useExhaust should go outdoors only
HEPA particle filterOften 6 to 12 monthsDust load, smoke, runtimeFollow device guidance and airflow cues
Activated carbon mediaOften 3 to 6 monthsOdor load, humidity, media amountReplace sooner if odors return
Indoor air monitorReview trends monthlyPlacement, sensor drift, humidityUse trends, not single readings alone

Related guides: Ventilation vs Air Purifier: When You Need One, the Other, or BothActivated Carbon Filters Explained: VOCs, Odors, and What They Can’t DoDo Air Purifiers Help With Smoke and Odors?

Frequently asked questions

How do garage VOCs entering the home usually happen?

They usually move through gaps around the garage-to-house door, cracks in shared walls or ceilings, and openings for utilities or ducts. Pressure differences make the problem worse when exhaust fans or other appliances pull air from the garage into the house.

What should I fix first if I smell garage fumes indoors?

Start by reducing the source: close and move fuels, solvents, paints, and other high-odor materials, and avoid running engines in the garage. Next, improve the door seal and look for obvious leakage paths before relying on filtration.

Can a HEPA air purifier remove garage VOCs?

HEPA filters are effective for particles, but they do not remove gaseous VOCs. For odors and some VOCs, the purifier needs substantial activated carbon or another sorbent media, and even then performance depends on airflow, humidity, and media amount.

Why do garage odors appear when the dryer or range hood runs?

Those appliances can create negative pressure in the home by exhausting indoor air. If the house does not have enough makeup air, it may draw replacement air from the garage through leaks or gaps.

Is it safe to use ozone or ionizer devices for garage odors?

Devices that intentionally generate ozone are not recommended in occupied spaces because ozone can irritate the lungs. Ionizers and similar technologies should be evaluated carefully for ozone production, actual airflow through the device, and maintenance needs.

How often should I check garage door seals and VOC-related storage?

Inspect door sweeps, weatherstripping, and latch alignment at least twice a year, especially after seasonal changes. Review stored fuels, solvents, and other chemicals every few months so damaged or unnecessary containers are not left in place.

Summary: Practical Takeaways

Garage VOCs entering the home are usually a pathway and pressure problem combined with stored sources. The most reliable order of operations is source control, air sealing, appropriate ventilation, and then filtration as a supporting measure.

For the garage-to-house door, aim for continuous contact at the sweep and weatherstripping, no visible light around the closed door, and a latch that pulls the door tight. For ventilation, move garage air outdoors when odors are created, while avoiding changes that interfere with combustion safety or building code requirements.

For filtration, use HEPA media for particles and activated carbon or other sorbent media for some VOCs and odors. Replace filters based on use, odor return, and manufacturer guidance. A calm, routine checklist is usually more effective than relying on one device to solve every garage air quality concern.

Carbon Filter Saturation Explained What Matters at Home

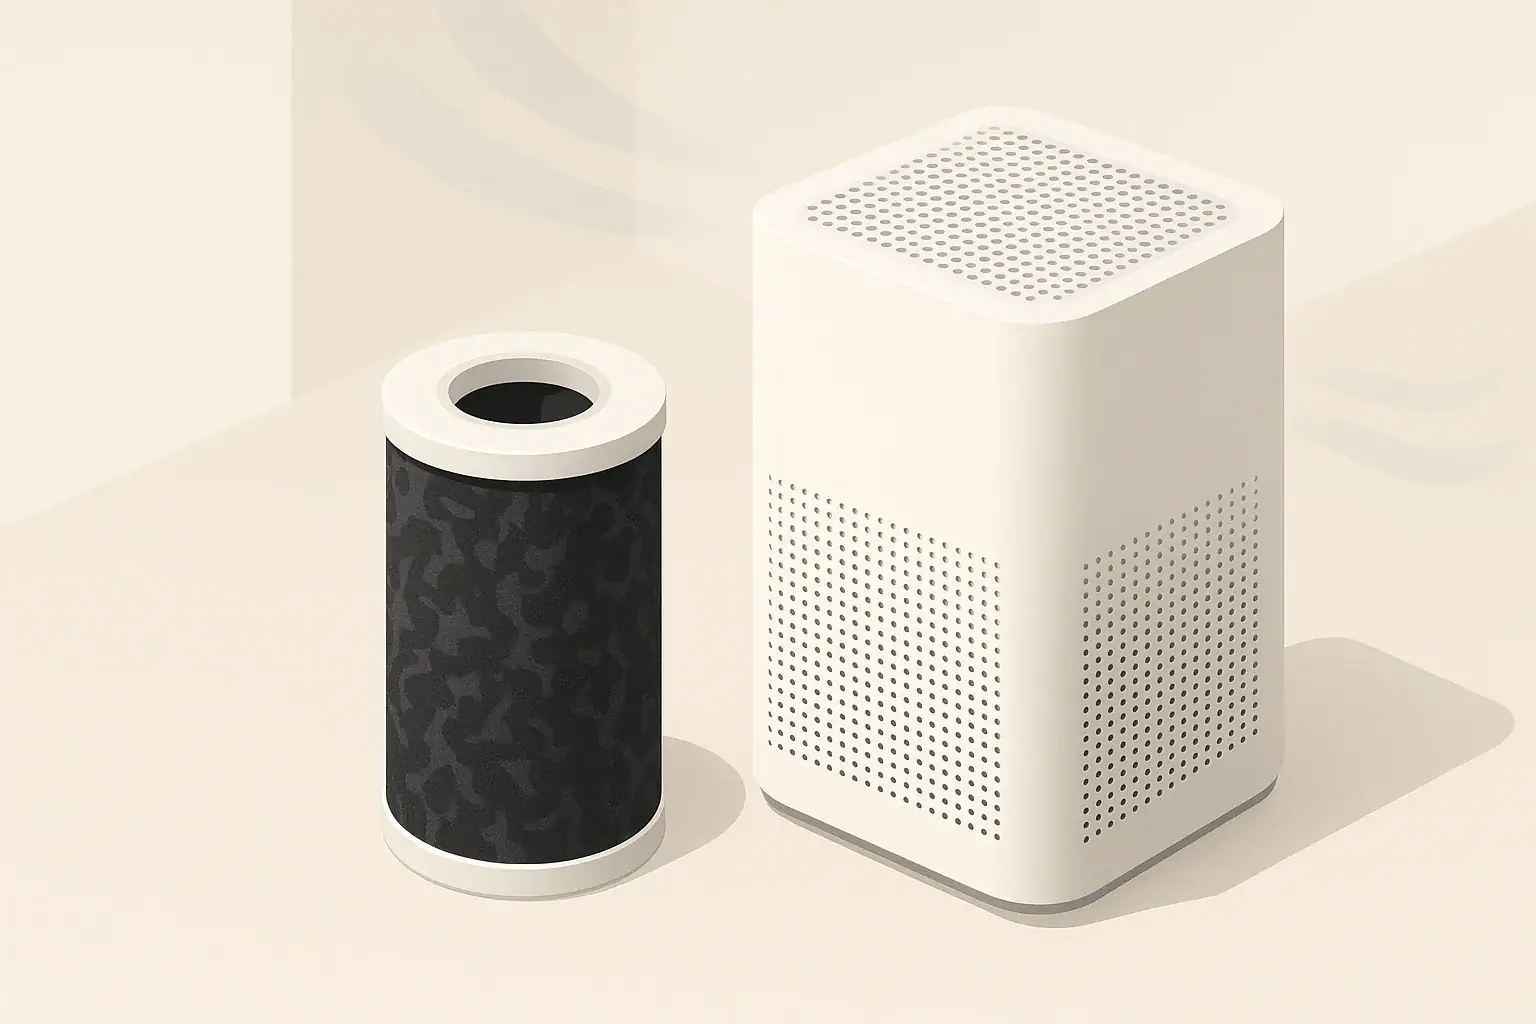
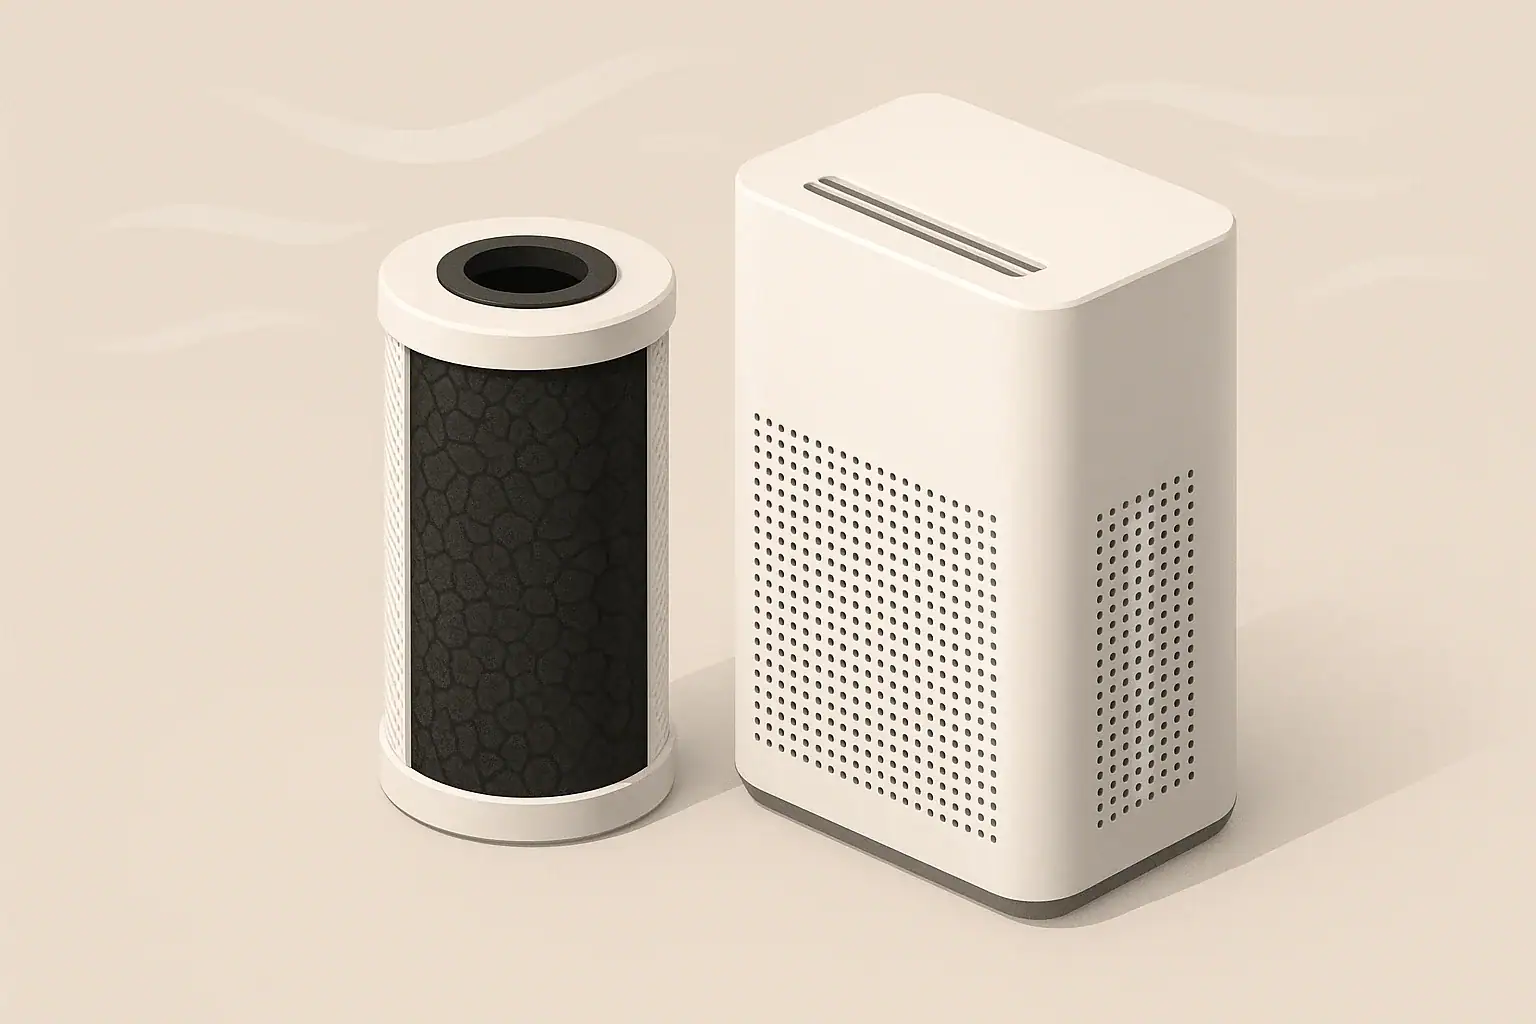
Activated carbon filter cartridge beside a purifier

A carbon odor filter is likely spent when odors return quickly after the air purifier has been running, especially if the prefilter is clean and airflow is normal.

Carbon filter saturation means the activated carbon has adsorbed enough gas molecules that it can no longer hold much more. The change is often noticed as odor breakthrough rather than a visible change in the filter. Because homes, odors, humidity, and filter designs vary, the best approach is to combine a few practical checks instead of relying on one clue.

Quick answer
  • Odor returns fast: If the same smell comes back within about 15 to 60 minutes after running the purifier, saturation is a reasonable possibility.
  • Typical replacement range: Light odor use may last around 3 to 6 months; frequent cooking, smoke, solvents, or new furnishings can shorten that range.
  • Airflow matters: Weak airflow may indicate a clogged prefilter or particle filter, not only spent carbon.
  • Source control comes first: Remove or reduce the odor source when possible, then use carbon and ventilation as support.
  • No single sensor tells all: TVOC readings can be useful trends, but they do not directly measure whether a carbon filter is saturated.

What Carbon Filter Saturation Means

Activated carbon is a porous material designed to capture many odor-causing gases and some volatile organic compounds, often shortened to VOCs. It does this mainly through adsorption, where gas molecules cling to the surface inside the carbon pores.

Saturation happens when available adsorption sites are mostly occupied or when the carbon can no longer hold a specific mix of gases effectively. At that point, incoming odor compounds can pass through the filter instead of being captured. In practical home terms, the purifier may still move air and may still capture particles if it has a particle filter, but odor control becomes noticeably weaker.

Carbon saturation is not the same as a dirty dust filter. A gray or dusty prefilter can often be cleaned or replaced based on visible buildup. A spent carbon filter may look almost unchanged, which is why smell patterns, use conditions, and replacement history matter.

How Activated Carbon Handles Odors and VOCs

Carbon performance depends on carbon mass, pore structure, airflow, contact time, humidity, and the types of gases present. Activated carbon filters with a thicker bed of granular or pelletized carbon generally offer more capacity than a thin carbon sheet, but design details vary. More carbon gives more surface area and usually more holding capacity, while slower contact through the carbon bed can improve adsorption.

Odors are also mixtures, not single substances. Cooking smells, wildfire smoke residue, pet odors, cleaning product fragrances, and off-gassing from new materials do not behave the same way. Some compounds are captured more readily than others, and high humidity can compete for adsorption space or reduce efficiency for certain gases.

It is also important to separate particle filtration from gas filtration. HEPA-style filters are designed for particles such as dust, pollen, and smoke particles. Activated carbon is used for gases and odors. A purifier can perform well for particles while doing little for odors if the carbon layer is small or already spent.

Common cues for judging odor filter condition. Example values for illustration.
Carbon filter saturation checks
CueWhat it may meanPractical check
Odor returns soon after runningCarbon may be near saturationRun the purifier on a higher setting for 30 minutes and reassess
Airflow feels weakDust loading may be the issueCheck prefilter and particle filter before blaming carbon
Odor improves near an open windowVentilation is helping dilute gasesUse short ventilation periods when outdoor conditions are suitable
Odor is strongest at one sourceSource control may matter mostRemove, seal, clean, or isolate the source if reasonable
TVOC trend stays elevatedOngoing emissions may exceed filter capacityCompare trends before and after source reduction
Filter is past normal intervalReplacement is more likelyCheck the date installed and the use pattern
Odor changes to stale or sourFilter or housing may contain residuesInspect for dampness, dust, or improper storage

Signs Your Odor Filter Is Spent

The most common sign of carbon filter saturation is odor breakthrough. This means the purifier seems to help briefly, but the odor returns while the unit is still running or shortly after it has been operating.

Odors return faster than they used to

If the same room, same purifier setting, and similar odor source used to clear noticeably better, a faster odor return is a useful clue. This is especially relevant if nothing else has changed, such as room size, purifier placement, or ventilation pattern.

The filter is beyond a realistic service period

Many home carbon filters are changed every few months, but service life can be shorter in heavy odor conditions. Frequent frying, indoor smoke residue, hobby solvents, strong fragrances, or new carpeting and furniture can consume carbon capacity faster than mild everyday odors.

Particle performance seems fine but odor control is weak

A purifier may still reduce visible dust or help lower particle readings while odors persist. That difference often points to the carbon stage rather than the fan or particle filter. However, a clogged particle filter can still limit airflow through the carbon, so both stages should be checked.

A TVOC monitor shows a persistent trend

Consumer TVOC readings are best treated as trend indicators, not precise chemical tests. If readings rise after a known source and do not drop as expected with ventilation and purifier use, the carbon stage may not be keeping up. Sensor drift, humidity, and mixed gases can affect readings, so use the monitor as one clue among several.

Common Mistakes That Look Like Saturation

Not every odor problem means the carbon is spent. Many homes have airflow, source, or placement issues that make a working filter seem ineffective.

A common mistake is placing the purifier too far from the odor source or blocking its intake with furniture. Carbon can only adsorb gases that reach the filter. If the room has stagnant corners or the purifier is tucked behind a sofa, much of the odorous air may bypass the unit.

Another mistake is expecting a small carbon sheet to handle strong or continuous emissions. Thin carbon layers can help with light odors, but they have limited capacity. Strong sources need source reduction and ventilation, not just more run time.

Cleaning products, scented candles, air fresheners, and fragrances can also add more gases to the room. Masking an odor does not remove the original source and may add load to the carbon filter. For odor troubleshooting, simplify the room by reducing optional scented products for a few days.

Finally, high humidity can complicate odor control. Moisture does not automatically ruin every carbon filter, but damp conditions can reduce adsorption effectiveness for some gases and may create separate musty odors from materials, dust, or hidden dampness.

What To Do Before Replacing the Carbon Filter

Before buying a replacement, do a short, controlled check. The goal is to determine whether the filter is likely spent or whether another condition is causing poor odor control.

  • Check the source: Identify whether the odor comes from cooking residue, trash, drains, pet areas, damp materials, smoke residue, fresh paint, furniture, or cleaning products.
  • Clean the prefilter: If the unit has a washable or vacuumable prefilter, maintain it according to the manual so airflow is not restricted.
  • Inspect airflow: Make sure air is entering and leaving the purifier freely. Keep several inches of clearance around intakes and outlets when possible.
  • Run a short high-speed test: Operate the purifier on a higher setting for about 30 to 60 minutes, then compare odor strength near the source and across the room.
  • Ventilate briefly if suitable: When outdoor air is acceptable, short ventilation can dilute gases and reveal whether the source is ongoing.
  • Check dates: Note when the carbon filter was installed and whether recent events increased odor load.

If odor remains similar after these checks and the carbon filter is within or beyond its expected interval, replacement is a practical next step. If the odor is tied to dampness, combustion, sewer gas, or a strong chemical spill, focus on the source and appropriate safety guidance rather than relying on a purifier alone.

Real-World Scenarios: Cooking, Smoke, Pets, and New Materials

Cooking odors often come from both airborne gases and particles. A kitchen exhaust fan vented outdoors, if available, is usually more direct than a portable purifier after the fact. A carbon filter in a nearby room can help with lingering odors, but grease and heavy cooking residue may shorten filter life.

Smoke odors are also mixed. Smoke contains particles, gases, and residues that can settle on fabrics and surfaces. A purifier with particle filtration and carbon may help reduce airborne components, but settled odors often require cleaning surfaces, laundering fabrics, and increasing ventilation when outdoor air quality allows.

Pet odors are frequently source-based. Litter areas, bedding, rugs, and soft furniture can hold odor compounds. Carbon filtration may reduce airborne smells, but routine cleaning and keeping the purifier near the main odor pathway usually matters more than running it in a distant room.

New materials such as furniture, flooring, mattresses, paints, or adhesives may release VOCs over time. The highest emissions often occur early, then decline gradually. Ventilation, temperature moderation, and source choices are important; carbon filtration can be a supporting tool but has finite capacity.

Safety, Ventilation, and Technology Notes

Odor filters are not safety devices for hazardous conditions. If an odor suggests a gas leak, combustion problem, sewer gas, or a strong chemical exposure, follow appropriate safety steps for that situation and do not rely on a portable air purifier as the solution.

Ventilation is often the simplest way to dilute indoor gases when outdoor conditions are suitable. This may mean opening windows briefly, using a bath fan, running a kitchen exhaust fan that vents outdoors, or improving routine air exchange. In apartments, ventilation options may be limited, so source control and purifier placement become more important.

Some devices include ionizers, UV-C lamps, photocatalytic features, or other add-ons. These technologies vary widely, and they are not the same as activated carbon. For indoor use, many people prefer systems that do not intentionally generate ozone. If a device includes optional ionizing or reactive features, review the documentation carefully and consider whether the feature is necessary for your goal.

Never modify appliances, disable safety systems, or attempt to create ozone to remove odors. Ozone can react with indoor materials and is not a routine home odor-control strategy.

Maintenance and Replacement Planning

A simple maintenance plan prevents most guesswork. Write the installation date on the filter frame or keep a reminder in a household calendar. Track unusual events such as wildfire smoke days, painting, strong cooking periods, renovation work, or extended use on high speed.

Store replacement carbon filters sealed until use. Activated carbon can adsorb gases from the air even before installation, so leaving a filter unwrapped in a garage, closet, or utility room may reduce its useful capacity. Keep filters dry and away from solvents, fuels, fragrances, and cleaning chemicals.

When replacing a filter, check the gasket or fit of the filter frame if the design includes one. Poor sealing can allow bypass, where air moves around the filter instead of through it. Bypass can make a new filter seem weak even when the carbon itself is fresh.

Plan costs realistically. Carbon filters used for odor control may need more frequent replacement than particle filters in some homes. Homes with light odor concerns may change carbon less often, while homes with continuous sources may need more frequent changes or a larger carbon capacity approach.

General home filter planning ranges. Example values for illustration.
Filter replacement planner
Filter or taskTypical interval rangeWhat changes itReminder
Washable prefilterEvery 2 to 4 weeksDust, pets, open windowsClean only as the manual allows
Thin carbon sheetAbout 1 to 3 monthsCooking, smoke, fragrancesLimited odor capacity
Granular or pellet carbon filterAbout 3 to 6 monthsCarbon mass, humidity, gas loadReplace sooner if odors break through
Particle filterAbout 6 to 12 monthsDust load and run timeOdor control is not its main job
Purifier exterior and grillesMonthlyRoom dust and placementKeep intakes and outlets clear
Storage checkBefore installationUnsealed packaging or damp storageUse sealed, dry filters

Related guides: Activated Carbon Filters Explained: VOCs, Odors, and What They Can’t DoHow Much Activated Carbon Do You Need to Remove Odors?When to Replace Carbon Filters (And How to Tell They’re Spent)

Frequently asked questions

What are the most reliable carbon filter saturation signs at home?

The most reliable clue is odor breakthrough: the same smell returns quickly even after the purifier has been running. A filter that is past its expected service life, especially in a room with frequent cooking, smoke, or fragrance exposure, is also more likely to be saturated. Weak odor control with otherwise normal airflow is another common sign.

How long does a carbon filter usually last before it is saturated?

For light household odor use, a carbon filter may last about 3 to 6 months, but the range can be much shorter with heavy odor sources. Thin carbon sheets often have less capacity and may need replacement sooner. Use pattern, humidity, and the amount of carbon in the filter all affect the final lifespan.

Can I tell if the carbon filter is spent by looking at it?

Usually, no. A saturated activated carbon filter may look nearly the same as a fresh one because saturation is about adsorption capacity, not visible dirt. Dusty prefilters are often easy to see, but odor performance is a better clue for carbon.

Does better airflow mean the carbon filter is still working?

Not necessarily. Good airflow can mean the fan and particle stages are fine, but the carbon may still be nearing saturation. If airflow is weak, check the prefilter and particle filter first, because reduced airflow can make odor control seem worse than it really is.

Do TVOC monitors prove that a carbon filter is saturated?

No. TVOC monitors can show useful trends, but they do not directly measure carbon saturation or identify the exact odor source. If readings stay elevated after ventilation and normal purifier use, the carbon stage may be overloaded or the source may still be active.

Summary: Practical Takeaways for Spent Carbon Filters

Carbon filter saturation is usually noticed as odor breakthrough, not as a dramatic visual change. If odors return quickly, the filter is past its normal service period, and airflow checks look normal, replacement is a reasonable step.

For the best results, pair carbon filtration with source control, basic cleaning, and ventilation when outdoor conditions allow. Use monitors as trend tools, not as final proof that a filter is fresh or spent.

A calm checklist is often enough: identify the source, clear airflow, check the prefilter, review the installation date, run a short test, and replace the carbon if odor control remains weak. This approach keeps odor troubleshooting practical without assuming every smell requires a new purifier.

New Carpet Smell Explained: Carpet VOCs and Steps

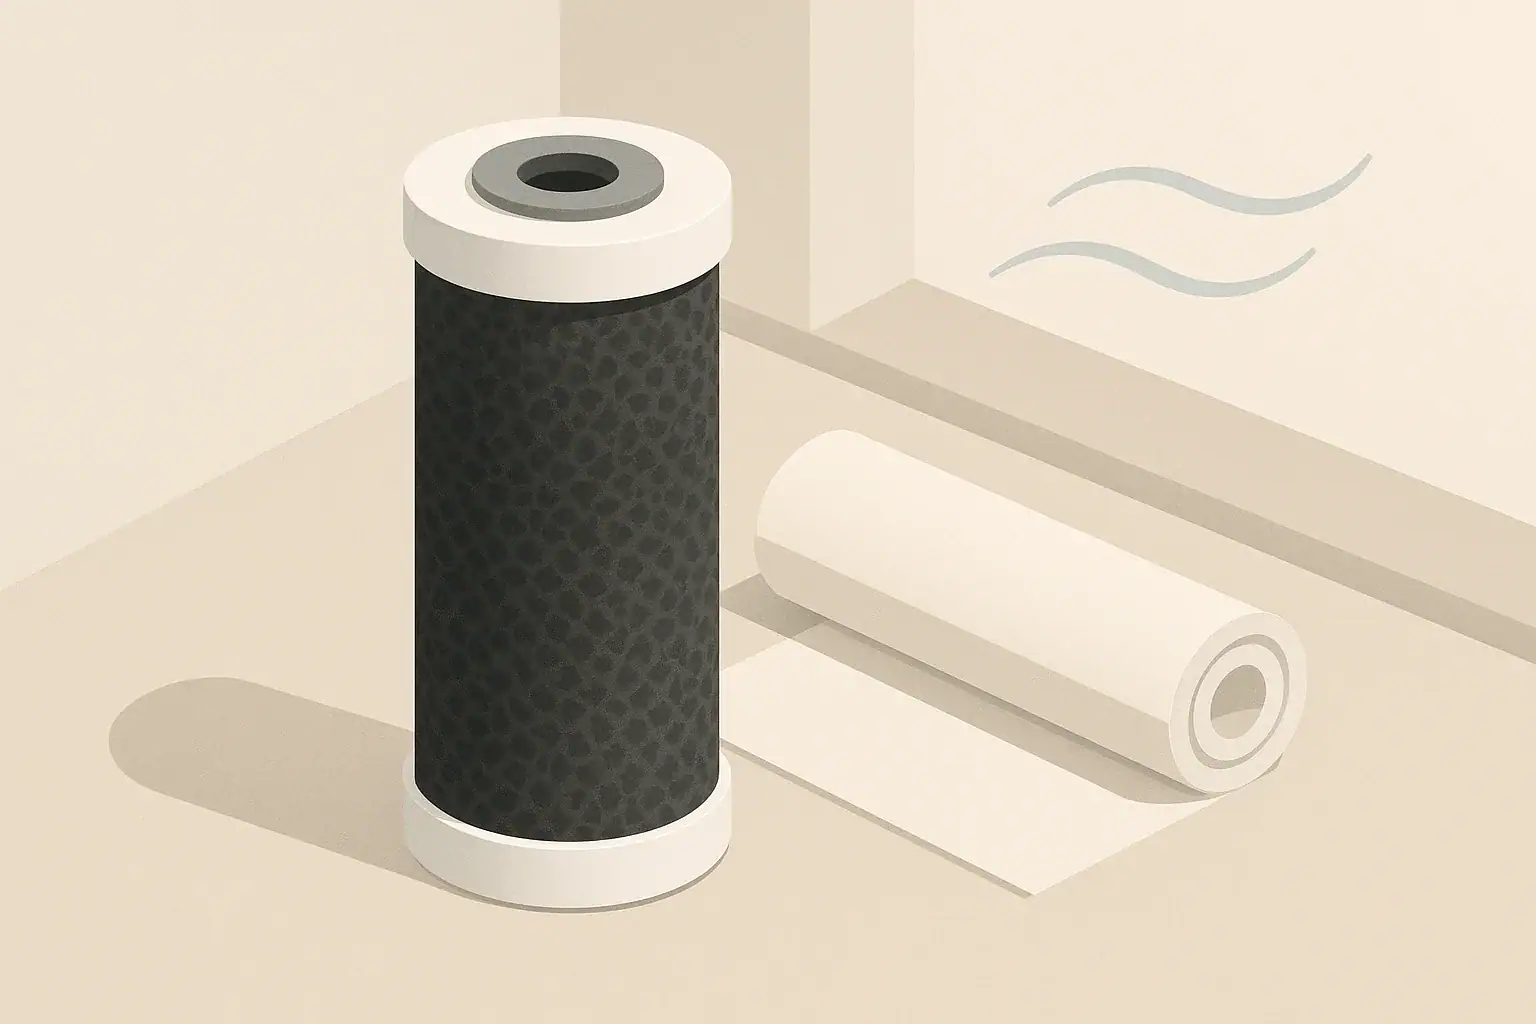
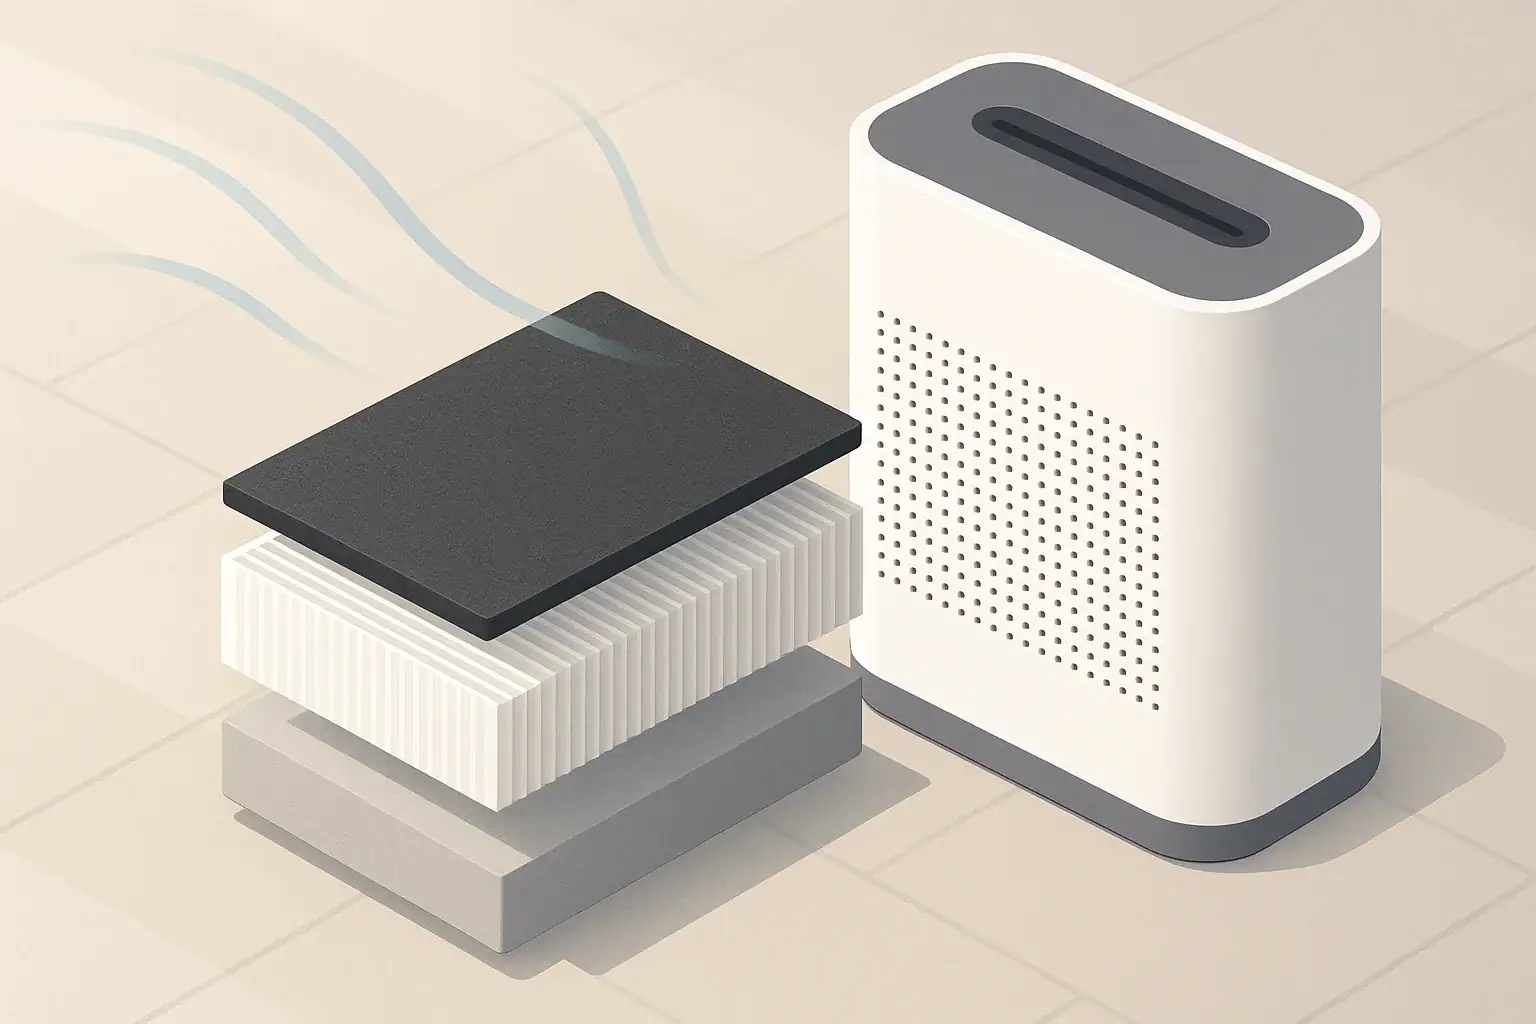
Carbon filter beside rug in neutral room

New carpet smell usually comes from volatile organic compounds, or VOCs, released by carpet fibers, backing, cushion pad, adhesives, and installation materials.

For most homes, the practical response is source control, ventilation, time, and targeted filtration rather than panic. Odors are often strongest during the first few days, then taper as materials off-gas. Rugs and carpets vary widely, so the best plan is to reduce exposure during installation and keep air moving afterward.

Quick answer
  • Ventilate during and after installation; 48 to 72 hours of extra outdoor air is a practical starting point when weather and security allow.
  • Keep indoor humidity roughly 30% to 50% to support comfort and reduce damp carpet risk.
  • Use a properly sized air purifier if needed; HEPA helps particles, while meaningful activated carbon is the main filter type for many odors and VOCs.
  • Ask installers to unroll or air out materials before installation when possible, especially in bedrooms and nurseries.
  • If odor persists for weeks or seems linked to dampness, check for moisture, adhesive issues, or poor ventilation rather than only adding fragrance.

What New Carpet Smell Means

New carpet smell is a mixture of odors from newly manufactured or recently installed materials. The smell can come from the carpet face fiber, primary and secondary backing, latex compounds, cushion pad, seam tape, tack strips, adhesives, and nearby packaging.

VOCs are carbon-based chemicals that can evaporate into air at room temperature. Some have strong odors at low levels, while others may have little smell. That means odor is a useful cue, but it is not a precise measurement of total VOC concentration.

Carpet is not the only indoor VOC source. Fresh paint, composite wood furniture, cleaning products, air fresheners, flooring adhesives, and stored solvents can all contribute. When carpet is installed at the same time as painting, remodeling, or new furniture delivery, the combined odor can be stronger than carpet alone.

Carpet and Rug VOC Basics: Sources, Timing, and Airflow

Where VOCs can come from

Different carpet and rug components can off-gas at different rates. Synthetic fibers, stain-resistant treatments, backing materials, rubberized rug pads, and adhesives may each add their own odor profile. Area rugs can also arrive tightly wrapped, so odors may be concentrated when the packaging is opened.

Installation choices matter. A loose-laid area rug usually has fewer installation-related materials than wall-to-wall carpet glued over a large surface. Stretch-in carpet over a cushion pad may avoid full-spread adhesive, but the pad and carpet still need air-out time.

Why smell often changes over time

Many new-material odors are strongest at first because the most volatile compounds evaporate quickly. Warm temperatures, low air exchange, and closed rooms can make the smell more noticeable. Ventilation dilutes indoor air and helps carry released compounds outdoors.

A practical way to think about it is this: source control comes first, ventilation is the main dilution tool, and filtration can be a support tool. A purifier with only a particle filter may improve dust and fibers, but it is not designed as the primary tool for gases. Activated carbon or other gas-phase media is the relevant filtration category for many VOC and odor concerns.

Decision matrix for carpet VOC steps. Example values for illustration.
Carpet and rug odor response options
SituationPrimary stepWhy it mattersNote
Before installationRequest low-emission materials and air-out timeReduces source strength when availableAsk about carpet, pad, and adhesive
First 48 to 72 hoursIncrease outdoor airDilutes early off-gassingUse windows, fans, or HVAC outdoor air if suitable
Closed bedroomVentilate before sleeping in the roomPrevents odor buildup in a small spaceSecurity and weather come first
Noticeable dust or fibersVacuum with good filtrationRemoves loose particlesFollow carpet care instructions
Persistent odorCheck moisture and installation materialsDampness or adhesive issues can prolong smellDo not mask with heavy fragrance
Odor control supportUse activated carbon filtrationCarbon can adsorb some gasesCapacity and contact time vary
Particle control supportUse HEPA filtrationCaptures fine particles, not most gasesSize the unit for the room

Common Mistakes and Troubleshooting Cues

One common mistake is treating all indoor air problems as particle problems. HEPA filters are useful for fine particles such as dust, smoke particles, and fibers, but most VOCs are gases. For odor reduction, look for gas-phase filtration such as activated carbon, while recognizing that capacity varies by filter size, media amount, airflow, and replacement timing.

Another mistake is closing the room to contain the smell without any planned air exchange. Closing a door can protect the rest of the home temporarily, but the room itself may accumulate odors. If you isolate a newly carpeted room, pair that with window ventilation or mechanical exhaust when conditions allow.

Fragrance is also easy to overuse. Scented sprays, plug-ins, and heavily fragranced cleaners can add more VOCs while covering the original smell. A low-odor cleaning routine is usually a better fit during the first week after installation.

When to look beyond normal off-gassing

Some clues suggest the issue may not be simple new-carpet odor. A musty smell, damp pad, wet baseboards, or condensation near the floor points toward moisture. A sharp adhesive smell that does not fade may call for a conversation with the installer about the adhesive, cure time, and ventilation conditions.

If the smell is localized to one rug pad, backing, or adhesive spot, remove or separate the suspect item if possible and air it out in a ventilated area. For rented homes or apartments, document the timeline and communicate with the property manager before making changes.

Practical Air Quality Steps After Carpet or Rug Installation

Start before installation if you can. Ask for product information on carpet, pad, and adhesives, and choose low-emission options when available. If the installer can store or unroll materials in a ventilated area before installation, that may reduce the strongest initial odor indoors.

  • Ventilate early: Open windows on opposite sides of the home when weather and outdoor air conditions are acceptable.
  • Use fans safely: A window fan exhausting outward can help move indoor air outside. Keep cords, rain, pets, and children in mind.
  • Run HVAC circulation: If your system allows fan-only operation, it can mix air and pass it through the central filter, though it does not replace outdoor air.
  • Keep temperature moderate: Very warm rooms can make odors more noticeable. Use normal comfort settings rather than extreme heating.
  • Control humidity: Aim for about 30% to 50% relative humidity as general indoor comfort guidance.
  • Vacuum after settling: Vacuum once loose fibers and dust have settled, following the carpet manufacturer’s care instructions.

For an air purifier, match the unit to the room and the goal. If the concern is lint, dust, or fine particles, room size and clean air delivery rate matter. If the concern is smell, the device needs enough activated carbon or similar media to be relevant, and the filter must be replaced before it is spent.

Real-World Examples: Bedrooms, Apartments, and Area Rugs

New wall-to-wall carpet in a bedroom

A bedroom is often a smaller enclosed room, so odor can build overnight. A practical plan is to ventilate heavily during the day, keep the door open when privacy is not needed, and delay sleeping in the room for a short period if the odor is strong and another space is available. A purifier can support particle control and, if equipped with carbon, some odor reduction.

Apartment with limited window options

Apartments can be harder because windows may be on one side only, and hallway ventilation may be limited. Use safe window opening when outdoor conditions allow, run bathroom or kitchen exhaust fans briefly if they vent outdoors, and avoid adding scented products. If outdoor air quality is poor, use shorter ventilation periods when conditions improve rather than leaving windows open continuously.

Large area rug over hard flooring

For an area rug, unroll it in a ventilated space before placing it in the main room if practical. Check the rug pad separately, because pads made from rubber-like or synthetic materials can have their own odor. Rug pads should be dry, compatible with the floor finish, and replaced if they remain tacky, damp, or unusually strong-smelling.

Safety, Standards, and Product Choices

When shopping, look for clear information about emissions testing, carpet cushion, adhesives, and recommended ventilation after installation. Low-emission certifications can be useful comparison tools, but they do not mean a product has no emissions or no odor. They indicate that the product was tested against a defined program or standard at the time of evaluation.

Be cautious with devices or settings that intentionally generate ozone. Ozone is not a routine home solution for new carpet smell and can react with indoor materials. Air purifiers marketed for homes should be used according to their instructions, and any ionizer or similar feature should be evaluated carefully, especially if ozone generation is mentioned.

UV-C features, when present in some air-cleaning devices, are generally aimed at biological contaminants on surfaces inside the device rather than carpet VOCs in a room. They are not a substitute for ventilation, source control, or carbon media for odors. Do not modify appliances, defeat safety interlocks, or use lamps outside their intended housings.

Maintenance and Upkeep for Carpets, Rugs, and Filters

After the first week, routine upkeep becomes more important than intensive ventilation. Vacuuming helps remove tracked-in dust, fibers, and particles that settle into carpet. Use a vacuum setting appropriate for the carpet pile so the machine cleans effectively without damaging fibers.

Keep carpets dry. Clean spills promptly, avoid over-wetting during spot cleaning, and allow cleaned areas to dry fully. Damp carpet or pad can create odor problems that are different from new material off-gassing.

If you use an air purifier, plan for filter costs and replacement intervals. A clogged prefilter reduces airflow. A spent carbon filter may stop helping with odors even if air still passes through it. Central HVAC filters should also be checked on a schedule, especially after remodeling or flooring work, because installation dust can load filters quickly.

Filter replacement planner for homes with new carpet or rugs. Example values for illustration.
Air filtration upkeep after carpet installation
Filter typeTypical interval rangeWhat changes itReminder
Purifier prefilter2 to 4 weeks for cleaningDust, pets, renovation debrisWash only if the manual allows it
HEPA or particle filter6 to 12 monthsRuntime, smoke, dust loadReplace when airflow drops or indicator triggers
Activated carbon filter3 to 6 monthsOdor load, carbon amount, airflowOdor return can be a practical cue
HVAC return filter1 to 3 monthsSystem use, filter size, household dustCheck sooner after flooring work
Vacuum filterPer manual, often several monthsFine dust and carpet fiber loadClean or replace to maintain suction
Dehumidifier filterMonthly cleaning checkHumidity season and dustImportant if drying damp areas

Related guides: Activated Carbon Filters Explained: VOCs, Odors, and What They Can’t DoVentilation vs Air Purifier: When You Need One, the Other, or BothHow to Choose the Right Air Purifier for Your Room Size

Frequently asked questions

How long does new carpet smell VOCs usually last?

For many homes, the strongest new carpet odor is noticeable for the first few days and then gradually fades over one to several weeks. The exact timeline depends on the carpet, pad, adhesive, room temperature, and how much fresh air the space gets. If the smell remains strong for weeks, it is worth checking for moisture or installation issues.

Does opening windows help reduce new carpet smell VOCs?

Yes. Outdoor air exchange is one of the most effective ways to dilute VOCs and move them out of the room. Cross-ventilation, safe use of fans, and HVAC fan circulation can all help when weather and outdoor air quality allow.

Will a HEPA air purifier remove carpet VOCs?

HEPA filters are good for particles such as dust, fibers, and some renovation debris, but they do not remove most gases well. For odor and VOC reduction, activated carbon or other gas-phase media is the more relevant filter type. A purifier can still be useful if it combines particle filtration with enough carbon for the room size.

Can carpet padding or adhesive cause the smell, not just the carpet itself?

Yes. Carpet pad, seam tape, adhesives, and backing materials can all contribute to the odor profile. In some cases, one of those materials is the main source of the smell rather than the carpet face fiber.

When should I worry that the smell is not normal off-gassing?

A musty odor, visible dampness, condensation near the floor, or a smell that gets worse instead of fading may point to moisture or installation problems. A sharp adhesive odor that persists can also be a sign to contact the installer. If the smell is localized to one area, inspect that area first.

Summary: Practical Takeaways for Carpet and Rug VOCs

New carpet smell is usually a temporary mix of VOCs and odors from carpet materials, pads, adhesives, and packaging. The most useful steps are to choose lower-emission materials when possible, ventilate during the first few days, keep humidity in a reasonable range, and avoid adding scented products that complicate the air mixture.

Use the right tool for the job. Outdoor air exchange is the main dilution strategy for VOCs, activated carbon can support odor reduction, and HEPA filtration helps with particles rather than gases. If an odor persists, becomes musty, or seems tied to dampness, check for moisture and installation issues instead of relying only on air cleaning.

Cleaning Product VOCs Explained What Works After Sprays

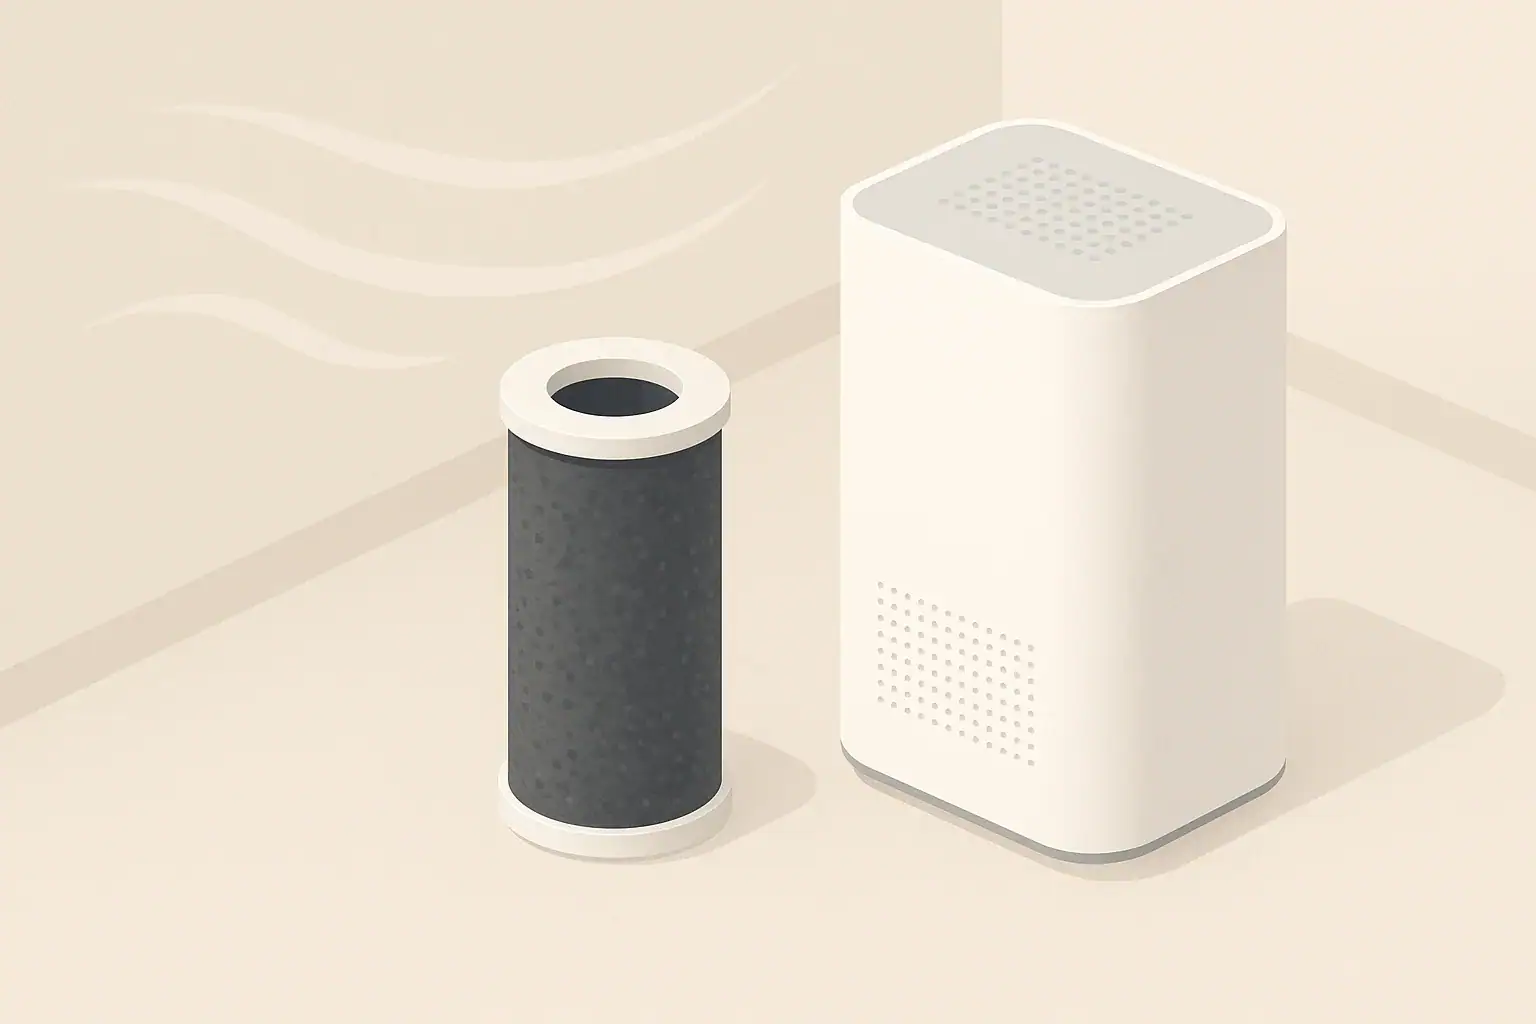
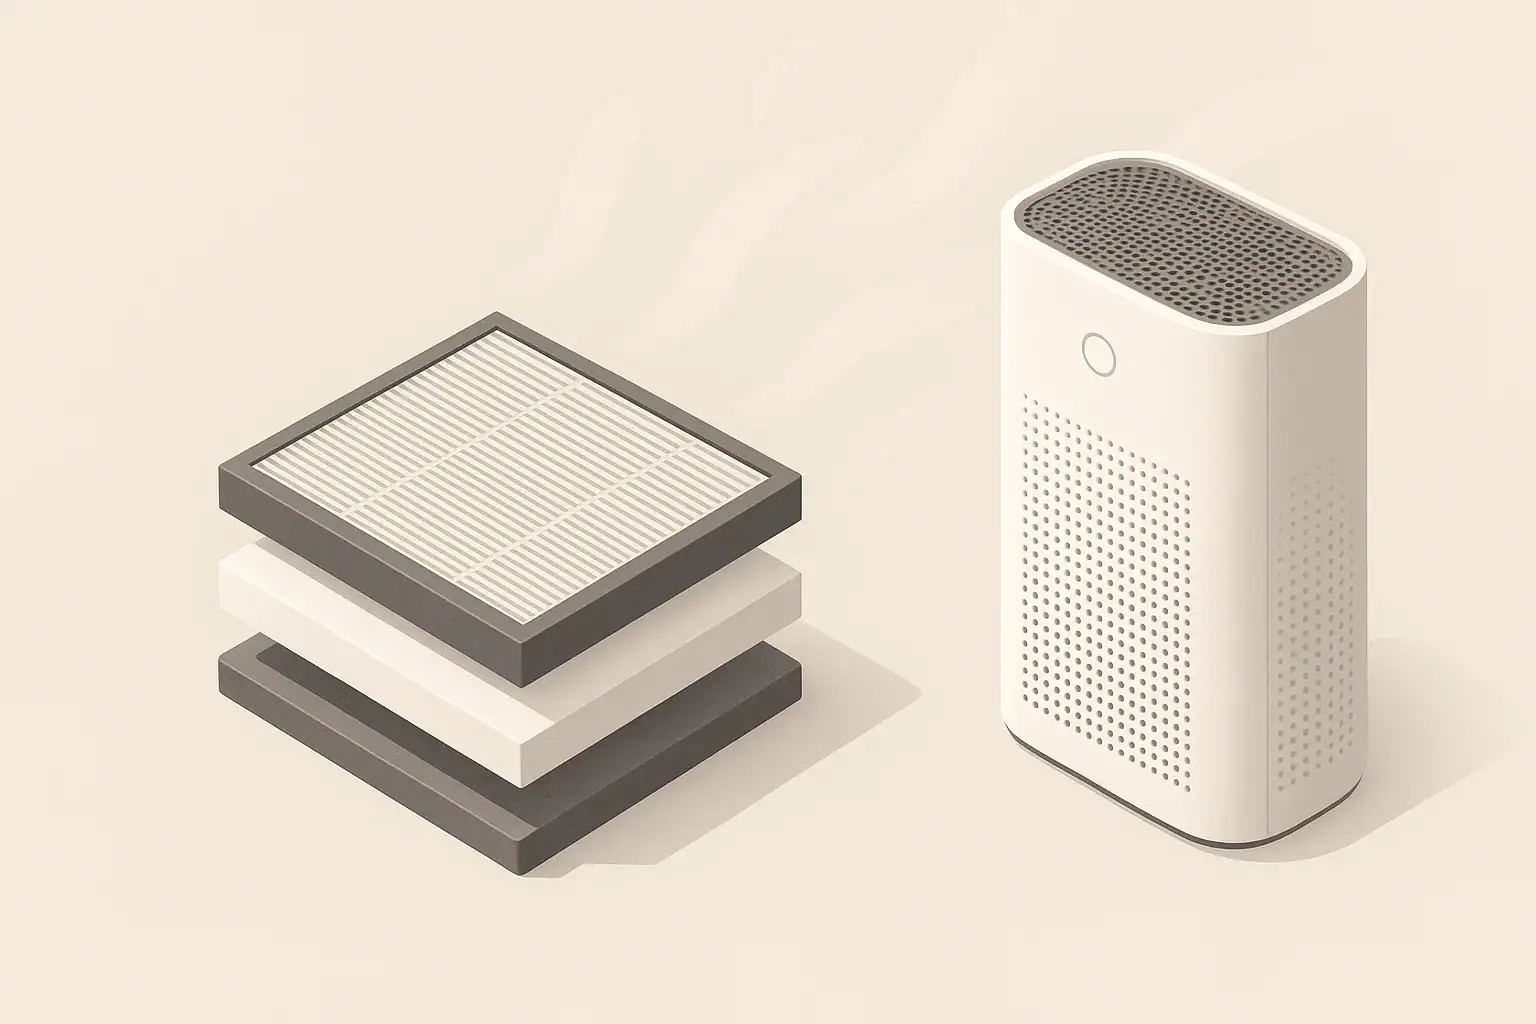
Isometric carbon filter near a simple air purifier

To lower indoor VOC peaks after cleaning sprays and disinfectants, reduce the amount released, ventilate during and after use, and use activated carbon filtration as a supporting tool.

Cleaning product VOCs can rise quickly because sprays create small droplets and expose more product surface area to room air. The practical goal is not to make a perfect reading on a sensor, but to shorten the peak, move vapors outdoors, and avoid unnecessary re-spraying.

Quick answer
  • Ventilate while cleaning when possible, then continue for about 15–60 minutes; use 1–2 hours for strong odors or small rooms.
  • Use the smallest effective amount of product and apply to a cloth when the label allows, instead of spraying broadly into the air.
  • Run a purifier with a meaningful activated carbon stage on high during cleanup and shortly after; HEPA alone mainly targets particles, not most gases.
  • Keep people and pets out of the just-cleaned area until surfaces are dry and the room smells normal for that home.
  • Do not mix products, especially bleach with ammonia or acids; follow label directions for dwell time and ventilation.

What Cleaning Product VOC Peaks Mean Indoors

VOCs, or volatile organic compounds, are gases that evaporate from liquids and solids at normal indoor temperatures. Many household cleaning products can release VOCs, including fragranced sprays, glass cleaners, degreasers, floor cleaners, disinfecting sprays, and some wipes after their liquid is exposed to air.

A VOC peak is a temporary rise after a source is used. Spraying a cleaner on a countertop, wiping a large floor area, or disinfecting several touch points in a small bathroom can produce a short-lived increase. The peak usually falls as outdoor air dilutes the room, surfaces dry, and vapors are exhausted or captured by sorbent materials such as activated carbon.

Indoor VOC sensors, often labeled TVOC, can show trends, but they do not identify each compound or prove safety. They are most useful for noticing patterns: which activities cause spikes, how long the room takes to settle, and whether ventilation changes reduce the duration of the peak.

How VOCs Move After Sprays and Disinfectants

VOCs behave differently from dust or smoke particles. A standard particle filter can be excellent for fine particles, but most gaseous compounds pass through it unless the purifier also includes enough sorbent media, commonly activated carbon. That is why a cleaning odor may remain even when a purifier is running with a clean particle filter.

Release, dilution, and removal

After a product is sprayed, three things happen at the same time. First, the product releases vapors from droplets and wet surfaces. Second, room air dilutes those vapors through leakage, open windows, exhaust fans, or mechanical ventilation. Third, some compounds may be adsorbed by carbon or absorbed into soft materials, where they can slowly re-emit later.

Why room size and air changes matter

A small bathroom can reach a stronger odor faster than an open kitchen because the same amount of product is spread through less air. Air changes per hour, often shortened to ACH, describe how many times room air is replaced or cleaned in an hour. For cleaning events, a temporary boost in air exchange is often more useful than a low, steady setting.

As a general planning idea, aim for noticeable air movement from the cleaned room toward outdoors. Cross-ventilation from two openings can clear odors faster than one cracked window, but outdoor conditions, security, noise, pollen, and weather all affect what is practical.

Control options for VOC peaks after cleaning. Example values for illustration.
Ways to lower VOC peaks after sprays and disinfectants
Control optionBest forPractical useLimit to know
Use less productReducing the sourceMeasure or spray only where neededMust still follow label directions
Spray onto clothReducing airborne mistUse when the product label allows itNot suitable for every disinfecting task
Bathroom or kitchen exhaust fanLocal removalRun during use and 15–60 minutes afterEffect depends on fan flow and makeup air
Open windowsDilution with outdoor airCreate crossflow when conditions allowOutdoor air may bring pollen, smoke, or humidity
Activated carbon filtrationOdors and some gasesRun on higher speed during the peakCarbon can saturate and needs replacement
HEPA filtrationFine particles and dropletsUseful as part of general air cleaningDoes not remove most VOC gases by itself
Time and surface dryingNatural declineKeep air moving until surfaces are drySlow in closed or humid rooms

Common Mistakes That Keep VOC Levels Elevated

Many indoor peaks come from ordinary habits rather than unusual product use. The fixes are often simple and do not require special equipment.

  • Over-spraying: More product does not always improve cleaning. It can leave extra residue and extend the drying period.
  • Cleaning in a closed room: A closed bathroom or laundry room can concentrate odors quickly. Even a partly open door and an exhaust fan can help.
  • Relying on fragrance as a cleanliness signal: A strong scent can make a room seem clean while also adding more VOCs.
  • Using a purifier with only a particle filter: HEPA-style filtration is useful for particles, but a carbon stage is the key air-cleaning feature for many odors and gases.
  • Leaving wet rags or wipes indoors: Used materials can continue releasing odors. Dispose of or store them according to the product label.
  • Mixing cleaning products: Mixing can create harmful gases or unwanted reactions. Use one product at a time and rinse when directed.

A Practical Checklist to Lower Peaks

The best approach is source control first, ventilation second, and filtration third. This order matters because it is easier to prevent a large release than to remove it after the room is filled with vapors.

Before cleaning

  • Read the label for ventilation, surface contact time, dilution, and safety instructions.
  • Choose unscented or lower-fragrance options when they meet the cleaning task.
  • Open a nearby window or turn on an exhaust fan if conditions allow.
  • Start the air purifier before spraying if it has an activated carbon filter.
  • Remove items that do not need to be exposed, such as pillows, towels, or soft toys near the work area.

During cleaning

  • Apply product close to the surface to reduce mist.
  • Spray onto a cloth when allowed by the product label.
  • Work in sections rather than coating a large area all at once.
  • Keep doors open when safe and practical, unless you are intentionally exhausting air from a small room.
  • Avoid using multiple scented products in the same session.

After cleaning

  • Continue ventilation for about 15–60 minutes, or longer if odor remains.
  • Run carbon-equipped air cleaning on a higher setting during the first part of the peak.
  • Let surfaces dry fully before closing the room.
  • Take trash, used wipes, or soaked paper towels out of the living area when appropriate.
  • If using a monitor, watch the trend rather than treating one number as an exact exposure measure.

Real-World Examples by Room

Different rooms need different strategies because the source size, ventilation path, and surface area vary.

Small bathroom disinfecting

A small bathroom has limited air volume and often a strong local exhaust option. Run the exhaust fan before you begin, keep the door slightly open if the fan needs makeup air, and continue the fan for 30–60 minutes after use. If the room has no fan or window, use less spray, apply carefully, and allow more time before closing it up.

Kitchen counters after cooking

Kitchens often have larger air volume but more surfaces. If the range hood vents outdoors, it may help during short cleaning tasks nearby. For general counters, apply cleaner to a cloth when suitable, wipe sections, and avoid layering a disinfectant over a fragranced degreaser unless the labels specifically support that sequence.

Bedroom or nursery surface cleaning

Bedrooms include fabrics that can hold odors. Clean hard surfaces earlier in the day when ventilation is easier, keep bedding away from spray drift, and allow surfaces to dry before the room is used for sleep. A purifier with both particle and carbon filtration can be run temporarily on a higher setting, then returned to a quieter setting.

Apartment cleaning with limited windows

In apartments, cross-ventilation may be limited. Use bathroom and kitchen exhaust where available, open a window briefly if outdoor air is acceptable, and clean one zone at a time. If a hallway or shared ventilation path is involved, avoid pushing strong odors toward neighbors or common areas.

Safety and Standards Considerations

Cleaning and disinfecting products are designed for specific uses. The safest air-quality strategy is to use them as labeled, avoid unnecessary mixing, and avoid technologies that intentionally add reactive chemicals to indoor air.

Do not mix bleach with ammonia, vinegar, acids, toilet cleaners, or other products unless a label explicitly instructs it. Mixing can create irritating or dangerous gases. If a label calls for dilution, use the stated dilution rather than guessing.

Be cautious with ionizers, ozone generators, and devices that intentionally produce ozone or reactive species. Ozone is not needed to lower routine cleaning VOC peaks in occupied homes and can react with some indoor chemicals. If a purifier includes optional ionization or similar features, review the instructions and consider whether the device can operate with those features off.

UV-C features, where present, are usually enclosed inside equipment and are not a substitute for source control, ventilation, or carbon adsorption. Do not modify devices, bypass safety switches, or use exposed UV-C lamps in occupied spaces.

Maintenance, Filters, and Monitoring

Activated carbon does not last forever. As carbon becomes loaded with captured compounds, it has less remaining capacity and may allow odors to pass through sooner. Replacement timing depends on the amount of carbon, airflow, product use, cooking odors, smoke events, humidity, and how often the purifier runs.

For homes that clean frequently or use strong-smelling products, carbon may need more attention than the particle filter. Some purifiers use a thin carbon sheet mainly for light odors, while others use deeper carbon beds. Without relying on brand claims, the general principle is that more suitable sorbent media usually provides more capacity, all else equal.

Pre-filters also matter. Dust buildup can reduce airflow, which weakens both particle removal and carbon contact. Vacuum or wash pre-filters only if the instructions allow it, and let any washable parts dry fully before reinstalling.

Monitors can help you compare routines, but TVOC readings are not universal. Two monitors can respond differently to the same cleaner. Use them as trend tools: note the baseline before cleaning, the peak after spraying, and the time it takes to return near the usual level.

Monitor metrics that may help interpret cleaning events. Example values for illustration.
Home air monitor metrics during and after cleaning
MetricWhat it can indicateCommon pitfallAction idea
TVOCGeneral trend in mixed gasesNot a full chemical analysisCompare before, peak, and after cleaning
PM2.5Fine particles or aerosol residueMay miss gases and odorsUse particle filtration and ventilation if elevated
CO2Ventilation pattern from occupancyNot a VOC measurementUse as a clue for fresh-air exchange
HumidityDrying conditions and comfortHigh humidity can slow dryingAim for a generally moderate indoor range
Odor observationPractical sign of lingering vaporsFragrance can mask other odorsContinue ventilation until odor is reduced
Time to baselineHow long the peak lastsBaseline changes through the dayTest one routine change at a time

Related guides: Ventilation vs Air Purifier: When You Need One, the Other, or BothActivated Carbon Filters Explained: VOCs, Odors, and What They Can’t DoDo Air Purifiers Help With Smoke and Odors?

Frequently asked questions

How long should I ventilate after using cleaning sprays?

For many routine cleaning jobs, ventilation for about 15 to 60 minutes after use is a practical starting point. Strong odors, small rooms, or heavy spraying may need 1 to 2 hours or more. Keep ventilation going until the surfaces are dry and the room smell has mostly cleared.

Does a HEPA purifier remove cleaning product VOCs after sprays?

HEPA filtration is effective for particles, droplets, and some aerosol residue, but it does not remove most VOC gases by itself. For odor and gas reduction, the purifier needs a meaningful activated carbon stage or other sorbent media. Ventilation and lower product use are usually the first-line controls.

Is it better to spray cleaner directly or onto a cloth?

Applying cleaner to a cloth can reduce airborne mist and limit how much product is released into the room, but only if the product label allows that method. Some disinfectants require the surface to stay wet for a specific contact time, so label directions matter. For general cleaning, targeted application usually creates less peak VOC exposure than broad spraying.

Can I use an air purifier instead of opening windows after cleaning?

An air purifier can help, especially if it includes a substantial activated carbon filter, but it is not a full substitute for fresh-air ventilation. Open windows or exhaust fans dilute VOCs and move them outdoors, which purifiers cannot do as quickly in many cases. The best results usually come from ventilation plus filtration.

Why does a cleaner still smell strong even after the floor looks dry?

Odor can persist after drying because some VOCs remain in the air, can slowly evaporate from surfaces, or can be held in soft materials like rugs and towels. Fragrance can also linger longer than the actual cleaning step. Continued ventilation and carbon filtration can help shorten that lingering period.

What is the biggest mistake people make with cleaning product VOCs after sprays?

Over-spraying in a closed room is one of the most common causes of a strong VOC peak. It increases both the amount released into the air and the time needed for drying and removal. Using less product, improving airflow, and avoiding unnecessary repeat spraying usually works better.

Summary Takeaways

Cleaning product VOC peaks are usually short-term events that can be managed with simple habits. The most effective steps are to use the right amount of product, avoid unnecessary spray mist, ventilate while surfaces dry, and support the process with activated carbon filtration when available.

HEPA filtration is useful for particles, but carbon is the relevant filter type for many odors and gases. Exhaust fans, open windows, and sensible product use often do the most work immediately after sprays and disinfectants.

If you use an air quality monitor, treat TVOC as a trend indicator rather than a precise safety score. A practical routine is to clean with ventilation on, run filtration during the peak, remove used materials promptly, and return the room to normal use after surfaces are dry and the air has settled.

Paint Fumes Indoors Explained: Ventilation and Carbon

Isometric carbon filter and purifier in neutral room

Paint fumes indoors are best reduced by combining outdoor-air ventilation, source control, and, when helpful, an air purifier with meaningful activated carbon rather than relying on one method alone.

Most indoor painting projects release a mix of odors and volatile organic compounds, often shortened to VOCs, plus small amounts of particles from sanding, dust, or overspray. Safe re-entry depends on the paint type, room size, ventilation, drying conditions, and the product label. The goal is practical: move fumes outdoors, avoid spreading them through the home, and give the room enough time to dry and air out.

Quick answer

  • Ventilate during painting and for at least 24 to 72 hours afterward when practical, with longer airing for oil-based, solvent-based, or strongly odorous coatings.
  • Aim for cross-ventilation when possible: one opening for fresh air in, another for exhaust out, supported by a window fan exhausting outdoors.
  • Re-enter when the coating is dry as directed, odor is low, and the room has been aired out; sensitive occupants may choose a longer waiting period.
  • Activated carbon can help reduce some paint odors and VOCs, but it has limited capacity and should not replace ventilation.
  • HEPA filtration is useful for dust and fine particles, especially after sanding, but it does not capture most paint vapors by itself.

What paint fumes indoors means and why it matters

Paint fumes are a general term for the odors and airborne chemicals released while paint, primer, stain, sealer, or coating products are applied and dried. The exact mix depends on the product. Water-based paints often have lower odor than many solvent-based coatings, but low odor does not always mean no emissions.

Indoors, fumes can linger because rooms have limited air exchange. Closets, bathrooms, bedrooms, and basements may clear more slowly than a large room with open windows. Temperature and humidity also matter. Cool, damp conditions can slow drying and extend the time that odors remain noticeable.

Good indoor air quality planning for painting is not about panic. It is about reducing unnecessary exposure, keeping the work area controlled, and using the right tool for the job. Ventilation removes polluted indoor air. Carbon adsorption can reduce some gases. Particle filtration captures dust. Each has a different role.

Ventilation and carbon filter basics

Ventilation is the primary strategy for paint fumes indoors because it replaces indoor air with outdoor air. The simplest setup is cross-ventilation: open a window or door on one side of the room and exhaust air out another opening. A fan placed to blow out a window can help move fumes directly outdoors instead of mixing them through the home.

A practical target for many home projects is to keep a steady flow of outdoor air during painting and continue it afterward. When conditions allow, airing out for 24 to 72 hours is a common general range for water-based products. Projects using oil-based paint, solvent-based primer, floor finish, spray coatings, or multiple coats may need longer, especially if odor remains strong.

Activated carbon filters work differently. Carbon has a porous surface that can adsorb some gases and odors. In air purifiers, carbon usefulness depends on how much carbon is present, contact time, airflow, and whether the purifier seals air through the filter rather than around it. Thin deodorizing sheets may reduce light odors but can saturate quickly during painting.

HEPA filters capture particles, not most vapors. They are still useful around painting projects when sanding, scraping, patching compound, or dust cleanup is involved. For fumes, however, HEPA alone is not the main tool.

Ventilation and filtration roles for indoor painting. Example values for illustration.
Paint fume control options compared
OptionWhat it helps withBest useKey limitation
Open-window ventilationGeneral fumes and odorsMild weather and safe outdoor conditionsDepends on wind, window layout, and outdoor air
Window exhaust fanDirecting fumes outdoorsCreating negative pressure in the work roomNeeds a safe exhaust path and make-up air
Activated carbon purifierSome VOCs and odorsSupplementing ventilation after paintingCarbon can saturate and may need replacement
HEPA purifierDust, sanding particles, fine debrisPrep work and cleanupDoes not remove most paint vapors by itself
Closing interior doorsLimiting spread to other roomsBedrooms, offices, apartmentsStill needs planned exhaust or fresh air
Low-VOC product choiceReducing source strengthPlanning before the project startsLabel terms vary; follow the product instructions

Common mistakes and troubleshooting cues

One common mistake is blowing a fan from the painted room into the rest of the home. That can dilute odor in the work room while spreading fumes to bedrooms, hallways, and HVAC returns. If a fan is used, the preferred direction is usually outward through a window or door to the exterior.

Another mistake is assuming an air purifier labeled for odors can handle a fresh painting project. Carbon capacity matters. Once carbon is saturated, it may stop adsorbing effectively and can sometimes allow odors to pass through. If the room still smells strong with the purifier running, increase ventilation and check whether the carbon filter is due for replacement.

Watch for practical cues. If paint feels tacky longer than expected, if odor increases when the room is closed, or if adjacent rooms begin to smell like paint, the ventilation pattern is not working well. Reopen the air path, exhaust outdoors, and keep interior doors closed where possible.

TVOC readings from consumer monitors can be useful for trends, but they are not a clearance test. Different sensors respond to different gases, and readings may drift. Use them as a supporting clue, not as proof that a room is risk-free.

A practical ventilation and re-entry checklist

Before painting

  • Read the paint or coating label for ventilation, drying, and cleanup instructions.
  • Choose lower-odor or low-VOC products when they fit the project requirements.
  • Remove unnecessary soft furnishings from the room, or cover them if removal is not practical.
  • Seal or close interior doors to limit spread into the rest of the home.
  • Plan an exhaust path to the outdoors and a fresh-air path into the room.

During painting

  • Keep air moving outdoors rather than toward living areas.
  • Use fans safely on stable surfaces and keep cords away from wet paint and walkways.
  • Close paint containers when not in use.
  • Avoid running central HVAC in a way that pulls fumes through the whole building, unless the system is intentionally being used for fresh-air ventilation as designed.

After painting

  • Continue ventilation for at least a day when practical, and longer if odor remains noticeable.
  • Wait for the product-specified dry or cure stage before regular use of the room.
  • Use activated carbon as a supplement, especially when weather limits open-window time.
  • Return soft furnishings after odor has decreased and surfaces are dry.

For safe re-entry basics, combine the label instructions with real-room conditions. A bedroom used overnight may deserve more airing time than a hallway. A nursery, sleeping area, or small apartment room with limited ventilation should be treated conservatively, without assuming that one open window is enough.

Real-world examples for homes and apartments

Painting one bedroom

Open the bedroom window and place a fan so it exhausts outdoors. Keep the bedroom door mostly closed, with a small gap or another opening for make-up air if needed. After the final coat, keep exhausting for several hours, then continue intermittent ventilation for the next one to three days as conditions allow.

Painting in an apartment

Apartments can be harder because there may be fewer windows and shared corridors. Avoid venting fumes into common hallways. If the only window is on one wall, use a fan to exhaust out that window and allow make-up air from another window in the apartment when possible. Keep the painted room separated from sleeping areas.

Painting a bathroom or closet

Small enclosed rooms can trap odor. A bathroom exhaust fan may help if it vents outdoors and is in good working order, but it may move less air than a window fan. For a closet, remove painted shelves or doors to a better-ventilated space when possible, or leave the closet open to a ventilated room after the strongest odor period has passed.

After sanding or patching

If sanding was part of the project, use dust control before focusing on fumes. Wipe surfaces with appropriate methods for the material, vacuum with a fine-particle filter if available, and run a HEPA-type particle purifier if you have one. Then use ventilation and carbon for the odor side of the project.

Safety and standards considerations

Follow the product label and safety data information for the coating you use. Some coatings require stronger ventilation, protective equipment, or professional handling. This is especially true for solvent-based finishes, spray applications, specialty primers, and coatings used on floors, cabinets, or industrial surfaces.

Be cautious with ozone generators, ionizers, and devices that intentionally produce reactive gases. Ozone is not a general home solution for paint fumes and can add indoor air concerns of its own. Do not use a device in a way that conflicts with its instructions or with basic occupied-space safety guidance.

UV-C features in some air cleaners are aimed at certain biological contaminants under specific design conditions. They are not a primary method for VOC removal. If a device includes UV-C or ionization, assess it carefully for emissions information and use it only as directed.

Combustion appliances, attached garages, and gas tools should not be used as part of a painting ventilation strategy. Do not modify appliances, block vents, or bypass safety systems to change airflow. Keep the plan simple: exhaust the work room outdoors, bring in fresh air, and use filtration only as a supplement.

Maintenance, filter replacement, and cost planning

Painting can load filters faster than normal daily use. A carbon filter that handled light cooking odors may become saturated quickly when exposed to fresh paint fumes. If odor returns soon after the purifier is turned off, or if the exhaust air from the purifier smells similar to the room, the carbon may be spent.

Particle filters can also load during prep and cleanup. Sanding dust, drywall residue, and fine debris can reduce airflow. Check the prefilter and housing after the project, following the manufacturer’s cleaning instructions. Do not wash filters unless the instructions clearly say they are washable.

Plan for filter replacement as part of project cost if you expect to use an air purifier heavily during painting. For a one-room refresh, one carbon replacement may be enough. For multi-room work or solvent-heavy coatings, ventilation and scheduling matter more than trying to solve everything with replacement filters.

Filter replacement planning around painting projects. Example values for illustration.
General filter upkeep after indoor painting
Filter or partTypical interval rangeWhat changes itReminder
Activated carbon filterWeeks to monthsFresh paint, strong odors, solvent useReplace sooner if odor passes through
Thin carbon sheetDays to weeks during heavy odorLow carbon amount and high VOC loadUseful for light odor, not major fumes
HEPA or particle filterMonths to a yearSanding dust, drywall dust, long runtimeCheck airflow and visible loading
Washable prefilterEvery few weeks as neededDusty prep work and pet hairDry fully before reinstalling
Window fan or box fan grilleAfter the projectDust, overspray, lint buildupClean only when unplugged
Room surfacesAfter paint is drySettled dust and residueUse cleaning methods suited to the surface

Related guides: Ventilation vs Air Purifier: When You Need One, the Other, or BothActivated Carbon Filters Explained: VOCs, Odors, and What They Can’t DoHEPA vs Carbon Filters: When Each One Matters MostWhen to Replace Carbon Filters (And How to Tell They’re Spent)

Frequently asked questions

How long should I ventilate after painting indoors?

For many water-based projects, ventilation for 24 to 72 hours after painting is a common practical range when conditions allow. Oil-based, solvent-based, or strongly odorous coatings may need longer airing out. Follow the product label and extend ventilation if odor remains noticeable.

Does an air purifier remove paint fumes indoors?

An air purifier can help, but only if it uses substantial activated carbon for gases and odors. HEPA filters mainly capture dust and particles, not most paint vapors. Ventilation is still the primary method for reducing paint fumes indoors.

What is the best way to set up a fan for paint fumes?

Place the fan so it exhausts air outdoors through a window or door rather than blowing fumes into other rooms. If possible, create cross-ventilation with a second opening for fresh air to enter. This helps move contaminated air out instead of circulating it inside.

When is it safe to sleep in a freshly painted room?

Sleep in the room only after it is dry as directed, odor has dropped to a low level, and the room has been aired out well. Some people, especially children, older adults, and sensitive occupants, may prefer a longer waiting period. If the smell is still strong, wait longer and keep ventilating.

Can I use HEPA instead of carbon for paint fumes indoors?

No. HEPA is useful for sanding dust, drywall particles, and cleanup debris, but it does not capture most paint vapors. For paint fumes indoors, carbon and ventilation address the odor and gas side, while HEPA handles particles.

Why do paint fumes linger in small rooms like closets and bathrooms?

Small rooms have limited air volume and often less natural air exchange, so fumes concentrate more easily. Humidity, cool temperatures, and closed doors can also slow drying and trap odor. Keeping air moving outdoors is especially important in these spaces.

Summary takeaways for paint fumes indoors

For paint fumes indoors, start with source control and ventilation. Choose appropriate products, keep containers closed, isolate the work room, and exhaust air outdoors when possible. Continue airing out after painting, commonly for 24 to 72 hours for many water-based projects and longer when odor, product type, or room conditions call for it.

Use activated carbon as a helpful supplement for some odors and VOCs, not as a substitute for fresh air. Use HEPA filtration for dust and particles from prep work and cleanup. For re-entry, rely on the product label, dryness, reduced odor, and practical room use. A calm plan before painting usually works better than trying to fix lingering fumes afterward.

Can You Vacuum a HEPA Filter? What Helps or Hurts

Layered HEPA filter beside a generic air purifier
You can vacuum some HEPA filters only if the manufacturer says the filter is washable, vacuum-cleanable, or reusable; otherwise, vacuuming can reduce performance or damage the filter media. Most home air purifier HEPA filters are designed to be replaced, not deeply cleaned. A gentle vacuum pass may remove loose surface dust from certain prefilters or reusable cartridges, but it usually does not restore the filter to new condition. The safest choice is to follow the filter label and the appliance manual.

Quick answer

  • Check the manual first: if it says replace only, do not vacuum the HEPA media.
  • If vacuuming is allowed, use low suction, a soft brush attachment, and light contact for about 30 to 60 seconds per side.
  • Vacuuming may remove visible lint and hair, but it will not reliably remove fine particles trapped deep in the fibers.
  • Replace most disposable HEPA filters on the schedule shown by the appliance or roughly every 6 to 12 months as general home guidance.
  • Avoid water, compressed air, stiff brushes, shaking, and detergents unless the manual specifically allows them.

What Vacuuming a HEPA Filter Really Means

A HEPA filter is a dense mat of fine fibers designed to capture airborne particles as air passes through it. In home air purifiers and HEPA vacuums, the filter works best when air moves through the intended pathway without gaps, tears, or damaged seals.

Vacuuming a HEPA filter usually means using a household vacuum hose or brush attachment to remove debris from the surface. This is different from restoring the filter. Fine particles can lodge throughout the depth of the media, not just on the outside face.

That distinction matters because a filter can look cleaner after vacuuming while still having reduced airflow. It may also look intact while small tears, crushed pleats, or weakened seals allow air to bypass the filter.

Check the Filter Type Before Any Cleaning

The cleaning decision starts with the filter design. Some air purifiers have a separate washable prefilter for hair, lint, and large dust. Others combine a prefilter, HEPA media, and carbon layer in one disposable cartridge. These designs should not be treated the same way.

Disposable HEPA filters

Most pleated HEPA filters in portable air purifiers are disposable. They are built to be replaced when loaded with particles. Vacuuming the outside may remove loose dust, but it can also pull fibers, disturb adhesive, or damage the pleat structure.

Washable or permanent HEPA-type filters

Some filters are marketed as washable, permanent, or reusable. Even then, the exact cleaning method varies. A washable prefilter is not the same as a washable HEPA filter. If the manual allows vacuuming but not rinsing, do not rinse it.

Carbon and combination filters

Activated carbon filters are used for some odors and gases. Vacuuming may remove surface dust, but it does not refresh spent carbon. Once adsorption capacity is reduced, the carbon layer usually needs replacement rather than cleaning.

Table 1: Cleaning decision checklist for HEPA filters. Example values for illustration.
HEPA filter cleaning decision checklist
Filter situationVacuuming guidancePractical note
Manual says replace onlyDo not vacuum HEPA mediaReplace on schedule or when airflow drops
Separate washable prefilterClean the prefilter as directedLet it dry fully before reinstalling
Manual says vacuum-cleanableUse gentle suction and soft brushAvoid pressing into pleats
Filter has carbon layerVacuuming will not renew carbonReplace when odors persist or schedule is reached
Filter is torn or deformedDo not rely on cleaningReplace to reduce bypass risk
Filter smells musty or dampDo not vacuum as a fixReplace and address moisture conditions
Heavy smoke or renovation dust exposureExpect shorter lifeInspect more often and replace if loaded

What Vacuuming Helps With and What It Cannot Fix

Vacuuming can help with large, loose debris on a filter face. This includes lint, pet hair, dust clumps, and fibers that are sitting on the surface. Removing that layer may modestly improve airflow in filters designed for cleaning.

Vacuuming cannot reliably remove fine particles embedded inside dense HEPA media. PM2.5-sized particles, smoke residue, and very fine dust can settle throughout the depth of the filter. Stronger suction does not necessarily solve that problem and may increase the chance of damage.

Vacuuming also cannot reset a filter life indicator unless the appliance is designed to be manually reset after maintenance. Many indicators are based on time, fan use, pressure change, or a combination of factors. A cleaner-looking filter may still be near the end of its useful life.

How to Vacuum a HEPA Filter If the Manual Allows It

If the manual allows vacuuming, use a cautious approach. The goal is to remove loose surface debris without crushing the pleats or pulling fibers out of alignment.

  • Turn the purifier or vacuum off and unplug it before removing the filter.
  • Remove the filter slowly so dust does not shake into the room.
  • Use a soft brush attachment or upholstery tool.
  • Choose low suction if your vacuum has adjustable power.
  • Move in the direction of the pleats rather than scrubbing across them.
  • Keep contact light; do not press the nozzle into the media.
  • Inspect the gasket or foam seal before reinstalling.
  • Make sure the filter is seated in the correct orientation.

If dust is released during removal, it can help to do the task near a trash bag or in a well-ventilated area. People who are sensitive to dust may prefer wearing a well-fitting dust mask for comfort during the task, without treating that as a substitute for safe maintenance.

Common Mistakes That Can Damage a HEPA Filter

The most common damage comes from treating a HEPA filter like a simple screen. HEPA media is dense and delicate compared with a washable mesh prefilter.

Using high suction or stiff brushes

High suction can distort pleats or pull at the filter fibers. Stiff brushes can abrade the surface. Even small openings may allow some air to bypass the intended filter path.

Washing a non-washable filter

Water can mat fibers, loosen adhesives, deform cardboard frames, and encourage unwanted moisture retention. Only rinse a filter if the manual clearly says that part is washable, and reinstall it only when completely dry.

Using compressed air

Compressed air may force particles deeper into the media or create weak spots. It can also spread dust into the room. For home maintenance, it is usually not a good substitute for replacement.

Ignoring seals and fit

A HEPA filter depends on both the media and the seal around it. A clean filter with a warped frame, missing gasket, or poor fit may allow bypass, meaning some air moves around the filter instead of through it.

Practical Examples From Home Air Purifiers and Vacuums

Different devices place HEPA filters in different conditions. Thinking through the use case helps set realistic expectations.

Bedroom air purifier used daily

A bedroom purifier that runs most nights may collect skin flakes, textile fibers, and general household dust. If the unit has a washable prefilter, cleaning that prefilter every few weeks can reduce visible buildup. The HEPA filter itself may still need replacement around the normal interval.

Pet household with visible hair

Pet hair can load the front surface quickly. Vacuuming or washing a prefilter, if allowed, can help protect airflow. For the HEPA element, follow the manual closely because hair removal can tempt people to scrape or pull at the pleats.

After wildfire smoke or cooking smoke exposure

Smoke contains fine particles that can load a filter even when the surface does not look heavily dusty. Vacuuming may remove ash-like surface dust, but it does not remove all tiny particles or restore any carbon layer used for odors.

HEPA vacuum cleaner exhaust filter

Some vacuum cleaners use a HEPA exhaust filter to reduce particle release from the vacuum. These filters may have different maintenance instructions than air purifier filters. If the vacuum loses suction, also check the dust bin, bag, hose, and pre-motor filters before assuming the HEPA exhaust filter is the only issue.

Replacement Planning and Safer Maintenance Habits

For most homes, the better long-term habit is to keep prefilters clean and replace disposable HEPA filters on time. Filter life depends on runtime, fan speed, dust level, pets, smoke exposure, renovation work, and how well the device is sealed.

Do not try to extend filter life by adding sprays, fragrances, oils, or chemical cleaners to the filter. These can affect airflow, create residues, or introduce unwanted compounds into the air stream. Ionizers, UV-C features, or other add-ons also do not replace the need for a properly fitted particle filter, and devices should not be modified or used in ways that intentionally generate ozone.

A simple inspection routine is often enough: look for heavy loading, unusual odor, visible damage, poor fit, and reduced airflow. If the appliance has a filter indicator, use it as a reminder, not as the only source of judgment.

Table 2: General filter replacement planner. Example values for illustration.
Filter replacement planner
Filter typeTypical interval rangeWhat can shorten itReminder
Washable mesh prefilterEvery 2 to 4 weeks for cleaningPets, lint, dusty roomsDry fully before reinstalling
Disposable HEPA filterAbout 6 to 12 monthsHigh runtime, smoke, renovationsReplace if damaged or airflow drops
Reusable vacuum-cleanable HEPA filterInspect monthlyFine dust and heavy debrisVacuum only if instructions allow
Activated carbon filterAbout 3 to 6 monthsFrequent odors or gas sourcesCleaning does not refresh carbon
Combination cartridgeAbout 6 to 12 monthsMixed particle and odor loadingReplace the full cartridge as directed
Vacuum cleaner HEPA exhaust filterAbout 6 to 12 monthsFrequent vacuum use, fine dustCheck bags and prefilters too

Related guides: How Often Should You Replace a HEPA Filter?HEPA Air Purifier vs “Washable Filter” Claims: What to Look ForHEPA Pre-Filters: How Much They Extend HEPA LifeActivated Carbon Filters Explained: VOCs, Odors, and What They Can’t Do

Key Takeaways

You can vacuum a HEPA filter only when the filter instructions allow it. When it is allowed, use light suction, a soft attachment, and gentle passes to remove loose surface dust. Do not scrub, wash, blow out, or heavily shake HEPA media unless the manual specifically says that method is safe.

Vacuuming may help airflow a little when surface debris is the issue, especially on washable prefilters or reusable filters. It does not reliably remove fine particles embedded deep in the media, restore activated carbon, or repair a damaged seal.

When in doubt, protect the filter structure and replace the filter instead of trying aggressive cleaning. A correctly fitted, undamaged filter is more important than a filter that looks clean after rough handling.

Frequently asked questions

Can you vacuum a HEPA filter?

You can vacuum a HEPA filter only if the manufacturer says the filter is vacuum-cleanable or reusable. If the manual says replace only, vacuuming can damage the media or reduce performance. Even when vacuuming is allowed, it usually removes only loose surface dust and not deep fine particles.

Does vacuuming a HEPA filter make it work like new?

No. Vacuuming can improve appearance and may help airflow a little, but it does not restore a loaded HEPA filter to new condition. Fine particles remain trapped in the fibers, and the filter may still need replacement on schedule.

What is the safest way to vacuum a HEPA filter?

Use low suction, a soft brush attachment, and very light contact if the manual allows cleaning by vacuum. Move along the pleats rather than across them, and avoid pressing into the media. Always reinstall the filter only after checking that the gasket and frame are intact.

Should I vacuum a disposable HEPA filter?

Usually no, because most disposable HEPA filters are meant to be replaced rather than cleaned. Vacuuming may disturb the fibers, collapse pleats, or shorten service life. If the filter is disposable but visibly dirty, replacement is generally the safer option.

Can I use water, compressed air, or a stiff brush on a HEPA filter?

Not unless the manual specifically approves it. Water can mat fibers or damage the frame, compressed air can drive particles deeper and spread dust, and stiff brushes can abrade the media. These methods are more likely to harm the filter than improve it.

How often should a HEPA filter be replaced?

Many home HEPA filters are replaced about every 6 to 12 months, but the real interval depends on runtime, pets, smoke exposure, dust level, and the device design. If airflow drops, odors persist, or the filter is damaged, replace it sooner. Always follow the appliance manual if it gives a specific schedule.

HEPA Filter Smells Musty: What Matters and What to Do

Layered HEPA filter beside a generic purifier

A HEPA filter that smells musty usually points to moisture, trapped dust, nearby moldy materials, or an overdue filter rather than normal filter operation.

The smell may come from the HEPA filter itself, the prefilter, the carbon filter, the purifier housing, or damp air passing through the unit. A musty odor does not prove that the filter is growing mold, but it is a practical cue to inspect humidity, cleanliness, airflow, and replacement timing.

Quick answer
  • Keep indoor relative humidity around 30% to 50% when practical; persistent levels above 60% make musty odors more likely.
  • Replace a non-washable HEPA filter if it smells musty after basic housing cleaning and 24 to 48 hours of dry operation.
  • Do not rinse a HEPA filter unless the manual clearly says it is washable; many HEPA filters are damaged by water.
  • Check the prefilter, carbon filter, intake grille, and room surfaces before assuming the HEPA layer is the only source.
  • Typical HEPA replacement intervals are often about 6 to 12 months, but heavy dust, smoke, pets, dampness, or continuous use can shorten that range.

What a musty HEPA filter smell usually means

A musty smell is commonly associated with damp dust, stagnant air, microbial growth on nearby materials, or an odor that has been absorbed into filter media. In an air purifier, the odor can be carried by air flowing through the machine even when the main HEPA filter is not the original source.

HEPA filters are designed to capture fine particles, not to neutralize gases or odors. If the filter has collected household dust and then became damp, the material around the captured particles can begin to smell stale. A purifier that sits in a humid room, basement, laundry area, or near a humidifier has a higher chance of picking up this odor.

The key question is whether the smell is temporary, caused by something nearby, or persistent enough that replacement is the practical option. A calm inspection can usually narrow it down without guessing.

How HEPA filters, moisture, and odors interact

A true HEPA filter is a dense particle filter. It can capture dust, pollen-sized particles, smoke particles, pet dander fragments, and other airborne particles, but it is not primarily an odor filter. Odor control usually depends on activated carbon or another sorbent layer, when present.

Moisture changes the situation. Damp filter media can trap smells more strongly, airflow can distribute the odor, and wet dust can develop a stale scent. Even if the HEPA layer remains structurally intact, a musty smell can make the purifier uncomfortable to use.

HEPA versus carbon for smells

HEPA filtration and carbon filtration do different jobs. HEPA targets particles. Activated carbon can adsorb some odor-causing gases, but its capacity is limited and it can become saturated. A purifier with both filter types may still smell musty if the carbon is exhausted, the HEPA filter is damp, or the housing needs cleaning.

Why humidity matters

For general home comfort and dampness control, many indoor air quality references use about 30% to 50% relative humidity as a practical target range. Short periods outside that range are common, but sustained humidity above about 60% can make musty odors and damp materials more likely. A basic humidity monitor can help confirm whether the room is actually damp.

Table 1: Musty HEPA filter troubleshooting matrix. Example values for illustration.
Common odor clues and first checks
What you noticeLikely area to checkWhy it mattersPractical first step
Musty smell only when purifier runsFilter stack and housingAirflow may be carrying odor from inside the unitUnplug, inspect filters, and clean removable dust from grilles
Smell remains when purifier is offRoom surfaces and humidityThe purifier may be moving odors already in the roomCheck humidity, damp textiles, closets, windows, and walls
Odor began after humidifier useNearby moisture sourceExtra moisture can dampen dust and filter mediaSeparate devices and keep humidity near 30% to 50%
Odor after storageStored filter or purifier cabinetClosed storage can trap stale air and moistureInspect before use and replace filters that smell persistently musty
Musty smell plus visible dust buildupPrefilter and intake grilleDust-loaded surfaces can hold odorsClean washable prefilters only as directed and dry fully
Odor returns quickly after cleaningHEPA or carbon elementThe odor may be embedded in mediaPlan replacement rather than repeated cleaning attempts

Common causes of a musty HEPA filter

Several ordinary household conditions can make a HEPA filter smell musty. The cause is often a combination of moisture, dust load, and time.

High indoor humidity

Rooms that regularly run above about 60% relative humidity are more likely to develop musty odors. Basements, bathrooms, laundry rooms, and poorly ventilated bedrooms can all have elevated moisture. If the purifier is placed in one of these spaces, the filter can absorb the room’s stale smell.

A filter used past its practical life

As a HEPA filter loads with particles, airflow resistance can increase and odor can become more noticeable. A filter may still pass air but feel stale because it has collected months of dust and household particles. If the filter has been in use longer than the recommended interval, replacement is usually more effective than trying to refresh it.

Wet cleaning or accidental moisture

Many HEPA filters are not washable. Rinsing, spraying, soaking, or vacuuming too aggressively can damage the media or leave moisture inside the pleats. Even a small spill, condensation event, or placement next to a misting humidifier can create a lingering musty smell.

Odors from the room, not the purifier

A purifier may draw in air from a closet, damp wall, carpet, pet bed, trash area, or window condensation zone. In that case, the filter can seem like the source because the fan concentrates the odor at the outlet. If the room smells musty before the purifier turns on, address the room condition first.

If the musty air starts from the room itself, an air purifier vs dehumidifier for musty air comparison can help you decide which fix matters more.

Risks and signs you should not ignore

A musty HEPA filter is mainly a sign to investigate moisture and maintenance. It does not automatically mean the air purifier is unsafe, and it does not confirm a specific contaminant. Still, there are practical reasons to respond promptly.

First, a damp or odor-loaded filter can make the room less pleasant and reduce confidence in the purifier. Second, moisture can reduce the usefulness of some filter materials, especially carbon layers that are already saturated. Third, the odor may point to a broader dampness issue in the room that deserves attention.

Stop using the filter and replace it if you see visible mold-like growth on the filter media, if the filter is wet, if the smell is strong and persistent, or if the purifier was exposed to a leak or flood. If there is visible growth on building materials, recurring water intrusion, or a strong musty smell that returns after cleaning, consider getting help from a qualified building or remediation professional.

What to do when the filter smells musty

Start with a simple, low-risk troubleshooting process. Do not modify the appliance, bypass safety parts, or use ozone-producing methods to remove odors.

Step-by-step checklist

  • Turn off and unplug the purifier. Let the fan stop fully before opening the unit.
  • Inspect the filter stack. Look for dampness, staining, heavy dust, warping, or visible growth.
  • Check the prefilter. If it is washable, clean it only as directed and let it dry completely before reinstalling.
  • Do not wash a standard HEPA filter. Replace it if it is damp, musty, damaged, or past its service life.
  • Wipe the housing. Use a dry or slightly damp cloth on accessible plastic surfaces, then let the unit dry fully before use.
  • Measure humidity. If the room is often above 60%, reduce moisture with ventilation, source control, or dehumidification.
  • Run the unit in a dry, clean room. If the odor remains after 24 to 48 hours, replacement is the practical choice.

If your purifier uses a separate carbon filter, check it as well. Carbon can hold odors and may need replacement sooner than the HEPA filter, especially in kitchens, rooms with smoke exposure, or spaces with frequent odor sources.

Real-world examples and troubleshooting cues

Bedroom with a humidifier nearby

A purifier sitting next to an ultrasonic or evaporative humidifier may pull in damp air continuously. If humidity rises above the intended range, the filter and prefilter can smell stale. Move the devices apart, avoid aiming mist toward the purifier, and use a humidity monitor to keep the room in a moderate range.

Basement purifier that smells stale

Basements often have cooler surfaces and limited air exchange. A purifier may reduce airborne particles but will not solve a damp basement by itself. If the filter smells musty, check for high humidity, stored textiles, cardboard, wall dampness, and floor drains. Dehumidification and moisture control may be more important than simply increasing purifier speed.

Purifier after wildfire smoke or cooking odors

Smoke and cooking particles can load filters quickly, and associated odors can linger in carbon or dust. A HEPA filter that smells musty after a heavy pollution event may actually be carrying a mixed stale odor. Replace filters sooner if airflow drops, odor persists, or the event was heavy enough to visibly darken prefilters.

After a smoke-heavy period, this wildfire smoke indoors guide is a useful follow-up if you want a cleaner recovery plan.

Unit pulled out of storage

A purifier stored in a closet, garage, or damp room can smell musty even before it has much recent use. Filters stored in humid conditions may not be worth keeping. If the smell is obvious when you open the unit, replacement is usually simpler than trying to air out old media.

Safety notes for odors, ozone, ionizers, and UV-C

Do not use ozone generators or intentional ozone treatments to deodorize a HEPA filter or room. Ozone can react with indoor materials and is not a routine home filter maintenance method. Choose mechanical cleaning, moisture control, and replacement instead.

Ionizers and UV-C features, when present in some air-cleaning devices, should be approached cautiously and used only according to the manufacturer’s instructions. They are not substitutes for replacing a damp or odor-loaded HEPA filter. If a purifier has optional electronic features, the most practical odor steps remain the same: inspect, clean accessible surfaces, control humidity, and replace filters when needed.

Also avoid adding fragrances, essential oils, disinfectant sprays, or deodorizing powders to a HEPA filter. These can damage filter materials, create residues, or send unintended substances through the fan. A filter should smell neutral, not perfumed.

Replacement timing and upkeep

There is no single replacement interval that fits every home. Filter life depends on run time, fan speed, room dust, pets, smoke exposure, humidity, and whether the purifier is sized well for the room. A unit running continuously in a dusty or damp space will usually need attention sooner than one used occasionally in a clean bedroom.

Use the manufacturer’s schedule as a starting point, then adjust based on conditions. If the filter smells musty, looks damaged, has been wet, or continues to smell after basic cleaning of the unit, replacement is reasonable even if the calendar interval has not passed.

Good upkeep reduces odor problems. Keep the purifier on a stable surface with open space around the intake and outlet. Avoid placing it directly beside humidifiers, wet laundry, litter boxes, trash bins, or damp windows. Vacuum the room regularly and clean washable prefilters only when the instructions allow it.

Table 2: Filter replacement planner for common home conditions. Example values for illustration.
Typical filter timing and what can shorten it
Filter typeTypical interval rangeWhat may shorten itReminder
Non-washable HEPA filterAbout 6 to 12 monthsHeavy dust, pets, smoke, damp rooms, continuous useReplace if musty, wet, damaged, or visibly loaded
Activated carbon filterAbout 3 to 6 monthsCooking odors, smoke, strong household odors, high humidityCarbon can saturate before it looks dirty
Washable prefilterAbout every 2 to 4 weeks for cleaningPet hair, high lint, dusty roomsDry completely before reinstalling
Disposable prefilterAbout 1 to 3 monthsVisible dust matting, pet hair, smoke particlesReplace when airflow is restricted or odor remains
Stored spare filterUse within its clean, dry storage lifeDamp storage, torn packaging, odor absorptionStore sealed in a dry indoor location
Filter after water exposureReplace promptlyLeaks, flooding, condensation, accidental washingDo not try to salvage a wet standard HEPA filter

Related guides: Best Air Purifiers for Allergies: What to Look For (CADR, HEPA, Carbon)How Often Should You Replace a HEPA Filter?Activated Carbon Filters Explained: VOCs, Odors, and What They Can’t Do

Frequently asked questions

Can a HEPA filter smell musty without having mold on it?

Yes. A HEPA filter can smell musty from damp dust, stale air, or odors absorbed into the filter media even if there is no visible mold. The purifier housing, prefilter, carbon layer, or the room itself can also be the source.

Should I wash a HEPA filter if it smells musty?

Only if the manufacturer specifically says the HEPA filter is washable. Many standard HEPA filters are damaged by water and may hold moisture that makes the smell worse. If the filter is non-washable and still smells after dry cleaning of the unit, replacement is usually the safest option.

How do I know whether the smell is from the filter or the room?

If the room smells musty before the purifier turns on, the issue may be in the room rather than the machine. If the odor mainly appears when the purifier runs, check the filter stack, intake grille, carbon filter, and housing first. Humidity readings above about 60% also suggest a room moisture problem.

What humidity level helps prevent a musty HEPA filter smell?

A practical indoor relative humidity target is often around 30% to 50%. Sustained humidity above about 60% makes damp dust and musty odors more likely. A humidifier, leaks, condensation, or poor ventilation can push a room into that higher-risk range.

When should I replace a HEPA filter that smells musty?

Replace it if the smell persists after cleaning accessible parts of the purifier and running it in a dry room for 24 to 48 hours. Replacement is also reasonable if the filter is wet, damaged, visibly dirty, or past its normal service interval. If there is visible mold-like growth or the unit was exposed to water intrusion, do not keep using the filter.

Can activated carbon remove a musty smell from a HEPA filter?

Activated carbon can reduce some odors, but it cannot fix a damp or degraded HEPA filter. If the carbon is saturated or the filter media is wet, the smell may return. In those cases, moisture control and replacement are more effective than trying to mask the odor.

Summary: practical takeaways

A musty HEPA filter is usually a maintenance and moisture signal. The most common causes are high humidity, damp dust, an overdue filter, odor-loaded carbon, storage in a humid place, or a musty room that the purifier is drawing from.

Keep humidity in a moderate range when possible, inspect the whole purifier rather than only the HEPA layer, and avoid washing filters unless they are clearly labeled washable. If the smell persists after basic cleaning and dry operation, or if the filter is wet, damaged, moldy-looking, or past its normal service window, replacing it is the practical next step.

A purifier works best as part of a broader indoor air quality routine: source control, ventilation when conditions allow, moisture management, correct placement, and timely filter changes.

H11 vs H13 HEPA Filters: Home Trade-Offs Explained

Layered HEPA filter media beside air purifier

For most homes, H11 and H13 HEPA filters can both reduce fine particles, but H13 captures a higher share per pass while H11 often allows easier airflow and lower operating cost.

The better choice depends on the whole purifier design, not the filter rating alone. A well-sealed purifier with enough CADR for the room can outperform a higher-rated filter in a weak or leaky unit.

Quick answer

  • Choose H13 when you want higher single-pass particle capture and the purifier still delivers enough airflow for the room.
  • Choose H11 when quiet operation, energy use, lower filter cost, or higher airflow at the same fan speed matters more.
  • Plan by CADR first: for many rooms, a CADR around two-thirds of room square footage is a common starting point for roughly 4.8 air changes per hour with an 8-foot ceiling.
  • Watch the seal: filter bypass around the edges can reduce real-world performance more than the difference between H11 and H13.
  • Budget for replacement: higher-density filters may cost more and can load faster in dusty or smoky conditions.

What H11 and H13 HEPA ratings mean

H11 and H13 are filter efficiency classes used in high-efficiency particle filtration systems. In home air purifiers, they are often used as shorthand for how much fine particulate matter a filter can capture as air passes through it.

H13 is the higher-efficiency class. It is commonly associated with very high capture of the most penetrating particle size, often abbreviated as MPPS. These particles are not the smallest possible particles; they are the hardest size range for many mechanical filters to capture.

H11 is a lower-efficiency class than H13. It may still capture a large share of fine airborne particles over repeated air passes, especially when the purifier moves enough air through the room. Some product descriptions use terms such as HEPA-type, HEPA-grade, or medical-grade loosely, so the actual tested performance and seal design matter.

Single-pass efficiency is not the whole result

Filter efficiency describes what happens to air that goes through the filter. A room air purifier also depends on fan power, cabinet sealing, filter fit, grille design, and placement. If air leaks around the filter, the stated rating becomes less useful.

In a home setting, the goal is usually not laboratory-grade filtration. The practical goal is to lower airborne particle levels in a specific room while keeping noise, energy use, and replacement cost manageable.

Efficiency, airflow, and CADR basics

The central trade-off is simple: denser filter media can capture more particles in one pass, but it can also create more resistance to airflow. If the fan is not designed for that resistance, the purifier may move less air, become louder at higher settings, or use more energy.

Clean Air Delivery Rate, or CADR, helps combine filtration efficiency and airflow into one practical number. CADR represents how much filtered air a purifier can deliver for a given particle category under test conditions. For homes, CADR is usually more useful than filter class alone because it reflects the purifier as a system.

A simple room planning rule

A common planning shortcut is to multiply room square footage by about two-thirds to estimate a CADR target for roughly 4.8 air changes per hour in a room with an 8-foot ceiling. For example, a 180-square-foot bedroom would suggest a CADR near 120 cubic feet per minute as a general planning target.

This is only a sizing estimate. Open doorways, taller ceilings, high particle sources, and preferred fan speed can change the target. If you plan to run the purifier on a lower and quieter setting, it can help to choose a unit with extra CADR capacity.

H11 vs H13 comparison for home air purifiers. Example values for illustration.
H11 and H13 home filter trade-offs
FactorH11 filterH13 filterHome planning note
Particle capture per passHigh, but lower than H13Higher single-pass captureEfficiency helps most when airflow remains strong
Airflow resistanceOften lowerOften higherDepends on media area, pleat depth, and fan design
CADR impactMay support higher CADR in compact unitsMay reduce CADR if the fan is not matched wellCompare purifier CADR, not filter label alone
Noise at useful settingsMay be quieter for the same airflowMay need a higher fan speedCheck performance at the speed you will actually use
Replacement costOften lowerOften higherCosts vary by size, construction, and replacement interval
Best fitGeneral dust and fine particle reductionHigher-efficiency particle filtration goalsBoth still need good sizing and seal quality

Where H13 helps and where H11 can be enough

H13 can be valuable when the purifier is engineered to maintain good airflow through the denser filter. It gives higher single-pass particle capture, which can be useful in smaller rooms, bedrooms, nurseries, home offices, or spaces where you want stronger particle reduction without relying only on recirculation.

H11 can be enough when the purifier has strong CADR, good sealing, and is run consistently. Because indoor air passes through a room purifier many times, a lower single-pass efficiency can still reduce particle levels when the airflow rate is high enough for the space.

Think in terms of delivered clean air

A high-efficiency filter with weak airflow may clean a room more slowly than a moderately efficient filter with strong airflow. That is why CADR, air changes per hour, and actual fan setting are central to the decision.

For everyday home use, the most balanced choice is often the filter that lets the purifier run quietly and continuously at a useful airflow level. Intermittent operation on a loud high setting is usually less practical than steady operation on a tolerable setting.

Common mistakes that reduce real-world filtration

The first mistake is buying by filter rating alone. H13 sounds stronger than H11, but the rating does not tell you whether the purifier is sized for the room or whether the filter is sealed well inside the housing.

The second mistake is placing the purifier where airflow is blocked. A purifier tucked tightly behind furniture, under a desk, or against heavy curtains may recirculate less room air. Most units work better with open space around the intake and outlet.

The third mistake is ignoring replacement timing. A loaded filter can increase resistance, reduce airflow, and make the fan work harder. In dusty homes, during wildfire smoke events, or with frequent cooking particles, filters may load faster than the calendar estimate suggests.

Signs the setup may need attention

  • The purifier is much louder than expected at the setting needed for the room.
  • Airflow from the outlet feels weak after months of use.
  • Dust buildup appears around grilles or filter edges.
  • A particle monitor shows slow improvement even with the purifier running.
  • The filter does not sit flat or the gasket area looks compressed unevenly.

Practical checklist for choosing between H11 and H13

Start with the room, not the filter. Measure the approximate floor area and note ceiling height. Larger rooms, open-plan spaces, and rooms with high ceilings need more clean air delivery than small enclosed bedrooms.

Next, compare CADR at realistic fan speeds. Some purifiers list a maximum CADR that may correspond to the loudest setting. If you are sensitive to noise or plan to use the purifier while sleeping, the lower-speed airflow may be more important than the maximum number.

Use this decision process

  • Step 1: Estimate the room size and target CADR.
  • Step 2: Check whether the purifier publishes CADR for particle removal.
  • Step 3: Look for a snug filter fit, gasket, or design that discourages bypass.
  • Step 4: Compare replacement filter cost and expected interval.
  • Step 5: Choose H13 if airflow remains sufficient; choose H11 if it gives a better balance of airflow, noise, and cost.

If two purifiers have similar CADR, similar noise, and similar cost, the H13 option may offer the stronger particle filtration margin. If the H13 option has much lower airflow or a replacement cost that makes regular maintenance unlikely, the H11 option may be more practical.

Real-world home examples

In a small bedroom, either H11 or H13 can work well if the purifier has enough CADR and runs quietly. H13 may be preferred when the unit can operate at a low or medium setting while still meeting the room target.

In a large living room, the airflow side of the trade-off often becomes more important. A single compact H13 purifier may not move enough air for the space. In that case, a higher-CADR H11 purifier, or two appropriately placed units, may provide better overall room cleaning.

In a home office, noise can drive the decision. If a denser H13 filter requires a distracting fan speed, an H11 unit with higher quiet-speed airflow may be easier to use throughout the workday.

In areas affected by seasonal smoke or frequent outdoor particle events, both filter efficiency and airflow matter. A well-sized H13 purifier can be a strong choice, but only if doors, windows, and other air leakage paths are managed reasonably during the event.

Safety, maintenance, and cost planning

Mechanical HEPA-style filtration does not intentionally produce ozone. Be cautious with add-on technologies that use ionization, plasma, or other electrically generated processes, especially if they are not clearly described. If a purifier includes optional ionizer or similar features, many households prefer to leave them off unless there is clear documentation that the device meets applicable ozone emission limits.

UV-C features, when present, should be enclosed and designed so users are not exposed to the lamp. UV-C does not replace particle filtration, and its effectiveness depends on exposure time, lamp condition, and design. For most homes, filter performance, CADR, and maintenance are more practical factors to compare.

Replacement planning

Filter replacement intervals vary widely. A filter used in a clean bedroom may last longer than one used near a kitchen, fireplace, pets, renovation dust, or outdoor smoke infiltration. Instead of relying only on a calendar, watch for reduced airflow, visible loading, and persistent odors if the unit also contains carbon.

Cost should include both electricity and filters. H13 filters may cost more, especially if they use more media or require tighter construction. However, a properly designed H13 unit may still be cost-effective if it runs efficiently and does not need frequent replacement in your conditions.

Typical filter replacement planning factors. Example values for illustration.
Home filter replacement planner
Filter typeTypical interval rangeWhat can shorten itReminder
Pre-filter2 to 4 weeks for cleaning or checkingPet hair, lint, heavy dustClean only as the manual allows
H11 particle filter6 to 12 monthsSmoke, renovation dust, high fan useReplace if airflow drops noticeably
H13 particle filter6 to 12 monthsHigh particle load or dense media loadingDo not wash unless specifically designed for it
Carbon layer3 to 6 monthsCooking odors, VOC sources, high humidityParticle capture and odor capture are different jobs
Combined cartridgeFollow the shortest useful component lifeAny heavy particle or odor loadA single cartridge may need replacement before all layers are exhausted
After unusual eventsCheck immediatelyWildfire smoke, sanding, nearby constructionInspect without shaking dust loose indoors

Related guides: True HEPA vs HEPA-Type: What the Labels Really MeanHow to Choose the Right Air Purifier for Your Room SizeAir Purifier Placement: Where to Put It for Best Results

Summary: how to choose without overthinking it

H13 is the higher-efficiency filter class and can be a good choice when the purifier still delivers enough clean airflow for the room. H11 can be a practical home choice when it supports better airflow, quieter operation, lower energy use, or lower replacement cost.

The main comparison is not H11 versus H13 in isolation. The better home setup is the one with adequate CADR, a well-sealed filter path, sensible placement, acceptable noise, and a maintenance cost you can keep up with.

For a small enclosed room, either rating may work if the purifier is properly sized. For larger or open spaces, delivered airflow often matters more than a higher filter label. When in doubt, size the purifier for the room first, then choose the highest-efficiency filter option that still meets your airflow, noise, and budget needs.

Frequently asked questions

Is H13 always better than H11 for home air purifiers?

Not always. H13 captures a higher share of particles per pass, but it can also add more airflow resistance. If that lower airflow reduces the purifier’s CADR or makes it too loud to run consistently, an H11 unit may perform better in real use.

What matters more: HEPA rating or CADR?

For home sizing, CADR usually matters more because it reflects how much clean air the purifier can actually deliver. The filter rating helps, but only if the fan, seal, and cabinet design allow enough airflow. A well-sized unit with a lower rating can outperform a poorly matched unit with a higher rating.

Can an H11 purifier clean smoke effectively?

Yes, if it has enough CADR for the room and is run long enough. Smoke control depends on delivered clean air, not just the filter class. In heavier smoke conditions, a higher-efficiency filter such as H13 may offer more margin if airflow remains sufficient.

Will an H13 filter make my purifier louder?

It can, depending on the purifier design. Denser filter media often increases resistance, which may force the fan to work harder to maintain airflow. Some well-designed units handle H13 without a major noise penalty, so the specific purifier matters.

How do I know if my purifier is sized correctly for a room?

Start with room square footage and compare it with the CADR rating. A common planning shortcut is to use a CADR around two-thirds of the room’s square footage for a typical 8-foot ceiling. If you want quieter operation, it is often wise to choose a unit with extra capacity.

Does a higher filter rating matter if air leaks around the filter?

Yes, leakage can reduce the benefit of any filter rating. If air bypasses the filter, the purifier cleans less effectively than the label suggests. A snug fit and a well-sealed housing are essential for real-world performance.

Multiple Air Purifiers in One Home Without Guessing

Multiple air purifiers in tidy home rooms

Multiple air purifiers can make sense in one home when each unit is sized and placed for the rooms where people spend the most time.

A room-by-room strategy usually works better than expecting one portable unit to clean an entire house. The practical goal is to match clean air delivery, airflow, noise, and maintenance to each space. This approach is especially useful in homes with bedrooms, closed doors, pets, cooking odors, smoke events, open-plan areas, or different comfort needs by room.

Quick answer
  • Prioritize bedrooms, main living areas, and rooms with recurring particle sources such as pets, cooking carryover, or smoke intrusion.
  • For particles, plan around CADR and room volume; many homes aim for about 4 to 5 air changes per hour in key rooms as general guidance.
  • One purifier per closed room is usually more effective than one unit in a hallway, because walls and doors limit air mixing.
  • Use HEPA-type particle filtration for dust and PM2.5; use meaningful activated carbon only when odor or gas adsorption is a concern.
  • Keep units away from blocked corners and leave open space around intake and outlet areas, often at least 12 to 24 inches where practical.
  • Avoid ozone-generating devices; treat ionizers and UV-C features cautiously and follow safety documentation.

What a multiple air purifier strategy means

Using multiple air purifiers does not mean placing a device in every room by default. It means assigning portable cleaners where they can do useful work based on room size, door patterns, pollutant sources, and daily routines.

Portable air purifiers work locally. They pull nearby air through filters and return filtered air to the same space. In an open room, that cleaned air can mix across the area. In a closed bedroom, office, or nursery, the unit mainly affects that room.

This is why a whole-home plan often starts with zones. A home may have a sleeping zone, a living zone, a cooking zone, and a work or hobby zone. Some rooms may need continuous low-speed operation, while others may only need higher-speed use during specific activities.

The strategy should also work with, not replace, source control and ventilation. Cleaning air is helpful, but removing pollutant sources, using a range hood, controlling moisture, and bringing in outdoor air when conditions are appropriate can all reduce the workload on purifiers.

How to size purifiers by room without overcomplicating it

The most useful sizing number for particle filtration is CADR, or clean air delivery rate. CADR estimates how much filtered air a unit can deliver for particles under test conditions. Higher CADR generally supports larger rooms or more air changes per hour.

ACH means air changes per hour. For portable purifiers, it is a planning estimate: how many times per hour the purifier could process the room’s air volume if mixing were ideal. It is not a guarantee that every corner of the room is cleaned evenly.

A simple sizing method

  • Measure room length and width.
  • Multiply by ceiling height to estimate room volume in cubic feet.
  • Choose a general ACH target, often around 4 to 5 ACH for important occupied rooms.
  • Estimate needed CADR: room volume multiplied by target ACH, then divided by 60.

For example, a 12 by 15 foot bedroom with an 8 foot ceiling is about 1,440 cubic feet. At 5 ACH, the rough CADR need is 1,440 × 5 ÷ 60, or about 120 cubic feet per minute. This is an illustrative planning number, not a product guarantee.

Open-plan spaces need extra judgment. A living room connected to a kitchen and hallway may behave like one larger zone, not one small room. If the area is large or irregular, two smaller units placed apart may provide better mixing and quieter operation than one large unit running loudly.

Room-by-room decision matrix. Example values for illustration.
Where multiple air purifiers tend to make sense
Room or situationPlanning choiceWhy it mattersPractical note
Primary bedroomDedicated purifierLong occupied hours with door often closedSize for the room, not the whole floor
Children’s bedroomDedicated purifier if used nightlyClosed-door sleeping limits shared airflowUse stable placement away from beds and cords
Open living areaOne large unit or two smaller unitsLarge volume and furniture can reduce mixingPlace where air can circulate freely
Home officeSmall dedicated unit if occupied dailyMany hours in a compact zoneConsider noise at work settings
Kitchen-adjacent areaPurifier plus source controlCooking particles and odors vary by activityUse ventilation first when available
Pet resting areaTargeted filtration nearbyHair, dander, and tracked dust collect locallyKeep prefilters clean
Hallway onlyUsually lower priorityDoors and walls limit room cleaningBetter for circulation support than primary cleaning

Placement and airflow room by room

Placement affects how well a purifier mixes air. A correctly sized unit can underperform if it is tucked behind a sofa, pressed against curtains, or placed where the outlet blows directly into a wall.

Bedrooms

In bedrooms, place the purifier where air can enter and exit without obstruction. A spot several feet from the bed is often comfortable because it limits direct airflow and fan noise while still cleaning the room. If the door is closed at night, size the unit for that bedroom as a separate space.

Living rooms and open plans

In open areas, avoid assuming that one corner unit will clean every connected space evenly. If the room has a sectional sofa, partial walls, or a long layout, placing units at different ends of the space can improve mixing. Run them at a speed that is tolerable enough to use consistently.

Kitchens and dining areas

Portable purifiers can help reduce particles that drift from cooking, but they should not be the only strategy. Use a vented range hood or open windows when outdoor conditions are suitable. Keep purifiers far enough from grease and steam that filters and sensors are not quickly coated.

Basements and damp rooms

Air purifiers do not remove moisture. If a basement is damp, the first step is moisture control, such as fixing leaks, improving drainage, or using a dehumidifier when appropriate. Filtration may help with airborne particles, but it cannot solve a humidity problem by itself.

Common mistakes when using several purifiers

The most common mistake is buying by floor area alone. Room volume, ceiling height, layout, and actual fan speed all matter. A purifier rated for a large room at its highest speed may be too loud for everyday use in a bedroom.

Another mistake is placing all units in central areas and expecting closed rooms to benefit. Air does not reliably travel through doorways, around corners, and back through a purifier at the same rate as air in the same room.

  • Undersizing: The room looks clean, but PM2.5 readings stay elevated after cooking, candles, or outdoor smoke.
  • Oversizing without using it: A powerful unit is effective on paper but too loud, so it stays off.
  • Blocked airflow: The purifier sits under a desk, behind furniture, or against fabric.
  • Ignoring filters: A clogged prefilter or overdue main filter reduces airflow and increases noise.
  • Relying on fragrance: Scented products may mask odors but do not equal filtration or ventilation.

A basic air quality monitor can help identify patterns, especially for PM2.5 after cooking or during outdoor smoke events. Readings should be interpreted as trend information, not as a medical assessment.

Practical room-by-room checklist

A useful home plan starts with where people spend time, not with the total number of rooms. Walk through the home and list the rooms used for sleeping, work, relaxing, cooking, exercise, and hobbies.

Step 1: Rank rooms by occupied hours

Bedrooms often come first because they are occupied for many continuous hours. A home office may rank next if someone works there daily. Guest rooms and formal dining rooms may rank lower unless they have a specific air quality concern.

Step 2: Match each room to its main issue

  • Dust and visible particles: particle filtration and regular cleaning matter.
  • PM2.5 from smoke or cooking: CADR and airflow become important.
  • Odors: activated carbon capacity matters, though ventilation is often needed too.
  • Dampness or musty conditions: moisture control should come before purifier upgrades.
  • Stuffy rooms: ventilation and CO2 trends may be more relevant than filtration alone.

Step 3: Decide on continuous or event-based use

Continuous low-speed use often works well in bedrooms and offices. Higher-speed use may be more appropriate during cooking, cleaning, after opening windows during pollen season, or when outdoor smoke briefly affects indoor air. The right setting is the one that balances airflow, sound, and actual use.

Real-world examples for different home layouts

Every home mixes air differently, but a few common patterns show how multiple units can be used without overbuying.

Two-bedroom apartment

A practical plan might use one purifier in the main bedroom and one in the living area. If the second bedroom is used as an office for eight hours a day, it may deserve its own smaller unit. If it is rarely used, moving a unit when needed may be enough.

Single-family home with open downstairs

An open living, dining, and kitchen area may need more combined CADR than a closed room of the same visible footprint. Two units placed apart can reduce dead zones and may run more quietly than one unit on high speed. Bedrooms upstairs should still be treated as separate rooms when doors are closed.

Home with pets

Pet areas often need a combination of filtration and cleaning. A purifier near a pet’s common resting area can help capture airborne particles, while vacuuming, washing bedding, and cleaning prefilters reduce the load on the device. Avoid placing the unit where hair can immediately block the intake.

Smoke or wildfire season planning

During outdoor smoke events, the priority is usually the most occupied rooms and the tightest rooms. Keep windows closed when advised by local conditions, reduce indoor particle sources, and run appropriately sized purifiers continuously in key rooms. A temporary clean-room approach can be more practical than trying to treat the entire home equally.

Safety and standards to consider

For particle filtration, look for mechanical filtration and clear CADR information. HEPA-type filters are designed to capture fine particles, while activated carbon is used for some gases and odors. The two filter types do different jobs, and one does not replace the other.

Ozone is not needed for home air cleaning and can be undesirable indoors. Avoid devices that intentionally generate ozone. If a purifier includes ionization, plasma, or similar electronic features, review the documentation carefully and use settings that align with your comfort level and local guidance.

UV-C features should also be interpreted cautiously. Their effectiveness depends on exposure time, intensity, design, and shielding. Do not modify devices, remove protective parts, or bypass safety systems.

For any purifier, follow the manufacturer’s safety instructions for clearances, filter installation, electrical use, and cleaning. Use portable units on stable surfaces where they are not likely to tip, especially in rooms used by children or pets.

Maintenance, filter planning, and operating cost

Multiple purifiers mean multiple filters, prefilters, and power cords. A simple maintenance plan prevents the system from becoming expensive or confusing.

Prefilters often need the most frequent attention because they collect lint, hair, and larger dust. Cleaning or replacing them as directed helps preserve airflow through the main filter. Main particle filters and carbon filters should be replaced based on use, environment, and the device’s instructions.

Homes with pets, frequent cooking, nearby construction, or seasonal smoke may load filters faster than homes with fewer particle sources. Noise can also change as filters clog because the fan works harder to move air.

To estimate operating cost, consider three items: the electricity used at normal fan speeds, the number of replacement filters per year, and whether a larger unit can run quietly at a lower setting. The lowest purchase price is not always the lowest ownership cost if filters are small, expensive, or replaced often.

Filter replacement planner for homes with multiple purifiers. Example values for illustration.
Typical filter planning considerations
Filter or partTypical interval rangeWhat changes itReminder
Washable prefilterEvery 2 to 4 weeksPets, dust, textile fibersDry fully before reinstalling
Disposable prefilterEvery 1 to 3 monthsHair, lint, visible buildupCheck airflow and fit
HEPA-type particle filterEvery 6 to 12 monthsRuntime, smoke, dust loadFollow device instructions
Activated carbon filterEvery 3 to 6 monthsOdors, VOC sources, cookingCarbon can saturate before it looks dirty
Sensor window or inletEvery 1 to 2 monthsDusty rooms, kitchen residueClean only as directed
Exterior grilleMonthly checkBlocked intakes, pet hairUnplug before cleaning
Whole-home scheduleReview seasonallyNew room use or new pollutant sourcesLabel dates by room

Related guides: How to Choose the Right Air Purifier for Your Room SizeAir Purifier Placement: Where to Put It for Best ResultsActivated Carbon Filters Explained: VOCs, Odors, and What They Can’t Do

Summary: a sensible multiple purifier plan

A sensible plan for multiple air purifiers starts with rooms, not gadgets. Prioritize bedrooms, work areas, and the main living space, then size each unit to the room volume and the amount of air cleaning you want.

Use CADR and ACH as planning tools, but also consider layout, doors, noise, maintenance, and actual daily habits. One well-placed purifier in a closed bedroom may do more useful work than a larger unit in a hallway.

For particles, focus on mechanical filtration and adequate airflow. For odors and some gases, look for meaningful activated carbon and remember that ventilation and source control still matter. For dampness, address moisture directly rather than expecting filtration to solve it.

The simplest rule is to put the right-sized purifier in the rooms where people spend the most time, keep airflow unblocked, maintain filters on a schedule, and avoid ozone-generating approaches.

Frequently asked questions

How many air purifiers do I need for a typical home?

There is no single number that fits every home, because room size, layout, and how often each room is occupied matter more than total square footage. Many homes start with one purifier in the main bedroom and one in the main living area, then add units where there are closed doors or repeated pollutant sources.

Is one large air purifier better than several smaller ones?

One large unit can work well in an open area, but several smaller units may perform better in a home with doors, hallways, and separate rooms. The better choice is the one that matches the room volume, runs at a tolerable noise level, and can stay on consistently.

Should I put an air purifier in every bedroom?

Bedrooms are often the best place to prioritize because people spend many hours there with the door closed. If a bedroom is used regularly for sleep, a dedicated purifier is usually more effective than relying on a unit elsewhere in the home.

Do air purifiers remove cooking odors and smoke as well as particles?

Particle filters are effective for smoke particles, dust, and PM2.5, but odors and gases need enough activated carbon to make a meaningful difference. For cooking, source control with a range hood or ventilation often helps more than filtration alone.

Where should I place multiple air purifiers for the best results?

Place each unit in the room it is intended to clean, with clear space around the intake and outlet so air can move freely. Avoid corners, furniture blocks, and direct obstructions, because poor placement can reduce how well the purifier mixes and cleans the room air.