How Often to Empty a Dehumidifier Bucket Without Guessing

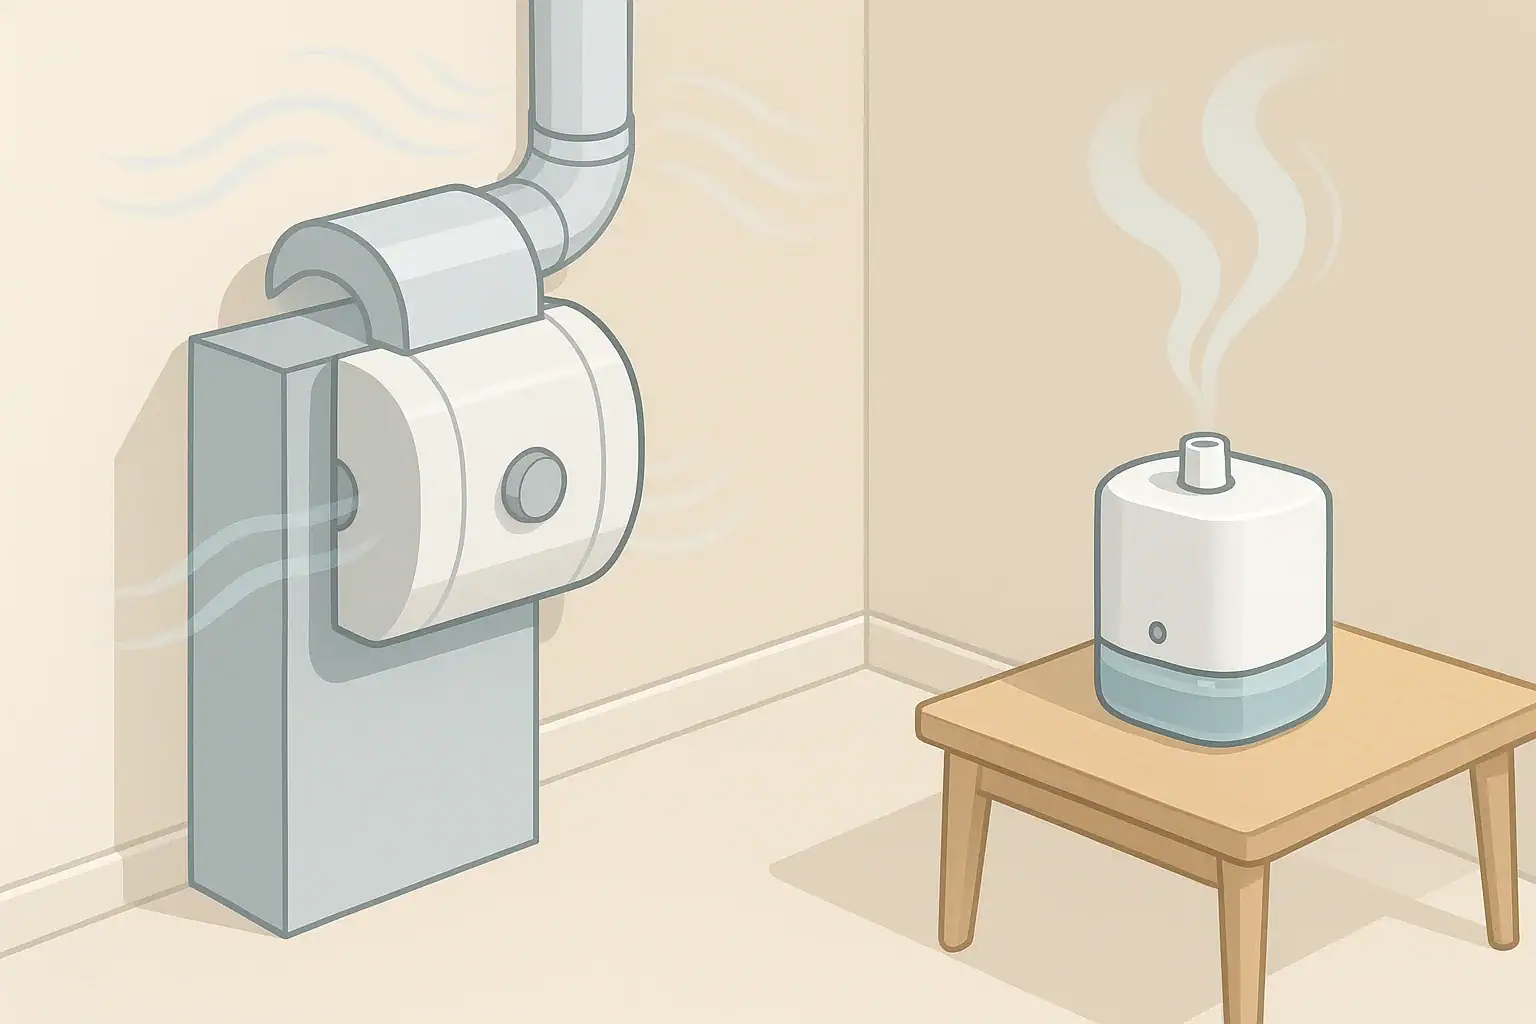
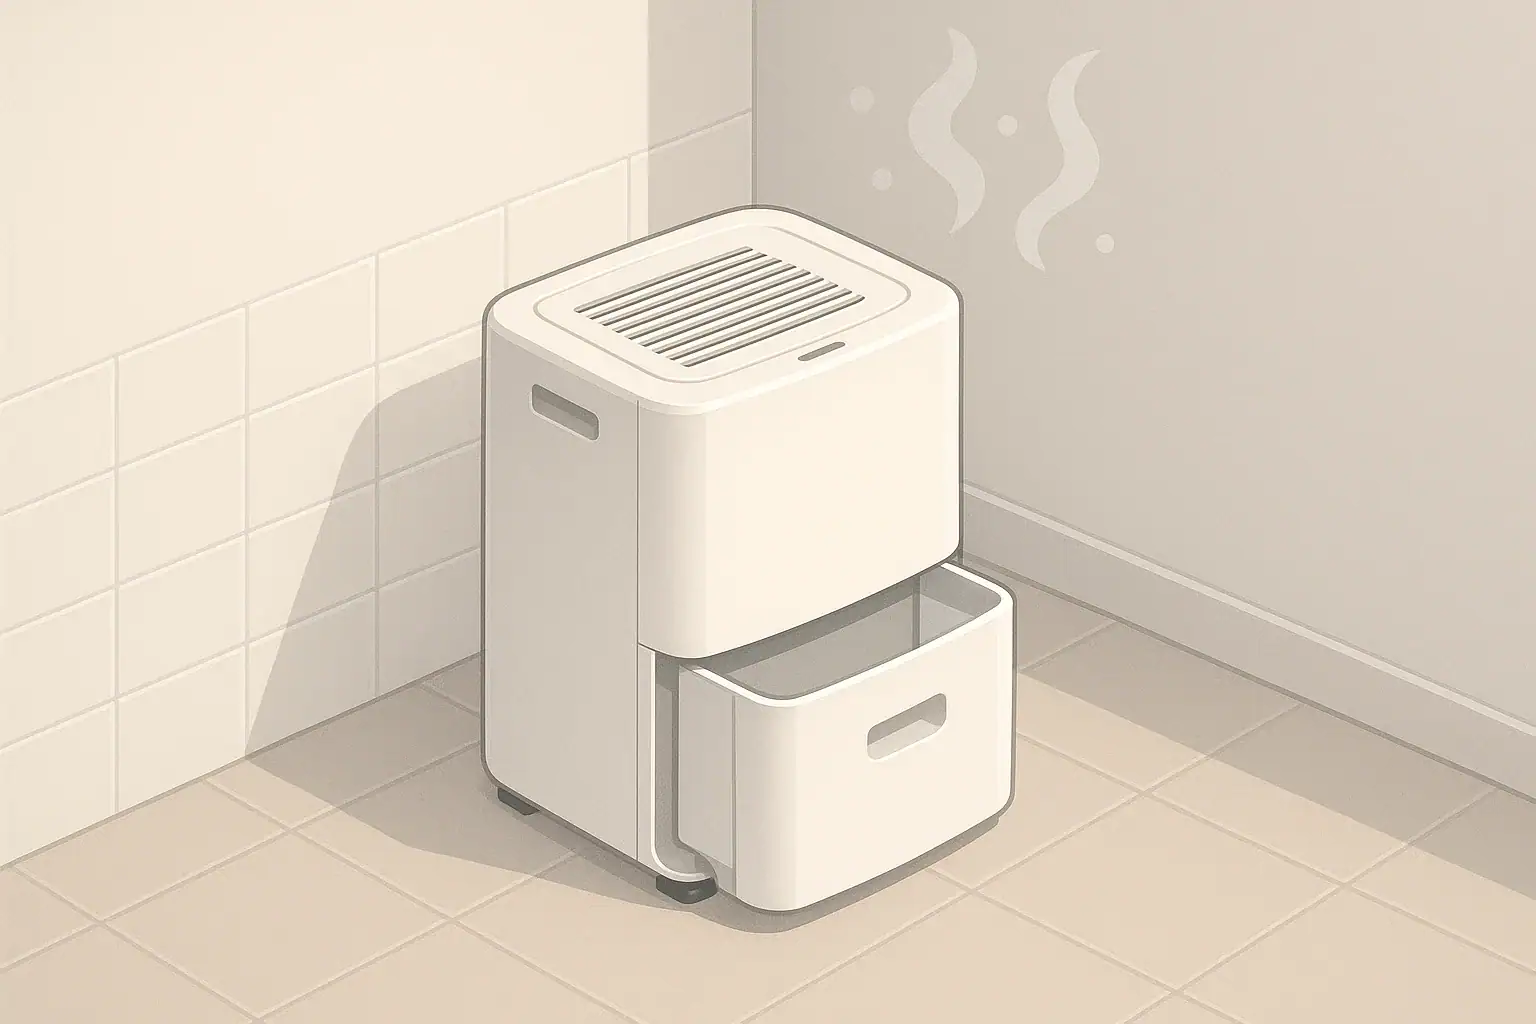
Generic dehumidifier in a clean laundry corner

Most dehumidifier buckets need emptying once or twice a day in a damp room, while every few days can be normal in a smaller or moderately humid space.

The normal schedule depends on room humidity, temperature, room size, bucket capacity, air leaks, and the moisture source. A bucket filling very fast is not automatically a problem, but it is a useful clue about how much moisture the unit is pulling from the air.

Quick answer

  • Once per day: common in basements, laundry areas, and damp rooms during humid weather.
  • Twice per day or more: can be normal if the room starts above about 60% relative humidity, has active moisture, or uses a small bucket.
  • Every 2–4 days: often reasonable in a smaller room that stays near a general indoor target of about 40%–50% relative humidity.
  • Sudden changes matter: a bucket that fills much faster than usual may point to open windows, wet materials, plumbing moisture, or poor drainage outdoors.
  • Use the humidistat: set a practical target, often around 45%–50%, rather than running continuously unless conditions require it.

What a normal dehumidifier bucket schedule means

A normal emptying schedule is the pace at which your dehumidifier collects water under your actual room conditions. There is no single number that fits every home because the bucket is only the collection point. The real question is how much water is available in the air and in surrounding materials.

In a damp basement after a rainy week, daily emptying may be expected. In a bedroom with air conditioning, closed windows, and moderate humidity, the bucket may fill slowly. In a laundry room, bathroom-adjacent area, or crawl-space access room, the bucket may fill quickly because moisture is being added repeatedly.

Relative humidity is the most useful number to watch. For general home comfort and dampness control, many households aim for roughly 40%–50% relative humidity, with about 60% commonly used as a practical upper warning point for persistent dampness. Exact comfort varies by season, building, and climate.

Why dehumidifier buckets fill at different speeds

A dehumidifier removes moisture by pulling room air across a cold surface, condensing water, and collecting it in a bucket or routing it to a drain. The more moisture the unit encounters, the faster the bucket fills.

Humidity, temperature, and air movement

Warm air can hold more moisture than cool air. A warm, humid room can produce water quickly, while a cool basement may slow collection even when it feels damp. Air movement also matters: if the unit is tucked into a corner or blocked by furniture, it may not sample the whole room well.

Room size and moisture sources

A larger space contains more air, but the bigger factor is often what adds moisture. Common sources include damp concrete, wet laundry, showers, cooking, open windows during humid weather, foundation seepage, and poor outdoor drainage. New construction materials, recent cleaning, or water intrusion can also raise moisture temporarily.

Bucket capacity and settings

Two units can remove the same amount of water while needing different emptying schedules if one has a smaller bucket. Continuous mode, a low humidity setpoint, or a fan that runs frequently will also collect more water than a unit set to cycle off at a moderate target.

Bucket-emptying patterns and likely explanations. Example values for illustration.
Common dehumidifier bucket patterns
Bucket patternPossible meaningWhat to check
Fills in a few hoursVery damp air, active moisture source, or small bucketLeaks, wet materials, open windows, drain issues
Fills once per dayCommon in damp rooms during humid periodsWhether humidity is trending toward the setpoint
Fills every 2–4 daysOften normal in a moderate roomHumidity level and comfort
Rarely fillsRoom may already be dry, unit may be off-cycle, or airflow may be poorHumidistat reading, filter, placement
Suddenly fills fasterNew moisture source or weather changeRain, laundry, plumbing, outdoor humidity
Stops collecting waterSetpoint reached, cold-room operation, full bucket switch, or maintenance issueBucket position, room temperature, filter, settings

How to tell if your emptying schedule is normal

The best way to judge normal is to compare bucket fill rate with the room’s humidity trend. If the room starts at 65% relative humidity and drops toward 50% while the bucket fills daily, the unit is probably doing useful work. If the room stays high and the bucket fills constantly, the moisture load may be larger than the unit can comfortably manage.

Use a separate humidity monitor if the built-in humidistat seems inconsistent. Built-in sensors are helpful for control, but their readings can be affected by location near the unit’s airflow. A small standalone monitor placed away from direct discharge air can give a more balanced room reading.

Look for patterns over several days rather than judging one fill cycle. A thunderstorm, a load of laundry, or a day with open windows can change the result. Notes such as “rained all day,” “used shower,” or “windows open” can make troubleshooting easier.

Common reasons a bucket fills too fast

A fast-filling bucket usually means the unit is finding moisture. That can be expected in humid weather, but it is worth checking for preventable sources.

  • Open windows or doors: humid outdoor air can keep replacing the air you just dried.
  • Wet surfaces: damp carpet, stored cardboard, concrete, or wood can release moisture for days.
  • Laundry and showers: drying clothes indoors and nearby bathrooms can add steady moisture.
  • Basement seepage: small amounts of water entry can keep humidity elevated even without standing water.
  • Low setpoint: setting the unit to 35% may make it run much more than necessary in many homes.
  • Undersized capacity or small bucket: the unit may remove water, but the bucket may not match the moisture load.

If a room remains above about 60% relative humidity for long periods despite frequent emptying, consider reducing moisture at the source. Dehumidification helps manage indoor humidity, but it does not fix leaks, drainage problems, or repeated water entry.

Practical ways to empty the bucket less often

If the unit is working well but the bucket is inconvenient, start with simple adjustments before changing equipment. The goal is to reduce unnecessary moisture and let the dehumidifier cycle normally.

Set a practical humidity target

A target around 45%–50% is a common starting point for many indoor spaces. If the room feels comfortable and surfaces stay dry, pushing much lower may only increase runtime and bucket emptying. In very damp areas, it may take time for materials to dry before the unit cycles less often.

Improve placement and airflow

Place the unit on a level surface with open space around the intake and exhaust. Avoid pushing it tightly against walls, curtains, storage bins, or furniture. Better airflow can help the unit read the room more accurately and remove moisture more efficiently.

Control moisture at the source

  • Run bathroom exhaust fans during and after showers when available.
  • Use kitchen ventilation when cooking creates steam.
  • Keep windows closed when outdoor humidity is high.
  • Move wet laundry drying to a better-ventilated area if possible.
  • Store absorbent items off damp floors and away from foundation walls.

For spaces with a floor drain or utility sink, a continuous drain hose may reduce bucket emptying. Follow the appliance manual and keep the hose routed downhill where gravity drainage is required. Do not alter safety switches or bypass the bucket shutoff system.

Real-world examples of normal emptying frequency

These examples are general because every home is different, but they show how conditions change the bucket schedule.

Basement after heavy rain: The room starts at 68% relative humidity and the bucket fills by evening. Daily emptying may be normal while the foundation and stored materials release moisture. If humidity eventually stabilizes near the setpoint, the schedule may slow.

Small bedroom in summer: The room stays around 48%–52% with air conditioning. The bucket may take several days to fill because the air conditioner is already removing some moisture and the room has fewer moisture sources.

Laundry area: The bucket fills quickly on wash days, especially if clothes are air-dried nearby. On non-laundry days, it fills more slowly. This difference suggests the appliance is responding to a predictable moisture source.

Bathroom-adjacent hallway: The bucket fills faster after repeated showers. Exhaust fan use, door position, and towel drying habits can all affect how often the bucket needs attention.

Safety, placement, and indoor air quality context

Use the dehumidifier on a stable, level surface and plug it in according to the manufacturer’s instructions. Keep the air openings clear, do not place the unit where it can sit in standing water, and empty the bucket before it overflows. A working full-bucket shutoff is an important safety and spill-prevention feature.

A dehumidifier is not a substitute for an air purifier or ventilation. It manages moisture; it does not capture fine particles the way a mechanical particle filter can, and it does not remove gases the way appropriate ventilation or sorbent media may help. For indoor air quality planning, think of humidity control, filtration, and ventilation as separate tools that can complement each other.

Be cautious with devices or features marketed around ozone, ionization, or UV-C. Ozone should not be generated intentionally in occupied indoor spaces. UV-C and ionizing features vary by design and should be evaluated carefully, with attention to safety instructions and independent standards where available.

Maintenance that affects bucket fill rate

Maintenance does not create moisture, but it affects how well the unit can remove it. A dirty filter can reduce airflow and make the unit less effective. A mis-seated bucket can trigger shutoff or leaking. Dust on coils can also reduce performance over time.

Check the washable intake filter on the schedule recommended in the manual, or more often in dusty spaces. Let it dry fully before reinstalling. Wipe the bucket periodically to reduce residue, especially if water sits for several days between emptying.

In cool rooms, frost or reduced collection can occur depending on the unit design and operating conditions. If the unit has a defrost mode, allow it to operate as intended. Do not scrape coils with sharp tools or modify the appliance.

Humidity control quick plan for reducing bucket surprises. Example values for illustration.
Humidity and bucket management checklist
GoalSimple actionsToolsNote
Track normal fill rateNote emptying times for one weekNotebook or reminder appCompare similar weather days
Keep humidity moderateTry a 45%–50% setpointHumidistat or humidity monitorAdjust for season and comfort
Reduce added moistureUse exhaust fans and close windows on humid daysFans and weather awarenessSource control lowers runtime
Improve airflowClear space around intake and exhaustBasic room layoutAvoid blocked corners
Prevent bucket problemsSeat bucket firmly after emptyingVisual checkFull-bucket switches need proper alignment
Limit maintenance lossesClean filter and bucket as directedManual and mild cleaning suppliesLet parts dry before reinstalling

Related guides: Basement Dehumidifier Guide: Targets, Drainage, and Energy UseDehumidifier Sizing: Liters/Day, Room Type, and Dampness LevelsBasement Dehumidifier Setup: Drainage, Placement, and RH Targets

Frequently asked questions

How often to empty dehumidifier bucket in a normal room?

In many homes, emptying every 2 to 4 days can be normal in a smaller or moderately humid room. In damp basements or during humid weather, once a day or even twice a day may be expected. The better check is whether the room’s humidity is moving toward your target.

Is it normal for a dehumidifier bucket to fill overnight?

Yes, that can be normal in a very damp room, near open windows, or if the space has an active moisture source. A small bucket or a low humidity setting can also make the bucket fill quickly. If the room still reads high humidity after the unit runs, look for hidden moisture sources or airflow problems.

Why does my dehumidifier bucket fill faster when it rains?

Rain often raises outdoor humidity and can increase moisture entering through leaks, foundation gaps, or open windows and doors. Basements and lower-level rooms are especially likely to collect more water during wet weather. If the faster fill rate happens every time it rains, check for seepage or drainage issues.

What humidity level should I aim for so the bucket does not fill too fast?

For many indoor spaces, a target around 45% to 50% relative humidity is a practical starting point. Going much lower can increase runtime without adding much comfort in many homes. If the room has moisture-sensitive materials or a specific climate issue, the best target may vary.

Does a bucket filling quickly mean my dehumidifier is working properly?

Often, yes. A fast-filling bucket usually means the unit is removing moisture from the air, which is the expected job. The key question is whether room humidity is actually dropping to a reasonable level and staying there.

Summary: what to take away

Emptying a dehumidifier bucket once or twice a day can be normal in a damp room, especially during humid weather or after rain. Emptying every few days can also be normal when the space is smaller, drier, or already near the humidity setpoint.

The most useful check is not the bucket alone; it is the relationship between bucket fill rate and relative humidity. If humidity is moving toward a practical target, the unit is likely doing its job. If the bucket fills constantly and humidity stays high, look for moisture sources, airflow limitations, or sizing issues.

For everyday use, set a reasonable humidity target, keep the unit clear of obstructions, empty and clean the bucket regularly, and control moisture at the source when possible. That approach gives you a predictable routine without guessing from the bucket alone.

Dehumidifier Auto Mode vs Continuous Mode: Which to Use

Generic dehumidifier in a tidy laundry corner

Use dehumidifier auto mode for normal humidity control, and use continuous mode only when the space stays damp, dries slowly, or needs short-term maximum moisture removal.

Auto mode is usually the better everyday setting because it cycles the compressor or fan based on a humidity target. Continuous mode can be useful, but it often uses more energy and may make a room drier than necessary if it runs without a sensible stopping point.

Quick answer

  • For most homes, aim for about 30% to 50% indoor relative humidity as general guidance, with many people finding 40% to 50% comfortable.
  • Use auto mode when the room can reach and hold your humidity target.
  • Use continuous mode for short periods after leaks, heavy laundry drying, shower moisture, or very damp basement conditions.
  • If continuous mode is needed all the time, check sizing, drainage, air leaks, ventilation, and possible moisture sources.
  • Use a separate hygrometer if you want a second reading, since built-in humidity sensors can vary by location.

What Auto Mode and Continuous Mode Mean

Dehumidifier auto mode uses a humidity setting, often called a humidistat target, to decide when the unit should run. When the surrounding air is above the selected relative humidity, the unit removes moisture. When the reading drops near the target, it slows, cycles off, or runs the fan intermittently depending on the design.

Continuous mode is different. It tells the dehumidifier to keep operating without relying on the humidity target as the main stop signal. Some units still pause for frost protection, tank-full protection, or safety controls, but the basic intent is steady moisture removal.

The practical difference is control. Auto mode tries to hold a range. Continuous mode prioritizes removal. That makes auto mode the better default and continuous mode a tool for specific situations.

Humidity Targets and Sizing Logic

Relative humidity is the amount of moisture in the air compared with how much the air can hold at that temperature. Warm air can hold more moisture than cool air, so the same water vapor load may feel different from room to room.

For general indoor comfort and dampness control, many homes use a target around 40% to 50% relative humidity. A broader general range of about 30% to 50% is commonly used for indoor humidity planning. Very low humidity can feel dry, while higher humidity can make rooms feel clammy and may support damp surfaces if temperatures vary.

Sizing matters because a small dehumidifier in a wet space may run continuously and still not reach the target. A larger unit may remove moisture faster, but it still needs good airflow and a realistic humidity source to manage. A room with seepage, an unsealed crawl space, frequent shower steam, or wet laundry may need more than a setting change.

For planning, think about three basics:

  • Room volume: Larger rooms and open basements contain more air to dry.
  • Moisture load: Showers, laundry, groundwater seepage, cooking, and outdoor air all add moisture.
  • Air movement: A dehumidifier only dries the air that reaches it, so closed doors and blocked intake areas reduce effectiveness.
Auto mode and continuous mode comparison. Example values for illustration.
How the two dehumidifier settings compare
FactorAuto modeContinuous mode
Best useEveryday humidity controlShort-term heavy moisture removal
Humidity targetUses a set point such as 45% or 50%May ignore the target while running
Energy useUsually lower when the room reaches targetUsually higher because runtime is longer
Comfort riskLess likely to over-dry the roomCan make air drier than needed
Drainage needTank may be enough in moderate useContinuous drain is often more practical
Troubleshooting clueIf it never cycles off, moisture load may be highIf needed daily, check for a moisture source

When to Use Auto Mode

Auto mode is the right starting point for most living areas, bedrooms, finished basements, and storage rooms that do not have active water problems. It gives the dehumidifier a clear job: bring the room close to a selected humidity target and avoid unnecessary runtime once the target is reached.

A common starting setting is 45% or 50% relative humidity. If the room still feels damp or surfaces remain cool and clammy, try a slightly lower target, such as 40% to 45%. If the room feels too dry, raise the target gradually.

Best situations for auto mode

  • Normal basement humidity without standing water or active leaks
  • Bedrooms or living areas that feel humid during warm months
  • Storage spaces where you want steady moisture control
  • Homes using a dehumidifier mainly during humid seasons
  • Rooms where noise and energy use matter

Auto mode also makes it easier to evaluate whether the unit is doing its job. If the humidity drops toward your target and the dehumidifier cycles off sometimes, the setting is probably working. If it runs constantly in auto mode, the room may be too damp for the unit, the target may be too low, or outdoor/load moisture may be entering faster than the unit can remove it.

When Continuous Mode Makes Sense

Continuous mode is useful when the priority is faster moisture removal rather than maintaining a narrow comfort range. It is most appropriate for temporary or high-load situations.

Examples include drying a bathroom after repeated showers, drying a laundry area, reducing humidity after wet cleaning, or helping a basement recover after a humid spell. It can also be useful when first setting up a dehumidifier in a damp room that has been humid for weeks or months.

Use continuous mode with a stopping plan

Continuous mode works best when you pair it with a clear stopping point. That may be a target humidity on a separate hygrometer, a timed check after several hours, or a switch back to auto mode once the room stabilizes.

  • For a damp basement startup, run continuous mode for several hours, then check humidity.
  • For shower or laundry moisture, run it during and shortly after the moisture event.
  • For a room that stays above 60%, use continuous mode temporarily while you investigate why.
  • If using a drain hose, confirm it slopes properly and drains to an acceptable location.

Continuous mode should not be used to mask water intrusion, plumbing leaks, or persistent structural dampness. A dehumidifier can remove moisture from air, but it cannot fix the source of water entering a space.

Common Mistakes and Troubleshooting Cues

The most common mistake is using continuous mode as the default simply because the room feels damp. That may lower humidity, but it can also waste energy and make it harder to notice the real problem.

Another common issue is setting the humidity target too low. A target such as 35% may be reasonable in some situations, but it can cause long runtimes in a humid basement or during muggy weather. If the unit never rests, try 45% or 50% and see whether comfort and dampness control remain acceptable.

If humidity does not drop

  • Check that doors or barriers are not blocking airflow to the damp area.
  • Confirm the air filter or intake grille is clean.
  • Make sure the unit is not too close to walls, curtains, hampers, or stored boxes.
  • Look for moisture sources such as wet foundation areas, unvented dryers, plumbing drips, or frequent shower steam.
  • Check whether the room temperature is low enough to reduce dehumidifier performance.

If the room gets too dry

Switch from continuous mode to auto mode and raise the humidity target. A dehumidifier does not need to run aggressively when the room is already within a reasonable range. If the air feels dry but the unit reads high humidity, compare with a separate hygrometer placed away from the dehumidifier outlet.

Real-World Examples by Room

Different rooms need different settings because moisture sources vary. The right mode depends less on the label on the room and more on whether humidity is stable, seasonal, or tied to a repeated moisture event.

Basement

Start with auto mode at about 45% to 50%. If the basement has been damp for a long time, continuous mode for the first day of active drying may help, but then switch back to auto and monitor the trend. If the unit cannot maintain below about 55% to 60% during normal weather, look for moisture entry and airflow limitations.

Bathroom or laundry area

Continuous mode can be useful during a moisture event, especially if ventilation is limited. After the space dries, auto mode is usually more practical. Exhaust ventilation, open interior doors when appropriate, and drying wet textiles promptly can reduce the burden on the dehumidifier.

Bedroom or living room

Use auto mode. These spaces usually benefit from quieter operation and stable humidity rather than maximum drying. Place the unit where air can circulate freely and avoid pointing dry discharge air directly at a bed or seating area.

Storage room

Auto mode is usually preferred for storage because the goal is steady conditions. Keep stored items away from walls and off the floor where practical so air can move around them. Avoid sealing damp items in boxes before the room has stabilized.

Safety, Maintenance, and Energy Considerations

Dehumidifiers remove moisture by cooling air over coils and collecting water. Because water and electricity are both involved, use the appliance as described by its manual and keep it on a stable, level surface. Do not bypass tank switches, safety shutoffs, plugs, or frost-protection features.

For continuous mode, drainage deserves extra attention. A full tank will stop most units, but a hose or pump setup can allow long operation. Check that hoses are secure, not kinked, and directed to a safe drain location. If water backs up or leaks, stop the unit and correct the drainage issue before continuing.

Some air quality devices include optional ionizers, UV-C features, or other add-ons, but a standard dehumidifier does not need ozone generation to control humidity. If a combined device includes extra air treatment functions, review the safety information carefully and avoid intentionally generating ozone indoors.

Maintenance affects how well either mode works. A clogged filter or dusty coil area reduces airflow, which can make the unit run longer and remove less moisture. Clean washable filters as directed, empty and rinse the bucket regularly, and inspect intake and exhaust grilles for dust buildup.

Energy use depends mostly on runtime. Auto mode often saves energy because the unit can cycle once the target is met. Continuous mode has a place, but if it becomes the normal setting, it is worth checking whether the dehumidifier is sized appropriately and whether the room has an unresolved moisture source.

Humidity control quick plan. Example values for illustration.
Practical humidity and dampness plan
GoalSimple actionsToolsNote
Everyday comfortUse auto mode around 45% to 50%Built-in humidistat or separate hygrometerAdjust slowly based on room feel
Initial damp room dryingUse continuous mode, then recheckTimer and hygrometerSwitch to auto after humidity stabilizes
Shower moistureRun during and after humid periodsVent fan and dehumidifierVentilation helps reduce the load
Laundry area moistureImprove airflow and dry textiles promptlyDehumidifier and drain optionContinuous mode may help short term
Basement dampnessUse auto mode and inspect moisture sourcesHygrometer and visual checksPersistent high readings need investigation
Storage protectionKeep air moving around stored itemsAuto mode and shelvingAvoid packing damp materials tightly

Related guides: How to Size a Dehumidifier (Sq Ft, Pints/Day, and Real-World Tips)Basement Dehumidifier Guide: Targets, Drainage, and Energy UseDehumidifier Running Cost: How Much Electricity Will It Use?

Frequently asked questions

Is auto mode or continuous mode better for everyday use?

Auto mode is usually better for everyday use because it maintains a chosen humidity level and stops running once the room reaches that target. Continuous mode is more of a short-term setting for heavy moisture situations.

When should I switch a dehumidifier to continuous mode?

Use continuous mode after leaks, during major drying jobs, or when a room is temporarily very damp, such as after showers or laundry drying. Once humidity starts to stabilize, switch back to auto mode so the unit does not run longer than necessary.

What humidity setting should I use in auto mode?

A common starting point is 45% to 50% relative humidity, which works well in many homes. If the room still feels damp, lower the target slightly; if it feels too dry, raise it gradually.

Why does my dehumidifier run all the time in auto mode?

If a dehumidifier never cycles off in auto mode, the room may have too much moisture for the unit, the target may be set too low, or outside air may be adding humidity faster than the unit can remove it. Check for leaks, airflow problems, dirty filters, and whether the dehumidifier is sized correctly.

Can continuous mode dry a room too much?

Yes. If it runs for too long, continuous mode can lower humidity more than you need and make the air feel dry or uncomfortable. That is why it is best used with a clear stopping plan and switched back to auto mode once conditions improve.

Summary: The Simple Setting Rule

Auto mode is the best default for most dehumidifier use because it manages humidity around a target and limits unnecessary runtime. Start around 45% to 50% relative humidity, adjust gradually, and use a separate hygrometer if you want to confirm the room trend.

Continuous mode is best treated as a temporary high-removal setting. Use it after moisture events, during initial drying, or when a damp space needs extra help for a limited period. Once the room approaches your target, switch back to auto mode.

If a dehumidifier needs continuous mode every day to keep humidity in a reasonable range, the setting is probably not the main issue. Check moisture sources, airflow, drainage, room temperature, and unit size before relying on constant operation.

Dehumidifier Ice Build-Up: Why Coils Freeze and What to Do

Generic dehumidifier in a tidy laundry corner

Dehumidifier ice build-up usually happens when the evaporator coils get too cold for the room conditions, often because the room is cool, airflow is restricted, or the unit is not defrosting properly. A dehumidifier needs warm, moist air moving across its coils to remove water efficiently. When that balance is off, moisture can freeze on the coil instead of dripping into the bucket or drain.

Quick answer

  • Most portable compressor dehumidifiers work best in rooms above about 65°F, unless the unit is designed for lower-temperature operation.
  • A practical indoor humidity target is often about 30% to 50% relative humidity, adjusted for season, comfort, and condensation risk.
  • If coils are iced, turn the unit off and let it thaw fully before restarting; do not chip ice with tools.
  • Check the air filter, intake clearance, fan operation, bucket position, and room temperature before assuming the unit has failed.
  • If ice returns in a warm room with clean airflow, a service issue such as a sensor, fan, or refrigerant problem may be possible.

What dehumidifier ice build-up means

Dehumidifier ice build-up is ice or frost forming on the cold evaporator coil inside the unit. A small amount of frost during certain operating cycles may not be unusual on some models, but heavy ice that blocks airflow, stops water collection, or keeps returning is a sign that something is out of balance.

A compressor-style dehumidifier works somewhat like a small air conditioner. It pulls room air across a cold coil, water vapor condenses on that coil, and the water drains into a bucket or hose. The air then passes across a warmer coil and returns to the room slightly warmer and drier.

If the cold coil drops below freezing and stays there, condensed water can freeze before it drains. As more ice forms, airflow gets weaker, the coil gets even colder, and the machine may collect less water.

Why dehumidifier coils freeze

Frozen coils usually come from one or more of three basic conditions: low room temperature, poor airflow, or a refrigeration and control problem. Understanding these factors helps you troubleshoot without guessing.

Room temperature is too low

Many standard portable compressor dehumidifiers are intended for warmer indoor spaces. In a cool basement, garage-like area, or unheated room, the coil can fall below 32°F more easily. Some units include an automatic defrost function, but defrost performance varies by design and conditions.

As general guidance, if the room is below about 60°F to 65°F, icing becomes more likely for many standard units. Low-temperature or basement-rated models may be designed to operate at lower temperatures, but the dehumidifier in winter cold basement article is the best source for that specific appliance.

Airflow is restricted

Airflow carries heat from the room to the coil. When airflow is blocked, the coil may get colder than intended. A clogged filter, blocked grille, furniture too close to the intake, heavy lint, or a weak fan can all contribute.

Humidity is low or the setting is too aggressive

When a dehumidifier is set very low, it may continue running after the room has already reached a moderate humidity level. In cooler rooms, long run times can increase the chance of frost. Many homes do not need a target below the 30% to 50% relative humidity range for general moisture control.

Controls or components are not working as expected

If the fan is not moving air, a temperature sensor is inaccurate, defrost is not cycling, or the sealed refrigeration system has a fault, ice may keep returning even when the room is warm and the filter is clean. These issues are not usually solved by home adjustment and may require service or replacement.

Common freezing clues and practical next steps. Example values for illustration.
Dehumidifier ice build-up troubleshooting matrix
What you noticeLikely factorWhat to checkPractical next step
Ice in a cool basementLow room temperatureRoom is near or below 60°F to 65°FWarm the space if practical or use a unit rated for cooler operation
Ice plus weak airflowRestricted intake or outletFilter, grille, clearance, dust buildupClean filter and allow open space around the unit
Ice after long continuous runningSetting may be too lowHumidistat target and actual room humidityTry a moderate target such as 40% to 50%
Bucket stays mostly emptyCoil blocked by iceWater collection drops while fan runsTurn off and thaw fully before retesting
Fan is noisy or not spinningFan or motor issueAir movement at the outletStop use and seek service guidance
Ice returns in a warm roomControl or sealed-system issueTemperature, filter, clearances all normalUse warranty or professional repair options
Frost appears briefly, then clearsNormal defrost cycle may be occurringWater collection resumes afterwardMonitor for repeated heavy ice

Common mistakes that make icing worse

Several everyday habits can make dehumidifier ice build-up more likely. These are usually easy to correct before looking for a mechanical problem.

  • Pushing the unit against a wall: Most dehumidifiers need clear intake and exhaust space. Restricted airflow can chill the coil too much.
  • Skipping filter cleaning: A dusty filter can reduce airflow even when the grille looks clean from the outside.
  • Running in an unheated area: A dehumidifier in a cold crawl space, utility room, or basement may freeze instead of removing much water.
  • Setting the humidity target too low: A very low setting increases run time and may not provide a practical benefit for normal home moisture control.
  • Ignoring drainage problems: A kinked hose, misaligned bucket, or clogged drain path can confuse troubleshooting because water removal appears poor.
  • Restarting before thawing: Running the machine while ice remains can keep airflow blocked and delay normal operation.

What to do when your dehumidifier coils freeze

If you find ice on the coils, use a calm step-by-step approach. The goal is to thaw the unit safely, restore airflow, and test it under reasonable room conditions.

1. Turn the unit off and let it thaw

Switch the dehumidifier off and unplug it before inspecting or cleaning accessible parts. Place towels nearby if melting ice may drip. Let the ice thaw naturally; this may take several hours depending on how much has formed.

Do not use knives, screwdrivers, or sharp tools to remove ice. Damaging the coil can create a leak or make the appliance unsafe to operate.

2. Clean the filter and check the grilles

Remove the washable air filter if your unit has one and clean it according to the manual. Vacuum dust from accessible intake and outlet grilles. Avoid spraying water into electrical areas or disassembling sealed sections of the appliance.

3. Improve placement

Move the dehumidifier to a level surface with open space around the intake and exhaust. As a general practice, allow several inches of clearance on all sides, or follow the owner’s manual if it specifies more. Keep curtains, stored boxes, laundry, and walls from blocking airflow.

4. Check the room conditions

Measure the room temperature with a simple thermometer and compare it with the dehumidifier’s operating range. If the room is cool, consider running the unit during warmer parts of the day, improving room heat, or choosing equipment specifically designed for cool spaces.

5. Use a moderate humidity setting

After the unit is fully thawed, restart it with a moderate target, often around 45% to 50% relative humidity for general dampness control. If the room stabilizes without condensation or musty odors, a lower setting may not be needed.

6. Watch one full operating cycle

Let the unit run long enough to confirm that air is moving, water is collecting, and ice is not reforming quickly. If heavy frost returns despite warm room temperature, clean airflow, and a reasonable humidity setting, stop the test and consider service guidance.

Real-world examples of frozen dehumidifier coils

Freezing looks different depending on the room. These examples are general and meant to help you identify patterns.

Cool finished basement

A basement sits around 60°F in spring, and the dehumidifier is set to 35%. The unit runs for long periods, then water collection slows and frost appears. Raising the target to about 45% and running during warmer periods may reduce icing, but a low-temperature-rated unit may be more suitable if the space remains cool.

Laundry area with lint buildup

A dehumidifier near a laundry area collects lint on the filter and intake grille. The fan still runs, but airflow is weak and the coil begins to freeze. Cleaning the filter more often and keeping lint away from the intake can restore normal operation if no mechanical issue is present.

Warm room with repeated icing

A room is 72°F, the filter is clean, the unit has open clearance, and the humidity target is moderate. Ice still returns after each thaw. In this case, a fan, sensor, defrost, or sealed-system problem becomes more likely, and the practical next step is warranty support, repair evaluation, or replacement planning.

Safety considerations and when to stop using it

A frozen dehumidifier is usually a troubleshooting issue, not an emergency, but electrical appliances and water deserve careful handling. Unplug the unit before cleaning accessible parts, emptying water around the appliance, or checking a drain hose.

Stop using the unit if you notice a burning smell, damaged cord, repeated tripped breaker, unusual loud grinding, water leaking onto electrical parts, or ice that returns immediately after basic checks. Do not bypass bucket switches, defrost controls, sensors, plugs, or other safety features.

Dehumidifiers are designed to remove moisture, not to sanitize air or intentionally generate ozone. Avoid using ozone-generating devices as a response to dampness or odors in occupied home spaces. If a product includes optional ionizing or UV-C features, review the documentation carefully and consider whether the feature is necessary for your goal; moisture control still depends on proper humidity, drainage, airflow, and source control.

Maintenance that helps prevent future ice build-up

Preventing ice is mostly about keeping air moving and matching the unit to the room. A few routine habits can reduce repeat problems and help the appliance work more predictably.

  • Clean the air filter regularly: Monthly cleaning is a common starting point, but dusty rooms, laundry areas, and pet areas may need more frequent attention.
  • Keep the coils and grilles clear: Dust on accessible surfaces can reduce performance. Follow the manual for what can be cleaned by the user.
  • Check the drain path: Make sure the bucket seats correctly, the float moves freely, and any hose slopes properly without kinks.
  • Use a realistic humidity target: Many homes aim for roughly 30% to 50% relative humidity, with the higher end often more practical in cooler weather to reduce over-drying.
  • Match the unit to the space: Large damp areas, cool basements, and high-moisture rooms may need equipment suited to those conditions.
  • Store it clean and dry: Before seasonal storage, empty the bucket, let components dry, and clean the filter to reduce stale odors when restarted.

If maintenance does not stop icing, compare the cost of repair with the age, capacity, and energy use of the unit. Older appliances may be less effective or lack defrost features that are useful in cooler spaces. If you are trying to size a dehumidifier for a colder area, matching capacity to the space can help avoid repeat freeze-ups.

Humidity and dampness quick plan for homes. Example values for illustration.
Humidity control actions that can support dehumidifier performance
GoalSimple actionsToolsNote
Stay in a practical RH rangeAim around 30% to 50% where comfortableHygrometer or monitorAdjust for season and condensation risk
Reduce freezing riskAvoid running standard units in very cool roomsThermometerCheck the appliance operating range
Improve airflowClear intake and outlet areasVisual checkKeep stored items and fabric away
Limit moisture sourcesUse bath fans and cover open sump areas where appropriateExhaust fansSource control reduces runtime
Prevent hidden drainage issuesInspect bucket, hose, and drain slopeFlashlightWater should move without backing up
Track changesCompare humidity before and after operationHumidity monitorLook for trends, not one reading

Related guides: Dehumidifier Capacity Estimator: Room Dampness to Liters/DayDesiccant vs Compressor Dehumidifiers: Which Is Better for Cold Rooms?Basement Dehumidifier Guide: Targets, Drainage, and Energy Use

Frequently asked questions

What room temperature is too cold for a standard dehumidifier?

Many standard portable compressor dehumidifiers start to ice up more often when the room is below about 60°F to 65°F. Some models are designed for lower-temperature use, so the owner’s manual is the best guide for the specific unit. If the space is consistently cool, a low-temperature-rated dehumidifier may perform better.

Can I just scrape the ice off the coils?

No, scraping ice off can damage the coil and create a leak or safety issue. Turn the unit off, unplug it, and let it thaw naturally before restarting. If melting water is likely to overflow, place towels around the appliance while it thaws.

Why does my dehumidifier keep freezing even though the room feels warm?

If ice keeps returning in a warm room, the problem may be restricted airflow, a faulty fan, an inaccurate sensor, a defrost issue, or a sealed-system fault. Start by checking the filter, grilles, and clearances, then watch whether the fan is moving air normally. If the problem continues, service or replacement may be needed.

What humidity setting helps prevent icing?

A moderate setting is usually better than a very low one. For many homes, a target around 45% to 50% relative humidity is a practical starting point, especially in cooler weather. Very low settings can make the unit run longer than necessary and increase frost risk.

How long should I wait before turning it back on after it freezes?

Wait until all visible ice has thawed and the unit is dry enough to restart safely. The thaw time can range from a few hours to longer, depending on how much ice formed and the room temperature. Restarting too early can leave ice in place and cause the coil to freeze again quickly.

When should I stop using the dehumidifier and call for service?

Stop using it if ice returns quickly in a warm room with a clean filter and open airflow, or if you notice burning smells, unusual noises, leaking near electrical parts, or repeated electrical trips. Those signs point to a possible mechanical or safety issue. A qualified repair service or warranty support can help determine whether repair is worthwhile.

Summary: key takeaways for frozen dehumidifier coils

Dehumidifier ice build-up is most often caused by cool room temperatures, restricted airflow, long run times at very low settings, or a fault in the fan, controls, defrost system, or sealed refrigeration system. Start with the simple checks: turn the unit off, let it thaw fully, clean the filter, improve clearance, confirm the room temperature, and use a moderate humidity target.

If ice does not return, the cause was likely operating conditions or maintenance. If ice keeps returning in a warm room with clean airflow and normal settings, stop running repeated tests and consider professional service, warranty support, or replacing the unit with one better matched to the space.

Dehumidifier Short Cycling Causes and How to Fix It

Generic dehumidifier in a clean laundry corner

Dehumidifier short cycling is usually caused by an oversized unit, restricted airflow, a poorly placed humidistat, low room temperature, a full or misread bucket, or a control problem, and the fix is to verify humidity, improve airflow and placement, clean the unit, and match capacity to the space.

Short cycling means the dehumidifier turns on and off repeatedly instead of running long enough to remove moisture steadily. A few normal pauses are expected, but frequent starts every few minutes can reduce moisture control, increase noise, and add wear to the compressor or fan.

Quick answer
  • A practical indoor humidity target is often about 40% to 50% relative humidity, with many homes aiming to stay below 60% to limit dampness.
  • If the unit shuts off within a few minutes, check the filter, intake clearance, exhaust clearance, bucket seating, drain hose, and humidistat setting first.
  • Allow at least 6 to 12 inches of open space around most intake and exhaust areas, unless the manual says otherwise.
  • In cool areas below about 60°F to 65°F, many compressor dehumidifiers may cycle more often or enter defrost mode.
  • If humidity stays high while the compressor short cycles, stop repeated restarting and consider professional service or replacement sizing review.

What Dehumidifier Short Cycling Means

A dehumidifier normally cycles. It senses room humidity, runs until it reaches the set point, pauses, and starts again when humidity rises. Short cycling is different: the run periods are unusually brief and repeat often, sometimes before the room has had time to mix air or drop humidity.

It helps to separate three behaviors:

  • Normal cycling: The unit runs for a reasonable period, pauses, and humidity remains near the target.
  • Fan-only cycling: The fan may sample air or continue briefly while the compressor is off. This may be normal depending on the design.
  • Problem short cycling: The compressor or whole unit starts and stops frequently while the room remains damp or the display changes rapidly.

Short cycling matters because dehumidifiers work best when they pull room air across cold coils long enough to condense moisture. Very brief bursts can dry only the air close to the machine, leaving the rest of the room humid.

Why It Happens: Humidity, Sizing, and Controls

Most short cycling is related to how the dehumidifier senses humidity and how quickly the nearby air changes. The humidistat may be built into the unit, so it reads the air immediately around the appliance rather than the whole room.

Humidity set point and measurement

If the set point is close to the current room humidity, the unit may turn on and off often. For example, if the room is near 50% and the set point is 49% or 50%, small air changes can trigger the control. A separate indoor hygrometer placed several feet away can help confirm whether the room is actually changing or just the sensor area.

Capacity and room conditions

An oversized dehumidifier can remove moisture near the machine quickly and stop before air from the rest of the room mixes in. An undersized unit usually has the opposite problem: it runs for long periods and may not reach the target. Room size, ceiling height, open doors, damp materials, laundry, showers, basement walls, and outdoor humidity all affect cycling.

Temperature effects

Compressor-style dehumidifiers generally work less efficiently in cooler spaces. In a cool basement or garage-like area, frost can form on the coil, triggering defrost cycles or brief compressor operation. That can look like short cycling even when the control system is protecting the unit.

Short cycling troubleshooting cues

Example values for illustration.

Common dehumidifier short cycling clues and likely checks
What you noticePossible causePractical check
Runs for a few minutes, then stopsSet point is too close to current humidityCompare with a separate hygrometer and adjust target by 5%
Stops with bucket light or warningBucket is full, misaligned, or float is stuckEmpty, reseat, and inspect the float without forcing parts
Cycles but room stays dampPoor air mixing or blocked airflowClear intake and exhaust and move unit away from walls
Starts and stops in a cool roomFrost or defrost behaviorCheck room temperature and review the operating range
Cycles rapidly after cleaning or movingSensor is exposed to outlet air or a dry pocketRelocate away from supply vents and corners
Runs briefly, then trips powerElectrical or compressor issueStop using it and arrange qualified service

Common Causes of Dehumidifier Short Cycling

Oversized capacity for the space

A high-capacity unit in a small room can satisfy its local sensor quickly. This is common in small bedrooms, closets, bathrooms, or laundry areas with the door partly closed. The room may still have moisture sources, but the air next to the unit reaches the target first.

Blocked intake or discharge airflow

Dehumidifiers need airflow across the coil. A dirty filter, lint buildup, furniture, walls, curtains, or storage boxes can reduce airflow. Restricted airflow may cause poor moisture removal, coil frosting, overheating protections, or rapid cycling. Dehumidifiers in winter can be more likely to show this kind of behavior in cooler spaces.

Humidistat placement and sensor lag

Because many units measure humidity at the machine, placement matters. If the exhaust air loops back into the sensor, the unit may think the room is drier than it is. If the unit sits in a corner, behind a door, or near an HVAC supply vent, readings may not represent the room. Placement and RH targets matter because poor positioning can make a unit respond to a dry pocket instead of the whole space.

Bucket, float, or drain problems

A dehumidifier may shut off when the bucket is full or not seated correctly. If a continuous drain hose is kinked, too high, or partially clogged, water may back up and trigger a shutoff. The float switch should move freely, but it should not be bent, taped, or bypassed.

Low temperature, frost, or dirty coils

Cooler air holds less moisture, and cold coils can frost in low-temperature conditions. A dirty filter or coil surface can make that worse. If you see ice, stop the unit, let it thaw, clean only accessible parts according to the manual, and avoid chipping ice or opening sealed components.

Step-by-Step Troubleshooting Checklist

Start with simple, safe checks before assuming the appliance is failing. These steps do not require modifying the unit or bypassing any safety feature.

  1. Confirm the humidity. Place a separate hygrometer 5 to 10 feet from the unit, away from direct exhaust air, windows, and vents. Compare readings after 20 to 30 minutes.
  2. Choose a practical set point. Try 45% to 50% relative humidity for many living spaces and basements. If the room is already near that range, short cycling may simply mean the unit is maintaining the target.
  3. Improve placement. Move the unit to a more open location. Keep intake and exhaust areas clear, and close only the doors needed to define the space you want to dry.
  4. Clean the filter. A washable prefilter or intake screen can collect dust and lint. Clean it as the manual directs and let it dry before reinstalling.
  5. Check the bucket and drain. Empty and reseat the bucket. If using a hose, make sure it slopes continuously to the drain and is not kinked or submerged.
  6. Check room temperature. If the space is cool, compare it with the operating range in the manual. A room that is too cool for the unit can cause repeated defrost or shutdown behavior.
  7. Give the compressor time. Avoid unplugging and immediately restarting the unit. Many appliances include a built-in delay to protect the compressor.
  8. Stop if electrical issues appear. Burning smells, tripped breakers, repeated power faults, or unusual loud starts are reasons to unplug the unit and seek qualified help.

If the unit short cycles only after reaching the set humidity, it may be operating normally. If it short cycles while humidity remains high, the likely causes are airflow, sensor location, temperature, drainage, or a mechanical fault.

Real-World Examples and Practical Fixes

Small bedroom with a large dehumidifier

A compact room may not need a large unit. If the dehumidifier runs for three to five minutes, stops, and the separate hygrometer still shows a stable 45% to 50%, cycling may be normal maintenance. If the room feels unevenly damp, open the door periodically or use a small fan to mix air rather than lowering the set point excessively.

Basement corner near storage

Basements often have cooler temperatures, concrete surfaces, and limited airflow. A unit tucked between boxes may read dry air at its sensor while the far side of the basement remains humid. Moving the unit to a central open area, cleaning the filter, and keeping interior doors open can improve run time and moisture removal. A basement dehumidifier guide can help you compare drainage and energy-use trade-offs.

Laundry area with a drain hose

A dehumidifier in a laundry space may cycle because the drain hose rises before reaching the drain or has lint buildup. Water backs up, the float switch activates, and the unit stops. The fix is usually to route the hose downward, remove kinks, and clean accessible hose ends without forcing internal parts.

Cool utility room

In a cool room, a compressor dehumidifier may frost and pause. If short cycling happens mostly during cooler nights, temperature may be the main driver. Review the appliance operating range and consider whether the space needs targeted ventilation, warmth, or a different humidity-control approach. If you are comparing technologies, desiccant vs compressor dehumidifiers is a useful place to start.

Safety and Standards to Keep in Mind

Dehumidifiers combine electricity, water collection, moving air, and in many models a sealed refrigerant system. Basic safety practices matter, especially in basements, bathrooms, and laundry areas.

  • Use a properly rated outlet and follow the manual for grounded or GFCI-protected locations where applicable.
  • Avoid extension cords unless the manual specifically allows them and the cord is correctly rated.
  • Do not bypass float switches, thermal protections, compressor delays, or door interlocks.
  • Do not open sealed refrigerant parts, puncture tubing, or attempt compressor repairs.
  • Keep the unit upright, especially after transport, and follow the manual before restarting.
  • Unplug the unit before cleaning accessible filters, grilles, or the bucket area.

Ozone generators, ionizers, and UV-C devices are not solutions for dehumidifier short cycling. Moisture control is handled by ventilation, source control, drainage, heating where appropriate, and dehumidification. Any add-on air treatment technology should be evaluated cautiously and should not be used to mask dampness or odors from moisture problems.

Maintenance That Helps Prevent Short Cycling

Regular maintenance keeps airflow steady and helps sensors respond more predictably. The right interval depends on dust, lint, pet hair, laundry use, basement conditions, and how many hours the unit runs.

  • Filter or intake screen: Check every few weeks during heavy-use seasons. Clean when dust or lint is visible.
  • Bucket: Empty before it overfills, rinse periodically, and let it dry to reduce residue.
  • Drain hose: Inspect for kinks, low spots, and buildup. Replace if it becomes stiff, cracked, or difficult to clean.
  • Coil area: Keep the intake side clean. Use only the cleaning methods allowed by the manual.
  • Placement: Recheck clearance after moving furniture, adding storage, or changing laundry routines.
  • Humidity monitor: Use a separate hygrometer as a reference, especially if the unit display changes quickly.

Maintenance also helps with ownership costs. A clean unit can move air more easily, which may reduce unnecessary runtime and make the appliance less likely to cycle from preventable airflow restrictions.

Humidity control quick plan

Example values for illustration.

Practical humidity goals and actions for reducing short cycling
GoalSimple actionsToolsNote
Verify room humidityMeasure away from the unit outletSeparate hygrometerWait for readings to stabilize
Maintain comfort rangeTry a 45% to 50% settingBuilt-in controlAdjust for season and room use
Reduce dampness riskKeep many spaces below 60%Hygrometer or monitorLook for persistent sources of moisture
Improve air mixingOpen interior doors or use a gentle fanPortable fanAvoid blowing exhaust into the sensor
Prevent drain shutoffMaintain downward hose slopeDrain hoseInspect for kinks and clogs
Limit frost-related cyclingUse within the listed temperature rangeRoom thermometerCool rooms may need a different approach

Related guides: Dehumidifier Sizing: Liters/Day, Room Type, and Dampness LevelsBasement Dehumidifier Guide: Targets, Drainage, and Energy UseDehumidifier in Winter: Does It Work in Cold Basements?

Frequently asked questions

What are the most common dehumidifier short cycling causes?

The most common dehumidifier short cycling causes are an oversized unit, restricted airflow, incorrect humidistat placement, a full or misread bucket, low room temperature, and control or sensor problems. A unit that is too large for the space can satisfy its local sensor quickly and shut off before the rest of the room dries.

How do I know if my dehumidifier is short cycling or just working normally?

Normal cycling usually means the unit runs long enough to lower humidity near the target, then pauses for a while. Short cycling is more likely if it starts and stops every few minutes while the room still feels damp or a separate hygrometer shows humidity is not dropping. If the room is already near the set point, brief cycles can be expected.

Can a dirty filter cause a dehumidifier to short cycle?

Yes. A dirty filter or blocked intake reduces airflow across the coil, which can make moisture removal less effective and trigger safety or defrost-related cycling. Cleaning the filter and keeping the intake and exhaust areas clear are simple first checks.

Why does my dehumidifier short cycle more in a cool basement?

Compressor dehumidifiers are less efficient in cooler air, and frost can form on the coil when temperatures are low. That can lead to brief compressor runs or defrost pauses that look like short cycling. If the room is below the unit’s recommended operating range, performance often drops.

Should I lower the humidity setting to stop short cycling?

Not always. If the set point is already close to the actual room humidity, changing it by a few percentage points may help, but a lower setting will not fix blocked airflow, poor placement, or a drainage issue. For many spaces, 45% to 50% relative humidity is a practical target.

When should I stop using a dehumidifier that short cycles?

Stop using it if you notice burning smells, repeated breaker trips, unusual loud starts, visible electrical faults, or if the unit keeps shutting down while humidity remains high. Those signs can point to a mechanical or electrical problem that needs qualified service. Do not bypass safety switches or try to force the compressor to keep running.

Summary: What to Check First

Dehumidifier short cycling usually comes down to sensing, airflow, drainage, temperature, sizing, or a fault. Start by confirming the room humidity with a separate hygrometer, then check the set point, filter, clearances, bucket, drain hose, and room temperature.

Aim for practical humidity control rather than the lowest possible number. For many homes, about 40% to 50% relative humidity is a reasonable comfort-oriented target, and staying below 60% helps reduce general dampness concerns. If the unit keeps starting and stopping while humidity remains high, or if there are electrical faults, repeated icing, or unusual noises, stop using it and get qualified service advice.

Humidifier Smells Bad: What Causes It and What to Do

Generic humidifier releasing gentle mist in a bedroom

A humidifier smells bad when stagnant water, mineral buildup, biofilm, residue, or an overused wick creates odors that the mist or fan carries into the room. The fix is usually simple: empty old water, clean the tank and base, remove scale, replace worn consumables, and keep indoor humidity in a reasonable range. Odors are also a useful cue that the unit may need a different water source or a more consistent cleaning routine.

Quick answer

  • Empty and dry the tank daily when the humidifier is in use, then refill with fresh water.
  • Clean most portable humidifiers at least weekly; clean more often if water sits, odor returns, or mineral scale builds quickly.
  • Aim for roughly 30% to 50% indoor relative humidity as general comfort guidance; avoid persistently damp rooms.
  • Use distilled or demineralized water if you notice white dust, heavy scale, or recurring mineral odor, especially with ultrasonic models.
  • Replace wicks, filters, or cartridges on the schedule in the manual, and sooner if they smell, discolor, harden, or stay slimy.

Why a Humidifier Starts to Smell Bad

A portable humidifier holds water at room temperature, moves air through or over that water, and disperses moisture into a living space. If water remains in the tank or base for too long, small amounts of dust, minerals, and household residue can collect there. Over time, that mixture can create musty, sour, swampy, or plastic-like odors.

The smell does not always mean the humidifier is unusable. In many cases, it means the water path needs to be emptied, cleaned, descaled, and dried. A new odor can also appear after the unit has been stored, after a wick has aged, or after tap water minerals have built up on surfaces.

Humidity level matters too. A humidifier that runs too long can make a room feel damp, especially near windows, exterior walls, carpets, curtains, and bedding. Damp surfaces can hold odors even if the humidifier itself has been cleaned, so look at both the appliance and the room conditions.

How to Read the Smell: Common Odor Clues

The type of odor can help narrow down where to start. Smell is not a precise test, but it is a practical troubleshooting cue. Check the water tank, base, mist outlet, wick or filter, and the area around the humidifier. If you are deciding whether the unit itself is the issue, it can help to compare models in an ultrasonic vs evaporative humidifiers breakdown.

Musty or basement-like

A musty smell often points to stagnant water, damp surfaces, or a wick that is staying wet between uses. It can also come from the room itself if humidity has been high for several days. Emptying the tank daily and letting parts dry can make a noticeable difference.

Sour, stale, or swampy

A sour smell commonly comes from old water in the tank or base, especially if the humidifier has not been run or cleaned for several days. The base can hold a small amount of water even after the tank looks empty, so inspect both areas. For a step-by-step routine, see this how to clean a humidifier guide.

Chalky, dusty, or mineral-like

A chalky odor or visible white powder usually points to hard-water minerals. Ultrasonic humidifiers can disperse minerals from tap water as fine white dust. Evaporative models are less likely to send minerals into the room, but their wicks can become loaded with scale. If that sounds familiar, the problem may be related to humidifier white dust as much as smell.

Odor clues and likely starting points. Example values for illustration.
Humidifier odor troubleshooting matrix
Odor or signLikely sourceFirst action
Musty smellStagnant water or damp wickEmpty, clean, dry, and inspect consumables
Sour smellOld water in tank or baseDrain all water and clean water-contact parts
Chalky smell or white dustHard-water mineralsDescale and consider distilled water
Plastic or chemical smellNew materials or cleaning residueRinse thoroughly and air dry before use
Wet cardboard smellAged evaporative wickReplace wick or filter if worn or discolored
Odor returns quicklyHidden residue in base, outlet, or capClean smaller parts and increase frequency
Room smells dampHumidity too high or poor airflowCheck humidity and reduce runtime

How to Clean a Bad-Smelling Humidifier

Always start by unplugging the humidifier and reading the manual. Designs vary, and some parts should not be submerged. The goal is to remove old water, loosen mineral scale, reduce residue, and let parts dry before the next refill.

Daily reset

When the unit is used regularly, a quick daily reset helps prevent many odors before they start.

  • Turn off and unplug the humidifier before handling it.
  • Empty the tank and base instead of topping off old water.
  • Rinse water-contact parts with clean water.
  • Wipe accessible surfaces with a clean cloth.
  • Let the tank and base air dry when the unit will not be used right away.

Weekly cleaning

For a deeper cleaning, remove the tank, cap, tray, mist outlet, and other washable parts listed in the manual. A common approach is to soak mineral scale with white vinegar or a manufacturer-approved descaling solution, then scrub gently with a soft brush or cloth. Rinse thoroughly so no cleaning smell is left behind.

Disinfection steps vary by product. If the manual allows a disinfecting step, use the recommended dilution and contact time, then rinse well and dry. Do not mix cleaners, especially bleach with vinegar or ammonia, because mixtures can create irritating fumes.

What not to overlook

Odor can hide in small areas: tank caps, float valves, mist chimneys, removable trays, and rubber gaskets. A clean tank will not solve the problem if the base reservoir or wick is still holding residue. If a part remains slimy, stiff, strongly scented, or discolored after cleaning, replacement may be the better option.

Water Choice: Tap, Distilled, or Demineralized

Water choice affects odor, scale, and maintenance. Tap water is convenient, but it can contain minerals that collect in the tank and base. Those minerals do not necessarily smell bad by themselves, but they create rough surfaces where residue is harder to remove.

Distilled or demineralized water generally reduces scale and white dust. It can be especially helpful for ultrasonic humidifiers, which turn water into a fine mist using vibration. If the water contains minerals, some of those minerals can leave the humidifier and settle as white dust on nearby surfaces.

Evaporative humidifiers use a wick or filter to draw water into airflow. They often leave more minerals in the wick instead of releasing them into the room. That can reduce visible dust, but it means the wick may need replacement when it becomes crusty, smelly, or less absorbent.

Filtered refrigerator or pitcher water may reduce some taste or odor compounds, but it does not always remove enough minerals to prevent scale. Softened water can also vary; check the humidifier manual because some manufacturers discourage certain water types. For recurring odor or mineral problems, distilled or demineralized water is usually the simplest comparison to try. If you want a broader comparison of humidifier water choices, that can help narrow the best option.

Real-World Troubleshooting Scenarios

The humidifier smells bad after one week of use

This usually means water is sitting too long or the base is not drying between refills. Start with a full cleaning, then switch from topping off the tank to emptying it daily. If the unit has a wick, inspect it for discoloration, stiffness, or a wet-cardboard odor.

The room smells damp even after cleaning

Check the room humidity with a basic hygrometer. If readings stay above about 50% for long periods, reduce the humidifier setting, run it for shorter periods, or improve air movement. Move the unit away from curtains, bedding, wood furniture, and exterior walls where moisture may linger.

White dust appears on furniture

White dust is usually a mineral issue, not a sign that the humidifier is broken. Try distilled or demineralized water, clean scale from the tank and base, and avoid placing the unit where mist lands directly on surfaces. If the model uses a replaceable cartridge or filter, follow the manual for replacement timing.

The smell appears only when the fan turns on

For evaporative or fan-assisted models, the odor may be in the wick, filter, air path, or fan grille rather than the water tank alone. Clean accessible parts without forcing open sealed components. Replace consumables if cleaning the tank does not remove the odor.

Safety and Indoor Air Quality Considerations

A humidifier is meant to add moisture, not to sanitize a room or replace ventilation. Keep expectations practical. It may improve comfort in dry conditions, but it should not be used to mask persistent odors, dampness, smoke, or ventilation problems.

Use the unit on a stable, water-resistant surface and keep mist from spraying directly onto walls, electronics, bedding, books, or furniture. Leave space around the unit so air can circulate. Avoid running an extension cord across wet areas, and unplug the humidifier before cleaning or moving it.

Some devices include optional features such as UV-C chambers, antimicrobial-treated parts, or ion-related functions. Treat these features as secondary to basic cleaning, fresh water, correct humidity, and replacement of worn parts. Do not modify appliances, bypass safety features, or intentionally generate ozone indoors.

If a humidifier continues to smell after careful cleaning and replacement of consumables, stop using it until the source is clear. Cracked tanks, damaged seals, inaccessible residue, or persistent odors can make replacement more practical than repeated cleaning attempts.

Maintenance Schedule and Prevention Checklist

The easiest way to prevent humidifier odor is to keep water moving, surfaces clean, and the room from becoming too damp. A small routine is more effective than occasional aggressive cleaning. The exact schedule depends on water hardness, runtime, device type, and storage habits.

  • Every use: Start with fresh water and check that the tank and base look clean.
  • Daily during use: Empty leftover water, rinse, and let parts dry when practical.
  • Weekly: Descale and clean water-contact parts according to the manual.
  • Monthly or as needed: Inspect wicks, filters, seals, caps, and mist outlets for odor or buildup.
  • Before storage: Clean, dry completely, remove disposable wicks if recommended, and store with the cap off or loose to allow airflow.

Also watch the room. Condensation on windows, damp fabric, a clammy feeling, or humidity readings above the general comfort range are cues to reduce output. A humidifier should add enough moisture for comfort without making surfaces stay wet.

Humidity and cleaning quick plan. Example values for illustration.
Humidifier upkeep plan
GoalSimple actionsTool or cueNote
Keep water freshEmpty and refill dailyFresh water routineAvoid topping off old water
Limit mineral scaleDescale weekly or as neededVinegar or approved descalerRinse until odor is gone
Reduce white dustTry distilled or demineralized waterSurface dust checkMost noticeable with ultrasonic mist
Avoid damp roomsTarget about 30% to 50% RHBasic hygrometerAdjust for climate and comfort
Protect wicksReplace when crusty, smelly, or stiffVisual and odor checkFollow the manual schedule
Store cleanlyClean and dry before storageDry tank and baseDo not store with water inside

Related guides: Ultrasonic vs Evaporative Humidifiers: Pros, Cons, and Which to BuyHow to Clean a Humidifier Properly (And How Often)Humidifier White Dust: Why It Happens and How to Stop ItHumidifier Water Choices: Tap vs Filtered vs Distilled

Frequently asked questions

Can a humidifier smell bad from old water even if the tank looks clean?

Yes. Old water can leave residue in the base, cap, float area, or mist path that is not obvious at a glance. If a humidifier smells bad, empty all standing water and clean every water-contact part, not just the visible tank.

How often should I clean a humidifier to prevent odors?

Most portable humidifiers should be cleaned at least weekly, and the tank should be emptied and dried daily during use. If odor returns quickly or scale builds fast, increase cleaning frequency. The exact schedule can vary by model, water hardness, and how long the unit runs each day.

Does distilled water help if my humidifier smells bad?

Distilled water can help reduce mineral buildup and white dust, which often contribute to recurring odor and cleaning problems. It is especially useful for ultrasonic humidifiers. It will not fix biofilm, stagnant water, or a worn wick by itself, so cleaning is still necessary.

Why does the humidifier smell bad only when the fan or mist turns on?

That usually means residue is trapped in the wick, filter, air path, or fan grille rather than only in the tank. When air moves through those parts, it can carry the odor into the room. Cleaning accessible components and replacing smelly consumables often helps.

When should I replace the wick, filter, or cartridge?

Replace consumables when they smell, turn discolored, become stiff, stay slimy, or no longer absorb water properly. Even if a part still looks usable, odor is a sign that performance may be declining. Follow the replacement interval in the manual, but replace sooner if buildup returns quickly.

Summary: What to Do When a Humidifier Smells Bad

When a humidifier smells bad, start with the basics: unplug it, empty all standing water, clean the tank and base, descale mineral buildup, rinse thoroughly, and let parts dry. Replace wicks, filters, or cartridges that remain smelly, slimy, crusty, or discolored.

Use fresh water instead of topping off the tank, and consider distilled or demineralized water if hard-water scale or white dust is a recurring issue. Keep indoor humidity in a practical range, often around 30% to 50% for general home comfort, and reduce runtime if the room feels damp.

A consistent maintenance routine is usually enough to prevent odors from returning. If the smell persists after cleaning, water changes, and consumable replacement, the issue may be hidden residue, damaged parts, or a room humidity problem rather than a simple water refill issue.

Whole-House vs Portable Humidifier: What Works Better

Whole-house and portable humidifiers in a neutral room

A whole-house humidifier usually makes sense when you want consistent humidity across most of a home, while a portable humidifier makes sense when you only need one room, rent your home, or want the lowest upfront cost.

The better choice depends on home size, heating system type, climate, maintenance habits, and how many rooms feel dry. For most homes, the practical goal is not maximum moisture; it is steady indoor relative humidity in a comfortable range without condensation or damp spots.

Quick answer
  • A general indoor humidity target is about 30% to 50% relative humidity, adjusted lower if windows or exterior walls show condensation.
  • Choose whole-house when multiple rooms are dry and the home has compatible central HVAC equipment.
  • Choose portable when dryness is localized, the space is small, or you want flexibility without installation.
  • Cold-climate homes may need to stay closer to 30% to 40% in winter to reduce condensation risk.
  • Cleaning matters: portable tanks and reservoirs need frequent care; whole-house systems need seasonal service and inspection.

What Whole-House and Portable Humidifiers Actually Do

Both types add water vapor to indoor air, but they do it at different scales. A whole-house humidifier is installed as part of, or alongside, a central heating and cooling system. It distributes moisture through the home’s ductwork when the system fan runs, depending on the design and controls.

Compare that setup with Ultrasonic vs Evaporative Humidifiers: Pros, Cons, and Which to Buy when you are deciding what kind of portable unit makes sense for a single room. A portable humidifier is a standalone appliance placed in a room. It may use evaporative, ultrasonic, or warm mist technology, but the basic purpose is the same: increase humidity in the nearby space. Its effect is strongest in the room where it is operating, especially if doors are closed.

Humidity affects comfort because dry air can make a room feel cooler, increase static electricity, and dry out wood furnishings. Too much humidity can support dampness, condensation, and musty conditions. The useful range is a middle zone, not simply the highest setting available.

Sizing Logic and Humidity Targets Without Guessing

The first sizing question is scope: one room, several rooms, or most of the home. A portable humidifier is normally selected by room size and run time. A whole-house system is selected by home size, construction tightness, climate, and the heating system’s airflow and runtime.

Relative humidity is the main number to watch. Many homes feel reasonable around 30% to 50% relative humidity. In colder weather, the upper end may be too high for some homes because warm, moist indoor air can contact cold glass or wall surfaces and form condensation. If condensation appears, lower the humidity setting and improve basic airflow.

For portable units, manufacturers often describe coverage by square footage, but real performance depends on ceiling height, door position, air leakage, and how often the unit is refilled. For whole-house systems, capacity is usually considered during installation planning rather than by a simple plug-in-room estimate.

  • Use a basic hygrometer to check actual humidity instead of relying only on the humidifier dial.
  • Measure in the room where comfort matters most, away from direct mist, registers, windows, and exterior doors.
  • Track readings for several days because humidity changes with outdoor weather and heating cycles.
  • Reduce the setting if you notice water on windows, damp sills, or musty smells.
Whole-house vs portable humidifier comparison. Example values for illustration.
Practical comparison of humidifier types
FactorWhole-house humidifierPortable humidifier
CoverageDesigned for many rooms through central ductworkDesigned for one room or a limited area
Upfront costTypically higher because installation is involvedTypically lower because it is standalone
Best fitOwners who want home-wide humidity controlRenters, small spaces, bedrooms, and temporary needs
Water supplyOften connected to a water lineTank must be filled by hand
ControlMay use a humidistat tied to HVAC operationUsually controlled on the unit or by a simple humidistat
MaintenanceSeasonal pads, panels, drains, and inspectionFrequent tank cleaning, descaling, and filter or wick changes
FlexibilityFixed location once installedEasy to move between rooms

Cost, Installation, and Home Fit

A whole-house humidifier is a building-system decision. It may require professional installation, a compatible central HVAC system, a suitable water connection, drainage, electrical connections, and a control strategy. Homes with ductless heating, radiators, or limited ductwork may not be good candidates without additional planning.

Portable humidifiers are simpler to start using. You place the unit on a stable surface, fill it, set the output, and monitor the room. The tradeoff is daily involvement: refilling, cleaning, and placing it where mist or moisture will not collect on furniture, walls, floors, or electronics.

Operating cost is not only electricity. It also includes water treatment, replacement wicks or cartridges, evaporative pads, cleaning supplies, and time. If you have hard water, mineral buildup can increase maintenance for both types, especially portable ultrasonic units that may disperse fine mineral dust if used with untreated tap water.

Common Mistakes and Troubleshooting Cues

One common mistake is choosing a humidifier before measuring humidity. A room that feels dry may also have drafts, uneven heating, or low air mixing. A small hygrometer helps separate actual low humidity from other comfort issues.

Another mistake is running a humidifier continuously at a high setting. More moisture is not always better. If windows fog, surfaces feel damp, or closets develop a musty odor, the humidity level is probably too high for the home’s temperature and ventilation conditions.

Signs the humidifier may be undersized

  • Humidity stays below the target range even after several hours of operation.
  • The unit runs constantly but only affects the area directly around it.
  • Doors, high ceilings, or open floor plans dilute the effect.
  • The HVAC fan or room fan is not moving air enough to distribute moisture.

Signs the humidifier may be oversized or set too high

  • Condensation forms on windows, especially overnight.
  • Moisture collects near the unit, on floors, or on nearby furniture.
  • Humidity readings remain above about 50% for long periods.
  • Rooms feel clammy rather than simply comfortable.

A Practical Checklist for Choosing Between Them

Start with the smallest effective solution. If only one bedroom is uncomfortable at night, a portable humidifier may solve the issue with less cost and commitment. If the entire home feels dry every winter and you already have central forced-air heating, a whole-house unit may be more convenient.

  • Define the area: one room, an open-plan zone, or the whole home.
  • Measure first: check relative humidity for several days during normal heating use.
  • Check the home type: central ductwork favors whole-house options; apartments and rentals usually favor portable units.
  • Consider cleaning habits: portable units need frequent hands-on cleaning; whole-house units need scheduled seasonal maintenance.
  • Watch condensation: the safest practical setting is the one that improves comfort without wet windows or damp surfaces.
  • Plan for water quality: hard water may require more cleaning, wick changes, or use of lower-mineral water in some portable units.

If you are unsure, a portable unit and hygrometer can be a low-commitment test. Use it in the main problem room for a week and note whether comfort improves while humidity stays in range. If several rooms remain consistently low, that is a sign to evaluate a larger-scale approach.

Real-World Examples

Dry bedroom in an apartment

A renter with one dry bedroom is usually better served by a portable humidifier. It avoids permanent installation, can be stored seasonally, and can be moved if the room use changes. The main tasks are filling the tank, cleaning it regularly, and keeping the unit away from walls and bedding.

Two-story house with central forced-air heat

If both floors are dry during winter, a whole-house humidifier may be worth evaluating. It can distribute moisture more evenly than several portable units, especially when the HVAC fan circulates air. However, balancing humidity between floors can still be affected by duct design, air leakage, and thermostat location.

Open-plan living area with high ceilings

A single portable humidifier may struggle in a large open space. The air volume is larger than the floor area suggests, and moisture can disperse into connected rooms. In this case, either a larger-capacity portable approach or a whole-house evaluation may be more practical.

Cold-climate home with window condensation

If condensation appears in winter, the humidity target is too high for the building conditions, even if the number looks reasonable on paper. Lower the setting, improve air circulation around windows, and check that exhaust fans are used during moisture-producing activities such as cooking and bathing.

Safety, Controls, and Maintenance Planning

Humidifiers should be used with attention to moisture control, electrical safety, and cleanliness. Place portable units on stable, water-resistant surfaces, keep cords away from wet areas, and avoid aiming mist directly at walls, furniture, bedding, or electronics. Follow the appliance instructions for water type, cleaning, and replacement parts.

For whole-house systems, maintenance often involves replacing an evaporative pad or panel, checking the water supply, inspecting the drain, and confirming that the humidistat works as intended. These tasks are commonly done before or during the heating season. If the system is connected to HVAC equipment, service should be handled without bypassing safety controls or altering appliance operation.

Humidifiers are different from air purifiers, ionizers, and UV-C devices. A humidifier controls moisture; it does not filter particles or gases from the air. Avoid intentionally generating ozone indoors, and be cautious with any add-on device that makes broad air quality claims without clear maintenance and safety guidance.

Water quality matters. In portable units, stagnant water and mineral buildup can create odors, residue, or visible scaling. Emptying unused water, drying parts as directed, and cleaning on a routine schedule are practical steps that help the unit operate as intended.

Humidity and dampness quick plan. Example values for illustration.
Humidity control actions for common goals
GoalSimple actionsToolsNote
Check baseline humidityMeasure for several days during normal useHygrometerAvoid judging by feel alone
Comfort in one roomUse a portable unit with the door partly closedPortable humidifierMonitor near the occupied area
Whole-home drynessEvaluate central HVAC compatibilityHumidistat and HVAC reviewDistribution depends on airflow
Reduce condensationLower the humidity setting and improve air movementHygrometer and fansCold surfaces set the limit
Manage hard water residueClean scale and consider lower-mineral water where appropriateCleaning suppliesFollow unit instructions
Seasonal shutdownEmpty, clean, dry, and replace spent partsManual and replacement mediaPrevents stale water storage

Related guides: Best Indoor Humidity Level to Prevent Mold (With Seasonal Targets)How to Stop Condensation on Windows (And Why It Matters for Mold)Ultrasonic vs Evaporative Humidifiers: Pros, Cons, and Which to Buy

Frequently asked questions

Is a whole-house humidifier better than a portable humidifier?

It depends on how much of the home feels dry and whether you have compatible central HVAC equipment. A whole-house system is usually better for multiple rooms and steady control, while a portable unit is often better for one room or a rental.

What humidity level should I aim for indoors in winter?

A common target is about 30% to 50% relative humidity. In colder climates, staying closer to 30% to 40% may help reduce window condensation and damp surfaces. If you see fogging or water on glass, lower the setting.

Can a portable humidifier work in an open floor plan?

It can help, but performance is often weaker in large open spaces because the moisture spreads through a larger air volume. In some cases, you may need a larger capacity unit, multiple units, or a whole-house approach. A hygrometer is useful for checking whether the target range is actually reached.

Do whole-house humidifiers need a lot of maintenance?

They usually need less day-to-day attention than portable models, but they still require seasonal maintenance. Common tasks include replacing pads or panels, checking the water supply, inspecting the drain, and confirming the humidistat works properly. Skipping maintenance can reduce performance and create water-related issues.

Why does my home get condensation when I use a humidifier?

Condensation usually means the indoor air is holding more moisture than cold windows or exterior walls can safely handle. The humidity setting may be too high for the current outdoor temperature or the home may have poor airflow. Lower the setpoint and watch for improvement over the next day or two.

Summary: Which Humidifier Makes Sense?

Choose a whole-house humidifier if dry air affects most rooms, you have compatible central HVAC, and you want a set-and-monitor approach with seasonal maintenance. It is usually the more integrated option, but it requires installation planning and proper controls.

Choose a portable humidifier if the problem is limited to one room, you rent, you want a lower upfront cost, or you prefer a device that can be moved and stored. It is flexible, but it requires more frequent refilling and cleaning.

The most practical decision starts with measurement. Aim for a moderate indoor humidity range, adjust downward if condensation appears, and choose the option that matches the actual space you need to humidify.

Humidifier Too Close to Furniture: Risks and Fixes

Humidifier near furniture with gentle mist

A humidifier is too close to furniture when mist or humid air can settle on surfaces before it disperses, which can lead to damp spots, finish damage, and white dust.

Most placement problems are practical rather than complicated. The usual goal is to give the mist enough space to mix with room air, keep direct moisture off surfaces, and maintain indoor relative humidity in a moderate range.

Quick answer

  • Keep most portable humidifiers at least 2 to 3 feet from wood furniture, walls, curtains, bedding, and electronics when space allows.
  • Aim for about 30% to 50% indoor relative humidity as general guidance, and avoid routinely exceeding 60%.
  • Place the humidifier on a stable, water-resistant surface, not directly on untreated wood or carpet.
  • If you see white dust, especially with an ultrasound or impeller unit, try distilled or demineralized water and clean the unit more often.
  • If nearby surfaces feel cool, damp, sticky, or cloudy, reduce output, move the unit, or run it for shorter periods.

Why Humidifier Placement Near Furniture Matters

A humidifier adds moisture to indoor air, but the moisture does not always spread evenly right away. If the unit points at a dresser, nightstand, sofa, wall, or bed frame, tiny water droplets can land before they evaporate. Over time, this can leave rings, dull patches, swelling, or a tacky film on some finishes.

Furniture risk depends on the humidifier type, mist output, room airflow, water mineral content, and surface material. Solid wood, veneer, particleboard, painted surfaces, leather, fabric, and electronics each respond differently to repeated moisture exposure.

White dust is a separate but related issue. It is usually mineral residue from tap water, most commonly noticed with cool-mist ultrasonic or impeller humidifiers. The dust may settle on nearby furniture first because those surfaces are closest to the mist stream.

How Condensation and White Dust Happen

Condensation is about moisture concentration

Condensation occurs when humid air or mist contacts a cooler surface and moisture collects faster than it can evaporate. Near furniture, this often shows up as a damp patch on a tabletop, beads of moisture on a wall, or a slight film on a glossy finish.

The issue is not only the total humidity level in the room. A room hygrometer might read 42%, while the air immediately above a nightstand could be much wetter because the humidifier is blowing mist directly at it. This local moisture pocket is why distance and direction matter.

White dust is usually mineral residue

Tap water contains dissolved minerals. Some humidifiers release very small droplets that can carry those minerals into the room. When the water evaporates, the minerals can remain as a pale powder on surfaces.

White dust is often more visible on dark furniture, glass shelves, glossy electronics, and black textiles. It is generally a maintenance and housekeeping problem, but it also signals that water quality and humidifier type should be considered.

Room size and output still matter

A small room with a high-output humidifier can become damp quickly, especially with closed doors and limited air movement. A large open room may need more run time, but the unit still should not blow mist directly onto nearby furniture.

Use the humidistat or output control if your unit has one. If it does not, use a separate room hygrometer and check readings in more than one location.

Humidifier placement risk checklist. Example values for illustration.
Common placement cues and practical adjustments
Placement cueWhy it mattersPractical adjustment
Less than 1 foot from furnitureMist may land before dispersingIncrease clearance if room layout allows
Directly aimed at wood or veneerRepeated moisture can affect finishesTurn nozzle toward open room air
Unit sitting on untreated woodSpills and local dampness can stainUse a water-resistant tray or surface
White film near the unitMinerals may be aerosolizedUse distilled or demineralized water
Window or wall moistureRoom humidity or local airflow may be highLower output and improve air mixing
Carpet feels damp below unitMoisture may be settling downwardMove to a hard, stable surface
Electronics nearbyMoisture and dust can settle in ventsKeep extra clearance and avoid direct mist

Common Warning Signs and Troubleshooting Cues

The easiest way to know if a humidifier is too close to furniture is to inspect the nearby area after 30 to 60 minutes of operation. You do not need special tools for the first check, although a basic hygrometer can help.

  • Damp surface: A tabletop, shelf, or wall feels wet, cool, or slightly sticky.
  • Cloudy finish: A wood or painted surface develops a dull patch where mist lands.
  • Powdery residue: White dust appears around the humidifier or on nearby furniture.
  • Musty odor: Damp textiles, carpets, or curtains may be staying wet too long.
  • Window moisture: Condensation appears on glass, especially during cold weather.
  • Fast humidity rise: Relative humidity climbs above the target range soon after the unit starts.

If any of these signs appear, start with simple fixes: move the humidifier farther away, reduce output, redirect the mist, or shorten run time. If the issue continues, the unit may be oversized for the space, the room may have limited air movement, or the water may be too mineral-heavy for that humidifier style.

For a broader seasonal target, see ideal indoor humidity in winter, which explains why cold weather often changes the safe range near windows and walls.

Practical Placement Checklist for Furniture Protection

Good placement is a balance between moisture distribution, safety, and convenience. The best spot is usually an open area where mist can mix with room air before reaching walls or furniture.

Use clearance and height thoughtfully

A general target of 2 to 3 feet from nearby furniture is a useful starting point for many portable units. More distance can be better for high-output cool-mist models or rooms with delicate finishes.

Place the humidifier on a level surface that can handle occasional moisture. A waterproof tray can provide a buffer under the unit, but it should not block vents or make the appliance unstable.

Avoid direct mist on sensitive items

Do not aim mist toward wood cabinets, musical instruments, books, paper, artwork, upholstered furniture, bedding, or electronics. These materials can absorb moisture or collect residue.

If the nozzle can rotate, point it toward open air rather than a surface. If the unit has no directional control, location becomes more important.

Check the room, not just the unit

Keep a hygrometer in the same room, ideally away from the immediate mist stream. Check it after the room has had time to stabilize. If readings are consistently above the desired range, reduce output or use the humidifier less often.

Air circulation can help moisture mix, but avoid creating a strong stream that pushes mist directly at furniture. A gentle ceiling fan or open interior door may be enough in some rooms.

If you are deciding between models, ultrasonic vs evaporative humidifiers is a helpful comparison because mist behavior and residue risk are not the same.

Real-World Examples of Too-Close Placement

Nightstand next to a bed

A small cool-mist humidifier on a nightstand may be convenient, but it is often close to wood, bedding, books, lamps, and electronics. If the mist points sideways, it may wet the nightstand or pillow area. A better arrangement is often a stable surface several feet away, with mist pointed toward open room space.

Living room console or media cabinet

Placing a humidifier on or near a media console can concentrate moisture near electronics and glossy furniture finishes. White dust may also show quickly on dark screens and shelves. More clearance, lower output, and low-mineral water can reduce residue.

Nursery or bedroom dresser

A dresser can seem like a safe elevated surface, but direct mist may cloud the finish or dampen nearby wall paint. If the room is small, use the lowest setting that maintains the desired humidity range and check surfaces after operation.

Open-plan room with dry winter air

In an open-plan space, a humidifier may need more run time to affect the whole area. However, placing it beside a sofa or wood table can still create a local damp zone. The better strategy is usually open-room placement, moderate output, and periodic humidity checks.

Safety and Standards Considerations

Use humidifiers according to the manufacturer instructions, especially for fill levels, surfaces, cleaning, and electrical clearance. Keep cords away from water paths and avoid placing the unit where it can be knocked over.

Indoor humidity guidance is generally aimed at comfort, reducing dampness, and limiting moisture problems. A practical range is often about 30% to 50% relative humidity, with extra caution when readings approach or exceed 60%. Outdoor temperature matters because cold windows and poorly insulated walls can condense moisture even when the room reading seems moderate.

Some indoor air devices use features such as ionization, UV-C lamps, or ozone-related technologies. For humidifier placement near furniture, these features are not a substitute for correct humidity control, cleaning, and clearance. Do not intentionally use ozone generators in occupied spaces, and do not modify appliances or bypass safety features.

If a humidifier has a UV-C or antimicrobial feature, treat it as a device-specific maintenance component rather than a reason to clean less often. Follow the manual for replacement parts, safe handling, and disposal.

Maintenance Habits That Reduce Residue and Dampness

Maintenance has a direct effect on furniture risk. A clean humidifier, correct water type, and moderate output make it easier to avoid condensation and white dust.

  • Empty and rinse regularly: Stagnant water can leave deposits and make cleaning harder.
  • Dry between uses when practical: Letting the tank and base dry can reduce buildup.
  • Descale as directed: Mineral deposits can collect in tanks, bases, wicks, and mist outlets.
  • Replace wicks or cartridges on schedule: Evaporative units depend on clean, absorbent media.
  • Use distilled or demineralized water when white dust is a problem: This is especially useful for ultrasonic and impeller models.
  • Wipe nearby surfaces: Early residue is easier to remove than buildup that sits for weeks.

Cleaning frequency depends on run time, water hardness, and humidifier design. Heavy daily use in winter usually requires more attention than occasional use in a mild season.

Do not add fragrances, oils, cleaners, or additives unless the appliance instructions specifically allow them. Unapproved additives can leave residue, affect plastics, or change what is released into the room.

For step-by-step upkeep, how to clean a humidifier covers cleaning cadence and the parts that usually collect buildup first.

Water choice matters too, so humidifier water choices tap vs filtered vs distilled can help if white dust keeps showing up on nearby furniture.

Humidity and dampness quick plan. Example values for illustration.
Practical humidity goals and actions
GoalSimple actionsToolsNote
Protect furniture near the unitKeep 2 to 3 feet of clearance and avoid direct mistVisual checkIncrease distance for delicate finishes
Limit white dustUse distilled or demineralized waterWater source choiceMost noticeable with ultrasonic mist
Keep humidity moderateTarget about 30% to 50% relative humidityHygrometerAdjust for season and condensation signs
Avoid damp walls or windowsLower output if condensation appearsSurface inspectionCold surfaces may condense first
Improve moisture mixingUse open-room placement and gentle airflowFan or open doorAvoid pushing mist at furniture
Reduce buildup in the unitRinse, dry, and descale as directedManual and cleaning suppliesWater hardness affects frequency

Related guides: Ideal Indoor Humidity in Winter: Comfort vs Mold RiskUltrasonic vs Evaporative Humidifiers: Pros, Cons, and Which to BuyHumidifier White Dust: Why It Happens and How to Stop It

Frequently asked questions

How far should a humidifier be from furniture?

A practical starting point is 2 to 3 feet from wood furniture, walls, curtains, bedding, and electronics. More distance is often better for high-output units, small rooms, or delicate finishes. The key is to keep mist from landing on surfaces before it disperses into the room.

Can a humidifier damage wood furniture?

Yes, if it is placed too close or aimed directly at the surface. Repeated mist exposure can cause dull spots, swelling, rings, or a tacky finish on some wood and veneer surfaces. A stable location with good airflow helps reduce that risk.

Why is there white dust near my humidifier?

White dust is usually mineral residue from tap water, and it is most common with ultrasonic or impeller humidifiers. The particles can settle on nearby furniture, electronics, and dark surfaces where they are easier to see. Using distilled or demineralized water often reduces the problem.

What humidity level is safest for furniture?

For many homes, about 30% to 50% relative humidity is a reasonable general range. Staying below 60% is usually helpful for reducing condensation and moisture damage. A hygrometer can confirm whether the room is staying in range.

Is it okay to put a humidifier on a dresser or nightstand?

It can be okay if the surface is stable, water-resistant, and far enough from the mist stream. However, dressers and nightstands are often near wood finishes, bedding, books, or electronics, which increases the chance of localized dampness. If possible, place the unit farther away and point it toward open room air.

What should I do if nearby furniture feels damp?

First, reduce the output or move the humidifier farther from the surface. Then check the room humidity and look for signs of condensation or white dust. If the issue continues, the humidifier may be too large for the space or may need cleaning and a lower-mineral water source.

Summary of Key Takeaways

A humidifier too close to furniture can create two common problems: local condensation and white dust. Condensation is mainly a moisture and airflow issue, while white dust is usually tied to minerals in water and humidifier type.

For most rooms, start with at least 2 to 3 feet of clearance, point mist toward open air, and keep indoor relative humidity around 30% to 50% as general guidance. Watch nearby surfaces during the first hour of use, especially in cold weather or small rooms.

If you already see damp spots or powdery residue, the practical fixes are straightforward: move the unit, lower the output, use lower-mineral water, clean the humidifier, and check humidity with a separate hygrometer. These steps help the humidifier add moisture to the room without unnecessarily wetting the furniture around it.

How to Clean Humidifier Scale Without Damaging Parts

Generic humidifier releasing gentle mist in a bedroom

Humidifier mineral build-up is removed most safely by unplugging the unit, disassembling only removable parts, soaking scale in diluted white vinegar or citric acid, and rinsing thoroughly before reassembly. Mineral scale usually comes from hard tap water, and the goal is to dissolve it rather than scrape it off. Gentle descaling protects tanks, trays, floats, wicks, seals, and ultrasonic parts better than abrasive pads or harsh chemicals.

Quick answer
  • Use a mild acid soak: commonly a 1:1 mix of white vinegar and water, or a light citric acid solution, for about 15–30 minutes as general guidance.
  • Keep water away from motors, plugs, control panels, sensors, and any non-removable electrical base.
  • Use a soft cloth, bottle brush, or cotton swab; avoid steel wool, knives, scouring powder, and aggressive scraping.
  • Rinse until vinegar or citric acid odor is gone, then air-dry parts fully before storing or reassembling.
  • If scale returns quickly, consider distilled or demineralized water, more frequent cleaning, or replacing mineral cartridges or wicks when applicable.

What Humidifier Mineral Build-Up Is and Why It Matters

Mineral build-up, often called scale, is the chalky, crusty, or cloudy residue left behind when water evaporates. It is usually made of minerals such as calcium and magnesium. These minerals are common in hard water and are not unusual in many U.S. homes.

Scale matters because it can interfere with how a humidifier moves water and air. It may clog mist outlets, coat ultrasonic discs, stiffen floats, reduce wick performance, or leave deposits in the tank and base. A dirty or scaled unit can also be harder to keep fresh because rough mineral surfaces can trap residue.

The right cleaning method depends on the part. A removable tank can usually be soaked or swished. A wick may need replacement instead of descaling. An electrical base may need careful spot cleaning only, with no soaking.

Why Scale Forms and Which Parts Are Vulnerable

Scale forms when dissolved minerals in water are left behind. The more minerals in the water, the faster deposits appear. Warm conditions, shallow water trays, and repeated evaporation can speed up visible build-up.

Hard water and white dust

Ultrasonic humidifiers can turn tiny water droplets into mist. If the water contains minerals, some of those minerals may settle as fine white dust on nearby surfaces. This is different from scale inside the unit, but both come from the same source: mineral-rich water.

Parts that need extra care

Not all humidifier parts tolerate the same cleaning approach. Flexible gaskets, rubber seals, wicks, floats, heating areas, ultrasonic discs, and sensors can be damaged by force, heat, incompatible chemicals, or soaking when they are not meant to be submerged.

  • Tanks: usually tolerate soaking, but check for caps, valves, and seals that can trap solution.
  • Base trays: often collect scale, but may be close to electrical components.
  • Ultrasonic discs: need gentle cleaning only; scratches can affect mist output.
  • Wicks or pads: often perform better when replaced on schedule rather than descaled aggressively.
  • Floats and valves: should move freely after cleaning, without forced bending.
Humidifier scale cleaning checklist by part. Example values for illustration.
Scale removal checklist
AreaWhy it mattersCareful cleaning note
Water tankHolds standing water and mineral residueSwish or soak with diluted vinegar, then rinse well
Tank cap and valveSmall openings can trap scaleUse a soft brush; avoid forcing springs or seals
Base trayDeposits can block water flowWipe with a damp cloth; do not flood the base
Ultrasonic discScratches may reduce mist outputUse a cotton swab and light pressure only
Wick or filterMinerals reduce absorption and airflowReplace when stiff, crusted, or discolored per manual
FloatControls water level sensingClean around the hinge and confirm free movement
Exterior ventsDust can restrict airflowWipe dry or lightly damp; keep liquid out of openings

Cleaning Agents That Remove Scale Without Harsh Scrubbing

Mineral scale dissolves best with mild acids. For household cleaning, plain white vinegar and citric acid are common choices. They work by loosening mineral deposits so you can wipe them away rather than grind them off.

White vinegar

A common starting point is equal parts white vinegar and water for removable plastic tanks and trays. For light scale, a shorter soak may be enough. For heavier scale, it may help to refresh the solution and repeat rather than extend soaking for hours.

Citric acid

Citric acid powder can also be used when diluted in water. A light solution is usually sufficient for routine scale. Dissolve the powder fully before it touches parts so granules do not scratch surfaces.

What to avoid

Avoid mixing cleaning chemicals. Do not mix vinegar with bleach. Avoid abrasive cleaners, metal scrapers, stiff wire brushes, and strong solvents. These can damage plastic, rubber seals, coatings, and delicate surfaces.

If the owner’s manual specifies a particular descaling method, follow that guidance first. Manufacturer instructions may reflect materials used in the tank, seals, heating area, or misting mechanism.

Step-by-Step Descaling Checklist

A careful process is usually more effective than a stronger cleaner. Work on a counter near a sink, keep small parts together, and take your time with rinsing.

1. Unplug and empty the humidifier

Turn the unit off, unplug it, and empty the tank and base. Never clean while the humidifier is plugged in. If the unit was recently running warm, allow it to cool before handling.

2. Remove only user-serviceable parts

Take off the tank, cap, tray, wick holder, or other removable pieces listed in the manual. Do not open sealed housings or remove protective covers that are not intended for routine cleaning.

3. Soak scaled removable parts

Place removable non-electrical parts in diluted vinegar or citric acid solution. A general soak time of 15–30 minutes is often enough for routine scale. For stubborn deposits, repeat the soak with fresh solution instead of using sharp tools.

4. Wipe and brush gently

Use a soft cloth, sponge, bottle brush, or cotton swab. Focus on corners, tank caps, seams, and small water channels. For ultrasonic discs, use only very light pressure.

5. Rinse thoroughly

Rinse parts with clean water until the cleaning smell is gone. Residual vinegar or citric acid can affect odor and may not be appropriate to leave on seals or surfaces.

6. Dry before reassembly

Let parts air-dry when possible, especially before storage. Reassemble only when the parts are clean, dry, and seated correctly.

Troubleshooting White Dust, Odors, and Stubborn Deposits

If scale keeps returning quickly, the water source is usually the first thing to review. Hard tap water can create visible deposits after only a few uses in some homes. Distilled or demineralized water can reduce mineral residue, especially in ultrasonic units.

White dust around the humidifier

White dust is commonly associated with minerals dispersed in mist. It may appear on nearby furniture, floors, or electronics. Using lower-mineral water and cleaning the tank more often can help reduce it.

Reduced mist output

Lower mist output may come from scale on an ultrasonic disc, clogged water path, saturated wick, or blocked air inlet. Clean the water-contact parts first, then check whether vents are dusty and whether the wick is due for replacement.

Persistent odors

Odor can come from stagnant water, residue in the tank, or parts that did not dry fully. Emptying the tank daily, rinsing between fills, and allowing parts to dry during breaks can reduce musty smells. Avoid masking odors with fragrances unless the humidifier is specifically designed for that use.

Crust that will not loosen

For hard crust, repeat a mild acid soak and gently wipe between rounds. If a part remains rough, cracked, warped, or clogged, replacement may be safer than forceful scraping. This is especially true for wicks, pads, seals, and small valves.

Real-World Cleaning Examples by Humidifier Type

Humidifiers use different methods to add moisture to air, so scale shows up in different places. The cleaning principles are similar, but the weak points vary.

Ultrasonic humidifiers

Ultrasonic models often have a small disc or plate in the base. Scale on this surface can reduce mist output. Use a cotton swab or soft cloth with diluted descaling solution, and avoid scratching the disc.

Evaporative humidifiers

Evaporative units use a wick or filter to draw water into airflow. Minerals may stiffen the wick and reduce performance. A tank and tray can often be descaled, but the wick is usually a replaceable part and should not be scrubbed aggressively.

Warm mist humidifiers

Warm mist units can collect scale near heating surfaces. Let the unit cool fully before cleaning. Mild descaling may loosen deposits, but do not chip or scrape coated surfaces or heating areas with metal tools.

Console or whole-room portable units

Larger portable units may have bigger reservoirs, floats, and multiple water paths. Clean one section at a time and confirm that floats and valves move freely before refilling. Larger tanks may need more frequent rinsing simply because they hold more standing water.

Safety, Materials, and When to Stop

Safe humidifier cleaning is partly about what not to do. Do not submerge any electrical base, control panel, cord, plug, sensor area, or motor housing. Do not pour cleaner into openings unless the manual identifies them as water-contact areas.

Do not modify the appliance, bypass shutoff features, or remove safety covers. If a part is not designed to come off, clean around it with a lightly damp cloth instead of forcing access.

Be cautious with specialty features. Some humidifiers include lights, antimicrobial parts, UV-C components, or electronic sensors. Maintain these only as directed by the manual. Do not intentionally generate ozone, add ozone-producing devices, or use harsh treatments inside a humidifier.

Stop cleaning and consider replacement parts or service if you see cracked plastic, swollen seals, damaged cords, corrosion near electronics, persistent leaking, or parts that no longer fit correctly. A very old or badly scaled unit may not be worth aggressive restoration.

Humidity and humidifier upkeep quick plan. Example values for illustration.
Home humidity and scale reduction planner
GoalSimple actionsToolsNote
Reduce scaleUse distilled or demineralized water when practicalClean water containerMost useful for ultrasonic units
Keep output steadyDescale water-contact parts weekly or as neededVinegar or citric acid, soft brushHard water may require more frequent cleaning
Limit white dustLower mineral content in fill waterDistilled water or demineralization cartridgeCartridges need periodic replacement
Avoid over-humidifyingUse a room hygrometer and adjust outputBasic hygrometerMany homes aim roughly around 30%–50% RH
Prevent stale waterEmpty and rinse the tank daily during useSink, clean clothLet parts dry during long breaks
Protect partsUse mild cleaners and avoid abrasive scrapingSoft cloth, cotton swabsReplace worn seals, wicks, or caps

Frequently asked questions

What is the safest way to clean humidifier mineral build-up?

The safest approach is to unplug the humidifier, remove only the parts meant for user cleaning, and soak mineral deposits in diluted white vinegar or a mild citric acid solution. After soaking, wipe gently and rinse thoroughly before using the unit again. Avoid scraping with sharp tools or cleaning any electrical base with liquid.

Can I use vinegar on all humidifier parts?

Vinegar is commonly used on removable water-contact parts such as tanks and trays, but not on electrical components, cords, plugs, or any sealed base. Some materials also have manufacturer-specific care instructions, so the manual should always come first. If a part includes rubber seals, sensors, or coatings, use extra caution and limit contact time.

How long should I soak scale before brushing it off?

For routine scale, a soak of about 15 to 30 minutes is often enough to loosen deposits. Heavier build-up may need a second soak with fresh solution rather than longer exposure or harder scrubbing. If the residue still will not come off, the part may be worn or damaged and could need replacement.

Why does my humidifier keep leaving white dust?

White dust usually comes from minerals in the water being dispersed with the mist, especially in ultrasonic humidifiers. Using distilled or demineralized water can reduce this problem, and regular cleaning helps prevent minerals from collecting inside the unit. If the dust continues, a demineralization cartridge or wick replacement may also help depending on the model.

Which parts should never be scrubbed hard when removing scale?

Do not scrub ultrasonic discs, sensors, rubber seals, valves, or wicks aggressively because these parts can be scratched, bent, or worn out. Mild wiping with a soft cloth, swab, or brush is usually enough once scale has been loosened by soaking. If the part is cracked, warped, or still clogged after gentle cleaning, replacement is safer than force.


Related guides: How to Clean a Humidifier Properly (And How Often)Humidifier Cleaning Routine: How to Prevent Slime and OdorsHumidifier Water Choices: Tap vs Filtered vs Distilled

Summary: Practical Takeaways

Humidifier scale is usually a hard-water maintenance issue, not a reason to use harsh cleaners. Mild acid descaling, gentle tools, thorough rinsing, and regular drying are the main steps that protect humidifier parts.

For routine care, unplug the unit, clean only removable or water-contact parts, soak scale with diluted vinegar or citric acid, and avoid scraping delicate surfaces. If mineral build-up returns quickly, review the water source, cleaning frequency, wick condition, and room humidity target.

A practical routine is simple: empty daily during use, rinse often, descale before deposits become heavy, and replace consumable parts when they become stiff, clogged, or worn. This keeps the humidifier easier to maintain without damaging the parts that control mist, airflow, and water level.

Bathroom Fan Timer Settings to Prevent Mold After Showers

Bathroom ventilation airflow from ceiling fan

Most bathroom fans should run for about 20 to 30 minutes after a typical shower to help clear moisture and reduce conditions that support mold growth.

The right bathroom fan timer setting depends on shower length, bathroom size, fan performance, outdoor weather, and whether surfaces stay damp afterward. A timer is useful because it keeps ventilation running after you leave the room without relying on memory.

Quick answer

  • Use 20 to 30 minutes after a normal shower as a practical starting point.
  • Use 30 to 60 minutes after long, hot, or back-to-back showers, especially in small or windowless bathrooms.
  • Aim for bathroom relative humidity to fall back below about 60% soon after showering, with many homes feeling comfortable around 30% to 50%.
  • If mirrors, walls, ceilings, or grout stay wet after the fan shuts off, increase the timer or check fan performance.
  • Run the fan during the shower and keep the door slightly open afterward when privacy and household conditions allow.

Why bathroom fan timer settings matter

Showers add a large amount of water vapor to a small room in a short time. When that vapor contacts cooler surfaces, it can condense on mirrors, painted ceilings, tile, grout, trim, and inside corners.

A bathroom fan removes moisture-laden air and replaces it with drier air from the rest of the home. A timer extends that air exchange long enough for humidity to drop after the visible steam has cleared.

The goal is not to make the bathroom perfectly dry instantly. The practical goal is to shorten how long surfaces stay damp, because persistent dampness is one of the main conditions that allows mold and mildew to appear on bathroom surfaces.

How long to run the fan after a shower

A good starting setting is 20 minutes after a standard shower. If the room still feels damp, the mirror remains fogged, or visible water sits on walls and ceiling areas, move the setting to 30 minutes and compare results over several days.

Longer run times are often useful for bathrooms with no window, multiple showers in a row, poor air movement under the door, or a fan that is older, noisy, dusty, or undersized. In those cases, 45 to 60 minutes may be reasonable, especially during humid seasons.

Use humidity as a practical check

A small humidity monitor can help you avoid guessing. Place it away from direct splash and not directly under the fan. After a shower, watch how long it takes for relative humidity to fall below about 60% and trend toward the home’s normal range.

Humidity readings vary by device and placement, so treat them as a guide rather than a perfect measurement. The pattern matters more than a single number: humidity should rise during a shower, then steadily fall while the fan runs.

Match run time to the bathroom, not just the shower

Fan capacity also matters. A common residential rule of thumb for many bathrooms is about 1 cubic foot per minute of fan airflow per square foot of floor area, with higher needs for large bathrooms or rooms with separate enclosed toilet or shower areas. Actual performance can be lower if ducts are long, kinked, dirty, or vented poorly.

If a fan sounds like it is running but humidity falls slowly, the timer may not be the only issue. Air has to leave the room through the fan and replacement air has to enter from under the door, a transfer grille, or an open door.

Bathroom fan timer starting points. Example values for illustration.
Timer setting decision matrix
ConditionStarting timer settingWhat to watch
Short normal shower20 minutesMirror clears and walls dry soon after
Long or very hot shower30 to 45 minutesHumidity drops steadily after use
Back-to-back showers45 to 60 minutesNo lingering damp smell or wet surfaces
Small windowless bathroom30 to 45 minutesCeiling corners and grout dry out
Humid outdoor weather30 to 60 minutesRoom returns near home baseline humidity
Oversized or well-ventilated bathroom15 to 30 minutesSurfaces are dry without over-running
Fan seems weak or loudTimer may not solve itCheck cleaning, ducting, and airflow

Common mistakes that leave bathrooms damp

The most common mistake is turning the fan off when the shower ends. Steam may clear quickly, but moisture remains on tile, glass, towels, walls, and ceiling surfaces. A timer helps keep air moving during this drying period.

Another common issue is running the fan with the bathroom door sealed tightly. Exhaust fans need replacement air. If there is little gap under the door, the fan may move less air than expected and may become noisier.

  • Starting the fan too late: Turn it on before or at the start of the shower.
  • Using only an open window: Windows can help in mild, dry weather but may be less useful during humid, cold, or still conditions.
  • Ignoring dust buildup: A dusty grille and fan wheel can reduce airflow.
  • Relying on scent: Air fresheners do not remove moisture.
  • Venting into an attic or wall cavity: Bathroom exhaust should discharge outdoors, not into enclosed building spaces.

If mold-like spotting keeps returning soon after cleaning, treat it as a moisture control clue. The next step is usually improving drying time, checking the fan path, and looking for leaks or condensation sources.

A practical checklist for daily use

Good timer settings work best when paired with simple habits. The fan does not need to do all the drying alone.

Before and during the shower

  • Turn the fan on before the room fills with steam.
  • Use the shower door or curtain in a way that limits spray onto walls and floors.
  • Keep the bathroom door cracked if privacy and household airflow allow.
  • Avoid blocking the fan grille with towels, decorations, or storage.

After the shower

  • Set the timer for 20 to 30 minutes as a baseline.
  • Squeegee shower glass or tile if water tends to linger.
  • Spread towels open so they dry faster.
  • Leave the shower curtain or door partly open to improve air movement.
  • Increase the timer if surfaces are still wet when it shuts off.

For many homes, small changes such as leaving the door ajar and opening the shower enclosure after use can reduce how long the fan needs to run. The best setting is the shortest practical time that clears humidity and dries surfaces reliably.

Real-world timer examples

Bathroom conditions vary, so examples are more useful than a single universal number. Use these scenarios as starting points, then adjust based on moisture, humidity readings, and surface drying.

Small interior bathroom

A compact bathroom with no window may collect steam quickly. Start the fan before showering and set the timer for 30 minutes afterward. If ceiling corners or the mirror remain damp, try 45 minutes and check whether the room returns to its normal feel.

Shared family bathroom

When several people shower within a short period, moisture has less time to clear between uses. A 45- to 60-minute timer after the last shower may work better than several short fan cycles. Keeping towels spread out and the door open between showers can also help.

Large bathroom with separate shower area

A large bathroom may still have a damp shower stall if airflow does not reach it well. A 20- to 30-minute timer may clear the main room but leave the shower enclosure wet. In that case, increase run time and improve airflow by leaving the shower door open after use.

Humid climate or humid season

When the rest of the home is already humid, the bathroom may dry more slowly. A longer timer can help, but whole-home humidity control may also matter. If indoor humidity commonly stays above about 60%, a dehumidifier or HVAC humidity strategy may be worth considering.

Safety, codes, and ventilation limits

Bathroom exhaust fans are ventilation devices, not mold removal devices. They help control moisture, but they cannot fix plumbing leaks, wet building materials, missing insulation, or long-term condensation problems by themselves.

Exhaust air should be ducted outdoors through an appropriate termination point. Sending moist bathroom air into an attic, crawlspace, garage, or wall cavity can move the dampness problem to another part of the home.

If you want a wall timer, humidity-sensing control, or fan replacement, use components rated for the location and follow local electrical code. For wiring changes, a qualified electrician is the appropriate route. Do not bypass safety devices or modify a fan outside its intended use.

Air purifiers, ionizers, fragrances, and ozone-generating devices are not substitutes for bathroom moisture control. Ozone generators should not be used in occupied indoor spaces, and devices marketed for odor control do not remove the water vapor that drives bathroom dampness.

Maintenance that keeps the timer effective

A timer can only work as well as the fan and duct allow. If airflow is restricted, extending the timer may use more energy without solving dampness.

Clean the grille regularly with the power off according to the fan’s instructions. Dust and lint can collect at the cover and on the fan wheel. A visibly dirty grille is a sign that airflow may be reduced.

Check the outdoor vent termination when accessible and safe to do so. The flap or damper should open when the fan runs and should not be blocked by lint, debris, nests, paint, or exterior obstructions.

Listen for changes. Grinding, rattling, or sudden loudness can indicate wear, looseness, or blockage. A fan that is very noisy may also discourage regular use, which reduces the benefit of having a timer.

If the fan runs but a tissue will not lightly hold to the grille, airflow may be weak. This is only a rough check, not a measurement, but it can help you notice when cleaning or professional evaluation is needed.

Humidity and mold-prevention quick plan. Example values for illustration.
Moisture control action planner
GoalSimple actionsHelpful toolNote
Clear shower steamRun fan during shower and afterFan timerStart with 20 to 30 minutes
Reduce lingering dampnessOpen shower door or curtainSqueegeeHelps surfaces dry faster
Track humidity trendCompare after-shower readingsHumidity monitorLook for steady decline
Improve replacement airCrack door when practicalDoor undercut or transfer pathFan needs incoming air
Control whole-home moistureKeep indoor humidity moderateHVAC or dehumidifierOften useful in humid seasons
Maintain airflowClean grille and check outletVacuum or soft brushFollow fan instructions
Address recurring damp spotsLook for leaks or cold surfacesProfessional inspection if neededTimer may not be enough

Related guides: Bathroom Mold Prevention: Exhaust Fan Timing and Humidity ControlBest Indoor Humidity Level to Prevent Mold (With Seasonal Targets)Ventilation vs Air Purifier: When You Need One, the Other, or Both

Frequently asked questions

How long should a bathroom fan run after a shower to help prevent mold?

A practical starting point is 20 to 30 minutes after a normal shower. Longer showers, small bathrooms, or humid conditions may need 30 to 60 minutes.

Should the bathroom fan run during the shower or only afterward?

It should run during the shower and continue afterward. Running it while you shower helps limit how much moisture builds up in the room, and the extra run time helps dry remaining surfaces.

What is the best way to know if my timer setting is long enough?

Watch whether mirrors, walls, grout, and the shower enclosure are dry soon after the fan turns off. A humidity monitor can also help by showing whether relative humidity drops steadily and falls below about 60% after showering.

Why does my bathroom still feel damp even when the fan runs?

The fan may be undersized, dirty, poorly ducted, or blocked by limited replacement air. High outdoor humidity, repeated showers, or a sealed bathroom door can also slow drying.

Can I use the window instead of a bathroom fan timer?

A window can help in mild, dry weather, but it is less reliable in humid, cold, or still conditions. A fan timer is usually more consistent because it keeps ventilation going after the shower ends.

What should I do if mold keeps coming back even with a longer fan timer?

Look beyond the timer for leaks, poor exhaust ducting, blocked vents, or recurring condensation on cold surfaces. If the problem continues, the bathroom may need maintenance or a professional inspection to find the moisture source.

Summary takeaways

For most bathrooms, set the fan timer to run 20 to 30 minutes after a shower, then adjust based on how quickly humidity falls and surfaces dry. Use 30 to 60 minutes for long showers, repeated showers, windowless bathrooms, humid weather, or rooms that stay damp.

The fan should run during the shower, not only afterward. Good replacement air, an open shower enclosure, dry towels, and a clean fan grille all help the timer setting work better.

If dampness persists despite longer run times, look beyond the timer. Weak airflow, blocked ducting, poor exterior venting, leaks, or high whole-home humidity may need attention before the bathroom can dry reliably.

Closet Dehumidifiers: Desiccant vs Electric Options

Closet corner with small dehumidifier and hanging clothes

Desiccant packs are usually better for small closets with mild dampness, while electric dehumidifiers are better for larger, leak-prone, or consistently humid closets.

The right closet dehumidifier option depends on closet size, moisture source, temperature, ventilation, and how often you can maintain the device. A simple humidity meter is the most useful starting point because it shows whether the closet is only slightly damp or needs stronger moisture control.

Quick answer
  • A practical indoor relative humidity target is often about 40% to 50%, with many homes aiming to stay below 60% to discourage persistent dampness.
  • Use desiccant packs for small enclosed closets, shoes, storage bins, and seasonal items where moisture is mild.
  • Consider an electric unit when closet humidity stays near or above 60%, odors return quickly, or the closet shares a wall with a damp bathroom, laundry area, or exterior wall.
  • Measure first with a basic hygrometer for several days; closet humidity can differ from the room by 5% to 15% or more.
  • Leave space around any electric unit for airflow, tank access, and heat release; do not place it under hanging fabrics.

What Closet Humidity Means and Why It Matters

Closets are small, enclosed spaces where air can become stagnant. Clothing, shoes, boxes, leather goods, and stored linens can hold moisture from normal indoor air, wet outerwear, or items that were stored before they fully dried.

A closet may feel damp even when the main room feels comfortable. This happens because closet doors reduce air exchange, exterior walls can be cooler, and crowded shelves limit airflow. Cool surfaces can also make relative humidity rise locally, even without a visible leak.

For general home comfort and dampness control, many households try to keep indoor relative humidity in a moderate range, often around 30% to 50% depending on season and climate. In closet planning, staying below 60% is a practical threshold because higher humidity over time can support musty odors and material deterioration.

A closet dehumidifier does not fix water intrusion, plumbing leaks, roof issues, or poor building drainage. If moisture keeps returning quickly, the device should be treated as a clue that the source needs investigation.

Desiccant Packs vs Electric Units: How They Work

Desiccant packs use moisture-absorbing materials to pull water vapor from the air. They are passive, silent, compact, and do not need an outlet. Common formats include hanging bags, canisters, small sachets, and rechargeable moisture absorbers.

Electric dehumidifiers use powered components to remove moisture more actively. Compact models may use small thermoelectric systems, while larger units often use refrigerant-based systems. In a closet, the key issue is not just water removal but also safe airflow, heat release, drainage or tank emptying, and access to a suitable outlet.

Desiccants work best in enclosed locations with light moisture loads. Electric units are more appropriate when new moisture enters regularly, the closet is walk-in sized, or humidity remains elevated despite passive measures.

Temperature matters. Some electric dehumidifiers are less effective in cooler spaces, while desiccants vs compressor dehumidifiers can remain useful across a wider range of closet conditions. However, desiccants also become saturated and must be replaced, emptied, or recharged.

Table 1. Closet dehumidifier option comparison. Example values for illustration.
Desiccant packs vs electric closet dehumidifiers
Decision pointDesiccant packsElectric units
Best fitSmall closets and storage binsWalk-in closets or persistent dampness
Power neededNo outlet requiredRequires a suitable outlet
Moisture removal speedSlow and gradualUsually faster and more active
NoiseSilentLow to moderate, depending on design
MaintenanceReplace, empty, or recharge when saturatedEmpty tank, clean intake areas, check placement
Space needsVery compactNeeds clearance for airflow and service access
Good first stepMild seasonal dampnessHumidity that stays high after basic fixes

Sizing a Closet Dehumidifier Without Guessing

Closet sizing starts with measurement, not product claims. A low-cost hygrometer placed inside the closet can show the actual relative humidity pattern over several days. Check readings with the door closed, after showers or laundry if nearby, and during humid outdoor weather.

Use closet type as a starting point

For a small reach-in closet, one or more passive desiccant packs may be enough if humidity is only slightly above the rest of the room. For a walk-in closet, an electric unit may be more practical if the area has poor ventilation or stores many absorbent materials.

As a general planning shortcut:

  • Small reach-in closet: start with passive moisture absorbers and better air circulation.
  • Medium closet with shoes, coats, or luggage: use multiple desiccants or a small powered unit if readings stay high.
  • Walk-in closet: consider a compact electric unit when humidity remains elevated for days.
  • Closet on an exterior wall: monitor more closely during cold or rainy seasons.

Compare the closet to the room

If the room is at 45% relative humidity and the closet is at 55%, airflow may be the main issue. If both the room and closet are near 60% or higher, the whole room or home may need broader humidity control, ventilation changes, or a larger dehumidifier outside the closet.

A closet dehumidifier should not be asked to dry an entire bedroom, basement, or bathroom. It is most effective when matched to the small space it serves.

Common Mistakes and Troubleshooting Cues

One common mistake is putting a desiccant pack in a closet and never checking it. Once saturated, it has little remaining capacity and may become messy depending on the format. Mark a reminder date, especially during humid months.

Another mistake is crowding the closet so tightly that air cannot move. A moisture absorber or electric unit works better when air can circulate around shoes, boxes, and clothing. Leave small gaps between items and avoid pressing stored goods against cold exterior walls.

Watch for troubleshooting cues:

  • Musty odors return within a few days after cleaning.
  • Humidity readings stay near or above 60% for long periods.
  • Condensation appears on walls, pipes, windows, or nearby surfaces.
  • Leather, paper, or fabric feels damp to the touch.
  • Moisture absorbers fill unusually quickly.

These signs do not automatically mean there is a serious problem, but they suggest the moisture source is stronger than the closet device can handle alone.

Practical Closet Moisture Checklist

Before buying a larger device, reduce the moisture load as much as possible. Simple steps often make desiccant packs more effective and may reduce the need for a powered unit.

Control what goes into the closet

  • Let coats, umbrellas, shoes, gym bags, and laundry dry fully before storage.
  • Avoid sealing damp items in plastic bins.
  • Store seldom-used fabrics in breathable containers when appropriate.
  • Rotate shoes and air out boots after wet weather.

Improve air movement

  • Open closet doors periodically when room humidity is moderate.
  • Do not block supply or return airflow in the room.
  • Leave shelf space and floor space for air to move.
  • Use louvered doors or passive vents only when suitable for the room design and privacy needs.

If the closet is next to a bathroom, laundry closet, or exterior wall, run local exhaust ventilation during moisture-generating activities when available. The goal is to reduce the amount of humid air that enters the closet in the first place.

Real-World Closet Scenarios

Small bedroom reach-in closet

A small closet that stores dry clothes and a few shoes usually does not need an electric device unless readings stay high. Start with a hygrometer, reduce clutter, and use one or two desiccant packs. If humidity stays near room levels, passive control may be enough.

Walk-in closet on an exterior wall

A walk-in closet with many clothes and limited airflow can create a separate microclimate. If readings remain around 55% to 65% during humid weather, a compact electric unit may be more consistent than passive packs alone. Keep the unit away from hanging garments and maintain clearance around intake and exhaust openings.

Apartment closet near a bathroom

In apartments, moisture from showers can drift into nearby closets, especially if the bathroom exhaust is weak or not used long enough. Desiccants can help with mild moisture, but better habits may matter more: run the exhaust fan if available, keep wet towels out of the closet, and allow the bathroom to air out before closing nearby doors.

Basement storage closet

A basement closet may reflect the humidity of the whole lower level. If the surrounding basement is damp, a small closet device may fill quickly or struggle. In that case, managing the broader basement humidity is usually more effective than only treating the closet.

Safety, Placement, and Indoor Air Quality Considerations

For any electric closet dehumidifier, follow the product instructions for clearance, temperature range, tank handling, and electrical use. Do not place powered devices where clothing, paper, or boxes can block airflow or rest against warm surfaces.

Avoid running cords through doorways where they can be pinched or damaged. Use a properly located outlet and avoid improvised setups. If the closet is in a bathroom, laundry area, or other potentially wet location, electrical safety requirements may be different from a dry bedroom closet.

Some air-cleaning products use ionizers, ozone-producing features, or UV-C components, but moisture control in a closet does not require intentional ozone generation. For indoor air quality planning, it is generally sensible to avoid devices that intentionally produce ozone in occupied spaces. UV-C components, where present in some devices, should be enclosed and used only as designed by the manufacturer.

Desiccant products should also be used carefully. Keep loose granules, liquids, or saturated containers away from children, pets, and stored items that could be damaged by spills. Choose a stable location where the container will not tip.

Maintenance and Cost Planning

Desiccant packs have a low upfront cost, but they are consumable unless designed to be recharged. In humid seasons, they may need attention more often than expected. Check the indicator, water collection chamber, or weight change according to the product format.

Electric units cost more upfront and use electricity, but they can remove moisture more consistently when the load is ongoing. Maintenance usually includes emptying the tank, wiping exterior surfaces, clearing dust from intakes, and checking that the automatic shutoff works as intended.

Plan for seasonal changes. A closet that is fine in winter may become damp in summer, while a closet on a cold wall may have issues during cooler months. Keep simple notes on humidity readings, weather, and maintenance dates so you can adjust without guessing.

If musty odors remain after humidity is controlled, clean the closet surfaces and inspect stored items. Odors can be held in shoes, cardboard, fabrics, and old storage materials even after the air becomes drier.

Table 2. Closet humidity quick plan. Example values for illustration.
Humidity and dampness action plan for closets
GoalSimple actionsToolsNote
Confirm conditionsMeasure for several days with door closed and openHygrometerCompare closet to room humidity
Stay in a moderate rangeAim around 40% to 50% when practicalHygrometer, ventilationSeason and climate affect results
Reduce mild dampnessAdd desiccant packs and reduce clutterPassive absorbersCheck saturation regularly
Manage persistent humidityUse a compact electric unit with clearanceElectric dehumidifierBest for larger or damp closets
Limit moisture sourcesDry shoes, coats, towels, and bags before storageDrying rack, room airflowPrevention lowers device workload
Watch for bigger issuesInspect for leaks, condensation, or wet wallsFlashlight, moisture notesFix sources rather than masking them

Related guides: Best Indoor Humidity Level to Prevent Mold (With Seasonal Targets)Desiccant vs Compressor Dehumidifiers: Which Is Better for Cold Rooms?Dehumidifier Capacity Estimator: Room Dampness to Liters/DayBasement Dampness 101: RH Targets, Dehumidifiers, and Ventilation

Frequently asked questions

Are desiccant packs enough for a small closet?

Yes, if the closet is small and the moisture problem is mild, desiccant packs are often enough. They work best when the closet is not seeing constant moisture from a leak, bathroom steam, or poor building ventilation. A hygrometer is the easiest way to confirm whether passive control is working.

When should I choose an electric closet dehumidifier instead?

Choose an electric unit when humidity stays near or above 60%, odors return quickly, or the closet is larger and more enclosed. Electric models are also more practical when the closet is near a bathroom, laundry area, or exterior wall that regularly introduces moisture. They remove moisture more actively, but they need power, airflow clearance, and regular maintenance.

How do I know if my closet humidity is actually a problem?

A closet is more likely to have a problem if it stays noticeably damper than the room, smells musty, or shows condensation on nearby surfaces. Persistent readings above about 60% relative humidity are a useful warning sign because they can support odor and material damage over time. Measuring for several days gives a better answer than checking once.

Can a closet dehumidifier fix a leak or damp wall?

No, a closet dehumidifier can manage moisture in the air, but it does not repair leaks, seepage, or building defects. If moisture keeps coming back quickly, there may be a source problem that needs attention. In that case, the dehumidifier is only a temporary control measure.

What is the best way to place an electric unit in a closet?

Place it where air can move freely around the intake and exhaust openings, with enough space for servicing and heat release. Keep it away from hanging clothes, paper, boxes, and anything that could block airflow or touch a warm surface. Use a proper outlet and avoid cords that could be pinched by the door.

Summary: Choosing the Right Closet Dehumidifier Option

For a small closet with mild seasonal dampness, desiccant packs are usually the simplest and quietest choice. They are compact, inexpensive to start, and useful where an outlet is unavailable.

For a walk-in closet, a closet near a moisture source, or a space that stays near or above 60% relative humidity, an electric dehumidifier is often more practical. It can remove moisture more actively, but it needs safe placement, power, clearance, and regular tank maintenance.

The most reliable approach is to measure first, reduce avoidable moisture, improve airflow, and then choose the smallest practical option that keeps the closet in a moderate humidity range. If the closet continues to feel damp despite those steps, look beyond the closet for leaks, ventilation problems, or whole-room humidity issues.