HEPA Pre-Filters: How Much They Extend HEPA Life

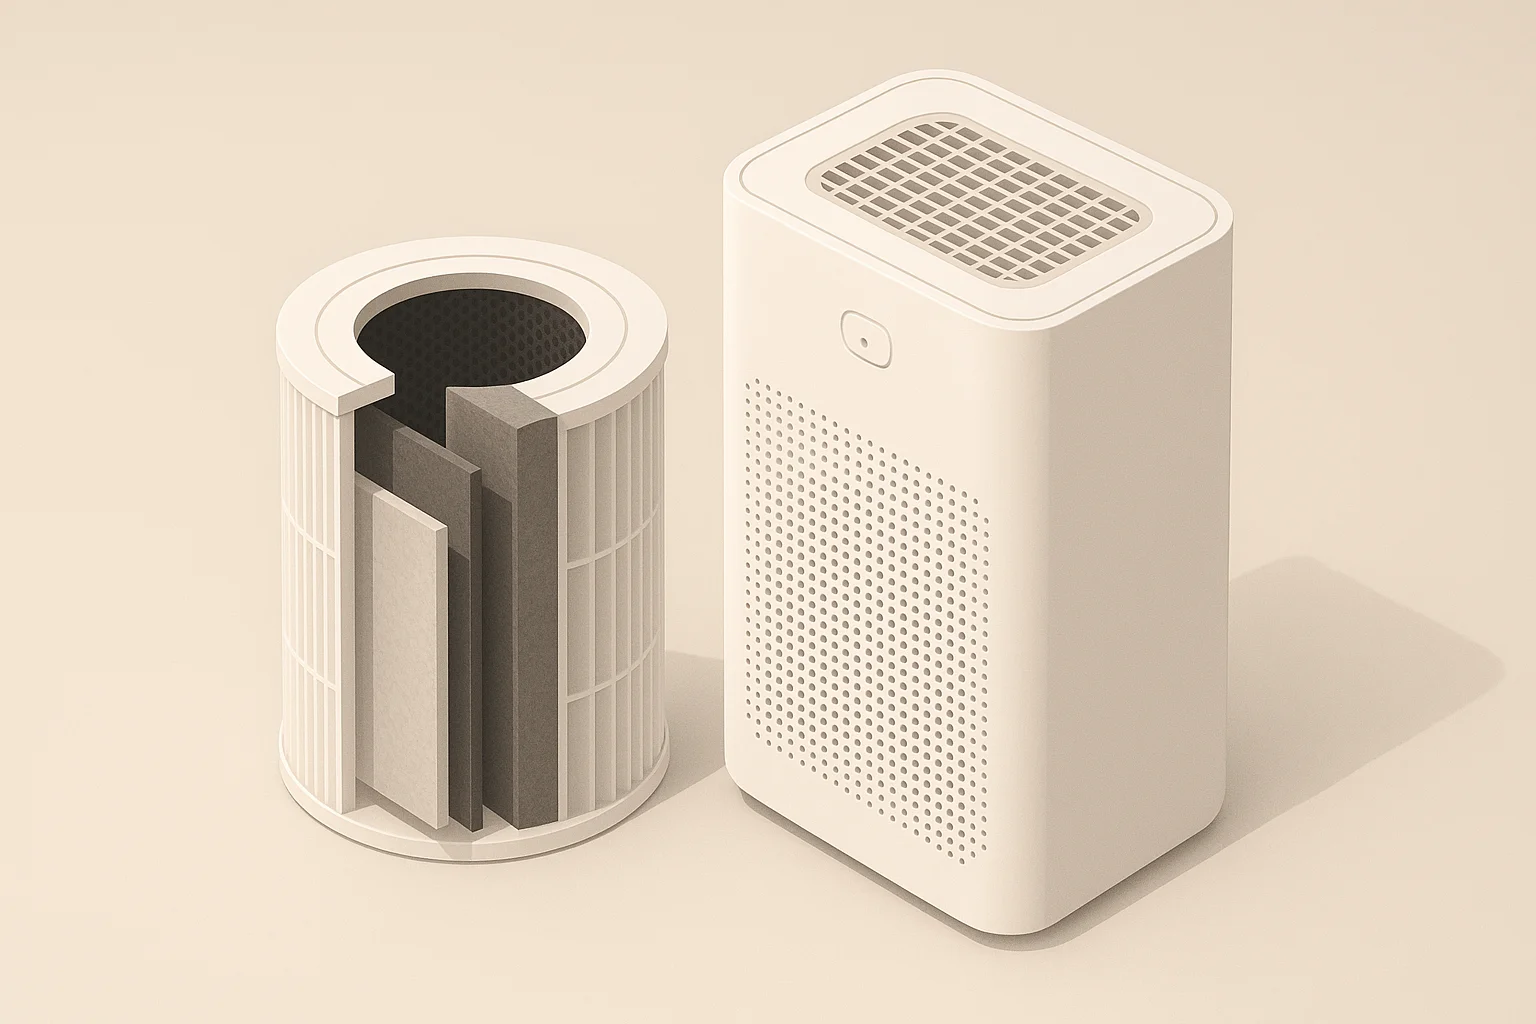
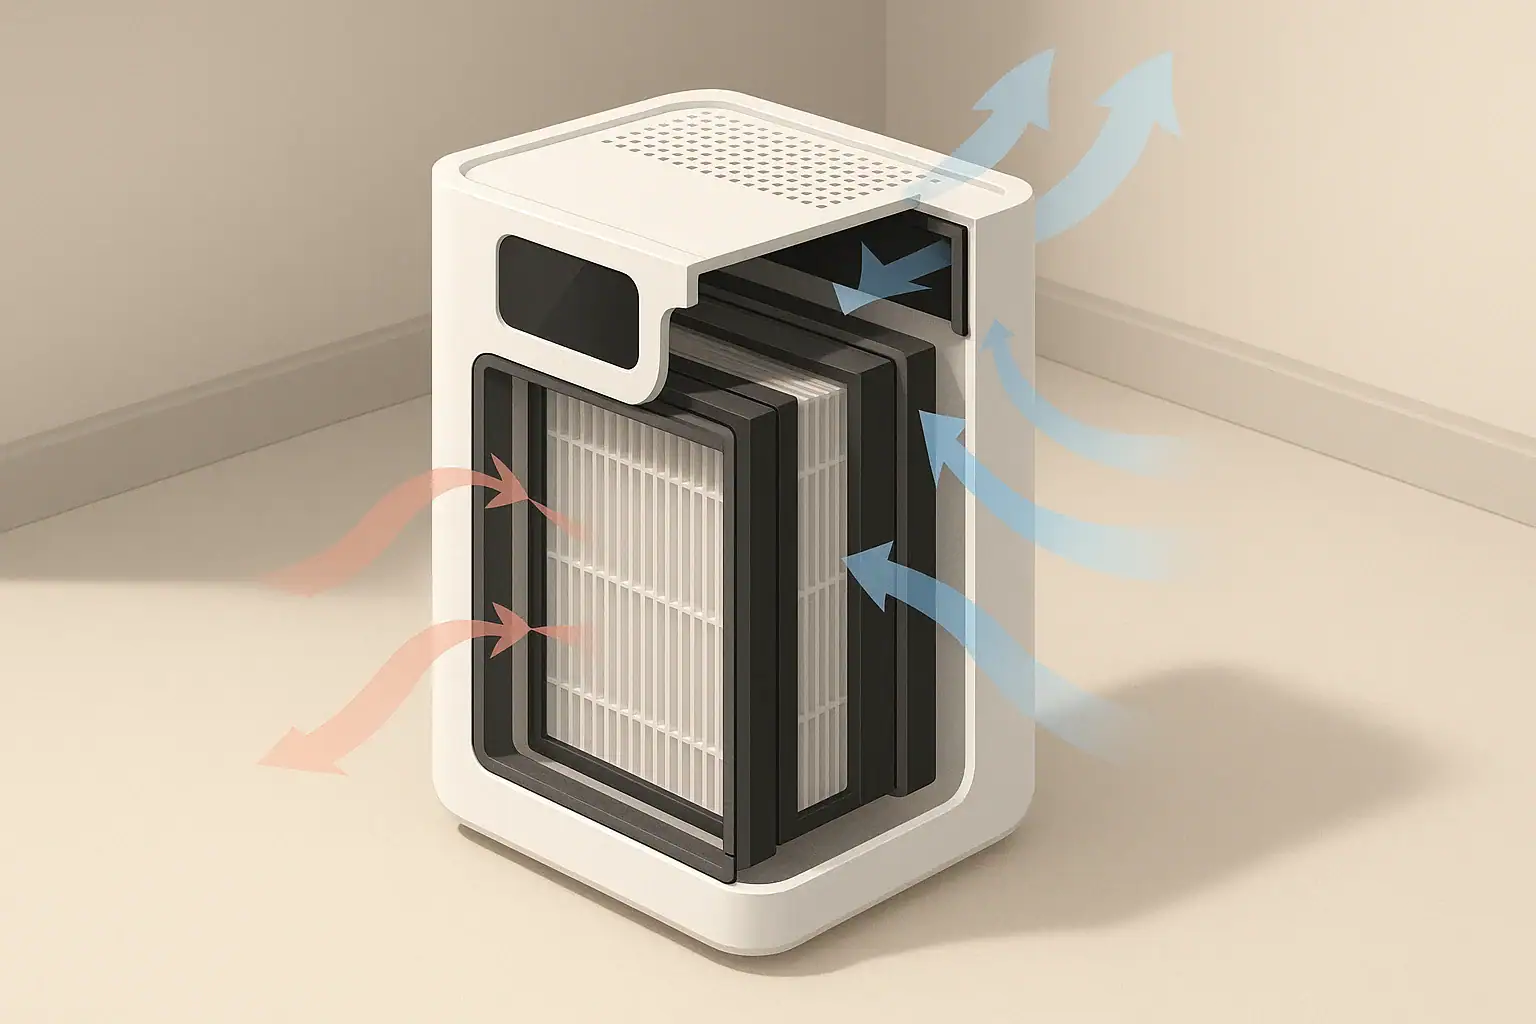
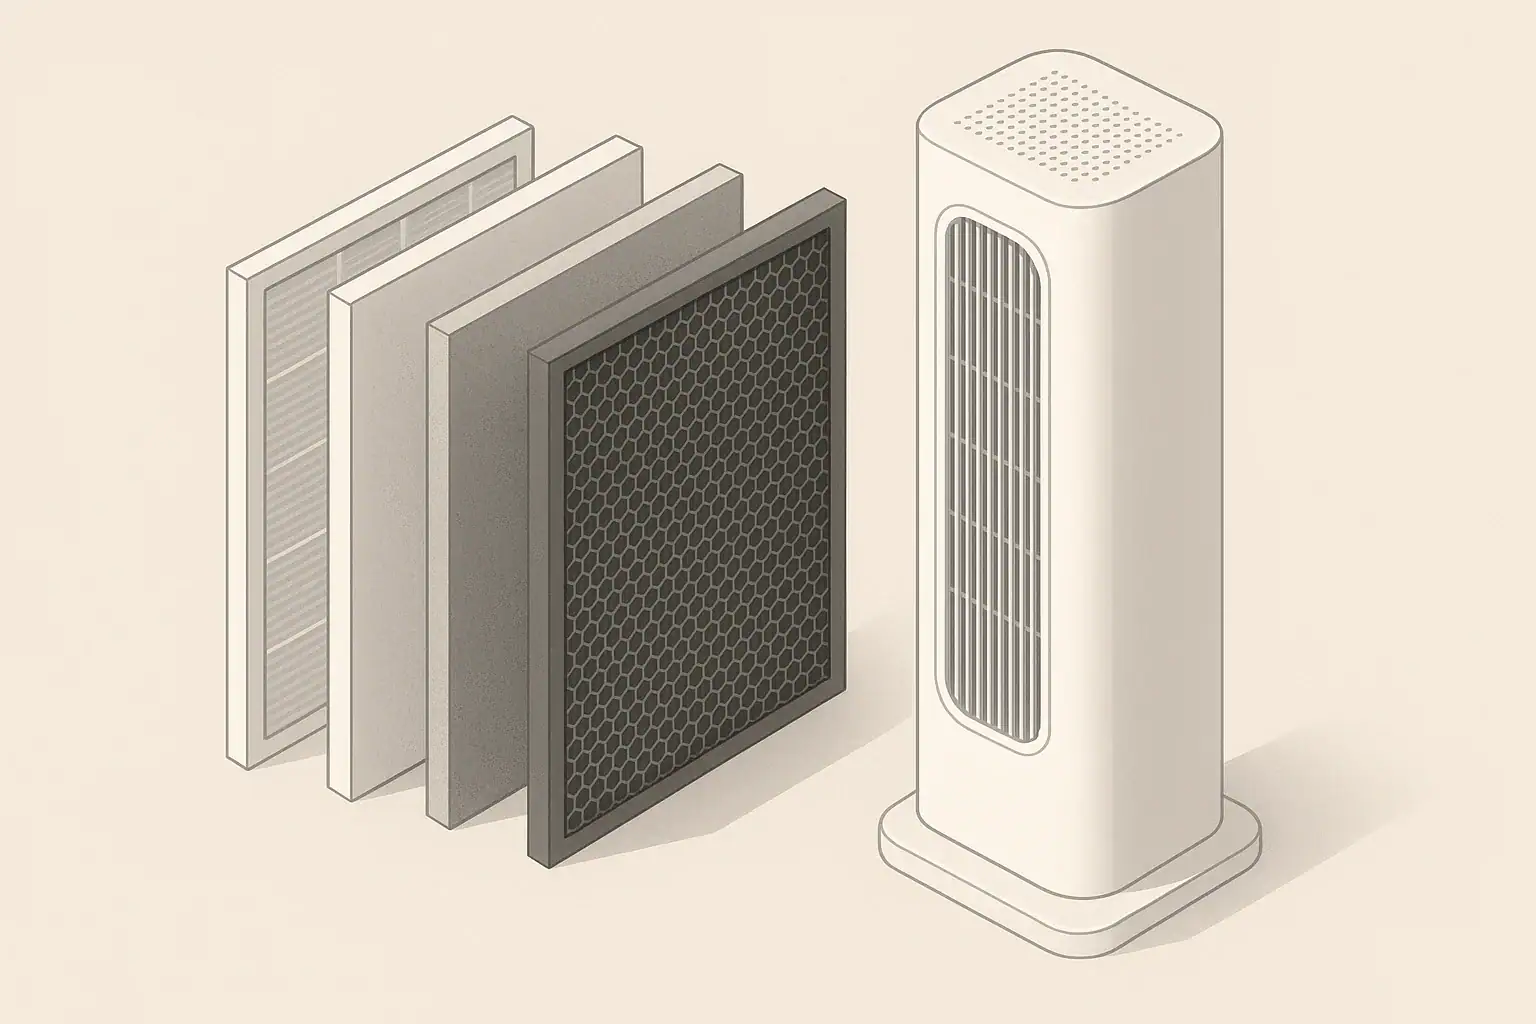
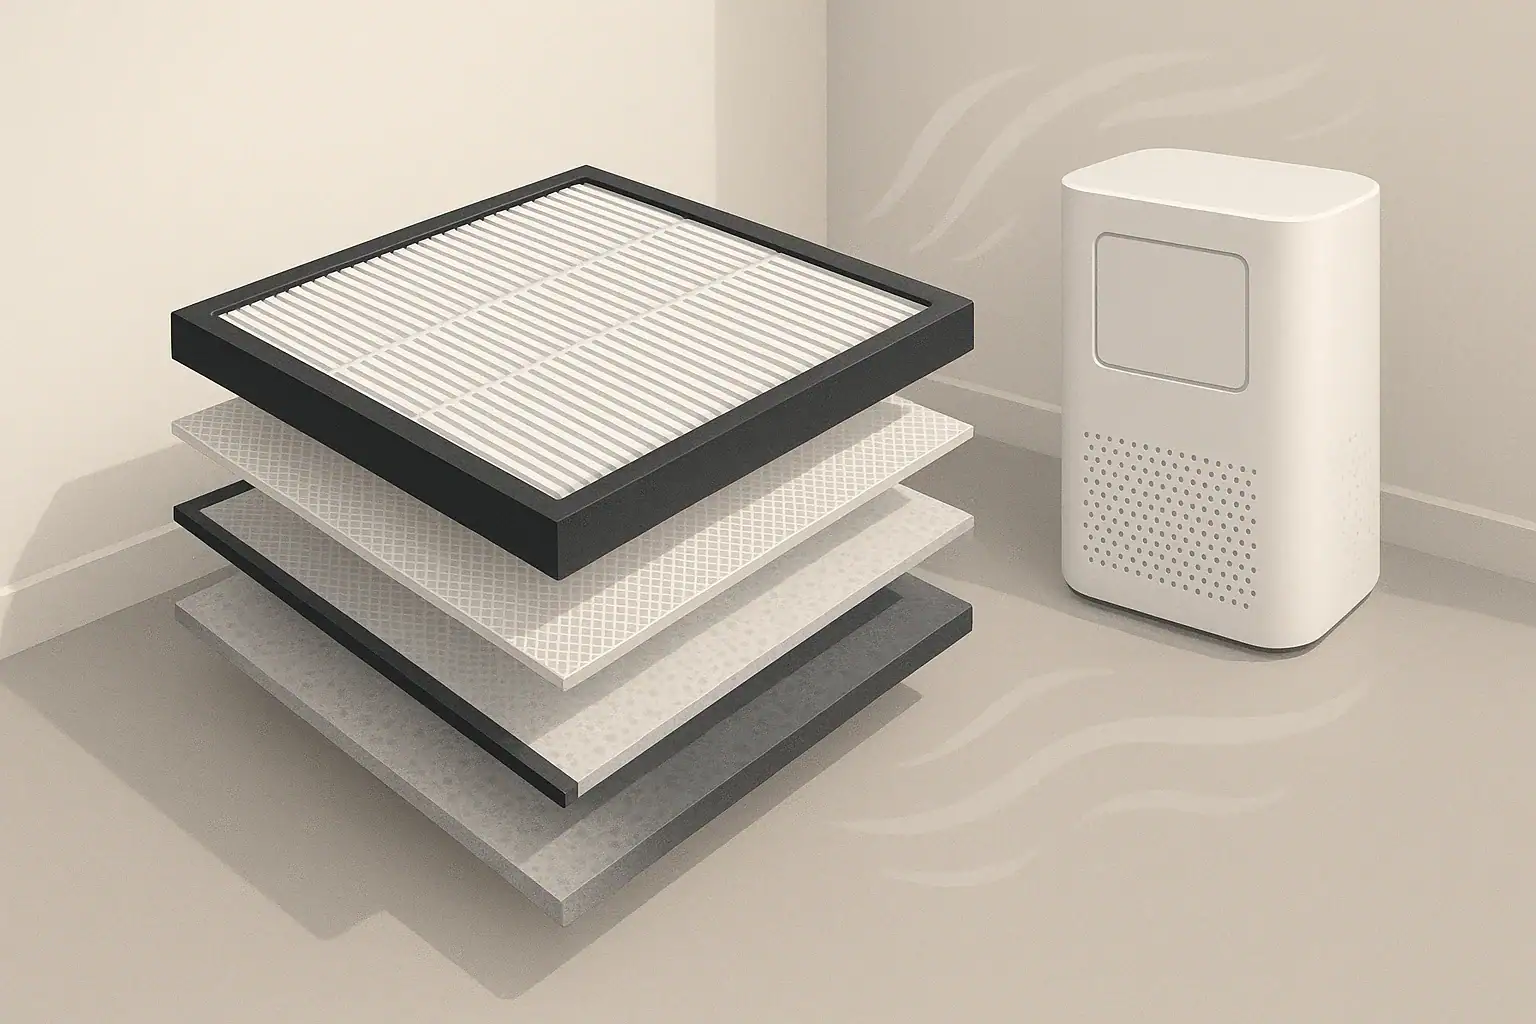
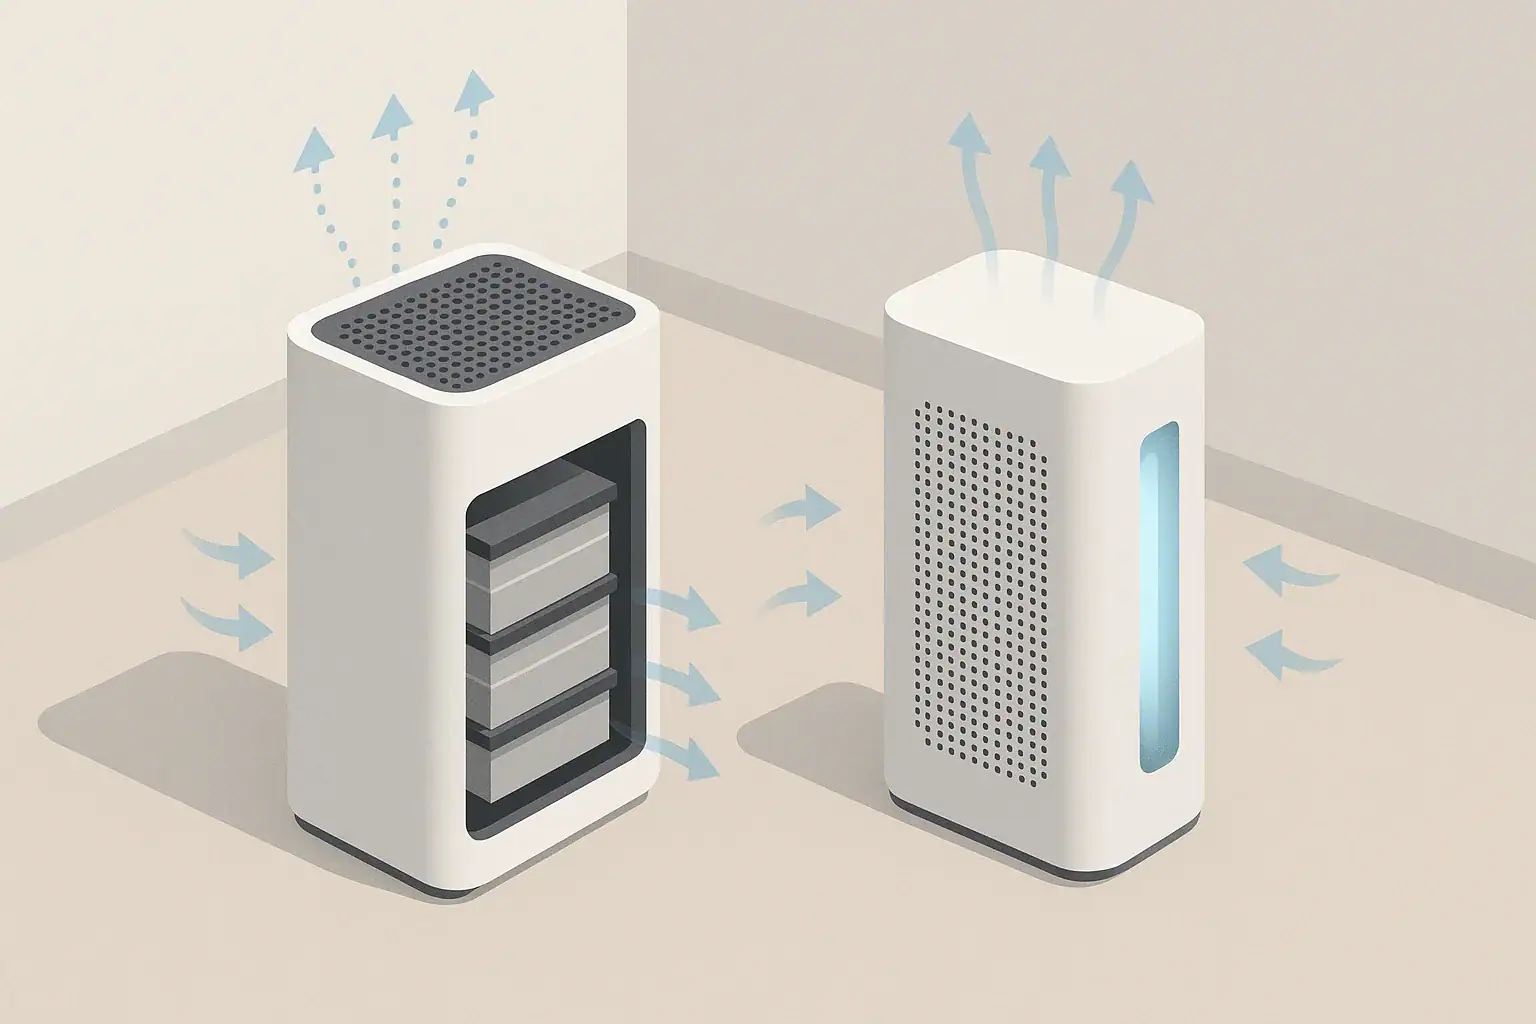
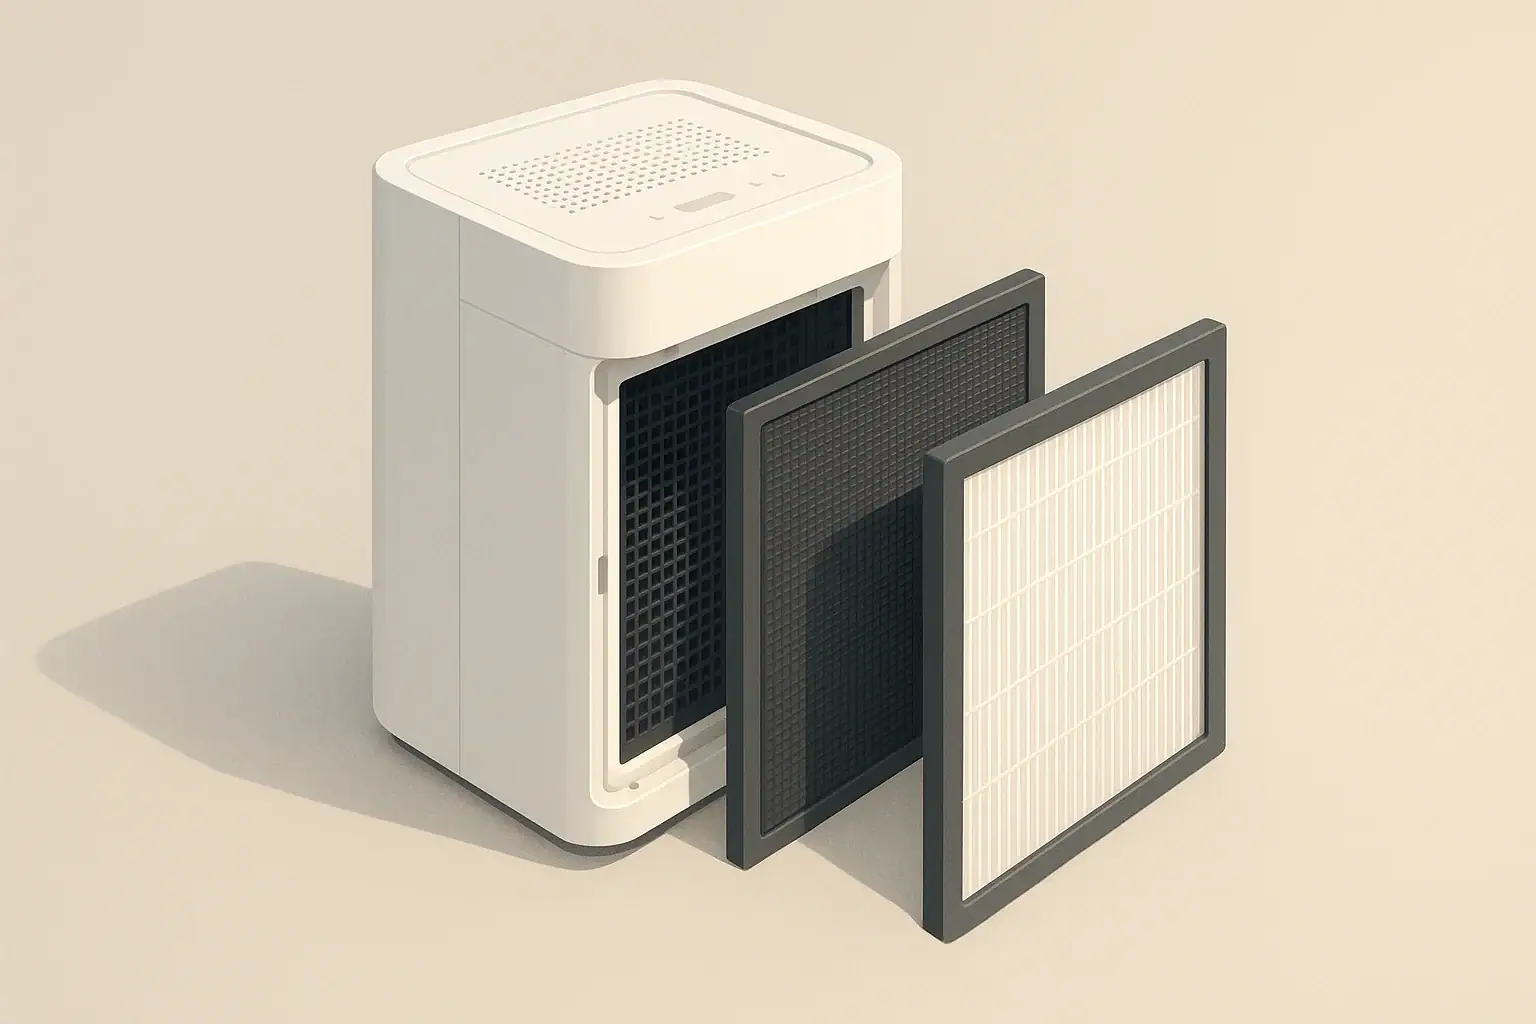
Isometric view of layered pre-filter and HEPA filter in purifier

HEPA pre-filters are an often-overlooked component of many home air purifiers. Before air reaches the high-efficiency particulate air (HEPA) media, a pre-filter captures larger particles such as hair, lint, and coarse dust. That front-line protection can reduce the rate at which the main HEPA element loads with debris, helping preserve airflow and extend the life of the primary filter. The degree of benefit depends on factors such as household dust levels, pet shedding, how often the pre-filter is cleaned or replaced, and how intensively the purifier is used. This article explains what pre-filters do, how they protect HEPA filters, typical lifespan impacts, the types available, and maintenance practices that help maximize filter life. Use the table of contents below to jump to the section you need.

What Is a HEPA Pre-Filter?

In many home air purifiers, the HEPA filter is not the first layer that incoming air touches. A HEPA pre-filter is a separate, usually less dense filter stage placed in front of the main HEPA media. Its job is to catch larger debris before it reaches the finer fibers of the HEPA filter.

Typical pre-filters are made from materials such as non-woven fabric, mesh, or foam. Some are washable or vacuumable, while others are disposable pads that are replaced more frequently than the primary HEPA element.

Pre-filters are designed to capture:

  • Larger dust and lint
  • Hair and pet fur
  • Fibers from fabrics and carpets
  • Some larger pollen and particulate matter

By intercepting this coarse material, the pre-filter reduces how quickly the HEPA media fills up, which can extend the useful life of the HEPA filter and help keep airflow more stable over time.

How Pre-Filters Protect HEPA Filters

The main role of a HEPA filter is to capture fine particles such as small dust, smoke particles, and other tiny airborne solids. These particles are measured in micrometers (microns), and HEPA media is engineered to trap a very high percentage of them.

However, HEPA media can clog quickly if it is asked to capture everything from coarse dust and hair to ultra-fine particles. A pre-filter acts as a first barrier, removing the bulkier material that would otherwise block the HEPA surface. This has several effects:

  • Slower loading of HEPA media: The HEPA filter accumulates fine particles more gradually, delaying the point at which its airflow resistance becomes too high.
  • More stable airflow and CADR: When the HEPA filter clogs more slowly, the purifier can maintain more consistent clean air delivery over its service life.
  • Less visible dirt buildup: The pre-filter collects the most visually obvious debris, so the HEPA element looks cleaner for longer, even though it is still capturing fine particles.
  • Potential cost savings: Because HEPA filters are usually the most expensive replacement components, protecting them with an inexpensive or washable pre-filter can reduce overall maintenance cost.

The effectiveness of a pre-filter depends on how well it is matched to the purifier’s fan capacity and HEPA area. A pre-filter that is too restrictive can reduce airflow, while one that is too open may let too much debris through. Most consumer units are designed as a system, with pre-filter and HEPA working together.

Table 1. Comparison of HEPA filters with and without a pre-filter

Example values for illustration.

Illustrative comparison of HEPA-only vs HEPA + pre-filter setups
Setup type What it captures first Typical HEPA replacement interval example Pros Considerations
HEPA only All particle sizes hit HEPA directly About 6–12 months in average use Simpler filter stack HEPA clogs faster with hair and lint
HEPA + basic pre-filter Hair, lint, larger dust first About 9–18 months in similar conditions HEPA stays cleaner longer Pre-filter needs more frequent attention
HEPA + washable pre-filter Coarse dust and pet hair About 12–24 months in lighter use Lower long-term filter cost Requires regular user cleaning
HEPA + dense pre-filter More fine dust before HEPA Varies; can be longer if airflow is maintained Extra protection for HEPA media May reduce airflow if not maintained
HEPA + pre-filter + carbon layer Coarse dust, then particles and some gases Often aligned to 12+ months for HEPA in examples More comprehensive filtration stack More pieces to track for replacement
HEPA + pre-filter in dusty home High dust load and lint first Often toward lower end of any range Better than HEPA only in same space Maintenance interval may still be short

How Much Do HEPA Pre-Filters Really Extend Filter Life?

There is no single percentage that applies to every purifier or home. The amount of life extension a pre-filter provides depends on several variables:

  • How dusty the home is and how often it is cleaned
  • Whether there are pets that shed hair and dander
  • How many hours per day the purifier operates
  • The fan speed used most of the time
  • Whether the pre-filter is cleaned or replaced on schedule

Manufacturers often specify a general HEPA replacement interval (for example, around one year of typical use). In practice, with an effective and well-maintained pre-filter, households sometimes see the HEPA element remain serviceable for longer than the baseline estimate. In dustier conditions or with heavy use, that extra life may be more modest, but it is still usually better than running without a pre-filter.

Illustrative lifespan scenarios

The following examples are not rules, but they help show how pre-filters influence HEPA life:

  • Light use, low dust: In a relatively clean apartment, running a purifier several hours a day on lower speeds with a maintained pre-filter, the HEPA element may remain within acceptable airflow and efficiency ranges beyond a year of use.
  • Average use, typical dust: In a typical home with moderate dust and occasional pet hair, a good pre-filter and routine cleaning might keep HEPA replacement closer to the upper end of the usual recommended interval.
  • Heavy use, high dust and pets: In a busy home with multiple pets and high fan speeds, a pre-filter may prevent very rapid clogging, but HEPA replacement could still be needed on approximately the schedule indicated in the manual, or even earlier if airflow drops noticeably.

Because indoor conditions are so variable, it is helpful to pay attention to signs that the HEPA filter is approaching the end of its useful life:

  • Noticeable reduction in airflow at the same fan setting
  • Filter status indicators on the device (if present)
  • Visible darkening and loading of the HEPA media, especially if combined with reduced performance

Pre-filters do not eliminate the need to replace HEPA filters. Instead, they can help you reach or modestly exceed the expected interval while sustaining more consistent performance.

Types of HEPA Pre-Filters

Not all pre-filters are the same. The design affects how they protect the HEPA filter and how you maintain them.

Washable or vacuumable pre-filters

Some pre-filters are designed to be cleaned and reused. They often resemble a mesh or a sturdy non-woven fabric.

Typical characteristics include:

  • Reusability: Can be washed with water (and allowed to dry fully) or vacuumed to remove dust and lint.
  • Lower ongoing cost: You purchase the pre-filter less often, focusing replacement spending on the HEPA stage.
  • Maintenance responsibility: Performance depends on how regularly and gently you clean the material.

It is important to follow the product manual for how and how often to clean, because some materials can be damaged by harsh scrubbing, hot water, or strong detergents.

Disposable pre-filter pads

Other systems use thin disposable pre-filter layers that are discarded and replaced. They may be separate sheets or integrated frames that sit in front of the HEPA element.

Characteristics of disposable pre-filters include:

  • Convenience: No washing or drying; you simply replace on a schedule or when visibly dirty.
  • More consistent performance: Each new pad starts clean and predictable, which can help maintain airflow and pre-filtration.
  • Ongoing cost: You need to purchase replacements more frequently, though they are usually less expensive than HEPA filters.

Combined pre-filter and carbon layers

In some purifiers, the pre-filter is combined with an activated carbon layer. The same piece may provide both coarse particle capture and some adsorption of odors or certain gases.

Key points about these combination layers:

  • Multiple roles: They protect the HEPA and provide a separate function related to gases and odors.
  • Shorter change interval: Carbon effectiveness typically declines with exposure, so this layer may need replacement more frequently than the HEPA filter.
  • HEPA protection still present: Even when odor reduction fades, the layer usually continues to serve as a mechanical pre-filter until it is replaced.

Maintaining Pre-Filters to Maximize HEPA Life

The way you maintain the pre-filter is a major factor in how much extra life the HEPA filter gains. A clogged pre-filter can actually reduce airflow significantly, even if the HEPA media is still relatively clean. Regular attention keeps the entire system balanced.

Basic maintenance habits

For most home units, practical habits include:

  • Check the pre-filter regularly: Inspect at least once a month in average conditions, more often if you notice high dust levels or have multiple pets.
  • Follow cleaning or replacement guidance: Use the intervals suggested in the manual as a starting point, adjusting based on visible buildup and performance.
  • Handle filters gently: Rough handling can tear or deform materials, creating gaps where unfiltered air can bypass the filter.
  • Allow washed pre-filters to dry fully: Moisture held in the filter can restrict airflow and may create conditions that are not ideal inside the purifier.

Signs the pre-filter needs attention

Beyond calendar reminders, there are practical signs that a pre-filter is due for cleaning or replacement:

  • A visible gray or fuzzy layer of dust and hair on the surface
  • Noticeable reduction in airflow at familiar fan settings
  • More dust settling near the purifier intake than usual

Addressing these early helps the pre-filter continue protecting the HEPA stage, supporting a longer useful life and steadier performance.

Table 2. Example planner for filter replacement intervals

Example values for illustration.

Illustrative filter replacement planner for a typical home
Filter type Typical interval range example What changes it Reminder
Washable pre-filter Clean every 1–3 months Pets, visible dust, smoky events Let fully dry before re-installing
Disposable pre-filter pad Replace every 2–6 months Dust load, fan speed usage Check visually each month for heavy loading
Carbon pre-filter layer Replace about every 3–6 months Odor levels, cooking, smoking nearby Odor reduction often fades before airflow issues
Main HEPA filter (with pre-filter) About 9–18 months in average use Hours of operation, dust, maintenance quality Use device indicators plus airflow and visual checks
Main HEPA filter (no pre-filter) About 6–12 months in average use Higher exposure to lint and hair Expect shorter intervals if air is dusty
All filters during smoky season May need earlier attention Extended high-speed use for fine particles Inspect more often during and after smoke events

Other Factors That Influence HEPA Filter Life

Pre-filters are only one piece of the picture. Several other factors can significantly affect how long a HEPA filter remains effective.

Room size and airflow

If a purifier is undersized for the room, it may run at higher speeds more often to move enough air. Higher fan speeds push more air (and particles) through the filters per hour, which can shorten the interval before the HEPA is loaded with fine particles, even with a good pre-filter.

On the other hand, using a purifier with adequate capacity for the space can allow more time at moderate speeds while still achieving sensible air changes per hour. This may help lengthen filter life while controlling noise.

Location in the home

Where the purifier sits also affects how much dust and debris it encounters:

  • Near doors and hallways: May pull in more tracked-in dust and fibers.
  • Low to the floor: Often exposed to more settled dust and pet hair.
  • Near soft furnishings: Can draw in fibers from carpets, rugs, and upholstery.

Thoughtful placement can moderate how much heavy debris reaches the intake, supporting the work of the pre-filter.

Housekeeping and dust sources

Basic housekeeping can have a noticeable impact on filter life. Regular vacuuming with a well-maintained vacuum, dusting with damp cloths or microfiber, and controlling clutter can reduce the amount of airborne and resuspended dust. This in turn lightens the load on both the pre-filter and the HEPA stage.

Other sources to be aware of include home projects that generate dust, frequent burning of candles, and open windows during windy or dusty conditions. During these activities, filters tend to load faster. Checking the pre-filter and HEPA more often around such events can help you respond before airflow falls off sharply.

Using basic air quality monitoring as a guide

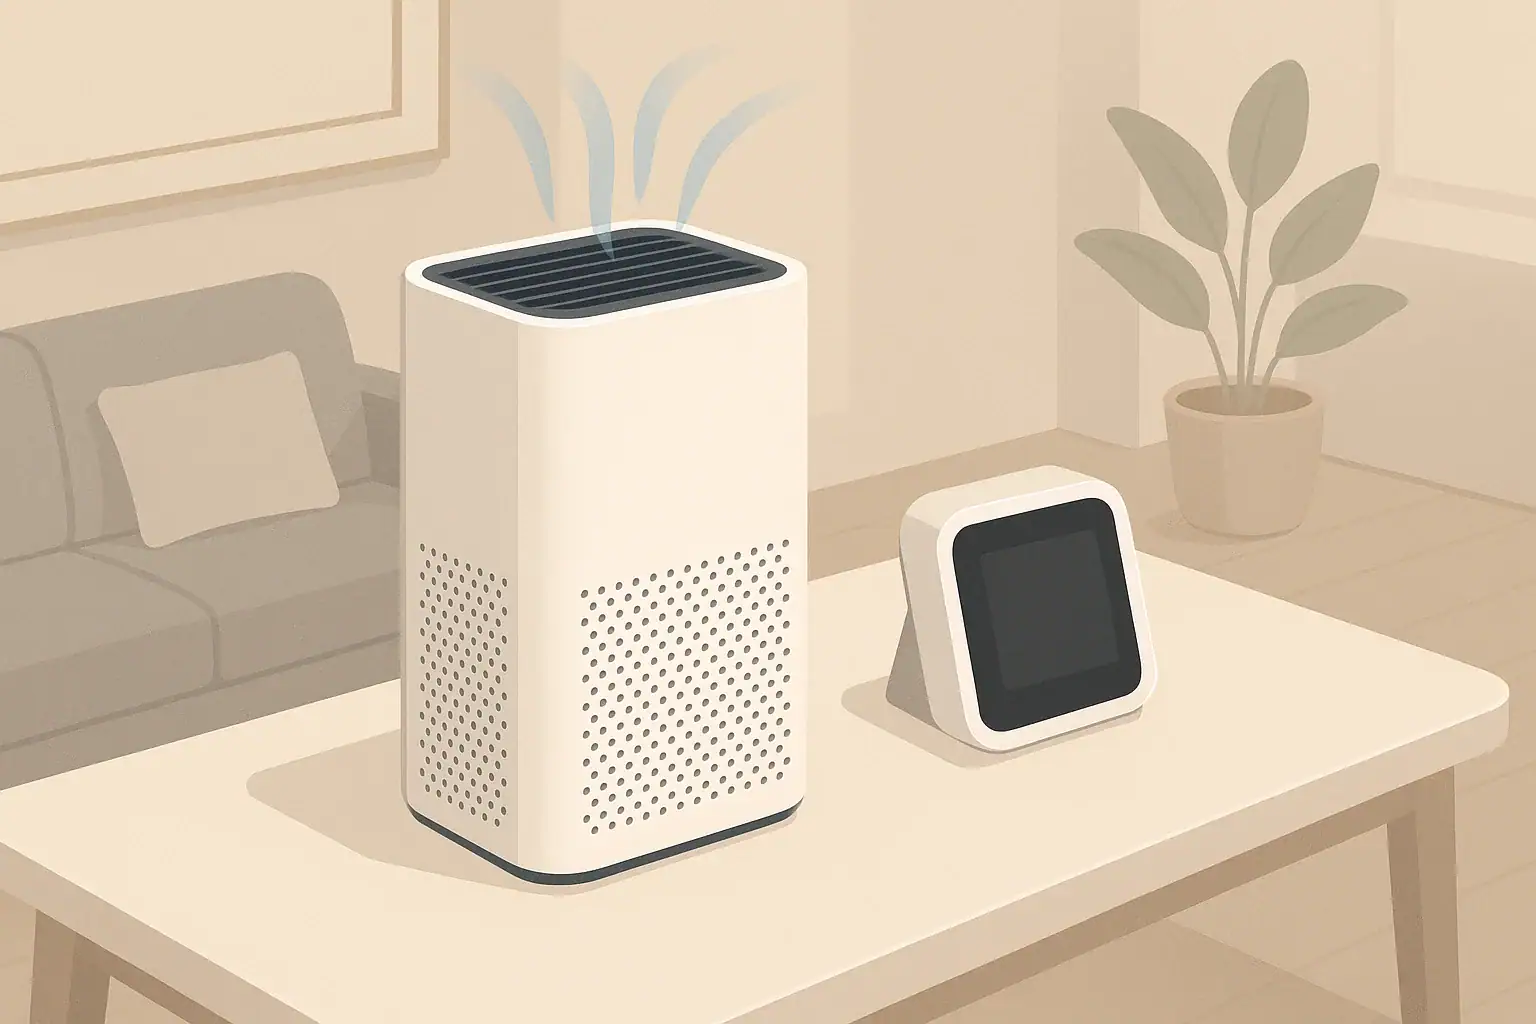
Some people use simple particle monitors that show general particulate levels in the home. While not necessary for everyone, these can help you connect filter wear with actual air conditions. For example, if background particle levels stay elevated even with the purifier running on familiar settings, it may be time to inspect the pre-filter and HEPA filter, along with considering room size, ventilation, and placement.

Used together with routine visual checks and any built-in filter indicators on the purifier, this can provide a practical picture of when maintenance is due and how effectively your pre-filter is supporting HEPA life.

Frequently asked questions

How often should I clean or replace a HEPA pre-filter?

Frequency depends on the pre-filter type and indoor conditions. Washable pre-filters are typically cleaned every 1–3 months, while disposable pads are often replaced every 2–6 months; inspect visually monthly and increase frequency if you have pets, heavy dust, or run the purifier continuously.

Can a clogged HEPA pre-filter reduce purifier performance?

Yes. A clogged pre-filter increases airflow resistance and can lower clean air delivery and make the HEPA stage work harder; cleaning or replacing the pre-filter restores airflow and helps maintain overall performance.

Do HEPA pre-filters remove odors or gases?

Plain mechanical pre-filters capture coarse particles but do not remove gases or most odors. Some units combine a pre-filter with activated carbon, which can adsorb certain odors and gases but loses effectiveness over time and requires its own replacement schedule.

How much extra life can a HEPA pre-filter add to the main HEPA element?

There is no fixed percentage because it depends on dust load, pet shedding, runtime, and maintenance. Typical illustrative ranges in consumer units show HEPA-only replacement around 6–12 months compared with about 9–18 months with a basic pre-filter and up to 12–24 months with a well-maintained washable pre-filter in lighter-use scenarios.

Is it safe to wash every pre-filter I find in a purifier?

No. Only pre-filters specified as washable should be washed; others are disposable and may be damaged by water. Always follow the manufacturer’s cleaning instructions, handle materials gently, and allow washable filters to dry completely before reinstalling.

Washable “HEPA” Filters: What Happens to Performance Over Time

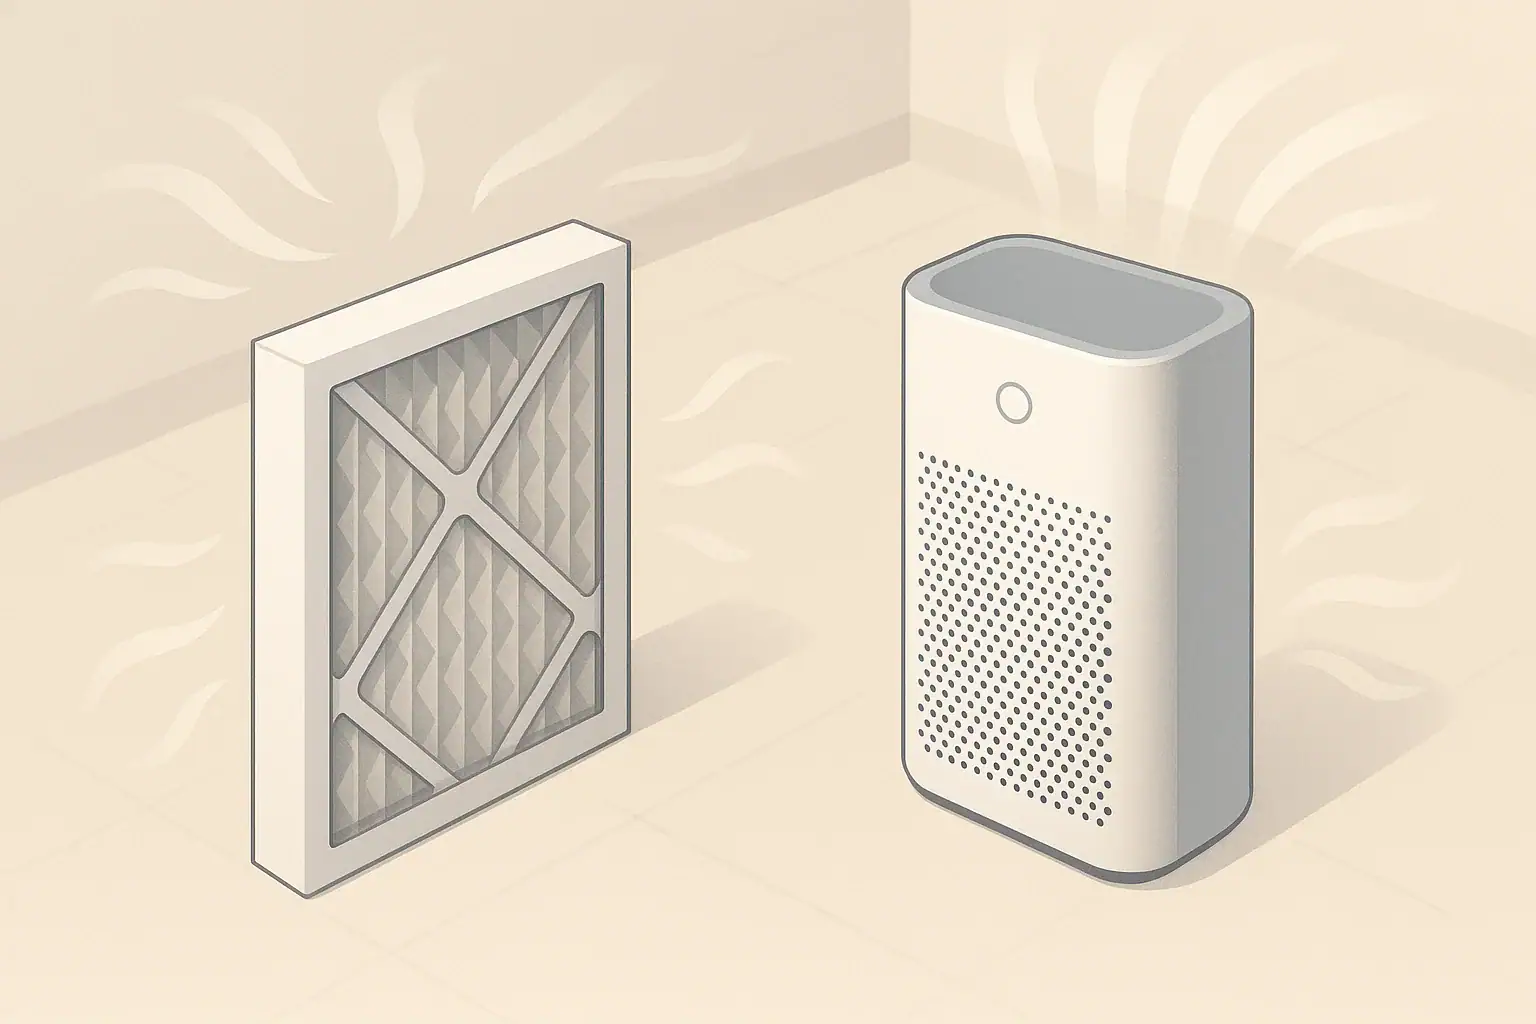
Isometric illustration of layered washable air filter beside purifier

Many air purifiers and HVAC accessories are marketed with washable or reusable filters that use words like “HEPA-type,” “HEPA-style,” or “HEPA-like.” These terms can be confusing, especially if you are trying to understand what happens to filtration performance over months or years of use.

In most cases, washable filters are not certified true HEPA filters. True HEPA refers to filters that meet a specific particle capture efficiency when tested under a standard, usually capturing at least 99.97% of very small particles under controlled conditions. Washable filters typically use different materials and designs that allow cleaning with water or gentle washing, but this convenience comes with tradeoffs.

Common types of washable or reusable filters include:

  • Permanent electrostatic filters that use charged fibers or mesh to attract particles and can be rinsed.
  • Foam or mesh pre-filters that capture larger dust and hair before air reaches a finer filter.
  • Washable fiber pads with looser weave compared to dense HEPA media.

What Are Washable “HEPA” Filters?

Some devices combine a washable pre-filter with a non-washable true HEPA filter. In that setup, only the pre-filter is intended for washing, and the HEPA filter is replaced periodically. When people talk about washable “HEPA” filters, they are often referring to these reusable pre-filters or to HEPA-type filters that do not meet full HEPA standards.

Why True HEPA Media Is Rarely Washable

To understand performance over time, it helps to know how HEPA-type filters work. Fine particle filters rely on a dense mat of fibers. As air flows through, particles are captured by several mechanisms, including interception, impaction, and diffusion. The balance between efficiency (how many particles are removed) and resistance (how hard the fan has to work to push air through) is very delicate.

True HEPA media is usually designed to be dry-only. When saturated with water and then dried, the fibers can shift, clump, or break. This can create small gaps or change the pore structure of the filter. Over time, repeated washing may:

  • Lower particle capture efficiency, especially for the smallest particles.
  • Increase air leakage through microchannels or weak spots.
  • Cause the filter material to shed fibers or deform.

Because of these risks, certified HEPA filters are almost always specified as disposable. If a filter is advertised as fully washable and also called HEPA, it is usually safer to assume it is a HEPA-type or high-efficiency filter, not a standard lab-tested HEPA cartridge.

Table 1. Washable filter types compared with replace-only HEPA

Example values for illustration.

Generalized comparison of common household filter options
Filter type Typical maintenance Fine particle capture (relative) Airflow resistance (relative) Notes
Washable mesh pre-filter Rinse every few weeks Low Low Good for hair and large dust; protects main filter.
Washable electrostatic panel Rinse monthly Low to medium Low to medium Performance depends on design and airflow speed.
Washable HEPA-type cartridge Rinse as directed Medium (may decline with age) Medium Efficiency and durability vary widely.
Disposable pleated MERV-style Replace every few months Medium to high Medium to high Used in many HVAC systems.
Disposable true HEPA cartridge Replace every 6–18 months (example) High High Designed for tested efficiency, not washing.

How Washable “HEPA” Filters Change With Use

All filters change over time as they collect particles. With washable filters, performance shifts in two main ways: how well they stop particles and how easily air can move through them.

Efficiency vs. Airflow Over the Filter’s Life

Right after you install a clean filter, it usually has its highest airflow because the media is not yet loaded with dust. As time passes:

  • Particle capture efficiency can increase slightly in the early phase as dust partially blocks tiny pores, helping catch smaller particles.
  • Airflow resistance almost always increases as dust accumulates, making the fan work harder to move the same amount of air.

For washable HEPA-type filters, this cycle repeats each time you clean the filter. However, cleaning never fully restores the filter to its original state. Small particles can embed deeply in the fibers, and mechanical action during washing can reshape the material.

Over many wash cycles, some users observe one or more of the following trends:

  • Airflow gradually returning closer to “new” levels after each wash, but not quite matching it.
  • Efficiency against the finest particles slowly declining as the media loosens or fibers degrade.
  • Visible staining that does not rinse out, suggesting persistent embedded material.

Mechanical Wear and Tear From Washing

Water and physical handling introduce stresses that dry filters do not experience. Each wash can contribute to:

  • Fiber fatigue from bending, squeezing, or shaking.
  • Bond failure where layers or pleats are glued or heat-bonded.
  • Edge damage where the filter meets the frame, increasing the risk of bypass leaks.

These effects usually happen slowly, so they may not be visible after just a few cycles. However, the cumulative impact over dozens of washes can be significant for both performance and structural integrity.

Risk of Bypass Leakage

Even if the filter media itself is still effective, performance can drop if air finds an easier path around it. This is called bypass leakage. For washable filters, leakage risk can increase over time when:

  • The frame warps slightly from repeated wetting and drying.
  • Gaskets or seals become compressed, cracked, or misaligned.
  • Edges fray, creating small gaps between the media and the frame.

Because household air purifiers often rely on tight seals, a small crack or warp can noticeably reduce the overall clean air delivery, even if the filter material still appears intact.

Cleaning Methods and Their Impact on Performance

How you clean a washable HEPA-type filter strongly influences how well it will perform over time. Manufacturers often specify certain methods for a reason. Deviating from those directions can accelerate wear or affect filtration.

Rinsing vs. Washing With Detergent

Simple rinsing with lukewarm water is usually the gentlest option for compatible filters. It can remove loose dust without aggressive mechanical action. Using detergents or soaps may seem helpful but can introduce other issues:

  • Residual surfactants may stay on fibers, potentially changing how particles interact with the media.
  • Hard scrubbing can stretch or tear delicate fiber mats.
  • Strong chemicals can weaken glues or plastic frames.

Unless directions say otherwise, a light rinse, sometimes paired with vacuuming the surface, is generally less risky than a full soapy wash.

Drying Time and Moisture Concerns

Filters must be fully dry before being reinstalled. If a washable HEPA-type filter goes back into service while damp:

  • It can increase resistance to airflow until it dries.
  • Fine particles may clump on the surface rather than distribute through the depth of the media.
  • Moist conditions in the fibers can encourage unwanted biological growth.

Drying can take many hours, depending on filter thickness and ambient humidity. For people who rely on continuous air cleaning, this downtime is important to consider.

Cleaning Frequency and Diminishing Returns

It is tempting to wash a filter as soon as it looks dusty, but over-cleaning can shorten its useful life. Most washable HEPA-type filters function best when cleaned at intervals that balance airflow, noise, and energy use with long-term durability.

Signs that a filter may need cleaning include:

  • Noticeably louder fan noise on the same speed setting.
  • Reduced perceived airflow from the outlet vents.
  • Dust build-up that does not brush or vacuum off easily.

If performance feels acceptable and manufacturer guidance allows, stretching the time between full washes may slow down mechanical wear and keep long-term efficiency higher.

How Performance Changes Compare With Disposable Filters

Both washable and disposable filters gradually load with particles, but their end-of-life behavior is different. Disposable HEPA filters are designed with a predictable decline: as they fill, resistance rises, and eventually the filter is replaced entirely, restoring both airflow and efficiency.

With washable HEPA-type filters, the curve is more complex. After each wash, the filter regains some of its airflow and some of its efficiency, but rarely to the original level. Over a long timeline, this can look like a gentle downward slope in performance with occasional partial resets.

Cost, Convenience, and Indoor Air Plans

Washable filters appeal because they reduce the number of replacements needed. However, there are tradeoffs that matter for overall indoor air quality planning:

  • Lower ongoing material cost but more time spent cleaning and drying.
  • Less waste from discarded filters, but potentially more energy use if reduced efficiency requires running fans at higher speeds for similar results.
  • Less predictable performance over time, since changes depend on real-world handling and cleaning habits.

For people focusing on fine particle reduction (such as smoke, traffic particles, or very small dust), it can be helpful to think of washable filters as part of a broader strategy that may also include replace-only HEPA filters, source control, and ventilation.

Table 2. Example planner for filter replacement and cleaning

Example values for illustration.

Illustrative intervals for different household filter types
Filter type Typical interval range (example) What changes the interval Reminder
Washable pre-filter 2–8 weeks between rinses Pet hair, visible dust, fan speed use Inspect visually; clean when clearly dusty.
Washable HEPA-type main filter 3–12 months between deep washes Particle levels, smoke exposure, cleaning method Avoid harsh scrubbing to extend life.
Disposable HEPA filter 6–18 months before replacement Usage hours, fan speed, indoor dust Follow device indicator or scheduled checks.
HVAC return filter (pleated) 1–3 months before replacement Seasonal use, occupants, renovations Check more often during heavy use.
Carbon or odor filter 3–12 months before replacement Cooking, smoking, chemical use Odor control fades before airflow is affected.

Practical Tips for Using Washable “HEPA” Filters

For households that choose washable HEPA-type filters, a few practical habits can help keep performance more consistent over time.

Match Expectations to Filter Type

First, identify exactly what role the washable filter plays in your setup:

  • If it is a pre-filter, its main job is to protect a finer filter by catching larger particles. In this case, small changes in its efficiency are less critical.
  • If it is the only filter stage in a device, its long-term behavior matters more, since you rely on it for most particle capture.
  • If it sits in front of a true HEPA filter, cleaning it regularly can help extend the life of the non-washable HEPA stage.

Use Gentle Cleaning and Careful Handling

To minimize long-term performance loss:

  • Follow any written directions for water temperature and cleaning frequency.
  • Avoid twisting, wringing, or bending the filter media.
  • Let the filter air-dry fully on a clean surface before reinstalling.
  • Inspect seals, gaskets, and frames for warping or cracks as the filter ages.

Track Subjective Performance Over Time

You may notice gradual changes before any indicator light or schedule suggests maintenance. Helpful checkpoints include:

  • Fan noise at usual settings compared with when the device was new.
  • Airflow strength felt by hand at the outlet.
  • General dust accumulation on nearby surfaces over weeks.

Basic particle monitors that display general PM levels can also help you see trends, though readings can be influenced by many factors such as outdoor air, cooking, and cleaning activities.

Plan for Event-Based Extra Cleaning

Special situations can put extra load on any filter, washable or not:

  • Nearby wildfires or heavy outdoor smoke.
  • Home projects that create dust, such as sanding or cutting.
  • Moving into a space that has been closed up for a long period.

After such events, a gentle extra cleaning of washable components and an inspection of non-washable filters can help keep your system working closer to its intended performance.

Consider Backup Options

Because washable filters require downtime for drying, some households keep a spare filter or an additional device available. This allows air cleaning to continue while a washed filter dries thoroughly. For people who rely heavily on air purification for comfort, such as during pollen season or smoky periods, this redundancy can make day-to-day use more flexible.

Over time, understanding how your specific washable HEPA-type filters respond to regular use and cleaning will help you balance convenience, cost, and indoor air quality in a way that fits your home.

Frequently asked questions

How many wash cycles can a washable HEPA-type filter tolerate before performance declines?

There is no universal count because tolerance depends on the filter’s materials, construction, and how gently it is cleaned. Many washable filters withstand multiple wash cycles, but repeated rinsing and handling will gradually loosen fibers, weaken bonds, and increase the chance of frame or seal damage. Monitor airflow and capture ability over time and follow manufacturer guidance for replacement.

Will washing restore a washable HEPA-type filter to its original filtration efficiency?

Washing typically removes surface dust and can restore some airflow, but it rarely returns the media to the exact performance of a brand-new filter. Fine or embedded particles can remain trapped and mechanical stresses from washing can alter fiber alignment. Expect partial improvement rather than a full reset in fine-particle capture.

Can washing washable HEPA-type filters cause mold or other hygiene problems?

If a filter is reinstalled while still damp, the moisture can encourage microbial growth and temporarily reduce performance. To avoid this, always dry the filter completely on a clean surface before putting it back into service, and replace the filter if you detect odors or visible mold. Using gentle cleaning and thorough drying minimizes hygiene risks.

What cleaning method best preserves washable HEPA-type filter performance?

The gentlest approach is a lukewarm water rinse and light surface vacuuming when recommended; avoid aggressive scrubbing, twisting, or wringing unless the manufacturer explicitly allows it. Do not use detergents or chemicals unless specified, since residues and solvents can alter fibers or adhesives. Handle frames and gaskets carefully and let the filter fully air-dry before reinstalling.

How do I know when to stop washing and replace a washable HEPA-type filter?

Replace the filter when cleaning no longer improves airflow or particle removal, or when you observe structural problems such as warped frames, frayed edges, cracked seals, or persistent staining and odors. Regular performance checks—visual inspection, airflow feel, or particle monitor trends—help determine when the filter has reached the end of useful service. Follow any manufacturer replacement recommendations as a baseline.

HEPA Filter Bypass Leakage: Why Seals Matter as Much as the Filter

Isometric illustration of HEPA filter and housing seals

Many people focus on getting a “HEPA” or even “H13” filter for their home air purifier and assume that guarantees clean air. In actual use, however, the filter media is only part of the story. The way the filter is sealed inside the purifier can be just as important as the filter’s rating on paper.

HEPA filter bypass leakage happens when some of the air drawn into a purifier slips around the edges of the filter instead of going through the filter fibers. The purifier may still move a lot of air and sound powerful, but its effective particle removal can drop significantly if air is escaping through gaps.

Understanding bypass leakage helps you:

  • Choose purifiers that are more likely to perform close to their stated filtration level.
  • Install and re-install filters correctly after cleaning or replacement.
  • Troubleshoot disappointing results from an otherwise well-rated machine.

Why HEPA Filter Seals Matter for Real-World Performance

Many people focus on getting a “HEPA” or even “H13” filter for their home air purifier and assume that guarantees clean air. In actual use, however, the filter media is only part of the story. The way the filter is sealed inside the purifier can be just as important as the filter’s rating on paper.

HEPA filter bypass leakage happens when some of the air drawn into a purifier slips around the edges of the filter instead of going through the filter fibers. The purifier may still move a lot of air and sound powerful, but its effective particle removal can drop significantly if air is escaping through gaps.

Understanding bypass leakage helps you:

  • Choose purifiers that are more likely to perform close to their stated filtration level.
  • Install and re-install filters correctly after cleaning or replacement.
  • Troubleshoot disappointing results from an otherwise well-rated machine.

What Is HEPA Filter Bypass Leakage?

Bypass leakage is any path where air can flow around, instead of through, the HEPA filter. A HEPA filter works because air is forced through dense fibers that capture particles. If air can take a shortcut around those fibers, it avoids the main filtering process.

Common bypass paths include:

  • Gaps between the filter and the housing: Small spaces along the edges where the frame does not meet the purifier body tightly.
  • Poor or missing gaskets: Compressed foam or rubber seals that are too thin, damaged, or absent.
  • Warped or misaligned filter frames: Filters that are slightly bent, undersized, or not fully seated in the slot.
  • Loose access doors or panels: Panels that do not latch firmly can leave small openings for air to leak around the filter.

Even narrow gaps can pass a surprising amount of air, because air follows the path of least resistance. If going through the HEPA media is harder than slipping through a crack, some portion of the airflow will choose the crack every time.

Table 1. HEPA vs. Carbon Filters in Home Air Purifiers

Example values for illustration.

General differences between common filter types
Filter type Main target Typical use in purifiers Key limitation
HEPA or HEPA-style Fine particles (dust, PM2.5, smoke) Primary particle filter for room air Does not address most gases or odors
Higher-grade HEPA (e.g., H13/H14) Very high particle capture efficiency Used when higher filtration performance is desired Requires good seals; more sensitive to bypass gaps
Standard activated carbon Some odors and certain gases Often paired with HEPA in a combo filter Capacity is limited; can saturate over time
Thicker or pellet-based carbon Improved gas and odor reduction Used when odor control is a priority Heavier and may increase airflow resistance
Pre-filter (mesh or coarse fiber) Larger dust, hair, and lint Protects downstream HEPA and carbon layers Does not replace a true HEPA filter
Electrostatic media (non-ozone) Fine particles with enhanced capture Sometimes integrated into filter layers Performance can change as media loads with dust

How Bypass Leakage Undermines a Good HEPA Filter

A HEPA filter’s efficiency rating (for example, capturing a high percentage of 0.3 micron particles under test conditions) assumes that all the air is pushed through the filter media with no leaks around the edges. In a home purifier, that ideal setup may not exist if seals are weak.

Effective Efficiency vs. Filter Efficiency

The useful metric in a real room is not just how efficient the filter media is, but how efficiently the whole system removes particles from the air that passes through it.

Even small leakage can reduce overall performance. For example, if a HEPA filter is highly efficient but 10–20% of the airflow bypasses the media, the effective performance of the purifier can drop noticeably. The purifier may still help, but not at the level the filter rating alone might suggest.

Impact on CADR and ACH Plans

Clean Air Delivery Rate (CADR) and Air Changes per Hour (ACH) are often used to estimate how fast a purifier can reduce particle levels in a room. These planning tools assume that most of the air going through the machine is actually being filtered.

Bypass leakage means that the machine’s real-world “clean air” output can be lower than you expect, especially at higher fan speeds where pressure across the filter is greater and air is more likely to push through any weak spots in the seals.

Where Leaks Happen: Common Seal and Housing Issues

Identifying where bypass leakage tends to occur helps you choose better-designed purifiers and handle filters more carefully during replacement.

Filter Frame and Gasket Problems

Most HEPA filters sit in a frame and rely on some type of gasket to seal against the purifier body. Weak points include:

  • Thin or uneven gaskets: If the sealing material does not compress evenly, some corners or edges may not fully contact the housing.
  • Aged or brittle seals: Over time, foam or rubber can harden and lose flexibility, leaving small voids.
  • Improperly seated filters: If a filter is not pushed fully into place, the gasket may barely touch or miss the sealing surface on one side.

Housing Geometry and Access Panels

The purifier’s body also matters. Design-related leak paths can include:

  • Loose filter doors: Doors that latch at only one or two points can flex, leaving slight gaps at the edges.
  • Complex internal shapes: Sharp corners or steps inside the filter cavity can make it hard for gaskets to seal continuously.
  • Multiple filter stages with gaps between them: If there is space between a pre-filter, carbon layer, and HEPA layer, air can sneak around one of the stages.

User-Introduced Issues

Even a well-designed purifier can leak if something about installation or maintenance is off. Common examples:

  • Leaving protective plastic wrap on a new filter, forcing the door to bulge and preventing a tight seal.
  • Installing a filter backwards or upside down when the frame is not symmetrical.
  • Trapping dust, hair, or debris along the gasket surfaces so they cannot seat evenly.

Practical Ways to Check for Bypass Leakage at Home

Most households do not have laboratory instruments, but there are simple checks that can help you spot obvious bypass issues in a home purifier.

Visual and Physical Inspection

Start with a basic inspection whenever you change or handle filters:

  • Look at the filter frame: It should be straight, not twisted or bowed.
  • Inspect the gasket: Check for cracks, missing chunks, or areas that look permanently flattened.
  • Check the housing: Run your finger along the sealing surface inside the purifier. It should be clean, smooth, and free of buildup.
  • Confirm a solid closure: When you close the filter door or panel, it should latch firmly without wobble or gaps.

Simple Airflow “Feel” Tests

While not precise, you can use airflow to get a sense of obvious leaks:

  • With the purifier running on a higher setting, carefully run your hand near the edges of the filter door (without blocking vents). Strong jets of air from seams or corners can indicate leakage.
  • Listen for whistling or hissing noises around the filter door that change when you press gently on the panel.

These basic checks do not replace instruments, but they can reveal large leak paths that are easy to correct by reseating a filter or ensuring the door is properly closed.

Using a Consumer Particle Monitor Thoughtfully

Some people use simple indoor particle monitors that report PM2.5 or similar metrics. While these devices vary in quality, they can provide rough feedback.

  • If particle levels drop slowly despite the purifier running at higher speed in a moderately sized room, bypass leakage (or undersizing) might be part of the reason.
  • If levels drop faster after you reseat the filter, clean the gasket areas, and fully latch the door, that suggests sealing made a difference.

Any single test is only a clue, not a lab-grade measurement, but trends over time can help you gauge whether your purifier setup is working as expected.

How to Minimize Bypass Leakage in Everyday Use

While you cannot change the internal engineering of a purifier, you can optimize what you control: filter installation, maintenance, and operating habits.

Install Filters Carefully

Each time you replace a filter:

  • Follow the orientation markings: Many filters have an indicated air-flow direction or front/back side; align them as specified.
  • Seat the filter fully: Press evenly around all edges until you feel or hear it set into place.
  • Remove all packaging: Take off plastic wraps and covers that are meant only for shipping. Leaving them on can warp the door and compromise the seal.

Keep Seal Surfaces Clean

Dust and lint can act like spacers between the gasket and the housing. When you replace filters:

  • Wipe the sealing surfaces gently with a dry or slightly damp cloth (unplug the unit first).
  • Check that the gasket itself is free of clumps of dust or fibers.

Check Door Alignment and Latches

If the filter door or panel does not sit flush:

  • Open it again and confirm nothing is trapped along the edges.
  • Verify that the filter is not protruding or incorrectly positioned.
  • Ensure all latches, clips, or screws are fully engaged, but do not over-tighten to the point of damaging plastic parts.

Operate at Appropriate Fan Speeds

Higher fan speeds create more pressure across the filter. That can be helpful for faster air cleaning, but if seals are weak, higher pressure can drive more air through any existing gaps.

Once you have good sealing practices in place, you can run higher speeds for quicker clean-up and then switch to lower speeds for ongoing maintenance and noise control.

Table 2. Example Filter Replacement Planner for Home Purifiers

Example values for illustration.

General intervals and factors that affect filter life
Filter type Typical interval range (example) What changes it Reminder
Pre-filter (washable mesh or foam) Clean every 1–3 months Visible dust buildup; pets; nearby roads Clogged pre-filters increase resistance and may encourage bypass
HEPA or HEPA-style cartridge Replace every 6–18 months Fan speed use, dust levels, and runtime hours A heavily loaded HEPA can deform or stress seals
High-grade HEPA (e.g., H13 range) Replace every 6–24 months Air quality, usage intensity, and room size Check gaskets closely during each replacement
Thin carbon sheet Replace every 3–6 months Odor exposure from cooking, smoke, or hobbies Odor reduction fades before airflow drops much
Thicker carbon canister or tray Replace every 6–24 months Concentration and duration of gas/odor exposure Follow manufacturer guidance for gas-phase media
Combination HEPA + carbon filter Replace every 6–12 months Both particle load and odor exposure Monitor for airflow changes and recurring odors

How Seals Fit into a Whole-Home Air Quality Strategy

Good HEPA sealing is important, but it is only one part of managing indoor air in a typical U.S. home or apartment. Bypass leakage can reduce the effectiveness of your purifier, but so can undersizing the unit, poor placement, or ignoring other sources of pollution.

Room Size, Placement, and Airflow

Even with excellent seals, a purifier needs to move enough air to keep up with the room and its sources of particles. To support whole-room filtration:

  • Match the purifier’s capacity to your room size and ceiling height when planning CADR and ACH.
  • Place the purifier where airflow is not blocked by furniture or heavy curtains.
  • Aim to avoid corners that trap air; near the center of a wall or in a clear area can be more effective.

Ventilation and Source Control

Purifiers with well-sealed HEPA filters are most effective when they complement basic ventilation and source reduction steps such as:

  • Using kitchen exhaust fans when cooking to reduce indoor particle and odor loads.
  • Limiting indoor smoking or high-particle hobbies in confined spaces.
  • Opening windows when outdoor conditions are suitable to dilute indoor pollutants.

Monitors, Humidity, and Maintenance

Simple particle and humidity monitors, periodic cleaning, and staying on top of filter changes all help your purifier perform closer to its potential. Well-sealed filters are one important piece in a broader routine that includes:

  • Keeping humidity in a comfortable, moderate range with humidifiers or dehumidifiers as needed.
  • Managing dust with regular vacuuming and surface cleaning.
  • Checking that safety features are intact and avoiding intentional ozone-generating devices for everyday indoor air cleaning.

When you think of a HEPA purifier as a system—filter media plus seals, housing, fan, and room conditions—it becomes clear why preventing bypass leakage is worth the small amount of extra attention during every filter change.

Frequently asked questions

How can I tell if my HEPA filter is experiencing bypass leakage?

Start with visual and physical checks: look for gaps, warped frames, or compressed gaskets and run your hand near seams while the unit is running to feel for jets of air. Listening for whistling noises and noting whether a particle monitor shows faster improvement after reseating the filter are also practical indicators.

Will a high-rated HEPA filter still fail to perform because of poor seals?

Yes. Laboratory efficiency ratings assume all air passes through the media, so even small edge leaks can substantially reduce real-world capture and lower the system’s effective performance. Ensuring proper sealing is therefore as important as choosing a higher-grade filter.

Can I fix bypass leakage myself, and what should I try first?

Often you can: reseat the filter, remove any shipping plastic, clean gasket and sealing surfaces, and ensure access panels latch fully. If the frame is warped or the gasket is cracked or brittle, replace those parts to restore a reliable seal.

Does running the purifier at high fan speed make bypass leakage worse?

Yes, higher fan speeds increase pressure across the filter and can drive more air through gaps, so leaks tend to worsen at higher settings. After confirming good seals, short periods at high speed are useful for quick clean-up, followed by lower speeds for ongoing maintenance.

How often should I inspect seals and gaskets for signs of bypass leakage?

Inspect seals and gasket surfaces whenever you replace or clean filters and check them visually every month if the unit is used heavily or you have pets or high dust loads. Replace any gasket or filter that looks cracked, permanently compressed, or warped to keep performance consistent.

True HEPA vs HEPA-Type vs “HEPA-Like”: Label Tricks to Avoid

isometric illustration of layered hepa air filter beside purifier

Why HEPA Labels Are So Confusing

Walk down any aisle or browse online for an air purifier, and you will see phrases like “True HEPA,” “HEPA-type,” “HEPA-style,” and “HEPA-like.” They sound similar, but they can describe very different levels of filtration performance.

This matters if you are trying to reduce indoor particles such as dust, pet dander, smoke particles, or pollen. The filter is the heart of an air purifier, and its efficiency is what largely determines how much fine particulate matter (including PM2.5) is removed from the air passing through it.

Manufacturers sometimes use creative wording to make products sound more capable than they are. Understanding the language around HEPA helps you:

  • Avoid paying more for filters that do not perform like true HEPA
  • Match the filter type to your indoor air goals
  • Read packaging and specifications with a critical eye

What “True HEPA” Really Means

“True HEPA” is a marketing phrase, but it usually refers to filters that meet a widely accepted HEPA efficiency benchmark: capturing at least 99.97% of particles with a diameter of 0.3 microns in a controlled laboratory test.

In practice, “true HEPA” filters are:

  • Made of dense fibrous media that traps particles through interception, impaction, and diffusion, not like a simple mesh screen.
  • Tested at a challenging particle size around 0.3 microns, often called the “most penetrating particle size” in filter testing.
  • Designed to seal tightly in the purifier so air does not easily leak around the edges (bypass).

H13 or H14 under European-style ratings, which refer to even higher efficiencies at certain test sizes. However, the most important point for home use is whether the filter is clearly described as meeting a recognized HEPA efficiency standard, not just having “HEPA” somewhere in its name.

Also remember: a high-efficiency filter alone does not guarantee clean air in a room. Airflow, room size, placement, and air changes per hour (ACH) all affect real-world results.

Table 1. Comparison of common marketing terms for HEPA-style filters. Example values for illustration.
HEPA terminology comparison overview
Term on packaging Typical meaning (general) What to verify before buying
True HEPA Often indicates 99.97% at 0.3 micron lab efficiency Look for an explicit efficiency number and tested particle size
HEPA (without qualifier) May or may not meet true HEPA lab criteria Check for a written standard or detailed test description
HEPA-type Usually lower efficiency than true HEPA See if any efficiency is listed at 0.3 microns or similar
HEPA-like Broad marketing term with no specific standard Be cautious if no numerical particle capture is disclosed
Medical grade HEPA Marketing phrase, not a single universal rating Look for recognized filter class (such as H13 or comparable)
99% efficient filter Percent may be at larger, easier-to-capture particles Confirm which particle size and test conditions were used

Example values for illustration.

HEPA-Type and HEPA-Like: What They Usually Mean

“HEPA-type” and “HEPA-like” filters are not standardized technical terms. They usually describe filters that resemble HEPA in appearance or construction but do not meet the strict efficiency criteria associated with true HEPA under controlled test conditions.

Manufacturers may use these softer terms when their filters:

  • Have lower efficiency at the most penetrating particle sizes
  • Are tested only at larger particles (for example, 1–3 microns)
  • Have less dense media to reduce cost or resistance to airflow

This does not mean HEPA-type filters are useless. They can still capture a significant amount of larger particles and may be acceptable when:

  • Your main concern is general dust and larger particles, not the finest particles
  • You want lower resistance to airflow, potentially allowing more clean air volume
  • You have modest air quality goals and a limited budget

The key is to understand that HEPA-type or HEPA-like labels do not guarantee HEPA-level performance. Without a stated capture efficiency and particle size, it is impossible to compare them directly with a true HEPA filter.

How HEPA Filters Are Tested

To appreciate the difference between filter labels, it helps to understand how HEPA performance is usually measured in the lab. While test standards differ across regions and industries, several common concepts show up repeatedly:

Most Penetrating Particle Size (MPPS)

HEPA filters are not equally efficient at all particle sizes. Counterintuitively, extremely small particles (below about 0.1 microns) may be captured fairly effectively because they move randomly and collide with fibers. Larger particles above about 1 micron are often captured easily by interception and impaction.

Somewhere in between—typically around 0.1–0.3 microns—is the size range where particles can slip through most easily. This is called the most penetrating particle size (MPPS). That is why 0.3 microns is often used as a reference point when quoting HEPA performance.

Single-Pass Laboratory Tests

Standard HEPA test methods generally evaluate how much of a test aerosol passes through the filter in a single pass at a specific airflow. The efficiency figure (such as 99.97%) describes removal under those controlled conditions, not real-life whole-room performance.

Real rooms are more complex. Clean air mixes with room air over time, and the effective removal of particles depends on:

  • Clean air delivery rate (CADR)
  • Room size and ceiling height
  • Air circulation patterns and placement of the purifier
  • How often new particles are generated (for example, from cooking or dusting)

Pressure Drop and Airflow

Higher-efficiency filters usually create more resistance to airflow (higher pressure drop). A purifier must have a fan powerful enough to push air through the filter while still delivering useful CADR and manageable noise. This is why some devices with very dense filters may run more loudly or provide less reach than you expect if the fan is weak.

Common Label Tricks and How to Read Around Them

Once you know what HEPA means technically, it becomes easier to spot vague or confusing marketing language. Here are patterns to watch for and how to interpret them calmly and critically.

Trick 1: Vague “99% Efficient” Claims

A filter might boast “99% efficiency” without saying what size particles that number refers to. Capturing 99% of particles that are 3 microns or larger is much easier than capturing 99% of particles around 0.3 microns.

What to look for:

  • A particle size paired with the percentage (for example, “99.97% at 0.3 microns” in a lab test)
  • An indication that testing followed a recognized method (rather than a vague “internal test”)

Trick 2: “As Small As” Language

Some packages say “captures particles as small as 0.3 microns” without giving an efficiency. Technically, almost any filter will capture some of these particles; the real question is what fraction is removed.

What to look for:

  • A numerical efficiency (for example, 95%, 99%, or 99.97%) at a given particle size
  • Whether the statement refers to the filter alone or the entire purifier system

Trick 3: HEPA-Type With No Numbers

When a filter is described as HEPA-type or HEPA-like without efficiency data, you can assume it is not claiming true HEPA performance. It might still help with larger particles, but you should not treat it as equivalent to a tested HEPA filter.

What to look for:

  • Any third-party test results that specify particle sizes and efficiencies
  • Whether the device lists a particle-related CADR (for example, for smoke or dust), which gives a more practical measure of whole-device performance

Trick 4: Emphasis on Extra Features Over Filtration

Some air cleaners minimize discussion of the actual filter and instead highlight ionizers, UV-C, or other add-ons. These technologies have their own pros, cons, and safety considerations, but they do not replace the need for effective mechanical filtration when your goal is particle reduction.

What to look for:

  • Clear description of the main filter (HEPA, HEPA-type, or otherwise)
  • Whether optional features can be turned off if you prefer to rely on the filter alone

True HEPA vs HEPA-Type vs HEPA-Like in Real-World Use

In actual homes, the difference among these filter categories shows up in how quickly and how thoroughly they reduce airborne particles, especially the finest ones that stay suspended for long periods.

When True HEPA Is Worth Prioritizing

True HEPA filters tend to make the most sense when:

  • You are sensitive to indoor particles and want more aggressive particle reduction
  • You live in an area affected by wildfire smoke or urban PM2.5 pollution
  • You want a purifier that can deliver strong particle CADR for its size

Even then, you will get the best results when the purifier and filter are correctly sized for the room, with enough airflow to deliver multiple air changes per hour.

When HEPA-Type May Be Sufficient

For some homes, HEPA-type filters can still be useful, especially when:

  • Your greatest concern is visible dust and larger particles
  • You run the device for longer periods, allowing repeated passes through the filter
  • You combine filtration with other strategies like regular cleaning and basic ventilation

Because HEPA-type filters may be less dense, the purifier can sometimes move air more quietly or at a lower cost, although this varies widely by design.

Why HEPA-Like Needs Extra Scrutiny

“HEPA-like” generally signals the weakest link to a formal standard. If there are no numbers and no mention of recognized testing methods, treat performance claims as broad marketing, not a guarantee. That does not mean the filter is useless, but it does mean you cannot easily compare it to true HEPA in any precise way.

How HEPA Fits With Carbon and Other Filters

Most home purifiers use multiple filter stages. HEPA or HEPA-type media is primarily for particles, while other filter layers address different concerns.

HEPA vs Activated Carbon

HEPA filters are not designed to remove gases or odors. For that, manufacturers often add an activated carbon filter or other sorbent media. This separate layer can help reduce certain smells and some volatile organic compounds (VOCs), although performance varies widely based on the amount and type of carbon, contact time, and contaminant levels.

A general multi-stage setup might include:

  • A pre-filter to catch hair and large dust, protecting the main filter
  • A HEPA or HEPA-type filter for fine particles
  • An activated carbon layer for some gases and odors

Seal Quality and Bypass

Even the best HEPA filter will underperform if air leaks around it. Good designs use gaskets, tight frames, or other features to minimize bypass. When comparing devices, pay attention not only to filter labels but also to how solidly the filter appears to fit into the housing.

Table 2. Example filter replacement planner for home use. Example values for illustration.
Typical filter replacement timing and factors
Filter type Typical interval range (example) What changes the interval Reminder
Pre-filter (washable) Every 2–4 weeks cleaning Pet hair, visible dust, fan speed Rinse or vacuum to protect main filter
True HEPA filter About 6–18 months Air pollution levels, usage hours, fan setting Follow device guidance and monitor airflow and noise
HEPA-type filter About 6–12 months Particle load, indoor activities like cooking Inspect for discoloration and clogging
Activated carbon filter About 3–12 months Odor intensity, smoking, cooking frequency Replace when odors linger despite running purifier
Combined HEPA + carbon cartridge About 6–12 months Both particle and odor loads Do not wait for strong smells; use schedule
HVAC furnace filter (high-MERV) About 1–3 months Fan runtime, dust, construction nearby Check monthly at first to learn your pattern

Example values for illustration.

Practical Checklist for Choosing a HEPA-Based Air Purifier

You do not need to become a filtration engineer to make a good choice. Use this simple checklist when you compare options:

1. Clarify Your Main Goal

  • Particle-focused: dust, smoke particles, pet dander, pollen → prioritize true HEPA or clearly specified HEPA-level filters and particle CADR.
  • Odor-focused: cooking smells, mild household odors → ensure there is a meaningful activated carbon stage.
  • General refresh: basic dust reduction and fresher feel → a well-sized HEPA-type filter may be acceptable when combined with regular cleaning and ventilation.

2. Examine the Filter Language Carefully

  • Is it called True HEPA or similar and backed by a numerical efficiency at a stated particle size?
  • If it says HEPA-type or HEPA-like, does the packaging provide any actual test data?
  • Are there vague phrases like “captures particles as small as…” without percentages?

3. Look Beyond the Filter to Whole-Room Performance

  • Check the clean air delivery rate (CADR) for particles relevant to you, such as smoke or dust.
  • Match CADR and airflow to your room size and ceiling height.
  • Consider noise levels at the fan speed you are likely to use for several hours a day.

4. Plan for Maintenance

  • Estimate ongoing filter costs over several years, not just the upfront device cost.
  • Check how easy it is to access and replace filters without tools.
  • Set reminders to clean pre-filters and replace main filters on schedule.

5. Combine Filtration With Other Basics

Even with the best HEPA filter, indoor air quality also responds to simple habits:

  • Using exhaust fans when cooking or showering, where available
  • Ventilating with outdoor air when conditions allow and it is practical
  • Reducing particle sources, such as limiting indoor smoking and handling dusty tasks with care

By reading HEPA labels carefully and focusing on both filter quality and overall airflow, you can choose equipment that supports cleaner indoor air in a practical, informed way.

Frequently asked questions

How can I verify that a “True HEPA” filter actually meets 99.97% at 0.3 microns?

Look for an explicit efficiency number and the particle size on the packaging or technical sheet (for example, “99.97% at 0.3 µm”). Prefer products with third-party or standardized test references and, when provided, a recognized filter class such as H13/H14. If only vague claims or no test details are shown, treat the label as marketing rather than a confirmed performance metric.

Is a HEPA-type filter sufficient for wildfire smoke or PM2.5 protection?

For wildfire smoke and PM2.5, true HEPA filters are generally recommended because they are tested and rated for the smallest, most penetrating particles. HEPA-type filters may reduce larger visible particles but often lack verified efficiency for fine smoke particles, so they may not provide comparable protection.

Will adding activated carbon make a HEPA-type filter effective against gases and odors?

Activated carbon targets gases and many odors, which HEPA media does not remove, so adding carbon can improve performance against smells and some VOCs. The effectiveness depends on the amount and type of carbon and contact time; a small carbon layer may have limited impact on heavier or high-concentration gases.

How often should I replace True HEPA versus HEPA-type filters?

Replacement intervals vary with use and pollution levels, but typical guidance is about 6–18 months for true HEPA filters and about 6–12 months for HEPA-type filters. Factors such as fan speed, indoor particle load, and whether a pre-filter is cleaned regularly will change how long a filter remains effective.

Can higher airflow or CADR make up for a lower-efficiency (HEPA-type) filter?

Higher CADR and airflow increase the volume of air processed and can improve whole-room particle removal, so a high-CADR HEPA-type unit may perform acceptably for some goals. However, airflow does not change the filter’s intrinsic capture efficiency for the smallest particles, so true HEPA filters usually outperform lower-efficiency media for fine particle removal even at similar CADR.

HEPA Grades Explained (H10–H14): What’s Relevant for Homes?

Isometric illustration of layered HEPA air filter near purifier

What Are HEPA Grades H10–H14?

HEPA (High Efficiency Particulate Air) is a class of mechanical air filters designed to capture very small particles. In many technical documents, especially in Europe, HEPA filters are divided into grades from H10 to H14. These grades describe how efficiently the filter captures particles under standardized test conditions.

In a typical US home, you will most often see marketing terms like “HEPA,” “True HEPA,” or “medical-grade HEPA,” but not always the formal H10–H14 labels. Still, understanding these grades helps you interpret what these filters are trying to achieve and what matters for everyday use.

Key ideas behind HEPA grades:

  • H10–H12: lower to mid HEPA efficiency range.
  • H13–H14: higher-efficiency HEPA often associated with more demanding applications.
  • Higher grade generally means better particle capture, but also more airflow resistance and potentially more fan noise or energy use.

For homes, the right grade is a balance between filtration efficiency and practical factors like airflow, noise, and cost.

How HEPA Grades Relate to Filtration Efficiency

HEPA grades are based on how well a filter captures fine particles in a controlled test. The formal standards used in laboratories differ somewhat from common marketing language, but the general idea is:

  • Filters are tested at the most penetrating particle size (often around 0.1–0.3 microns).
  • The test measures what percentage of particles pass through.
  • A higher grade allows fewer particles through (higher efficiency).

In real homes, the situation is more complex. The HEPA filter is only one part of the system. The fan power, room size, air changes per hour (ACH), clean air delivery rate (CADR), and how well the filter is sealed can affect how much the filter actually improves air quality.

Approximate relationships often described in technical references (rounded for simplicity):

  • H10–H11: entry-level HEPA; captures a large majority of fine particles, but not as high as H13–H14.
  • H12: mid-range HEPA with higher capture efficiency than H11.
  • H13–H14: high-efficiency HEPA used in cleaner rooms, some medical or industrial settings, and some high-end consumer purifiers.

These ranges are intended to give a relative sense of performance. Actual filter performance depends on specific test standards and setup.

Table 1. Simplified comparison of HEPA grades and typical home relevance

Example values for illustration.

HEPA grade comparison for home air cleaning
HEPA grade Relative particle capture level Common use context Typical home relevance
H10 Lowest HEPA range Basic air cleaners, some HVAC retrofit filters Can help with general dust but often not highlighted
H11 Moderate HEPA Entry-level HEPA purifiers Reasonable for everyday dust and some smoke particles
H12 Mid HEPA Higher-end consumer and light commercial units Good compromise between efficiency and airflow
H13 High HEPA Cleaner rooms, some healthcare and home devices Often marketed as “medical-grade”; strong fine particle capture
H14 Very high HEPA More specialized laboratories and critical environments Potentially overkill unless specific needs justify it
Non-HEPA (MERV-style) Lower to moderate capture Typical HVAC filters Good for system protection, limited for very fine particles

HEPA in the US vs. Formal H10–H14 Labels

In the United States, consumer air purifiers rarely advertise the H10–H14 designations directly. Instead, you will see terms like:

  • HEPA or True HEPA
  • HEPA-type or HEPA-like
  • H13 HEPA or “medical-grade” HEPA

These terms are not always used consistently. Some manufacturers reference international standards or laboratory tests that roughly correspond to H13 or H14 performance, but consumer labeling is not fully harmonized.

When you see H13 or H14 on US marketing material, it usually means the filter media has been tested to a higher efficiency standard similar to those grades. However, the overall purifier effectiveness still depends on how airtight the filter housing is, how fast air moves through, and how the device is used in the room.

What HEPA Grades Matter Most for Homes?

For most households, the goal is to reduce common indoor particles such as dust, pet dander, smoke particles from cooking or wildfires, and general fine particulate matter (PM2.5). From a practical standpoint, three main points matter more than the exact HEPA grade:

  • Good overall CADR and air changes per hour (ACH) for your room size.
  • Properly sealed HEPA filter to stop bypass air from leaking around the filter.
  • Consistent use and maintenance (filter replacement on time and good placement).

Within that context, here is how the grades generally fit into home needs:

H10–H12: Adequate for Everyday Dust and General Use

Filters in the lower HEPA grades can substantially reduce airborne dust and many fine particles in a typical home, especially when paired with good airflow and continuous operation.

They may be sufficient if your priorities are:

  • General cleanliness and reduced visible dust settling.
  • Comfort-oriented use, such as reducing stuffy or stale feeling air.
  • Moderate concern about urban pollution or seasonal smoke.

These filters often allow a bit more airflow at a given fan speed, which can help achieve better ACH at the same noise level compared with a more restrictive high-grade HEPA.

H13–H14: Higher Efficiency for Fine Particles

H13 and H14 filters aim to capture a very high fraction of fine particles in each pass. In home use, they are sometimes marketed for people who are particularly sensitive to indoor particles or who live in areas with frequent smoke or heavy outdoor pollution.

Practical considerations with H13–H14 filters:

  • At the same fan size, airflow can be lower due to higher resistance.
  • To maintain high CADR, the purifier may run the fan faster, resulting in more noise.
  • Filter replacements may be more expensive than lower grade HEPA.

For many households, an H13 filter paired with good room airflow and placement can be a solid choice, especially where outdoor air quality is frequently poor. H14 is typically more specialized and may not provide a noticeable advantage in everyday home settings compared with H13, once CADR and noise are factored in.

HEPA vs. HEPA-Type and Other Filter Terms

The label on the filter matters almost as much as the grade. Some common terms you may encounter:

“HEPA” or “True HEPA”

These terms generally indicate a filter designed to meet recognized HEPA standards, although not every product will specify an exact grade. For home selection, look for:

  • Specific claims about particle sizes (for example, around 0.3 microns) tested under standard conditions.
  • References to independent testing or adherence to recognized filtration standards.

“HEPA-Type” or “HEPA-Like”

These phrases usually signal that the filter is not a certified HEPA filter. It may capture many particles better than a basic filter, but it may fall short of official HEPA performance.

This does not mean HEPA-type filters are useless; they can still improve air cleanliness. But if you are aiming for a performance level comparable to H12–H13, verify whether the product provides clear efficiency data.

Pre-Filters, Carbon Filters, and HEPA Together

HEPA filters work best as part of a layered system:

  • Pre-filter catches larger dust and hair, protecting the HEPA filter and extending its life.
  • HEPA filter captures fine particles such as fine dust and smoke particles.
  • Activated carbon filter can help reduce certain odors and some gases, but it does not substitute for HEPA for particles.

For home use, a well-designed combination of pre-filter, HEPA of at least mid-grade efficiency, and sufficient carbon media can address both particles and many common smells, as long as expectations are realistic.

HEPA Grade vs. CADR and ACH: Which Matters More?

It is easy to focus on the HEPA grade alone, but the amount of clean air a device delivers to your room over time is often more important. Two key concepts help describe this:

  • Clean Air Delivery Rate (CADR): An indicator of how much filtered air a purifier supplies per unit time, usually expressed as a volume per minute.
  • Air Changes per Hour (ACH): How many times per hour the purifier can theoretically filter the room’s volume of air.

A purifier with a modest-grade HEPA filter but high CADR can sometimes reduce overall particle levels more effectively than a device with a very high-grade HEPA but low airflow. For most homes, it is sensible to:

  • Choose a purifier with enough CADR to achieve multiple ACH in the intended room.
  • Then consider a higher HEPA grade (such as H13) if the device still meets your noise and energy preferences.

The right balance depends on room size, how sensitive occupants are to noise, and how consistently the purifier will be used.

Table 2. Example filter replacement planner for home use

Example values for illustration.

Typical filter replacement timing in home purifiers
Filter type Illustrative interval range What can shorten the interval Reminder
Pre-filter (washable or vacuumable) Every 2–8 weeks cleaning Lots of pet hair, visible dust, heavy use Check more often if you see buildup on the intake
Standard HEPA (H10–H12 range) About 6–18 months Continuous high-speed use, very dusty or smoky air Watch for reduced airflow or persistent dust despite use
High-grade HEPA (H13–H14 range) About 6–24 months Heavy smoke seasons, urban pollution spikes Follow the device indicator if available, not just time
Thin basic carbon sheet About 3–6 months Strong or frequent cooking odors, indoor smoking Replace when odors no longer fade as before
Thicker granular carbon cartridge About 6–24 months Continuous exposure to odors or fumes Heavier cartridges may last longer but depend on load
HVAC return filter (high-MERV, non-HEPA) About 1–3 months High fan runtime, shedding pets, renovation dust Do not exceed the system’s recommended pressure drop

How to Decide Which HEPA Level to Choose

When picking an air purifier or replacement filter, try to look at the whole system instead of just one spec. A simple decision path for most homes:

Step 1: Clarify Your Main Goals

Common priorities include:

  • General dust control and a cleaner-feeling home.
  • Supportive environment for allergy- or asthma-friendly living, without expecting medical effects.
  • Seasonal wildfire smoke or urban pollution events.
  • Odor reduction from cooking, pets, or other sources.

If your main interest is basic dust and occasional outdoor pollution, an H11–H12 level filter with good CADR may be sufficient. If you frequently experience heavy smoke or very poor outdoor air, a well-sealed H13 filter paired with strong airflow can be more appropriate.

Step 2: Match Filter Grade to Room Size and Noise Tolerance

Higher-grade HEPA can restrict airflow. To compensate, you may need a larger purifier or to run it at higher speed. When choosing:

  • Estimate your room volume and desired ACH, then look for CADR that can support that.
  • If you prefer quieter operation, consider a slightly lower HEPA grade that allows enough airflow at lower fan settings.

In many bedrooms, the best practical option is a purifier sized a bit larger than necessary, with a mid-to-high HEPA grade, run at a moderate fan speed to balance noise and cleaning.

Step 3: Consider Maintenance and Long-Term Costs

Over time, filters and electricity are the biggest ownership costs:

  • Higher-grade HEPA replacements may cost more than basic HEPA.
  • If your environment is very dusty or smoky, filters will load faster regardless of grade.
  • Pre-filters that are washable or easily vacuumed can extend HEPA life.

Think about whether you are likely to keep up with recommended filter changes. A slightly lower grade HEPA that you actually replace on time will generally perform better than a very high-grade filter used far beyond its intended life.

Step 4: Do Not Forget Room Layout and Ventilation

Filter grade cannot overcome poor placement or lack of air circulation. For best results:

  • Place the purifier where air can flow freely around it, not behind furniture or curtains.
  • Run the purifier long enough each day to keep particle levels from building up.
  • Combine filtration with reasonable ventilation strategies when outdoor air quality allows, such as occasional window opening or using existing mechanical ventilation systems.

When these basics are covered, HEPA grade H12–H13 is often a comfortable middle ground for many US households, with H11 or H14 becoming more situation-specific choices.

Key Takeaways for Using HEPA at Home

HEPA grades H10–H14 provide a helpful framework for understanding filter performance, but they are only one piece of the indoor air quality picture. For homes, it is usually more productive to ask:

  • Does this purifier move enough air for my space at a noise level I can live with?
  • Is the HEPA filter well-sealed, and is the device designed to minimize bypass leaks?
  • Can I realistically maintain the filters on the suggested schedule?
  • How will this purifier fit with my existing ventilation, humidity control, and cleaning habits?

If you address those questions first, then use HEPA grade as a fine-tuning factor, you are more likely to end up with a setup that keeps indoor air cleaner in a practical, sustainable way for daily life.

Frequently asked questions

What is the difference between HEPA grades H10–H14 and which should I choose for home use?

H10–H14 represent increasing particle-capture efficiency measured under standard laboratory tests; higher grades trap a larger fraction of the most penetrating particle size but also create more airflow resistance. For most homes, mid-range to high-grade filters (H12–H13) are a practical balance between efficiency and airflow, while H14 is typically reserved for specialized environments and may not offer noticeable everyday benefits for typical household use.

Will upgrading from H11 to H13 noticeably reduce wildfire smoke or PM2.5 in a typical living room?

Upgrading to H13 can reduce more particles per pass, but real-world improvement depends on the purifier’s CADR, room size, and how well the filter and housing are sealed. A high-CADR H11 purifier can outperform a low-airflow H13 unit, so ensure adequate air changes per hour to see consistent reductions in smoke and PM2.5.

How do HEPA grades affect airflow, noise, and energy use?

Higher-grade HEPA media is denser and creates greater pressure drop, which can lower airflow at a given fan speed and cause devices to use more fan power to maintain CADR, increasing noise and energy use. Choosing a purifier with sufficient fan capacity or a slightly lower-grade HEPA can help balance noise and cleaning performance for your space.

Is “True HEPA” the same as H13, or can it include H10–H12 as well?

“True HEPA” generally indicates the filter meets recognized HEPA testing criteria but does not specify a particular grade, so it can cover H10 through H14. If you need a specific level of efficiency, look for the H-grade labeling or independent test data rather than relying solely on the “True HEPA” claim.

How often should I replace H10–H14 HEPA filters compared to each other?

Replacement intervals depend mainly on usage, particle load, and whether a pre-filter is used, not just the grade; heavy smoke or dust shortens filter life for all grades. Follow the device manufacturer’s recommendations and monitor for reduced airflow, increased noise, or filter-change indicators rather than assuming a fixed lifetime based solely on H-grade.

UV-C vs HEPA Filters: What Each Can and Can’t Do Indoors

Isometric illustration comparing HEPA purifier and UV-C air device

Why Compare UV-C and HEPA Indoors?

UV-C and HEPA are often mentioned together in discussions about indoor air purifiers, but they work in very different ways. Understanding what each technology can and cannot do helps you choose equipment that matches your real needs instead of relying on marketing terms.

At home, most people are dealing with a mix of dust, pet dander, smoke, outdoor particles that drift inside, smells from cooking, and moisture-related issues like mold growth. Some devices rely mainly on mechanical filtration such as HEPA, while others add UV-C lamps, ionizers, or other extras. Knowing the core strengths and limits of UV-C and HEPA makes it easier to sort through these options calmly and realistically.

How HEPA Filtration Works (And Its Limits)

HEPA stands for high-efficiency particulate air. These filters use a dense mat of fibers to physically capture particles carried by airflow. They are a type of mechanical filtration: air is pushed or pulled through the filter and particles get trapped.

What HEPA Filters Can Do Indoors

In a well-designed purifier with a good seal, HEPA filtration can:

  • Capture fine particles such as dust, pollen, pet dander, mold spores, and smoke particles.
  • Help reduce overall particle levels measured as PM2.5 or PM10 on common air quality monitors.
  • Work continuously as long as airflow is maintained and filters are replaced on schedule.
  • Function without producing gases like ozone when used in standard air purifiers that are designed to be ozone-free.

Many purifiers pair HEPA with a pre-filter (for hair and larger dust) and often an activated carbon filter for some odor and gas reduction. The HEPA layer is focused on particles only.

What HEPA Filters Cannot Do

Despite their high efficiency, HEPA filters have clear limitations:

  • They do not remove most gases such as volatile organic compounds (VOCs), cooking smells, or chemical fumes. A separate carbon or other gas-phase filter is needed for that.
  • They do not sterilize air or “kill” microorganisms; they trap them. Once captured, particles usually stay in the filter until it is replaced.
  • They cannot fix humidity problems, prevent condensation, or dry out damp areas. Dehumidification and moisture control are separate tasks.
  • They do not replace ventilation. HEPA filters clean recirculated air but do not add fresh outdoor air or lower indoor CO2 levels.
  • They depend on airflow and sizing. A small purifier with low clean air delivery rate (CADR) may not keep up with a large room or heavy particle sources.

For most homes, a correctly sized, well-sealed HEPA-based purifier is the main workhorse for particle reduction. Other technologies, like UV-C, may be added for specific reasons but do not replace the need for mechanical filtration.

Table 1. HEPA vs UV-C: Comparison of Core Roles

Example values for illustration.

Aspect HEPA Filtration UV-C Treatment
Primary target Airborne particles (dust, pollen, smoke) Microorganisms exposed to UV-C light
How it works Physically traps particles in fibers Damages genetic material with UV-C radiation
Helps with odors/VOCs No, needs carbon or other media Limited, often minimal in typical home units
Requires airflow sealing Yes, to avoid air bypassing the filter Yes, for enough exposure time and distance
Continuous effect while running Yes, as air repeatedly passes through Yes, but only on air or surfaces actually lit
Produces particles No No, but may affect gases depending on design
Relies on bulb/media replacement Filter changes on schedule UV-C lamp replacement to maintain output

How UV-C Air Treatment Works (And Its Limits)

UV-C is a band of ultraviolet light with shorter wavelengths than sunlight that reaches the ground. In controlled devices, UV-C can inactivate some microorganisms by damaging their genetic material. In homes, UV-C is typically used inside enclosed air purifiers or HVAC systems so the light stays out of occupied spaces.

What UV-C Can Do Indoors

In properly designed systems, UV-C can:

  • Inactivate some airborne microorganisms that pass close enough to the lamp for long enough at sufficient intensity.
  • Help limit growth on certain internal surfaces such as coils or internal components inside an HVAC unit or air cleaner, if the lamp is positioned for surface exposure.
  • Operate continuously inside enclosed devices without visible light or noise changes, assuming the system is built for that use.

Most consumer UV-C implementations are supplemental. They are meant to add another layer of treatment to already-filtered air, not to replace filters.

What UV-C Cannot Do (Especially in Typical Home Devices)

UV-C has significant practical limitations indoors, especially in compact purifiers:

  • Limited exposure time: Air often moves quickly through small devices. If the UV-C zone is short or weak, microorganisms may not receive enough dose to be meaningfully inactivated.
  • No effect on dust or dander: UV-C does not remove particles from the air; it only affects microorganisms exposed to the light.
  • Minimal effect on odors and VOCs in most home units. Some advanced systems can affect certain gases, but this is not a typical feature of standard residential devices.
  • Does not fix moisture problems: UV-C cannot dry damp materials, fix leaks, or control humidity.
  • Depends heavily on design and maintenance: A dusty or aging UV-C lamp may provide much less output than when new, reducing any potential benefit.

Because performance depends on lamp strength, placement, airflow patterns, and exposure time, real-world effectiveness can vary widely across devices.

UV-C Safety Considerations

UV-C is a form of radiation and should be handled with care:

  • Direct exposure to skin and eyes is not recommended. Home units are typically designed so UV-C light stays inside the device.
  • Follow manufacturer instructions regarding lamp replacement, cleaning, and access panels.
  • Avoid modifying units or defeating safety interlocks that prevent UV-C light from shining into occupied spaces.
  • Some UV-C technologies may interact with air to form small amounts of byproducts, depending on wavelength and design. Look for devices that specify low or no ozone production and avoid units marketed mainly for ozone output.

Used as intended in enclosed air purifiers or inside HVAC equipment, UV-C can be a controlled supplemental tool but should not be the main focus of an indoor air quality plan.

Particles vs Microorganisms vs Gases: Matching the Tool to the Job

HEPA and UV-C address different parts of the air quality picture. A simple way to think about this is to group indoor air concerns into three broad categories: particles, microorganisms, and gases/odors.

Particles: Where HEPA Shines

Particles include:

  • Dust and dust mite debris
  • Pollen and plant fragments
  • Pet dander and hair fragments
  • Smoke particles from cooking or wildfires
  • Mold spores carried in the air

Mechanical filtration such as HEPA is well suited for these. The key considerations are:

  • CADR (clean air delivery rate): Higher CADR means more filtered air per minute.
  • Room size and air changes per hour (ACH): The purifier should be able to cycle room air multiple times per hour.
  • Seal quality: Good design limits leaks and bypass around the filter.

Microorganisms: UV-C as a Supplement

Microorganisms include bacteria, viruses, and viable mold spores. HEPA filters can capture many particles that carry these organisms. UV-C can add another layer by inactivating some of what passes through the light field or grows on internal surfaces.

Key points to remember:

  • Capture first: Trapping particles that carry microorganisms reduces how far they travel indoors.
  • UV-C dose matters: The mix of lamp intensity, distance, and exposure time determines how much inactivation can occur inside a device.
  • Surface hygiene and moisture control still matter. Air treatment does not replace basic cleaning or moisture management.

Gases and Odors: Neither HEPA nor Basic UV-C Is Enough

Common indoor gases include VOCs from building materials, furnishings, and products, as well as cooking odors and other smells. For these issues:

  • Activated carbon or other gas-phase filters are usually more relevant than UV-C or HEPA alone.
  • Ventilation (bringing in outdoor air and exhausting indoor air) can help dilute indoor gases.
  • Source control—choosing lower-emitting products and controlling combustion sources—can reduce the amount of gas released indoors.

UV-C in typical home devices is not designed as a primary tool for gas or odor control.

When HEPA Alone Is Enough vs When UV-C Might Help

Most households can focus on good mechanical filtration, ventilation, and moisture control as their core strategy. UV-C may be considered as an add-on in specific scenarios.

Situations Where HEPA-Centered Solutions Are Usually Sufficient

HEPA-based purifiers (with optional carbon) are often adequate when:

  • You want to lower dust and fine particles for general comfort.
  • You are concerned about seasonal pollen entering from outdoors.
  • You live in an area with periodic smoke events and want to reduce indoor smoke particles.
  • You share space with shedding pets and want to limit dander in the air.
  • You are setting up a bedroom with a relatively stable layout and predictable use.

In these cases, selecting a purifier with appropriate CADR for the room, placing it where air can circulate freely, and maintaining filters on schedule are typically the biggest factors.

Situations Where UV-C May Be Considered as an Addition

UV-C can be one piece of a broader strategy when:

  • You are already using effective mechanical filtration and want an added layer of treatment inside ducts or devices.
  • You have an HVAC system where a UV-C lamp can be positioned near coils or drain pans to help limit biological growth directly on those components.
  • You prefer an enclosed UV-C implementation where the lamp is shielded from occupants and used as designed.

Even in these cases, UV-C should be viewed as supplemental. Managing moisture, cleaning surfaces, and maintaining filters remain essential.

Maintenance: Filters, Lamps, and Realistic Expectations

Both HEPA and UV-C systems rely on regular maintenance to perform as intended. Skipping filter changes or lamp replacements reduces their usefulness, sometimes without obvious visual clues.

Maintaining HEPA and Pre-Filters

For HEPA-based devices:

  • Pre-filters may need rinsing or replacement every few weeks to months, depending on dust and pet hair levels.
  • HEPA filters are typically replaced every several months to a couple of years, depending on usage, air quality, and device design.
  • Carbon filters saturated with odors or VOCs lose effectiveness and may need more frequent replacement than HEPA media.
  • Device seals and gaskets should remain intact; damaged seals can let air bypass the filter.

Maintaining UV-C Lamps

For UV-C components:

  • Lamp output declines over time, even when the lamp still lights up. Many lamps are rated for a certain number of operating hours.
  • Replacement intervals are typically on the order of months to a couple of years, as specified by the manufacturer.
  • Dust and film on the lamp can block UV-C and reduce exposure, so internal components may require careful cleaning according to instructions.
  • Ballasts and power supplies must function correctly for lamps to maintain their output.

Tracking operating time, perhaps by noting installation dates, helps avoid relying on a UV-C system that is past its effective lifetime.

Table 2. Filter and Lamp Replacement Planner (Example)

Example values for illustration.

Component Typical Interval Range* What Changes It Reminder
Pre-filter (dust screen) Every 1–3 months Pet hair, visible dust load Clean or replace when visibly dirty
HEPA filter Every 6–24 months Usage hours, outdoor pollution, indoor sources Follow device guidance and inspect regularly
Carbon filter Every 3–12 months Cooking frequency, smoke, strong odors Replace when odor control noticeably drops
UV-C lamp in purifier About 9–24 months Operating hours, on/off cycling Do not rely on brightness; track run time
UV-C lamp in HVAC About 12–24 months System runtime, placement near coils Coordinate with seasonal HVAC service
Gaskets and seals Inspect yearly Heat, age, repeated filter changes Replace if cracked or compressed
*Ranges are general examples, not device-specific requirements.

Putting It All Together: Practical Indoor Air Strategy

UV-C vs HEPA is not an either-or choice. For most homes, HEPA-based filtration, appropriate ventilation, and moisture control form the core of a practical air quality plan. UV-C, when safely enclosed and maintained, can be considered a secondary layer for specific situations, particularly within HVAC systems or as part of a well-designed purifier.

When planning your setup, it can help to prioritize:

  • Source control: Limit smoke, high-emission products, and uncontrolled moisture.
  • Ventilation: Use bathroom and kitchen exhaust fans, and open windows when outdoor air is acceptable.
  • Mechanical filtration: Choose and size HEPA-based purifiers to match your room sizes and layout.
  • Supplemental tools: Consider UV-C, carbon filters, dehumidifiers, or humidifiers as needed to address specific issues.
  • Ongoing maintenance: Keep filters, lamps, and equipment in good condition to match realistic expectations.

By understanding what UV-C and HEPA each can and cannot do, you can assemble a balanced, steady approach to indoor air quality that fits your home, climate, and day-to-day routines.

Frequently asked questions

Can a HEPA filter alone eliminate airborne viruses and bacteria?

HEPA filters capture particles that often carry viruses and bacteria, reducing how much of those particles circulate in the air, but they do not inactivate or kill microorganisms. Captured microbes remain on the filter until it is replaced, so HEPA filtration reduces exposure risk but does not sterilize the air. Combining HEPA with good ventilation, source control, and surface cleaning provides a more complete approach.

Will UV-C lighting remove mold spores and prevent mold growth in my home?

UV-C can inactivate some mold spores when exposed long enough at adequate intensity, and HVAC-mounted UV-C near coils can help limit biological growth on system components. However, in typical compact home purifiers the short exposure time limits effectiveness against airborne spores. Controlling moisture and fixing leaks are still the primary steps to prevent mold growth.

Do UV-C lamps or HEPA filters remove odors and volatile organic compounds (VOCs)?

Neither HEPA nor standard UV-C systems are effective at removing gases, odors, or most VOCs. Activated carbon or other gas-phase media, along with ventilation and source control, are the appropriate tools for reducing odors and gaseous pollutants. Some advanced or specialized systems can address certain gases, but that is not typical in basic residential units.

Are UV-C air purifiers safe to use in occupied rooms?

Direct exposure to UV-C radiation can harm skin and eyes, so safe designs keep the light enclosed within the device or HVAC ductwork. Properly built and installed units that prevent leakage of UV-C into occupied spaces are considered safe when used according to manufacturer instructions. Avoid devices that intentionally expose room air or surfaces to unshielded UV-C and units that generate ozone as the primary mechanism.

How should I maintain HEPA and UV-C components to ensure they keep working well?

Replace pre-filters, HEPA, and carbon filters on the schedule recommended by the device maker and inspect seals for damage. Track UV-C lamp operating hours and replace lamps per the manufacturer’s interval, and keep lamp housings free of dust and film that can block output. Regular maintenance ensures both technologies perform close to their intended effectiveness.

MERV 13 vs HEPA: What the Numbers Mean for Indoor Air

Isometric illustration comparing two generic air filtration devices

Understanding MERV 13 and HEPA in Plain Language

When you start comparing air filters, the numbers and acronyms can get confusing fast. Two of the most common terms you will see are MERV 13 and HEPA. Both relate to how well a filter can capture airborne particles, but they come from different rating systems and are usually used in different types of equipment.

This article explains what MERV 13 and HEPA actually mean, how they are tested, and what those numbers mean for everyday indoor air in a typical U.S. home. The goal is to help you decide when a high-MERV filter in your central system might be enough and when a HEPA air purifier could make more sense.

Because this is general guidance, always check the documentation for your specific HVAC system or air purifier before changing filters.

What MERV Ratings Measure

MERV stands for Minimum Efficiency Reporting Value. It is a scale used for many residential and commercial HVAC filters in the U.S. The scale typically runs from 1 to 16 for standard filters. Higher numbers generally mean the filter can capture smaller particles more efficiently during standardized testing.

How MERV Testing Works

MERV ratings come from a laboratory test that passes particles of different size ranges through the filter and measures how many are captured. The key size ranges go from larger dust and lint down to fine particles that are closer to the size of common indoor particulate matter.

A higher MERV rating means the filter keeps more of those test particles from passing through. However, the rating does not fully describe airflow resistance, how the filter performs once it starts to load with dust, or how well it is sealed inside your ductwork or filter slot.

What “MERV 13” Generally Means

Within the residential range, MERV 13 is often considered a high-performance filter. In many general summaries, a MERV 13 filter is described as being able to capture a significant share of:

  • Common household dust
  • Pet dander-sized particles
  • Fine particles similar in size to many smoke and smog particles

These summaries are based on standardized test ranges, but real-world performance depends on:

  • How well the filter fits and seals in the filter slot
  • How often it is replaced
  • Whether the HVAC fan runs often enough to move air through the filter
  • Whether your system can handle the added resistance of a high-MERV filter

Using MERV 13 in many residential systems is possible, but not all equipment is designed for it. Higher resistance filters can reduce airflow if the system and ductwork were not sized for them. That can affect comfort and efficiency, so professional guidance is wise when moving up the MERV scale.

Table 1. General comparison: MERV 13 vs HEPA in home use. Example values for illustration.
Aspect MERV 13 Filter HEPA Filter
Typical location Central HVAC return or furnace filter slot Portable room air purifier or dedicated HEPA system
Rating system MERV scale used for many HVAC filters HEPA standard with efficiency target for very fine particles
Main focus Broad indoor air cleaning with whole-home airflow High-efficiency particle removal in specific rooms
Fine particle capture High for many household and smoke-sized particles Very high for very fine particles in test conditions
Airflow considerations Must match HVAC blower capacity and duct design Fan and filter are designed together in one unit
Installation Replaces existing HVAC filter; sealing matters Plug-in appliance; room placement matters
Coverage style Whole home, depending on duct layout and runtime Single room or limited area per device

What HEPA Means and How It Differs

HEPA stands for High Efficiency Particulate Air. It is a standard used primarily for filters in dedicated air cleaning devices, not in most conventional residential HVAC systems.

Under common HEPA definitions, the filter must meet a very high efficiency requirement when tested with very small particles. In manufacturer literature, this is often described as capturing nearly all test particles at a specific particle size. While the exact test details can vary by region or standard, the key idea is that HEPA filters are engineered to be extremely effective on fine particles when properly installed and sealed in the device.

True HEPA vs Marketing Terms

Product packaging can use terms like “HEPA-type” or “HEPA-like.” These are marketing phrases and may not indicate that the filter meets a recognized HEPA standard. For consumers, this distinction matters:

  • Filters that meet a HEPA standard usually have test data behind the claim.
  • HEPA-type or HEPA-style filters may be improved over simple filters but are not necessarily tested to the same criteria.

If you are looking for the higher end of particle removal for a room purifier, check how the manufacturer describes the filter media and any efficiency testing that is referenced.

Why HEPA Is Usually in Room Purifiers, Not Furnaces

HEPA filters are dense compared to many typical HVAC filters. They can create a lot of resistance to airflow if placed in a duct system that was not designed for them. That is why, in most homes, you see HEPA filters in portable air purifiers or in specialized whole-house systems that are engineered for HEPA, not simply added into an existing furnace slot.

A portable HEPA air purifier combines:

  • A fan sized for the HEPA filter’s resistance
  • A housing that helps seal air so it passes through the filter media instead of around it
  • Sometimes, additional pre-filters or carbon filters for coarse particles and odors

This “matched set” design helps maintain both good airflow (for better air changes per hour in the room) and high filtration efficiency.

Particle Sizes, PM2.5, and What These Filters Actually Catch

When comparing MERV 13 and HEPA, it helps to think about particle size. Many indoor air discussions now refer to PM2.5, which means fine particles with diameters generally smaller than 2.5 micrometers. These come from sources such as cooking, outdoor smoke that drifts indoors, and other combustion activities.

In very simple terms:

  • MERV 13 is typically considered very capable at reducing many particles in the PM2.5 range and above.
  • HEPA is designed to maintain very high capture efficiency even down to a small test particle size that is in the fine-particle range.

Laboratory test conditions do not perfectly match how filters behave in homes, but both technologies are relevant for reducing airborne particles that basic fiberglass filters barely touch.

Where Monitors Fit In

Affordable consumer air quality monitors often display PM2.5 estimates. They are not laboratory instruments, but they can still help you:

  • See general trends when cooking or burning candles
  • Compare indoor and outdoor conditions during a smoke event
  • Observe how fast particles drop after you switch on an air purifier

Readings should be treated as approximate. Different devices may give different numbers even in the same room, but the direction and relative changes over time can still guide your use of filters and ventilation.

Whole-Home vs Room-by-Room: How MERV 13 and HEPA Work Together

You do not necessarily have to choose between MERV 13 and HEPA. In many homes, they play different roles and can complement each other.

Using MERV 13 in a Central System

When your HVAC system can handle a MERV 13 filter, it can help lower the baseline level of particles across the entire home. Key factors for effectiveness include:

  • Runtime: The filter only cleans air when the fan is running. Some homeowners use the “fan on” setting during high particle events if the system allows.
  • Filter fit: Gaps or bent frames can let air bypass the media, reducing performance.
  • Replacement schedule: A clogged filter increases resistance and can reduce both airflow and cleaning effectiveness.

Even with an efficient filter, rooms far from return ducts, or spaces with closed doors for long periods, may not see strong circulation. That is where room-based solutions can help.

When a HEPA Air Purifier Makes Sense

A HEPA room purifier is most useful when you need focused particle reduction in a specific area, such as:

  • A bedroom used for much of the day or where someone prefers cleaner-feeling air
  • A home office where doors stay closed
  • A living room during local wildfire smoke or other temporary events

For effective use, look at:

  • Clean Air Delivery Rate (CADR): A measure that mixes airflow and filter efficiency; higher CADR generally means faster cleaning for a given room size.
  • Air changes per hour (ACH): How many times per hour the purifier can theoretically process a room’s air volume. More air changes usually mean faster reduction of airborne particles.
  • Placement: Ideally away from obstructions, with some open space around the intake and outlet so air can circulate.

Replacing or cleaning pre-filters on schedule helps the HEPA filter maintain airflow and performance over time.

Filter Efficiency vs Airflow: Why “Stronger” Is Not Always Better

It is tempting to assume that the highest-rated filter is always the best choice. In practice, air cleaning is a balance between how well the filter captures particles and how much air you can move through it without causing problems.

HVAC System Limits

Your furnace or air handler is designed for a certain pressure drop across the filter. If the filter is too restrictive, or if it clogs and is not replaced, you can end up with:

  • Reduced airflow at supply vents
  • Temperature imbalances between rooms
  • Potential strain on the blower motor over time

This is why many manufacturers specify a maximum recommended MERV rating and type of filter for their equipment. If you want to move from a standard filter to MERV 13, it is wise to verify compatibility and possibly consult a professional.

Matching Purifier Settings to Room Needs

Portable HEPA purifiers face a similar trade-off between noise and airflow. Higher speeds provide more air changes per hour but are louder and may not be practical for sleeping or quiet work. Lower speeds are quieter but move less air.

One common approach is to run the purifier at a higher setting when the room is unoccupied or during the day, then use a lower setting at night if noise is a concern. The goal is to keep air turning over regularly while still fitting daily routines.

Table 2. Example filter replacement planner for home air filters. Example values for illustration.
Filter type Typical interval range What changes it Reminder
Basic fiberglass HVAC filter About 1 month Heavy dust, pets, fan runtime Check monthly and replace when visibly dirty
Pleated MERV 8–11 HVAC filter About 1–3 months Seasonal use, renovation dust Inspect each month during peak use
MERV 13 HVAC filter About 1–3 months Fan set to “on”, local smoke events Watch for reduced airflow or increased fan noise
HEPA filter in room purifier Often 6–12 months Speed setting, continuous use Follow device indicator or manual guidelines
Pre-filter in purifier Clean or replace every 1–3 months Visible dust, pet hair Keeping pre-filters clean supports HEPA lifespan
Activated carbon filter Often 3–6 months Odor sources, smoke exposure Effectiveness may fade before it looks dirty

Practical Steps to Decide Between MERV 13 and HEPA

When you are planning improvements to indoor air quality, it helps to think in layers: basic filtration, room-focused cleaning, ventilation, and moisture control. MERV 13 and HEPA are two tools within that bigger picture.

Questions to Ask About Your Home

To decide where to start, consider:

  • How is your HVAC system set up? Single-story vs multi-story, number and location of return vents, and how often the system runs.
  • Are there rooms that stay closed off? Closed doors reduce air mixing, which can limit the effect of a central filter alone.
  • What are your main concerns? Everyday dust, seasonal pollen drift, nearby traffic, wildfire smoke events, or simply wanting air that feels cleaner.
  • How much maintenance are you comfortable with? Central filters and room purifiers both require periodic attention.

Example Scenarios

Here are a few illustrative scenarios that show how MERV 13 and HEPA can fit into a broader plan:

  • Typical suburban home, moderate concerns: Upgrading a compatible HVAC system from a basic filter to MERV 11 or MERV 13 (as allowed by the equipment) and replacing filters regularly may offer a noticeable reduction in dust and fine particles for the whole home.
  • Apartment with limited control over central system: A portable HEPA air purifier sized correctly for the bedroom or main living area can provide room-level air cleaning even if the building filter is basic.
  • Home in a wildfire-prone region: Combining a high-MERV central filter (if the system allows) with one or more HEPA purifiers in key rooms, and managing window opening during smoke events, can help reduce indoor particle buildup.

No single step solves every air quality issue, but understanding what MERV 13 and HEPA actually mean helps you choose the tools that fit your home, equipment, and comfort priorities.

Frequently asked questions

Can I install a MERV 13 filter in any home HVAC system?

Not always. Many HVAC systems can accept higher-MERV filters, but some were designed for lower pressure drop and may experience reduced airflow or blower strain with a MERV 13; check the equipment specifications or consult a professional before upgrading.

Will a MERV 13 filter remove wildfire smoke as effectively as a HEPA purifier?

MERV 13 filters are effective at capturing many PM2.5 particles found in smoke and can reduce whole-home exposure when the system runs, but HEPA filters generally have higher capture efficiency for the smallest particles and provide faster, room-level removal when used in a correctly sized purifier.

How often should I replace a MERV 13 filter compared to a HEPA filter in a room purifier?

MERV 13 HVAC filters typically need inspection and replacement around every 1–3 months depending on runtime and local conditions, while HEPA filters in portable purifiers often last 6–12 months; pre-filters and usage patterns will affect those intervals.

If I use MERV 13 in my furnace, do I still need a HEPA room purifier?

Possibly—merv 13 improves baseline whole-home air quality, but a HEPA room purifier is useful for focused cleaning in bedrooms, closed offices, or during acute events like heavy smoke, especially where occupants are vulnerable.

How can I verify a filter is actually improving indoor air quality?

Use a consumer PM2.5 monitor to track relative changes before and after running filters or purifiers, check CADR and ACH ratings for purifiers to confirm coverage for room size, and ensure proper filter fit and system airflow to avoid bypass or performance loss.

PM2.5 Monitor vs Air Purifier Sensor: Accuracy and Practical Use

Isometric illustration of air purifier and PM2.5 monitor in a room

PM2.5 refers to fine particles with diameters of 2.5 micrometers or smaller. These particles come from sources such as outdoor pollution, wildfire smoke, cooking, and indoor activities that create dust or aerosols. Many people rely on electronic sensors to get a rough picture of their home’s particulate levels.

Two common options are:

  • Stand-alone PM2.5 monitors – independent devices designed primarily for measuring air quality.
  • Built-in sensors in air purifiers – integrated into the purifier to adjust fan speed or show a basic air quality indicator.

While both may refer to “PM2.5,” they are not the same in design, accuracy, or how you should use the readings. Understanding the tradeoffs helps you set realistic expectations and make better decisions about placement, operation, and when to ventilate or run your purifier on higher speed.

PM2.5 Monitor vs Air Purifier Sensor: What Is the Difference?

PM2.5 refers to fine particles with diameters of 2.5 micrometers or smaller. These particles come from sources such as outdoor pollution, wildfire smoke, cooking, and indoor activities that create dust or aerosols. Many people rely on electronic sensors to get a rough picture of their home’s particulate levels.

Two common options are:

  • Stand-alone PM2.5 monitors – independent devices designed primarily for measuring air quality.
  • Built-in sensors in air purifiers – integrated into the purifier to adjust fan speed or show a basic air quality indicator.

While both may refer to “PM2.5,” they are not the same in design, accuracy, or how you should use the readings. Understanding the tradeoffs helps you set realistic expectations and make better decisions about placement, operation, and when to ventilate or run your purifier on higher speed.

How PM2.5 Sensors Work in Monitors and Air Purifiers

Most consumer PM2.5 sensors, whether in a dedicated monitor or built into an air purifier, are based on a similar principle: optical particle detection. They use a small light source and a photodetector inside a chamber where air flows through.

Optical PM2.5 Sensor Basics

In simple terms, the sensor:

  • Draws air into a small chamber using a fan or natural convection.
  • Shines light (often from an LED or laser diode) through the air sample.
  • Measures how much light is scattered by particles passing through.
  • Uses internal algorithms to estimate particle counts and sometimes mass concentration (for example, micrograms per cubic meter) in different size ranges such as PM1, PM2.5, or PM10.

These sensors are generally designed for trend and relative information rather than precise laboratory-grade readings. Still, they can be very useful for showing when particle levels are clearly higher or lower than your usual baseline.

What Makes Stand-Alone PM2.5 Monitors Different

Dedicated PM2.5 monitors focus on measuring air quality, not moving large volumes of air. Compared with many built-in purifier sensors, they often offer:

  • More detailed readouts – numerical PM2.5 values, sometimes PM1 and PM10, and additional metrics like TVOCs or CO2 equivalents.
  • Better placement flexibility – you can position them away from walls, drafts, and direct purifier outlets to capture a more representative room sample.
  • Longer averaging and logging – some models smooth readings over time or store trends to highlight daily patterns.
  • Less self-interference – because they are not built into high-speed airflow devices, they may be less affected by turbulence and immediate clean-air output from a purifier.

However, consumer monitors still rely on low-cost optical sensors. They are not substitutes for regulatory-grade instruments used by authorities or research labs.

What Built-In Air Purifier Sensors Are Optimized For

Air purifier sensors are typically tuned for control and convenience rather than precision measurement. Their main jobs are:

  • Detecting when particle levels increase so the purifier can ramp up fan speed (auto mode).
  • Providing a simple air quality indicator, often a color or basic scale.
  • Allowing the purifier to slow down when air is relatively cleaner to reduce noise and energy use.

These sensors are installed inside the purifier housing or near the air intake. Their readings are strongly influenced by where the purifier sits in the room and how air circulates. They are helpful for on-the-spot control but do not necessarily reflect overall room averages, especially in large or complex spaces.

Table 1. Stand-Alone PM2.5 Monitor vs Air Purifier Sensor

Example values for illustration.

High-level comparison of typical home PM2.5 options
Feature Stand-alone PM2.5 monitor Built-in air purifier sensor
Primary purpose Measure and display air quality data Control purifier speed and show simple status
Typical readout detail Numeric PM2.5 and sometimes PM1/PM10 Color ring or basic scale, occasional numeric PM2.5
Placement flexibility Can be moved to different rooms or spots Fixed where purifier is located
Influence of purifier airflow Lower if placed away from purifier outlet Higher, since it samples air at or near the unit
Usefulness for whole-room overview Often better if positioned thoughtfully Good for local conditions near the purifier
Role in decisions Helps plan ventilation, purifier use, and habits Helps automate fan speed and respond quickly
Maintenance needs Keep sensor inlet clean; avoid dust buildup Occasional sensor area cleaning if accessible

Accuracy Expectations: How Reliable Are the Readings?

Consumer PM2.5 sensors are useful tools, but it is important to see them as guides, not lab instruments. Accuracy varies widely between devices and even between units of the same model. Several factors affect reliability.

Sensor Calibration and Drift

Low-cost optical sensors are typically factory-calibrated using standard test aerosols. Over time, their response can drift as the light source ages or dust builds up inside the sensing chamber.

Common implications include:

  • Offset errors – the sensor might read somewhat higher or lower than the true concentration but still track changes reasonably well.
  • Nonlinear response – differences may become larger at very high or very low concentrations.
  • Device-to-device variation – two monitors side by side may disagree by a noticeable margin, yet both can still reflect trends.

Most home users do not have access to formal calibration services. Instead, you can use these devices to see relative changes: for example, how much PM2.5 increases when you fry food or how quickly levels drop after turning a purifier to a higher setting.

Sampling Location and Airflow

Where the sensor is placed often matters more than small differences in factory calibration.

  • Near a source (stove, candle, smoking area) readings can spike very quickly and may not represent the average across the room.
  • Near supply vents or open windows the sensor may show more of the incoming outdoor air than the room as a whole.
  • Inside or next to a purifier built-in sensors may see cleaner air than the far corners of the room, especially if the purifier is strong relative to the room size.

To understand overall room air, aim for a representative and stable position: away from direct vents, not on the floor, and not right next to obvious particle sources.

Particle Type and Humidity Effects

Optical sensors estimate particle mass based on how particles scatter light and on assumptions about their size and density. This can lead to differences when particle types change.

  • Smoke particles may scatter light differently than dust from vacuuming or from outdoor soil.
  • Humidity can cause hygroscopic particles to swell, changing measured scattering without an actual change in dry mass.
  • Very high humidity may cause fog-like droplets that optical sensors interpret as high particle levels.

Because of this, a PM2.5 reading is best seen as an index related to particle load, especially when humidity or particle sources are changing.

When a Stand-Alone PM2.5 Monitor Is Most Helpful

Adding a stand-alone monitor can make sense when you want a clearer picture of indoor air behavior over time or across multiple rooms. It can also help you use your air purifier more strategically rather than running it blindly.

Understanding Daily and Seasonal Patterns

A monitor placed in a main living area can reveal patterns such as:

  • Spikes during cooking or high-heat oven use.
  • Increases when doors or windows are opened on polluted days.
  • Seasonal changes during wildfire periods, cold snaps, or pollen-heavy seasons (for particles that behave like PM2.5).

Seeing trends helps you decide when to close windows, when to use a range hood more consistently, or when to run purifiers at higher settings.

Checking Room Coverage and Purifier Placement

If you already use an air purifier, a monitor can show how effective your setup is:

  • Place the monitor across the room from the purifier to see whether PM2.5 levels drop there, not just near the unit.
  • Try different purifier locations (for example, more central vs corner) and note how fast levels fall after a particle spike such as cooking.
  • Compare readings with doors open vs closed between rooms to understand how well air circulates.

This can guide decisions about whether you need additional purifiers for other rooms or just better placement and door management.

Sharing One Monitor Between Spaces

In smaller homes or apartments, you can rotate a single PM2.5 monitor:

  • Keep it in the living area most of the time for general tracking.
  • Move it to a bedroom for a night or two to see overnight levels.
  • Occasionally check kitchens or basements if you suspect dust or smoke buildup.

Short checks in different rooms can help you prioritize where to run purifiers or improve ventilation, without buying multiple monitors.

Using an Air Purifier’s Built-In Sensor Effectively

Even without a separate monitor, the sensor inside an air purifier can provide useful feedback—especially for auto mode and general awareness.

Auto Mode and Fan Speed Behavior

When you use auto mode, the purifier interprets its sensor input to adjust fan speed. Typical behavior includes:

  • Low fan speed when the sensor detects relatively clean air.
  • Higher fan speed when the sensor sees increased particles (for example, from cooking or outdoor smoke entering).
  • Gradual reduction in speed as particles are removed near the purifier’s intake.

Auto modes are useful for set-and-forget convenience, but remember that the sensor reacts to air at or near the unit. If your purifier is in a corner and a far room has higher pollution, auto mode might not fully respond to that distant condition.

Reading Color Indicators and Basic Scales

Many purifiers show a color ring or simple air quality scale. While the exact thresholds vary by manufacturer, you can still use the changes as a guide:

  • Use color changes to learn which activities (broiling, sanding, candles) generate noticeable particles.
  • Note how long it takes for the indicator to transition from “poor” to “better” after the source stops.
  • If the indicator rarely changes, try moving the purifier closer to likely particle sources to see more responsive behavior.

These indicators can be especially useful for people who prefer not to think about numbers and just want to know whether the purifier is working harder than usual.

Limitations for Whole-Home Air-Quality Insights

An integrated sensor has a narrow field of view. It may not show:

  • Conditions in closed rooms away from the purifier.
  • Small localized sources such as printer dust, craft work, or a candle in another room.
  • Differences in multi-level homes where air mixing is limited.

For these situations, a separate PM2.5 monitor—or an additional purifier in key rooms—can provide more complete coverage.

Practical Placement Tips for Better PM2.5 Readings

Whether you rely on a stand-alone monitor or a purifier’s internal sensor, placement is one of the easiest ways to improve usefulness.

Where to Place a Stand-Alone PM2.5 Monitor

For more representative readings:

  • Place the monitor about breathing height when seated or standing, such as on a shelf or table.
  • Avoid placing it directly in front of vents, windows, or fans that may blow air straight into the inlet.
  • Keep it several feet away from air purifier outlets so it does not only sample freshly filtered air.
  • Do not place it on the floor in a corner, where airflow may be limited and dust accumulation can skew readings.

If you are investigating a specific issue (such as cooking smoke traveling down a hallway), it is reasonable to place the monitor temporarily near that path, as long as you understand those readings are more localized.

Optimizing Air Purifier Position for Sensor Performance

Because the purifier’s built-in sensor samples air where the unit sits, good purifier placement also helps sensor usefulness.

  • Place purifiers in relatively open areas, not hidden behind furniture or curtains.
  • Avoid pushing the back of the purifier right against a wall if the intake is on that side; allow some space for airflow.
  • If your main particle source is in a known area (for example, near the kitchen), consider placing the purifier within that general zone while keeping it clear of splashes or heat.

These steps help the sensor see air that is more representative of the room instead of a blocked or stagnant pocket.

Interpreting Readings for Everyday Decisions

Numbers or color codes become more useful when you know how to respond to them in simple, practical ways. The goal is not perfection but informed choices about ventilation, filtration, and habits.

Using PM2.5 Readings with Ventilation

Ventilation and filtration can complement each other, especially when outdoor air quality is acceptable.

  • When both indoor and outdoor air are relatively low in particles, opening windows can refresh indoor air and dilute indoor sources.
  • If outdoor air is noticeably worse (such as during a wildfire event or heavy traffic pollution), readings may stay lower indoors with windows closed and purifiers running.
  • A PM2.5 monitor near a frequently opened door can show whether outdoor spikes are entering and lingering.

Tracking these patterns over time helps you decide when to rely more on natural ventilation and when to lean on filtration.

Coordinating Multiple Purifiers and Rooms

In larger homes, you might operate more than one purifier. A stand-alone monitor can help you:

  • Identify which rooms benefit most from a dedicated purifier.
  • Check whether a single purifier in a hallway can meaningfully reduce PM2.5 in adjacent rooms.
  • Decide whether doors should be left open or closed while purifiers run, based on how readings rise or fall.

Even if you mostly rely on built-in sensors and auto modes, occasional checks with a PM2.5 monitor can validate that your coverage strategy is working as intended.

Adjusting Habits in Response to Spikes

Monitoring can highlight simple behavior changes that reduce particle loads:

  • Using a range hood consistently during cooking that produces smoke or grease.
  • Avoiding activities such as heavy indoor sanding or spraying near living spaces without extra ventilation and filtration.
  • Vacuuming with a well-sealed machine and filter, and running a purifier nearby during and after cleaning sessions.

These changes, guided by sensor feedback, can lower the frequency and duration of high particle episodes indoors.

Table 2. Common Home Air Quality Monitor Metrics and How to Use Them

Example values for illustration.

Monitor metrics guide for everyday interpretation
Metric What it generally indicates Common pitfalls Simple action idea
PM2.5 Fine particle load from smoke, cooking, dust Values vary between devices; humidity can affect readings Use purifiers or ventilation when sustained levels are elevated
PM10 Larger particles like coarse dust and some pollen Short spikes may come from cleaning or movement only Vacuum and dust regularly; check filter condition
TVOC (generic) Overall volatile organic compounds estimate Readings can change with perfumes, cleaning products, or cooking fumes Increase ventilation and reduce strong chemical product use
CO2 (or estimated) Indicator of occupancy and ventilation rate Estimated values may not match dedicated CO2 sensors Open windows or increase fresh air when persistently elevated
Humidity Moisture level in the air Placement near kitchens or bathrooms can skew readings Use humidifiers or dehumidifiers to stay in a moderate range
Temperature Indoor comfort and HVAC operation Direct sun or drafts can create local hot or cold spots Adjust thermostat and check for drafts or heat sources

Bringing It All Together at Home

Both stand-alone PM2.5 monitors and air purifier sensors can play useful roles in managing indoor air. The built-in sensor in a purifier is well-suited for everyday automation and quick feedback. A separate monitor adds flexibility, helps you understand patterns across rooms and seasons, and lets you verify whether your purifiers, ventilation strategies, and habits are working as intended.

Rather than focusing on exact numbers, use these tools to recognize trends, compare before-and-after scenarios, and guide practical steps such as improving ventilation, adjusting purifier placement, and managing activities that generate particles. With that mindset, even modest consumer sensors can become effective aids for maintaining more comfortable and consistently cleaner indoor air.

Frequently asked questions

How much more accurate is a stand-alone PM2.5 monitor compared with an air purifier’s built-in sensor?

Stand-alone monitors typically provide more detailed numerical readouts and are placed for representative sampling, so they often give a better room-average view. However, both device types commonly use similar low-cost optical sensors, so neither is equivalent to laboratory instruments; the main advantage of a monitor is placement flexibility and logging, not a fundamentally different sensing principle.

Can I rely on my purifier’s sensor to decide whether to open windows during outdoor pollution events?

Not by itself: a purifier’s sensor reads air near the unit and may not reflect conditions near doors or other parts of the home. For window-opening decisions during pollution events, cross-check with a separate monitor placed near the doorway or consult up-to-date outdoor air quality information.

What is the best placement for a PM2.5 monitor to reflect typical indoor exposure?

Place the monitor at breathing height on a table or shelf in the main living area, away from direct vents, windows, and purifier outlets. Avoid floors, corners, and very near particle sources unless you are intentionally measuring localized spikes.

How often should I clean or recalibrate PM2.5 sensors to keep readings reliable?

Perform basic maintenance like gently cleaning the sensor inlet area every few months or according to the device manual to reduce dust buildup; this helps limit drift. Formal recalibration is rarely available for consumer devices, so periodic cross-checks against another monitor or known events (like outdoor spikes) are practical ways to confirm continued usefulness.

Will humidity or different particle types affect readings differently between monitors and purifier sensors?

Yes. Both types use optical detection and can overestimate particle load when hygroscopic particles swell in high humidity or when fog droplets are present. Differences in measured values between devices are often driven more by sampling location and vendor algorithms than by the particle type alone.

Warm Mist vs Cool Mist Humidifiers: Hygiene and Comfort Trade-Offs

Two humidifiers showing warm and cool mist in a living room

Humidifiers can make dry indoor air more comfortable, especially during winter heating season or in arid climates. Choosing between warm mist and cool mist models affects hygiene, comfort, noise, and safety in your home. Both types can raise relative humidity, but they do it in different ways and come with distinct trade-offs.

This comparison focuses on practical, home-oriented considerations: how each type works, what it means for cleaning and hygiene, how they feel to use, and where they fit into an overall indoor air quality plan.

Understanding the basic mechanisms makes it easier to see why hygiene and comfort differ between warm and cool mist devices.

Warm mist humidifiers (often called steam vaporizers) rely on heat. Inside the unit, water is heated until it produces steam, which cools slightly as it leaves the device. The output may feel pleasantly warm but typically does not raise room temperature by much.

Why Compare Warm Mist vs Cool Mist Humidifiers?

Humidifiers can make dry indoor air more comfortable, especially during winter heating season or in arid climates. Choosing between warm mist and cool mist models affects hygiene, comfort, noise, and safety in your home. Both types can raise relative humidity, but they do it in different ways and come with distinct trade-offs.

This comparison focuses on practical, home-oriented considerations: how each type works, what it means for cleaning and hygiene, how they feel to use, and where they fit into an overall indoor air quality plan.

How Warm Mist and Cool Mist Humidifiers Work

Understanding the basic mechanisms makes it easier to see why hygiene and comfort differ between warm and cool mist devices.

How Warm Mist Humidifiers Work

Warm mist humidifiers (often called steam vaporizers) rely on heat. Inside the unit, water is heated until it produces steam, which cools slightly as it leaves the device. The output may feel pleasantly warm but typically does not raise room temperature by much.

Key characteristics of warm mist systems include:

  • Heating element: Boils or nearly boils water to create steam.
  • Simple airflow path: Steam rises and mixes with room air, usually without a fan.
  • Mineral handling: Minerals in tap water may deposit inside the tank or on internal parts.

Because water is heated, some microorganisms in the tank water are inactivated before reaching the air. However, hygiene still depends strongly on cleaning practices.

How Cool Mist Humidifiers Work

Cool mist humidifiers add moisture to the air without heating the water. The two most common types are ultrasonic and evaporative.

  • Ultrasonic: Uses a high-frequency vibrating membrane to create a fine water mist that is pushed into the air.
  • Evaporative: Uses a wick or filter that absorbs water; a fan blows air through the wet material so water evaporates naturally.

General characteristics of cool mist systems include:

  • No intentional heating: Output feels neutral or slightly cool.
  • Fan use (often): Evaporative models rely on a fan, while ultrasonic units may use a gentle airflow system.
  • Mineral handling: Ultrasonic models may release fine white dust from minerals in hard water, while evaporative wicks can trap many minerals in the filter media.

Because water is not heated, hygiene depends heavily on tank cleanliness, water quality, and regular maintenance.

Table 1. Comparison of warm mist vs cool mist humidifiers

Example values for illustration.

Key differences between warm and cool mist humidifiers
Aspect Warm Mist Cool Mist (Ultrasonic / Evaporative)
Moisture output temperature Warm steam that cools quickly Room-temperature mist or vapor
Typical power draw (example) Higher (e.g., heating element may use tens to hundreds of watts) Lower (e.g., fan or small transducer may use tens of watts)
Noise profile Soft boiling or bubbling sounds Fan noise (evaporative) or faint hum (ultrasonic)
Mineral handling Minerals tend to build up inside the unit Ultrasonic may release white dust; evaporative traps minerals in wick
Scald risk Higher, due to hot water and steam Lower, mist and water stay cool
Perceived comfort Can feel cozier in cool rooms Can feel fresher, especially in warmer rooms
Cleaning priority Important, especially for mineral buildup Very important, especially for tank hygiene

Hygiene Considerations: Warm Mist vs Cool Mist

Both warm and cool mist humidifiers can operate hygienically when maintained correctly. The differences lie in how forgiving each type is if cleaning habits are not perfect, and how they handle minerals and potential microbial growth.

Microorganisms and Water Temperature

Warm mist units heat water, which can reduce some microorganisms in the steam that reaches the air. However, this does not make them maintenance-free. Biofilm and residue can still form on surfaces in contact with water, especially if the unit is not emptied and cleaned regularly.

Cool mist units do not use heat, so the water in the reservoir stays at room temperature. This can be comfortable to use but also means:

  • Microorganisms can potentially grow if water sits for long periods.
  • Stagnant water, even if visually clear, may still require cleaning and refreshing.
  • Filters and wicks need routine attention to avoid musty odors and buildup.

In both cases, using fresh water, emptying tanks between uses when possible, and following the manufacturer’s cleaning recommendations are central to hygienic operation.

Minerals, White Dust, and Residue

Tap water contains dissolved minerals such as calcium and magnesium. How a humidifier handles these minerals affects both hygiene and housekeeping.

  • Warm mist: Minerals tend to stay behind in the tank and on heating elements as scale. Over time, this buildup can reduce performance and make cleaning more difficult. Descaling becomes a key maintenance task.
  • Cool mist ultrasonic: The vibrating membrane can atomize both water and minerals. These minerals may settle as a fine white dust on nearby surfaces. This dust is mainly a cleanliness and filter-dusting issue, but it signals that water hardness is high.
  • Cool mist evaporative: Many minerals remain in the wick or filter. The wick may stiffen or discolor as it loads with minerals, and needs regular replacement or cleaning if the model allows it.

Using lower-mineral water (such as distilled or low-mineral filtered water) can reduce dust and scale, regardless of humidifier type. This can simplify hygiene and keep the unit easier to clean.

Cleaning Workload and Routine

Hygiene is more about habits than technology. Typical good practices include:

  • Daily or frequent: Empty tank, rinse, and refill with fresh water.
  • Weekly (or as recommended): Deeper cleaning of tank surfaces, caps, and any parts in contact with water.
  • As needed: Descale mineral deposits, replace wicks or filters, and inspect for signs of residue or odor.

Warm mist models often require more descaling; cool mist models often require more attention to wicks, filters, and tank cleanliness. Choosing the type that best matches your willingness to do each kind of maintenance can support better hygiene over time.

Comfort and Sensory Experience

Comfort from a humidifier comes from both humidity level and how the output feels and sounds. Warm and cool mist units can reach similar humidity targets, but daily experience differs.

How the Mist Feels in the Room

Once moisture mixes with room air, the air’s temperature is largely determined by your heating or cooling system, not the humidifier. However, the immediate sensation near the unit can differ:

  • Warm mist: The steam plume can feel cozy on cool winter nights. Some people prefer this feeling in bedrooms when air is otherwise chilly.
  • Cool mist: Output feels neutral or slightly cool. This can be more comfortable in warmer rooms or during milder seasons when extra warmth is not desired.

Both types can help air feel less dry when humidity is raised into a moderate range, commonly around 30–50% relative humidity, which many people find comfortable for general living spaces.

Noise, Light, and Sleep Considerations

Noise level and sound type can matter a lot in bedrooms and nurseries.

  • Warm mist: May emit gentle boiling or gurgling sounds. The lack of a fan can be appealing where very low airflow noise is desired.
  • Cool mist ultrasonic: Often very quiet, with a soft hum or faint buzzing from the transducer and airflow system.
  • Cool mist evaporative: Uses a fan, so noise depends on speed. Low settings may work as light white noise for some people.

Indicator lights, control panels, and glowing water tanks can also influence sleep. Many models offer dim or night modes, but brightness levels vary. If you are sensitive to light or noise, consider control placement, fan speeds, and whether you can position the unit farther from the bed.

Perceived Warmth and Seasonal Use

In cold climates, warm mist units can feel more seasonally appropriate, even though they generally do not replace meaningful heating capacity. In contrast, cool mist models can feel more comfortable in shoulder seasons or in rooms that tend to run warm.

Some households use different modes or different units by season: warm mist for very cold months and cool mist for the rest of the year. Others choose one type and adjust room temperature and placement to stay comfortable.

Safety and Household Suitability

Safety is a central consideration, especially in homes with children, pets, or limited space. Both warm and cool mist humidifiers can be used safely when placed and maintained correctly, but their risk profiles differ.

Scald and Burn Risks

Warm mist devices contain hot water and produce hot steam at the outlet. Risks include:

  • Accidental tipping or pulling down the unit, potentially spilling hot water.
  • Touching hot surfaces or steam outlets at close range.

For this reason, warm mist units are usually placed out of reach on stable, level surfaces and away from high-traffic areas.

Cool mist devices operate at or near room temperature, so scald risk is lower. They still require stable placement to avoid spills and electrical hazards, but burns from the mist or tank water are not a primary concern.

Electrical and Placement Safety

All humidifiers combine water and electricity, so basic precautions apply to every type:

  • Keep the unit on a stable, water-resistant surface.
  • Avoid placing directly on carpets or wooden surfaces that could be damaged by moisture.
  • Allow clearance around the unit so mist can disperse and not condense heavily on walls, windows, or furniture.
  • Route cords to minimize tripping and accidental tipping.

Over-humidifying a room may lead to condensation on windows or cooler surfaces. Persistent dampness can contribute to mold-friendly conditions. Using a separate hygrometer or an indoor air quality monitor with humidity readout can help keep humidity in a moderate range.

Households with Children, Older Adults, or Pets

In homes where devices may be bumped, grabbed, or knocked over, cool mist humidifiers often fit better from a scald-risk standpoint. If you prefer warm mist for comfort, consider:

  • Placing the unit on a high, stable surface away from common pathways.
  • Ensuring the cord is not dangling or easy to pull.
  • Supervising use in play areas or shared spaces.

Regardless of type, regularly inspecting the tank, cord, and plug for wear or damage supports safe, long-term use.

Energy Use and Cost of Operation

When comparing warm mist vs cool mist, energy use and ongoing costs are another practical trade-off. While humidifiers are usually not the largest energy users in a home, differences can add up over a dry season.

Electricity Use

Warm mist models use electricity to heat water. Heating generally requires more power than running a small fan or ultrasonic transducer.

  • Warm mist: The heating element may draw significantly more power while operating. If run for many hours a day, this can be noticeable on electricity use.
  • Cool mist ultrasonic: Typically lower power draw; much of the energy goes to the transducer and modest airflow system.
  • Cool mist evaporative: Mainly powers a fan; power use depends on fan speed and size but is usually moderate.

If operating costs are a priority, cool mist units often have an advantage, especially when used for long periods or in multiple rooms.

Filter, Wick, and Descaling Costs

Ongoing costs are not just about electricity. They also include cleaning supplies and any replaceable components:

  • Warm mist: May require descaling solutions or tools to remove mineral deposits. Some models include replaceable components, while others rely mainly on manual cleaning.
  • Cool mist ultrasonic: Some users choose to buy low-mineral water to reduce white dust; this can increase operating cost but may reduce cleaning time.
  • Cool mist evaporative: Wicks or filters need replacement at intervals recommended by the manufacturer. Costs vary by size and type.

Factoring in both energy use and replacement supplies helps estimate the total cost of running a humidifier through a heating season.

Choosing the Right Type for Your Home

Warm mist vs cool mist is not about one being universally better. It is about matching device characteristics to your home layout, climate, and comfort preferences.

Questions to Ask Before You Buy

Consider the following when deciding between warm and cool mist humidifiers:

  • Who will use the room? Children, older adults, and pets may influence your tolerance for scald risk.
  • How cold or warm is the space? Very cold bedrooms may feel better with warm mist; warmer spaces may suit cool mist.
  • How hard is your water? Hard water increases scale in warm mist units and white dust or wick loading in cool mist units.
  • What kind of maintenance do you prefer? Are you more comfortable descaling heating elements or replacing wicks and filters?
  • Where will you place the unit? Space, outlets, and distance from beds or desks matter for noise, light, and safety.

Integrating Humidifiers into Overall Air Quality

Humidifiers are one piece of indoor air quality. To keep air comfortable and pleasant over time, combine them with other simple strategies:

  • Use exhaust fans or window ventilation when weather and security allow, to reduce stuffiness.
  • Consider air purifiers with appropriate sizing (matching clean air delivery to room volume) for particle and odor control.
  • Monitor indoor humidity and basic particulate levels with simple meters or monitors to avoid over-humidifying.
  • Address sources of moisture, such as leaks or persistent condensation, separately from comfort humidification.

This broader view helps keep humidity in a comfortable range while limiting unwanted side effects like condensation or musty smells.

Table 2. Humidity and mold quick-plan checklist

Example values for illustration.

Simple planning guide for humidity and mold awareness
Goal Simple actions Tools Note
Keep humidity in a moderate range Run humidifier only until hygrometer shows a mid-level range (example: roughly 30–50% RH) Standalone hygrometer or basic air quality monitor with humidity Avoid continuous maximum output without checking levels
Limit window condensation Reduce humidifier setting, increase ventilation when safe, and move unit farther from windows Visual checks each morning during cold weather Persistent condensation can signal over-humidifying or insulation issues
Prevent musty odors Empty and clean humidifier regularly, allow parts to dry between uses if possible Soft brushes, mild cleaning agents, clean towels Odor often indicates buildup in tanks, wicks, or filters
Avoid damp corners and closets Do not direct mist into confined spaces; keep airflow paths open Small fan or improved room layout for airflow Localized dampness can occur even when room-wide humidity seems moderate
Balance humidifiers with other moisture sources Use kitchen and bathroom exhaust fans during cooking and showers Range hood, bathroom fan, or window ventilation Reduces surplus moisture so comfort humidification stays in check
Plan for seasonal changes Adjust run times as outdoor temperature and heating use change Basic seasonal checklist or reminder Dry winter air may need more humidification than milder seasons

Summary: Weighing Hygiene and Comfort Trade-Offs

Warm mist and cool mist humidifiers both help relieve the discomfort of very dry indoor air. Warm mist units offer a cozier feel in cold rooms and a heating process that can reduce some microorganisms in the steam, but they draw more power, require regular descaling, and carry higher scald risk. Cool mist units are generally more energy-efficient and safer to touch, but they rely even more on diligent tank cleaning and, for ultrasonic types, may produce mineral dust when used with hard tap water.

Choosing between them means thinking about who uses the space, how much time you want to spend on maintenance, your water hardness, and your preferred room feel. By pairing the right type of humidifier with thoughtful placement, moderate humidity targets, and routine cleaning, you can support a comfortable, practical indoor environment through the dry months.

Frequently asked questions

How often should I clean warm mist vs cool mist humidifiers?

Emptying and rinsing the water tank daily when the unit is in regular use is a good baseline for both types. Perform a deeper weekly clean of surfaces and parts that contact water, descale heating elements on warm mist models as needed, and replace or clean wicks/filters on evaporative cool mist units according to the manufacturer’s schedule.

Is distilled water necessary to prevent white dust and scale?

Distilled or low-mineral water is not strictly required but it greatly reduces mineral scale in warm mist units and white dust from ultrasonic cool mist units. Using lower-mineral water lowers cleaning frequency and can extend the life of filters and components, though it may raise operating costs if you buy larger quantities.

Can using a humidifier increase mold risk in my home?

Humidifiers can contribute to mold-friendly conditions if they cause persistent condensation or over-humidify a room. To reduce risk, aim for moderate indoor humidity (commonly 30–50% RH), monitor with a hygrometer, avoid directing mist toward cool surfaces, and maintain ventilation and routine cleaning.

Which humidifier type is safer for homes with children or pets?

Cool mist humidifiers generally present lower scald risk because they do not contain hot water or steam. Warm mist models can still be used safely if placed out of reach on stable surfaces and monitored to prevent tipping, but many households with active children or pets prefer cool mist for peace of mind.

How can I reduce mineral white dust from an ultrasonic humidifier?

Use distilled or low-mineral water, run a demineralization cartridge if available, and clean the unit regularly to minimize dust. Placing the unit on surfaces that are easy to wipe and avoiding very hard tap water are also effective strategies.

Desiccant vs Compressor Dehumidifiers: Pros, Cons, and Use Cases

Isometric illustration comparing two generic indoor air devices

Humidity is a major part of indoor air quality. Too much moisture can encourage mold growth, musty odors, and dust mites, while air that is too dry can feel uncomfortable and irritating. Many U.S. homes use dehumidifiers to keep relative humidity in a more comfortable range, often around 30–50% depending on climate and season.

Dehumidifiers support, but do not replace, other air quality tools such as ventilation and air purifiers. They do not remove fine particles like smoke or dust in any meaningful way, but they can help limit dampness that contributes to mold and general stuffiness.

Two main technologies are used in home dehumidifiers:

  • Compressor (refrigerant) dehumidifiers
  • Desiccant dehumidifiers

Understanding how each type works will help you choose the right option for your climate, room conditions, and comfort goals.

How Dehumidifiers Fit Into Home Air Quality

How Compressor and Desiccant Dehumidifiers Work

Both compressor and desiccant dehumidifiers have the same basic purpose: pull in moist air, remove some of the water, and return drier air to the room. The difference is in how they remove that moisture.

Compressor (Refrigerant) Dehumidifiers

Compressor dehumidifiers use a refrigeration cycle similar to an air conditioner.

Typical steps:

  • A fan pulls humid room air over cold coils.
  • Water in the air condenses on the cold surface and drips into a tank or drain hose.
  • The air then passes over warmer components and is blown back into the room, slightly warmer and drier.

They tend to work best when room temperatures are moderate or warm, commonly above the mid-60s °F. At cooler temperatures, the coils can ice up and efficiency drops, so many units cycle defrost modes to cope.

Desiccant Dehumidifiers

Desiccant dehumidifiers use a moisture-absorbing material instead of cold coils. The desiccant media might be a wheel or cartridge coated with a material that naturally attracts water molecules.

Typical steps:

  • A fan moves humid air through or across the desiccant material.
  • The desiccant absorbs moisture from the air.
  • A heater warms part of the desiccant to release the trapped moisture, which then condenses and drains away.

Because they are not relying on cold coils, desiccant dehumidifiers can work more consistently at lower room temperatures than many compressor models. They do, however, add more noticeable warmth to the room because of the built-in heater.

Comparison of compressor vs desiccant dehumidifier characteristics. Example values for illustration.
Key differences between compressor and desiccant dehumidifiers
Aspect Compressor dehumidifier Desiccant dehumidifier
Best temperature range (illustrative) Around 65–95 °F Around 40–80 °F
Typical room warmth impact Mild warming Moderate warming
Relative energy efficiency at higher temps Often higher Often lower
Performance in cool spaces Can drop noticeably More stable
Typical unit weight Heavier (compressor + coils) Lighter to moderate
Noise character Compressor hum + fan Mainly fan + heater sound
Common use Basements, whole rooms in warm seasons Cool rooms, garages, targeted spaces

Example values for illustration.

Pros and Cons of Compressor Dehumidifiers

Compressor dehumidifiers are widely used in U.S. homes, especially in warmer and humid regions. They are often the default choice for basements, living areas, and whole-room moisture control.

Advantages of Compressor Dehumidifiers

  • Generally more energy-efficient in warm conditions
    At typical indoor summer temperatures, compressor units usually remove more moisture per unit of electricity compared with similar-sized desiccant units.
  • High moisture removal potential
    Compressor models are often sized to remove many pints of water per day. This makes them practical for damp basements, large rooms, or homes in consistently humid climates.
  • Common and easy to find
    Because they are widely used, there is a broad range of capacities, physical sizes, and feature sets to choose from.
  • Often better for continuous summer use
    In hot, humid seasons, compressor units align well with typical indoor temperatures and can operate for long periods when sized and drained correctly.

Limitations of Compressor Dehumidifiers

  • Reduced performance in cooler rooms
    In spaces that regularly drop below the mid-60s °F, the coils can frost and moisture removal declines. Even with defrost controls, overall performance can be limited in unheated basements or garages.
  • Weight and bulk
    The compressor and refrigeration components add weight, which can be noticeable if you need to move the unit between floors or rooms.
  • Compressor noise
    In addition to fan noise, they produce a humming or cycling sound from the compressor. Noise levels vary by design and setting.
  • Warm air output
    Like all dehumidifiers, compressor units warm the air somewhat. In already hot rooms this can be noticeable, especially if the space is small or has limited air circulation.

Pros and Cons of Desiccant Dehumidifiers

Desiccant dehumidifiers use a different principle that can be attractive in specific home situations, especially where temperatures run cooler or where smoother moisture control is desired.

Advantages of Desiccant Dehumidifiers

  • Better suited to cooler environments
    Because they rely on moisture-absorbing media and internal heating, desiccant units generally maintain more consistent operation at lower room temperatures than many compressor-based models.
  • Smoother performance across seasons
    If a space experiences wide temperature swings, such as a sunroom, seasonal cabin, or partially heated basement, desiccant technology can help maintain moisture control without the sharp efficiency drop seen in some compressor units.
  • Different noise profile
    Without a compressor, the sound is often dominated by the fan and internal air movement. Many people perceive this type of sound as less intrusive than compressor cycling, though overall noise still depends on design and fan speed.
  • Can help slightly warm cool rooms
    The built-in heater that regenerates the desiccant media contributes noticeable warmth. In a cool, damp room, this can feel like a benefit, as long as you do not need the space to stay cold.

Limitations of Desiccant Dehumidifiers

  • Energy use at higher temperatures
    In warm climates or heated rooms, desiccant units often use more electricity to remove the same amount of moisture compared with a well-sized compressor unit.
  • Added heat in already warm spaces
    The extra warmth they introduce can be uncomfortable in small or poorly ventilated rooms during warm seasons.
  • Typically smaller capacities
    Many residential desiccant units are sized for modest moisture loads. Very damp basements or large open areas may require multiple units or a different approach.
  • Availability and options
    There are generally fewer residential desiccant models on the U.S. market than compressor models, which can limit specific feature combinations or capacities.

Energy Use, Noise, and Maintenance Differences

Beyond basic pros and cons, it helps to consider how each type fits into your day-to-day routine, energy bills, and overall comfort level at home.

Energy Use Considerations

Energy performance varies by design and operating conditions, but some general patterns are common:

  • Compressor units in warm, humid rooms often provide more moisture removal per kilowatt-hour, making them practical for long summer runs in many regions.
  • Desiccant units in cooler spaces can avoid the steep efficiency drop that compressor coils experience in cold air, so they may be the more realistic option for unheated or lightly heated areas.
  • Thermostats and timers can help whichever type you choose run only as needed. Pairing a dehumidifier with a simple humidity target (via built-in or separate hygrometer) can prevent unnecessary operation.

Noise and Comfort

Noise is highly design-dependent, but there are some recurring themes:

  • Compressor dehumidifiers combine fan noise with a hum and occasional clicking or cycling from the refrigeration system.
  • Desiccant dehumidifiers mainly produce fan noise and airflow sounds, sometimes described as more constant but less mechanical.

For bedrooms, offices, or TV rooms, pay attention to fan speed options and any quiet modes. Placement also matters: keeping the unit away from hard corners and elevating it slightly can reduce reflected noise.

Maintenance and Upkeep

Maintenance needs are broadly similar across both technologies:

  • Water removal: Empty the tank regularly or set up a continuous drain if the unit supports it and you have a suitable drain point.
  • Filter cleaning: Many units use a basic mesh filter to catch dust. Rinse or clean this as recommended to keep airflow consistent.
  • Coil or intake care: For compressor units, keeping intake and exhaust areas free of dust improves efficiency. For desiccant units, maintaining clear airflow paths is equally important.
  • General inspection: Periodically check for unusual noises, leaks, or error lights, and follow the manufacturer’s instructions if something seems off.

Regular maintenance reduces the chance of performance dropping or of the unit working harder than necessary.

Best Use Cases for Compressor Dehumidifiers

Choosing the right technology often comes down to the room’s primary conditions and how you use the space. Compressor dehumidifiers tend to be the first choice in several scenarios.

Warm, Humid Basements

In many U.S. regions, basements are damp during warmer months. When the basement is mostly finished or semi-finished and stays above the mid-60s °F, a compressor dehumidifier is usually practical.

They are often used for:

  • Finished basements with carpeting or furniture
  • Storage areas where you want to discourage musty odors
  • Spaces connected to the main living area where moisture migrates upward

Whole-Room Moisture Control in Living Spaces

For large family rooms, open-plan living areas, or main floors that feel sticky during humid seasons, a compressor dehumidifier with suitable capacity can help maintain a more comfortable environment alongside air conditioning and ventilation.

In these settings, consider:

  • How open the floor plan is, since air needs to circulate to and from the unit
  • Whether continuous drainage is possible to avoid frequent tank emptying
  • Where noise is least disruptive while still allowing good airflow

High-Moisture Everyday Activities

Homes with frequent cooking, long showers, indoor laundry drying, or many occupants may generate extra moisture. While ventilation and exhaust fans should be the first line of control, a compressor dehumidifier can help stabilize humidity in shared areas once basic ventilation strategies are in place.

Best Use Cases for Desiccant Dehumidifiers

Desiccant dehumidifiers shine in situations where temperatures are cooler, or where space conditions make compressor operation less effective or less comfortable.

Cool or Seasonally Unheated Rooms

Spaces that spend much of the year below normal living-room temperatures can benefit from desiccant technology, such as:

  • Unheated or lightly heated basements that stay cool for most of the year
  • Garages or workshops where freezing conditions are possible
  • Seasonal cabins or sunrooms that are only occasionally heated

In these rooms, a compressor unit may cycle frequently into defrost or remove moisture slowly, while a desiccant unit can maintain a more predictable level of operation.

Targeted Moisture Control in Small Spaces

Desiccant dehumidifiers are often used in compact areas where fine control of moisture is helpful, for example:

  • Closets or small storage rooms with recurring dampness
  • Small bedrooms that feel clammy during cool, wet weather
  • Home offices or hobby rooms where you want more consistent humidity

The added warmth can be a benefit in these smaller, cooler spaces, as long as the room does not already run warm.

Shoulder Seasons and Mild Climates

In regions with long, cool, and damp shoulder seasons, indoor temperatures may hover below typical summer setpoints. In these weeks, heating may be minimal, but the air can still feel damp. A desiccant unit can help keep humidity in a more comfortable range even when compressor units are less efficient.

Desiccant vs Compressor: How to Choose for Your Home

To decide between desiccant vs compressor dehumidifiers, focus less on the technology label and more on your room conditions, comfort goals, and how the unit fits into your broader indoor air strategy.

Key Questions to Ask

  • What is the typical room temperature?
    If it usually stays above the mid-60s °F, compressor units are often more energy-efficient. If it spends long periods cooler than that, a desiccant unit may maintain performance more reliably.
  • How damp is the space?
    Very damp or large spaces may require the higher capacities more common in compressor models, or additional moisture control strategies such as drainage improvements and ventilation.
  • How important is noise type vs level?
    Some people dislike compressor hum more than a steady fan sound. Thinking about where the unit will sit relative to sleeping or working areas can guide your choice.
  • Is extra heat welcome or a drawback?
    In a cool, damp room, the additional warmth from a desiccant unit may be comfortable. In a warm, humid room, that same heat could be unwelcome.
  • Can you support continuous drainage?
    Regardless of type, routing a hose to a floor drain, sink, or condensate pump (following product instructions) can make long-term operation more convenient.

Integrating Dehumidifiers with Other Air Quality Tools

Dehumidifiers work best when combined with other basic indoor air practices:

  • Ventilation: Use kitchen and bathroom exhaust fans, and open windows when outdoor conditions allow, to remove moisture at its source.
  • Air purification: If you are also concerned about particles like dust or smoke, a separate air purifier with appropriate filtration can complement a dehumidifier.
  • Humidity monitoring: A simple hygrometer or air quality monitor that displays humidity can help you track trends and adjust settings, without needing to guess.

Viewed this way, the choice between desiccant and compressor is one part of a broader plan to keep your home comfortable and limit excessive dampness.

Simple humidity and mold prevention planning guide. Example values for illustration.
Humidity and mold quick planning examples
Goal Simple actions Tools Note
Reduce basement dampness Seal obvious water entry paths, run dehumidifier, improve drainage where possible Compressor or desiccant dehumidifier, hygrometer Address liquid water issues in addition to humidity control.
Limit bathroom moisture buildup Use exhaust fan during and after showers, keep door slightly open afterward Exhaust fan, possibly small dehumidifier nearby Removing steam at the source reduces load on any dehumidifier.
Maintain comfortable bedroom humidity Monitor levels, ventilate when outdoor air is drier, use dehumidifier if consistently high Hygrometer, small dehumidifier if needed Avoid overshooting toward very dry air for comfort.
Protect stored items in closets Promote airflow, avoid tightly packed items, use moisture control devices Small desiccant unit or moisture-absorbing packs Check periodically for musty odors or visible dampness.
Manage seasonal dampness in cool rooms Use targeted dehumidification, seal drafts, consider modest heating Desiccant dehumidifier, weatherstripping Stable temperatures help maintain more even humidity.
Plan for laundry moisture indoors Dry clothes in well-ventilated area, run fan or dehumidifier nearby Fan, dehumidifier sized for the room Reducing drying time helps limit moisture buildup.

Example values for illustration.

Putting It All Together

Desiccant vs compressor dehumidifiers each address the same problem—excess moisture—but excel under different conditions. Compressor models usually fit warm, humid rooms and larger spaces where energy efficiency and capacity matter most. Desiccant models are often better suited to cooler, smaller, or seasonally used rooms where consistent operation and added warmth are acceptable or even helpful.

Whichever type you choose, combining dehumidification with basic ventilation, routine maintenance, and simple humidity monitoring will give you a more predictable and comfortable indoor environment over time.

Frequently asked questions

Which is more energy-efficient: desiccant vs compressor dehumidifiers?

Energy efficiency depends on operating temperature and unit design. Compressor units typically remove more moisture per kilowatt-hour in warm, humid rooms, making them more efficient for summer or heated living spaces. Desiccant units avoid the steep efficiency drop compressors can experience at low temperatures but often use more electricity than compressors in warm conditions.

Can I use a desiccant dehumidifier in an unheated basement or garage?

Yes. Desiccant dehumidifiers perform well in unheated or cool spaces because they do not rely on cold coils, but they add measurable heat to the room and may have lower daily moisture capacity, so confirm the unit is sized for the space and moisture load.

How should I size a dehumidifier for a basement: compressor or desiccant?

Size based on square footage, ceiling height, and how damp the space is; very damp or large basements typically need higher-capacity units. Compressor dehumidifiers commonly offer higher pints-per-day ratings suitable for large or persistently wet basements, while many residential desiccant units are smaller and may require multiple units or alternative moisture control measures for very wet spaces.

Will a desiccant dehumidifier make my room noticeably warmer?

Yes. The regeneration heater in desiccant units adds moderate warmth to the exhaust air, which can be helpful in cool rooms but may be undesirable in already warm or poorly ventilated spaces.

Which type is better for bedrooms or living rooms where noise matters?

Noise varies by model, but the character differs: compressor units add a hum and cycling from the refrigeration system in addition to fan noise, while desiccant units tend to produce a steadier fan/heater sound. For sleeping or quiet living areas, choose low-decibel models, use quiet or low fan settings, and position the unit to minimize reflected noise.