Air Purifier Plastic Smell Explained: Causes and Red Flags

Generic air purifier in a tidy room
An air purifier that smells like plastic is often experiencing normal new-material off-gassing, but a hot, burning, chemical, or worsening odor can signal a problem that needs prompt attention. Most new air purifiers have plastic housings, seals, fan parts, adhesives, foam, and packaging that can release a noticeable smell at first. A mild plastic odor that fades with use is common, especially during the first few hours to several days. The key is whether the smell is light and improving, or sharp, hot, smoky, or getting stronger.
Quick answer
  • A mild new-plastic smell often fades after about 24 to 72 hours of normal use in a ventilated room.
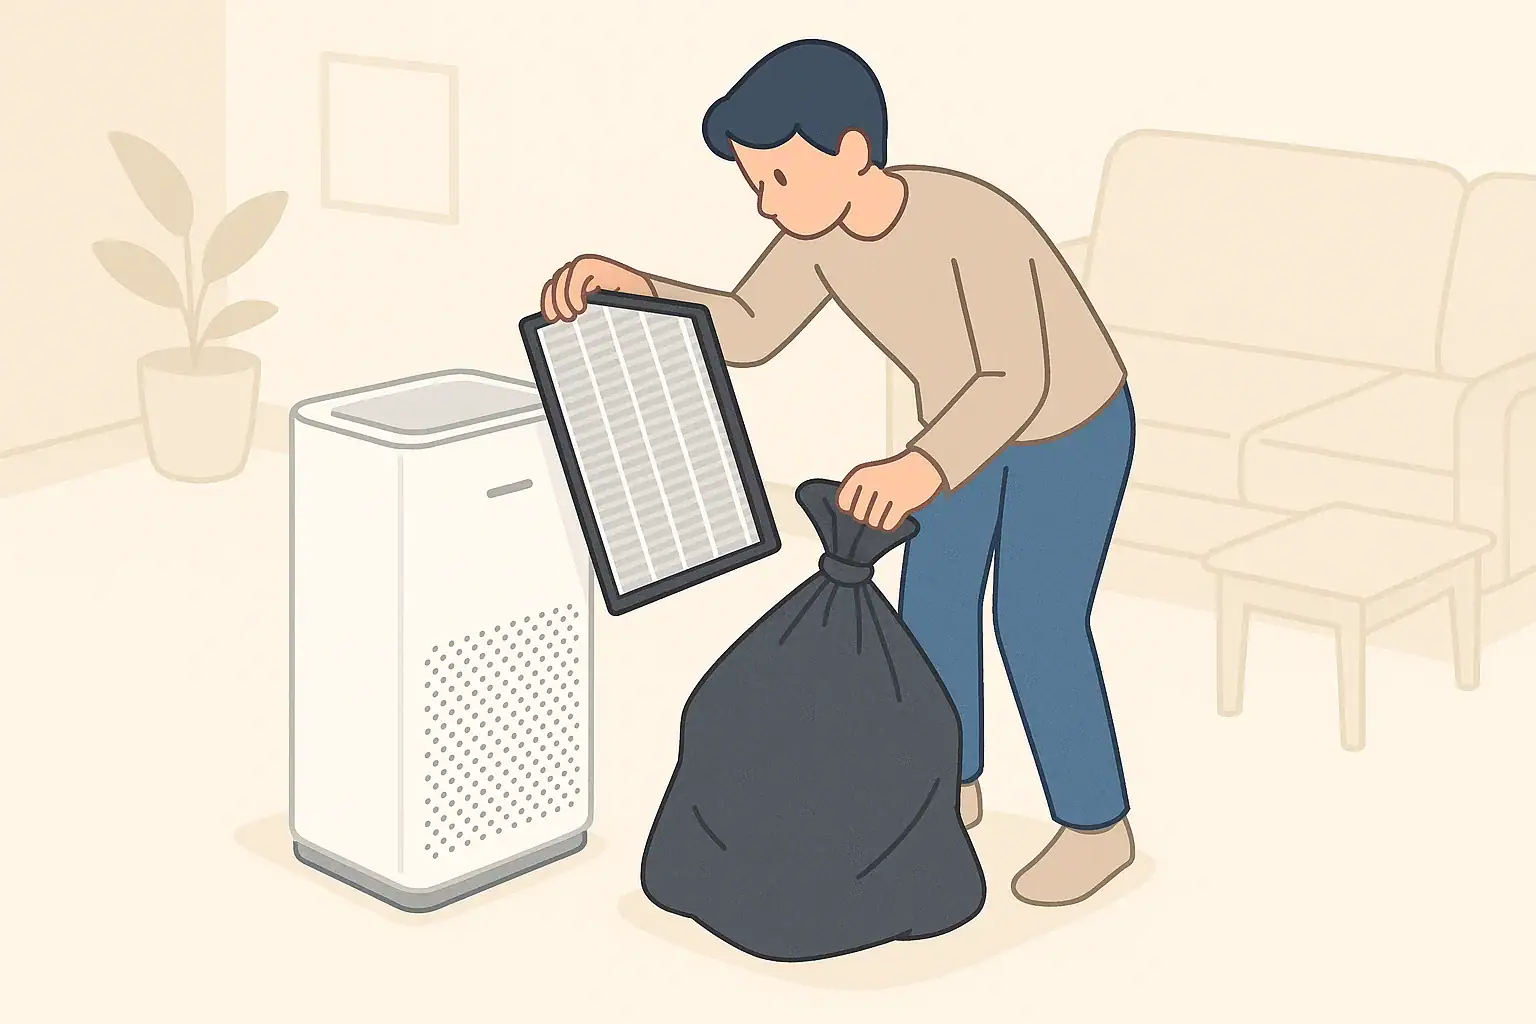
  • Check the filter immediately: many filters ship inside a plastic bag that must be removed before operation.
  • If the odor smells hot, burnt, smoky, or electrical, turn the unit off and unplug it.
  • Activated carbon can help with some odors and VOCs, while a particle filter alone is not designed for gases.
  • Keep the purifier at least a few inches from walls and soft furnishings so the motor and airflow are not restricted.
  • If the smell persists beyond about a week or worsens, stop using the unit and contact the seller or manufacturer.

Why an air purifier can smell like plastic

An air purifier plastic smell usually comes from materials inside or around the unit. The outer shell, internal fan assembly, seals, cable insulation, foam pads, filter frame, and packaging can all have a new-material odor. This is not unique to air purifiers; many new appliances have a temporary smell after being unpacked.

The smell is often more noticeable because an air purifier moves a large amount of air through a small space. If a component has a light odor, the fan can distribute it into the room quickly. The smell may seem stronger on higher fan speeds, even when the source is minor.

It is also possible for a purifier to smell like plastic because of user setup issues. The most common example is a filter that is still wrapped in shipping plastic. In that case, the airflow is restricted, filtration will not work properly, and the plastic smell can become strong when the fan runs.

Break-in time: what is typical and what is not

For a new unit, a mild plastic smell commonly improves after the purifier runs for several hours in a well-ventilated room. A practical break-in range is about 24 to 72 hours. Some units may take a little longer, especially if they were tightly packaged or stored in warm conditions.

A reasonable first step is to run the purifier in an occupied or unoccupied living area where windows can be opened briefly, as long as outdoor air conditions are suitable. Use a normal or medium fan speed, not a blocked corner or closet. Good airflow helps the materials air out while also preventing heat buildup.

The odor should trend downward. If it is strongest when first unboxed and gradually becomes hard to notice, that pattern fits normal break-in. If it becomes sharper, warmer, smoky, or irritating, treat it as a warning sign rather than a break-in smell.

Plastic smell troubleshooting matrix. Example values for illustration.
Common smell patterns and practical next steps
Smell patternLikely explanationWhat to checkPractical response
Light new-plastic odorNew materials airing outPackaging removed, room ventilatedRun for 24 to 72 hours and monitor improvement
Strong plastic smell right awayFilter may still be wrappedFilter compartment and pre-filterTurn off, unplug, remove all shipping plastic
Hot or burning odorPossible motor, wiring, or overheating issueHeat at outlet, cord, housing, or ventsStop use and seek support or inspection
Chemical solvent-like odorAdhesives, coatings, or nearby sourceNew furniture, cleaners, paint, flooringVentilate and identify whether purifier is the source
Musty plastic smellDamp filter or dirty housingFilter condition and humidityReplace wet filters and clean approved surfaces
Odor only on high speedAirflow carrying a faint source fasterFan setting, placement, restricted intakeImprove clearance and retest at several speeds

Main causes to check first

Shipping plastic left on the filter

This is the first thing to check. Many replacement filters and new-unit filters are sealed in clear plastic to keep them clean during shipping. The purifier may still turn on with the plastic in place, but airflow will be reduced and the smell may be obvious.

Turn the unit off and unplug it before opening any filter compartment. Remove the filter, inspect all sides, and look for plastic wrapping, cardboard inserts, tape, or protective foam. Reinstall the filter only as directed by the user manual.

New materials and adhesives

Plastic housings and internal parts can release a temporary smell, especially when the fan warms slightly during normal operation. Adhesives, rubber feet, foam seals, and packaging can also contribute. This type of smell should be mild and should fade.

Filter media and carbon odor

Some filters have a noticeable scent when new. Activated carbon can have a faint dry, dusty, or charcoal-like smell. That is different from a melting or electrical odor. A HEPA-style particle filter may also carry packaging smell, but it is not designed to remove gases or VOCs by itself.

Nearby sources in the room

The purifier may not be the original source. New rugs, foam mattresses, vinyl flooring, paint, hobby materials, candles, cleaning sprays, and air fresheners can all create odors that the purifier circulates. If the smell appears only in one room, look at recent changes in that space.

What to do when the plastic smell appears

Use a calm, step-by-step process. The goal is to separate normal break-in from setup problems and potential safety issues.

  • Turn the unit off before inspecting it. Unplug it before removing panels or filters.
  • Remove all packaging. Check the filter, filter frame, intake grille, outlet grille, cord tie, and any foam shipping pieces.
  • Confirm correct filter orientation. Filters often have an airflow direction or specific side that faces outward.
  • Place it in open air. Leave several inches of clearance around intakes and outlets, and avoid curtains or bedding.
  • Ventilate briefly if conditions allow. Opening a window can help new materials air out, but avoid bringing in smoke, high pollen, or outdoor pollution when that is a concern.
  • Run it at a moderate speed. A medium setting is often enough for break-in without unnecessary noise.
  • Recheck after several hours. The smell should be weaker, not stronger.

If the purifier has an unusual plastic smell only when placed near a wall, under a desk, or behind furniture, airflow may be restricted. Move it into a more open location and retest. Restricted airflow can make the motor area warmer and can also reduce cleaning performance.

Common mistakes and troubleshooting cues

One common mistake is assuming every odor means the purifier is working. Odor is not a reliable measure of particle removal. A particle filter can remove dust, smoke particles, and fine particles from airflow, but odors are usually gases or vapors. For odors, activated carbon or similar sorbent media matters more than a particle filter alone.

Another mistake is masking the smell with fragrances. Scented sprays, oils, or plug-in fragrances add more vapors to the room and may load carbon faster. Some purifiers are not designed to be used with essential oils, and adding oils to a device can damage materials or create residue.

Pay attention to timing. If the smell starts after a filter replacement, inspect the new filter and packaging. If it starts after cleaning, make sure only approved cleaning methods were used and that surfaces are dry before operation. If it starts after a power surge, drop, spill, or visible damage, stop using the unit and seek assistance.

A plastic smell that follows the purifier from room to room usually points to the unit or filter. A smell that stays in one room may come from a room source, such as new furnishings, damp materials, stored chemicals, or recent painting.

Real-world examples of plastic smell scenarios

New purifier in a bedroom

A new purifier is unboxed in the evening and run near the bed. A mild plastic scent is noticeable, especially on high speed. The filter wrapping has been removed, the unit is cool to the touch, and the odor is weaker the next day. This fits a typical break-in pattern.

Filter still sealed inside the unit

A purifier starts with a strong plastic smell and low airflow. When the filter compartment is opened after unplugging the device, the filter is still in a clear bag. Removing the bag and reinstalling the filter restores airflow. This is a setup issue, not normal filtration.

Odor after cleaning the room

The purifier smells chemical after a room is cleaned with strong products. The odor may be from cleaning vapors being pulled through the purifier. Ventilation and source control are more important than relying on the purifier alone.

Hot smell from the outlet area

A purifier produces a hot smell near the cord, plug, or housing. The odor does not fade and may be stronger at higher speed. This is not a break-in condition. The safer response is to turn it off, unplug it, and avoid further use until the issue is addressed.

Safety red flags: when to stop using the purifier

Most mild new-plastic smells are not urgent, but some odor patterns deserve a conservative response. Stop using the purifier if you notice any of the following:

  • A burning plastic, smoky, or electrical odor
  • Visible smoke, sparks, discoloration, or melted parts
  • A cord, plug, outlet, or housing that feels unusually hot
  • Buzzing, grinding, rattling, or fan speed changes with odor
  • Odor that becomes stronger over time instead of fading
  • Odor after a spill, water exposure, drop, or damaged panel

Do not open sealed electrical compartments, bypass switches, or modify the purifier. Use the manual, warranty process, retailer return process, or qualified electrical help when needed.

A note on ionizers, ozone, and UV-C

Some purifiers include optional ionizer, plasma, or UV-C features. These are different from basic fan-and-filter operation. If a feature creates a sharp, fresh, bleach-like, or electrical smell, check the manual and consider turning that feature off if it is optional.

For home use, many people prefer filtration-focused operation without intentional ozone generation. Ozone can react with indoor materials and is not needed for routine particle filtration. UV-C components should remain enclosed as designed and should not be viewed directly or modified.

Maintenance and odor prevention

Good maintenance reduces the chance of stale, dusty, or musty smells. Replace filters within the general interval suggested by the manufacturer, and shorten the interval when the purifier is used around smoke, cooking particles, renovation dust, pets, or frequent odors.

Pre-filters, if washable or vacuumable according to the manual, can collect hair and large dust. Keeping them clean helps maintain airflow. Never reinstall a damp filter unless the manual specifically says it is washable and it has fully dried. Moisture trapped in filter media can create unpleasant odors and may reduce filter performance.

Placement also matters. Avoid pushing the purifier tightly against a wall, placing it behind furniture, or covering the outlet. For many rooms, a practical target is several inches of open space around the intake and outlet, with more clearance when the manual calls for it.

General filter replacement planning. Example values for illustration.
Filter types and odor-related upkeep
Filter or partTypical interval rangeWhat can shorten itReminder
Pre-filterEvery few weeks to monthly cleaning checkPet hair, dust, lint, high fan useClean only as the manual allows
HEPA-style particle filterAbout 6 to 12 monthsSmoke, renovation dust, heavy particlesReplace if airflow drops or odor persists
Activated carbon filterAbout 3 to 6 monthsCooking odors, VOC sources, fragrancesCarbon can become saturated before it looks dirty
Combination filterAbout 6 to 12 monthsMixed particle and odor loadsFollow the shorter interval if odors return
Outer housing and grillesMonthly visual checkDusty rooms, floor placementWipe dry exterior surfaces when unplugged
Room source controlAs neededNew furniture, cleaning products, dampnessRemove or ventilate sources when practical

Related guides: Activated Carbon Filters Explained: VOCs, Odors, and What They Can’t DoAir Purifier Placement: Where to Put It for Best ResultsAir Purifier Maintenance Checklist: Filters, Sensors, and Cleaning

Frequently asked questions

How long should a new air purifier plastic smell last?

A mild new-plastic smell often improves within about 24 to 72 hours of normal use in a ventilated room. Some units may need a little longer if they were tightly packaged or stored warm. If the odor is not fading after about a week, it should be checked more closely.

Is it normal if my air purifier smells like plastic when I first turn it on?

Yes, a light plastic odor can be normal when a purifier is new because plastic, foam, adhesives, and packaging materials can off-gas. The smell should be mild and should decrease with use. If it is hot, smoky, or getting stronger, it is not a normal break-in smell.

What should I check first if my air purifier smells like plastic?

Unplug the unit and inspect the filter compartment for shipping plastic, cardboard inserts, tape, or foam pieces. Many filters arrive sealed in plastic and must be fully unwrapped before use. Also confirm that the filter is installed in the correct orientation and that airflow is not blocked.

Can a blocked filter or poor airflow make the plastic smell worse?

Yes. If the purifier is pressed against a wall, tucked behind furniture, or has restricted intake, the motor area can run warmer and any odor may become more noticeable. Better clearance and normal airflow often reduce both odor and heat buildup.

When is a plastic smell a safety problem?

Stop using the purifier if the odor is burning, smoky, electrical, or accompanied by heat, sparks, discoloration, or a melted part. Those signs can indicate an overheating or electrical issue rather than normal off-gassing. Unplug the device and contact the seller or manufacturer for help.

Will activated carbon remove an air purifier plastic smell?

Activated carbon can help with some odors and volatile compounds, but it will not fix a setup problem or a heat-related issue. A particle filter alone is not designed to remove gases well. If the smell is caused by shipping plastic or overheating, the source must be addressed directly.

Summary: what to remember

A mild air purifier plastic smell is often a short break-in issue from new materials, especially during the first 24 to 72 hours. The smell should be light, should not involve heat or smoke, and should gradually fade.

The first practical check is simple: unplug the unit and confirm that all shipping plastic has been removed from the filter and interior packaging. Then place the purifier where airflow is not blocked and run it in a ventilated space when outdoor conditions are reasonable.

Stop using the purifier if the odor is burning, electrical, smoky, hot, or getting stronger. Do not modify the unit or bypass safety features. When in doubt, use the manual, return process, warranty support, or qualified help rather than continuing to run a purifier that smells abnormal.

Air Purifier Timer vs Auto Mode: What Works Better

Generic air purifier in a tidy bedroom

Auto mode usually cleans better with less attention, while a timer can save energy when you only need the purifier during predictable periods. The better setting depends on room size, fan speed, sensor quality, and how often particles or odors enter the room. In many homes, the most practical approach is auto mode during variable conditions and a timer for scheduled use, sleep, or empty rooms.

Quick answer

  • Best for cleaning: Auto mode, if the purifier has a responsive particle sensor and is correctly sized for the room.
  • Best for predictable energy savings: Timer mode, especially when running the unit 1–4 hours after cooking, cleaning, or opening windows.
  • General cleaning target: Plan around about 4–5 air changes per hour for routine particle reduction in a closed room, using CADR and room volume as guides.
  • Energy rule of thumb: Fan speed matters more than the timer itself; high speed usually uses much more power than low or medium.
  • Practical default: Use auto mode when air quality changes, and use a timer when the source and time window are known.

What timer mode and auto mode actually do

An air purifier timer is a scheduling tool. It turns the purifier off after a selected period, or in some models, starts and stops the unit on a schedule. The timer does not measure air quality; it simply follows time.

Auto mode is a control setting. It uses one or more built-in sensors to estimate current air conditions and adjust fan speed. Most home purifiers that offer auto mode rely mainly on a particle sensor, although some models may also react to odors or gas-related signals.

The important difference is that timer mode is based on your expectation, while auto mode is based on the purifier’s sensor reading. A timer can be very efficient when the situation is predictable. Auto mode can be more effective when the room changes in ways you cannot easily schedule.

Energy and cleaning basics: CADR, ACH, fan speed, and sensors

To compare air purifier timer vs auto mode fairly, it helps to separate cleaning performance from energy use. Cleaning depends mostly on airflow through the filter, filter efficiency, room size, and how well air circulates. Energy use depends mostly on fan speed and run time.

CADR and room volume

Clean Air Delivery Rate, or CADR, is a general measure of how quickly a purifier can deliver filtered air for particles such as smoke, dust, or pollen. For room planning, a simple estimate is:

ACH = CADR × 60 ÷ room volume

Room volume is floor area multiplied by ceiling height. For example, a 200-square-foot room with an 8-foot ceiling has about 1,600 cubic feet of air. A purifier with a CADR near 120 cubic feet per minute would provide about 4.5 air changes per hour in that room, before real-world placement and leakage effects.

Why fan speed matters more than the setting name

A timer on high speed for two hours may use more electricity than auto mode on low speed for much of the day. Likewise, auto mode can use more energy if the sensor repeatedly raises the fan to high because pollution sources continue.

General home purifiers often use relatively low power on low speed and more power on high speed. Exact wattage varies by design, motor, filter resistance, and fan setting. For energy planning, compare the setting you actually use, not only the advertised maximum.

Sensor quality changes auto mode results

Auto mode is only as useful as the sensor and control logic behind it. A responsive particle sensor can increase fan speed when cooking particles, dust, smoke, or outdoor particles enter the room. However, a poorly placed or less sensitive sensor may react slowly or miss changes across the room.

Auto mode also may not respond strongly to every odor or gas. Activated carbon can help reduce some odor compounds, but a particle sensor does not directly measure all gases or VOCs.

Comparison of common air purifier operating choices. Example values for illustration.
Timer vs auto mode comparison
SettingHow it worksEnergy patternCleaning patternBest use
Timer on lowRuns for a set time at low speedLowest during operationSlow, steady filtrationQuiet occupied rooms
Timer on mediumRuns for a set time at moderate speedModerateBetter air mixing than lowAfter cleaning or light cooking
Timer on highRuns strongly, then turns offHigher but limited by timeFastest short-term particle reductionKnown short pollution events
Auto modeFan changes based on sensor readingsVariableAdapts to changing conditionsDaily use with changing particle levels
Manual continuous lowRuns constantly at low speedLow but continuousConsistent background filtrationBedrooms or offices
Off when awayNo airflow through the filterNoneNo active filtrationWhen ventilation or source control is enough

Common mistakes that reduce cleaning or waste energy

The wrong setting is not always the main problem. Many performance issues come from sizing, placement, or expectations.

  • Using auto mode in an undersized room setup: If the unit is too small for the room, the fan may run high often but still not provide enough clean air.
  • Placing the purifier in a corner or behind furniture: Restricted intake or outlet airflow reduces both cleaning and energy efficiency.
  • Using a short timer for a large room: A 30-minute run may not move enough air in an open-plan area.
  • Expecting particle auto mode to handle all odors: Odor control depends on the carbon type, amount, airflow, and source control.
  • Turning the purifier off too soon after a source event: Particles can remain suspended or resettle and become airborne again.
  • Ignoring filter loading: A clogged prefilter or overdue main filter can reduce airflow and make higher speeds more necessary.

If the purifier seems to run high all the time in auto mode, look for ongoing sources. Common examples include cooking, candles, smoke intrusion, dusty activity, open windows during high outdoor particle periods, or a unit placed too close to a particle source.

Practical setting checklist for everyday home use

Use the setting that matches the air quality pattern in the room. The goal is not to run the purifier as little as possible; it is to provide enough filtered airflow without unnecessary high-speed operation.

Use auto mode when conditions change

  • Outdoor particle levels vary during the day.
  • Cooking, cleaning, pets, or foot traffic change the particle load.
  • You want a hands-off setting for a bedroom, living room, or home office.
  • The purifier is correctly sized and the sensor is not blocked.

Use a timer when the event is predictable

  • Run the purifier during and after cooking for about 1–3 hours, depending on room size and ventilation.
  • Use a 1–4 hour timer after vacuuming, dusting, or opening windows.
  • Set a sleep timer if noise or light is a concern and the bedroom has already been filtered before bedtime.
  • Use scheduled operation in rooms that are occupied at predictable times.

Use manual mode when you need certainty

Manual speed can be useful when auto mode is too conservative or too reactive. For example, choosing medium speed during a known source event may deliver steadier filtration than waiting for a sensor to respond. Manual high speed can be helpful for short periods, but it is usually louder and uses more power.

Real-world examples: which setting makes sense?

Bedroom overnight

For a bedroom, quiet and consistency usually matter. If the purifier is sized well, continuous low or auto mode can maintain background filtration with modest noise. A timer may work if you run the purifier on medium or high before sleep, then switch to low or allow it to turn off later. If the room is exposed to changing outdoor air or hallway air, auto mode may be more practical.

Kitchen and nearby living area

Cooking can create a short-term particle event. Source control and ventilation are important, such as using a range hood when available. A purifier near, but not directly in the path of grease or steam, can help filter particles in adjacent spaces. Timer mode on medium or high for 1–3 hours after cooking is often a practical choice, while auto mode may extend the run if particles remain elevated.

Home office during the workday

If the room is occupied for predictable hours, a schedule or timer can reduce unnecessary run time. Auto mode is useful if outdoor air, pets, or household activity changes throughout the day. For video calls or focused work, many people use low or medium speed for noise control and increase speed during breaks.

Open-plan spaces

Open-plan rooms are harder to clean with a single purifier because the air volume is larger and airflow paths are less controlled. Auto mode may react to nearby particles but may not represent the whole space. In larger areas, sizing by total volume and using steady manual or scheduled operation can be more reliable than short timer runs.

Safety and standards considerations for automatic features

For routine home particle filtration, a mechanical filter-based purifier is the usual starting point. Look for clear information about CADR, filter type, room size assumptions, and ozone-related testing or claims. Avoid using any device in a way that intentionally generates ozone indoors.

Some purifiers include ionizers, plasma features, or UV-C lamps. These features vary widely in design and are not the same as standard HEPA-style particle filtration. If a unit includes optional electronic features, review the manufacturer’s safety information and keep ozone-related claims in perspective. It is reasonable to choose operation that does not rely on optional ionizing features if your main goal is particle filtration.

UV-C components, where present, are typically enclosed inside a device. Do not bypass covers, modify safety switches, or operate internal lamps outside their intended housing. For most home users, correct sizing, good placement, and filter maintenance matter more than extra features.

Maintenance and upkeep that affect both modes

A clean, well-maintained purifier performs more predictably in both timer and auto mode. Maintenance affects airflow, noise, energy use, and the purifier’s ability to respond to changing conditions.

  • Clean the prefilter when recommended: Dust and lint on the prefilter can restrict airflow.
  • Replace the main particle filter on schedule: A loaded filter may reduce airflow and increase noise at higher speeds.
  • Replace carbon when odors return: Carbon can become saturated depending on odor load and ventilation.
  • Keep sensors clean: Dust on sensor inlets can make auto mode less accurate.
  • Leave clearance around the unit: Many purifiers need open space around intake and outlet areas.
  • Track operating hours: A timer may reduce filter loading, while continuous auto mode may increase total hours.

Filter cost planning should include how the purifier is actually used. A unit running continuously for a bedroom may need different replacement timing than a unit used only after cooking or cleaning. Manufacturer intervals are a starting point, not a perfect match for every home.

General filter upkeep planner for timer and auto mode users. Example values for illustration.
Filter replacement and cleaning planner
Filter or partTypical interval rangeWhat changes itReminder
Washable or vacuumable prefilterEvery 2–4 weeksPets, dust, lint, frequent useClean gently and let dry if washed
Main particle filterAbout 6–12 monthsRun time, high particle load, filter sizeUse the device manual as the baseline
Activated carbon filterAbout 3–6 monthsCooking odors, smoke, VOC sourcesReplace when odors pass through sooner
Sensor inletMonthly checkDusty rooms, pet hair, placementKeep openings clear, do not spray cleaners inside
Air intake and outlet grillesMonthly checkFurniture blockage, dust buildupMaintain open airflow on all sides needed
Operating schedule reviewSeasonallyWeather, wildfire smoke, pollen, occupancyAdjust timer or auto use as conditions change

Related guides: How to Choose the Right Air Purifier for Your Room SizeAir Purifier Placement: Where to Put It for Best ResultsAir Purifier Maintenance Checklist: Filters, Sensors, and Cleaning

Summary: simple rules for choosing timer or auto mode

Choose auto mode when particle levels change and you want the purifier to adjust without constant attention. It is usually the better option for day-to-day cleaning if the unit is correctly sized, the sensor is responsive, and airflow is not blocked.

Choose timer mode when the source is predictable and time limited. It can save energy by preventing unnecessary run time after cooking, cleaning, or a planned room-use period. For many homes, the most balanced setup is auto mode for changing conditions, manual medium or high for short known events, and a timer when you know when filtration is no longer needed.

The setting alone does not determine results. Room size, CADR, fan speed, placement, filter condition, and ventilation all matter. If you use those basics well, both timer and auto mode can support cleaner indoor air while keeping energy use practical.

Frequently asked questions

Is auto mode better than a timer for everyday use?

Usually, yes, if the purifier has a good particle sensor and the room conditions change throughout the day. Auto mode can adjust fan speed when dust, cooking particles, or outdoor air change. A timer is better when you know exactly when you need filtration and when you do not.

When does a timer work better than auto mode?

A timer works better when the pollution source is predictable, such as after cooking, vacuuming, or opening windows. It can prevent the purifier from running longer than needed once the event is over. That can save energy, especially if the purifier would otherwise stay on high.

Does auto mode use less electricity than running a timer?

Not always. Energy use depends more on fan speed and how long the purifier runs than on the setting name itself. Auto mode may use less power if it stays on low most of the time, but it can use more if the sensor repeatedly triggers higher speeds.

Why does my purifier stay on high in auto mode?

It usually means the sensor is detecting ongoing particle levels or reacting to a nearby source. Common causes include cooking, smoke, dust, pets, open windows, or clogged filters. Placement and sensor cleanliness can also affect how the unit behaves.

Can I use auto mode overnight in a bedroom?

Yes, if the purifier is appropriately sized and the noise level is acceptable. Auto mode can maintain background filtration while adjusting for changes in room air. If the room stays fairly stable, continuous low speed or a sleep timer may also work well.

Air Purifier for Rental Apartments Without HVAC Changes

Portable air purifier in tidy apartment room

A portable air purifier can be used in a rental apartment without HVAC changes by sizing it for the room, placing it where air can circulate freely, and maintaining the filters on schedule. This approach is useful for renters because it does not require ductwork, electrical changes, or landlord-approved construction. It also gives you control room by room, which often fits apartment layouts better than whole-home assumptions.

Quick answer
  • Choose a portable purifier with a particle CADR that supports about 4 to 5 air changes per hour for the main room when possible.
  • For a typical 8-foot ceiling, a 200-square-foot room often needs roughly 110 to 135 cfm CADR for 4 to 5 ACH.
  • Place the unit with several inches of clearance on all intake and outlet sides, away from curtains, bedding, and tight corners.
  • Use HEPA-style particle filtration for dust, smoke particles, and PM2.5; use meaningful activated carbon only when odor control is a goal.
  • Avoid intentionally ozone-generating devices, and treat ionizers and UV-C features as optional technologies to evaluate carefully.

What a portable apartment air purifier setup means

In a rental apartment, a portable setup means using a freestanding air cleaner plugged into a standard outlet. It does not involve cutting into walls, modifying HVAC equipment, changing shared building ventilation, or bypassing any safety system.

This matters because apartments often have constraints that houses do not. You may have shared hallways, sealed windows, kitchen odors from nearby units, limited storage, and lease rules that restrict permanent alterations. A portable purifier works within those limits by filtering the air that passes through the unit in the room where it is operating.

It is important to separate filtration from ventilation. A portable purifier can remove many airborne particles from room air when properly sized, but it does not add outdoor air or reduce carbon dioxide from occupancy. Ventilation, window use, exhaust fans, and source control still matter for overall indoor air quality.

Sizing basics: CADR, room size, and ACH

The most useful sizing number for a portable air purifier is CADR, or clean air delivery rate. CADR is commonly expressed in cubic feet per minute and estimates how much filtered air the unit can deliver for particles under test conditions. Higher CADR generally means faster particle removal in a given room, assuming good placement and a reasonably sealed filter path.

ACH means air changes per hour. For a portable purifier, it estimates how many room volumes of cleaned air the unit can theoretically deliver in one hour. A practical planning formula is: required CADR in cfm equals room volume in cubic feet multiplied by the target ACH, then divided by 60.

For example, a 12-by-15-foot bedroom with an 8-foot ceiling has a volume of 1,440 cubic feet. For a 4 ACH target, the planning CADR would be about 96 cfm. For a 5 ACH target, it would be about 120 cfm. These are planning estimates, not guarantees, because furniture, open doors, fan speed, filter loading, and air mixing all affect performance.

Choosing a practical target

For general apartment use, many people plan around 4 to 5 ACH for the room where they spend the most time. A lower target may still be useful for light dust control or background filtration. A higher target may be preferred for short-term particle events, such as cooking smoke or outdoor wildfire smoke infiltration, if the noise level remains acceptable.

Portable apartment purifier planning checklist. Example values for illustration.
Rental apartment setup decisions
TaskWhy it mattersPractical note
Measure the roomRoom volume drives CADR planningUse length, width, and ceiling height
Pick a target ACHSets a realistic filtration goalAbout 4 to 5 ACH is a common planning range
Check usable fan speedHigh speed may be louder than preferredSize with the speed you will actually use
Review filter typeParticles and odors need different mediaHEPA-style filters target particles; carbon targets some gases and odors
Plan placementBlocked airflow reduces effectivenessKeep intake and outlet areas open
Budget replacementsDirty filters reduce airflowPlan for filter costs before purchase

Placement and airflow in a rental apartment

Placement can make a well-sized purifier perform better or worse. The unit needs access to room air, so avoid wedging it behind furniture, under a desk, inside a closet, or directly against a wall if the intake or outlet is on that side.

A central open area is usually better than a tight corner, but the best spot must also be practical and safe. Keep cords out of walkways, avoid placing the purifier where it can be tipped over, and keep it away from water sources such as sinks, tubs, and humidifier mist.

Bedrooms are often the easiest rooms to plan because doors can be closed during use. Living rooms and open-plan apartments are harder because the purifier may need to handle a larger connected volume. If the kitchen, living room, and hallway all share air freely, size for the open area rather than only the square footage near the sofa.

Door and window strategy

When outdoor air quality is good, opening windows briefly can help with ventilation and odors. When outdoor particle levels are elevated, closed windows and filtration may be the more practical approach. A portable purifier cannot decide which condition applies, so a basic air quality monitor or local outdoor air information can help guide day-to-day choices.

Common mistakes and troubleshooting cues

A common mistake is buying for the apartment total square footage when the purifier will only be used in one room. Another is buying for the smallest listed room size while running the purifier on its quietest setting, which may deliver much less airflow than the maximum rating.

If dust seems to settle quickly, check whether the unit is running long enough and whether the prefilter is clogged. If odors remain, remember that particle filters are not designed to remove most gases. Some odors require source control, ventilation when appropriate, cleaning, or a purifier with a substantial activated carbon section.

If the purifier feels ineffective near a cooking area, it may be dealing with a strong source at close range. Use kitchen exhaust if available and safe to operate, cook with lids when practical, and move the purifier where it can circulate air without being exposed to grease or steam. Do not place a purifier directly on a stovetop, counter edge, or wet surface.

Portable setup checklist for renters

Start with the room where clean-air benefits would be most noticeable for daily comfort, such as the bedroom, home office, or main living space. One appropriately sized purifier in the right room is often more practical than one undersized unit expected to handle an entire apartment.

  • Measure first: Get the room dimensions and estimate ceiling height.
  • Calculate roughly: Use CADR equals room volume times ACH divided by 60.
  • Check filter fit: Make sure replacement filters are available and not unusually expensive.
  • Plan a location: Choose an open spot near where air naturally circulates.
  • Run it consistently: Continuous low or medium operation often works better than short bursts.
  • Use source control: Reduce indoor particle and odor sources where practical rather than relying only on filtration.

If you move often, also consider weight, carrying handles, and storage space. A purifier that is easy to move between rooms may be useful, but it should still be sized for each room where you expect it to perform well.

Real-world rental apartment examples

Studio apartment

In a studio, the sleeping and living areas may share one air volume. Size the purifier for the main open space, not just the bed area. If the kitchen is nearby, filtration can help with particles, but cooking odors may still require source control and ventilation when outdoor conditions allow.

Bedroom in a shared apartment

For a single bedroom, closing the door can make the room easier to filter. This can be useful when roommates have different schedules or cooking habits. Measure the bedroom volume and use the purifier in that closed room during the times you care most about filtration.

Older apartment with leaky windows

Drafty windows can bring in outdoor particles and odors. A portable purifier can reduce indoor particle levels over time, but it will work harder if infiltration is steady. Simple renter-friendly sealing products may help if allowed by the lease, but avoid permanent changes unless approved.

Safety and standards to consider

Choose equipment intended for indoor residential use and follow the manufacturer instructions for clearance, electrical safety, and filter replacement. Use the purifier with a properly rated outlet and avoid extension cord setups that create trip hazards or overheating risks.

Ozone deserves special caution. Devices that intentionally generate ozone are not appropriate for occupied residential air cleaning. Ozone can react with indoor materials and is not the same as filtration. If a purifier includes ionization, plasma, or similar electronic features, look for clear information about ozone emissions and whether the feature can be turned off.

UV-C features are sometimes included inside air purifiers. In a sealed device, UV-C may be marketed for treating surfaces or air passing inside the unit, but performance depends on exposure time, lamp condition, and design. Renters should not modify UV-C lamps, remove shielding, or use unshielded UV-C devices in occupied rooms.

Also think about noise. A purifier that is too loud may be turned off, which defeats the setup. If possible, plan around a medium fan speed for daytime and a quieter speed for sleep, recognizing that lower speeds usually mean lower CADR.

Maintenance, filters, and cost planning

Maintenance is part of performance. A clogged prefilter or overdue main filter can reduce airflow and make a purifier less useful. Check the manual for the expected replacement schedule, then adjust based on visible dust, runtime, cooking exposure, pets, smoke events, and outdoor conditions.

Many portable purifiers use a prefilter plus a main particle filter. Some include activated carbon for odors and gases. Thin carbon sheets may help with light odors, while larger carbon beds generally provide more capacity, but no portable carbon filter is unlimited. Once saturated, carbon media needs replacement.

Keep the outside of the unit clean, vacuum washable or cleanable prefilters if the instructions allow, and avoid washing filters that are not designed to be washed. Do not add fragrances, oils, or homemade filter materials to the purifier, because these can affect airflow, emissions, or safety.

Filter replacement planning for portable apartment purifiers. Example values for illustration.
Filter replacement planner
Filter partTypical interval rangeWhat can shorten itReminder
Washable prefilterEvery 2 to 4 weeks for cleaning checksPets, dust, frequent cookingClean only as instructed
Disposable prefilterAbout 1 to 3 monthsHeavy lint or visible buildupReplace if airflow drops
Main particle filterAbout 6 to 12 monthsHigh runtime, smoke events, dusty areasDo not wash unless labeled washable
Activated carbon sheetAbout 3 to 6 monthsPersistent odors or cooking exposureOdor return can signal saturation
Larger carbon cartridgeAbout 6 to 12 monthsFrequent gas or odor exposureCapacity varies by carbon amount
Sensor or air inlet areaMonthly visual checkDusty rooms or floor placementGently clean according to the manual

Related guides: How to Choose the Right Air Purifier for Your Room SizeAir Purifier Placement: Where to Put It for Best ResultsBest Air Purifiers for Allergies: What to Look For (CADR, HEPA, Carbon)

Frequently asked questions

How do I choose the right air purifier size for a rental apartment?

Measure the room you actually plan to use the purifier in, then estimate the room volume and match it to a CADR that can deliver about 4 to 5 air changes per hour. If you only need clean air in a bedroom or office, size for that room instead of the entire apartment. Running the purifier on a low setting that is too small for the space usually gives disappointing results.

Can an air purifier clean the whole apartment without HVAC changes?

A portable purifier can improve air quality room by room, but it usually cannot clean an entire apartment equally well unless the space is small and open and the unit is large enough. Closed doors, hallways, and separate rooms limit how far filtered air can spread. For most renters, it is more practical to focus on the room where they sleep or spend the most time.

Where should I place an air purifier in a rental apartment?

Place it where it can draw in and release air freely, with several inches of clearance on all sides if possible. Avoid corners, behind furniture, closets, and tight spaces that block airflow. Keep it away from water, curtains, bedding, and anything that could tip it over or obstruct the intake.

Do I need HEPA and activated carbon in the same purifier?

HEPA-style particle filtration is useful for dust, smoke particles, and other fine particles. Activated carbon is more relevant when odor reduction or some gas reduction is the goal. Many renters do fine with strong particle filtration alone unless they specifically want help with cooking odors, pet smells, or other airborne odors.

Is it safe to use ionizers, UV-C, or ozone features in a rental apartment?

Ozone-generating devices are not appropriate for occupied residential air cleaning. Ionizers, plasma features, and UV-C can vary widely in design and effectiveness, so they should be evaluated carefully rather than assumed to improve air quality. It is best to choose a purifier that clearly explains its filtration performance and safety features, and to avoid modifying any built-in safety shielding.

Key takeaways for renters

An air purifier for rental apartments works best as a room-by-room filtration tool, not as a replacement for ventilation or source control. Start by measuring the room, estimating the CADR needed for a practical ACH target, and choosing a location with open airflow.

For most renters, the simplest durable setup is an appropriately sized portable purifier with effective particle filtration, optional carbon if odors matter, quiet operation at the speeds you will actually use, and a realistic filter budget. Avoid permanent HVAC changes, avoid ozone-generating approaches, and keep the unit maintained so it can continue moving air as intended.

Air Purifier for Printer and Craft Rooms: What Matters

Generic air purifier in a tidy craft room

An air purifier for printer and craft rooms should combine strong particle filtration, meaningful activated carbon, and placement that keeps airflow near the source without blocking intake or exhaust.

Printer and craft rooms can release a mix of airborne particles, odors, and vapors depending on what you do in the space. A portable air purifier can help reduce recirculating particles and some odors, but it works best alongside source control, careful material handling, and ventilation when needed.

Quick answer
  • For active printing or craft sessions, plan around 4 to 6 air changes per hour as general guidance; use higher airflow if dust or fine particles build up quickly.
  • Use a particle filter such as true HEPA for paper dust, toner traces, sanding dust, and fine particles; add substantial activated carbon for odors and many VOCs.
  • Estimate CADR with this simple formula: room volume in cubic feet × target ACH ÷ 60 = CADR in cfm.
  • Place the purifier in the same room, usually 3 to 8 feet from the printer or work area, with open space around the intake and outlet.
  • Do not rely on a purifier alone for strong solvent fumes, resin work, aerosol sprays, or flammable vapors; follow product labels and use ventilation.

Why printer and craft rooms need different air planning

A home office with an occasional inkjet print job is not the same as a room used for laser printing, paper cutting, model making, painting, adhesives, heat tools, or resin crafts. The air concerns can change from minute to minute based on the task.

Particles are one part of the picture. Laser printers can contribute fine particles during operation, and any printer area can collect paper dust. Crafting can add visible dust from cutting, sanding, powders, fibers, glitter, or clay. These are primarily particle issues, so true HEPA filtration matters.

VOCs, or volatile organic compounds, are the other major category. They can come from some inks, paints, markers, adhesives, solvents, coatings, and craft resins. VOCs are gases, not particles, so a HEPA filter alone is not designed to capture them. Activated carbon and ventilation are the main practical tools for odors and many gaseous compounds.

The goal is not to make the room sterile or to create a lab-grade environment. The practical goal is to reduce buildup, improve room air turnover during projects, and avoid sending dust or odors into nearby living spaces.

Particles, VOCs, and sizing basics

Match the filter to the pollutant type

A particle filter and a gas-phase filter do different jobs. A true HEPA-style filter is intended for airborne particles, including dust and fine particulate matter. It does not remove gases in a meaningful way. Activated carbon and related sorbent media can help with many odors and some VOCs, but capacity varies by the amount of media, contact time, and the specific chemical.

For printer and craft rooms, the preferred setup is often a sealed portable purifier with both a high-efficiency particle filter and a separate carbon stage. Thin deodorizing sheets may reduce mild odors briefly, but they usually have limited capacity for frequent projects.

Use CADR and ACH for room planning

CADR, or clean air delivery rate, estimates how much filtered air a purifier supplies in cubic feet per minute. ACH, or air changes per hour, translates that airflow into a room-size target.

Use this general formula for planning: room volume × desired ACH ÷ 60 = CADR in cfm. For example, a 120 square foot room with an 8 foot ceiling has about 960 cubic feet of air. At 5 ACH, the planning CADR is about 80 cfm. This is an illustration, not a product guarantee.

In printer and craft rooms, 4 to 6 ACH is a useful starting range for active use. If the room is open to a hallway, has tall ceilings, or includes dusty craft work, plan for more airflow or use source control such as dust collection, covered storage, and cleaning between tasks.

Example values for illustration.
Air control choices for printer and craft room concerns
ConcernPrimary controlPurifier feature to look forPractical note
Paper dustHousekeeping and filtrationHigh-efficiency particle filterClean shelves and printer areas so dust is not repeatedly stirred up.
Fine printer particlesAirflow and filtrationCADR sized for the roomRun the unit during and after larger print jobs.
Toner handling dustCareful cartridge handlingSealed particle filter pathAvoid shaking cartridges or brushing loose toner into the air.
Adhesive odorsVentilation and source reductionActivated carbon stageCap containers promptly and use the least amount needed.
Paint or marker smellsMaterial choice and ventilationCarbon with adequate mediaLow-odor materials can reduce the load on the purifier.
Sanding or cutting dustCapture at the sourceParticle filtration plus strong airflowUse wet methods or local collection when appropriate for the material.
Resin or solvent workVentilation and label directionsCarbon as a supplement onlyA purifier should not be treated as the main safety control.

Placement that works with room airflow

Placement affects how quickly a purifier can draw in room air and return filtered air without short-circuiting. The simplest rule is to keep the purifier in the same room as the source and give it open space to breathe.

For a printer station, place the purifier close enough to influence the immediate area, often about 3 to 8 feet away, but not so close that paper, exhaust heat, or cords become a problem. Keep the purifier away from loose craft materials that could block the intake.

For a craft table, place the unit where air can move across the work zone and toward the purifier without blowing directly onto powders, glitter, wet paint, or delicate materials. Direct airflow can scatter lightweight supplies, so angle the outlet away from the table if needed.

Clearance and door position

Many portable purifiers need at least several inches of clearance on all intake and exhaust sides. More open space is usually better. Avoid squeezing the unit under a desk, inside a cabinet, behind a printer stand, or between storage bins.

If the room has a door, closing it during a short project can help the purifier cycle the same room air more efficiently. If VOC odors are present, however, ventilation to the outdoors may be more important than isolating the room. Use the approach that fits the material and task.

Practical checklist for printing, crafting, and cleanup

A good air plan starts before the purifier is turned on. Small habits can reduce the amount of material released into the room and extend filter life.

Before the project

  • Choose low-odor or water-based materials when they meet the project requirements.
  • Open and prepare only the materials needed for the session.
  • Set the purifier on a higher speed before printing, sanding, cutting, painting, or gluing.
  • Check that intakes and outlets are not blocked by paper stacks, fabric, or storage bins.
  • Use outdoor-venting exhaust when product labels call for ventilation.

During and after the project

  • Keep lids and caps closed between uses.
  • Do not aim purifier airflow at loose powders, toner, glitter, or wet coatings.
  • Run the purifier for 30 to 60 minutes after active work as a general cleanup period.
  • Wipe hard surfaces with a damp cloth instead of dry dusting when fine dust is present.
  • Dispose of used wipes, scraps, and packaging according to the material label.

These steps are general home practices, not a substitute for safety data sheets or product instructions. Materials such as strong solvents, spray coatings, and two-part resins can require more specific ventilation and handling.

Common mistakes and troubleshooting cues

One common mistake is buying for floor area only. Ceiling height, open doors, connected rooms, and fan speed all affect real-world performance. If a purifier is rated for a large room only on its highest setting, check whether you are willing to use that louder setting during projects.

Another mistake is expecting carbon to last indefinitely. Activated carbon fills up over time. If odors return quickly even with clean airflow and correct placement, the carbon stage may be saturated or too small for the task.

Placement can also cause disappointing results. A purifier behind a printer cabinet may clean the air immediately around the cabinet but fail to mix with the rest of the room. A purifier across the room may still help, but it may take longer to affect the source area.

Signs to review your setup

  • Visible dust settles soon after cleaning.
  • Odors linger into the next day after normal projects.
  • A PM2.5 monitor rises during printing or cutting and takes a long time to settle.
  • The purifier filter loads quickly with powder, paper dust, or fibers.
  • The room feels stuffy because ventilation is limited, even when particles are controlled.

These cues do not diagnose a problem. They simply suggest that size, placement, filtration type, cleaning habits, or ventilation may need adjustment.

Real-world room examples

Small home office with occasional printing

For a small enclosed office with an inkjet printer and light paper handling, a particle-focused purifier sized for 4 to 5 ACH may be enough for general dust control. A modest carbon stage can help with mild odors, but ventilation and material choices still matter.

Laser printer plus paper storage

A room with a laser printer, reams of paper, and frequent print runs benefits from stronger airflow and careful placement. Set the purifier near the printer area, keep paper dust under control, and run the device during and after larger jobs. Avoid placing the purifier where warm printer exhaust blows directly into an intake unless the purifier manual allows that spacing.

Craft room with cutting, sanding, and adhesives

This is a mixed-pollutant room. Use particle filtration for dust and fibers, carbon for odors, and local capture or damp cleanup for dust-producing work. For adhesives, paints, and coatings, limit open containers and ventilate according to label directions.

Shared open-plan craft corner

Open-plan spaces are harder because the effective room volume is larger than the craft corner. A purifier near the work area can still reduce local particle buildup, but whole-space control may require higher CADR, more than one unit, or better source control.

Safety standards and technology cautions

For occupied home spaces, choose air-cleaning methods that do not intentionally generate ozone. Ozone generators are not appropriate as a daily air-cleaning strategy in occupied rooms. If a purifier includes an ionizer, plasma feature, or similar electronic function, review whether it can be turned off and whether the product is listed for low ozone emissions under applicable safety standards.

UV-C features, when enclosed inside an appliance, are usually marketed for treating surfaces inside the unit. They do not replace particle filtration, activated carbon, or ventilation for printer and craft room pollutants. Do not modify a purifier, remove safety shields, or operate lamps outside their intended enclosure.

Also consider ordinary electrical and material safety. Keep purifiers away from heat tools, wet work areas, overspray, and flammable vapor sources. A portable purifier is not an explosion-control device and should not be used as the main control for concentrated solvent vapors.

Maintenance is part of safety and performance. A clogged prefilter reduces airflow. A poorly seated filter can allow bypass, where air leaks around the media instead of going through it. Check that filters fit firmly and that access panels close correctly after replacement.

Example values for illustration.
Monitor metrics for printer and craft rooms
MetricWhat it can indicateCommon pitfallPractical action idea
PM2.5Fine particle changes during printing, cutting, or sandingLow-cost sensors can vary by dust type and humidityWatch trends before, during, and after projects.
PM10Larger dust from paper, fibers, powders, and cuttingNot all monitors measure it accuratelyUse with visual dust checks and cleaning habits.
TVOCGeneral change in mixed gases or odorsReadings are broad and not chemical-specificUse as a prompt to ventilate and cap materials.
CO2Ventilation proxy when people occupy the roomIt does not measure printer particles or VOCs directlyIncrease outdoor air when levels climb during long sessions.
Relative humidityMoisture conditions that affect comfort, paper, and dustVery dry or damp air can affect materialsMany homes aim roughly for 30 to 50 percent indoors.
Odor notesHuman sense of lingering smellsNose fatigue can make odors seem to disappearRecord which materials cause lingering odors and adjust use.

Related guides: How to Choose the Right Air Purifier for Your Room SizeAir Purifier Placement: Where to Put It for Best ResultsActivated Carbon Filters Explained: VOCs, Odors, and What They Can’t DoVentilation vs Air Purifier: When You Need One, the Other, or Both

Frequently asked questions

How strong should an air purifier be for an air purifier for printer and craft rooms?

A practical starting point is about 4 to 6 air changes per hour for active use, then adjust for room size, ceiling height, and how much dust or odor the space produces. If the room is open to other areas or you do heavier sanding, cutting, or frequent printing, you may need more airflow.

Do I need HEPA, activated carbon, or both for printer and craft rooms?

HEPA-style filtration is useful for paper dust, toner traces, sanding dust, and other fine particles. Activated carbon helps with odors and many VOCs, but it does not replace particle filtration. For mixed-use rooms, a purifier with both stages is usually the most practical choice.

Where should I place an air purifier in a printer or craft room?

Place it in the same room as the source and keep the intake and outlet unobstructed. In many rooms, 3 to 8 feet from the printer or work area is a reasonable starting point, as long as the airflow is not aimed at loose materials or blocked by furniture.

Will an air purifier remove toner fumes, paint smells, or solvent odors?

It can help reduce some odors if it has enough activated carbon, but performance depends on the chemical and the amount of carbon in the unit. Strong solvent fumes, spray coatings, resin work, and flammable vapors usually need ventilation and source control, not filtration alone.

How long should I run the purifier after printing or crafting?

A general cleanup period of 30 to 60 minutes after active work is a reasonable starting point. Longer run times may be useful if odors linger, dust is heavy, or the room is open to other spaces.

Can I rely on an air purifier instead of ventilation in a craft room?

No, not for every material or task. A purifier is helpful for recirculating particles and some odors, but ventilation is still important for many VOCs, strong solvents, aerosols, and any material whose label says to use outdoor ventilation.

Summary takeaways

An air purifier for printer and craft rooms works best when it is planned for both particles and gases. Use true HEPA-style particle filtration for dust and fine particles, and use a meaningful activated carbon stage when odors or VOCs are part of the project.

Size the unit with CADR and ACH rather than floor area alone. A general target of 4 to 6 ACH is a practical starting point for many active rooms, with adjustments for ceiling height, room openings, dust-producing tasks, and acceptable noise level.

Place the purifier in the same room, near but not directly interfering with the printer or workspace. Keep the intake and outlet clear, run the purifier during and after projects, and pair it with source control, damp cleanup, and ventilation when materials call for it.

A purifier is a useful support tool, not a substitute for safe material handling. For strong solvents, sprays, resin work, or flammable vapors, follow the product instructions and use appropriate ventilation rather than relying on filtration alone.

Humidifier Safety Explained: Bacteria Risk and Safe Levels

Isometric illustration of a home humidifier in a clean living room

Humidifier safety mainly depends on controlling bacteria growth, using clean water, and keeping indoor humidity within a moderate range around 30–50% relative humidity.

Humidifiers can make dry indoor air more comfortable, but they also add moisture to surfaces and can release fine minerals or microbes if not maintained. With simple cleaning habits and attention to humidity levels, most households can use humidifiers safely without complicated equipment.

Quick answer
  • Aim for indoor humidity around 30–50% RH for everyday comfort.
  • Try not to stay above about 55–60% RH for long periods to limit mold and dust mite growth.
  • Empty and rinse portable humidifiers daily when in use; deep clean about weekly.
  • Use clean, low-mineral water when possible and avoid adding anything not meant for humidifiers.
  • Replace filters, wicks, or cartridges on the schedule in the manual or sooner if visibly dirty.
  • Stop using the humidifier and clean it if you notice white dust, slime, or musty odors.

What Humidifier Safety Means and Why It Matters

Humidifier safety is about balancing the comfort benefits of added moisture with the potential downsides of excess humidity, mineral residue, and microbial growth. When managed poorly, humidifiers can contribute to damp surfaces and release fine particles that degrade indoor air quality.

Most concerns fall into three main areas:

  • Bacteria and mold in the tank or on internal surfaces.
  • Too much humidity, which can support dust mites and mold growth in your home.
  • Mineral and chemical residues from tap water, especially with ultrasonic units that create visible “white dust.”

None of these issues are inevitable. They are largely preventable with routine maintenance, simple hygiene steps, and a basic understanding of safe humidity ranges.

Key Concepts: Bacteria, Mist Types, and Humidity Limits

Different humidifier designs have different safety considerations, but the basic principles are similar: keep water fresh, surfaces clean, and humidity in a moderate range.

Bacteria and Biofilm in Humidifier Tanks

Bacteria, mold, and algae can grow in standing water, especially if it is warm and stagnant. Over time, a slimy layer called biofilm can form on tank surfaces, providing a place for microbes to survive and multiply. If water with microbes is aerosolized as mist, some of that material can enter room air.

Growth is more likely when:

  • Water is left in the tank for days between uses.
  • The tank is rarely cleaned or disinfected.
  • The unit is in a warm location with sunlight or near heating vents.

Cool Mist vs Warm Mist vs Evaporative Units

Common household humidifiers include:

  • Ultrasonic cool mist: Use a vibrating diaphragm to create fine droplets. They are efficient but can broadcast both minerals and any microbes present in the water.
  • Evaporative (wick/fan): Draw air over a wet wick or filter. The water that evaporates is relatively purified of minerals, but the wick can harbor microbial growth if not replaced or cleaned.
  • Warm mist/steam: Boil water to produce steam, which can reduce microbes in the vapor stream, though minerals can still deposit around the device. The unit itself still needs cleaning to prevent scale and residues.

No design completely eliminates maintenance. Warm mist units may reduce bacteria in the mist itself, but the tank and internal parts can still host deposits and biofilm. Ultrasonic units tend to highlight mineral content as white dust if tap water is very hard.

Safe Indoor Humidity Ranges

Relative humidity (RH) expresses how much moisture is in the air compared to the maximum it can hold at that temperature. For most homes:

  • 30–50% RH is commonly used as a comfortable, general target range.
  • Below ~30% RH many people notice dry skin, static electricity, and dry nasal passages.
  • Above ~55–60% RH for extended periods, indoor surfaces can stay damp enough to support mold growth and higher dust mite populations.

Managing humidity is not about hitting an exact value; it is about avoiding long periods at the extremes. A simple digital hygrometer can help you check indoor levels in different rooms.

Table 1. Humidifier maintenance checklist and why each step matters — Example values for illustration.
Task Why it matters Typical frequency example
Empty and rinse tank Reduces standing water where bacteria can grow Daily when in regular use
Wipe surfaces dry Disrupts biofilm and removes residue Daily or every couple of days
Deep clean with mild cleaner Removes scale, slime, and buildup About weekly during season
Replace wicks or filters Prevents clogged, moldy, or smelly media Every 1–3 months, or as directed
Check humidity with hygrometer Helps avoid over-humidifying rooms Every few days or when weather changes
Store unit dry off-season Discourages long-term microbial growth Once per year

Example values for illustration.

Common Humidifier Safety Mistakes and Warning Signs

Recognizing early warning signs helps you correct minor issues before they affect indoor air quality.

Letting Water Sit in the Tank

One of the most common problems is leaving water sitting in the tank for days or weeks. Even if the unit is switched off, stagnant water can support microbial growth, which may release odors or residues when you turn the unit back on.

Running at Maximum Output All Day

Continuously running a humidifier at its highest setting in a closed room can easily push RH above 60%. This may lead to condensation on windows, damp patches on walls, and more favorable conditions for mold. If you see persistent condensation or surfaces that feel damp, it is a cue to lower the output, open a door, or run the unit for shorter periods.

Ignoring White Dust or Film

Ultrasonic humidifiers in areas with hard tap water can leave a light dust on furniture and surfaces. This “white dust” is mainly dried mineral residue carried in the mist. While this is mainly a cleanliness concern, it can also increase particulate matter in the air.

If you see noticeable white dust:

  • Wipe it up regularly to avoid buildup.
  • Consider using lower-mineral water (such as distilled or demineralized) if suitable.
  • Check for any fine chemical or scale films in the unit and clean as directed.

Overlooking Odors, Slime, or Discoloration

Musty smells, visible slime, or discoloration in the tank or on components are signs of microbial growth or mineral buildup. If you notice these, stop using the unit until it is cleaned thoroughly, and consider shortening your cleaning interval.

Using Additives Not Intended for Humidifiers

Adding fragrances, essential oils, or other chemicals to the water can damage some units and may increase airborne volatile compounds. Unless a product and device are specifically designed for combined use, it is safer to avoid adding anything to the humidifier tank besides water and any cleaning solution specified in the instructions (used only during cleaning, then rinsed out).

Practical Cleaning and Operation Steps

Simple, steady routines are more effective than occasional deep cleanings. Always follow the manufacturer’s specific instructions first, then use the general ideas below as a complement.

Daily or Frequent Tasks While in Use

  • Unplug first: Always disconnect power before opening or moving the unit.
  • Empty the tank: Pour out leftover water instead of topping it off day after day.
  • Rinse with clean water: Swish water around the tank and any removable reservoir to dislodge loose film.
  • Let parts air-dry briefly: If possible, allow the tank opening to face the air for a few minutes before refilling.
  • Refill with clean, cool water: Use low-mineral water if white dust is a problem or if recommended.

Weekly or Regular Deep Cleaning

Deep cleaning usually involves a few extra steps beyond a simple rinse:

  • Disassemble as far as the manual allows, separating the tank, base, and any removable tray or nozzle.
  • Use a mild cleaning agent appropriate for the device materials (often mild detergent or a dilute household cleaner as permitted by the manual).
  • Scrub corners and seams with a soft brush or cloth, taking care not to damage seals or coatings.
  • Rinse thoroughly so no cleaner remains that could be aerosolized.
  • Allow parts to dry completely when possible, especially before long storage.

Managing Humidity with Simple Checks

To keep humidity in a safe range:

  • Place a small digital hygrometer in the room where the humidifier is used.
  • Monitor RH at different times of day, especially during cold weather when windows are closed.
  • Turn the humidifier down or off if RH is approaching or exceeding about 55–60% for long stretches.
  • Use exhaust fans or open a door slightly to limit buildup of moisture in small spaces like bedrooms.

Real-World Use Scenarios

Examples can illustrate how to balance comfort, cleanliness, and humidity goals.

Bedroom in a Dry Winter Climate

In a cold, dry climate, indoor RH may fall below 25% in winter. A small ultrasonic or evaporative humidifier can increase comfort overnight. In this scenario:

  • Start at a low or medium setting and check RH before bed and in the morning.
  • Aim to keep RH generally between 30–45% overnight.
  • Look for signs of over-humidification, such as condensation on the inside of windows; if present, reduce run time.

Apartment with Mixed Heating and Cooling

In some apartments, humidity may be low in winter but moderate or high in summer. A humidifier may be useful only seasonally. When not in regular use:

  • Drain and dry the unit completely.
  • Store it in a clean, dry place with the tank uncapped so moisture can escape.
  • Clean it again before the next season of use, even if it looks visibly clean.

House with Visible White Dust

If you notice white dust accumulating under an ultrasonic humidifier in a hard-water region, you might:

  • Switch to lower-mineral water for the humidifier.
  • Set the unit on an easy-to-wipe surface rather than fabric.
  • Use the lowest setting that maintains comfortable humidity to reduce particle output.

Humidifier Safety, Air Quality, and Other Devices

Humidifiers affect indoor air quality alongside ventilation and filtration strategies. While they do not clean air, their operation can indirectly change how particles and microbes behave indoors.

Humidifiers and Air Purifiers Together

Using a humidifier and an air purifier in the same room is common. The purifier can capture airborne dust, mineral particles, and some microbes. To avoid interfering with each other:

  • Do not place the humidifier’s mist outlet directly against the purifier’s intake.
  • Keep some distance between devices so moisture does not accumulate on the purifier’s filters.
  • Monitor filter condition more often if the purifier runs near a humidifier.

Ionizers, UV-C, and Built-In Disinfection Features

Some devices include ionizers or UV-C lamps to treat air or water inside the unit. These features may aim to reduce microbial growth, but performance varies widely by design, intensity, and contact time. General considerations include:

  • Follow all safety instructions closely, especially around UV-C exposure and lamp replacement.
  • Do not rely on such features as a substitute for physical cleaning and water changes.
  • Avoid devices that intentionally produce ozone as a byproduct or selling point for occupied indoor spaces.

Even when internal disinfection is present, biofilm can still form on surfaces, so manual maintenance remains essential.

Maintenance, Filters, and Long-Term Upkeep

Keeping a humidifier safe and effective over time means planning for ongoing costs and time commitments, not just the initial purchase.

Filter and Wick Replacement

Evaporative units often use wicks, and some ultrasonic models include mineral-reducing cartridges or filters. Over time these parts become saturated with minerals and debris or grow discolored. Clues that replacement is due include:

  • Reduced output even when water is full and settings are normal.
  • Persistent odors that do not resolve after cleaning.
  • Visible darkening, crusting, or fraying of the wick or filter media.

Following the manual’s interval is a good starting point, but heavy use or hard water may require more frequent replacement.

Scaling, Hard Water, and Surfaces

If your water supply is rich in calcium or magnesium, hard deposits (scale) may build up on heaters, nozzles, and tanks. Scale can reduce efficiency and hide microbial growth. Regular descaling with an appropriate cleaner, as allowed by the manual, can extend the unit’s life and help maintain consistent output.

Seasonal Shutdown and Storage

At the end of the dry season:

  • Empty all water and run the unit briefly on fan-only mode if available to dry internal parts.
  • Clean and rinse the tank and base thoroughly.
  • Remove wicks or filters if they are at the end of life; discard them rather than storing damp media.
  • Store the unit in a place where dust and moisture are limited.

Frequently Asked Humidifier Safety Questions

Can humidifiers spread bacteria?

Humidifiers can release waterborne material if the tank or internal surfaces host microbial growth, especially in ultrasonic designs that aerosolize water directly. Keeping water fresh, cleaning regularly, and avoiding long periods of stagnation greatly reduces this risk.

Is distilled water necessary?

Distilled or demineralized water can reduce mineral deposits and white dust, which is particularly helpful in ultrasonic units. It is not strictly required for safety in all situations, but it may simplify cleaning and reduce airborne mineral residue in homes with very hard tap water.

What humidity is too high for a bedroom?

Long periods above roughly 55–60% RH increase the chance of condensation, mold growth, and higher dust mite activity. Short spikes may be unavoidable, but if your hygrometer shows levels above this range for many hours each day, it is worth reducing humidifier output or improving ventilation.

Where should I place a humidifier?

Place the unit on a flat, water-resistant surface a few feet away from walls, electronics, and bedding. Aim the mist into open space, not directly at curtains or ceilings, and keep cords away from walking paths. Avoid placing it on high shelves where spills would be harder to manage.

Do central (whole-house) humidifiers have different safety needs?

Central humidifiers connect directly to the home’s HVAC system and water supply. They share the same core issues—microbial growth, scaling, and over-humidification—but maintenance may involve inspecting ductwork, drain lines, and internal pads. Following the HVAC professional’s servicing schedule and monitoring whole-home humidity is important.

Table 2. Humidity and mold quick-plan examples — Example values for illustration.
Goal Simple actions Tools Note
Stay near 30–50% RH in winter Run humidifier on low/medium and check levels Humidifier, hygrometer Avoid continuous max output in small rooms
Prevent window condensation Lower humidity setting, open curtains, use fan Hygrometer, exhaust fan Persistent condensation can signal over-humidification
Reduce mold-friendly dampness Limit humidifier use, ventilate, dry wet areas quickly Dehumidifier or fans if needed Keep RH below about 55–60% when possible
Handle musty odor near humidifier Stop use, clean thoroughly, change water and filters Cleaning tools, fresh filters Do not restart until odor and visible growth are gone
Transition between seasons Turn off humidifier when outdoor air turns humid Hygrometer, calendar reminder Reassess if RH drops again with weather changes
Monitor whole-home moisture Place small meters in several rooms Multiple hygrometers Check high-risk areas like basements and bathrooms

Example values for illustration.


Related guides: How to Clean a Humidifier Properly (And How Often)Humidifier Water Choices: Tap vs Filtered vs DistilledHumidifier Cleaning Routine: How to Prevent Slime and Odors

Summary: Safe, Comfortable Humidifier Use

Humidifier safety centers on three ideas: avoid stagnant water, clean surfaces regularly, and keep humidity in a moderate range. Bacteria and mold are more likely to grow when water sits for days, tanks are rarely cleaned, and rooms stay overly damp.

By emptying and refilling the tank daily, deep-cleaning about weekly during heavy use, and watching for signs such as musty odors or white dust, you can manage the main risks. Checking indoor RH and adjusting output to keep levels roughly between 30–50% for comfort—and generally below about 55–60% long-term—supports healthier building materials and more stable indoor air quality.

With these habits, a humidifier can be one useful tool among others—like ventilation, filtration, and dehumidification—for keeping indoor air more comfortable across changing seasons.

Frequently asked questions

How often should I disinfect my humidifier to reduce bacteria risk?

Disinfect tanks and parts about weekly during regular use, and rinse daily to remove standing water; increase frequency if you notice slime, odors, or heavy use. Regular disinfection prevents biofilm buildup that can harbor bacteria.

What signs indicate a humidifier might be releasing bacteria or mold into the air?

Musty or sour odors, visible slime or discoloration in the tank, and unexplained respiratory irritation after use are common signs; white dust alone typically indicates minerals rather than microbes. Stop use and clean the unit thoroughly if you observe these signs.

Do I need to use distilled water to prevent bacterial growth and white dust?

Distilled or demineralized water reduces white dust and mineral scale, which can make cleaning easier, but it does not replace regular cleaning to prevent bacteria. In many areas tap water is safe if you maintain frequent rinsing and disinfection.

What indoor humidity level best balances comfort and minimizing mold or dust mite growth?

Aim for about 30–50% relative humidity for comfort and reduced microbial risk, and try to avoid sustained levels above about 55–60% which favor mold and dust mites. Use a hygrometer to monitor levels in different rooms and adjust runtime accordingly.

Are built-in UV or ionizer features enough to skip manual cleaning?

Built-in disinfection features may reduce microbial load but vary widely in effectiveness and should not replace routine cleaning and water changes. Continue to follow the manufacturer’s maintenance instructions even if such features are present.

Air Purifier Safety for Kids and Pets Explained

air purifier placed safely away from child and pet

Air purifier safety for kids and pets mainly comes down to stable placement, secure cords, and choosing units that do not emit ozone or expose sharp or hot parts.

Most portable air purifiers are designed for everyday household use, but curious children and animals introduce extra considerations. Paying attention to where you put the purifier, how you route cords, and which features you use can reduce tipping risks, avoid tripping hazards, and keep fingers, paws, and noses away from moving parts.

Quick answer
  • Place purifiers on the floor or sturdy surfaces, at least 3–5 ft from cribs, pet beds, and play zones.
  • Use a dedicated, grounded outlet; keep cords tight to the wall and out of walkways or chewing range.
  • Choose purifiers that are labeled ozone-free and avoid ozone generators around kids and pets.
  • Aim for 12–18 in clearance around air inlets/outlets while still keeping devices out of high-traffic paths.
  • Use child locks (if available) and avoid placing units where they can be easily pulled down by cords.
  • Check filters and exterior surfaces monthly for dust buildup, damage, or loose panels.

Why air purifier safety matters around kids and pets

In homes with children and animals, air purifiers are just one more appliance in the environment. While their primary purpose is to improve indoor air quality, they also introduce moving air, electrical cords, and sometimes elevated placements that may attract attention.

Safety concerns fall into a few broad categories: physical hazards like tipping and tripping, electrical concerns from cords and outlets, and air-quality issues such as unintended ozone or strong air drafts near sensitive occupants. None of these are unique to air purifiers, but they should be considered when you plan where and how to use a unit in family spaces.

Understanding these basic risks helps you set up an air purifier so it does its job quietly in the background, without becoming a toy, step stool, or scratching post.

Key placement concepts: stability, airflow, and distance

Good placement balances safety with performance. Purifiers need clear airflow to clean the room effectively, but they should not be placed where a child can climb on them or a pet can easily knock them over.

Stability and tipping

  • Low center of gravity: Floor placement is generally safer than putting a purifier on a tall, narrow table or shelf.
  • Weight and base size: Heavier units with wider bases tend to be more stable than narrow, top-heavy designs.
  • Away from edges: Keep any elevated purifier several inches back from furniture edges so it cannot be pulled down.

Airflow and clearance

  • Intake and outlet space: Most purifiers benefit from about 12–18 inches of clearance on all sides for efficient air circulation.
  • Far from obstacles: Avoid pushing the unit tightly into corners or behind thick curtains that can block airflow or get drawn into vents.
  • Room coverage: Central or semi-central locations usually clean the space more evenly than tucked-away spots, but safety and cord routing may adjust that ideal.

Distance from kids and pets

  • Sleeping areas: Placing purifiers 3–5 feet away from cribs, beds, and pet resting spots reduces direct drafts and access to controls.
  • Play zones: Avoid placing units in the middle of play mats, toy storage areas, or pet feeding stations.
  • Reachable controls: If toddlers can press buttons or open filter doors, consider relocating the unit or using built-in child locks.

Combining these concepts helps you select spots that feel natural for your furniture layout and still maintain both performance and safety.

Table 1. Air purifier placement and safety checklist

Example values for illustration.

TaskWhy it mattersNotes
Keep 12–18 in clearance around unitAllows air to flow freely into and out of purifierAvoid curtains, walls, and large furniture blocking vents
Place 3–5 ft from beds and cribsReduces direct airflow on faces and curious contactStill close enough to benefit local air quality
Use floor or low, sturdy surfaceReduces chance of tipping from climbing or bumpsAvoid tall, narrow stands or wobbly furniture
Route cords along wallsPrevents tripping and pulling unit down by cordUse cord clips or covers where needed
Avoid high-traffic pathsLess likely to be bumped by running kids or petsCorners with open airflow often work well
Keep away from water sourcesReduces electrical hazard from spills or splashesDo not place directly next to aquariums or sinks

Common safety mistakes with kids and pets

Many safety issues come from everyday habits rather than rare failures. Recognizing common mistakes can help you avoid them when setting up or moving a purifier.

Using cords as handles or toys

Children or pets may pull on cords out of curiosity. This can drag a purifier off a table or cause it to tip over. Loose, dangling cords can also become chew targets for some pets.

Avoid coiling excess cord on top of furniture or letting it hang within easy reach. When possible, plug in near the device and keep the cord short and flat against the wall.

Perching purifiers on unstable furniture

Putting a unit on a lightweight end table, top of a dresser, or on stacked books introduces tipping risk, especially if kids might bump or lean on the surface. Even if the purifier itself is stable, the furniture may not be.

Choose heavy, low furniture if you must elevate the purifier, and position it far from the edge.

Blocking vents with toys, blankets, or pet beds

Items can migrate over time. A blanket may slip down in front of an intake or a pet bed may inch closer to the purifier. This can reduce performance and, in some cases, cause the device to run hotter than intended.

Check regularly that intakes and outlets remain clear and that nothing soft is resting directly against the unit.

Ignoring child locks and control locks

If a purifier includes a control lock feature, not using it can lead to frequent setting changes by curious hands. Units might be turned off, set to high speeds during naps, or have safety timers disabled.

Using available lock functions can keep your chosen settings consistent and reduce surprises.

Practical guidance: room-by-room safety placement

Thinking about where children and pets spend time in each room helps you place air purifiers in a way that naturally reduces risk.

Nurseries and kids’ bedrooms

  • Place the purifier on the floor or a low, sturdy surface several feet from the crib or bed.
  • Orient the outlet so that airflow is not blowing directly onto a baby’s face or into a bassinet.
  • Use any available dim or night mode to reduce light and noise at night.
  • Keep the power cord behind furniture when possible, away from small hands and feet.

Family living rooms

  • Position the unit along a wall or near a corner that still has open airflow, not in the main walking or running path.
  • Keep 3–5 feet of distance from play mats, low bookshelves with toys, and common pet resting zones.
  • Use cord clips to keep cables flat against baseboards, especially where children run or where there are mobility aids.
  • Consider how furniture might shift over time and verify vents stay unblocked.

Pet zones

  • Avoid placing the purifier directly next to litter boxes, food bowls, or scratching posts where pets frequently dig or jump.
  • For cats that like to climb, choose locations they cannot easily reach or use as launch pads.
  • For dogs, especially large or energetic ones, keep the unit out of chasing or wrestling zones.
  • Observe your pet’s behavior for a few days after placement and adjust if they seem overly interested in the device.

Cord management and electrical safety

Cords are a central part of air purifier safety, particularly in households where kids or pets may tug, chew, or trip on them. Simple cord habits go a long way toward preventing incidents.

Routing and securing power cords

  • Use the closest suitable outlet: This minimizes cord length running across open floor space.
  • Run cords along walls: Place cords where they are less likely to be walked on or played with.
  • Secure with clips or covers: Cord clips, low-profile raceways, or floor covers can keep cords in place and reduce chewing access.
  • Avoid pinch points: Do not route cords under heavy furniture legs or doors that can damage insulation.

Outlet considerations

  • Dedicated outlets: Avoid overloading outlets or power strips with many high-wattage devices.
  • Grounded outlets: Use three-prong grounded outlets where possible for better safety.
  • Childproofing: Consider outlet covers or tamper-resistant receptacles in areas where children can reach.
  • Dry environments: Keep purifiers away from bathtubs, sinks, and other water sources to prevent moisture-related hazards.

Chewing and scratching concerns

Some pets, especially young ones, may chew on cords or scratch at vents. If this is a concern in your home, consider:

  • Using cord protectors or channels to cover exposed wires.
  • Placing the cord entirely behind furniture or inside cable tracks.
  • Observing early interactions between the pet and the purifier, and relocating if chewing starts.

Filter types, emissions, and kid/pet-safe choices

Most mechanical air purifiers use fans and filters that simply move air through a physical medium. These are typically considered suitable for homes with children and pets, when used as directed. Some technologies, however, can produce byproducts like ozone, which you may wish to avoid indoors.

Mechanical filters (HEPA and pre-filters)

  • HEPA-style filters: Designed to capture fine particles such as dust and pollen. They do not generate ozone.
  • Pre-filters: Capture larger particles like pet hair and lint, helping protect the main filter.
  • Safety profile: Primary considerations are keeping the unit intact so filters are not accessible to children and pets.

Activated carbon filters

  • Odor and gas reduction: Activated carbon is often used to reduce common household odors.
  • Kid/pet safety: Carbon is usually enclosed inside the filter frame. The main concern is preventing ingestion of loose filter material if a panel were damaged or opened.

Ionizers, UV-C, and ozone concerns

  • Ionizers: Some devices include ionization features. These can sometimes generate small amounts of ozone as a byproduct.
  • UV-C lamps: Used in some purifiers for surface disinfection inside the unit. Properly enclosed lamps are designed to avoid direct UV exposure.
  • Ozone generators: Devices marketed primarily for ozone production can introduce higher ozone levels and are generally not recommended for occupied spaces, especially with children or pets.

When possible, look for air purifiers that are labeled as not intentionally producing ozone and avoid using dedicated ozone generators in living areas.

Maintenance habits that support safety

Routine maintenance keeps an air purifier working effectively and can prevent safety issues caused by neglect, such as overheating from blocked filters or loose panels children can open.

Regular filter checks

  • Visual inspections: Once a month, briefly turn off and unplug the purifier, then check for dust buildup, damage, or warped filters.
  • Replacement intervals: Follow the manufacturer’s general guidance for changing filters, adjusting for heavier use (for example, wildfire smoke events, construction dust, or multiple shedding pets).
  • Secure reassembly: Ensure filter doors and panels close fully and latch so kids and pets cannot easily open them.

Cleaning the exterior safely

  • Always unplug before wiping surfaces or vacuuming intakes.
  • Use a dry or slightly damp cloth; avoid getting water into vents or controls.
  • Vacuum pre-filter grilles gently with a brush attachment to remove dust and pet hair.

Monitoring noises and odors

Changes in sound or smell can signal an issue. If the purifier rattles, smells hot, or emits unfamiliar odors, turn it off and unplug it before investigating. Check for blocked vents, clogged filters, or foreign objects in the intake path.

FAQs: everyday safety questions about kids, pets, and purifiers

Can I run an air purifier in a baby’s room all night?

Many families run air purifiers continuously in nurseries. To do this safely, place the unit several feet from the crib, use a stable floor location, route cords out of reach, and choose a quiet setting that does not create strong drafts near the baby.

Is the noise from a purifier harmful to children or pets?

Most consumer air purifiers operate at sound levels similar to fans or white noise machines. Many people find this background noise acceptable or even soothing. If someone seems bothered, switch to a lower speed or move the unit farther away.

Can pets be allergic to the purifier itself?

Pets can react to dust released during filter changes or to strong new-plastic odors from fresh devices. Changing filters outdoors or in a ventilated space and airing out new units for a short time before use can help reduce these effects.

Is it safe if my cat sits on top of the purifier?

This depends on the unit’s design and weight. If the purifier is stable and on the floor, a light pet may not pose an issue, though fur may accumulate faster. If the unit rocks, vibrates, or is on a table, relocate it or find a more stable placement to prevent tipping.

Should I turn the purifier off when I leave the house?

Many air purifiers are intended for continuous use. If you choose to run one while away, make sure it is on a stable surface, away from flammable materials, with unobstructed vents and intact cords. Follow the manufacturer’s instructions regarding unattended operation.

Table 2. Filter replacement planner for family homes

Example values for illustration.

Filter typeTypical interval range (example)What changes itReminder
Pre-filter (washable or vacuumable)Every 1–3 monthsHigh dust, pet hair, visible buildupCheck monthly; clean more often with shedding pets
HEPA or fine particle filterEvery 6–12 monthsHeavy smoke seasons, construction dust, high useReplace sooner if airflow drops or odors persist
Activated carbon filterEvery 3–6 monthsCooking odors, litter box smells, tobacco smokeChange when odors are no longer reduced effectively
Combined HEPA + carbon cartridgeEvery 6–12 monthsHours of daily use, pollution eventsFollow indicator lights plus visual and odor checks
Specialty filters (e.g., added layers)Varies by designLocal air quality and specific pollutantsReview manual and note replacement timing on a calendar

Related guides: Air Purifier Maintenance Checklist: Filters, Sensors, and CleaningBest Air Purifiers for Pets: Dander, Odors, and Filter CostsAir Purifier for Baby’s Room: Noise, Safety, and Filter Choices

Key takeaways for safer air purifier use with kids and pets

Safe air purifier use in family homes hinges on simple, consistent habits. Place units on stable surfaces with enough space for airflow, but away from cribs, play zones, and pet hangouts. Route cords along walls, keep them out of reach, and use grounded outlets.

Choose purifiers that rely on mechanical filtration and are labeled as not intentionally producing ozone, especially in rooms where children and pets spend a lot of time. Maintain filters on a regular schedule, keep vents clean, and act on unusual noises or smells promptly. With these basics in place, an air purifier can operate quietly in the background, supporting indoor air quality without becoming a safety concern.

Frequently asked questions

How close can an air purifier be to a baby’s crib or a pet bed?

Position purifiers about 3–5 feet away from cribs, beds, and pet resting areas to reduce direct drafts and limit access to controls. Also maintain roughly 12–18 inches of clearance around intakes and outlets so airflow isn’t obstructed and the unit runs efficiently.

Are ionizers or ozone-producing purifiers safe around children and pets?

Avoid devices that intentionally produce ozone for occupied spaces, as ozone can irritate lungs and be harmful to sensitive children and pets. If you’re uncertain, choose mechanical-filter purifiers (HEPA and carbon) and look for models labeled as not intentionally producing ozone.

What should I do if my pet chews cords or tries to access the filter compartment?

Secure cords along walls or in protective channels and place the unit where pets cannot reach panels. Check filter doors monthly, ensure panels latch properly, and relocate the purifier if a pet persists in chewing or pawing at it.

Is it safe to run an air purifier overnight or when the house is empty?

Running a purifier continuously is generally acceptable if it’s on a stable surface, has unobstructed vents, and cords are intact and secured; follow the manufacturer’s guidance on unattended operation. Do not run ozone-generating devices in occupied or pet-filled spaces, and investigate any unusual noises or smells before leaving a unit running.

What electrical precautions help keep kids and pets safe around purifiers?

Use a grounded outlet, avoid overloading power strips, and keep cords flat against baseboards or in cord covers to reduce tripping and chewing risks. Consider outlet covers in reachable areas and never place purifiers where they could be exposed to water sources.

AHAM CADR Ratings Explained: What Really Matters

Isometric illustration of air purifier circulating clean air in living room

AHAM CADR ratings are standardized numbers that estimate how quickly an air purifier can reduce smoke, dust, and pollen particles in a test room, making it easier to compare different models fairly.

Many air purifiers list high airflow or marketing terms, but CADR is one of the few independent measures that focuses on how effectively a unit cleans the air of common particles. Understanding how CADR is tested, what the numbers mean, and how to relate them to your specific room size helps you avoid guesswork and choose a purifier that is appropriately sized for your home.

Quick answer
  • CADR is a lab-tested rating (in cubic feet per minute) for smoke, dust, and pollen removal.
  • For a typical bedroom (~150 sq ft), many people target ~100–150 CFM CADR for smoke or dust.
  • For a medium room (~250 sq ft), a common planning range is ~160–250 CFM CADR.
  • CADR is based on a fixed test room; in larger or open spaces, you may need multiple units or higher CADR.
  • Always compare CADR to your room’s floor area, not just the purifier’s advertised “coverage.”
  • Use the lowest of the three CADR numbers (smoke, dust, pollen) as a conservative guide.

What AHAM CADR Ratings Are and Why They Matter

CADR stands for Clean Air Delivery Rate. It is a number, expressed in cubic feet per minute (CFM), that describes how effectively an air purifier removes certain airborne particles from a test room. CADR ratings are developed and administered by the Association of Home Appliance Manufacturers (AHAM) in standardized laboratory tests.

In these tests, an air purifier runs in a room of known size and particle levels. Instruments measure how quickly the concentration of particles decreases compared with natural decay without the purifier. The result is converted into a CADR value that blends both filtration efficiency and airflow.

CADR matters because:

  • It allows apples-to-apples comparisons. Different units tested under the same protocol can be compared on performance instead of marketing claims.
  • It connects to room size. Because CADR is in CFM, you can relate it to the volume of your room and estimate how many air changes per hour you might achieve.
  • It focuses on particles. CADR does not measure gases, odors, or chemicals directly; it is specifically about particle removal (smoke, dust, pollen).

Key CADR Concepts and How to Relate Them to Room Size

AHAM CADR testing covers three particle categories: smoke (fine particles), dust (medium-sized particles), and pollen (larger particles). A purifier will usually have three separate CADR numbers, one for each category.

What the three CADR numbers mean

  • Smoke CADR: Represents very fine particles, often used as a proxy for particles similar in size to typical indoor fine particles. This number is often the most conservative indicator of performance.
  • Dust CADR: Represents mid-sized particles common in household dust.
  • Pollen CADR: Represents larger particles common in outdoor pollen that can enter the home.

Because the same purifier is generally more efficient at capturing larger particles than very fine ones, the pollen CADR is often higher than dust, and dust higher than smoke. When planning, many people use the lowest of the three CADR values as a safer estimate of real-world particle cleaning ability.

Simple sizing logic using CADR

CADR can be loosely related to floor area using a simple rule of thumb. In the AHAM framework, a traditional sizing shortcut has been:

  • Approximate maximum room size (in square feet) ≈ CADR smoke × 1.5 (example planning idea, not a hard rule).

For example only: if a purifier has a smoke CADR of 160 CFM, 160 × 1.5 ≈ 240 square feet of suggested floor area. This assumes average ceiling heights and a moderate air change target in a typical home room.

In practice, if you want:

  • Higher air changes per hour (ACH) or faster cleanup, you may want CADR significantly higher than this shortcut suggests.
  • Gentler, quieter operation most of the time, you may also choose higher CADR and run at lower fan speeds.
Table 1. CADR vs ACH checklist for typical rooms. Example values for illustration.
Illustrative CADR sizing checklist by room size and goal
Room type example Approx. floor area (sq ft) Ceiling height note Example smoke CADR planning idea (CFM) Why this range
Small bedroom or office 100–150 Standard 8 ft 80–150 Moderate to higher ACH with a compact unit
Medium bedroom 150–200 Standard 8–9 ft 120–180 Supports multi-hour use with reasonable noise
Large bedroom or small living room 200–300 8–9 ft 160–250 Provides stronger circulation in larger spaces
Open-plan living/dining zone 300–450 8–10 ft 250–350+ Helps compensate for larger volume and mixing
High-ceiling or loft space Varies 9–12+ ft Increase CADR vs standard room Extra volume requires more clean air per minute
Rooms with frequent smoke-like particles Varies Standard Favor higher smoke CADR Faster removal of fine particles

Example values for illustration.


Common Misunderstandings and CADR Limitations

While CADR is useful, it is easy to misinterpret or overextend what the numbers mean. Knowing the boundaries of CADR helps you compare air purifiers more realistically.

CADR is about particles, not gases

CADR ratings do not measure gases, volatile organic compounds (VOCs), or specific odors. Some purifiers include activated carbon or other media to address certain gases, but this is outside the scope of AHAM CADR testing. If you are concerned about odors or VOCs, look for information about the type and amount of gas-phase media and ventilation strategies, rather than relying on CADR alone.

CADR uses a specific test room size

AHAM CADR tests are performed in a standardized chamber, not in every possible room shape or floor plan. Real homes have:

  • Open doorways and hallways that allow air to mix between rooms.
  • Furniture and walls that may affect airflow.
  • Different ceiling heights and volumes.

This means a purifier with a given CADR might perform differently in your space compared with the test room, especially in open-plan areas. CADR is still a useful comparative tool, but it is not a guarantee of exact real-world performance.

CADR does not tell you about noise or energy use

Two purifiers with similar CADR can differ significantly in noise and power consumption at the speeds required to achieve those CADR values. A purifier may reach its tested CADR only at its highest fan speed, which can be louder than you prefer for continuous use, especially in bedrooms.

When comparing units, consider CADR alongside separate noise level and power usage information to balance cleaning performance with comfort and operating cost.

Marketing “coverage area” can be confusing

Some devices advertise a maximum room size that assumes relatively low air changes per hour or intermittent use. These coverage numbers may be calculated differently from model to model. By contrast, AHAM CADR is standardized. Using CADR to derive your own room size estimate can be more consistent than relying only on advertised coverage area.

How to Use AHAM CADR to Compare Air Purifiers Fairly

To make fair comparisons and match a purifier to your space, it helps to use a step-by-step approach that connects CADR, room size, and your noise preferences.

Step 1: Measure your room

Start with the room where you will use the purifier most often.

  • Measure length and width to get floor area in square feet.
  • Note ceiling height; higher ceilings increase volume and may call for higher CADR.
  • Decide whether doors will typically be open or closed, as open doors effectively enlarge the treated volume.

Step 2: Decide on your cleaning goal

Consider how intensively you want to clean the air:

  • General background cleaning: Often acceptable with moderate CADR relative to floor area.
  • More frequent particle removal: May require higher CADR or multiple units, especially in large or open spaces.
  • Quieter operation: You may choose a higher CADR unit and run it at medium speed to achieve your target quietly.

Step 3: Translate CADR to a practical room-size target

As a general heuristic, you can relate smoke CADR to room area (with average ceiling height) using the earlier shortcut: room area (sq ft) ≈ 1–2 times the smoke CADR. Staying near the lower end of that ratio gives a more conservative and often more robust level of cleaning, while higher ratios may correspond to lighter background filtration.

Example ideas only:

  • A 120 CFM smoke CADR purifier might be comfortable in roughly 120–180 sq ft for moderate use.
  • A 200 CFM smoke CADR purifier might be planned for roughly 200–300 sq ft for similar expectations.

These are approximations to illustrate the logic, not exact limits.

Step 4: Compare smoke CADR first, then dust and pollen

When comparing units side by side:

  • Use the smoke CADR or the lowest of the three CADR numbers for a conservative comparison.
  • If two purifiers have similar CADR but one is quieter at that performance level, it may better fit bedrooms or quiet areas.
  • If one purifier has much higher pollen CADR but similar smoke CADR, the improvement may be more significant for larger particles than very fine ones.

Real-World Scenarios for Using CADR

Applying CADR in concrete situations helps show how the numbers translate into everyday choices. The scenarios below are illustrative and not medical advice.

Scenario 1: Small bedroom

Consider a 10 × 12 ft bedroom (120 sq ft) with an 8 ft ceiling. Someone wants a quieter environment at night and moderate particle reduction.

  • A purifier with a smoke CADR around 100–150 CFM could be a reasonable target.
  • Running it at a medium setting may keep noise acceptable while still providing regular air cleaning.
  • Placing the purifier away from walls and large furniture, with a clear path to the bed area, helps airflow.

Scenario 2: Medium living room

Now consider a 15 × 16 ft living room (240 sq ft) mostly closed off from other spaces, where people gather in the evening.

  • A smoke CADR in the neighborhood of 160–250 CFM may be appropriate for active use.
  • If the room opens widely to a hallway or kitchen, the effective space is larger, and a higher CADR or additional purifier might be considered.
  • Quiet operation may be less critical here than in a bedroom, allowing for higher fan speeds when needed.

Scenario 3: Open-plan space

In an open-plan area that includes a living room, dining area, and part of a kitchen, the total floor area may be 350 sq ft or more, sometimes with higher ceilings.

  • One option is a purifier with a substantially higher smoke CADR (for example, in the mid-200s or above) placed centrally.
  • Another approach is using two smaller purifiers in different zones to improve circulation and flexibility.
  • Because air moves freely between spaces, it may take longer to notice reductions in particle levels than in a closed room.

Safety, Standards, and What CADR Does Not Cover

CADR testing focuses on particle removal performance; it does not certify every safety aspect of a purifier. When evaluating devices, it is helpful to be aware of other standards and safety considerations.

Ozone and electronic air cleaners

Some air-cleaning technologies, such as certain ionizers or ozone generators, can produce ozone. Elevated ozone indoors is generally undesirable. Many modern mechanical purifiers (using HEPA or similar filters plus fans) are designed to operate without intentionally producing ozone.

CADR by itself does not tell you whether a purifier emits ozone. Look for information indicating that a device is designed to be ozone-free or meets relevant emission limits for consumer products in your area.

UV-C and other add-ons

Some purifiers include UV-C lamps or other additional technologies aimed at inactivating microorganisms. These features are not part of the standard CADR tests and do not affect the listed CADR values, which are based on particle removal rates.

If you consider a device with UV-C or other add-ons, check how the lamps are shielded, expected replacement intervals, and any manufacturer safety information. For most homes, a well-sized mechanical filter (such as a HEPA-type filter) plus regular ventilation can provide substantial particle reduction without relying on additional technologies.

Filter integrity and leakage

CADR testing assumes that filters are properly installed and that air passes through them rather than around them. In real-world use, gaps, poor seals, or damaged gaskets can reduce actual performance below the tested CADR.

Regularly checking that filters sit squarely in their frames, that covers close fully, and that any sealing strips are intact can help maintain performance closer to the tested rating.

Filter Maintenance, CADR, and Long-Term Performance

CADR ratings are determined with clean or nearly new filters. Over time, as filters load with particles, airflow may decrease and effective CADR can drop. Good maintenance practices help preserve a purifier’s ability to clean the air.

Filter replacement intervals

Most purifiers use a combination of a particulate filter (such as HEPA or similar) and often a prefilter and/or carbon filter. Typical replacement intervals are expressed in months or years of average use. Actual life depends on:

  • How many hours per day the purifier runs and at what speed.
  • How dusty or smoky the environment is.
  • Whether doors and windows are often open.

Waiting far beyond recommended intervals can reduce airflow and lower effective CADR, even if the fan is running at the same speed setting.

Prefilters and simple cleaning

Many units include a washable or vacuumable prefilter that catches larger particles, helping protect the main filter and maintain airflow. Cleaning this prefilter as recommended can:

  • Help the main filter last closer to its expected life.
  • Keep noise from rising due to airflow restriction.
  • Support more stable particle removal over time.

Cost planning for filters

Because CADR performance depends on filter condition, it is practical to consider filter replacement costs as part of owning an air purifier.

  • Estimate how often you are likely to replace filters based on your expected usage.
  • Compare devices not only on CADR but also on expected annual filter costs.
  • Plan a simple reminder system (calendar notes or similar) to check filters periodically.

CADR and Air Changes per Hour: Planning Examples

Another way to think about CADR is through air changes per hour (ACH), which describes how many times per hour a purifier can theoretically move a volume of air equal to the room’s volume through its filters.

ACH is not measured directly in the CADR test, but CADR helps you estimate it. The basic idea is:

  • Room volume (cubic feet) = floor area (sq ft) × ceiling height (ft).
  • Approximate ACH ≈ (CADR × 60) ÷ room volume.

These calculations are approximate and assume good mixing of air. Still, they can help you understand how strongly a purifier can circulate and filter the air in a given space.

Table 2. ACH planning examples using CADR. Example values for illustration.
Illustrative ACH targets and CADR planning ideas
Home scenario example Example ACH range idea What this implies for CADR Notes
Light background filtering in a small bedroom ~3–4 ACH CADR roughly near room volume ÷ 20 Suitable when doors mostly closed and sources are modest
More intensive filtering in a bedroom ~5–8 ACH CADR closer to room volume ÷ 10 Supports faster reduction in particle spikes
Medium living room with regular activity ~4–6 ACH CADR scaled to larger volume Helps manage everyday dust and outdoor particles
Open-plan area with shared spaces ~4–8 ACH (locally) May need higher CADR or multiple units Air mixing between zones slows cleanup
Short-term higher cleaning (such as after cooking) Temporarily higher ACH Run purifier on higher fan for a period Then reduce to a quieter setting for steady use
Rooms with higher ceilings ACH goal unchanged CADR increases with added volume Ceiling height is as important as floor area

Example values for illustration.


Related guides: CADR Calculator: Room Size + Ceiling Height + ACH TargetAir Purifier Placement: Where to Put It for Best ResultsBest Air Purifiers for Wildfire Smoke: What Specs Matter Most

Key Takeaways on Using AHAM CADR Ratings

AHAM CADR ratings provide a standardized way to compare how effectively air purifiers remove smoke, dust, and pollen particles in a controlled environment. By focusing on the smoke CADR or the lowest of the CADR values, you gain a practical reference point that can be related to your room size and desired air changes per hour.

For practical home use, measure your room, consider ceiling height, and decide how intensively you want to clean the air. Use CADR to choose a purifier with enough capacity so you can often run it at a comfortable noise level while still meeting your goals. Remember that CADR does not address gases, odors, or safety features directly, so it should be considered alongside information about filtration type, ozone emissions, noise, and filter maintenance needs.

Viewed this way, CADR becomes a straightforward tool: not the only factor in choosing an air purifier, but a clear and useful one for making fair comparisons and realistic plans for your home’s indoor air quality.

Frequently asked questions

Which CADR number should I use when choosing an air purifier — smoke, dust, or pollen?

Use the smoke CADR or the lowest of the three values as a conservative guide because smoke represents the finest particles that are hardest to remove. Pollen and dust CADR numbers are often higher because larger particles are easier to capture, so relying on the lowest value helps ensure broader effectiveness.

How do I calculate what CADR I need for my room?

Measure your room’s floor area and ceiling height to get volume, then estimate ACH with ACH ≈ (CADR × 60) ÷ room volume. For a simple rule of thumb, many people use smoke CADR × 1.5 as an approximate suggested floor area, adjusting upward for higher ACH goals or taller ceilings.

Does a higher CADR guarantee faster removal of odors and gases?

No; AHAM CADR measures particle removal only and does not indicate performance against gases, VOCs, or odors. For gas-phase contaminants, look for information about activated carbon or other dedicated gas-phase media and consider ventilation strategies.

How does filter age affect a purifier’s CADR and what maintenance helps preserve performance?

Filters loaded with particles reduce airflow and can lower effective CADR compared with test ratings. Regularly cleaning or replacing prefilters, following manufacturer replacement intervals for main filters, and ensuring good seals keep real-world performance closer to the rated CADR.

Can I rely on a purifier’s advertised coverage area instead of CADR?

Advertising claims for coverage area are calculated differently among manufacturers and may assume low ACH or intermittent use. AHAM CADR is standardized and better for apples-to-apples comparisons; use CADR relative to your room volume and factor in noise and energy to choose a practical unit.

Ozone and Ionizers: What Zero Ozone Labels Mean

Modern air purifier in living room suggesting ozone-safe operation

“Zero ozone” certifications for ionizers and air purifiers indicate that the device’s ozone emissions are tested and kept at or below very low limits set by independent standards, not that ozone is literally absent in all conditions.

Understanding what these labels actually measure helps you choose equipment that improves indoor air without adding irritating or unnecessary byproducts. This is especially useful when comparing ionizers, electronic air cleaners, and other add-on features that can produce ozone if not carefully designed.

Quick answer
  • “Zero ozone” usually means ozone emissions are below a strict test limit (for example, <0.005–0.050 ppm in lab conditions), not absolute zero.
  • Look for devices labeled as “ozone-free” or certified to low-emission standards when shopping for air purifiers with ionizers or UV-C.
  • Mechanical filtration (HEPA + activated carbon) is the primary choice if you want to avoid ozone-producing technologies.
  • Ionizer features are often optional; you can typically turn them off if you prefer to limit any ozone byproducts.
  • Good room ventilation, correct purifier sizing, and regular filter changes reduce the need for aggressive electronic air cleaning.

What ozone and ionizers are, and why they matter

Ozone (O3) is a gas made of three oxygen atoms. Outdoors, high ozone levels are a well-known component of smog. Indoors, ozone can be produced in small amounts by certain electrical devices, including some types of ionizers and UV-C lamps used in air purifiers.

Ionizers (also called ion generators) electrically charge particles in the air. Charged particles tend to stick to nearby surfaces or collection plates instead of remaining airborne. This can reduce airborne dust and smoke, but depending on the design, the ionization process can also generate ozone as a side effect.

Because ozone at elevated levels can irritate airways and react with indoor materials and VOCs, modern standards and certifications aim to keep emissions extremely low. “Zero ozone” or “ozone-free” marketing terms evolved from that goal, but they have specific technical meanings that are easy to misunderstand if you only read the label.

Key concepts behind “zero ozone” certifications

To interpret a “zero ozone” claim, it helps to understand what is actually measured and how. Standards bodies and testing labs typically focus on emissions from a device, not total room concentration under every possible condition.

Emission limits vs. room levels

Most standards for air-cleaning devices specify a maximum ozone emission rate or resulting concentration in a controlled test chamber. A few core ideas:

  • Emission rate – how much ozone a device adds to the air per unit of time in the test setup.
  • Chamber concentration – the ozone level measured in a standardized test room while the device operates.
  • Background ozone – the level present in the test chamber before the device is turned on.

“Zero ozone” marketing language often means the device’s emissions are below the test method’s detection limit or below a very low specified threshold that is considered negligible in normal use.

Mechanical vs. electronic air cleaning

There are two big groups of air-cleaning methods in homes:

  • Mechanical filtration – HEPA filters and pre-filters capture particles physically; activated carbon and similar media adsorb many gases and odors. These do not intentionally generate ozone.
  • Electronic processes – ionizers, electrostatic precipitators, plasma, and some UV-C systems rely on electrical or high-energy reactions in air. These have potential to produce ozone if not well-controlled.

Many “zero ozone” certifications are essentially saying: this device either does not use ozone-forming technologies or uses them in a way that keeps any ozone byproducts below a very low test limit.

Table 1. Comparing common air-cleaning methods and ozone considerations. Example values for illustration.
Method Main purpose Ozone concern Typical home use notes
HEPA filtration Capture fine particles (dust, smoke, pollen) None (does not generate ozone) Primary choice for most home purifiers
Activated carbon Adsorb odors and many VOCs None (passive media) Useful for smoke and odor complaints
Ionizer / ion generator Charge particles to help them settle or collect Potential low ozone byproduct if not well-controlled Often optional; look for low-emission claims
Electrostatic precipitator Collect charged particles on plates Can produce ozone if voltages are high Check for explicit low-ozone certification
UV-C in duct or purifier Surface/coil treatment, air disinfection Some lamps can create ozone, others are low-ozone Confirm lamp type and ozone-testing claims
Ozone generator (“shock” device) Intentional high ozone for odor treatment High ozone output by design Not for occupied rooms; avoid for routine home use

How “zero ozone” language can be confusing

Because “zero” sounds absolute, many people assume the label means no ozone at all is possible. In practice, it means “at or below a very low, specified limit under test conditions.” A few common sources of confusion:

Marketing terms vs. technical definitions

  • “Ozone-free” and “zero ozone” are not standardized marketing phrases. Different manufacturers may use them slightly differently.
  • Laboratory test reports usually show actual measured levels and detection limits, which are more precise than the words on the box.
  • Standards are typically framed as “not to exceed X ppm under Y test,” which is much more specific.

When in doubt, look for a reference to a recognized test method or standard, not just the phrase itself.

Room conditions vs. lab conditions

Certification tests use fixed room sizes, controlled temperature and humidity, and defined run times. Real homes vary:

  • Small, closed rooms may accumulate emissions more than large, well-ventilated spaces.
  • Very long run times at maximum power could differ from typical test cycles.
  • Other sources of ozone indoors (for example, some older office equipment) are not part of purifier tests.

This is why it helps to combine low-emission equipment with basics: adequate ventilation, correct unit sizing, and sensible operating habits.

Practical checklist for choosing low-ozone air cleaning

If you prefer to minimize ozone in your home while improving indoor air quality, you can follow a simple decision process when you shop and set up equipment.

Step 1: Prioritize mechanical filtration

  • Choose devices where a HEPA or high-efficiency particle filter does most of the cleaning work.
  • For odors and many VOCs, add or select units with a substantial activated carbon or other sorbent filter.
  • Consider ionizers and other add-ons as optional, not essential, for everyday particle control.

Step 2: Evaluate ionizer and UV-C claims

  • Check whether the ionizer or electronic feature can be switched off independently from the main fan.
  • Look for wording that indicates tested low ozone emissions rather than vague “fresh air” or “energized oxygen” language.
  • If UV-C is included, see whether the lamp type is described as low-ozone or specifically designed to limit ozone formation.

Step 3: Match purifier capacity to your room

An undersized purifier may tempt you to rely more on ionizing or “boost” modes to see a difference. Instead, plan capacity using room volume and air changes per hour (ACH):

  • Measure room length × width × height to get volume in cubic feet.
  • Decide on an approximate ACH target, often 4–8 ACH for general particle reduction in bedrooms and living spaces.
  • Choose a purifier with a clean air delivery rate (CADR) that fits that volume and target ACH, so you can run at lower, quieter fan speeds.

Step 4: Keep ventilation in mind

Even with a certified low-ozone purifier, basic ventilation helps keep any byproducts and accumulated indoor pollutants diluted.

  • Use kitchen and bathroom exhaust fans when generating moisture or combustion byproducts.
  • When outdoor air quality is good, occasional window opening can help refresh indoor air.
  • In apartments, consider how air flows between rooms so a single purifier can serve the most-used area effectively.

Real-world examples of using ionizers cautiously

The role of an ionizer or electronic feature changes depending on your home and goals. Here are a few neutral, practical scenarios.

Scenario 1: Small bedroom with dust concerns

A compact bedroom with moderate dust may only need a mechanical purifier sized to reach about 4–6 ACH. In this setting:

  • Running the unit on a low, continuous fan setting often controls dust without relying on ionization.
  • If the purifier includes an ionizer, you might choose to keep it off by default and only test it occasionally.
  • Regular vacuuming with a good filter and washing bedding complements the purifier, further reducing the need for electronic boosts.

Scenario 2: Open-plan living room with wildfire smoke episodes

In a larger space exposed to seasonal smoke, the priority is usually high CADR and generous carbon filtration:

  • Select a purifier or multiple units large enough to reach around 5–8 ACH in the main seating area.
  • Focus on HEPA + carbon performance; ionizers provide minimal additional benefit for heavy smoke compared with simply increasing airflow and filter capacity.
  • If the purifier offers an ion mode, you may choose to experiment with and without it, while paying attention to any odor changes or perceived irritation.

Scenario 3: Home office with electronic equipment

Some older electronics and equipment can already contribute small amounts of ozone. If you work long hours in a closed office:

  • Favor a purely mechanical purifier or one clearly labeled as tested to very low ozone emission levels.
  • Use periodic ventilation breaks when outdoor air is acceptable.
  • If your purifier includes an ionizer, consider leaving that feature off and relying on filtration only.

Safety, standards, and how they relate to home use

Different organizations publish guidelines or testing protocols intended to keep indoor ozone from air-cleaning devices very low. While details vary, they share a few themes:

  • Cap device emissions so that under realistic use, room concentrations remain well below discomfort thresholds.
  • Discourage use of high-output ozone generators in occupied spaces for routine odor control.
  • Encourage design choices that prioritize mechanical filtration over ozone-forming methods.

What this means when you read a label

On packaging or spec sheets you might see references to independent testing, laboratory limits, or adherence to certain voluntary programs. In practical terms, these indicators mean:

  • The device was operated at a defined setting and run time in a controlled chamber.
  • Measured ozone stayed at or below a specific low target concentration or emission rate.
  • The manufacturer is signaling that ozone production is not the primary cleaning mechanism.

While not every home device will list all technical details, seeing any reference to low ozone emissions or third-party testing is generally more informative than vague freshness claims.

Maintenance habits that support low byproducts

Even a low-emission purifier performs best when maintained properly. Some upkeep steps also indirectly support lower byproduct formation and better air quality overall.

Keep filters clean and correctly installed

  • Replace pre-filters and main filters on the schedule recommended by the manufacturer, or sooner if visibly loaded with dust or if airflow drops.
  • Ensure filters fit snugly with minimal bypass gaps; leaks reduce real-world CADR and may tempt you to rely more on electronic modes.
  • Do not wash or vacuum filters that are intended to be disposable unless documentation explicitly allows it.

Operate ionizers and UV-C features moderately

  • Use electronic boost modes only when needed, such as brief periods of strong odors, rather than continuously.
  • If you notice sharp or metallic odors when certain modes are on, consider turning them off and increasing mechanical filtration or ventilation instead.
  • Follow service instructions for replacing UV-C lamps to prevent degraded or unpredictable performance over time.

Plan for long-term costs

Zero-ozone or low-emission devices are still subject to regular operating costs:

  • Factor in the cost of replacement HEPA and carbon filters when comparing units.
  • Budget for electricity use at the fan speeds you intend to use for several hours per day.
  • Consider that a properly sized, efficient unit run continuously on low may be more effective and comfortable than a smaller unit run hard with extra electronic features.

FAQs about ozone, ionizers, and certifications

Does a “zero ozone” purifier add any ozone to my room?

Under standard test conditions, its emissions are at or below a very low limit, and often below the test method’s detection threshold. That does not guarantee zero molecules at all times, but it indicates ozone is not expected to be a meaningful byproduct in normal use.

Are ionizers automatically unsafe?

No. Some ionizers are engineered and tested so that any ozone produced is very low. The main questions are how the device is designed, whether emissions have been measured, and whether mechanical filtration can do most of the work without relying heavily on ionization.

Should I disable the ionizer mode on my purifier?

Many people choose to default to mechanical filtration and keep ionizer modes off, especially in small or poorly ventilated rooms. Others use ionization intermittently. If your device has a low-ozone certification, leaving the ionizer on may still be within conservative limits, but using it is a personal choice.

Can I rely on smell to detect ozone?

Ozone can have a sharp, chlorine-like or metallic smell at higher concentrations, but odor is not a precise or reliable detector. Some people notice it more than others, and other chemicals can have similar smells. If a device mode changes the air smell noticeably in a way you dislike, you can switch that feature off and rely on filtration and ventilation instead.

What should I focus on first to improve indoor air?

For most homes, the biggest gains come from source control (reducing smoke, strong chemicals, and excess moisture), basic ventilation, and a HEPA + carbon purifier. Ionizers and advanced features are optional refinements, not core requirements.

Table 2. Example filter replacement planner for home purifiers. Example values for illustration.
Filter type Typical interval range What changes it Reminder
Pre-filter (mesh or foam) Clean every 1–3 months Dusty homes, pets, nearby roads Rinse or vacuum if the manual allows
HEPA or high-efficiency particle filter Replace about 6–18 months Fan speed, hours per day, dust and smoke load Check airflow and visible loading periodically
Activated carbon / gas filter Replace about 3–12 months Odor intensity, VOC sources, smoke events Change sooner if odors return quickly
Electrostatic collector plates Clean every 1–3 months Heavy particle loads, smoke, cooking aerosols Power off and dry fully before reassembly
UV-C lamp (if present) Replace about 9–24 months Operating hours and on/off cycling Output can decline before the lamp burns out
HVAC system main filter Replace about 1–3 months Fan runtime, season, home occupancy Check monthly during heavy use seasons

Related guides: UL 2998 ‘Zero Ozone’ Explained (What It Certifies and What It Doesn’t)Do Air Purifiers Produce Ozone? What to Avoid and What to Buy InsteadBest Air Purifiers for Wildfire Smoke: What Specs Matter Most

Summary: how to think about “zero ozone” at home

“Zero ozone” certifications are best understood as a signal that an air purifier or ionizer has been tested to keep ozone emissions extremely low, not as a promise of literal zero in all situations. They complement—but do not replace—basic indoor air strategies.

For most households, the practical path is straightforward: focus on mechanical filtration sized correctly for your rooms, use ventilation when feasible, and treat ionizers and other electronic features as optional tools you can switch off if you prefer. Reading labels with this context in mind helps you choose equipment that supports cleaner, more comfortable indoor air with minimal byproducts.

Frequently asked questions

How can I verify a “zero ozone” or “ozone-free” claim on a purifier?

Look for documentation that references a recognized test method or a third-party laboratory report showing measured ozone emission rates or chamber concentrations and the detection limits. Review whether the test configuration (fan speed, run time, and settings) matches how you plan to use the device.

Does a “zero ozone” certification cover the purifier when its ionizer or boost mode is turned on?

Only if that specific mode was included in the test. Certifications usually apply to the tested configuration, so check product literature to confirm whether the ionizer or boost setting was tested; if it wasn’t, assume the certification may not apply to that mode.

Can I rely on smell or irritation to detect unsafe ozone from a purifier?

No. A noticeable sharp or metallic smell can indicate higher ozone levels, but many people do not perceive ozone reliably and other chemicals can produce similar odors. Use measured test results or an ozone monitor for confirmation rather than relying on smell alone.

Should people with asthma or chemical sensitivities avoid devices labeled “zero ozone”?

People with respiratory sensitivities should prioritize mechanical filtration (HEPA + carbon) and avoid relying on electronic ionizers unless the device explicitly documents very low emissions for the relevant settings. Even emissions below conservative limits can bother particularly sensitive individuals, so choose units that allow ionization to be turned off or that have clear third-party verification.

Can ozone from a purifier add to other indoor ozone sources and raise room concentrations?

Yes. Ozone contributions from multiple sources—older electronics, outdoor air infiltration, or other devices—can be additive in a room. Combining good ventilation with low-emission equipment and avoiding high-output ozone generators reduces the risk of elevated combined concentrations.

How to Dispose of Used Air Filters Safely

Person safely placing a used air filter into a trash bag

To dispose of used air filters safely, turn off the unit, carefully remove the filter, place it in a sealed bag, and put it in regular household trash unless your local rules say otherwise.

Used filters from home air purifiers, HVAC systems, and small appliances usually go in the trash, but how you handle them matters for dust control, safety, and basic hygiene. Some parts, like plastic frames, may be recyclable if they can be separated and cleaned, while others should never be opened, washed, or burned.

Quick answer
  • Turn off the purifier or HVAC system before removing any filter.
  • Handle used filters gently and bag them (plastic trash bag tied shut) to limit dust release.
  • Dispose of most used home filters in regular household trash unless local rules say otherwise.
  • Do not burn filters, cut them open, or shake them out indoors to “clean” them.
  • Check local waste or recycling guidelines if you have metal or plastic housings that can be separated.
  • Wash reusable pre-filters only if the manufacturer clearly states they are washable.

Why Safe Filter Disposal Matters

Air filters do their job by trapping particles, dust, and sometimes gases or odors. When you remove a used filter, that captured material can be released again if the filter is handled roughly or disposed of carelessly. Safe disposal is mostly about minimizing that release and respecting basic waste rules in your area.

In a typical home, used filters from portable air purifiers and HVAC systems are not classified as hazardous waste. They mainly contain common household dust, pollen, pet dander, and smoke particles. However, they can be messy, and in some situations (heavy smoke events, renovation dust, or mold issues), you want to be especially careful to avoid stirring up what they have collected.

Good disposal habits also support the rest of your indoor air quality strategy. Replacing filters on time and discarding them properly keeps your equipment working as intended and prevents clogged or damaged filters from becoming a source of dust blowback.

Key Filter Types and What That Means for Disposal

How you dispose of a filter depends partly on what type it is and whether any part of it is reusable. Most residential filters fall into a few main categories.

Fiberglass and Basic Panel Filters

These are thin, inexpensive filters often used in central HVAC systems. They usually have a cardboard frame with a fibrous mat inside.

  • Disposal: Typically go directly in household trash.
  • Recycling: Not practical to separate; dispose as one piece.
  • Handling: Handle gently; the fibers can shed if bent or crushed.

Pleated HEPA-Style and High-Efficiency Filters

Many portable air purifiers and upgraded HVAC filters use pleated media, sometimes marketed as HEPA or HEPA-style. True HEPA and high-efficiency media are usually made from dense fiber mats.

  • Disposal: Bag and place in household trash; the media is not designed to be opened or washed.
  • Recycling: Frames may be cardboard or plastic; in most homes, they are discarded as a whole because separating cleanly is difficult.
  • Handling: Avoid crushing or shaking, especially if they have captured fine smoke or dust.

Activated Carbon and Odor/VOC Filters

These filters contain carbon granules or impregnated media to help reduce odors and some gases (VOCs). They may be standalone filters or combined with particle filters.

  • Disposal: Typically bag and place in household trash once saturated.
  • Recycling: Home-scale carbon filters are usually not recycled; reactivation requires specialized facilities.
  • Handling: Do not cut them open or pour out the carbon; that can create dust and mess.

Washable Pre-Filters

Many air purifiers include a coarse pre-filter to catch hair, lint, and larger dust. Some of these are washable or vacuumable.

  • Disposal: Only discard them once they are damaged or no longer effective.
  • Reuse: Rinse or vacuum according to manufacturer instructions, and fully dry before re-installing.
  • Handling: Clean outdoors or over a trash can if possible to avoid releasing dust indoors.

Specialty Filters (UV, Ionizer, or Combination Units)

Some systems include UV lamps, ionizing elements, or catalytic surfaces along with filters. The filter part is usually removed and discarded like other filters, while lamps or electronic modules may have separate disposal rules.

  • Disposal: Follow the manual; UV bulbs and electronics may need e-waste or lamp recycling.
  • Handling: Avoid touching UV bulbs with bare hands and never break them intentionally.
Table 1. Typical home filter types and general disposal approach – Example values for illustration.
Filter type Common use Reusable part? Typical end-of-life handling
Fiberglass panel Basic HVAC intake No Bag and put in regular trash
Pleated HEPA-style Portable purifiers No Bag, avoid crushing, trash
High-MERV HVAC Upgraded furnace/AC No Bag and trash; follow local rules
Activated carbon Odor/VOC reduction No (home scale) Keep sealed, place in trash
Washable pre-filter Hair/lint capture Yes Clean and reuse; trash when damaged
UV or electronic module Specialty units Sometimes Refer to e-waste or lamp recycling

Example values for illustration.

Common Mistakes to Avoid When Disposing of Filters

Most disposal errors are simple to avoid once you know what to look out for. The main risks are making a big dusty mess, damaging your equipment, or ignoring local waste rules.

Shaking or Beating Filters to “Extend” Their Life

Shaking, banging, or blowing out disposable filters to make them last longer can release captured dust back into the air and may damage the filter media. Once a disposable filter is loaded, its resistance to airflow increases and its performance declines. At that point, it should be replaced, not cleaned.

Cutting Filters Open or Trying to Separate Layers Indoors

Cutting open used filters to “recycle the parts” seems appealing but often causes more problems than it solves. The trapped dust, soot, and fibers can spread, especially if you work indoors. In addition, many recycling programs do not accept mixed or contaminated materials from filters.

Burning Used Filters

Burning used air filters in fireplaces, fire pits, or outdoor burners is not recommended. Filters may contain synthetic fibers, adhesives, and collected particles that can release unwanted fumes or smoke when burned. Household trash guidelines typically advise against burning this type of material.

Ignoring Local Regulations

While most residential filters can go in regular trash, local rules vary. For example, some municipalities may have specific guidance for construction dust, wildfire cleanup, or filters used in home workshops. Checking your area’s solid waste or sanitation website once can clarify how they want you to handle these items.

Step-by-Step: How to Dispose of Used Filters Safely

A simple, consistent routine helps you swap filters without stirring up dust or damaging your equipment. The basic idea is to turn things off, remove the filter gently, contain it, and then clean the surrounding area if needed.

1. Prepare the Area

  • Turn off the air purifier or HVAC system before opening any panel or grille.
  • Have a trash bag open and ready nearby so you can place the filter directly into it.
  • If possible, crack a window or ensure some ventilation while you work, especially if the filter is very dusty.

2. Remove the Filter Carefully

  • Open the access panel or cover slowly to avoid jarring the filter.
  • Hold the filter frame, not the media, and pull it out gently.
  • Keep the filter as upright as possible; avoid twisting or bending.

3. Bag and Seal the Filter

  • Place the used filter directly into the trash bag without setting it down elsewhere.
  • If the filter is very dusty, you may double-bag it for extra containment.
  • Tie or seal the bag closed before taking it to your main trash bin.

4. Inspect and Wipe the Housing

  • Use a slightly damp cloth or a vacuum with a brush attachment to clean dust from the filter slot or housing.
  • Avoid using wet cleaners directly on electrical components.
  • Let any damp surfaces dry before installing the new filter.

5. Install the New or Cleaned Filter

  • Check airflow arrows or markings so the filter faces the correct direction.
  • Ensure the filter sits flat and the access panel closes securely; gaps can cause air bypass.
  • Turn the system back on and confirm normal airflow and noise.

Real-World Scenarios and Disposal Tips

Different home situations can change how often you are dealing with filters and how careful you may want to be during disposal. Here are a few examples.

After a Dusty Home Project

If you have done sanding, drywall work, or other dusty projects, your filters may load up quickly. In that case:

  • Expect to replace filters sooner than usual (sometimes right after the project).
  • Bag them promptly; renovation dust can be fine and easily stirred up.
  • Consider wearing a basic dust mask while changing especially dirty filters.

Following a Wildfire Smoke Event

Wildfire smoke can clog HEPA and HVAC filters faster than normal usage. Smoke particles are very fine and can darken filter media.

  • Replace heavily darkened or smoky-smelling filters once outdoor air improves.
  • Handle gently and bag them to keep fine soot from becoming airborne.
  • Ventilate the area while changing filters if outdoor conditions permit.

In a Home With Pets

Pet hair and dander can accumulate on pre-filters and main filters.

  • Clean washable pre-filters regularly to extend the life of the main filter.
  • Bag used filters promptly to avoid hair and dander spreading when you carry them through the house.
  • Consider changing filters a bit more often than the default schedule if you see visible buildup.

When Mold or Moisture Is Involved

If a filter has been exposed to visible mold, water damage, or persistent dampness, it is best to treat it with extra caution.

  • Avoid touching the media directly; hold the frame only.
  • Place the filter in a sealed bag and remove it from living spaces promptly.
  • Address the moisture source (humidity, leaks, condensation) so the new filter does not face the same issue.

Safety, Standards, and Local Guidelines

There are no universal national rules that apply to every household filter, so local guidance is important. However, a few general principles can help you stay aligned with common safety and waste practices.

Household vs. Hazardous Waste

Standard home air filters used for dust, pollen, and smoke are generally treated as regular household waste. They are not usually considered hazardous unless they have been used in a situation involving regulated contaminants (which is uncommon in typical homes).

If a filter has been used in a home workshop or for specific chemicals, check your local hazardous waste guidelines or contact your waste authority for clarity.

Electronics, UV Lamps, and Ionizer Components

Electronic air cleaners, UV-C units, and some ionizers may contain components that should be handled differently from simple fiber filters.

  • UV lamps may fall under the same rules as fluorescent or specialty bulbs and need drop-off at designated sites.
  • Electronic modules may belong in e-waste recycling if your area offers it.
  • Paper or fiber filters that run alongside these electronics usually still go in household trash.

Ozone-Generating Devices

Some older or specialty devices may generate ozone intentionally. While this article does not cover modifying or operating such devices, any filters or parts you remove should be handled like other used filters: bag, seal, and dispose of according to local rules. Avoid trying to alter or repurpose components in ways not described by the manufacturer.

Filter Maintenance, Replacement Timing, and Cost Planning

Safe disposal fits into the broader picture of filter maintenance. Knowing when filters are due for replacement helps you plan costs and keep the process simple.

Typical Replacement Intervals

Manufacturers usually provide a recommended range, but actual life depends on usage, room size, outdoor air quality, and how dusty or busy your home is. Many home users follow these general patterns:

  • HVAC filters: roughly every 1–3 months in active use, with shorter intervals in dusty conditions or heavy use.
  • Portable HEPA filters: roughly every 6–12 months of regular use, sometimes longer in light-use settings.
  • Carbon filters: often every 3–6 months, or sooner if odors are persistent.
  • Washable pre-filters: rinsed or vacuumed every 2–4 weeks, depending on dust and pet hair.

Signs a Filter Should Be Replaced Sooner

  • Visible thick dust, lint, or discoloration across most of the surface.
  • Noticeably reduced airflow from vents or your purifier, despite normal fan settings.
  • Persistent odors even after running the purifier or HVAC for a while.
  • Noise changes, such as the fan working harder than usual.

Budgeting for Filters and Disposal Supplies

Filters are an ongoing cost of owning air purifiers and HVAC systems. Including trash bags, occasional masks or gloves, and proper storage space for spare filters in your planning can make disposal feel routine rather than disruptive.

  • Keep a small stock of replacement filters so you are not tempted to overextend dirty ones.
  • Store them in a dry area away from direct sunlight and strong odors.
  • Mark replacement dates on a calendar or set reminders based on your typical schedule.
Table 2. Example filter replacement planner for common home filters – Example values for illustration.
Filter type Typical interval range What affects the interval Reminder idea
Basic HVAC panel About 1–3 months Seasonal use, dust load, pets Check at the start of each month
High-MERV HVAC About 1–2 months Continuous fan settings, renovations Inspect every 4–6 weeks
Portable HEPA About 6–12 months Daily runtime hours, room size Note the install date on the filter
Carbon odor filter About 3–6 months Cooking, smoking, strong odors Replace when odors persist
Washable pre-filter Clean every 2–4 weeks Pet hair, visible dust Align with regular house cleaning
UV lamp module About 9–12 months Hours used, on/off cycling Follow device hour counter or label

Example values for illustration.


Related guides: Best Air Purifiers for Allergies: What to Look For (CADR, HEPA, Carbon)How Often Should You Replace a HEPA Filter?Air Purifier Maintenance Checklist: Filters, Sensors, and Cleaning

Key Takeaways for Safe Filter Disposal

Safe disposal of used air filters is straightforward when you focus on containment and basic cleanliness. Turn off the system first, remove filters gently, and place them directly into a sealed trash bag. Most residential filters go in regular household trash unless your local waste authority advises otherwise.

Avoid shaking, cutting, or burning filters, and do not attempt to wash media that is not designed to be washable. Clean the filter housing lightly before installing a fresh filter, and keep track of replacement intervals so filters are changed before they become overloaded. With these simple habits, filter disposal becomes a routine, low-stress part of maintaining indoor air quality at home.

Frequently asked questions

How should I dispose of a HEPA or pleated filter heavily loaded with wildfire smoke?

Place the used HEPA or pleated filter directly into a trash bag without shaking or compressing it, then seal the bag to contain fine soot. Wear a basic mask and handle the filter gently, and follow any local guidance if wildfire cleanup rules differ in your area.

Can I recycle the plastic or metal parts of an air filter?

Some frames and metal components may be recyclable if they can be separated cleanly and are accepted by your local recycling program. If separating the parts would create dust or require cutting the filter media, it’s usually safer to bag the filter and dispose of it as household trash and check recycling rules for intact components.

What should I do if a filter has visible mold or has been water-damaged?

If a filter is moldy or water-damaged, avoid touching the media and place it in a sealed bag to remove it from living spaces promptly. Address the moisture source before installing a replacement, and consult local waste guidance if you suspect significant contamination.

How do I clean and reuse a washable pre-filter safely?

Follow the manufacturer’s instructions: remove the pre-filter, vacuum or rinse it outdoors or over a trash can to limit indoor dust, and allow it to dry completely before reinstalling. Do not use harsh chemicals or high heat unless the instructions explicitly permit those methods.

Do UV bulbs and electronic purifier components need special disposal?

Yes; UV bulbs and electronic modules often fall under lamp or e-waste recycling rules and should be taken to designated drop-off sites when available. Do not intentionally break UV bulbs, and dispose of the filter media separately by bagging it according to normal household waste guidance unless local rules state otherwise.

Storing Humidifiers and Dehumidifiers Off-Season Without Mold

Person removing filter from home air device for seasonal storage

To store humidifiers and dehumidifiers off-season without mold, you need to fully clean, disinfect, dry, and open-vent them before packing in a breathable, dry place.

Both devices handle standing water and damp surfaces, which makes them easy places for mold and biofilm to grow if they are put away wet or dusty. Careful end-of-season cleaning, drying, and storage helps prevent odors, deposits, and mold spores from building up before you use them again.

Quick answer
  • Target indoor humidity around 30–50% in most homes to limit mold growth.
  • Always empty tanks and reservoirs completely before storage.
  • Clean scale and residue with mild detergent and a non-abrasive brush.
  • Disinfect water-contact parts, then air-dry 24–48 hours until fully dry.
  • Store units in a cool, dry, ventilated area (not in damp basements).
  • Inspect and quick-clean devices before using them again next season.

Why Off-Season Storage Matters for Mold Prevention

Humidifiers and dehumidifiers both collect or expose water as part of normal operation. When that water is left behind in reservoirs, hoses, wicks, or internal surfaces, it can support mold, mildew, and bacterial growth during storage. The first time you turn the unit back on, that buildup can release unpleasant odors and particles into your indoor air.

Off-season storage is especially important in climates with big seasonal humidity swings. Many people use humidifiers in dry winter months and dehumidifiers in damp spring and summer months. Each time you stop using a device for multiple weeks, you have a chance either to dry it thoroughly and keep it clean or to seal in moisture and spores.

Proper storage does not require specialized chemicals or tools. It mainly involves:

  • Removing all standing water
  • Cleaning away mineral deposits and visible residue
  • Disinfecting surfaces that touch water
  • Allowing enough time for complete drying
  • Choosing a storage spot that stays dry and temperate

Key Concepts: How Humidifiers and Dehumidifiers Enable Mold

Understanding how each device handles water helps explain where mold and slime tend to appear.

Humidifiers: Water Mist and Mineral Deposits

Humidifiers add moisture to indoor air by turning water into mist or vapor. Their main mold and residue risks are:

  • Water reservoirs and tanks that stay damp and may collect slimy biofilm.
  • Wicks or filters that remain moist and trap minerals and organic material.
  • Mineral scale from tap water that creates rough surfaces where microbes can cling.
  • Fine internal passages that are hard to dry if water is left inside.

Because humidifiers intentionally add water to the air, storing them while still wet or dirty makes it easy for mold to establish itself during the off-season.

Dehumidifiers: Collected Condensate and Damp Coils

Dehumidifiers pull moisture from the air and collect it as liquid in a bucket or drain line. Their mold risk centers around:

  • Condensate buckets or tanks that may be put away with residual water.
  • Drain hoses that stay wet inside and can harbor slime and algae.
  • Evaporator and condenser coils that remain damp after shutoff.
  • Air filters that trap dust, which can hold moisture near surfaces.

Over time, a dehumidifier that is stored with a little water or heavy dust can develop musty odors, even if it is technically dry on the outside.

Table 1. End-of-season storage checklist for humidifiers and dehumidifiers

Example values for illustration.

Task Device type Why it matters Notes
Empty tanks and buckets Humidifier & dehumidifier Removes standing water that supports mold Do this immediately after final use
Clean visible residue Humidifier Reduces mineral scale and biofilm surfaces Use mild detergent and a soft brush
Disinfect water-contact parts Humidifier & dehumidifier Knocks down microbial load before storage Rinse thoroughly afterward
Rinse and drain hoses Dehumidifier Helps clear slime and algae in lines Hang to dry fully if removable
Air-dry 24–48 hours Humidifier & dehumidifier Allows hidden moisture to evaporate Leave covers, tanks, and caps off
Cover loosely in storage Humidifier & dehumidifier Limits dust while allowing air exchange Avoid sealing in plastic if items are not bone dry

Common Mistakes That Lead to Moldy Devices

Most mold issues in stored humidifiers and dehumidifiers can be traced to a few repeatable habits rather than rare failures.

Storing While Still Wet Inside

Putting a device away immediately after its last run often means there is water film left on tanks, coils, wicks, and hoses. Even a thin layer of moisture can support microbial growth during weeks or months of storage.

Skipping the Final Deep Clean

Cleaning only when the unit starts to smell or looks dirty in the middle of the season is common. When the season ends, people sometimes simply unplug the unit and store it as-is. Any existing scale, slime, or dust then sits undisturbed and can worsen while the unit is not in use.

Sealing Devices in Airtight Plastic

Airtight plastic wraps or bags trap any remaining humidity, turning the inside into a still, moist environment. Without air circulation, surfaces dry very slowly, and any microbes left after cleaning may continue to multiply.

Storing in Damp Basements or Garages

Even a perfectly cleaned and dried device can become musty if it is stored for months in a space with persistently high humidity or visible dampness. Moist air can condense on cooler device surfaces, reintroducing water where mold spores can land and grow.

Reusing Disposable Parts Beyond Their Life

Some humidifiers use disposable wicks or filters. Reusing them season after season, or storing them damp, can lead to stubborn odors and visible discoloration. Even if you clean the rest of the device, these parts may remain a source of smell and debris.

Step-by-Step: Off-Season Storage for Humidifiers

The following process is general and should be adjusted based on the instructions that come with your specific device. Always defer to the manufacturer’s safety and cleaning guidance.

1. Power Down and Cool

  • Unplug the humidifier and let it cool if it has warm or hot components.
  • Move it to a sink, tub, or area where minor splashes are okay.

2. Empty the Reservoir Completely

  • Remove the water tank and pour out all water.
  • Drain any base reservoir that may hold additional water.
  • Tip gently in different directions (as allowed) to remove trapped water.

3. Clean Away Mineral Deposits and Film

  • Use a mild dish detergent and a soft brush or cloth to scrub the tank, base, and removable parts.
  • For visible white scale from hard water, follow the product’s instructions; many allow a diluted acid cleaner such as a mild vinegar solution, but check the manual first.
  • Rinse thoroughly so no cleaning solution remains.

4. Disinfect Water-Touching Surfaces

  • Use a disinfecting step that is compatible with the materials in your unit. Some manuals specify diluted bleach or other solutions.
  • Apply only as directed and never mix cleaning products.
  • After the contact time recommended in the instructions, rinse well with clean water.

5. Handle Filters and Wicks

  • If your humidifier uses disposable wicks or filters, consider replacing them at the start of the next season rather than storing them damp.
  • If the manufacturer allows rinsing or reusing certain parts, rinse and then air-dry thoroughly.
  • Discard any part that remains discolored, has persistent odor, or shows visible mold.

6. Air-Dry Open for 24–48 Hours

  • Reassemble only enough to keep parts from warping; leave caps off tanks and lids slightly open.
  • Place components on a clean, dry surface with good room airflow.
  • Allow at least a full day for hidden moisture to evaporate. In cool or humid rooms, more time may be helpful.

7. Store in a Dry, Ventilated Space

  • Choose a closet or interior room that generally stays dry and between about 40–80 °F.
  • Cover the device loosely with a breathable cloth or leave it uncovered to allow air circulation.
  • Avoid directly on concrete floors; use a shelf or pallet if needed.

Step-by-Step: Off-Season Storage for Dehumidifiers

Dehumidifiers require slightly different attention due to their coils, fans, and often heavier construction, but the general goals are the same: remove water, clean, disinfect, dry, and store dry.

1. Turn Off and Let the Coils Dry

  • Switch the unit off according to its controls, then unplug it.
  • If possible, leave it in place for a few hours with the bucket removed so remaining moisture on the coils can drip into the bucket compartment and evaporate.

2. Empty and Clean the Condensate Bucket

  • Remove the water bucket and pour out any remaining water.
  • Wash the bucket with mild detergent and warm water.
  • Rinse thoroughly and leave it out of the unit to dry.

3. Flush and Dry Any Drain Hose

  • If you use a continuous drain hose, disconnect it according to the instructions.
  • Run clean water through the hose to loosen any slime or sediment.
  • Hang the hose so both ends are open and water can drain and evaporate.

4. Clean the Air Filter and Grilles

  • Remove the air filter and clean it as recommended (often vacuuming or rinsing).
  • Allow it to dry completely before reinserting or storing.
  • Wipe dust from intake and exhaust grilles with a dry or lightly damp cloth.

5. Wipe Internal Surfaces You Can Safely Reach

  • If accessible without disassembly, lightly wipe the bucket compartment and any exposed plastic surfaces that may get damp.
  • Do not open sealed panels or attempt to clean internal electrical or refrigeration components.

6. Optional Disinfection of Water-Contact Areas

  • If the manufacturer allows, you may disinfect the bucket and drain fittings with an appropriate diluted solution.
  • Rinse thoroughly and allow all treated parts to dry.

7. Final Drying and Storage

  • Let the assembled unit sit with the bucket slightly ajar for at least 24 hours in a dry room.
  • Once dry, insert the dry bucket and filter.
  • Store in an upright position in a dry area away from direct moisture sources.

Real-World Scenarios: Where Mold Problems Show Up

These simplified examples show how storage choices influence mold and odor issues.

Winter Humidifier, Summer in the Closet

An apartment resident runs a tabletop humidifier in winter, then in spring simply empties the tank and puts it in a bedroom closet. The tank still has scale on the bottom and faint slime in corners. By fall, the device smells musty as soon as water is added, and grayish film appears in the tank after a few uses. A full cleaning and drying before storage would likely have prevented this buildup.

Basement Dehumidifier Retired for Winter

A homeowner uses a dehumidifier during humid months, then stores it in an unheated, slightly damp garage over winter. Even after being cleaned and emptied, the unit sits in high humidity, and condensation forms and evaporates repeatedly on the metal coils and surfaces. The following spring, the unit produces a noticeable musty smell when first started. Storing it in a drier, conditioned space would have lowered this risk.

Vacation Home Devices Used Only Part of the Year

In a vacation home that is closed for months, devices may sit unused in a closed-up building. If humidifiers and dehumidifiers are left with water in them when the home is locked, mold and biofilm have long uninterrupted periods to grow. In such settings, it is especially important to ensure all water is removed and parts are dry before the home is closed for the season.

Safety Considerations and What Not to Do

Mold prevention during storage should not compromise electrical or mechanical safety.

Avoid Unapproved Chemicals or Additives

  • Do not add unapproved biocides, essential oils, or homemade mixtures to tanks or buckets unless the manufacturer clearly allows it.
  • Some substances can damage plastics, seals, or internal parts over time.

Do Not Disassemble Beyond Instructions

  • Avoid opening sealed compartments, bypassing safety switches, or modifying controls in the name of “deep cleaning.”
  • Changes to internal components can create shock risks, leaks, or performance issues.

Respect Electrical Safety Around Water

  • Always unplug the unit before cleaning, especially when using water or wet cloths.
  • Keep electrical connections and control panels dry.
  • If a unit has been stored in a flooded or heavily damp area, inspect carefully and consider professional evaluation before use.

Ionizers and UV-C Features

  • Some devices include optional ionizing or UV-C components. Storage steps usually focus on the water path and filters rather than these features.
  • Follow the manual for any lamps or elements that require periodic replacement; do not attempt to retrofit or upgrade these systems yourself.

Maintenance Planning: Keeping Devices Ready for Next Season

Good off-season storage is only one part of mold prevention; simple planning can make next-season setup easier and cleaner.

Track Filter and Wick Replacement

  • Note the month and year when you last replaced wicks or filters.
  • Store a replacement set nearby, clearly labeled, so you are not tempted to reuse heavily aged parts.

Quick Start-of-Season Inspection

  • Before the first run each season, open the device and inspect tanks, buckets, wicks, and hoses.
  • Look for discoloration, residue, or odor. If present, clean and disinfect again before use.

Aim for Moderation in Humidity Levels

  • Keep indoor relative humidity roughly in the 30–50% range for general comfort and mold limitation, adjusting as needed for your climate.
  • A simple humidity meter can help you avoid over-humidifying in winter or under-dehumidifying in summer.
Table 2. Humidity and mold risk quick-plan examples

Example values for illustration.

Goal Simple actions Tools Note
Limit mold in damp basement Run dehumidifier in humid months; store it dry when not needed Portable dehumidifier, basic humidity meter Aim near 40–50% RH as a general comfort target
Reduce dry-air discomfort in winter Use humidifier during very dry periods; stop if windows fog Humidifier, room humidity meter Try to keep above about 30% RH but below levels that cause condensation
Store devices between seasons Clean, disinfect, dry 24–48 hours, then keep in dry room Cleaning tools, breathable cover Check for odor or residue before first use next season
Limit musty odors from stored units Avoid damp storage spaces and airtight plastic wraps Shelf in interior closet Airflow helps surfaces stay dry during storage
Plan for filter changes Note replacement dates and keep spares nearby Notebook or simple reminder Regular changes support cleaner operation and air

Related guides: Best Indoor Humidity Level to Prevent Mold (With Seasonal Targets)Air Purifier for Mold Spores: What Works and What Doesn’tBasement Dampness 101: RH Targets, Dehumidifiers, and Ventilation

Summary: Simple Habits to Avoid Moldy Storage

To keep humidifiers and dehumidifiers from becoming mold sources during the off-season, treat the last day of use as a small project. Empty all water, clean away visible residue, disinfect water-contact surfaces as allowed, and then let everything air-dry for at least a full day before storage.

Store devices in a dry, ventilated space, ideally in the same part of the home where humidity is already controlled. When the next season arrives, a quick inspection and rinse are usually all you need before turning them back on. These simple habits help maintain cleaner equipment and support more comfortable indoor humidity levels year after year.

Frequently asked questions

How long should I air-dry a humidifier or dehumidifier before storing it?

Air-dry components for at least 24–48 hours in a well-ventilated room, leaving tanks, caps, and lids open so hidden moisture can evaporate. In cool or humid indoor conditions, extend drying time until all surfaces feel and look completely dry to the touch.

Can I wrap my device in airtight plastic for storage?

Only if the unit and all parts are completely bone-dry; otherwise airtight plastic traps residual moisture and promotes mold growth. A loose, breathable cover or cloth is usually safer because it limits dust while allowing air circulation.

Is diluted vinegar or bleach safe to use before storage?

Diluted vinegar can remove mineral scale, and diluted bleach is commonly recommended for disinfection if the manufacturer allows it. Always check the manual, follow recommended concentrations and contact times, never mix cleaners, and rinse thoroughly after treatment.

Should I remove filters or wicks before storing a humidifier?

Disposable wicks or filters should be replaced rather than stored if they are damp or aged; reusable filters should be cleaned and fully dried before storage. If a part shows discoloration, persistent odor, or visible mold, discard it and install a new one next season.

Where is the best place in my home to store these devices off-season?

Store units upright in a dry, ventilated interior space such as a closet or shelf that stays between roughly 40–80 °F. Avoid damp basements, unconditioned garages, or direct placement on concrete floors where ambient moisture can condense on components.