One Big Purifier vs Two Small Ones: Which Cleans Air Faster in Your Home?

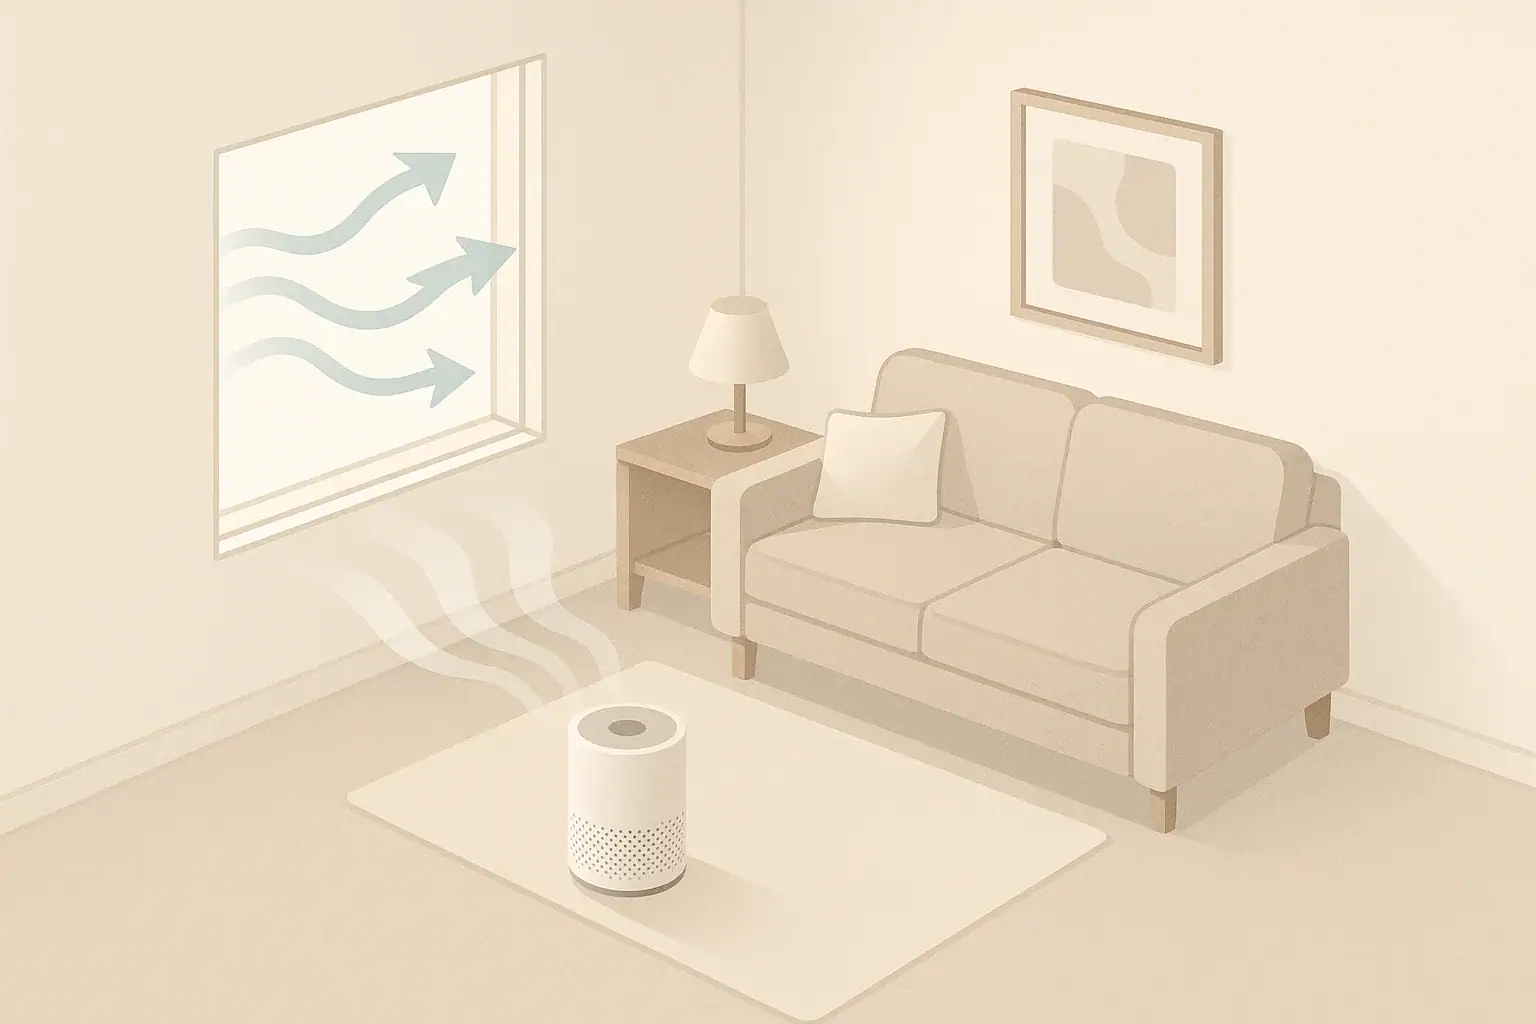
Isometric room scene with generic air purifier and measuring tools

In most homes, the setup that cleans air fastest is the one with the higher usable total CADR in the rooms you actually occupy, whether that is one big purifier or two smaller ones. The right choice depends on your floor plan, room sizes, noise tolerance, and how evenly you want clean air spread across bedrooms, living areas, and work spaces.

This guide explains how to compare one large air purifier against two smaller units using simple ideas like CADR, ACH, and room volume. You will see where a single high-capacity purifier shines, where multiple smaller purifiers win, and how placement, noise, and filter costs change the real-world results. By the end, you will be able to sketch your layout, run a quick sizing check, and pick a configuration that clears smoke, dust, and allergens quickly without wasting money or energy.

What “Cleans Faster” Really Means and Why It Matters

When people compare one big purifier vs two small ones, they usually mean one of two things by “faster”:

  • How quickly particle levels drop after a spike (for example, cooking smoke or outdoor wildfire smoke leaking in).
  • How consistently low particle levels stay in the places where people breathe most of the time.

Air purifiers do not clean the whole house at once. They clean the air that actually passes through their filters. That is why room layout, door positions, and where you place the purifier matter as much as the number of units you buy.

Choosing the wrong configuration can lead to common problems:

  • A powerful single purifier that leaves far bedrooms or corners stuffy and dusty.
  • Several small purifiers that are easy to live with but too weak to keep up with smoke or pet dander.
  • Units that technically have enough airflow, but only at fan speeds that are too noisy to use.

Understanding what “fast cleaning” means in your specific rooms is the first step to deciding whether one large or two smaller purifiers will work better.

Key Concepts: CADR, ACH, and Room Volume

You do not need advanced math to compare one big purifier vs two small ones. A few simple concepts are enough to get close in real homes.

Clean Air Delivery Rate (CADR)

CADR (Clean Air Delivery Rate) is a measure of how much clean, filtered air a purifier can deliver each minute. It is usually given in cubic feet per minute (CFM). Higher CADR means:

  • Faster reduction in airborne particles after a pollution spike.
  • Better ability to keep indoor air cleaner when there is a steady source of dust, smoke, or allergens.

When you use two purifiers in the same area, their CADR values are roughly additive, as long as they are not blocking each other’s airflow. For example, two smaller units each providing 130 CFM give you around 260 CFM total in that shared space.

Room Volume and Air Changes per Hour (ACH)

To understand how “big” a purifier really is for your space, you need the room volume and a rough air changes per hour (ACH) target.

  • Room volume (in cubic feet) = length × width × height.
  • ACH describes how many times per hour the purifier can move that room’s volume of air through its filters (in theory).

A simple planning formula is:

CADR (CFM) ≈ Room volume (cubic feet) × Target ACH ÷ 60

Many people aim for around 4–8 ACH in bedrooms and main living areas for comfort and general cleanliness, with the higher end used when there are strong particle sources or sensitive occupants. This is a planning range, not a medical standard.

Example CADR and ACH planning for different room setups – Example values for illustration.
Space type Approx. size (ft) Room volume (cu ft) Target ACH range Approx. CADR needed (CFM) Typical purifier setup
Small bedroom 10 × 12 × 8 960 4–8 ACH 64–128 One medium single unit
Medium bedroom or office 12 × 14 × 8 1,344 4–8 ACH 90–180 One larger unit or two small units
Living room 15 × 16 × 8 1,920 4–8 ACH 128–256 One strong unit in room
Open-plan living + kitchen 20 × 20 × 9 3,600 4–8 ACH 240–480 One very strong unit or two moderate units
Two small bedrooms combined 2 × (10 × 12 × 8) 1,920 4–8 ACH each 2 × 64–128 Two separate small or medium units

This table shows why layout matters: the same total CADR can be delivered by one large unit in a shared space or by two smaller units placed directly in separate rooms.

Equal vs Unequal Total CADR

Once you know your approximate CADR target, you can compare configurations:

  • If total CADR is equal: one big purifier and two small ones have similar theoretical cleaning speed, and layout plus placement usually decide which feels better.
  • If total CADR is different: the option with higher total CADR at fan speeds you will actually use almost always cleans faster.

In practice, many people end up using lower fan speeds than the maximum because of noise. That means the “usable” CADR at medium speed is often more important than the maximum CADR printed on the box.

Real-World Examples: When One Big vs Two Small Work Best

Looking at common home layouts makes the trade-offs much clearer. Here are practical scenarios showing how one big purifier vs two small ones perform.

Scenario 1: Compact Studio or One Main Living Space

Imagine a 450-square-foot studio with an 8-foot ceiling. The main space is mostly open, with a small kitchen area and a sleeping corner. You want good control of cooking smoke and dust.

  • One big purifier: A single unit with around 240–300 CFM placed near the center can reach 4–5 ACH for the whole area. Cleaning is fast and even, and maintenance is simple.
  • Two small purifiers: Two 120–150 CFM units can match or exceed that CADR, but you now have two power cords, two filter sets, and more fan noise sources in the same open room.

In this case, a single well-placed larger purifier usually makes more sense and feels simpler.

Scenario 2: Two Bedrooms Off a Hallway

Now consider a small home with two bedrooms and a hallway connecting them to a living room. Doors are often closed at night. You care most about clean air while sleeping.

  • One big purifier in the hallway or living room: It can only clean the bedrooms efficiently when doors are open. With closed doors, air exchange is slow, so bedroom particle levels may stay high for hours.
  • Two small purifiers in each bedroom: Even if each unit is modest (for example, 80–120 CFM), they can deliver 4–8 ACH inside each closed room. Nighttime air quality improves much more quickly where it matters.

Here, two smaller purifiers clearly win because they put airflow directly into enclosed spaces.

Scenario 3: L-Shaped Open-Plan Area

Picture an L-shaped living and dining area with a partial wall and furniture creating corners where air can stagnate. You want allergies and pet dander controlled throughout the space.

  • One big purifier: Placed in the main section, it may clean that side very well but leave the far leg of the “L” with slower air turnover and lingering dust.
  • Two smaller purifiers: One unit near the center of each leg of the “L” can reduce dead zones and keep particle levels more even, even if the total CADR is similar.

In irregular spaces, two smaller units often feel more effective because they improve mixing and reduce stuffy corners.

Scenario 4: Strong Local Pollution Source

Suppose you frequently cook with high-heat methods that generate lots of particles, or you have a nearby busy road that brings in outdoor pollution near one side of the home.

  • One big purifier: If it is placed far from the source, it may take longer to catch spikes, even if overall CADR is high.
  • Two small purifiers: One can live close to the kitchen or source wall to capture spikes early, while the second stays near seating or sleeping areas for comfort.

Flexibility is the advantage here: two smaller units let you “chase” temporary sources without dragging a heavy machine around.

Common Mistakes and Troubleshooting Slow Air Cleaning

Many people buy capable purifiers but still feel like their air is not getting clean fast enough. Often the problem is not the device itself, but how it is used.

Frequent Sizing and Placement Mistakes

  • Under-sizing for room volume: Choosing one small purifier for a large room or multiple rooms, then running it at low speed and expecting quick results.
  • Relying on a hallway unit for closed bedrooms: Assuming air will automatically circulate through closed doors at night.
  • Pushing purifiers into tight corners: Blocking air intake or outlet with furniture, curtains, or walls so the unit mostly recirculates the same pocket of air.
  • Running only on the quietest setting: Never using higher fan speeds to clear spikes, so pollution lingers for hours.
  • Ignoring filter loading: Letting filters clog with dust, which quietly reduces CADR over time.

How to Tell If Your Setup Is Too Weak or Poorly Placed

Signs that your current configuration is not cleaning fast enough include:

  • Visible dust settling quickly on surfaces even with daily purifier use.
  • Lingering cooking smells or smoke haze more than an hour after cooking.
  • One room feeling stuffier or dustier than others, even though you run a large unit nearby.
  • Noticeable relief in symptoms (sneezing, irritation) only when sitting very close to the purifier.

Quick Fixes Before Buying More Equipment

  • Increase fan speed temporarily: Use higher speeds during and after pollution events, then drop to a quieter setting once levels come down.
  • Reposition the unit: Move a single purifier toward the center of the room, away from corners, and give it clear intake and outlet space.
  • Open doors when possible: If you rely on one big purifier for several rooms, open doors to help mixing when noise and privacy allow.
  • Check filters: Inspect and replace clogged or discolored filters according to the manual’s guidance.
Common issues and practical adjustments for purifier setups – Example values for illustration.
Observed issue Likely cause One big purifier adjustment Two small purifiers adjustment
Bedrooms stay stuffy at night Hallway unit cannot overcome closed doors Move unit into primary bedroom or add a second unit Place one unit in each bedroom and keep doors mostly closed
Cooking smoke lingers in kitchen Purifier too far from source or too low CADR Move unit closer to kitchen and use higher speed while cooking Dedicate one unit near kitchen, keep the other in living/sleeping area
One corner of room feels dusty Poor mixing or blocked airflow Reposition unit more centrally and clear obstructions Move one unit toward the neglected corner to balance coverage
Noise is bothersome at effective speeds Need high fan speed to hit ACH target Run high speed while away, then medium/low when present Run both units at lower speed and increase distance from seating
Filter indicator triggers frequently High particle load or small filter area Vacuum pre-filters and consider a unit with larger filter capacity Alternate usage between units or share runtime to spread load

Safety Basics for Using One or Multiple Air Purifiers

Air purifiers are generally safe appliances, but using one big purifier vs two small ones changes how many outlets, cords, and filters you are managing. A few simple precautions reduce risk and keep performance consistent.

Electrical and Placement Safety

  • Avoid overloaded outlets: Do not plug several high-wattage devices into a single outlet or power strip along with your purifier, especially if you run two units in the same area.
  • Keep cords tidy: Route power cords where they will not be tripping hazards, and avoid pinching them under furniture or doors.
  • Allow ventilation space: Do not cover air inlets or outlets with fabric, furniture, or toys. Both one large and two small purifiers need clear airflow to avoid overheating and maintain CADR.
  • Stable footing: Place purifiers on flat, stable surfaces where they cannot easily be knocked over by pets or children.

Filter and Air Quality Safety

  • Use appropriate filters: Follow the manufacturer’s instructions for filter type and replacement. Improvised or incompatible filters can reduce performance and may not seal properly.
  • Avoid blocking exhaust: Do not direct the clean air outlet straight into curtains or walls at close range, which can trap heat and reduce circulation.
  • Watch for unusual smells: A burning smell, odd chemical odor, or visible smoke from the unit is a sign to turn it off, unplug it, and inspect filters and housing.
  • Do not rely on purifiers for all hazards: Air purifiers help with particles and some gases but do not replace proper ventilation, carbon monoxide detectors, or professional remediation for serious mold or combustion issues.

Special Considerations with Multiple Units

  • Child and pet access: Two small units mean more fan inlets at floor level. Consider locations where small hands or paws cannot easily reach moving parts.
  • Consistent settings: If you rely on two units to reach a target ACH, make sure both are actually turned on and set to the intended fan speed.

Long-Term Use, Maintenance, and Operating Costs

Over months and years, the cost and effort of running one big purifier vs two small ones can matter as much as initial cleaning speed.

Filter Replacement Patterns

Two smaller purifiers usually mean more total filters to track and replace. However, a single high-capacity purifier may use larger, more expensive filters. What matters most is:

  • How many hours per day each unit runs.
  • The typical particle load in your home (for example, pets, nearby traffic, frequent cooking).
  • Whether you clean pre-filters regularly to protect the main filter.

In dusty or smoky environments, it is common to see shorter filter life than the most optimistic estimates in manuals. Plan your budget assuming you will replace filters at the earlier end of the suggested range.

Energy Use Over Time

  • Fan speed matters more than unit count: Power draw rises as you move from low to medium to high speed. Two small units on low may use similar power as one larger unit on medium.
  • Use high speed strategically: Run higher speeds during pollution spikes or when you are away, then drop to quieter speeds to save energy while maintaining cleaner air.
  • Zone your usage: With two small purifiers, you can turn off units in unoccupied rooms to save energy while keeping critical spaces covered.

Storage and Seasonal Use

If you only need heavy-duty air cleaning during certain seasons (for example, wildfire season or pollen peaks), think about where you will store purifiers when not in use.

  • One big purifier: Easier to store a single unit, but it may be bulky and need more space.
  • Two small purifiers: Easier to tuck into closets or under shelves, but you must remember where each is stored and protect both from dust and moisture.

Before storing any purifier, remove or seal filters according to the manual’s guidance, and keep the unit in a dry area to avoid mold or odor buildup.

Practical Takeaways and Specs to Look For

By now, the basic pattern is clear: the best choice is the one that delivers enough usable CADR to your priority rooms, at fan speeds you can live with, given your layout.

  • Choose one big purifier when you have one main open space, want simple maintenance, and can place the unit centrally with good airflow.
  • Choose two small purifiers when you have multiple closed rooms, an irregular layout, or strong local pollution sources that benefit from flexible, moveable coverage.
  • Match CADR to room volume: Use rough ACH targets (4–8) and room volume to estimate the CADR you need for each zone.
  • Plan for noise: Compare performance at medium speeds, not just maximum, since that is where you will likely run purifiers most of the time.

Specs to Look For When Comparing One Big vs Two Small Purifiers

Use this checklist when you are reading product boxes or spec sheets, regardless of brand:

  • CADR values (CFM): Note particle CADR and compare it to your room volume and ACH target. For two small units, add their CADR if they will run in the same space.
  • Recommended room size: Look for realistic room size guidance and compare it with your actual room dimensions and ceiling height.
  • Noise levels by fan speed: Check sound levels at low, medium, and high settings. Focus on the speed you will use daily.
  • Filter type and replacement interval: Confirm the presence of a high-efficiency particle filter and any gas or odor filter, plus typical replacement timing.
  • Filter cost and availability: Estimate yearly filter cost for one large unit vs two small units based on your expected runtime.
  • Power consumption: Note wattage at different speeds and consider how many hours per day you will run each unit.
  • Physical size and weight: Consider whether you will move the unit between rooms or leave it in one place.
  • Intake and outlet design: Look for designs that allow flexible placement without forcing you into tight corners.
  • Controls and timers: Simple timers or auto modes can help you run higher speeds when you are away and quieter speeds when home.

If you sketch your floor plan, calculate or estimate room volumes, and compare realistic CADR and noise levels, the choice between one big purifier and two small ones becomes straightforward. You will know which configuration can clean your indoor air faster, more evenly, and more comfortably for the way you actually live.

Frequently asked questions

What specifications and features should I prioritize when choosing an air purifier setup?

Prioritize usable CADR at the fan speed you will actually run, noise levels at that speed, filter type and replacement cost, and the unit’s recommended room coverage based on your room volume. Also consider physical size, placement flexibility, and power consumption so the unit fits your layout and daily use patterns.

Will a single purifier in a hallway clean bedrooms with closed doors?

Not reliably. Closed doors restrict air exchange, so a hallway unit may not provide enough ACH inside closed bedrooms. For consistent night-time air quality, place a purifier inside each bedroom or open doors to improve mixing when practical.

Are air purifiers safe to run continuously in my home?

Yes—most modern air purifiers are designed for continuous indoor use when operated according to the manufacturer’s instructions. Take basic precautions like avoiding overloaded outlets, keeping intake and exhaust clear, inspecting filters regularly, and stopping use if you detect burning smells or unusual odors.

How do I estimate how much CADR or how many purifiers I need for a room?

Estimate room volume (length × width × height) and pick an ACH target (commonly 4–8 for living spaces and bedrooms). Use the rule CADR (CFM) ≈ Room volume × ACH ÷ 60; if you plan to run multiple units in the same space, add their usable CADR values together.

Can two small purifiers be quieter or more energy efficient than one large unit?

Possibly—noise and energy depend more on fan speed than unit count. Two small units running at low speeds can be quieter or use similar energy compared with one unit on a higher speed, and multiple units let you zone coverage to save energy in unused rooms.

What’s a quick troubleshooting step if the air still feels dusty despite running purifiers?

Try increasing fan speed temporarily to clear spikes, repositioning the purifier away from corners with clear intake/outlet space, and checking or replacing clogged filters. If you rely on a single unit for multiple rooms, open doors to improve mixing or add a second unit where air remains dusty.
CADR vs Room Size: Simple Tables to Match an Air Purifier to Your Space

Isometric illustration of room size planning with air purifier

CADR vs room size comes down to one idea: the higher the CADR (in CFM), the larger the room an air purifier can handle at a given air change rate. If the CADR is too low for your room volume, the purifier will clean the air slowly; if it is higher than you need, you gain faster cleanup and more flexibility to run quieter fan speeds.

When you understand how Clean Air Delivery Rate (CADR), room size, and air changes per hour (ACH) fit together, you can quickly see whether a purifier is undersized, well matched, or comfortably strong for your space. This helps you avoid guesswork, especially in bedrooms, nurseries, and open-plan living areas where air quality and noise both matter.

This guide walks through the core concepts, gives practical CADR planning examples, highlights common mistakes, and finishes with a simple specs checklist you can use while comparing air purifiers online or in-store.

What CADR Means and Why Room Size Matters

CADR (Clean Air Delivery Rate) is a lab-tested measure that combines two things: how much air a purifier moves and how efficiently its filter removes particles from that air. In the United States, CADR is usually expressed in cubic feet per minute (CFM).

Most CADR labels include separate values for different particle sizes:

  • Dust CADR – for fine dust-sized particles commonly found on surfaces and in the air.
  • Pollen CADR – for larger particles that tend to settle more quickly.
  • Smoke CADR – for very small particles that stay suspended longer; often used as a conservative reference.

Room size matters because the same CADR will behave very differently in a 120-square-foot bedroom than in a 450-square-foot living room with tall ceilings. A purifier that feels powerful in a small office can feel weak in an open-plan space because it has to process a much larger volume of air.

To connect CADR to room size in a useful way, it helps to think in terms of air changes per hour (ACH): how many times per hour the purifier could theoretically process the entire volume of air in the room. Higher ACH usually means faster reduction of airborne particles, while lower ACH means a slower cleanup rate.

Key Concepts: CADR, Room Volume, and ACH

Three basic measurements let you estimate whether a purifier is sized reasonably for your space:

  • Room area in square feet (length × width).
  • Ceiling height in feet.
  • Target ACH (an example air changes per hour goal for planning).

From these, you can estimate the room volume and a theoretical CADR target.

Step 1: Estimate room volume

Room volume (cubic feet) ≈ floor area (sq ft) × ceiling height (ft).

For example, a 12 ft × 15 ft bedroom with an 8 ft ceiling has:

  • Area = 12 × 15 = 180 sq ft
  • Volume = 180 × 8 = 1,440 cubic feet

Step 2: Choose an example ACH target

ACH is not a strict rule at home, but people often use ranges like these for planning:

  • Lower ACH (around 2–3) – slower turnover; sometimes used as a loose minimum.
  • Moderate ACH (around 4–5) – more frequent air processing for general living spaces.
  • Higher ACH (around 6–8) – more aggressive turnover that some people prefer for bedrooms or higher particle loads.

Step 3: Convert ACH and volume to an example CADR

A simple planning relationship often used is:

CADR (CFM) ≈ (Room volume × ACH) ÷ 60

This formula is a theoretical guide, not a guarantee. Real rooms have doors, leaks, furniture, and uneven airflow. However, it gives you a useful starting point to see whether a CADR number is in the right ballpark for your room.

Table 1. Example CADR vs Room Size and ACH – Example values for illustration.
Approx. room area (sq ft) Ceiling height note Illustrative room volume (cu ft) Example CADR for ~4 ACH (CFM) Example CADR for ~6 ACH (CFM)
100–150 Standard ~8 ft 800–1,200 ≈55–80 ≈80–120
150–250 Standard ~8–9 ft 1,200–2,250 ≈80–150 ≈120–225
250–350 Standard to slightly tall 2,000–3,150 ≈135–210 ≈200–315
350–500 Taller or partial open-plan 2,800–4,500 ≈185–300 ≈280–450
500–700 High or open-plan section 4,000–6,300 ≈265–420 ≈400–630

Use the table as a rough planning aid: if your room falls near the middle of a range, you can compare that example CADR with the smoke or dust CADR on purifier spec sheets. Choosing a purifier with CADR toward the higher end of the example range often gives more flexibility to run quieter speeds.

Real-World CADR vs Room Size Examples

Seeing specific room scenarios makes the CADR vs room size relationship easier to apply at home.

Example 1: Small bedroom or home office

Room: 10 ft × 12 ft bedroom, 8 ft ceiling.

  • Area = 120 sq ft
  • Volume = 120 × 8 = 960 cu ft

If you plan for a moderate example of 4 ACH:

  • CADR ≈ (960 × 4) ÷ 60 ≈ 64 CFM

For a higher example of 6 ACH (often preferred in sleeping spaces):

  • CADR ≈ (960 × 6) ÷ 60 ≈ 96 CFM

In practice, many people in this situation look for a purifier with a smoke or dust CADR somewhere around 90–130 CFM to allow for quieter nighttime operation and some real-world losses from furniture and door gaps.

Example 2: Medium living room

Room: 14 ft × 18 ft living room, 9 ft ceiling.

  • Area = 252 sq ft
  • Volume = 252 × 9 = 2,268 cu ft

Planning for about 4 ACH:

  • CADR ≈ (2,268 × 4) ÷ 60 ≈ 151 CFM

Planning for about 6 ACH:

  • CADR ≈ (2,268 × 6) ÷ 60 ≈ 226 CFM

A purifier with CADR in the 180–250 CFM range can often provide a good balance between performance and noise for this type of room, especially if you sometimes run the unit on a lower fan speed while watching TV.

Example 3: Open-plan living and dining area

Space: 20 ft × 25 ft combined area, 10 ft ceiling.

  • Area = 500 sq ft
  • Volume = 500 × 10 = 5,000 cu ft

Planning for about 4 ACH:

  • CADR ≈ (5,000 × 4) ÷ 60 ≈ 333 CFM

Planning for about 6 ACH:

  • CADR ≈ (5,000 × 6) ÷ 60 ≈ 500 CFM

In practice, it is often more realistic to treat open-plan spaces in zones. For example, you might prioritize the seating area where people spend the most time and place a purifier with a CADR in the 250–350 CFM range nearby, then optionally add a second unit near the dining or kitchen side if needed.

Example 4: High ceilings and loft spaces

High ceilings increase room volume without changing floor area, which can quietly push you into a higher CADR range than floor area alone would suggest.

Room: 15 ft × 15 ft loft, 14 ft ceiling.

  • Area = 225 sq ft
  • Volume = 225 × 14 = 3,150 cu ft

At 4 ACH, CADR ≈ (3,150 × 4) ÷ 60 ≈ 210 CFM. A purifier sized only for a typical 8 ft ceiling (around 1,800 cu ft) would feel underpowered here. When ceilings are significantly taller than standard, it often makes sense to step up at least one CADR “size” or consider multiple units.

Common CADR vs Room Size Mistakes and Troubleshooting

Even when the basic math is right, real-world performance can feel disappointing if a few practical details are overlooked. The list below can help you troubleshoot weak results and avoid common CADR vs room size mistakes.

Table 2. Common CADR and Room Size Issues – Example values for illustration.
Issue Typical sign at home Likely cause Practical adjustment
Room feels under-cleaned Dust builds quickly; odors linger CADR too low for room volume or ACH target Check room volume; consider a higher CADR unit or second purifier
Good specs, poor results Purifier runs, but nearby air feels stale Blocked airflow or poor placement Move unit away from corners; give several inches of clearance around vents
Clean near device, not across room Air feels fresher close by only Large or oddly shaped room Reposition closer to main seating/sleeping area or add another unit
Too noisy at effective speed High fan speed cleans well but is not tolerable CADR adequate only at top speed Choose a higher-CADR purifier so a lower speed still meets your ACH goal
Performance fades over time Air felt cleaner when the purifier was new Loaded or clogged filters Inspect and replace filters on schedule; gently vacuum pre-filters if allowed

Common sizing and setup mistakes

  • Relying only on “maximum room size” labels. Manufacturers may use different ACH assumptions, so two purifiers both labeled for 300 sq ft can have very different CADR values. Always compare the actual smoke or dust CADR numbers.
  • Ignoring ceiling height. Floor area alone can be misleading in rooms with vaulted or cathedral ceilings. Higher ceilings mean more volume and a need for higher CADR to reach the same ACH.
  • Placing the purifier in a corner or behind furniture. Tight placement can trap clean air near the device and slow mixing with the rest of the room.
  • Expecting one small purifier to handle an entire floor. It is usually more realistic to focus on the main rooms where people spend time, or to use multiple units in large or segmented spaces.

Quick troubleshooting cues

  • If you run the purifier on high for an hour and notice only minor improvement, your CADR may be too low for the room volume or for your desired ACH.
  • If the air feels cleaner near the device but not across the room, try moving it closer to the main activity zone and away from walls.
  • If noise forces you to keep the fan on low all the time, consider that your effective CADR is closer to the low-speed rating, not the maximum rating.

Safety Basics When Matching CADR to Room Size

Air purifiers are generally straightforward to use, but a few safety basics are worth keeping in mind while you size and place a unit in your home.

  • Electrical load and outlets: Larger, higher-CADR purifiers may draw more power than small desktop units. Plug them directly into a wall outlet, avoid overloading power strips, and keep cords out of walkways.
  • Stable placement: Choose a flat, stable surface so the purifier cannot tip easily. This is especially important in homes with children or pets, or when using tall tower-style units.
  • Clearance around air inlets and outlets: Leave space on all sides specified in the manual so the motor does not overheat and airflow is not restricted.
  • Filter type awareness: Understand what your purifier is designed to handle. Particle-focused CADR ratings do not cover gases or chemicals, even if the unit contains a basic carbon filter.
  • Ventilation and source control: A high CADR cannot compensate for strong ongoing pollution sources. Whenever practical, reduce smoke, heavy cooking fumes, or other emissions at the source and use ventilation in combination with filtration.
  • Manufacturer instructions: Follow guidance for filter changes, cleaning, and safe operation. This helps keep performance closer to CADR expectations and supports electrical safety over time.

Long-Term Use, Maintenance, and Seasonal Storage

Even a well-sized purifier can lose effectiveness if filters are clogged or the device is not maintained. CADR ratings are based on new or properly maintained filters in lab conditions, so keeping up with maintenance helps your real-world performance stay closer to those numbers.

Filter care and replacement

  • Pre-filters: Many purifiers use a washable or vacuumable pre-filter to catch larger particles. Cleaning this regularly can help maintain airflow and extend the life of the main filter.
  • Main particle filters: These are usually replaced on a schedule based on hours of use or months of operation. If your indoor air has a lot of dust or other particles, you may need to replace them more often than the basic estimate.
  • Gas or odor filters: Activated carbon and similar media can saturate over time, especially with strong or continuous odor sources. When they are spent, airflow may remain similar, but odor reduction will decline.

Operating patterns and CADR over the day

  • Continuous low-to-moderate operation: Many people run purifiers continuously at a moderate fan speed to keep particle levels from building up.
  • Boost periods: In some homes, it is helpful to run the purifier on a higher speed for a while after activities that generate more particles, such as cooking or cleaning.
  • Night mode or quiet settings: In bedrooms, a higher-CADR purifier may allow you to use a quieter setting overnight while still meeting your approximate ACH goal.

Seasonal storage tips

  • Before storing the purifier, wipe the exterior, clean or replace filters as recommended, and let the unit dry completely if any washable parts were rinsed.
  • Store in a dry, temperature-stable area to avoid moisture damage to filters and internal components.
  • When bringing the purifier back into service, inspect filters for dust, odor, or visible wear and replace them if needed so CADR performance is not compromised from the start of the season.

Practical Takeaways and Specs to Look For

Bringing CADR and room size together turns air purifier shopping into a simple planning exercise instead of guesswork. Once you know your room area, ceiling height, and a rough ACH goal, you can quickly narrow down which CADR range makes sense for your situation.

Use the steps and examples below as a quick reference while you compare models.

Key takeaways

  • CADR tells you how much clean air a purifier can deliver; room volume tells you how much air needs to be processed.
  • ACH is a helpful planning tool: higher ACH usually means faster cleanup but may require higher CADR or higher fan speeds.
  • For many bedrooms and living rooms, example ACH targets between about 4 and 6 are common planning points, not strict rules.
  • Open-plan spaces, high ceilings, and complex room shapes often benefit from higher CADR, multiple units, or zoning by activity area.
  • Placement, filter condition, noise tolerance, and operating patterns all influence how close real-world performance comes to CADR expectations.

Specs to look for when comparing air purifiers

  • Smoke and dust CADR (CFM): Check that at least one of these values lines up with the example CADR range for your room size and ACH goal.
  • Recommended room size from the manufacturer: Use it as a reference, but confirm that the stated room size aligns with the CADR numbers, especially if you want higher ACH.
  • Fan speed options and noise levels: Look for a purifier that still meets your approximate ACH target at a fan speed you can comfortably use for hours at a time.
  • Filter types included: Note whether the unit has a dedicated fine particle filter, a pre-filter, and any odor or gas filter media, and how each is maintained or replaced.
  • Filter replacement interval and cost: Estimate how often you will need new filters based on your expected run time and air quality, and factor that into long-term ownership.
  • Energy use: For purifiers that will run continuously, compare power consumption at the fan speed you plan to use most often.
  • Dimensions and placement flexibility: Confirm that the purifier will physically fit where you plan to place it while still leaving enough clearance for airflow.

By combining simple CADR vs room size estimates with these practical specs, you can choose an air purifier that fits your space, supports your comfort preferences, and remains effective over the long term.

Frequently asked questions

Which CADR and performance specs should I check when choosing a purifier for my room?

Check the smoke and dust CADR (CFM) because those values are most useful for sizing a purifier to your room volume and ACH goal. Also consider fan speed options and noise at the speeds you plan to use, filter types and replacement intervals, and energy use since these affect real-world performance and operating cost.

Why does the room still feel dusty even though my purifier’s CADR seems sufficient?

Common causes include poor placement, blocked airflow, large or oddly shaped rooms, or clogged filters, all of which reduce effective air mixing and lower real-world cleaning. Verify clearance around the unit, try moving it nearer the main activity zone, and inspect or replace filters as needed.

Are there safety concerns when running a high-CADR air purifier continuously?

Larger, high-CADR units can draw more power, so plug them into a wall outlet and avoid overloading power strips; ensure stable placement and required clearance to prevent overheating. Follow maintenance guidance and avoid devices that intentionally generate ozone or other byproducts unless specifically designed and certified for safe use.

How long should I run a purifier each day to reach my ACH goal?

To meet a target ACH, run the purifier continuously at the fan speed that provides the CADR needed for that ACH, because intermittent operation lowers average air changes. Many households use continuous low-to-moderate operation to keep particle levels steady and run short high-speed boosts after pollution events like cooking or cleaning.

Is it better to use multiple smaller purifiers or one large unit for an open-plan area?

Zoning with multiple units often works better for open-plan or segmented spaces because each unit can be placed near occupied areas to ensure even cleaning and reduce dead spots. A single large unit can suffice if its CADR is high enough and the room allows good air mixing, but multiple units usually add flexibility and more uniform coverage.

Do CADR values tell me how well a purifier removes gases, VOCs, or odors?

No—CADR ratings measure removal of particles such as smoke, dust, and pollen and do not quantify gas, VOC, or odor removal. For those contaminants, look for specified activated carbon or other adsorbent media and any manufacturer test data on gas-phase performance.

Room Size Calculator for Air Purifiers: Simple CADR Rule of Thumb

Isometric illustration of room air purifier sizing scene

The simplest way to size an air purifier is to multiply your room’s square footage by about 0.08–0.12 to get a target CADR (in CFM) for typical 8 ft ceilings. That range usually delivers around 4–5 air changes per hour (ACH) in an average enclosed room, which is a good starting point for most homes.

This room size calculator approach helps you avoid buying a purifier that is too weak to keep up with dust, smoke, or pet dander, or so oversized that it is louder and more expensive than you need. By combining room area, ceiling height, CADR, and ACH, you can quickly check whether a given model is in the right ballpark for your bedroom, living room, or home office.

The guide below walks through the basic math in plain English, then shows real-world examples, common mistakes to avoid, and practical specs to look for when you compare air purifiers and their coverage claims.

What a Room Size Calculator for Air Purifiers Really Tells You

A room size calculator for air purifiers estimates how much clean air (CADR) you need to cycle through a space to reach a target number of air changes per hour (ACH). In other words, it connects:

  • The size of the room you want to treat
  • How quickly you want the air cleaned (ACH)
  • The purifier’s clean air delivery rate (CADR)

When these three match, the purifier can realistically keep up with everyday particle loads. If they do not, you may see issues such as visible dust buildup, lingering cooking or smoke odors, or allergy symptoms that do not improve much even with the purifier running.

Using a calculator or simple rule of thumb matters because manufacturer “maximum coverage” numbers often assume lower ACH than many people expect for comfort. A quick sizing check lets you compare different models on equal terms and decide whether one unit is enough or if you may need two smaller units or a different placement strategy.

Key Concepts: CADR, ACH, and Room Volume

Three basic concepts drive any room size calculator for air purifiers: room volume, CADR, and ACH. Once you understand how they connect, the math becomes straightforward.

Room volume

Room volume is the total amount of air in the space:

Room volume (cubic feet) = floor area (sq ft) × ceiling height (ft)

  • Measure length and width in feet, then multiply for floor area.
  • Multiply that area by ceiling height to get cubic feet.

For many homes with 8 ft ceilings, you can use area alone as a shortcut, but volume becomes important when ceilings are higher or when spaces are very open.

CADR (Clean Air Delivery Rate)

CADR is how much filtered air a purifier delivers, usually in cubic feet per minute (CFM). Higher CADR means the unit can move and filter more air in the same amount of time.

  • CADR is often listed separately for smoke, dust, and pollen.
  • The smoke CADR is commonly used as a general sizing reference because it deals with smaller particles.
  • CADR ratings come from test conditions; real rooms may perform slightly differently.

ACH (Air Changes per Hour)

ACH tells you how many times per hour the purifier theoretically filters a volume of air equal to the room’s volume.

  • 2–3 ACH: lighter needs, basic dust and comfort.
  • 4–5 ACH: stronger everyday cleaning for many homes.
  • 6+ ACH: more intensive cleaning, often for sensitive individuals or heavy smoke/pollen periods.

The key relationship between these three is:

CADR (CFM) ≈ (Room volume in cubic feet × ACH) ÷ 60

Dividing by 60 converts hours to minutes so that ACH (per hour) and CADR (per minute) line up.

Rule-of-thumb shortcut for typical rooms

For an enclosed room with 8 ft ceilings and a target of roughly 4–5 ACH, a quick shortcut many people use is:

  • CADR ≈ 0.08–0.12 CFM per square foot of floor area

Multiply your room’s square footage by a number in that range to get a ballpark CADR target. This is not a strict standard, but it works well as a starting point for comparing options.

Table 1. CADR and ACH planning for common room sizes – Example values for illustration.
Room type Approx. size (sq ft) Example ceiling height (ft) Example ACH target Approx. CADR needed (CFM)
Small bedroom 100 8 5 ACH ≈ (100 × 8 × 5) ÷ 60 ≈ 67
Medium bedroom 150 8 5 ACH ≈ (150 × 8 × 5) ÷ 60 ≈ 100
Home office 180 8 5 ACH ≈ (180 × 8 × 5) ÷ 60 ≈ 120
Living room 250 8 4 ACH ≈ (250 × 8 × 4) ÷ 60 ≈ 133
Open-plan zone 400 9 3 ACH ≈ (400 × 9 × 3) ÷ 60 ≈ 180

Real-World Room Size Calculator Examples

Seeing the math applied to everyday rooms makes it easier to use a room size calculator for air purifiers in your own home. The examples below use both the full formula and the rule-of-thumb shortcut so you can compare.

Example 1: Typical bedroom

Imagine a 12 ft by 15 ft bedroom with 8 ft ceilings:

  • Area = 12 × 15 = 180 sq ft
  • Volume = 180 × 8 = 1,440 cubic feet

You want about 5 ACH for strong overnight filtration.

  • CADR ≈ (1,440 × 5) ÷ 60 = 7,200 ÷ 60 ≈ 120 CFM

Using the shortcut (0.08–0.12 CFM per sq ft):

  • Lower end: 180 × 0.08 ≈ 14.4 → about 140 CFM
  • Upper end: 180 × 0.12 ≈ 21.6 → about 220 CFM

The full formula and shortcut give overlapping ranges, so a purifier with a smoke CADR around 120–180 CFM would usually be a reasonable match for this room, depending on how aggressive you want to be and how much noise you can accept.

Example 2: Larger living room

Now consider a 20 ft by 13 ft living room with 9 ft ceilings:

  • Area = 20 × 13 = 260 sq ft
  • Volume = 260 × 9 = 2,340 cubic feet

You decide that 3–4 ACH is acceptable for this larger space.

  • At 3 ACH: CADR ≈ (2,340 × 3) ÷ 60 ≈ 117 CFM
  • At 4 ACH: CADR ≈ (2,340 × 4) ÷ 60 ≈ 156 CFM

Here, the 8 ft ceiling shortcut would underestimate the needed CADR, because the actual ceiling is 9 ft. Using the full volume-based formula is more accurate and helps you avoid undersizing the purifier.

Example 3: Open-plan area with zones

Suppose you have an open-plan space combining kitchen, dining, and seating areas:

  • Total area: 500 sq ft with 9 ft ceilings → 4,500 cubic feet

If you aimed for 4 ACH across the entire space, you would need:

  • CADR ≈ (4,500 × 4) ÷ 60 = 18,000 ÷ 60 ≈ 300 CFM

That is a relatively strong unit. An alternative is to treat the main seating zone separately:

  • Seating zone: 250 sq ft × 9 ft = 2,250 cubic feet
  • At 4 ACH: CADR ≈ (2,250 × 4) ÷ 60 ≈ 150 CFM

You might use one purifier sized for the seating zone and another smaller unit closer to the kitchen, rather than relying on a single device to handle the entire open-plan area.

Example 4: Different ACH priorities in the same home

Consider a home with two key spaces:

  • 120 sq ft bedroom, 8 ft ceilings → 960 cubic feet
  • 300 sq ft living room, 9 ft ceilings → 2,700 cubic feet

You want more intense cleaning in the bedroom (6 ACH) and moderate cleaning in the living room (3 ACH):

  • Bedroom CADR ≈ (960 × 6) ÷ 60 ≈ 96 CFM
  • Living room CADR ≈ (2,700 × 3) ÷ 60 ≈ 135 CFM

Even though the living room is much larger, the CADR needs are in a similar range because you chose a higher ACH for the smaller bedroom. This illustrates how target ACH can be as important as room size when you plan purifier capacity.

Common Sizing and Placement Mistakes

Even with the right room size calculator for air purifiers, certain habits can undermine performance. Recognizing these patterns makes troubleshooting much easier.

Typical oversizing and undersizing issues

  • Relying only on “maximum room size” claims. These numbers may assume 1–2 ACH, which is often below what people expect for noticeable improvement.
  • Ignoring ceiling height. A 200 sq ft room with 10 ft ceilings has 25% more volume than the same area with 8 ft ceilings, so the same purifier will deliver fewer air changes per hour.
  • Using one unit for multiple closed rooms. A purifier in the hallway or one bedroom cannot reliably deliver the same ACH to other closed rooms.
  • Expecting whole-house coverage from a single portable unit. Portable purifiers are typically designed for one room or a defined zone, not an entire home.

Placement and airflow mistakes

  • Blocking intakes or outlets. Placing the purifier flush against walls, behind sofas, or under low tables restricts airflow and reduces effective CADR.
  • Hiding the purifier. Tucking the unit into a closet or cabinet limits circulation and can make noise worse.
  • Putting it too far from the main breathing zone. If you spend most of your time at a desk or on a couch, but the purifier is in a distant corner, you may not feel much benefit.
  • Buying a unit that meets your target ACH only on the loudest speed. In practice, you may run it on a lower setting because of noise, which drops the real ACH below your goal.
  • Not adjusting speeds for different situations. During cooking, cleaning, or smoke events, it often helps to temporarily run the purifier on higher speeds to catch up.
Table 2. Common room sizing and usage problems – Example values for illustration.
Issue How it shows up What to check or adjust
Undersized purifier Dust returns quickly, odors linger, little improvement in symptoms Recalculate CADR using room volume and ACH; consider a higher-CADR unit or a second purifier
Oversized but underused Strong unit run only on low; air feels only mildly improved Check ACH at the actual fan speed you use; increase speed when the room is occupied
Poor placement Clean air near unit, but stale or dusty air in seating or sleeping areas Move purifier closer to the main occupied zone; keep a few feet of clearance around intakes and outlets
Open doors and hallways Purifier seems to “chase” odors without clearing them Close doors when possible or size for the combined volume; consider separate units for different rooms
Clogged filters Airflow feels weaker, fan sounds strained, performance drops over time Inspect filters, clean pre-filters if allowed, and replace main filters on schedule

Safety Basics When Using Air Purifiers

Room size calculators focus on performance, but basic safety and comfort should always come first when operating any air-cleaning device.

Electrical and placement safety

  • Use a suitable outlet. Plug the purifier directly into a properly grounded household outlet. Avoid overloading power strips with multiple high-draw devices.
  • Keep clear of water sources. Do not place the purifier where it can be splashed by sinks, bathtubs, or humidifiers.
  • Maintain stable footing. Put the unit on a flat, stable surface to reduce the risk of tipping, especially in homes with children or pets.

Airflow and respiratory comfort

  • Avoid directing strong airflow at faces while sleeping. Some people find this drying or uncomfortable; aim the outlet slightly away from the bed.
  • Watch for drafts in small rooms. High fan speeds in tight spaces can feel drafty; adjust speed or placement to balance comfort and ACH.

Filter and byproduct considerations

  • Use filters as intended. Stick with filter types compatible with your unit and install them correctly to prevent air bypass.
  • Be cautious with add-on features. Some technologies can produce byproducts or odors if misused; follow operating instructions and use the simplest effective settings when in doubt.

During smoke or pollution events

  • Seal the room as reasonably as possible. Close windows and doors to reduce incoming pollutants so the purifier can keep up more easily.
  • Monitor comfort and visibility. If indoor air still looks hazy or smells strong even at high speeds and correct sizing, consider reducing indoor particle sources and improving overall ventilation strategies when outdoor air improves.

Long-Term Use, Maintenance, and Performance

A room size calculator for air purifiers gives you a starting CADR target, but long-term performance depends on how you operate and maintain the unit over months and years.

Filter maintenance and CADR over time

  • Pre-filters. Many units include a pre-filter to catch larger dust and hair. Cleaning or replacing this layer on schedule helps maintain airflow.
  • Main particle filters. As they load with fine particles, resistance increases and effective CADR can drop. Replacing them at the suggested interval keeps performance closer to your original sizing assumptions.
  • Gas and odor filters. Carbon or other sorbent filters saturate over time and gradually become less effective at odor control, even if airflow feels strong.

Seasonal and lifestyle adjustments

  • Allergy seasons. During heavy pollen seasons, you may want to run the purifier more hours per day or at a higher speed to maintain your target ACH.
  • Smoke events. Wildfire smoke or nearby burning can temporarily increase particle loads, so it is common to step up to higher speeds for several hours.
  • Occupancy changes. Adding pets, starting a home hobby that creates dust, or turning a guest room into a home office may call for recalculating room size and ACH needs.

Storage and downtime

  • Short breaks. If you pause use for a few weeks, it is usually enough to turn the unit off and restart it when needed.
  • Longer storage. For seasonal storage, clean or replace filters before putting the purifier away, and store it in a dry, indoor location to avoid moisture damage.
  • Restarting after storage. When you bring the unit back into service, inspect filters for dust or odors and replace them if they have been sitting for an extended period.

Practical Takeaways and Specs to Look For

The goal of any room size calculator for air purifiers is to turn basic measurements into a practical purchasing and setup plan. Once you know your room’s square footage, ceiling height, and target ACH, you can quickly narrow down suitable models.

Step-by-step summary

  1. Measure room length and width to find area in square feet.
  2. Note ceiling height and calculate volume (area × height) if it differs from 8 ft.
  3. Choose an ACH target based on how intensively you want to clean the air.
  4. Use the formula CADR ≈ (volume × ACH) ÷ 60, or the 0.08–0.12 CFM per sq ft shortcut for 8 ft ceilings.
  5. Compare your CADR target to product specifications, focusing on the smoke CADR where available.
  6. Plan placement so that the purifier has clear airflow and is near the main occupied zone.
  7. Allow some margin so you can run the unit on medium instead of maximum most of the time.

Specs to look for when comparing purifiers

  • CADR ratings (CFM). Check that smoke CADR is in the range you calculated for your room and ACH target.
  • Recommended room size plus ACH context. If a product lists coverage without ACH, use your own calculations rather than relying on marketing numbers.
  • Fan speed options. Multiple speeds let you match noise and cleaning intensity to the situation.
  • Noise levels by speed. Look for sound levels that you can tolerate at the speed needed to reach your CADR target.
  • Filter types. Confirm that the unit includes a high-efficiency particle filter and, if you care about odors, a separate gas or odor filter layer.
  • Filter replacement indicators. Simple reminders help you maintain performance close to your original sizing assumptions.
  • Energy use. Power consumption at the speeds you plan to use most often can matter if the purifier will run many hours per day.

By combining a straightforward room size calculation with these practical specs, you can choose and use an air purifier that fits your space, meets your comfort goals, and maintains performance over time.

Frequently asked questions

How do I use a room size calculator for air purifiers to pick the right CADR?

Measure the room area and ceiling height to get volume, choose a target ACH, then apply CADR ≈ (volume × ACH) ÷ 60. For typical 8 ft ceilings you can use the 0.08–0.12 CFM per sq ft shortcut and compare the result to a purifier’s smoke CADR, leaving some margin so you can run it on a lower speed most of the time.

Which specs and features matter most when choosing an air purifier?

Key specs are CADR (smoke CADR is especially useful), recommended coverage with ACH context, fan speed options and noise levels, and filter types such as HEPA for particles and carbon for odors. Also consider energy use and filter replacement indicators for maintenance and long-term performance.

What is a common mistake people make when sizing an air purifier?

A common error is relying only on a product’s “maximum room size” without checking the assumed ACH; marketing numbers often assume low ACH that won’t meet comfort expectations. Ignoring ceiling height or trying to use one unit for multiple closed rooms also leads to undersizing.

Are there safety precautions I should follow when running an air purifier continuously?

Use a properly grounded outlet, avoid overloading circuits or placing the unit near water, and keep it on a stable surface with clearances around intakes and outlets. Follow filter and operation instructions and be cautious with features that may produce byproducts unless they are specified as safe.

Can one portable purifier effectively clean an open-plan area, or should I use multiple units?

Large open-plan areas often require a very high CADR unit or zoning with multiple purifiers to reach target ACH across the whole volume. Treating high-use zones separately usually provides better coverage and flexibility than relying on a single device.

How high should ACH be for allergies or smoke?

For basic comfort, 2–3 ACH can suffice; 4–5 ACH is a strong everyday target for allergy relief or moderate smoke control, and 6+ ACH may be appropriate for sensitive individuals or heavy smoke events. Choose an ACH based on symptom severity, noise tolerance, and how persistent the pollution source is.

VOC Sensors Explained: Why Readings Vary and How to Use Them Safely

Isometric illustration of a home air quality monitor on a desk

VOC sensors in home air quality monitors do not measure every chemical separately; they estimate the overall level of volatile organic gases so you can spot pollution spikes and decide when to ventilate. These TVOC or VOC readings are best used as trend indicators, not as precise laboratory measurements or health diagnoses.

Understanding what your VOC monitor is actually seeing makes the numbers far less confusing. Instead of worrying about every jump on the display, you can connect changes to real-world activities like cooking, cleaning, or painting and respond with simple actions such as opening windows or running exhaust fans.

This guide explains how common indoor VOC sensors work, why readings vary so much, and how to use them safely in everyday life. You will find practical examples, typical patterns to watch for, and clear checklists you can apply to any consumer VOC or TVOC monitor you already own or plan to buy.

What VOC Sensors Are Measuring and Why It Matters

VOC sensors are designed to detect volatile organic compounds, a broad family of gases that evaporate from many everyday materials and activities. Because these gases can build up indoors, VOC monitors give you an early warning that your air is being loaded with chemical emissions, even when you do not see smoke or dust.

Typical indoor VOC sources include:

  • Cooking and frying, especially at high heat
  • Household cleaners, disinfectant sprays, and polishes
  • Air fresheners, candles, incense, and other scented products
  • Paints, varnishes, adhesives, and hobby supplies
  • New furniture, flooring, mattresses, and building materials
  • Personal care items such as hair spray, perfume, and nail products

Most home devices do not identify individual chemicals. Instead, they estimate a combined level known as total volatile organic compounds (TVOC). The number you see is usually reported in parts per billion (ppb) or micrograms per cubic meter (µg/m³), or it may be converted into a simplified “air quality” scale.

From a practical standpoint, VOC sensors matter because they help you:

  • Notice when everyday activities are loading your air with extra gases
  • Compare your usual background level to short-term spikes
  • Decide when to ventilate, change products, or run filtration designed for gases

They are not medical devices and cannot tell you whether a specific level is safe for every person. Their strength is showing patterns and relative changes so you can manage indoor air quality more deliberately.

How Common Home VOC Sensors Work

Most consumer air quality monitors use one of a few sensor technologies to estimate VOC or TVOC levels. Each type has its own strengths, weaknesses, and quirks that show up in your day-to-day readings.

Major sensor types in home VOC monitors

The most common approaches include metal-oxide (MOX) sensors, electrochemical cells, and photoionization detectors (PID). Some modules combine a sensing element with on-board processing that converts raw signals into a TVOC estimate or a simplified indoor air quality index.

Table 1. Common VOC sensor technologies in home monitors – Example values for illustration.
Sensor type How it detects VOCs Typical strengths Common limitations
Metal-oxide (MOX) Heated metal-oxide surface changes electrical resistance when VOC molecules land on it. Affordable, compact, long operating life, widely used in consumer monitors. Sensitive to humidity and temperature; broad response to many gases; numbers rely on internal algorithms.
Electrochemical Chemical reactions at electrodes generate a current proportional to gas concentration. Can be more selective for certain gases; often good sensitivity at low levels. Finite life, can saturate at high concentrations, may require periodic calibration.
Photoionization (PID) Ultraviolet light ionizes VOC molecules; resulting current indicates total VOC level. Fast response, sensitive to many VOCs at very low concentrations. Higher cost; sensor lamp and calibration need maintenance; still reports combined VOCs.
Integrated IAQ modules Sensor chip plus processor estimates TVOC and sometimes a derived air quality index. Simple outputs, easy to interpret; can filter noise and smooth short-term fluctuations. Heavily dependent on manufacturer assumptions; scales differ between devices.

Why your TVOC number is an estimate

In almost all home devices, the TVOC value is a calculated estimate, not a direct measurement of each chemical in the air. The sensor is usually calibrated against a standard test gas in the factory. The monitor then assumes that changes in its raw signal correspond to changes in total VOCs under typical indoor conditions.

This means two important things for everyday use:

  • Different brands or models can show different numbers in the same room.
  • Your own monitor is most useful when you compare it to its own baseline over time.

Many devices also use “self-calibration” routines that treat the lowest readings over a period (often days) as clean air. This helps the sensor adapt to slow drift but can make absolute values less meaningful, especially if your home never reaches truly low VOC levels.

Real-World VOC Reading Patterns and Examples

VOC readings often look jumpy or unpredictable at first glance. In practice, most of the spikes and dips follow repeatable patterns tied to everyday activities and building conditions.

Typical short-term spikes

Short, sharp increases in TVOC are common during activities that release a lot of gases in a few minutes. Examples include:

  • Spraying a multipurpose cleaner on kitchen counters
  • Frying food on a hot stove or oven broiling
  • Lighting scented candles or incense
  • Using nail polish, remover, or strong hair products in a bathroom
  • Applying glue or paint for a craft or repair project

It is common to see a monitor jump from a low baseline to several times higher within a few minutes of starting one of these tasks. With good ventilation, readings usually fall back toward baseline over tens of minutes to a few hours.

Longer-lasting elevations

Some sources cause a sustained increase in background VOC levels instead of just brief spikes. Examples include:

  • New furniture or flooring that off-gasses for days or weeks
  • Freshly painted rooms or recent renovation work
  • Storing solvents, paints, or fuels in an attached garage or small closet

In these cases, you may notice that your “normal” reading is higher than before, even when nothing special is happening. Watching how this baseline changes over days can help you decide whether additional ventilation, product changes, or storage adjustments are needed.

Comparing patterns across rooms

If you use more than one VOC monitor, you may see different patterns in different spaces:

  • A kitchen or main living area may show large evening spikes from cooking and cleaning.
  • A bedroom might have smaller but longer spikes from scented products or nearby closets.
  • A basement workshop could show sharp peaks during hobbies followed by slow decay overnight.

Rather than trying to match the numbers exactly between devices, focus on which activities cause the largest changes in each room and how quickly levels fall after you ventilate or stop the source.

Table 2. Example VOC patterns and simple responses – Example values for illustration.
Scenario Typical TVOC pattern What it often indicates Simple action to try
High-heat cooking without exhaust fan Fast spike to several times baseline, then slow decline over 1–3 hours. Cooking emissions and limited removal of gases. Use range hood or open a window during and after cooking until readings drop.
New sofa delivered to living room Background level rises and stays elevated for days, with small daily peaks. Off-gassing from new materials and finishes. Increase daily airing of the room; consider moving item to a better-ventilated space temporarily.
Spray cleaner used in a small bathroom Very sharp spike followed by rapid drop once fan or window is used. Concentrated product use in a confined space. Run exhaust fan during and after cleaning; reduce spray amount or switch to lower-emission methods.
Monitor placed near a humidifier Readings creep up when humidifier runs, even without obvious odor sources. Sensor response affected by high humidity or direct mist. Move monitor farther from humidifier and retest readings at similar times of day.

Common VOC Monitor Mistakes and Troubleshooting Cues

Many confusing VOC readings come from how the monitor is used rather than from a serious air quality problem. Watching for a few common pitfalls can make your data more reliable and easier to interpret.

Placement problems

Poor placement is one of the biggest sources of misleading readings. Common issues include:

  • Too close to sources: Placing the monitor right next to a stove, candle, or cleaning area can produce extreme spikes that do not represent the room as a whole.
  • Direct drafts: Positioning the sensor directly in front of an HVAC vent, fan, or open window can dilute or concentrate air and make readings unstable.
  • Obstructed airflow: Tucking the monitor into a corner, behind curtains, or under a shelf can trap air and slow its response.

As a rule of thumb, place VOC sensors near breathing height on an open surface, with a few inches of clearance around the inlets, and away from direct sprays, steam, or heat.

Misinterpreting warm-up and drift

Most VOC sensors need a warm-up period after you plug them in or after a power outage. During this time, numbers may drift up or down before stabilizing. Some devices also adjust their baseline gradually over days to compensate for sensor aging.

Troubleshooting cues:

  • If readings change steadily for an hour or two after power-up with no obvious activity, treat them as warm-up values.
  • If your “clean” reading slowly climbs over months, the sensor may be drifting or the environment may have changed; look for new sources or consider recalibration or replacement if supported.

Confusing humidity and temperature effects with VOCs

Many sensors, especially MOX types, respond to humidity and temperature as well as gases. You might see readings rise when:

  • A shower runs and steam fills a bathroom.
  • A humidifier blows mist directly toward the monitor.
  • The room temperature changes quickly, such as when heating or cooling turns on.

If VOC numbers consistently track humidity changes more than your actual activities, try moving the monitor, reducing direct steam exposure, or comparing readings at similar temperature and humidity levels across different days.

Overreacting to single numbers

Another common mistake is treating one reading as a hard verdict on air quality. Because home VOC sensors are broad indicators, they are more reliable when you:

  • Compare current values to your own normal baseline for that time of day.
  • Look at how quickly readings rise and fall with specific actions.
  • Track patterns over days and weeks instead of focusing on one spike.

If you see a sudden jump, ask what changed in the last few minutes. If you cannot identify a clear cause and the elevation persists, that is a cue to investigate potential hidden sources or ventilation issues more carefully.

Using VOC Sensors Safely and Realistically

VOC monitors are helpful tools, but they have limits. Using them safely means understanding what they can and cannot tell you and how to integrate them with other basic safety measures in your home.

What VOC sensors are not designed to do

Consumer VOC monitors are not substitutes for dedicated safety devices. In particular, they are not meant to replace:

  • Smoke alarms or heat detectors
  • Carbon monoxide alarms
  • Combustible gas leak detectors

Do not disable or ignore code-required safety devices based on your VOC readings. Treat the VOC monitor as an additional source of information about general indoor air quality, not as a primary life-safety system.

Reasonable expectations for health decisions

Because VOC sensors measure combined gas levels and not specific chemicals, they cannot diagnose medical conditions or confirm that an environment is safe for every individual, especially people with chemical sensitivities or chronic health issues.

Use VOC trends to support practical steps such as:

  • Improving ventilation during and after high-emission activities
  • Reducing or changing products that consistently cause large spikes
  • Identifying rooms that may benefit from better airflow or gas-phase filtration

If occupants experience persistent symptoms or you notice strong, unusual odors that do not resolve with ventilation, consider seeking professional advice or more detailed testing beyond what a consumer VOC monitor can provide.

When to be more cautious

Take extra care with VOC readings when:

  • You are doing major renovation, painting, or flooring projects.
  • You store solvents, fuels, or strong chemicals in attached spaces.
  • There are signs of moisture damage or mold that may be accompanied by additional gases.

In these situations, use your VOC monitor to track trends while also following building codes, ventilation recommendations, and any applicable guidance for safe product use and storage.

Maintaining VOC Monitors for Reliable Long-Term Use

Like any sensor, VOC monitors perform best when they are installed, maintained, and stored with some basic care. A few simple habits can extend their useful life and keep readings more consistent over time.

Routine checks and cleaning

Most home VOC sensors do not require complex maintenance, but it helps to:

  • Dust the exterior gently with a dry cloth to keep air inlets clear.
  • Verify that vents are not blocked by objects, curtains, or wall coverings.
  • Review readings at similar times of day every few weeks to confirm that your baseline still makes sense.

Avoid using cleaners or solvents directly on the device, as these can temporarily spike readings or damage sensitive components.

Storage and environmental conditions

VOC sensors are designed for typical indoor environments. For best performance:

  • Keep the monitor within the temperature and humidity range listed in its documentation.
  • Avoid placing it where it can be splashed, exposed to condensation, or subjected to extreme heat or cold.
  • If you must store the device for a long period, power it down and keep it in a dry, room-temperature location.

After long storage, allow extra time for warm-up and baseline stabilization when you power it back on.

Recognizing end-of-life behavior

Over years of use, all sensors gradually age. Signs that your VOC monitor or its sensing element may be nearing the end of its useful life include:

  • Readings that no longer respond to obvious VOC sources.
  • Numbers that stay fixed at one value for long periods.
  • Extreme drift that makes your usual baseline impossible to identify.

If your device supports sensor replacement or recalibration, follow the manufacturer’s instructions. Otherwise, consider replacing the monitor when it no longer reacts in a logical way to everyday activities and ventilation changes.

Practical Takeaways and Specs to Look For

Used with realistic expectations, VOC sensors are practical tools for understanding and improving everyday indoor air quality. The key is to focus on patterns, connect them to real-world activities, and respond with simple, repeatable actions rather than chasing individual numbers.

In daily use, you will get the most value when you:

  • Establish a typical baseline for each room at calm times.
  • Note which activities cause the largest and most frequent spikes.
  • Ventilate or adjust habits when readings climb well above your normal background.
  • Revisit placement and maintenance if numbers seem inconsistent or tied mainly to humidity swings.

Specs to look for when choosing a VOC monitor

If you are evaluating a new VOC or TVOC monitor for your home, consider these practical features and specifications:

  • Clearly labeled VOC or TVOC metric: Prefer devices that state units (such as ppb or µg/m³) or explain their internal air quality scale.
  • Trend and history display: Graphs or logs over hours and days make it easier to see patterns and compare before-and-after changes.
  • Stable sensor technology: Look for descriptions of how the device handles warm-up, drift, and humidity compensation.
  • Multiple metrics: Monitors that also show particles, humidity, temperature, or CO₂ can help you separate different air quality issues.
  • Adjustable alerts: Customizable notifications let you set thresholds appropriate for your home’s typical baseline.
  • Power and placement flexibility: Options such as plug-in power with battery backup or wall versus tabletop mounting can improve real-world usability.
  • Documented operating ranges: Clear temperature and humidity limits help you avoid installation locations that could distort readings.

Choosing a monitor with these features, and using it with the interpretation strategies in this guide, will make VOC readings a practical part of your overall indoor air quality toolkit rather than a source of confusion or unnecessary worry.

Frequently asked questions

Which specs or features matter most when choosing a VOC monitor?

Prioritize clear metrics (ppb or µg/m³ or a explained index), trend/history logging, and information about how the device handles warm-up, drift, and humidity. Additional useful features include multiple environmental metrics (temperature, humidity, particles), adjustable alerts, and documented operating ranges. These make it easier to interpret spikes and compare readings over time.

How can sensor placement lead to misleading VOC readings?

Placing a monitor too close to a source, directly in a draft, or tucked behind objects can cause spikes, dilution, or delayed responses that do not reflect the room as a whole. For more representative data, put the device at breathing height on an open surface, keep a few inches of clearance, and avoid direct sprays, steam, or vents.

Are consumer VOC monitors sufficient for home safety?

No. Consumer VOC monitors provide general information about combined gas levels and trends but are not substitutes for smoke alarms, carbon monoxide detectors, or combustible gas leak sensors. Use VOC readings to guide ventilation and product choices, and rely on code-required alarms for life-safety protection.

How should I interpret TVOC numbers from a home monitor?

TVOC values are estimates of combined volatile organics, so treat them as relative indicators rather than precise concentrations of individual chemicals. Compare readings to your device’s own baseline, watch how quickly levels change with activities, and use trend graphs to spot persistent elevations that merit further action.

What maintenance do VOC sensors typically need?

Basic maintenance includes keeping air inlets dust-free, avoiding solvents or sprays on the device, and checking that vents aren’t blocked. Some sensors require periodic calibration or have replaceable sensing elements; consult the device documentation and consider replacement if readings stop responding logically.

Why do VOC readings sometimes change with humidity or temperature?

Many common sensor types, especially metal-oxide sensors, respond to humidity and temperature as well as gases, so steam or direct mist can raise readings even without extra VOC sources. If readings track humidity more than activities, move the monitor away from humidifiers or steam and compare measurements at similar environmental conditions.

CO2 Monitors for Homes: Good Numbers, Better Ventilation, and Safer Air

Isometric indoor air quality monitor on a modern desk

For most homes, good CO2 numbers usually stay below about 800–1200 ppm in regularly used rooms, and consistently higher readings mean your ventilation is struggling to keep up. A home CO2 monitor makes those invisible changes visible so you can decide when to open windows, use exhaust fans, or adjust how you use each room. It does not measure oxygen directly or replace life‑safety alarms, but it is a practical tool for fresher, less stuffy indoor air.

If you live in a tight, energy‑efficient house, work from a home office, or share a small bedroom, a CO2 meter can quickly show when indoor air is getting stale. By watching patterns over days instead of chasing one perfect number, you can fine‑tune ventilation, improve comfort, and support better indoor air quality without guessing.

What CO2 Monitors for Homes Actually Tell You (and Why It Matters)

A home CO2 monitor measures carbon dioxide in parts per million (ppm) and uses that as a simple indicator of how well your home is ventilated relative to how many people are in a space. When people breathe in a closed room, CO2 rises. When outdoor air is brought in, CO2 falls toward outdoor levels.

CO2 itself at normal indoor levels is mainly a comfort and ventilation signal, not a direct toxin in the way smoke or high levels of carbon monoxide are. The practical value is that higher CO2 often comes along with:

  • Stuffy, heavy‑feeling air
  • Rooms that feel “used” or stale by morning
  • Signs that other indoor pollutants might also be building up

Because outdoor CO2 is typically in the hundreds of ppm, you can think of your indoor reading as “outdoor air plus what people add.” The higher it drifts above typical outdoor levels, the more your home is relying on recirculated air instead of fresh air exchange.

For everyday home use, it is often helpful to group CO2 readings into broad comfort‑oriented zones rather than fixating on a single cutoff value.

Table 1. Typical indoor CO2 comfort ranges in homes – Example values for illustration.
CO2 range (ppm) Ventilation situation How the air often feels Simple response idea
Near outdoor background to ~800 Good fresh air; windows open or effective mechanical ventilation Air usually feels fresh and light Maintain current ventilation; no change needed
~800–1200 Typical for occupied rooms with windows closed Comfortable for many people, may feel slightly used in small rooms Consider brief airing out if levels creep higher or stay elevated
~1200–1800 (sustained) Ventilation is not keeping up with occupancy Air can feel stuffy; some people report fatigue or mild headaches Increase outdoor air, reduce crowding, or adjust how long spaces are used
>1800 for long periods Very low air exchange relative to use Often noticeably stale; may signal broader ventilation issues Re‑evaluate room use and ventilation strategy; consider mechanical solutions

Key Concepts: How Home CO2 Monitors Work and What Affects Readings

Most home CO2 meters use one of two approaches: direct CO2 sensing or estimating CO2 from other gases. Knowing which type you have helps you interpret what the numbers really mean.

Direct‑sensing NDIR CO2 monitors

Many dedicated home units use non‑dispersive infrared (NDIR) sensors. In simple terms, the device shines infrared light through a small chamber of air and measures how much light is absorbed by CO2 at specific wavelengths. More CO2 means more absorption, which the monitor converts into ppm.

  • Measures CO2 directly: Less influenced by common household chemicals compared with indirect methods.
  • Responds to real changes: Opening a window, turning on a balanced ventilation system, or several people entering a room will quickly change the reading.
  • Subject to drift: Over months or years, the sensor can slowly shift, so occasional calibration or outdoor “reference” exposure is recommended.

“eCO2” or CO2‑equivalent estimates

Some multipurpose indoor air quality gadgets report an “eCO2” or CO2‑equivalent value. These often do not measure CO2 directly. Instead, they measure volatile organic compounds (TVOCs) or similar gases and use a built‑in model to guess what a typical CO2 level might be in a “normal” home.

  • Good for general freshness trends: Rising eCO2 usually means more indoor emissions or less fresh air.
  • Can be skewed by products and activities: Strong cleaners, cooking fumes, or new furnishings can drive eCO2 up even when occupancy is low.
  • Best treated as approximate: Use eCO2 to see patterns, not as a precise measurement.

Calibration, baseline, and seasonal changes

Even with a good NDIR sensor, readings are not frozen in time. Three things often affect what you see:

  • Calibration method: Some monitors self‑calibrate by assuming that at some point during the week they will see near‑outdoor CO2. Others require you to manually start a calibration when the device is placed in fresh outdoor air.
  • Baseline variation: Outdoor CO2 is not perfectly constant. Urban areas or locations near heavy traffic can run higher than rural settings, so your “good” indoor number might be a bit different from someone else’s.
  • Seasonal behavior: In heating or cooling seasons, windows are often closed longer, so CO2 tends to sit at higher baselines than during mild weather when you naturally ventilate more.

Because of these factors, CO2 monitors for homes are best used for relative comparisons: how one room compares to another, how your home behaves before and after a change, or how quickly levels drop when you ventilate.

Real‑World Home Examples: Bedrooms, Offices, and Gatherings

Watching CO2 patterns over a normal week quickly shows how your home “breathes.” Here are common scenarios and what typical readings might look like in practice.

Bedroom overnight patterns

Many people first notice high CO2 in bedrooms. A small, well‑sealed room with the door closed and one or two people sleeping can see CO2 rise steadily through the night.

  • Example pattern: 700 ppm at bedtime, 1100 ppm by midnight, 1500+ ppm by morning with the door and windows closed.
  • Simple adjustments: Opening the door a crack, running a small supply of outdoor air, or slightly opening a window can keep readings hundreds of ppm lower.

Home office during work hours

In a home office with the door partly closed and windows shut for noise or temperature, CO2 can slowly climb over the day.

  • Example pattern: 600–700 ppm in the morning, rising to 900–1200 ppm by late afternoon.
  • Response ideas: Take short breaks with the door open, run ventilation or exhaust fans during lunch, or schedule calls in better‑ventilated spaces when possible.

Living room during gatherings

When several people share a medium‑sized living room with closed windows, CO2 can spike quickly.

  • Example pattern: 700 ppm before guests arrive, 1200–1600 ppm within an hour during a gathering.
  • Response ideas: Crack a window, use bathroom or kitchen exhaust fans to pull in more outdoor air, or occasionally move conversations to a larger or more open area.

CO2, humidity, and comfort together

CO2 often rises alongside humidity in tight rooms, especially during sleep or when many people share a space. While CO2 points to ventilation, humidity points to moisture buildup that can affect comfort and mold risk. A bedroom that regularly shows both high CO2 and high humidity overnight is a strong candidate for improved fresh air supply and moisture control.

Table 2. Example CO2 patterns and simple troubleshooting actions – Example values for illustration.
Situation Typical CO2 pattern Likely cause Practical adjustment
Small bedroom, door closed Rises from ~700 to 1600+ ppm overnight Very low fresh air exchange while occupied Crack door or window, add timed ventilation, or reduce crowding in that room
Home office with closed door Slow climb from ~600 to 1200 ppm by late afternoon Long occupancy in a semi‑isolated space Open door during breaks, run fans to mix air, or bring in outdoor air mid‑day
Living room during cooking and guests Jump from ~700 to 1500 ppm within an hour Multiple people plus limited ventilation Use kitchen exhaust, open a window briefly, or shift part of the gathering to larger spaces
Whole home always above ~1200 ppm Readings stay high in multiple rooms, day and night Overall ventilation rate is low for the home Review ventilation strategy and consider adding or improving mechanical outdoor air supply

Common Mistakes and Troubleshooting CO2 Readings

Because CO2 monitors for homes are easy to move and check, it is common to run into confusing or misleading readings at first. Most issues fall into a few predictable categories.

Mistake 1: Placing the monitor in the wrong spot

  • Too close to your face: A monitor inches from your mouth or pillow will show exaggerated spikes that do not represent the room.
  • Right next to windows or vents: Readings here reflect the incoming fresh air stream, not what most of the room experiences.
  • On hot surfaces or in direct sun: Excess heat can affect some sensors and electronics, causing drift or unstable numbers.

Better placement: At typical breathing height on a shelf, desk, or nightstand, several feet away from your face and out of direct airflow from vents or windows.

Mistake 2: Expecting an air purifier to lower CO2

Standard particle‑filter air purifiers do not remove CO2. They can reduce dust, smoke, and other particles while CO2 remains high. If your monitor shows elevated CO2, the solution usually involves more outdoor air or fewer people in the space, not a stronger purifier setting.

Mistake 3: Chasing one “perfect” number

Trying to hold every room at a single CO2 value all day is unrealistic and can waste energy. Instead, look for:

  • Rooms that are much higher than the rest of the home
  • Spaces where CO2 stays high long after people leave
  • Times of day when levels regularly peak

Addressing those patterns usually gives more benefit than trying to flatten every small fluctuation.

Mistake 4: Misreading eCO2 as exact CO2

If your device reports eCO2 and levels swing wildly when you cook or use strong cleaners, you are probably seeing the influence of VOCs, not just human breathing. In that case, treat the trends as “air freshness” clues rather than precise CO2 values.

Simple troubleshooting steps

  • Move the monitor to a different room and compare patterns.
  • Place it in outdoor air for 15–30 minutes to see if readings move near expected outdoor levels.
  • Note what you are doing when numbers spike: cooking, cleaning, gatherings, or closing doors and windows.

Safety Basics: What CO2 Monitors Do and Do Not Replace

CO2 monitors are helpful indoor air quality tools, but they are not complete safety systems. Understanding their limits keeps expectations realistic and supports safer overall home air quality.

CO2 vs. carbon monoxide and smoke

  • CO2 (carbon dioxide): A normal part of the air we exhale. In homes, it is mainly a marker of ventilation and occupancy at typical levels.
  • CO (carbon monoxide): A dangerous gas produced by incomplete combustion from appliances, vehicles, or generators. It is typically measured by dedicated CO alarms, not by CO2 monitors.
  • Smoke and fire: Detected by smoke alarms or heat detectors, not by CO2 meters.

Even if your CO2 readings look fine, you still need dedicated life‑safety detectors for smoke and carbon monoxide where required.

High CO2 vs. low oxygen

In normal homes, CO2 can rise significantly before oxygen changes enough to be a concern. A typical home CO2 monitor does not measure oxygen, so it should not be treated as an oxygen‑safety device. Its job is to show how much exhaled air is building up relative to outdoor air, not to manage life‑support situations.

Using CO2 data sensibly

  • Use CO2 readings to guide when you ventilate, especially in tight rooms used for sleeping, working, or gatherings.
  • Combine CO2 information with humidity, temperature, and how a space feels to decide on comfort and moisture control steps.
  • If you ever suspect combustion or ventilation problems with fuel‑burning appliances, treat that as a separate safety issue regardless of CO2 readings.

To get lasting value from CO2 monitors for homes, treat them as long‑term measuring tools rather than gadgets you check once and forget. A few basic habits help keep readings useful over time.

Calibration and periodic checks

  • Outdoor check: Every few months, place the monitor outside for 15–30 minutes and note the reading. It should sit near expected outdoor CO2 levels for your area, even if not exact.
  • Manual calibration: If your device allows it, run a calibration while it is in outdoor air or a well‑ventilated space, following the instructions.
  • Compare rooms, not just numbers: Use one monitor to rotate between rooms for a week at a time to build a picture of how each area behaves.

Handling, storage, and environment

  • Avoid extreme conditions: Do not store monitors in very hot attics, damp basements, or where they can freeze.
  • Keep vents clear: Do not block the small air inlets or cover the device with cloth or paper.
  • Power and batteries: For plug‑in units, use stable power; for battery‑powered devices, replace batteries promptly when low‑power warnings appear.

Using CO2 alongside other indoor air metrics

Many home monitors combine CO2 with temperature, humidity, particle levels, or VOC indexes. Over months, you can use these combined readings to spot patterns like:

  • Bedrooms that show both high CO2 and high humidity overnight
  • Living areas where particle spikes from cooking happen while CO2 stays moderate
  • Seasonal shifts where winter readings stay higher because windows stay closed

These patterns support decisions about ventilation upgrades, exhaust fan run‑times, dehumidification, or changing how you use particular rooms.

Practical Takeaways and Specs to Look For in a Home CO2 Monitor

Used well, CO2 monitors for homes are quiet feedback tools that help you match ventilation to how you actually live in your space. The goal is not perfect numbers; it is fresher‑feeling rooms, better comfort, and more informed decisions about airflow and occupancy.

When you are choosing or upgrading a CO2 monitor, a short checklist makes it easier to pick a model that fits how you plan to use it.

Specs and features to look for

  • Sensor type: Prefer a true NDIR CO2 sensor for more reliable, direct measurements; recognize that eCO2 is an estimate.
  • Measurement range and resolution: A range that comfortably covers at least 400–5000 ppm with clear 1–10 ppm resolution is typically sufficient for homes.
  • Update speed: Readings that refresh every few seconds to a minute help you see how quickly CO2 responds when you open windows or turn on fans.
  • Data display: A clear screen that shows current CO2, plus at least basic indicators for temperature and humidity, makes daily use easier.
  • Trend or logging capability: Graphs, simple history views, or basic logging make it easier to spot overnight peaks and weekly patterns.
  • Calibration options: Either reliable automatic baseline correction or a straightforward manual calibration method helps keep numbers useful over time.
  • Power options: Decide whether you need plug‑in power for continuous monitoring, battery power for portability, or both.
  • Audible or visual alerts: Optional alarms or color indicators can remind you to ventilate when CO2 climbs above your chosen comfort range.
  • Build quality and stability: A design that sits securely on a flat surface and resists tipping helps avoid accidental damage and erratic readings.

Once you have a monitor in place, give it a few weeks in each room to learn your home’s normal patterns. Then use that baseline to guide simple actions: opening windows at strategic times, running exhaust fans a bit longer, adjusting how many people use smaller rooms, or planning future ventilation improvements. Over time, those small, data‑informed steps can make a noticeable difference in how fresh and comfortable your home air feels.

Frequently asked questions

Which technical specifications most affect the accuracy and usefulness of a home CO2 monitor?

Sensor type is the primary factor: true NDIR sensors measure CO2 directly while eCO2 estimates can be skewed by VOCs. Also check measurement range and resolution, update speed, calibration options, logging or trend features, power choices, and optional audible/visual alerts for practical daily use.

How can placing the monitor incorrectly skew readings?

Placing a monitor too close to a person’s mouth, next to a vent or open window, or in direct sun can produce readings that don’t represent the room average. For more reliable numbers, set the device at typical breathing height, several feet from occupants, and away from direct airflow or heat sources.

Can CO2 monitors detect carbon monoxide or smoke?

No. CO2 monitors measure carbon dioxide and do not detect carbon monoxide or smoke; dedicated CO detectors and smoke alarms are required for life‑safety monitoring.

At what CO2 level should I ventilate a room?

As a general guide, readings under about 800 ppm usually indicate good fresh air; 800–1200 ppm is moderate and may warrant brief airing if it drifts higher; sustained readings above ~1200 ppm suggest ventilation isn’t keeping up and you should increase outdoor air or reduce occupancy. Use trends and how the space feels rather than reacting to every small fluctuation.

Will an air purifier lower CO2 levels?

Standard particle‑filter air purifiers do not remove CO2; they reduce particles like dust and smoke but leave gaseous CO2 largely unchanged. To lower CO2 you need more outdoor air exchange or fewer people in the space.

How often should I calibrate or check a home CO2 monitor?

Perform a simple outdoor baseline check every few months and run a manual calibration if your device supports it, following the manufacturer’s instructions. Regular checks help you spot sensor drift, and replacing batteries or addressing low‑power warnings promptly keeps data consistent.

Indoor Air Quality Monitors: What to Measure (PM2.5, CO2, VOCs, Humidity)

Isometric illustration of a home air quality monitor on desk

Indoor air quality monitors are small devices that show you real-time numbers for key pollutants and comfort factors like PM2.5, carbon dioxide, VOCs, temperature, and humidity so you can decide when to ventilate, filter, or dehumidify your home. Instead of guessing whether a room feels stuffy, smoky, or damp, you get clear readings that support better choices for health and comfort.

These monitors do not clean the air by themselves, but they act like a dashboard for your indoor environment. When you understand what each metric means, you can match it with practical actions: open a window, run an exhaust fan, turn on an air purifier, or adjust a humidifier or dehumidifier. Over time, patterns in the data help you see which rooms are most problematic and which habits make the biggest difference in your indoor air quality.

This guide explains what home air quality monitors measure, how the sensors work, how to interpret common readings, and how to avoid mistakes so the numbers you see translate into useful, everyday decisions.

What Indoor Air Quality Monitors Measure and Why It Matters

Indoor air quality monitors are designed to track a handful of core indicators that together describe how clean, fresh, and comfortable your indoor air is. The most common metrics are:

  • PM2.5 – fine particles from dust, smoke, and cooking
  • CO2 – carbon dioxide, a marker of how stale or well-ventilated a room is
  • TVOC – total volatile organic compounds, a broad indicator of gaseous chemicals
  • Relative humidity – how dry or damp the air feels
  • Temperature – comfort and how much moisture air can hold

Each of these numbers tells a different part of the story:

  • PM2.5 helps you see how much fine particulate matter you are breathing from activities like frying food, burning candles, or when outdoor smoke seeps indoors.
  • CO2 reveals whether fresh air is keeping up with the number of people in a room, especially in bedrooms and home offices with closed doors.
  • TVOC shows when emissions from cleaning products, paints, new furniture, or cooking are elevated and need extra ventilation or filtration.
  • Humidity alerts you when the air becomes very dry (irritating to skin and airways) or very damp (more favorable for mold and dust mites).

Used together, these measurements help you prioritize what to fix first: improve ventilation, add or adjust an air purifier, change cleaning products, or control moisture. The goal is not to chase perfect numbers but to keep your everyday living spaces within reasonable, stable ranges that feel better and carry lower long-term moisture and pollutant risks.

How Indoor Air Quality Monitors and Sensors Work

Most consumer indoor air quality monitors combine several sensor types in one housing. Understanding the basics of each sensor helps you interpret the readings and spot when something looks off.

PM2.5 sensors typically use an optical method:

PM2.5 Particle Sensors

PM2.5 sensors typically use an optical method:

  • A tiny fan pulls room air into a sensing chamber.
  • A small light source shines through the air stream.
  • A detector measures how much light is scattered by particles.

The monitor then estimates particle concentration based on how much light scattering it sees. These sensors are very good at detecting changes—for example, a sharp spike during searing or toasting food—but their absolute accuracy can vary, especially at extremely low or very high levels.

CO2 Sensors

Home CO2 monitors commonly use non-dispersive infrared (NDIR) technology:

  • Infrared light passes through the sampled air.
  • CO2 absorbs specific wavelengths of this light.
  • The sensor measures how much light is absorbed and converts it to a CO2 concentration.

Because this method detects actual CO2 molecules, it is generally reliable for ventilation trends. However, sensors can slowly drift and may need occasional calibration or a “fresh air” reset according to the manufacturer’s instructions.

VOC Sensors

Most consumer VOC sensors are metal-oxide semiconductor (MOS) sensors. They work by:

  • Heating a sensing surface that reacts to certain gases.
  • Measuring changes in electrical resistance when VOCs are present.
  • Converting that change into a TVOC value or an index score.

These sensors respond to a broad mix of organic gases rather than identifying individual chemicals. As a result, TVOC readings are best used as a “more or less” indicator—useful for spotting spikes and trends, not for precise chemical analysis.

Humidity and Temperature Sensors

Humidity and temperature sensors are typically small digital components:

  • Humidity sensors measure changes in an element that absorbs moisture.
  • Temperature sensors measure changes in electrical properties with temperature.

These readings are usually stable and respond quickly to changes in your home, as long as the monitor is not placed in direct sunlight, on an exterior wall, or directly in the path of a vent or humidifier mist.

Table 1. Common home monitor types and what they measure. Example values for illustration.
Monitor type Key metrics included Best use case What you still will not see
Particle-only monitor PM2.5 (sometimes PM10) Tracking smoke and dust, pairing with air purifiers CO2, VOCs, humidity, temperature
CO2 & comfort monitor CO2, humidity, temperature Checking ventilation in bedrooms and home offices Particles, VOCs, specific pollutants
VOC-focused monitor TVOC, sometimes humidity and temperature Evaluating off-gassing from cleaning, painting, or new items Particles, CO2, detailed chemical breakdown
Multi-sensor room monitor PM2.5, CO2, TVOC, humidity, temperature Overall view of indoor air in key living spaces Exact identification of individual gases
Whole-home monitoring system Depends on connected sensors Comparing multiple rooms or floors at once Fine-grained detail in any single location

Real-World Examples of Using Monitor Readings

Seeing how numbers change during everyday activities makes indoor air quality monitors much easier to use. Below are common scenarios and how you might respond.

Cooking and PM2.5 Spikes

High-heat cooking, especially frying or broiling, often causes a sharp PM2.5 spike:

  • Before cooking, PM2.5 might sit at a relatively low level.
  • Within minutes of searing food, the monitor may show a rapid jump.
  • Running the range hood on a higher setting, opening a nearby window (if outdoor air is acceptable), and running a portable air cleaner can bring the number back down more quickly.

Over several days, you can compare different cooking methods—pan-frying vs. baking, or covered vs. uncovered pans—and see which ones keep particle levels lower.

Bedrooms, CO2, and Overnight Stuffiness

In a typical closed bedroom with one or two people sleeping, CO2 often climbs steadily overnight:

  • The monitor may show a gradual increase after you close the door and turn off ventilation.
  • Cracking a window, running a small exhaust fan elsewhere in the home, or keeping the door partly open can slow or reverse the buildup.
  • Comparing several nights lets you see which changes keep CO2 more stable while still maintaining comfort and noise levels.

Cleaning, VOCs, and Lingering Odors

When you use strong cleaning sprays or polishes, TVOC readings often jump:

  • A quick burst of cleaner can cause an immediate spike that takes a while to fall.
  • Turning on a bathroom or kitchen exhaust fan and opening windows (when outdoor conditions allow) usually shortens the time it takes for TVOC levels to return closer to baseline.
  • Comparing different products or application methods can show which ones keep VOC spikes lower.

Basements, Humidity, and Mold Risk

Basements and lower levels often run more humid than upstairs rooms:

  • A portable monitor moved between floors may show that the basement stays consistently more damp.
  • Running a dehumidifier, improving drainage, and using exhaust fans during wet weather can bring readings into a more moderate range.
  • Spot-checking corners, closets, and near exterior walls can help identify micro-areas where moisture lingers.
Table 2. Example actions when readings change in daily life. Example values for illustration.
Metric behavior Likely situation Common pitfall Practical response
PM2.5 spikes sharply then slowly declines Cooking, candles, or indoor smoke Ignoring spikes because they fade on their own Use exhaust fan and air purifier; adjust cooking method next time
CO2 climbs steadily in a closed room Occupied bedroom or office with low ventilation Assuming comfort equals good air quality Add fresh air by opening doors/windows or running mechanical ventilation
TVOC jumps and stays elevated after cleaning Use of strong sprays, polishes, or solvents Spraying more product to mask odors Increase ventilation and consider lower-emission products next time
Humidity remains high in one area Basement, bathroom, or laundry area Only checking humidity in main living room Target that area with dehumidification and moisture control

Common Mistakes and Troubleshooting Indoor Air Quality Readings

Indoor air quality monitors are simple to use, but certain habits and placements can produce confusing or misleading readings. Recognizing these patterns makes troubleshooting easier.

Placement Mistakes

  • Too close to sources: Placing the monitor right next to a stove, candle, or cleaning product can exaggerate spikes that do not reflect the air you actually breathe across the room.
  • In direct sunlight or on exterior walls: Temperature and humidity sensors may read higher or lower than the room average, making it harder to judge comfort and moisture risks.
  • Next to vents or fans: Strong air currents can cause rapidly fluctuating CO2 or VOC readings that are not representative of the whole space.
  • On the floor or in dead corners: Stagnant air can make readings slower to respond to changes, while resuspended dust near the floor can exaggerate particle levels.

Sensor Interference and False Spikes

  • Humidifier mist: Some particle sensors interpret water droplets as particles, causing temporary PM2.5 spikes when a cool-mist humidifier runs nearby.
  • Fresh paint or strong cleaners: VOC sensors may stay elevated for hours or days after a major painting or cleaning project, even if you do not smell anything strongly.
  • Outdoor air swings: Placing a monitor directly in a draft from an open window can cause CO2 and temperature readings to jump up and down quickly as outdoor air mixes with indoor air.

Interpreting Numbers Without Context

  • Focusing only on a single snapshot: A one-time reading tells you less than the pattern over hours or days. Trends are more important than any single number.
  • Relying only on an overall “air score”: Many monitors show a simple index, but the underlying PM2.5, CO2, VOC, and humidity readings are more useful for deciding what to do.
  • Expecting lab-grade accuracy: Consumer monitors are designed for practical guidance, not regulatory measurements. Use them for relative changes and comparisons, not official compliance decisions.

Simple Troubleshooting Steps

  • Move the monitor to a different location in the same room and watch whether readings stabilize.
  • Turn off nearby devices such as humidifiers or fans to see if suspected interference disappears.
  • Take the monitor outside for a short period to observe how CO2 and sometimes PM2.5 behave in fresh outdoor air.
  • Compare readings at the same time of day across several days to distinguish one-time events from consistent patterns.

Safety Basics When Using Indoor Air Quality Monitors

Indoor air quality monitors are tools for awareness, not emergency safety devices. Understanding their role helps you use them appropriately.

What Monitors Can and Cannot Do

  • They can: Highlight stale air, elevated particles from smoke or cooking, higher VOC levels after cleaning, and humidity conditions that favor mold growth.
  • They cannot: Replace dedicated safety alarms for hazards such as carbon monoxide, natural gas leaks, or smoke and fire detection.

Even if your monitor shows “good” or “fair” readings, you still need dedicated life-safety alarms where required and recommended, as well as proper ventilation and moisture control.

Responding to Concerning Readings

  • Persistent high PM2.5: Reduce indoor smoke sources, improve kitchen ventilation, and use appropriate filtration. If outdoor smoke is severe, limit window opening during peak events and focus on filtration indoors.
  • Consistently elevated CO2: Look for ways to increase fresh air exchange, such as running exhaust fans longer, opening windows when conditions allow, or adjusting how long doors stay closed in heavily used rooms.
  • High TVOC after renovations: Ventilate newly painted or furnished rooms more aggressively, and consider limiting time spent there until readings trend lower.
  • High humidity in specific areas: Address moisture sources, run dehumidifiers where needed, and watch for visible condensation or musty odors.

When to Seek Professional Help

  • If you see consistently unusual readings that do not respond to reasonable ventilation or filtration steps.
  • If there are visible signs of mold growth, chronic condensation, or strong unexplained odors.
  • If anyone in the home experiences persistent respiratory symptoms that seem related to time spent indoors.

In these situations, a more detailed inspection or specialized testing may be appropriate in addition to everyday monitoring.

Maintaining Indoor Air Quality Monitors for Long-Term Use

Like any measuring tool, indoor air quality monitors work best when they are maintained and used consistently over time. Basic care helps keep readings more reliable and extends the useful life of the device.

Routine Care and Cleaning

  • Dust control: Gently wipe the exterior with a dry or slightly damp cloth to keep vents and openings free of dust. Avoid spraying cleaners directly on the monitor.
  • Vent openings: Check periodically that air inlets and outlets are not blocked by dust, pet hair, or nearby objects.
  • Stable placement: Keep the monitor on a solid surface where it will not be knocked over, especially if it uses a small fan to draw in air.

Calibration and Sensor Drift

  • CO2 calibration: Many CO2 monitors benefit from occasional exposure to outdoor air or a manufacturer-recommended calibration routine to keep readings from drifting over time.
  • VOC and particle sensors: These may slowly change response as they age. Watching long-term trends and comparing with your own observations (smell, visible dust, or smoke) can help you notice when a sensor may be drifting.
  • Software or firmware updates: When available, updates can improve stability or add features. Follow the manufacturer’s guidance for applying them safely.

Storage and Seasonal Use

  • If you store the monitor for a season, keep it in a dry, temperature-moderate place away from direct sunlight and high humidity.
  • When bringing it back into service, allow it to sit in the room for a while before relying on the readings, especially for VOC and humidity sensors that may need time to stabilize.
  • Consider recording typical seasonal ranges for your home so you can quickly spot unusual changes from year to year.

Practical Takeaways and Specs to Look For

Indoor air quality monitors are most valuable when they guide simple, repeatable actions instead of adding data without context. Focus on a few key habits:

  • Check readings at predictable times, such as morning, evening, and during cooking or cleaning.
  • Use patterns to prioritize improvements: ventilation for high CO2, filtration and source control for high PM2.5, product choices and airing out for high TVOC, and moisture control for humidity issues.
  • Compare rooms and floors so you know where to focus purifiers, fans, or dehumidifiers.

Specs to Look For in a Home Air Quality Monitor

When choosing a monitor for long-term use and potential integration with other home comfort tools, look for features that match how you actually live:

  • Core metrics included: At minimum, consider PM2.5, CO2 (not just a “CO2 equivalent”), humidity, and temperature. TVOC is helpful if you are concerned about gases from products and materials.
  • Clear display: Readable numbers for each metric, not just a color or generic “air quality” label.
  • Logging and trends: Ability to view hourly or daily trends on-screen or in an app so you can link patterns to activities.
  • Update frequency: Reasonably quick refresh rates so you can see changes when you open a window, start a fan, or turn on a purifier.
  • Power options: Plug-in power for continuous monitoring, with battery backup if you want to move the monitor around for spot checks.
  • Calibration options: A simple way to perform fresh-air calibration for CO2 and reset other sensors if recommended.
  • Data units and scaling: Clear units for each metric (for example, micrograms per cubic meter for PM2.5) and ranges that make sense for home use.
  • Alerts or notifications: Optional visual or audible alerts when readings cross user-selected thresholds, helping you respond without watching the display constantly.

By choosing a monitor with the right mix of sensors and practical features—and by using its readings to guide everyday actions—you can turn indoor air quality data into concrete improvements in comfort, moisture control, and overall home air quality.

Frequently asked questions

Which specifications and features should I prioritize when choosing an indoor air quality monitor?

Prioritize monitors that measure core metrics relevant to your concerns—typically PM2.5, CO2, humidity, and temperature; TVOC is useful for gas-phase emissions. Also look for clear numeric displays, data logging or trend views, reasonable update rates, easy calibration options (especially for CO2), and optional alerts to notify you when levels exceed chosen thresholds.

Why do my monitor readings sometimes spike or fluctuate unexpectedly?

Sporadic spikes often come from local sources (cooking, candles, sprays), placement too close to vents or windows, or sensor interference like humidifier mist. Move the device to a neutral central spot, remove nearby sources, and observe trends over time to distinguish true events from transient artifacts.

Can an indoor air quality monitor replace smoke or carbon monoxide alarms?

No. Consumer air quality monitors are for awareness and trend tracking and are not certified life-safety devices; they typically do not detect carbon monoxide reliably or act as substitutes for smoke and CO alarms. You should install and maintain dedicated, certified alarms for those hazards.

How often should I calibrate or perform maintenance on a monitor?

Follow the manufacturer’s guidance, but common practices include occasional fresh-air exposure or calibration for CO2 sensors, keeping inlet vents and the exterior free of dust, and applying firmware updates when available. Regular spot checks and comparison to expected conditions help you notice sensor drift over months or years.

Where is the best place to position a monitor for representative room readings?

Place the monitor on a stable surface near breathing height, away from direct sources (stoves, candles), vents, direct sunlight, and exterior walls. Avoid corners, floors, or positions directly in air drafts to get readings that better reflect the room’s average conditions.

What does a high TVOC reading mean, and when should I be concerned?

TVOC indicates a mix of volatile organic chemicals and is useful as a relative indicator of off-gassing or product emissions. Short-lived spikes after cleaning or painting are common and usually resolved with ventilation, but persistent high TVOC readings or related symptoms (headache, irritation) warrant increased ventilation, product changes, or further investigation by a professional.

Ventilation vs Air Purifier: When You Need One, the Other, or Both

Living room with window ventilation and floor air purifier

Ventilation is better for removing stale air, moisture, and CO2, while an air purifier is better for removing indoor particles like dust, pollen, and smoke; many homes need both at different times. When you compare ventilation vs air purifier, you are really choosing between bringing in fresh outdoor air or cleaning the air you already have indoors.

Understanding when to open windows, when to run exhaust fans, and when to rely on a portable air cleaner can dramatically improve indoor air quality, comfort, and mold risk. The right mix changes with seasons, outdoor pollution, and what is happening inside your home.

This guide walks through how ventilation and air purifiers work, where each one shines, and how to troubleshoot common problems like stuffy rooms, lingering odors, and wildfire smoke. You will also find simple decision tools, safety tips, and a practical checklist of specs to look for when choosing or upgrading equipment.

What Ventilation and Air Purifiers Do (and Why It Matters)

Ventilation and air purification are two different tools for managing indoor air quality, not direct substitutes for each other.

Ventilation is the intentional exchange of indoor air with outdoor air. It dilutes indoor pollutants, removes excess moisture, and helps keep CO2 and odors from building up. It can be as simple as opening a window or as complex as a whole-house mechanical system.

Air purifiers are recirculating devices that pull indoor air through filters or other media to remove particles and some gases. They do not bring in fresh air or control humidity, but they can significantly reduce dust, pollen, smoke, and some odors inside a room.

Why this matters:

  • Relying only on ventilation when outdoor air is smoky or polluted can make indoor air worse.
  • Relying only on an air purifier in a tightly sealed room can leave CO2 and moisture high, so the space still feels stuffy.
  • Matching the tool to the problem (and sometimes combining both) is key to healthier, more comfortable air.

A helpful way to think about it is: ventilation controls how much new air you get, while an air purifier controls how clean that indoor air becomes once it is inside.

How Ventilation and Air Purifiers Work

Both tools move air, but they move and treat it in very different ways.

How Home Ventilation Works

Most homes use a mix of these ventilation approaches:

  • Natural ventilation: Opening windows and doors or relying on small leaks and cracks in the building. Wind and temperature differences drive the airflow.
  • Spot (local) exhaust: Bathroom fans, kitchen range hoods, and laundry exhausts remove air from specific rooms where moisture and pollutants are generated.
  • Whole-house mechanical ventilation: Dedicated fans and ducts bring in outdoor air and exhaust indoor air on a schedule. Some systems recover heat or energy to reduce the impact on heating and cooling.

Ventilation is especially important for:

  • Keeping CO2 from building up in occupied rooms.
  • Removing moisture from showers, cooking, and drying clothes.
  • Clearing strong odors and fumes at the source.

How Air Purifiers Work

Portable air purifiers recirculate indoor air through a series of filters or media:

  • Pre-filter: Catches hair, lint, and larger dust so the main filter lasts longer.
  • Fine particle filter (often HEPA-type): Captures very small particles such as dust, smoke, pollen, and pet dander.
  • Activated carbon or other sorbent media: Adsorbs some odors and volatile organic compounds (VOCs) from cooking, smoke, or off-gassing materials.

Some devices add technologies like ionizers or UV lights. These can change how particles behave or attempt to affect microorganisms, but they do not replace good mechanical filtration. Many people prioritize units that focus on strong particle filters and adequate carbon while avoiding added ozone.

Comparing Tools: Which Problem Needs Which Solution?

Table 1. Ventilation vs air purifier: which to prioritize? Example values for illustration.
Indoor air problem Ventilation priority Air purifier priority Most effective first step
Stuffy room, several people, no windows open High Low Increase outdoor air (open window or run fresh-air system) to reduce CO2 and odors.
Wildfire smoke outside, hazy sky Low High Close windows and run a purifier with a good fine particle filter in main rooms.
High humidity after showers, fogged mirrors High Low Run bathroom exhaust fan and consider dehumidification; purifier will not remove moisture.
Everyday dust and pet dander in living room Medium High Use a purifier sized for the room and keep up with cleaning and vacuuming.
Strong cooking odors that linger High Medium Use the range hood during cooking and ventilate; purifier with carbon can help with leftover odor.
Pollen season, windows occasionally open Medium High Ventilate when outdoor air is comfortable, then run a purifier to reduce indoor pollen.
New furniture or paint smell Medium Medium Combine added ventilation with a purifier that includes ample sorbent media.

In many situations, you will use both tools at different times of day or different seasons, adjusting based on weather and outdoor air quality.

Real-World Scenarios: When to Use Each (or Both)

It is easier to choose between ventilation and an air purifier when you connect them to everyday situations in your home.

Scenario 1: Stuffy Bedroom at Night

Several hours after going to bed, the room feels heavy and air seems stale even though it is not visibly dusty.

  • Likely issue: CO2 and other exhaled pollutants building up in a closed room.
  • Better tool: Ventilation first. Crack a window if outdoor air is acceptable, or use a mechanical fresh-air option if available.
  • How a purifier helps: It can reduce particles and allergens but will not lower CO2 on its own. Use it in addition to, not instead of, fresh air.

Scenario 2: Wildfire Smoke in the Region

The outdoor air is visibly hazy, and local reports mention elevated smoke and fine particles.

  • Likely issue: High outdoor PM2.5 that can easily leak indoors.
  • Better tool: Air purifier. Keep windows and doors closed as much as practical and run a purifier with a strong fine particle filter in the rooms you use most.
  • Ventilation approach: Temporarily reduce natural ventilation; use only the minimal amount of outdoor air needed for safety and comfort until outdoor conditions improve.

Scenario 3: Bathroom Moisture and Mold Spots

After showers, mirrors stay fogged for a long time, and small mold spots show up on ceiling corners.

  • Likely issue: Excess humidity and poor moisture removal.
  • Better tool: Ventilation. Run the bathroom exhaust fan during showers and for at least 20–30 minutes afterward. If there is no fan, opening a window can help when outdoor air is not humid.
  • Role of purifier: An air purifier does not remove humidity and will not fix the underlying moisture problem, though it can help with musty odors after moisture is controlled.

Scenario 4: Persistent Cooking Odors

Cooking with high heat or frying leaves a noticeable smell that lingers into the next day.

  • Likely issue: Inadequate kitchen exhaust and lingering particles and VOCs.
  • Better tool: Ventilation first. Use a range hood that vents outdoors whenever you cook, and continue running it for a short period after finishing.
  • Supplement with purifier: A purifier with both fine particle and sorbent media can help reduce greasy particles and some odors in adjacent rooms.

Scenario 5: Allergies, Pets, and Dust

Someone in the home has allergies, there are pets, and dust seems to settle quickly between cleanings.

  • Likely issue: Elevated indoor particles from pet dander, tracked-in dust, and everyday activities.
  • Better tool: Air purifier. Use one sized appropriately for the bedroom and main living area, and run it on a higher setting when symptoms are worse.
  • Ventilation role: Normal ventilation is still important, but it will not selectively remove allergens the way filtration can.

Scenario 6: Small Apartment Near a Busy Road

Opening windows lets in traffic noise and sometimes noticeable outdoor pollution, but keeping them closed makes the air feel stale.

  • Likely issue: Need to balance fresh air with outdoor pollution and noise.
  • Strategy: Use short, targeted ventilation periods when outdoor air is cleaner (early morning or late evening) and rely on a purifier the rest of the time to reduce indoor particles.
  • Extra step: If there is a bathroom or kitchen fan, use it briefly to flush air after activities that create moisture or strong odors.

Common Mistakes and Troubleshooting Cues

Many air quality problems persist not because the wrong equipment was purchased, but because it is used in the wrong way or for the wrong problem.

Typical Missteps with Ventilation

  • Running bathroom fans for only a few minutes. Moisture remains on surfaces and in the air, increasing mold risk.
  • Using recirculating range hoods as if they were outdoor vents. These often only pass air through a simple filter and blow it back into the room, so smoke and moisture are not fully removed.
  • Never opening windows in mild weather. In moderate outdoor conditions, brief window openings can quickly reduce CO2 and odors at very low cost.
  • Over-ventilating during pollution events. On high-smoke or high-smog days, more outdoor air can increase indoor particle levels.

Typical Missteps with Air Purifiers

  • Buying a unit that is too small. A purifier undersized for the room may run constantly without noticeably improving air quality.
  • Placing the purifier in a corner or behind furniture. Restricted airflow reduces how much room air passes through the filters.
  • Running on the quietest setting only. Lowest speeds may not provide enough clean air delivery during high-pollution periods.
  • Ignoring filter replacement indicators. Clogged filters reduce performance and can cause air to bypass the filter media.

Quick Troubleshooting Guide

Table 2. Troubleshooting common indoor air complaints Example values for illustration.
Symptom Likely cause What to check Adjust ventilation or purifier?
Room feels stuffy, mild headache, especially with several people Low fresh air, elevated CO2 Windows always closed, fans off, tightly sealed room Increase ventilation first; keep purifier for particles if needed.
Visible haze or smell of smoke indoors during regional fires Outdoor particles leaking inside Windows cracked open, gaps around doors, HVAC bringing in unfiltered air Close leaks where practical and run purifier on higher speed.
Condensation on windows and mold near corners High indoor humidity, poor moisture removal Bathroom/kitchen fans underused or not vented outdoors Improve exhaust and consider dehumidification; purifier is secondary.
Dust quickly returns after cleaning Ongoing particle sources and resuspension Vacuum type, pet activity, purifier size and speed Use purifier more consistently and improve cleaning methods.
Purifier seems loud but air still feels dirty Undersized unit or blocked airflow Room size vs purifier rating, placement, filter condition Reposition unit, replace filters, or use a higher-capacity purifier.

Safety Basics for Ventilation and Air Purifiers

Most ventilation and air-cleaning strategies are straightforward, but a few safety points are important.

Ventilation and Combustion Safety

  • Avoid backdrafting. Strong exhaust fans in tight homes can sometimes pull combustion gases from fireplaces or fuel-burning appliances back into the living space. If you notice soot, smoke smell, or unusual drafts near these appliances when fans run, have the system evaluated.
  • Do not ignore carbon monoxide alarms. If a CO alarm sounds, follow emergency guidance immediately and ventilate the space, then address the combustion source before returning to normal operation.
  • Use unvented combustion appliances carefully. Devices such as unvented space heaters add moisture and combustion byproducts directly to the room air. Adequate ventilation is essential when they are used.

Air Purifier Safety Considerations

  • Check for ozone-related features. Some devices use technologies that can generate ozone as a byproduct. Excess ozone can irritate lungs and should be avoided indoors.
  • Follow electrical and placement guidelines. Keep purifiers away from water sources, do not pinch cords under furniture, and avoid blocking air inlets or outlets.
  • Filter changes and dust exposure. When replacing dirty filters, handle them gently and consider placing them directly into a bag to reduce dust release.

Balancing Safety with Air Quality

During outdoor pollution events, it can be tempting to seal a home completely. Maintain at least minimal ventilation for health and safety, especially if there are combustion appliances in use. Use air purifiers to reduce particles while keeping necessary levels of fresh air.

Long-Term Use, Maintenance, and Seasonal Adjustments

Ventilation systems and air purifiers work best when they are maintained and adjusted with the seasons.

Maintaining Ventilation Systems

  • Bathroom and kitchen fans: Periodically clean fan grilles and check that air is actually moving outside by holding a tissue near the fan while it runs.
  • Ducted systems: Make sure exterior vents are not blocked by debris, nests, or vegetation.
  • Seasonal operation: In cooler months, you may rely more on mechanical ventilation; in mild weather, windows can handle a larger share of air exchange.

Maintaining Air Purifiers

  • Pre-filters: Clean or replace them on the schedule recommended by the manufacturer, or more often in dusty environments.
  • Fine particle filters: Replace when indicated or when airflow or performance clearly drops.
  • Sorbent media: Odor-absorbing filters eventually saturate; if odors return quickly, it may be time to replace this stage even if it still looks clean.

Seasonal Strategy Shifts

  • Spring and fall: Outdoor air is often more comfortable, so you may use more natural ventilation and rely on purifiers for pollen and dust.
  • Summer: In humid climates, limit open windows during the hottest, most humid hours and use exhaust fans strategically to control moisture.
  • Winter: Homes are typically closed up, so mechanical ventilation and purifiers become more important for managing CO2, moisture, and indoor-generated pollutants.

Putting It All Together: Practical Takeaways and Specs to Look For

Choosing between ventilation and an air purifier is not a one-time decision. It is an ongoing adjustment based on what the air needs on a given day.

  • Use ventilation whenever you need to remove moisture, CO2, and strong odors at the source, especially in bathrooms and kitchens.
  • Use an air purifier when you need to reduce particles and some gases indoors, especially during smoke events, pollen season, or in homes with pets and dust sensitivity.
  • Combine both tools in most homes: ventilation for freshness and moisture control, and purifiers for targeted particle and odor reduction in key rooms.

Specs to Look For: Air Purifier Checklist

  • Room size rating: Check that the stated coverage area matches or exceeds the square footage of the room you plan to use it in.
  • Clean Air Delivery Rate (CADR): Higher CADR values for smoke and dust generally mean faster particle removal. Look for values that provide several air changes per hour in your room size.
  • Filter types: A dedicated fine particle filter plus a separate pre-filter and sorbent stage provide more complete coverage of common indoor pollutants.
  • Noise levels: Look for sound levels that you can tolerate at the speeds you will actually use, especially in bedrooms.
  • Filter replacement indicators: Built-in reminders help maintain performance over time.
  • Energy use: Consider power draw at typical operating speeds, since purifiers often run for many hours per day.

Specs to Look For: Ventilation and Exhaust

  • Bathroom fan airflow: A fan should be appropriately sized for the room and able to clear moisture within a reasonable time after showers.
  • Range hood performance: Hoods that vent outdoors and capture steam and smoke directly above the cooking surface are generally more effective.
  • Whole-house ventilation controls: Simple, understandable controls make it easier to adjust runtime with seasons and occupancy.
  • Noise and user comfort: Quieter fans are more likely to be used consistently, especially at night.

By matching these specifications to your home’s layout, climate, and everyday habits, you can build a balanced strategy where ventilation and air purification work together to keep indoor air cleaner, drier, and more comfortable over the long term.

Frequently asked questions

Which specifications and features matter most when choosing an air purifier or ventilation system?

For air purifiers, prioritize room-size coverage, Clean Air Delivery Rate (CADR) for relevant pollutants, filter types (HEPA for particles plus activated carbon for gases/odors), noise, and energy use. For ventilation, look at airflow capacity (CFM), whether the system vents outdoors or recirculates, and user-friendly controls; heat- or energy-recovery features can reduce heating/cooling impacts. Match specs to your room size, typical pollutants, and how you plan to use the device.

Is it OK to rely only on an air purifier instead of ventilating a room?

Not always. Air purifiers are effective at removing particles and some gases but do not remove CO2 or humidity produced by occupants and activities. For occupied, sealed spaces you still need some ventilation to control CO2, moisture, and combustion byproducts, while a purifier can supplement particle control.

Are there any safety concerns I should know about when using ventilation or air purifiers?

Yes. For ventilation, excessive exhaust in tight homes can cause backdrafting from combustion appliances, and carbon monoxide alarms must be heeded. For air purifiers, avoid devices that produce ozone or other harmful byproducts, and follow electrical and filter-handling guidance to reduce dust exposure and fire risk.

How often should I change or clean air purifier filters and check ventilation components?

Follow the manufacturer’s guidance, but typical intervals are: pre-filters cleaned monthly or as needed, HEPA filters replaced every 6–12 months depending on use and pollution levels, and sorbent/carbon media replaced when odors return. For ventilation, inspect and clean fan grilles periodically and check that exterior vents are clear at least once or twice a year.

Where is the best place to put a portable air purifier for maximum effectiveness?

Place the purifier where airflow is unobstructed, ideally near the center of the room or between the main pollutant source and occupants, and not tucked into a corner or behind furniture. Elevating the unit slightly off the floor can improve circulation, and ensure inlet/outlet areas are kept clear for the rated airflow to be achieved.

How should I balance ventilation and filtration during outdoor pollution events like wildfires?

Close windows and doors during high outdoor pollution and run a HEPA-capable purifier indoors to reduce infiltrated particles. Limit ventilation to brief, targeted periods when outdoor air quality improves; maintain minimal ventilation needed for combustion safety if fuel-burning appliances are in use.

Dehumidifier Running Cost: How Much Electricity Does It Really Use?

Isometric illustration of a dehumidifier in a tidy laundry room

A typical home dehumidifier costs somewhere between a few dollars and several tens of dollars per month to run, depending mainly on wattage, runtime, and your local electricity rate. Once you know these numbers, you can estimate dehumidifier running cost in minutes and decide whether continuous operation, timed use, or seasonal use makes the most sense for your home.

This guide walks step by step through how much electricity a dehumidifier uses, how to calculate cost per day and per month, and how to cut that cost without letting humidity, mold risk, or musty odors get out of control. You will see real-world examples, simple formulas, and practical tips for basements, laundry rooms, and living spaces.

All examples use approximate values so you can plug in your own wattage, hours of use, and utility rate. The goal is to keep indoor humidity in a healthy range while keeping your energy bill predictable and manageable.

What Dehumidifier Running Cost Means And Why It Matters

Dehumidifier running cost is the amount you pay in electricity to remove moisture from indoor air over time. It is usually expressed as cost per hour, per day, per month, or per season. Because dehumidifiers often run for many hours at a stretch, even a moderate power draw can add up.

Understanding this cost matters for several reasons:

  • Budgeting: A unit running nearly nonstop in a damp basement can become one of your higher plug-in energy users.
  • Right-sizing: An undersized dehumidifier may run constantly and still not reach your humidity target, wasting energy without solving the problem.
  • Comfort and health: If you avoid running the dehumidifier because you are worried about cost, humidity can creep high enough to support mold, dust mites, and musty odors.
  • Long-term planning: Once you know what humidity control really costs, you can compare it to other improvements such as better drainage, sealing, or ventilation upgrades.

Instead of guessing, you can treat dehumidifier electricity use as a measurable, adjustable part of your overall indoor air quality plan.

Key Factors That Drive Dehumidifier Electricity Use

Dehumidifier running cost is mostly determined by three numbers: power draw in watts, hours of operation, and your price per kilowatt-hour. Several practical details influence each of these.

Power Rating And Capacity

The power rating tells you how much electricity the unit uses while the compressor is running. You will usually find this printed on a label near the cord or in the manual. Typical ranges include:

  • Small room units: roughly 200–400 W
  • Medium portable units: roughly 400–700 W
  • Large or high-capacity units: roughly 600–900 W or more

Higher-wattage models can remove more moisture per hour, so they may reach the target humidity faster and cycle off sooner. That means a 700 W unit does not automatically cost more to run than a 400 W unit; total cost depends on how long each one runs.

Runtime Per Day

Runtime is the number of hours the compressor actually runs in a 24-hour period. It is rarely the same as the number of hours the unit is plugged in or switched on, because the humidistat cycles the compressor on and off.

Runtime depends on:

  • Humidity level: Very damp basements or laundry areas can keep the unit running most of the day.
  • Setpoint: Aiming for 40% relative humidity instead of 50% can significantly increase runtime.
  • Room size and layout: Large, open spaces or connected rooms take longer to dry.
  • Moisture sources: Leaks, wet foundations, frequent showers, or indoor drying of clothes all add to the moisture load.

Electricity Rate

Your local electricity rate, expressed in cost per kilowatt-hour (kWh), converts energy use into dollars. It varies by region and sometimes by time of day. In many areas, residential rates fall roughly between $0.10 and $0.25 per kWh.

Even a small change in rate makes a noticeable difference when a dehumidifier runs for hundreds of hours over a season.

Room Conditions And Setup

Two identical dehumidifiers can use very different amounts of electricity in different spaces. Important conditions include:

  • Temperature: Refrigerant-based units work more efficiently in warmer air; cool basements can reduce performance and increase runtime.
  • Airflow: Blocked intakes, closed doors, and cluttered corners trap moist air and make the compressor work longer.
  • Building envelope: Poorly sealed foundations, crawlspaces, and window frames allow a constant stream of humid air that the dehumidifier must handle.

Improving the room conditions often reduces runtime more than changing the dehumidifier itself.

Real-World Cost Examples And Simple Calculations

You can estimate dehumidifier running cost with a straightforward three-step calculation. All you need is the unit’s wattage, estimated runtime, and your electricity price.

Step-By-Step Cost Formula

  1. Convert watts to kilowatts: kilowatts = watts ÷ 1000
  2. Estimate daily energy use: daily kWh = kilowatts × hours of runtime per day
  3. Convert to cost: daily cost = daily kWh × price per kWh

From there, you can multiply by 30 for a rough monthly cost or by the number of days in your typical humid season.

Typical Dehumidifier Running Cost Scenarios – Example values for illustration.
Scenario Wattage (W) Runtime (hours/day) Daily Use (kWh) Daily Cost at $0.15/kWh Approx. Monthly Cost (30 days)
Mildly damp bedroom, evening use 300 4 1.2 $0.18 $5.40
Basement, moderate humidity 500 8 4.0 $0.60 $18.00
Very damp basement, near-continuous 650 20 13.0 $1.95 $58.50
Seasonal use, laundry area 450 3 1.35 $0.20 $6.08

Example values for illustration.

Example: Mildly Damp Room

Suppose you run a 300 W dehumidifier for 4 hours each evening at an electricity rate of $0.15/kWh:

  • Power: 300 W = 0.3 kW
  • Daily energy: 0.3 kW × 4 h = 1.2 kWh
  • Daily cost: 1.2 kWh × $0.15 = $0.18
  • Monthly (30 days): about $5.40

In this case, the cost is modest, and comfort improvement is often worth the added electricity use.

Example: Damp Basement In Humid Weather

Now consider a 500 W unit in a basement that runs about 12 hours per day at the same rate:

  • Power: 500 W = 0.5 kW
  • Daily energy: 0.5 kW × 12 h = 6 kWh
  • Daily cost: 6 kWh × $0.15 = $0.90
  • Monthly (30 days): about $27.00

This is a more noticeable cost, but it is also where humidity control can make the biggest difference for mold prevention and protecting stored items.

Comparing To Other Appliances

To put these numbers in context, a dehumidifier running many hours per day may use similar daily energy to a small window air conditioner or a few space heaters used briefly. It usually uses more than a single fan or a compact air purifier, but less than central air conditioning serving an entire home.

Common Mistakes That Increase Running Cost (And How To Fix Them)

Certain habits and setup choices can quietly push dehumidifier running cost much higher than necessary. Watching for these issues can save energy while keeping humidity in a safe range.

Typical Costly Mistakes

  • Setting the humidity target unnecessarily low
  • Running in continuous mode when the space is only moderately damp
  • Ignoring water leaks and moisture sources that overwhelm the unit
  • Blocking airflow with furniture or storage boxes
  • Letting filters and coils clog with dust
  • Using a small unit in a very large or open space
Common Dehumidifier Cost Problems And Quick Checks – Example values for illustration.
Symptom Likely Cause What To Check Simple Fix
Runs almost nonstop, humidity barely drops Undersized unit or heavy moisture source Room size, leaks, standing water, wet walls Address leaks, improve drainage, consider higher-capacity unit
High electricity bill during humid months Long runtime and low setpoint Target humidity setting and timer schedule Raise setpoint to 45–50% and use timer where possible
Unit feels hot and airflow seems weak Blocked grilles or dirty filter Intake/exhaust clearance, filter condition Move clutter away, clean or replace filter
Water bucket fills very quickly every day High moisture load Sources like showers, laundry, unvented appliances Use exhaust fans, vent dryer outdoors, limit indoor line-drying
Ice on coils in a cool basement Low air temperature for refrigerant unit Room temperature and defrost cycle Raise room temperature if possible or reduce use in cold conditions

Example values for illustration.

Quick Troubleshooting Routine

  1. Check the setpoint: If it is below about 40% relative humidity, raise it to 45–50% and monitor comfort and smell for a week.
  2. Observe runtime: Note approximately how many hours per day the compressor actually runs for a few days in a row.
  3. Inspect for moisture sources: Look for damp walls, plumbing drips, unvented dryers, or water pooling near the foundation.
  4. Inspect airflow: Make sure there is at least several inches of space around the intake and exhaust, and that filters are clean.
  5. Recalculate cost: Use your updated runtime and setpoint to see how much cost changes after adjustments.

Repeating this routine at the start and middle of the humid season helps keep cost and humidity under control.

Safety Basics When Running A Dehumidifier For Long Hours

Dehumidifiers are generally safe household appliances, but long runtimes and damp environments add some risks that are worth managing.

Electrical Safety

  • Use a grounded outlet: Plug the dehumidifier directly into a properly grounded wall outlet, not a light-duty extension cord or power strip.
  • Keep cords dry: Avoid running the power cord across wet floors or where condensation may pool.
  • Inspect the cord: If you notice fraying, discoloration, or heat damage, stop using the unit until it is repaired or replaced.

Water Handling And Spills

  • Empty the bucket safely: Turn off or unplug the unit before removing a heavy water bucket, and avoid splashing near the outlet.
  • Check drain hoses: If you use a continuous drain, ensure the hose slopes downward and empties into a suitable drain to prevent backflow or leaks.
  • Prevent slip hazards: Wipe up spills promptly so damp floors do not become slippery.

Heat And Ventilation Around The Unit

  • Allow airflow: Do not drape clothes or fabrics over the dehumidifier; blocked vents can cause overheating and reduced efficiency.
  • Avoid confined spaces: Running a unit inside a tightly closed closet or small enclosure can trap heat and moisture.
  • Monitor in very hot rooms: In spaces that already get warm, such as small mechanical rooms, check that the dehumidifier does not contribute to uncomfortable or unsafe temperatures.

Safe Operation Over Time

  • Follow rated conditions: Many residential dehumidifiers are designed for temperatures above a certain minimum; running below that can cause ice buildup on coils.
  • Listen for changes: Unusual noises, burning smells, or repeated tripping of breakers are signs to shut the unit off and investigate.
  • Keep away from children and pets: Place the unit where it cannot be easily tipped over or blocked.

Maintenance And Long-Term Use To Control Cost

Regular maintenance keeps a dehumidifier working efficiently, which directly affects electricity use. A neglected unit may run longer, remove less moisture, and cost more to operate.

Routine Maintenance Tasks

  • Clean or replace filters: Clogged filters reduce airflow and force the compressor to run longer to achieve the same humidity reduction.
  • Check coils and grilles: Dust buildup on coils and vents reduces heat transfer and efficiency.
  • Inspect the drain system: Ensure buckets, hoses, and pumps (if present) are clean and draining properly.

Seasonal Start-Up And Shut-Down

  • Beginning of humid season: Clean filters, check the cord, test the bucket float or drain hose, and verify that the humidistat responds when you adjust the setpoint.
  • End of season: Empty and dry the bucket, run the fan briefly to help dry internal parts, clean filters, and store the unit in a dry location.

Storage Tips

  • Store dry: Allow the unit to air out so residual moisture does not sit in the bucket or coils for months.
  • Protect from dust: Cover loosely with a breathable material rather than sealing in plastic, which can trap moisture.
  • Keep upright: Store the dehumidifier in an upright position to protect the compressor and refrigerant system.

Basic maintenance can noticeably reduce runtime and therefore total running cost over the life of the appliance.

Practical Takeaways And Specs To Look For

When you understand how dehumidifier running cost works, you can make better decisions about when to run it, how hard to run it, and whether your current setup is the best fit for your home. The main levers you control are humidity setpoint, runtime, room conditions, and basic maintenance.

Key Practical Takeaways

  • Estimate cost using watts, runtime, and your electricity rate so you are not surprised by seasonal bills.
  • Aim for a moderate indoor humidity range, often around 45–50% in most living spaces, to balance comfort, mold prevention, and energy use.
  • Address moisture sources such as leaks, poor drainage, and unvented appliances before relying solely on dehumidification.
  • Use built-in humidistats and timers instead of continuous mode whenever conditions allow.
  • Revisit settings at least once or twice per season as weather and household habits change.

Specs To Look For When Evaluating A Dehumidifier

If you are comparing dehumidifiers with running cost in mind, pay close attention to these specifications and features on labels, manuals, or product descriptions:

  • Power draw (watts): Use this to calculate approximate hourly and monthly electricity cost.
  • Moisture removal capacity (pints per day or similar): Higher capacity can dry spaces faster, especially in basements or large rooms.
  • Recommended coverage area: Match the unit to your room size so it does not run constantly without reaching the setpoint.
  • Humidity control range: Look for a clear adjustable range so you can set a realistic target (for example, 40–60% relative humidity).
  • Built-in humidistat: Allows the unit to cycle off when the target humidity is reached, reducing unnecessary runtime.
  • Timer functions: Let you schedule operation for the most humid parts of the day or when noise is less of a concern.
  • Fan speed options: Multiple speeds can help balance noise, comfort, and energy use.
  • Drainage options: A hose connection or pump option can support continuous drainage, which is helpful for long runtimes in basements.
  • Operating temperature range: Important if you plan to use the unit in cooler basements or shoulder seasons.
  • Filter access and maintenance: Easy-to-remove filters and accessible coils make regular cleaning more likely, improving efficiency.

By combining a realistic cost estimate with the right set of features, you can keep indoor humidity under control without overspending on electricity or equipment.

Frequently asked questions

Which specs and features should I prioritize when buying a dehumidifier to minimize running cost?

Prioritize power draw (watts), moisture removal capacity (pints per day), and an accurate built-in humidistat. Look for clear coverage area recommendations, timer functions, and good filter access because proper sizing and control reduce runtime and overall energy use.

What common mistake causes dehumidifier running cost to rise unnecessarily?

Using an undersized unit for a large or very damp space is a frequent mistake, because it runs nearly nonstop without reaching the setpoint. Other common issues include setting the humidity target too low and blocking airflow with storage or dirty filters.

Is it safe to run a dehumidifier continuously, and what precautions should I take?

Continuous operation is generally safe when the unit is installed and maintained correctly, but take basic precautions such as using a grounded outlet, avoiding extension cords, and keeping the unit clear of obstructions. Monitor for unusual noises, overheating, or repeated breaker trips and inspect cords and drains regularly.

How can I quickly estimate my dehumidifier running cost without special tools?

Use the simple formula: convert watts to kilowatts (watts ÷ 1000), multiply by estimated compressor runtime hours per day to get daily kWh, then multiply by your price per kWh. Multiply daily cost by 30 for a rough monthly estimate.

Will a higher-wattage dehumidifier always cost more to operate?

Not necessarily: higher-wattage units often remove moisture faster and may cycle off sooner, so total energy use depends on runtime as well as wattage. Proper sizing for the space and humidity load is more important than wattage alone.

Can simple maintenance tasks really reduce electricity use, and which tasks matter most?

Yes. Cleaning or replacing filters, keeping coils and grilles free of dust, and ensuring proper drainage all improve airflow and heat transfer so the compressor runs less often. Regular checks of hose connections and the humidistat also help maintain efficient operation.

Basement Dehumidifier Guide: Humidity Targets, Drainage, and Energy Use

Isometric illustration of dehumidifier in a clean basement corner

A basement dehumidifier works best when you set realistic humidity targets, choose reliable drainage, and run it efficiently for your specific space. Instead of chasing a perfect number, aim to keep your basement dry enough to avoid musty odors, condensation, and visible damp spots while controlling energy use.

This guide walks through what humidity level to aim for in finished and unfinished basements, how to size and position a dehumidifier, and the pros and cons of bucket, gravity, and pump drainage. You will also see real-world examples, common mistakes, safety basics, and a practical specs checklist to use when buying or adjusting a unit.

Whether you are dealing with a slightly damp storage basement or a very humid lower level you want to finish, the same principles apply: measure, adjust, and observe over time. With a simple plan, most basements can reach a steady, comfortable state that supports better indoor air quality in the rest of the home.

Why Basement Humidity Control Matters

Basements are naturally prone to higher humidity because they sit below grade, have more contact with soil, and often have limited sunlight and ventilation. Cool surfaces and moist air are a perfect combination for condensation, musty smells, and long-term moisture problems.

For most homes, keeping basement relative humidity roughly in the 40%–55% range during the warmer months is enough to limit mold-friendly conditions and make the air feel less clammy. In an unfinished or rarely used basement, a slightly wider range may still be acceptable as long as surfaces are not staying visibly damp.

Effective basement dehumidification matters because it can:

  • Protect building materials: Drywall, flooring, and wood framing are less likely to swell, warp, or support mold growth when humidity is controlled.
  • Protect stored items: Cardboard boxes, fabrics, and paperwork are especially vulnerable to dampness and musty odors.
  • Improve comfort upstairs: Moisture can migrate upward, making the whole house feel muggy and increasing cooling loads.
  • Support other systems: Air purifiers and HVAC filters work more predictably when humidity is in a moderate range.

Think of a basement dehumidifier as one part of a moisture-control strategy that also includes drainage, grading, and air sealing. The dehumidifier handles airborne moisture; the rest of the house should handle bulk water and obvious leaks.

Key Concepts: Targets, Sizing, and Drainage Basics

Before you buy or adjust a basement dehumidifier, it helps to understand three core ideas: what humidity level to target, how much capacity you need, and how you will drain the collected water.

Humidity Targets and How to Measure Them

Most people find basements comfortable and low-risk when humidity is kept in a moderate band rather than at an exact number. A practical approach is:

  • Finished basements: Aim for roughly 40%–50% relative humidity during humid seasons.
  • Partially finished basements: Aim for roughly 40%–55%, watching for condensation on windows, metal, and cold walls.
  • Unfinished storage basements: Focus on avoiding visible dampness, standing water, and strong musty odors, even if readings occasionally drift into the upper 50s.

Use a simple digital hygrometer placed away from the dehumidifier’s direct airflow. Check readings at different times of day for a week to learn your typical range and how quickly humidity rebounds when the unit is off.

Sizing a Basement Dehumidifier

Dehumidifier capacity is usually described as pints of water removed per day under standardized test conditions. In practice, you size by combining floor area, ceiling height, and how damp the space feels.

Basement Dehumidifier Sizing Snapshot
Basement condition Approximate area served Relative dampness description Suggested capacity band
Small, finished rec room Up to about 500 sq ft Occasional stuffiness in humid weather Lower to mid-range capacity
Medium, partially finished basement About 500–1,000 sq ft Frequent musty odor, little or no visible water Mid-range capacity
Large, unfinished storage basement About 1,000–1,500 sq ft Noticeable dampness on walls or floor at times Mid to higher capacity
Very humid or partially flooded areas Any size Regular condensation, past water intrusion Higher capacity or multiple units

Example values for illustration.

If your basement has higher-than-average ceilings or many separate rooms, treat it as a larger space, or plan on using fans to move air between zones.

Drainage Options: Bucket, Gravity, and Pump

Every dehumidifier must send collected water somewhere. The three typical options are:

  • Bucket: The built-in reservoir that you empty by hand. Simple, but labor-intensive in very humid basements.
  • Gravity drain: A hose connects to the unit and runs downhill to a floor drain, utility sink, or sump basin.
  • Condensate pump: A small pump moves water uphill to a higher drain when gravity alone is not possible.

For continuous, low-effort operation in a damp basement, gravity drainage or a pump is usually more practical than relying on the bucket alone.

Energy Use in Simple Terms

Basement dehumidifiers can draw several hundred watts while running. A unit labeled around 600 watts that runs for 8 hours in a day uses about 4.8 kilowatt-hours of electricity. The key energy levers you control are:

  • How low you set the humidity target.
  • How many hours per day the unit actually runs.
  • How much extra moisture is entering from leaks, open windows, or unsealed gaps.

Moderate setpoints, good air sealing, and realistic expectations usually keep both humidity and energy use in check.

Real-World Basement Dehumidifier Setups and Examples

Every basement is different, but patterns repeat. These examples show how targets, drainage, and energy strategies change based on conditions.

Example 1: Finished Family Room Basement

A homeowner has a finished basement with carpet, a TV area, and a guest bedroom. In late spring, a musty smell appears after several rainy weeks.

  • Starting point: Hygrometer readings hover around 60%–65% relative humidity.
  • Action: Install a mid-range capacity dehumidifier near the center of the open area, set to 45%–50% RH.
  • Drainage: Gravity hose to a nearby floor drain, with the unit raised slightly on blocks to maintain slope.
  • Adjustment: After a week, readings stabilize around 48% and the musty odor fades. Runtime gradually decreases as surfaces dry out.

Example 2: Unfinished Storage Basement With Occasional Water

An older home has an unfinished basement used for storage. After heavy storms, a thin film of water appears near one wall, and cardboard boxes feel damp.

  • Starting point: Relative humidity often sits above 70% during wet periods.
  • Action: Address obvious water entry (clean gutters, extend downspouts, move boxes off the floor), then add a higher-capacity dehumidifier.
  • Drainage: Condensate pump discharging into a nearby utility sink because no floor drain is available.
  • Adjustment: Target set around 50%–55% RH to reduce moisture load without overworking the unit. A small fan helps move air into a back storage corner.

Example 3: Split Basement With Multiple Rooms

A split-level home has a partially finished basement with a main room, a separate laundry area, and a small workshop, each with doors.

  • Starting point: Humidity is moderate, but the laundry room smells musty and shows condensation on cold water pipes.
  • Action: Place a dehumidifier in the main room, run it to about 45%–50% RH, and keep doors between rooms open during operation.
  • Drainage: Bucket-only operation initially, emptied once per day during humid weeks.
  • Adjustment: A small fan in the laundry room improves air mixing. If humidity remains high in that room, a second smaller dehumidifier may be added just for laundry days.

Example 4: Cool Climate Basement in Winter

In a colder climate, winter air is dry, and the basement temperature drops near the lower end of the dehumidifier’s operating range.

  • Starting point: Hygrometer shows 35%–40% RH for weeks at a time.
  • Action: Dehumidifier use is paused for the winter because humidity is already low and the unit would be inefficient in the cooler air.
  • Drainage: Hoses are disconnected and drained; the unit is cleaned and stored upright until spring.
  • Adjustment: Humidity is checked periodically. If readings climb, short daily runs may be used rather than continuous operation.
Basement Dehumidifier Scenarios and Responses
Observed condition Likely cause Practical response What to monitor next
Musty odor but no visible water Persistent high humidity in air and materials Run dehumidifier to mid-40s RH, increase air circulation Odor intensity and RH readings over 1–2 weeks
Condensation on pipes and windows Cool surfaces meeting humid air Lower RH target a bit, insulate cold pipes if possible Morning condensation and hygrometer trends
Bucket fills multiple times per day High moisture load and frequent runtime Switch to gravity drain or pump; check for water intrusion Daily water collection and floor/wall dampness
Dehumidifier rarely turns on Already dry air or setpoint too high Verify hygrometer accuracy; adjust target if needed Humidity during humid weather or after storms
Unit feels hot and room warms up Normal heat output from dehumidifier compressor Ensure good airflow; consider lower-capacity or different placement Room temperature and comfort level over time

Example values for illustration.

Common Mistakes and Troubleshooting Cues

Many basement humidity problems persist not because the dehumidifier is weak, but because of setup mistakes or unrealistic expectations. Watching for these warning signs can save time and energy.

Common Setup Mistakes

  • Placing the unit in a corner: Tucking a dehumidifier tightly into a corner or closet restricts airflow and reduces its effective coverage. Leave space around intake and exhaust grilles.
  • Blocking air movement between rooms: Closed doors or heavy curtains can trap humidity in side rooms. Keep pathways open or use fans to move air.
  • Running with windows open in humid weather: The dehumidifier ends up drying a steady stream of outdoor air instead of stabilizing the basement.
  • Ignoring bulk water issues: Trying to fix active leaks or seepage with a dehumidifier alone often leads to constant runtime and limited results.
  • Using the bucket in very wet basements: Constantly full buckets can cause the unit to shut off and may tempt you to stop using it when you get tired of emptying it.

Drainage and Overflow Problems

Drainage issues tend to show up as small puddles, damp spots under the unit, or unexpected shutoffs.

  • Gravity hose not sloped: If the hose rises at any point, water can back up into the bucket or leak at the connection.
  • Pump not cycling: A condensate pump that is clogged or unplugged may overflow its reservoir.
  • Hose end submerged: If the hose discharges below standing water in a drain, backpressure can slow or stop flow.

Check hoses for kinks, ensure a steady downhill path for gravity drains, and periodically test pumps by adding water to confirm they switch on and discharge properly.

Signs Your Dehumidifier Is Undersized or Overworked

  • Humidity barely drops: If readings stay well above your setpoint even after many hours, the unit may be too small or the moisture load too high.
  • Unit runs nearly nonstop: Continuous operation during average humid days suggests undersizing or significant moisture entry.
  • Persistent condensation: Ongoing condensation on windows or pipes indicates that surface temperatures and humidity levels are still not aligned.

In these cases, consider increasing capacity, adding a second unit for separate rooms, or addressing structural moisture sources such as foundation cracks, poor exterior grading, or unvented combustion appliances.

Noise, Vibration, and Comfort Issues

Dehumidifiers produce fan and compressor noise. To reduce disturbance:

  • Place the unit away from bedrooms or quiet workspaces when possible.
  • Set it on a stable, level surface to minimize vibration.
  • Use a lower fan speed if your model allows, as long as humidity control remains adequate.

Safety Basics for Basement Dehumidifiers

Dehumidifiers are generally safe household appliances, but basements add extra considerations like damp floors, long run times, and limited supervision.

Electrical and Placement Safety

  • Use a grounded outlet: Plug the unit directly into a properly grounded wall outlet. Avoid extension cords unless they are rated for the load and length.
  • Keep cords off wet areas: Route power cords and hoses so they do not sit in puddles or create tripping hazards.
  • Stable, level surface: Position the dehumidifier on a flat, sturdy surface so it cannot tip over, especially if the bucket is heavy when full.
  • Avoid blocking vents: Keep combustible materials, fabrics, and cardboard away from intake and exhaust grilles.

Water Management and Leak Containment

  • Use trays or mats if needed: A shallow tray or waterproof mat under the unit can contain minor drips or spills.
  • Inspect connections: Check hose and pump connections periodically, especially after moving the unit or cleaning.
  • Test safety shutoffs: Many units turn off automatically when the bucket is full or if they tip. Confirm that the unit stops when you remove the bucket.

Operating Conditions and Air Quality

  • Respect temperature limits: Most residential dehumidifiers are designed for moderate temperatures. Very cold basements can cause coils to frost and reduce performance.
  • Allow ventilation for combustion appliances: If your basement has a furnace or water heater, make sure any air sealing or dehumidification does not interfere with required combustion air.
  • Monitor for unusual smells or sounds: Burning smells, rattling, or sudden changes in noise level warrant turning the unit off and investigating.

Maintenance and Long-Term Use

Routine care keeps a basement dehumidifier closer to its original performance and reduces the chance of breakdowns during peak humidity.

Regular Maintenance Tasks

  • Clean the air filter: Many units have a washable mesh filter. Rinse and dry it on a regular schedule, or more often in dusty basements.
  • Dust intake and exhaust grilles: Light dusting or vacuuming (following the manual) improves airflow and efficiency.
  • Check drainage paths: Inspect hoses for kinks, algae buildup, or sediment. Clear any clogs in pump reservoirs.
  • Inspect for frost or ice: In cool basements, coils may frost. Many units have automatic defrost cycles; if ice persists, check operating temperature and airflow.

Seasonal Adjustments and Storage

Humidity needs shift with the seasons, and your dehumidifier strategy should shift with them.

  • Spring and summer: Expect more frequent operation. Verify your humidity target and drainage setup before the most humid weeks arrive.
  • Fall: Watch for shoulder-season swings. You may be able to raise the setpoint slightly or reduce runtime as outdoor air dries.
  • Winter in cold climates: If humidity stays low, unplug, drain, and clean the unit. Store it upright to protect internal components.

Tracking Performance Over Time

A simple log helps you notice changes before they become problems.

  • Record weekly humidity readings, runtime patterns, and any musty odors.
  • Note any changes in noise, vibration, or heat output.
  • Track how often you need to empty the bucket or how much water a pump discharges.

If performance drops noticeably despite clean filters and clear drainage, the unit may be nearing the end of its useful life or operating outside its intended temperature range.

Putting It All Together and Specs to Look For

Effective basement dehumidification is about matching the appliance to the space and then letting it work with minimal fuss. Start by measuring humidity, choosing a realistic target, and confirming that bulk water issues are under control. Then select a capacity that fits your basement size and dampness level, and set up drainage that you can trust to run unattended.

Over the first few weeks, watch humidity trends, musty odors, and any condensation on cold surfaces. Small adjustments in placement, airflow, and setpoint usually bring the space into a stable, comfortable range without excessive energy use.

Practical Specs to Look For in a Basement Dehumidifier

When selecting or upgrading a basement dehumidifier, pay attention to these practical features and specifications:

  • Capacity rating (pints per day): Choose a band that matches your square footage and dampness level, with some margin for peak humidity periods.
  • Operating temperature range: Make sure the unit is rated for the typical temperatures in your basement, especially if it runs in spring and fall.
  • Built-in humidistat: Allows you to set a target humidity and lets the unit cycle automatically instead of running constantly.
  • Drainage options: Look for a threaded drain outlet for gravity hoses and compatibility with external condensate pumps if your drain is higher.
  • Auto-restart after power loss: Useful in areas with brief outages so the unit resumes its previous settings automatically.
  • Filter accessibility: A filter that is easy to remove, clean, and reinstall encourages regular maintenance.
  • Noise level and fan speeds: Multiple fan settings can help balance noise and performance, especially in finished living spaces.
  • Physical size and handle design: Consider weight, handles, and wheel design if you need to move the unit between rooms or up and down stairs.

By combining these specs with a clear understanding of your basement’s humidity patterns, you can choose and operate a dehumidifier that keeps the space dry, protects your home, and avoids unnecessary energy use over the long term.

Frequently asked questions

Which specifications and features should I prioritize when choosing a basement dehumidifier?

Prioritize capacity (pints per day) for your basement area and dampness level, the operating temperature range, and a built-in humidistat so the unit cycles to a target RH. Also look for reliable drainage options (threaded outlet or pump compatibility), easy-to-clean filters, and an auto-restart feature after power loss. Noise level and multiple fan speeds are helpful for finished living spaces.

How can poor placement or setup reduce a dehumidifier’s effectiveness?

Placing a unit in a tight corner or blocking intake/exhaust grilles restricts airflow and short-circuits circulation, reducing coverage and increasing runtime. Closed doors, heavy obstructions, or running the unit with humid outdoor air flowing in will also limit its ability to lower overall basement humidity.

What safety precautions should I follow when operating a dehumidifier in a basement?

Use a properly grounded outlet and avoid running cords through standing water; route hoses and power away from wet areas and tripping paths. Place the unit on a stable, level surface, keep vents clear of combustible materials, and ensure dehumidification doesn’t interfere with required combustion air for furnaces or water heaters.

When is a condensate pump necessary compared with a gravity drain or bucket?

Use a condensate pump when no nearby floor drain exists or when you must lift discharge to a higher sink or drain. A gravity drain is simpler and lower-maintenance when you can slope a hose downhill to a drain, while a bucket is acceptable only for small, infrequent moisture loads where daily emptying is practical.

How do I determine the right dehumidifier capacity for my basement?

Estimate based on floor area, ceiling height, and how damp the space is; sizing charts or the article’s capacity bands give a practical starting point. Treat higher ceilings, multiple rooms, or very wet conditions as larger spaces and consider a higher-capacity unit or multiple units for even coverage.

What routine maintenance keeps a basement dehumidifier performing well?

Clean or rinse the air filter regularly, dust intake/exhaust grilles, and inspect hoses and pump reservoirs for clogs or algae. Test condensate pumps periodically, watch for coil frost in cool basements, and perform seasonal cleaning and upright storage if you put the unit away in winter.

Desiccant vs Compressor Dehumidifiers: Best Choice for Cold Rooms and Basements

Isometric illustration of a home dehumidifier in a cold room

For most genuinely cold rooms, a desiccant dehumidifier is usually more reliable than a compressor dehumidifier, but the best choice depends on how cold the space actually gets. If your room stays closer to normal indoor temperatures, a compressor (refrigerant) dehumidifier can still be the better fit.

This guide walks through desiccant vs compressor dehumidifiers for cold basements, garages, crawl spaces, and three-season rooms. You will see how each type works, how temperature affects moisture removal, and what that means for mold prevention, condensation control, and comfort in real homes.

By the end, you should be able to match the right dehumidifier type to your specific space, avoid common mistakes that waste energy, and know which specs to check before you buy or move a unit into a cooler area.

Why Dehumidifier Type Matters in Cold Rooms

Cold rooms behave differently from the rest of your home. Concrete walls, uninsulated floors, and limited heating all make these areas feel damp and musty even when the rest of the house seems fine. Choosing between a desiccant and a compressor dehumidifier is not just a technical detail; it directly affects how much water you actually remove and how much you pay to run the unit.

In cool and cold spaces, three things change compared with a typical living room:

  • Air holds less moisture at lower temperatures, so the same relative humidity can still cause condensation and mold on cold surfaces.
  • Standard compressor dehumidifiers struggle as temperatures drop, often frosting, shutting off, or collecting far less water than their rated capacity.
  • Desiccant dehumidifiers are less sensitive to cold air, but they add more heat and may remove less water per hour in warmer conditions.

Understanding these differences helps you decide which technology is better for your cold basement, garage, or crawl space, and whether you need to adjust how and when you run an existing unit.

How Desiccant and Compressor Dehumidifiers Work

Both desiccant and compressor dehumidifiers remove moisture from the air, but the way they do it explains why they behave so differently in cold rooms.

Compressor (Refrigerant) Dehumidifiers

Compressor dehumidifiers use a refrigeration cycle similar to a small air conditioner.

  • A fan pulls humid room air across very cold metal coils (the evaporator).
  • Water vapor condenses on the cold surface and drips into a bucket or drain hose.
  • The now-drier air passes over warm coils (the condenser) and returns to the room slightly warmer.

In a warm room, this process is efficient: the air is warm enough to give up moisture easily, and the coils stay cold without freezing. In a cold room, the coils can drop to freezing temperature quickly, ice builds up, and the unit must pause to defrost. During defrost cycles, you are using electricity but not removing much (or any) water.

Desiccant Dehumidifiers

Desiccant dehumidifiers rely on moisture-absorbing materials instead of cold coils. For room-sized units, the most common design uses a rotating desiccant wheel and a small heater.

  • A fan moves humid air through the desiccant material, which captures water vapor.
  • A separate, warmed airstream passes through part of the wheel, drying it out.
  • The released moisture is condensed and collected or drained away, and the regenerated desiccant rotates back into the main airflow.

Because the system depends on absorption and gentle heating instead of pushing coils below freezing, performance stays more consistent in cool air, within the temperature range listed in the product specs.

Table 1. Desiccant vs compressor dehumidifiers in cold-room conditions – Example values for illustration.
Aspect Desiccant dehumidifier Compressor dehumidifier
Typical effective temperature range About 40–70 °F (check product rating) About 60–90 °F (some rated to ~41–45 °F)
Performance at 45–55 °F Generally stable moisture removal Often reduced; may cycle into defrost
Heat added to the room Noticeable warming; can feel like a small space heater Mild warming; usually less noticeable
Typical use in homes Cold basements, unheated rooms, garages above freezing Main living areas, warm basements, summer humidity control
Noise character Fan noise; generally steady, low vibration Fan plus compressor hum; may cycle on and off
Water removal per day (same size class) Often lower in warm rooms, but more consistent in cool rooms High in warm, humid rooms; can drop sharply in cold rooms
Best match for very cool but occupied spaces Often preferred Only if the room stays within rated temperature

Real-World Cold Room Scenarios and What Works Best

To decide between desiccant vs compressor dehumidifiers, start with how cold your space actually gets and how you use it. The same house might need different approaches in different areas.

Cool but Not Frigid Basements (Around 55–65 °F)

Example: A partly finished basement with storage, a laundry corner, and a TV area. It feels cool year-round, and in summer the air smells a bit musty.

  • If the temperature usually stays above the compressor unit’s minimum rating, a compressor dehumidifier can work well and often removes more water per hour.
  • If the basement frequently dips into the low 50s or high 40s, a desiccant unit may maintain more consistent humidity without constant defrosting.

Practical cue: If you already use a compressor model and notice long run times with very little water in the bucket during cooler months, it may be operating near its limit.

Unheated Garages and Workshops

Example: A garage where you store tools, seasonal items, or a hobby workbench. It may be 40–50 °F in spring and fall, and near freezing in winter.

  • In shoulder seasons when the garage is cool but above freezing, a desiccant dehumidifier rated for low temperatures is often the more dependable option.
  • Standard compressor dehumidifiers are usually not designed for prolonged use near freezing and can ice up or shut down.

Practical cue: If condensation forms on metal tools or car parts, you need better humidity control or more ventilation. A low-temperature-rated dehumidifier can help, but only if the space stays within its operating range.

Crawl Spaces and Underfloor Areas

Example: A low crawl space with bare soil or a thin plastic vapor barrier. It smells earthy, and floor joists show signs of surface mold.

  • Crawl spaces often track outdoor temperature and can be quite cool, especially at night.
  • Specialty low-temperature compressor units or desiccant systems are commonly used, but they are most effective when combined with ground vapor barriers and drainage improvements.

Practical cue: If you see standing water or obvious leaks, address those first. No dehumidifier type can overcome liquid water problems or poor drainage.

Three-Season Rooms and Enclosed Porches

Example: A sunroom that is comfortable on sunny days but drops to 45–55 °F at night in spring and fall. Windows fog on cool mornings.

  • When the room is warmed by the sun and stays above about 60 °F, a compressor dehumidifier can be efficient.
  • On consistently cool, damp days, a desiccant unit can reduce condensation on windows and furniture more reliably.

Practical cue: If you only notice issues during a few damp weeks each year, a portable unit that can be moved between warm and cool spaces may make more sense than a permanently placed dehumidifier.

Table 2. Example cold-room situations and likely better dehumidifier type – Example values for illustration.
Cold-room scenario Typical temperature range Often better choice Key reason
Partly finished basement used year-round 55–65 °F Either; desiccant if often below ~60 °F Balance between steady performance and energy use
Unheated garage with stored tools 40–55 °F (above freezing) Desiccant (if rated for low temps) More reliable drying in cool air
Crawl space under main living area Close to outdoor temperature Low-temp-rated unit (often desiccant or specialty compressor) Must handle cooler, variable conditions
Three-season room with cool nights 45–70 °F Compressor when warm; desiccant when consistently cool Switch type or move unit seasonally
Storage-only basement with little heat 50–60 °F Desiccant Stable performance and slight warming benefit

Common Mistakes and Troubleshooting in Cold Rooms

Many people assume a dehumidifier will work the same in every room. In cold areas, a few specific mistakes cause poor performance, icing, or wasted energy.

Mistake 1: Ignoring Minimum Operating Temperature

Every dehumidifier lists an operating temperature range. Running a compressor unit below its minimum can cause:

  • Ice on the coils and frequent defrost cycles.
  • Loud clicking or short cycling as the unit repeatedly shuts off.
  • Very little water in the bucket despite long run times.

Fix: Check the temperature of the room with a simple thermometer. If it is below the unit’s rating, move the dehumidifier to a warmer space or switch to a low-temperature-capable or desiccant model.

Mistake 2: Expecting a Small Unit to Dry a Large, Cold Space

Cold rooms often have more exposed concrete and outside walls, so humidity loads can be higher than you expect. A small dehumidifier in a large basement or garage may run constantly and never catch up.

  • Signs include constant operation, little change in humidity, and persistent musty odors.
  • This can happen with both desiccant and compressor models.

Fix: Estimate the square footage and typical humidity level, then choose a capacity that matches the size and dampness of the space, not just the size label on the box.

Mistake 3: Poor Placement and Blocked Airflow

In cold rooms, people often push dehumidifiers against exterior walls or into tight corners to keep them “out of the way.” This can choke off airflow and reduce performance.

  • Signs include warm air blowing but little water collected, or the unit feeling hot to the touch.
  • Dust buildup on intake grilles and filters is another clue.

Fix: Leave space around the unit on all sides, keep filters clean, and avoid placing the exhaust directly against cold surfaces where condensation can re-form.

Mistake 4: Using a Dehumidifier to Solve Liquid Water Problems

Dehumidifiers control airborne moisture, not leaks. In cold rooms, water can enter through foundation cracks, unsealed slab joints, or clogged exterior drains.

  • If you see puddles, flowing water, or obvious seepage, address drainage and sealing first.
  • Running any dehumidifier in the presence of ongoing leaks will waste energy and may shorten the unit’s life.

Troubleshooting Checklist for Cold-Room Dehumidifiers

  • Unit runs but collects little water: Check room temperature, humidity level, and filter cleanliness. Confirm the unit is sized correctly and within its rated temperature range.
  • Ice on coils (compressor type): Room may be too cold, airflow may be blocked, or the unit may be in a long defrost cycle.
  • Room still smells musty: Inspect for hidden moisture sources (leaks, damp materials), improve air circulation, and check actual humidity with a hygrometer.
  • Room feels too warm (desiccant type): Reduce fan speed if available, increase ventilation slightly, or run the unit on a timer instead of continuously.

Safety Basics for Using Dehumidifiers in Cold Rooms

Dehumidifiers are generally safe when used as directed, but cold rooms add a few extra considerations related to condensation, freezing, and electrical safety.

Electrical and Moisture Safety

  • Place the dehumidifier on a stable, level surface above any areas that might collect water.
  • Keep cords and plugs away from damp floors, floor drains, and areas where condensation drips.
  • Do not run extension cords through standing water or across wet concrete.
  • In garages or utility spaces, route hoses and cords where vehicles, tools, or storage bins will not crush them.

Temperature and Freezing Concerns

  • Do not operate any dehumidifier below its specified minimum temperature, especially if the space may drop below freezing.
  • Water left in internal reservoirs or hoses can freeze, expand, and damage components.
  • If your cold room regularly freezes, plan to shut down and properly drain the unit during the coldest months.

Heat Build-Up and Ventilation

  • Desiccant units can noticeably warm small, enclosed rooms. Ensure there is enough ventilation to avoid stuffy conditions.
  • Do not cover the unit or block vents to “trap” more heat; this can cause overheating or safety shutoffs.
  • In tiny rooms, consider running the unit on a lower setting or using a timer to avoid unnecessary heat build-up.

Safe Drainage Practices

  • When using a continuous drain hose, maintain a downward slope with no kinks or loops that can trap water.
  • Secure the hose outlet so it cannot slip out of a drain and leak onto the floor unnoticed.
  • Periodically check the hose for clogs, especially in dusty crawl spaces or garages.

Maintenance and Seasonal Storage for Cold-Room Dehumidifiers

Proper maintenance helps any dehumidifier last longer and perform better, but it is especially important in cool, dusty, or seldom-visited spaces.

Routine Maintenance Tasks

  • Filters: Clean or replace air filters on the schedule recommended in the manual. Dusty basements and crawl spaces may need more frequent attention.
  • Coils and grilles (compressor type): Gently vacuum or wipe accessible surfaces to keep airflow unobstructed.
  • Water bucket and drain lines: Rinse buckets periodically and flush hoses to prevent slime or mineral buildup.
  • Hygrometer checks: Compare the unit’s humidity reading (if it has one) to a separate hygrometer a few times per year.

Seasonal Use Patterns

In many climates, cold rooms are dampest in spring and fall when outdoor air is cool and moist and heating is off or minimal.

  • Use built-in humidistats or timers so the unit runs mainly when humidity is actually high.
  • In very cold, dry winter conditions, you may be able to reduce run time or turn the unit off entirely.
  • In summer, a compressor unit may be moved from a cold basement into a warmer living area where it is more efficient.

Storing a Dehumidifier in a Cold Space

  • Before storage, empty the bucket, drain internal water according to the manual, and allow the unit to run in fan-only mode (if available) for a short time to dry out.
  • Store the unit upright to protect the compressor and internal components.
  • If the storage area can freeze, make sure no water remains in hoses or internal reservoirs.
  • Cover the unit loosely to keep dust off, but do not wrap it tightly in plastic where trapped moisture could encourage corrosion.

Practical Takeaways and Specs to Look For

Choosing between desiccant vs compressor dehumidifiers for cold rooms comes down to matching the technology to your temperature range, room size, and how you use the space.

  • For consistently cool rooms (roughly 40–60 °F), desiccant dehumidifiers typically provide more stable performance and add a bit of welcome warmth.
  • For rooms that are only occasionally cool and mostly stay above about 60 °F, compressor dehumidifiers are often more energy-efficient for heavy moisture loads.
  • If you already own a compressor unit, monitor how it behaves as temperatures drop before deciding whether you need a different type.

Specs to Look For When Choosing a Dehumidifier for Cold Rooms

Before purchasing or moving a dehumidifier into a cold space, review these key specifications and features:

  • Operating temperature range: Confirm that the minimum temperature is at or below the coldest conditions you expect in the room.
  • Moisture removal capacity: Check daily pint or liter ratings and match them to your room size and dampness level, not just the label on the box.
  • Type of technology: Decide whether desiccant or compressor is better suited to your typical temperature and usage pattern.
  • Humidistat and controls: Look for adjustable humidity settings, multiple fan speeds, and timer options to avoid over-drying and reduce energy use.
  • Drainage options: Continuous drain ports, built-in pumps, or gravity-drain compatibility are especially useful in basements, crawl spaces, and garages.
  • Noise level: If the cold room is also a living or work space, check published sound levels or user descriptions of noise.
  • Power draw: Note the wattage and consider how many hours per day the unit will likely run in your climate.
  • Dimensions and weight: Make sure the unit fits through access doors, around obstacles, and into tight spaces if used in crawl spaces or small rooms.
  • Air filter type and access: Easy-to-remove filters encourage regular cleaning, which is important in dusty cold areas.

When you combine the right dehumidifier type with appropriate sizing, safe installation, and basic maintenance, even difficult cold rooms can stay drier, less musty, and more protective of your home’s structure and stored belongings.

Frequently asked questions

Which technical specs should I prioritize for a dehumidifier used in cool areas?

Prioritize the unit’s minimum operating temperature and moisture removal capacity (pints or liters per day) for your room size. Also check drainage options, humidistat controls, power draw and noise, and ease of filter access; a low-temperature rating or clear defrost behavior is especially important for cool areas.

Can a dehumidifier fix water leaks or standing water in a basement?

No. Dehumidifiers remove airborne moisture rather than bulk liquid, so you should repair leaks, improve drainage, and seal entry points first. Running a dehumidifier while liquid water is present wastes energy and may not resolve mold or structural damage.

Is it safe to use a dehumidifier in a cold, damp room like an unheated garage?

Yes if the unit is rated for the room’s temperatures and you follow basic precautions: place it on a stable surface above puddles, avoid using extension cords, route drain hoses safely, and prevent stored water from freezing. If the space can freeze regularly, drain and store the unit during the coldest periods to avoid damage.

How can I tell if a compressor dehumidifier is icing or struggling in a cold room?

Signs include visible ice on coils, long run times with very little water collected, frequent defrost cycles, or the unit repeatedly shutting off. Check the room temperature against the unit’s minimum rating, ensure airflow isn’t blocked, and clean filters to confirm whether the environment or the unit is the issue.

Will a desiccant dehumidifier make a small room noticeably warmer?

Yes. Desiccant units use a heated regeneration process and can raise the temperature in small, enclosed rooms, which can be beneficial in cool spaces. If the added heat is unwelcome, run the unit on a lower setting, use timers, or increase ventilation.

What is a common placement mistake that reduces dehumidifier performance?

Putting the unit against a wall or in a tight corner so the intake or exhaust is blocked is a frequent error; clogged filters and restricted airflow also reduce efficiency. Leave clearance around the unit and maintain clean filters for best performance.