HEPA, CADR, and Air Purifier Certifications: A Practical Buyer’s Cheat Sheet

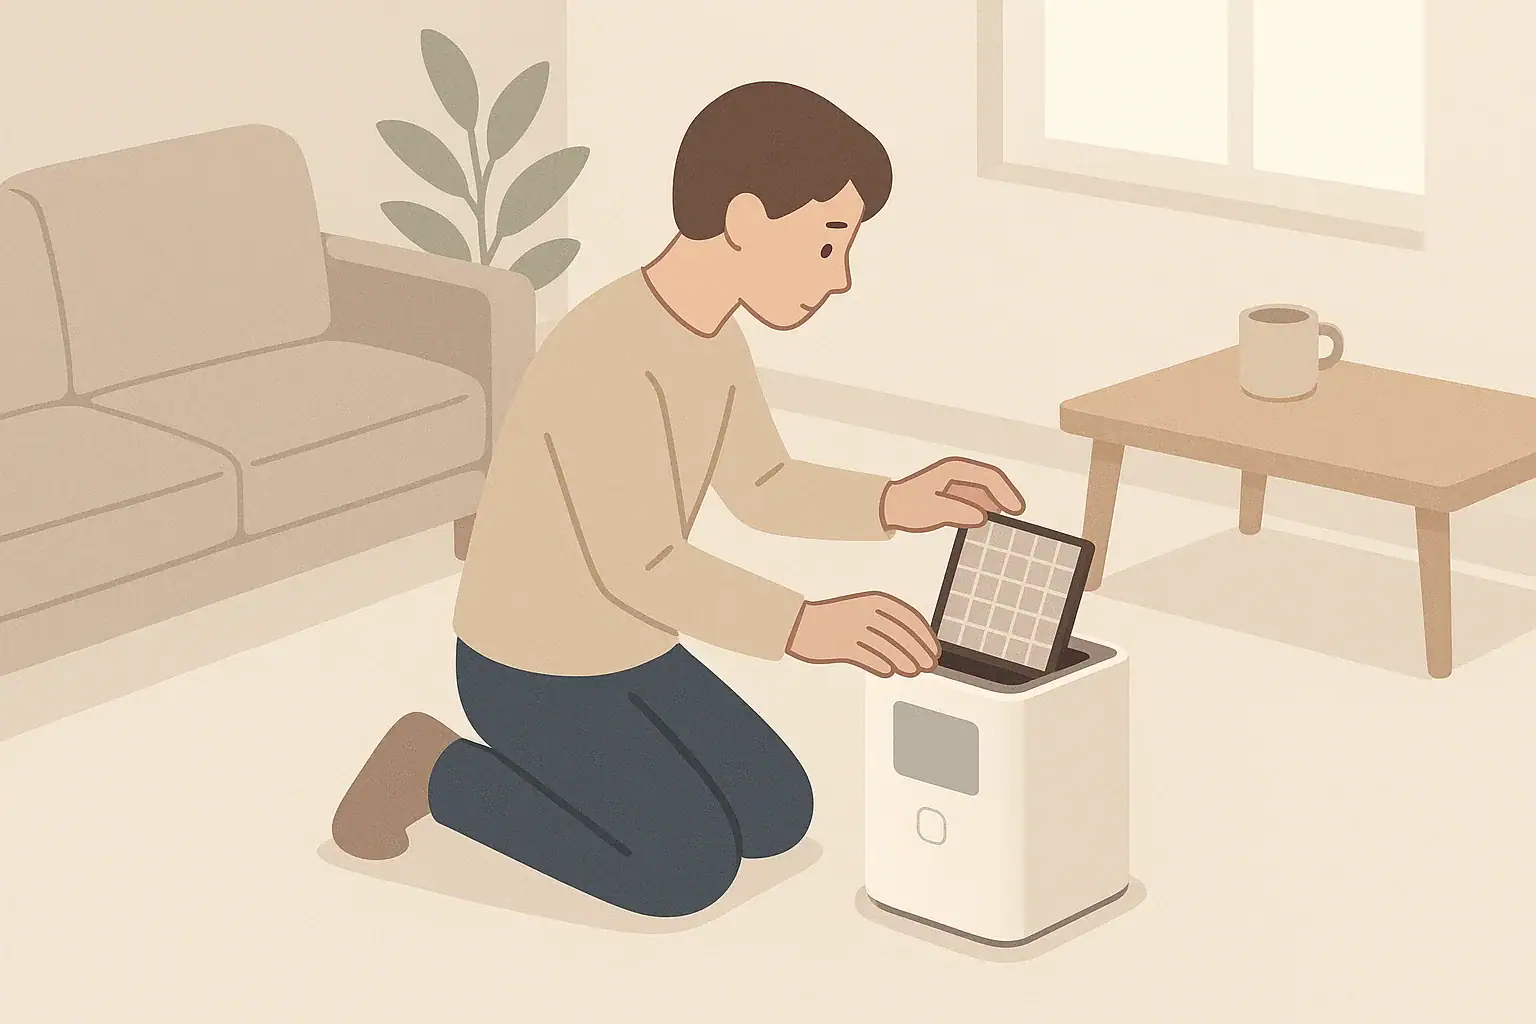
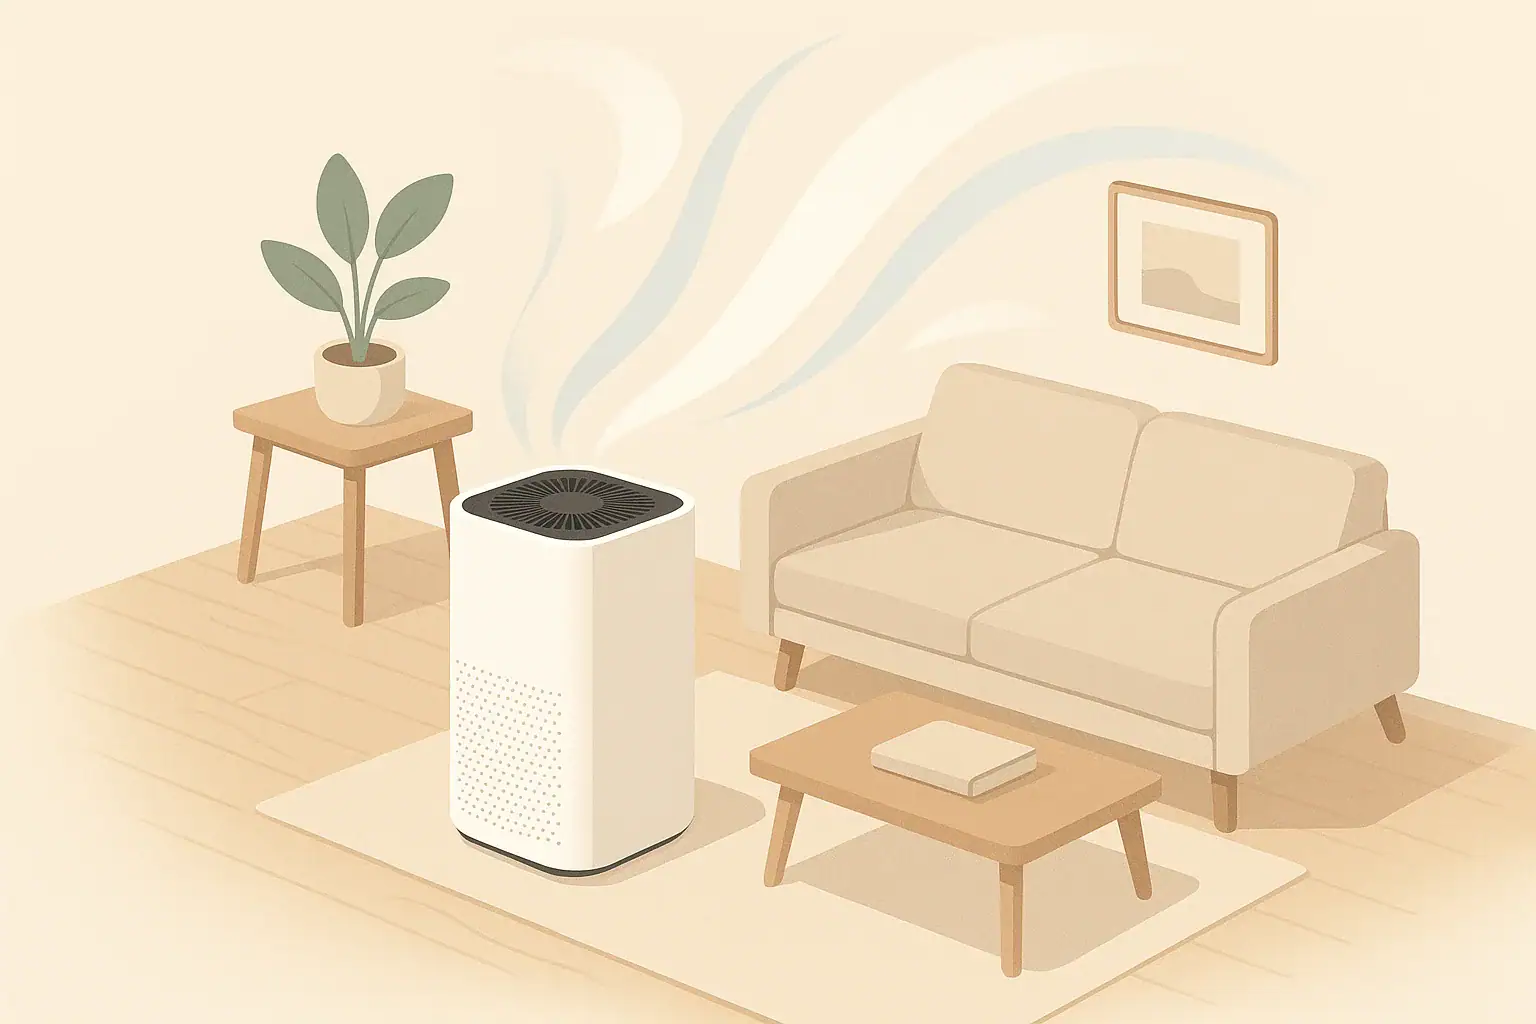
Isometric illustration of a home air purifier in a clean living room

HEPA, CADR, and air purifier certifications matter because they tell you how well a purifier removes particles, how fast it cleans a room, and how safely it operates. When you understand these labels, you can quickly see whether a purifier is powerful enough for your room, if it actually uses high-efficiency HEPA filtration, and whether it keeps ozone and other byproducts low. This turns confusing marketing claims into practical numbers you can compare.

This guide breaks down HEPA ratings, CADR scores, and common certification badges in plain language. You will see how to translate lab-style terms into real-world decisions for bedrooms, living rooms, and home offices. Along the way, you will find simple room-sizing examples, typical noise and energy tradeoffs, and warning signs to avoid. Use it as a cheat sheet whenever you evaluate air cleaners, from basic dust control to more demanding smoke or allergy situations.

What HEPA, CADR, and Certifications Really Mean

At a high level, three ideas drive how an air purifier performs:

  • HEPA filtration describes how efficiently the filter captures tiny particles like dust, pollen, and smoke.
  • CADR (Clean Air Delivery Rate) describes how quickly the purifier can reduce those particles in a room.
  • Certifications and labels describe how safely and consistently the purifier operates in everyday use.

HEPA and CADR work together. A very efficient HEPA filter with weak airflow may clean slowly. Strong airflow with a poor filter may push a lot of air but leave fine particles behind. CADR bundles both pieces into one number so you can compare models more fairly.

Certifications add another layer. They can indicate limits on ozone emissions, suitability for people with allergies or asthma, and expected energy use. While not every label is essential for every home, understanding the major ones helps you avoid overpaying for decorative badges that do not match your needs.

Key Concepts: HEPA Classes, CADR, and ACH

Most of the confusing language on air purifier boxes comes back to a few core concepts.

HEPA vs HEPA-Type Filters

HEPA stands for High Efficiency Particulate Air. In technical standards, a HEPA filter is designed to capture nearly all particles around the most penetrating particle size (often near 0.1–0.3 micron) in a single pass under lab conditions.

  • HEPA / “True HEPA” usually signals a high-efficiency filter tested at very small particle sizes.
  • HEPA-type / HEPA-like / 99% filter usually means the media looks similar but may only be tested on larger particles or to a looser standard.

If the packaging only says “HEPA-type” and does not list a tested efficiency at a specific particle size, treat it as a mid-grade particle filter, not a full technical HEPA filter.

H10–H14 and Other HEPA Classes

In engineering standards, HEPA filters are divided into classes such as H10 through H14:

  • H10–H12: Medium to high efficiency for fine particles.
  • H13–H14: Very high efficiency, capturing an extremely high percentage of tiny particles in lab tests.

Consumer packaging may use terms like “H13-grade HEPA” to signal premium filtration. Without a referenced standard or test report, treat these as helpful hints rather than proof of a specific lab rating. Real-world performance also depends on how well the filter is sealed inside the purifier.

CADR: Clean Air Delivery Rate

CADR combines filter efficiency and airflow into one number, reported in cubic feet per minute (CFM). It is usually listed separately for:

  • Smoke (very small particles)
  • Dust
  • Pollen

Higher CADR means faster particle reduction in a standardized test room. When you are sizing a purifier for a room, the smoke CADR is often the most useful single number because it reflects performance on the smallest, hardest-to-capture particles.

ACH: Air Changes per Hour

ACH tells you how many times per hour the purifier can process the air volume of a room. It links CADR to your room size:

Approximate formula:
ACH ≈ (Smoke CADR × 60) ÷ (Room area in sq ft × Ceiling height in ft)

Higher ACH means faster cleanup of airborne particles. Many people aim for about 4–5 ACH in bedrooms and higher in spaces with more pollution sources, such as rooms affected by wildfire smoke.

Table 1. Example CADR and room size planning guide. Example values for illustration.
Room area (sq ft) Ceiling height (ft) Illustrative smoke CADR target (CFM) Approximate ACH range
120 (small bedroom) 8 80–100 4–6 ACH
200 (standard bedroom) 8 130–180 4–7 ACH
300 (large bedroom / office) 8–9 200–250 4–6 ACH
400 (living room) 8–9 260–320 4–5 ACH
600 (open-plan zone) 9 380–450 4–5 ACH

Example values for illustration.

Other Helpful Labels

Beyond HEPA and CADR, you may see:

  • Ozone-related labels indicating low or no ozone emissions.
  • Allergy or asthma-focused seals indicating tested particle removal and reasonable noise at useful settings.
  • Energy-focused labels indicating lower power draw at specific fan speeds.

These do not replace HEPA and CADR, but they add context for safety, comfort, and long-term operating cost.

Real-World Examples: Matching Ratings to Rooms and Needs

Turning technical numbers into everyday decisions is easier with a few concrete scenarios.

Example 1: Small Bedroom with Dust and Pollen

Room: 11 × 12 ft bedroom with 8 ft ceiling (about 130 sq ft). The main concerns are dust and seasonal pollen.

  • A smoke CADR around 90–120 CFM can usually provide roughly 4–6 ACH.
  • A standard HEPA filter (or clearly specified “True HEPA”) is typically sufficient.
  • Thin carbon is often enough if odors are mild; noise at low to medium speed matters more for sleep.

In this case, a mid-range CADR with genuine HEPA filtration and quiet operation at a middle speed may be more important than premium HEPA classes or very thick gas-phase filters.

Example 2: Living Room During Wildfire Smoke

Room: 18 × 20 ft living room with 9 ft ceiling (about 360 sq ft). The concern is fine smoke particles during wildfire season.

  • A smoke CADR in the 250–320 CFM range can help reach 4–5 ACH.
  • High-efficiency HEPA (or marketing claims similar to H13) can be useful for very fine smoke particles.
  • Thicker carbon or gas-phase media can help with smoke odor, not just particles.
  • Noise at higher fan speeds becomes a tradeoff; you may run it on high during the day and medium in the evening.

Here, CADR and real airflow are critical. A small bedroom-sized purifier, even with good HEPA, will struggle to keep up in a large room filled with smoke.

Example 3: Home Office with VOC and Odor Concerns

Room: 10 × 14 ft office with 8 ft ceiling (about 140 sq ft). The concerns are printer emissions, light chemical odors, and some dust.

  • A smoke CADR of roughly 90–120 CFM is usually adequate for particles.
  • HEPA handles particles from dust and some printer aerosols.
  • Look for meaningful carbon or specialized gas-phase media (not just a very thin deodorizing sheet) for VOCs and odors.
  • Energy use matters if the unit runs all day; check wattage at the speed you plan to use.

In this scenario, gas and odor control is nearly as important as particle control, so the design and mass of the gas-phase filter stage are key.

Example 4: Nursery or Sensitive Sleeper

Room: 10 × 10 ft nursery with 8 ft ceiling (100 sq ft). The concern is general air quality for a baby or someone with asthma.

  • A smoke CADR of 70–100 CFM can provide multiple ACH in this small space.
  • Look for mechanical filtration with HEPA and low ozone emissions.
  • Noise at the speed that delivers enough CADR is critical; extremely quiet “sleep modes” may not provide much cleaning.
  • Clear filter replacement guidance helps maintain consistent performance over time.

Here, safety, noise, and consistent HEPA performance are more important than maximum CADR or premium HEPA classes meant for very large rooms.

Common Mistakes When Reading HEPA, CADR, and Certifications

Many buyers focus on one impressive-sounding claim and overlook the rest of the system. Watching for a few patterns can prevent disappointment.

Misreading HEPA and Filter Claims

  • Assuming all “HEPA” labels are equal: Some filters are marketed as HEPA-type without listing a tested efficiency or particle size.
  • Ignoring filter seals: Even a good HEPA media can underperform if air leaks around the edges of the filter.
  • Expecting HEPA to remove odors: HEPA targets particles, not gases; odor reduction depends on carbon or other gas-phase media.

Misusing CADR and Room Size

  • Using the largest advertised room size as a guarantee of performance, without checking ACH or ceiling height.
  • Comparing CADR at different fan speeds: Some materials highlight CADR at maximum speed, while noise claims focus on a much lower speed.
  • Ignoring open doors and adjacent spaces: CADR tests assume a defined test room; open layouts dilute effectiveness.

Overvaluing or Misunderstanding Certifications

  • Assuming any seal guarantees symptom relief: Allergy or asthma-related labels indicate helpful features, not medical outcomes.
  • Treating ozone-related badges as optional when sensitive people or children are in the home.
  • Focusing on energy labels only and overlooking whether the purifier can deliver enough CADR at a comfortable noise level.
Table 2. Common buying mistakes and what to check instead. Example values for illustration.
Common mistake What it looks like Better check
Trusting “HEPA-type” as full HEPA Packaging says “HEPA-style” with no efficiency listed Look for stated efficiency at a particle size, or “True HEPA” with clear specs
Using max room size on box Box claims coverage for 400 sq ft, but fine print assumes low ACH Calculate ACH using smoke CADR, your room area, and ceiling height
Expecting odor removal from HEPA alone Good dust control but lingering cooking or smoke smells Check for meaningful carbon or gas-phase media and replacement schedule
Ignoring noise at useful CADR Quiet on “sleep” mode but not enough cleaning Compare dB ratings at the fan speed that delivers your target CADR
Running with clogged filters Airflow drops over time, but unit still powers on Follow filter change intervals and watch for reduced airflow or rising noise

Example values for illustration.

Troubleshooting Cues in Daily Use

Once a purifier is running, a few signs can hint that ratings are not being achieved in your space:

  • Persistent haze or dust near light beams even after hours of operation may indicate undersized CADR or heavy pollution sources.
  • Strong odors that return quickly can suggest saturated or minimal carbon media.
  • Noticeably weaker airflow than when the unit was new often points to clogged filters or blocked intake grills.

In these cases, compare your room size to the purifier’s smoke CADR, check filter age, and verify that air inlets and outlets are not obstructed by walls, curtains, or furniture.

Safety Basics: Ozone, Byproducts, and Sensitivities

Most portable air purifiers rely on mechanical filtration (HEPA plus carbon) and are generally considered low-risk when used as directed. Still, some technologies and setups can introduce avoidable concerns.

Ozone and Reactive Byproducts

  • Ozone-generating devices intentionally produce ozone as a cleaning method and are not recommended for occupied spaces.
  • Some ionizers and electronic technologies may generate small amounts of ozone as a byproduct, even when not marketed as ozone generators.
  • Mechanical-only purifiers that rely on fans, HEPA, and carbon typically have negligible ozone emissions.

If anyone in the home has asthma, COPD, or other respiratory conditions, choosing units that emphasize mechanical filtration and low emissions is especially important.

Filter Materials and Dust Handling

  • Used filters hold captured particles; handle them gently and avoid shaking them indoors.
  • Pre-filters that can be rinsed or vacuumed should be cleaned outdoors or in a well-ventilated area to prevent re-releasing dust.
  • Replacement filters should be genuine or well-matched to the model to maintain proper seals and performance.

Electrical and Placement Safety

  • Place purifiers on stable, flat surfaces with clear space around the air inlets and outlets.
  • Avoid blocking vents with curtains, furniture, or bedding, which can restrict airflow and overwork the fan.
  • Follow rated voltage and do not use damaged cords or extension setups that exceed their capacity.

Safe operation supports the long-term performance implied by HEPA, CADR, and certification claims.

Long-Term Use: Filters, Performance, and Storage

HEPA and CADR numbers are typically measured with clean filters and ideal airflow. Over time, dust loading, saturated carbon, and mechanical wear can reduce real-world performance if you do not maintain the system.

Filter Replacement and Performance Drift

  • HEPA filters gradually clog with dust and fine particles. Airflow drops, which can reduce CADR even if particle efficiency remains high.
  • Carbon and gas-phase filters lose capacity as they adsorb gases; odor control fades even if airflow feels normal.
  • Pre-filters help extend HEPA life by capturing hair, lint, and large dust before they reach the main filter.

Most manufacturers give a recommended replacement interval based on average use. Heavy smoke, pets, or high dust levels may require more frequent changes than the default schedule.

Cleaning and Handling Tips

  • Vacuum or rinse pre-filters if the manual allows it, but avoid washing HEPA filters unless they are explicitly designed for that.
  • Turn the purifier off and unplug it before opening the housing or removing filters.
  • Seal used filters in a bag before disposing of them to reduce dust release.

Storage Between Seasons

Some people use high-CADR purifiers mainly during wildfire season or peak allergy months. When storing a unit:

  • Remove heavily used carbon filters if they are saturated or past their recommended life.
  • Store HEPA filters in a dry area; avoid damp basements or garages that might encourage mold growth on dusty media.
  • Cover the purifier to keep dust out of the intake and outlet grills.

When you bring the purifier back into use, check the filters for visible discoloration, odors, or damage and replace as needed so CADR and HEPA performance are close to what the original ratings suggest.

Practical Takeaways and Specs to Look For

When you put everything together, HEPA, CADR, and certifications become a simple decision framework rather than a pile of technical jargon.

  • Think of HEPA as the quality of filtration for tiny particles.
  • Think of CADR as the speed of cleaning for a specific room size.
  • Think of certifications as guardrails for safety, efficiency, and user-friendliness.

Start with room size and pollution level, then choose a purifier that delivers enough smoke CADR for your target ACH, uses genuine high-efficiency particle filtration, and fits your noise and energy preferences at the speed you will actually run.

Specs to Look For Checklist

Use this checklist when comparing product pages or boxes:

  • Room size and ACH
    • Your room area (length × width) and ceiling height written down.
    • Target of roughly 4–5 ACH for general use, higher for smoke or high pollution.
    • Smoke CADR high enough to reach that ACH in your room.
  • Filter type and claims
    • Clear mention of HEPA or “True HEPA,” not only “HEPA-type.”
    • Any reference to HEPA classes (H10–H14) treated as a bonus, not the only proof.
    • Meaningful carbon or gas-phase media if odors or VOCs are a concern.
  • Safety and emissions
    • Mechanical filtration (fan + HEPA + carbon) as the primary cleaning method.
    • Statements about low ozone or compliance with emission limits, especially for sensitive households.
  • Noise and energy
    • Decibel (dB) ratings at the speed that provides your target CADR.
    • Power draw (watts) at typical operating speeds if you plan long daily runtimes.
  • Maintenance details
    • Estimated replacement intervals for HEPA and carbon filters.
    • Availability and cost of replacement filters.
    • Pre-filter presence and whether it is washable or vacuumable.
  • Design and fit for your space
    • Size and shape that fit where you will place it with clear airflow paths.
    • Simple access to filters so you are more likely to replace them on time.

With these points in mind, HEPA, CADR, and certifications stop being confusing buzzwords and become tools you can use to choose a purifier that fits your room, your air quality goals, and your long-term budget.

Frequently asked questions

Which specifications and features should I prioritize when choosing an air purifier for my home?

Prioritize the smoke CADR to ensure enough cleaning speed for fine particles and verify it can reach your target ACH for the room; choose a genuine HEPA filter or a specified H‑class for particle efficiency. If odors or VOCs matter, look for meaningful carbon or gas‑phase media, and check noise (dB) and power draw at the fan speed you will actually use.

How can I avoid overestimating a purifier’s coverage based on the box’s room-size claim?

Don’t rely solely on the largest advertised room size; instead calculate ACH using the smoke CADR, your room area, and ceiling height to see real performance. Also check the CADR at the speed you plan to run and consider open layouts that can dilute effectiveness.

Are ozone-producing or electronic air cleaners safe for people with respiratory conditions?

Ozone‑generating devices are not recommended for occupied spaces and can be harmful for people with asthma or COPD; some electronic cleaners and ionizers may emit small amounts of ozone as a byproduct. For sensitive households, prefer mechanical filtration (fan + HEPA + carbon) with clear low‑emission statements.

How often should I replace HEPA and carbon filters to keep the purifier performing as rated?

Replacement intervals depend on usage, pollution levels, and filter type; HEPA filters commonly last months to a year, while carbon filters often need replacement sooner in smoky or odor‑heavy conditions. Watch for decreased airflow, louder operation, or returning odors as signs that filters need changing.

How do I use CADR and ACH together to size a purifier for my room?

Use the formula ACH ≈ (Smoke CADR × 60) ÷ (Room area × ceiling height) to estimate air changes per hour and pick a unit whose smoke CADR reaches your target ACH (about 4–5 for general indoor use). CADR already reflects both airflow and filter efficiency, making it the practical number for sizing.

Can HEPA filters remove odors and volatile organic compounds (VOCs)?

HEPA filters capture particles but do not remove gases, most odors, or VOCs; effective control of these requires carbon or other gas‑phase media with sufficient mass and contact time. Beware thin “odor” sheets or light deodorizing layers, which are often inadequate for real-world VOC removal.
UL 2998 ‘Zero Ozone’ Explained: What the Label Really Guarantees

Isometric air purifier in a tidy room suggesting ozone free safety

UL 2998 “zero ozone” means an air-cleaning device has been tested and shown to emit only a very small amount of ozone under controlled conditions, not literally none. In other words, it is a low-ozone emission certification, not a promise that your indoor air will always contain zero ozone. This matters if you are comparing air purifiers, ionizers, UV systems, or other electronic air cleaners and want to avoid unnecessary ozone exposure.

Many people see terms like ozone free, no ozone, or zero ozone and assume all devices with those labels are equally safe. UL 2998 adds a layer of clarity by tying those claims to a defined test method and limit. Used correctly, it can help you choose safer equipment for asthma, allergy, or general indoor air quality concerns, while still paying attention to filtration performance, room size, and ventilation.

This guide breaks down what UL 2998 does and does not certify, how it is tested, where it helps in real homes, and how to combine it with other specs when you are shopping for air quality devices.

What UL 2998 ‘Zero Ozone’ Means and Why It Matters

UL 2998 is a voluntary product standard that verifies very low ozone emissions from air-cleaning devices. When a product is certified to UL 2998, it has been independently tested and shown to keep ozone output at or below a strict threshold. The label is often shortened to phrases like “zero ozone” or “verified ozone-free,” but in practice it means “ozone emissions are extremely low under the test method.”

This distinction is important because almost any electrical device can generate trace ozone, and some air cleaners intentionally or unintentionally create more. UL 2998 focuses specifically on devices where ozone is an unwanted byproduct, such as ionizers, electronic air cleaners, and UV-based systems, and confirms that design steps have been taken to limit that byproduct.

For a homeowner, the standard matters in three main ways:

  • It reduces the risk that your air cleaner will add meaningful ozone to the room.
  • It provides a third-party check on marketing phrases like “no ozone.”
  • It helps you compare electronic technologies that historically had higher ozone potential.

What it does not do is guarantee that your entire home will be ozone-free, or that the certified device is the most effective option for particle or gas removal. You still need to match the unit to your room size, filtration needs, and overall indoor air strategy.

Key Concepts: How UL 2998 Testing Works

To understand what UL 2998 actually certifies, it helps to look at how the testing is structured. The standard defines a method for measuring ozone emissions from a device in a controlled environment, not in a random living room.

Typical elements of the test include:

  • Controlled chamber: The device is placed in a test chamber with a known volume and a measured starting ozone level.
  • Defined operating mode: The unit is run at a specified setting, often at or near maximum output, for a set time period.
  • Continuous monitoring: Sensitive instruments measure ozone concentration in the chamber over time.
  • Emission limit: The measured ozone contribution from the device must stay at or below the UL 2998 limit to pass.

The result is an emission rating, not a prediction of the exact ozone level you will see in your bedroom or living room. Real-world concentrations depend on room volume, ceiling height, air exchange rate, outdoor ozone, and surfaces that react with ozone.

Because UL 2998 is emissions-focused, it does not measure how well a product removes particles, volatile organic compounds, or odors. Those performance factors are covered by other standards and specifications, such as clean air delivery rate, filter type, and airflow.

Table 1. How UL 2998 fits into common air-cleaning choices – Example values for illustration.
Device type Main air-cleaning method Typical ozone concern How UL 2998 helps your decision
Portable purifier with mechanical filters only HEPA-style and/or carbon filters plus a fan Usually very low; ozone mainly from electronics and motor UL 2998 can confirm that any electronic components keep emissions very low.
Purifier with ionizer or electrostatic plates Charged particles collected on plates or room surfaces Historically higher ozone risk from electrical discharge UL 2998 is especially useful to verify that the ionization design limits ozone.
UV-based air treatment (portable or in-duct) UV lamps targeting microbes in air streams or on coils Certain UV wavelengths can create ozone as a side effect UL 2998 helps confirm that lamp choice and housing keep ozone minimal.
Devices marketed for odor removal using ozone Deliberate ozone generation to react with odors Intentionally high ozone output, often unsuitable for occupied rooms These devices are not compatible with UL 2998 “zero ozone” style claims.
Whole-house systems with add-on electronic stages Central fan plus optional ion, UV, or electronic modules Additional stages can introduce ozone if not well controlled UL 2998 is relevant to the electronic modules, not the basic ductwork or fan.

Seen this way, UL 2998 is one piece of a larger decision tree. It tells you about the safety side of ozone emissions, while other specs tell you about cleaning performance and comfort.

Real-World Examples of Using UL 2998 at Home

In practice, UL 2998 becomes useful when you are comparing specific types of air-cleaning equipment or trying to solve particular indoor air problems without adding ozone risk.

Here are a few realistic scenarios:

  • Small bedroom with allergies: You want better dust and pollen control for sleep, but you are sensitive to smells and chemicals. A compact purifier that relies on mechanical filtration and carries a UL 2998-style low-ozone certification gives reassurance that the device itself is unlikely to add irritating ozone while it runs overnight.
  • Living room with an ionizing feature: You find a purifier with an optional ion mode marketed as boosting performance. If the model is evaluated to UL 2998, that is a signal that the ionization stage has been tested for low ozone emissions. You might still choose to run it with the ion function off most of the time, but the certification suggests the design has considered ozone safety.
  • In-duct UV coil treatment: You are addressing musty odors from a damp coil or drain pan. A UV system for the ductwork that meets a low-ozone standard helps ensure that the UV lamps and housing are selected to minimize ozone escaping into occupied rooms.
  • Home office during wildfire smoke season: You rely on a purifier for smoke particles and odor. UL 2998 certification does not tell you anything about smoke removal efficiency, but it does indicate that the purifier is unlikely to add ozone to an already stressed indoor environment when you run it on high for long periods.

These examples show a pattern: UL 2998 is most helpful when you already know what type of device you need and are comparing similar options. It can tip the balance toward designs that control ozone better, especially for sensitive households or for devices that will run many hours each day.

Table 2. Common situations and how to apply UL 2998 information – Example values for illustration.
Home situation Typical goal How to use UL 2998 info Extra checks to make
Asthma or COPD in the household Limit respiratory irritants, including ozone Favor devices with low-ozone certification, especially if they use ion or UV stages. Confirm adequate filtration for fine particles and avoid intentional ozone generators.
Basement with musty odor Reduce moldy smell without adding new pollutants If using UV or electronic cleaners, look for low-ozone verification. Address moisture source, dehumidify, and improve ventilation where possible.
Open-plan living area All-day filtration with minimal side effects Use low-ozone certified units if they will run on higher fan speeds for long hours. Match purifier capacity to room volume and check noise levels at usable speeds.
Occasional odor shocks (painting, strong cleaners) Short-term odor reduction Do not rely on ozone-generating odor devices; use low-ozone filtration instead. Increase ventilation during and after the activity and minimize harsh chemicals.
Home with multiple plug-in devices Avoid cumulative ozone from many small sources Choose low-ozone certified options where available. Periodically review how many devices are running and remove unnecessary ones.

Common Mistakes and Troubleshooting Cues

Even with a clear standard like UL 2998, it is easy to misinterpret labels or use devices in ways that undermine their benefits. Watching for a few common mistakes can help you troubleshoot problems and avoid unnecessary ozone exposure.

Assuming “zero ozone” means zero exposure

One frequent misunderstanding is treating the label as a guarantee that your indoor air will contain no ozone at all. In reality:

  • Outdoor ozone can enter through windows, doors, and leaks.
  • Other devices in the home may emit ozone, even if your main purifier is low-ozone.
  • Materials and surfaces can react with ozone, changing levels over time.

Troubleshooting cue: If you use a low-ozone device but still see elevated readings on a reliable monitor, look for other sources or high outdoor ozone rather than assuming the certified device is the only cause.

Focusing only on ozone and ignoring performance

Another common mistake is choosing a device solely because it has a UL 2998-style label, without checking whether it actually moves enough air or uses effective filters for your needs. A very safe but undersized or poorly filtered unit may not improve your air meaningfully.

Troubleshooting cue: If allergy or dust symptoms do not improve, review room size, airflow, and filter ratings. Low ozone emissions are helpful, but they do not replace basic sizing and filtration requirements.

Using ozone-generating devices in occupied spaces

Some products are marketed to remove odors or sanitize rooms by deliberately generating ozone. These devices are not the same as low-ozone air purifiers and are generally not intended for continuous use in occupied living areas.

Troubleshooting cue: If a device’s instructions mention using it only in unoccupied spaces or warn about strong ozone smells, it is likely not designed to meet a low-ozone standard. Consider whether it fits your goals for everyday indoor air quality.

Ignoring maintenance and operating mode

Filters loaded with dust, damaged UV shields, or modified housings can change how a device behaves over time. In some cases, improper maintenance could allow more ozone to escape than in the original test condition.

Troubleshooting cue: If you notice new sharp or metallic odors near a device, or if occupants report throat or eye irritation when it runs, turn it off, inspect for damage or overdue maintenance, and consult the manual. Do not assume that a past certification guarantees current performance under all conditions.

Ozone and Safety Basics with UL 2998 Devices

From a safety standpoint, UL 2998 is designed to reduce the risk that air-cleaning devices will add problematic amounts of ozone to the indoor environment. Still, it is only one layer in a broader safety picture.

Key safety considerations include:

  • Vulnerable occupants: Children, older adults, and people with asthma or other lung conditions may be more sensitive to ozone and other irritants. For these groups, choosing low-ozone devices and avoiding intentional ozone generators is especially important.
  • Duration of use: Devices that run continuously, such as bedroom or nursery purifiers, benefit most from low-ozone design because even small emissions can add up over long runtimes.
  • Room size and ventilation: In smaller, tightly sealed rooms, any emissions have less volume to disperse into. Good ventilation, where outdoor air quality allows, helps dilute indoor pollutants, including residual ozone.
  • Combined technologies: Some products layer ionization, UV, and filtration in one housing. UL 2998-style verification is particularly relevant here, as multiple electronic stages could otherwise increase ozone potential.

It is also helpful to remember that ozone is only one part of indoor air safety. Particles, moisture, carbon dioxide, and volatile organic compounds all play roles in comfort and health. A safe setup usually combines low-ozone equipment with effective filtration, moisture control, and reasonable ventilation practices.

If you use an air quality monitor that includes an ozone or oxidizing gas channel, interpret the readings carefully. Low-cost sensors can be influenced by other gases, but they can still provide useful trends. If readings rise when a particular device runs, or if occupants feel worse when it is on, that is a signal to re-evaluate how and where you are using the equipment.

Long-Term Use, Maintenance, and Storage Considerations

Maintaining the low-ozone performance of a device over time requires basic care and attention to its operating environment. Certification tests are performed on products in proper working order; real homes can be harsher.

For long-term use:

  • Follow filter schedules: Replace or clean filters as recommended. Severely clogged filters can change airflow patterns, which may affect how air moves around internal electronic components.
  • Inspect UV and electronic stages: If your device uses UV lamps, ion modules, or electronic plates, follow the manufacturer’s guidance for replacement and cleaning. Avoid touching lamps or plates with bare hands, which can damage surfaces.
  • Keep intakes and outlets clear: Do not block grills with furniture, curtains, or clutter. Restricted airflow can cause hot spots and may alter how air passes by any ozone-forming components.
  • Operate within rated conditions: Use the device in the temperature and humidity ranges specified in the manual. Extreme environments can shorten component life and potentially change behavior.

For storage and seasonal use:

  • Store units in a dry, clean area to avoid corrosion of electrical parts.
  • Cover or bag devices loosely to limit dust buildup on internal components.
  • When bringing a device out of storage, visually check for damage, rodent activity, or loose parts before plugging it in.

If you ever notice unusual sounds, smells, or visible arcing inside an electronic air cleaner, disconnect it and have it inspected or replaced. A device that is damaged or heavily modified is no longer operating under the conditions assumed by any certification test.

Practical Takeaways and Specs to Look For

UL 2998 “zero ozone” is most useful when you treat it as one piece of a complete indoor air quality plan. It tells you that a device’s ozone emissions are very low under defined test conditions, but it does not guarantee overall air cleanliness or comfort on its own.

When you are comparing air purifiers, UV systems, or other air-cleaning technologies, a practical approach is to:

  • Use UL 2998 or similar low-ozone verification to screen out higher-ozone designs, especially for ionizers and UV-based products.
  • Confirm that the device has enough airflow and appropriate filters for your main concerns (dust, smoke, odors, or a mix).
  • Fit the device into a broader strategy that includes ventilation, humidity control, and basic cleanliness.

To make shopping and comparison easier, you can use a simple checklist of specs and features to review before buying.

Specs to Look For When Choosing Low-Ozone Air-Cleaning Devices

  • Ozone-related information: Look for mention of low-ozone or “zero ozone” style certification and confirm that it refers to a defined test standard, not just marketing language.
  • Filtration type: Check whether the device uses mechanical filters (for particles), sorbent media (for odors and some gases), or active electronic stages. Favor designs where filtration does most of the cleaning work.
  • Room size rating: Make sure the stated coverage area or airflow matches the actual room where you will use it, taking ceiling height into account.
  • Noise levels: Review sound levels at the fan speeds you are likely to use for sleeping, working, or relaxing.
  • Filter replacement indicators: Built-in reminders can help you keep performance and safety closer to tested conditions over time.
  • Energy use: Consider power draw at typical operating speeds, especially if the device will run many hours per day.
  • Operating modes: Check whether optional modes (such as ion or “boost” settings) can be turned off if you prefer to rely on mechanical filtration alone.
  • Physical placement: Confirm that the design allows for placement away from walls, curtains, and seating areas so that air can circulate freely without blowing directly on occupants.

By combining this checklist with an understanding of what UL 2998 does and does not promise, you can select air-cleaning equipment that supports cleaner, lower-ozone indoor air while still meeting your everyday comfort and maintenance needs.

Frequently asked questions

Which specifications and features should I prioritize when choosing a low-ozone air-cleaning device?

Look for a stated UL 2998 or equivalent low-ozone verification, but also check airflow or CADR, filter type (HEPA for particles), and room-size rating. Noise, maintenance indicators, and the ability to disable optional electronic stages are also important to match the device to your use case.

What are common mistakes people make when interpreting low-ozone labels?

People often assume a low-ozone label guarantees no ozone exposure and ignore device sizing, filtration effectiveness, or other ozone sources in the home. Skipping maintenance or running undersized units are frequent errors that reduce real-world benefits.

Are UL 2998-certified devices safe for people with asthma or other respiratory conditions?

UL 2998 certification indicates very low ozone emissions, which is beneficial for sensitive occupants, but it does not ensure particle removal or odor control. For people with respiratory conditions, combine low-ozone devices with appropriate filtration, ventilation, and medical advice as needed.

Does UL 2998 testing say anything about how well a device removes particles, smoke, or odors?

No. UL 2998 is focused on ozone emissions only; performance for particles, smoke, and gases is measured by other metrics such as CADR, filter type, and sorbent media. Use those specs alongside UL 2998 when comparing devices.

How is UL 2998 testing conducted and what does the certification represent?

Testing is done in a controlled chamber with defined operating modes and continuous ozone monitoring; the device must stay below a specified emission limit. The certification represents an emission rating under test conditions, not an exact prediction of home concentrations.

Can a UL 2998-certified device still contribute to indoor ozone under some conditions?

Yes. Outdoor ozone infiltration, other emitting devices, changes from damaged or poorly maintained components, and different room ventilation can all affect indoor ozone. If occupants notice irritation or monitor shows rises, investigate additional sources and maintenance.

Do Air Purifiers Produce Ozone? What to Avoid and What to Use Instead

Isometric illustration of a modern air purifier in a tidy room

Some air purifiers do produce ozone, but many well-designed models do not and are considered ozone-free for home use. Whether an air cleaner emits ozone depends on the technology inside it, not on the fact that it is called an “air purifier.”

If you are sensitive to air quality, have asthma or allergies, or simply want healthier indoor air, it is important to understand which purification methods can create ozone and which ones rely on safer mechanical filtration. This helps you avoid devices that add a lung irritant while you are trying to solve dust, smoke, or odor problems.

This guide explains how ozone from air purifiers is created, which technologies to treat with caution, and how to pick an effective ozone-free purifier. You will see concrete examples, comparison tables, and a practical checklist of specs to look for so you can match a purifier to your room size, indoor air concerns, and comfort level.

What It Means When an Air Purifier Produces Ozone (and Why It Matters)

Ozone is a highly reactive gas made of three oxygen atoms (O3). Outdoors, it is a major part of smog. Indoors, even relatively low concentrations can irritate the lungs, throat, and eyes, especially during long exposure. People with asthma, COPD, or allergies are often more sensitive, but anyone can be affected.

When an air purifier produces ozone, it usually happens in one of two ways:

  • The device is intentionally designed as an ozone generator and marketed as an “air cleaner.”
  • The device uses high-voltage or reactive technologies (such as ionizers or some UV systems) that create ozone as a byproduct.

By contrast, a purifier that relies on mechanical filtration (a fan pulling air through particle and gas filters) does not need ozone to work. These ozone-free air purifiers are generally preferred for everyday home use because they physically remove particles and many odors without adding reactive gases.

Understanding this difference matters because it changes both safety and effectiveness. A unit that deliberately releases ozone can reduce some odors, but it does not reliably remove fine particles like smoke, and it can make indoor air more irritating. A filter-based purifier may look less “high-tech,” yet it often delivers more predictable results with fewer side effects.

Key Technologies: How Different Air Purifiers Can Create or Avoid Ozone

Most home air purifiers fall into two broad categories: mechanical filtration and electronic or reactive technologies. The second group is where ozone is more likely to appear.

Mechanical filtration (typically ozone-free)

  • Particle filters (HEPA or similar) capture dust, pollen, pet dander, and smoke particles by forcing air through a dense fiber mat.
  • Activated carbon or other sorbent filters adsorb many odors and some gases on a porous surface.
  • Pre-filters catch hair and larger dust so the main filters last longer.

These components are passive. They do not rely on high voltage or deliberate chemical reactions, so they are considered ozone-free when used without extra ionizing or UV features.

Electronic and reactive technologies (ozone possible or likely)

  • Ozone generators intentionally create ozone and release it into the room to “oxidize” odors or microorganisms.
  • Ionizers and electrostatic precipitators use high voltage to charge particles so they stick to plates or surfaces; ozone can form as a side effect.
  • UV-C and photocatalytic oxidation (PCO) use ultraviolet light, sometimes combined with a catalyst surface, to inactivate microbes or break down gases. Certain UV wavelengths and designs can generate ozone.
  • Plasma, bipolar ionization, hydroxyl, and “advanced oxidation” systems rely on reactive chemistry that can also produce ozone or other byproducts.

Because marketing language can be confusing, it helps to compare these approaches side by side.

Table 1. Common home air cleaning approaches and ozone considerations
Technology type Main target pollutants Typical ozone risk Notes for everyday home use
HEPA-style mechanical filtration Fine particles (dust, PM2.5, pollen, smoke) Very low when no ionizer or UV is added Preferred for general particle reduction; simple and predictable.
Activated carbon or other sorbent media Many odors and some gases (VOCs) Very low (passive media) Best paired with a particle filter; capacity is finite and must be replaced.
Ozone generator marketed as purifier Odors, some microbes via oxidation High by design (intentional ozone) Not recommended for occupied rooms; does not filter particles effectively.
Ionizer or electrostatic precipitator Airborne particles Low to moderate, depends on design May deposit particles on surfaces; can add ozone and other byproducts.
UV-C / PCO / plasma systems Microbes, some gases Variable; some designs can create ozone Performance and byproducts depend on wavelength, shielding, and room conditions.

Example values for illustration.

For most households, a purifier built around mechanical filtration, with no ozone-generating features, is the simplest way to reduce particles and many odors while keeping risk low.

Real-World Scenarios: When Ozone From Purifiers Shows Up at Home

Seeing how this plays out in everyday situations makes it easier to recognize potential ozone issues before they become a problem.

Scenario 1: Strong “fresh” smell after turning on a new purifier

A homeowner buys a small purifier advertised as using “activated oxygen” to remove pet odors. Within minutes of turning it on, the room smells sharply “fresh” or similar to chlorine. Family members start to notice throat scratchiness after an hour.

What is likely happening: The device is acting as an ozone generator. The sharp, chemical-like smell is a common sign that ozone or other reactive compounds are present. Even if the odor fades over time, the unit may still be producing ozone at a lower, less noticeable level.

Scenario 2: Built-in ionizer on a filter-based purifier

Another household owns a purifier with a HEPA filter and a small indicator light labeled “ion.” They use it mainly on fan-only mode. One day they press the ion button out of curiosity. Over the next week, they notice a faint metallic or electrical smell near the unit and a fine dark film building up on nearby walls.

What is likely happening: The purifier’s ionizer is charging particles, which then stick to surfaces instead of being captured in the filter. The film on the wall is deposited dust. Depending on the design, the ionizer may also be creating small amounts of ozone.

Scenario 3: UV add-on in a duct or portable system

A homeowner installs a UV-C lamp in their ductwork or buys a portable purifier with a UV mode to reduce germs. The device is older, and the lamp housing becomes discolored or brittle over time. When the UV feature is on, some occupants report headaches or chest tightness.

What is likely happening: Aging components or poor shielding may allow UV at wavelengths that generate ozone. The lamp may also be interacting with dust and other materials inside the unit, creating byproducts that leak into the airstream.

Scenario 4: Trying to handle wildfire smoke or heavy cooking odors

During a wildfire event or after frequent high-heat cooking, someone buys an “advanced oxidation” purifier promising to break down smoke and VOCs. The air still looks hazy, and smoke odor lingers, even though the device runs on its highest setting.

What is likely happening: The purifier is not moving enough air through effective filters. Reactive technologies can alter some gases but do not physically remove fine smoke particles the way a high-efficiency filter does. The homeowner would likely see better results from a correctly sized, ozone-free, filter-based purifier combined with improved ventilation when outdoor air is acceptable.

Scenario 5: Sensitive occupants or chronic conditions

In a home with a child who has asthma or an adult with chronic bronchitis, even mild ozone levels can trigger coughing or chest tightness. A purifier that quietly emits ozone might not bother other family members, but the sensitive person can feel worse when the unit is running.

What is likely happening: The reactive gas is irritating already inflamed airways. In these homes, sticking to strictly ozone-free purification and good source control is especially important.

Common Mistakes and Troubleshooting Signs With Ozone and Air Purifiers

Many ozone-related issues start with well-intentioned decisions. Recognizing common mistakes and early warning signs can help you correct course quickly.

Common selection and use mistakes

  • Confusing “fresh smell” with clean air: A chemical or sharp scent is not proof that air is cleaner. It can be a sign of ozone or other byproducts.
  • Relying on marketing buzzwords: Terms like “plasma,” “activated oxygen,” “triple oxidation,” or “mountain-fresh air” often signal reactive technologies rather than straightforward filtration.
  • Ignoring room size: A small ozone-free purifier undersized for the room will not keep up with smoke or dust, leading some users to turn to stronger but riskier devices.
  • Leaving ion or UV modes on by default: Many units power up with all features active, even when the filters alone would be sufficient.
  • Using ozone-generating devices in occupied spaces: Some products are intended for unoccupied shock treatments but are mistakenly run in bedrooms or living rooms.

Warning signs your purifier may be creating ozone or unwanted byproducts

  • Noticeable sharp, metallic, or chlorine-like odor when the unit runs, especially near the outlet.
  • New or worsening coughing, throat irritation, or chest tightness that improves when the purifier is turned off or removed.
  • Unusual headaches or eye irritation associated with time spent near the device.
  • Dark or sticky films accumulating on nearby walls or furniture, suggesting particle deposition from ionization.

Simple troubleshooting steps

  • Turn off extra modes: Disable ion, plasma, UV, or “boost” features and run only the fan and filters for several days. Note any changes in odor or symptoms.
  • Change location: Move the unit to a different room and see whether any irritation follows it.
  • Inspect labels and manual: Look for any mention of ozone generation, ionization, or advanced oxidation. If the core technology is ozone-based, consider discontinuing use in occupied rooms.
  • Compare with a simple fan-plus-filter unit: If a basic, clearly filter-based purifier improves comfort without the same side effects, the original device may be producing ozone or other byproducts.
Table 2. Troubleshooting cues: Is your air purifier likely producing ozone?
Observation What it may indicate Suggested action
Sharp, chemical “fresh” smell near the outlet Possible ozone or reactive byproducts Turn off ion/UV modes, ventilate room, and reassess comfort.
Increased coughing or throat irritation when purifier runs Ozone or other irritants affecting airways Stop using suspected unit; switch to a clearly ozone-free, filter-based model.
Dark film or dust streaks on nearby walls Ionizer depositing particles on surfaces Disable ion mode or replace with a purely mechanical purifier.
Marketing mentions “activated oxygen” or “ozone power” Intentional ozone generator Avoid using in occupied rooms; consider other options for odor control.
Little improvement in visible haze or dust levels Device not moving enough air through effective filters Choose a higher-CADR, properly sized, ozone-free purifier.

Example values for illustration.

Safety Basics: Reducing Ozone Risk From Air Purifiers

A few high-level safety principles go a long way toward keeping indoor air healthier while you use air cleaners.

Prioritize ozone-free purification methods

  • Favor purifiers that rely on mechanical filtration (HEPA or similar plus optional carbon) as the primary cleaning method.
  • Avoid devices whose main function is generating ozone, even if they are labeled as “air purifiers” or “sanitizers.”
  • Be cautious of products that emphasize ionization, plasma, or advanced oxidation without clear, independent testing for low ozone emissions.

Use reactive technologies, if at all, with clear boundaries

  • If you must use an ozone generator for a specific odor or mold remediation task, do so only in unoccupied spaces and follow strict time, ventilation, and re-entry guidelines.
  • Do not run ozone-generating devices in bedrooms, nurseries, or spaces used by people with respiratory conditions.
  • With UV or PCO systems, ensure that components are intact, housings are not cracked, and any recommended shields or baffles are in place.

Consider sensitive groups and building conditions

  • People with asthma, COPD, heart disease, or chronic respiratory infections are more vulnerable to ozone and should avoid exposure whenever possible.
  • Tight, energy-efficient homes can trap both pollutants and ozone indoors, making ozone-generating devices a higher risk.
  • Children and older adults may notice symptoms later or describe them less clearly, so monitor comfort and breathing when new devices are introduced.

Integrate purification with overall indoor air strategy

  • Combine ozone-free filtration with source control (for example, using exhaust when cooking, storing chemicals properly, and avoiding indoor smoking).
  • Use ventilation thoughtfully: bring in outdoor air when outdoor pollution is low, and close windows plus run filtration when outdoor smoke or smog is high.
  • Manage humidity with dehumidifiers or humidifiers as needed to reduce mold growth and dust mite levels, which also improves overall respiratory comfort.

Long-Term Use, Maintenance, and Storage of Ozone-Free Purifiers

Once you choose an ozone-free air purifier, proper maintenance keeps it effective and prevents you from feeling tempted by “stronger” but riskier devices later.

Filter care over the life of the purifier

  • Pre-filters: Clean or replace regularly to capture larger dust and hair. This protects the main filter and maintains airflow.
  • HEPA or high-efficiency filters: Replace on schedule or sooner if airflow drops or noise increases at the same fan setting.
  • Carbon or gas filters: Expect odor control to fade before the filter looks dirty; plan periodic replacement if you rely on smell reduction.

Operating patterns that keep air cleaner

  • Run the purifier for long stretches, often continuously, at a moderate fan speed in rooms you use most.
  • Increase fan speed during high-pollution events such as wildfire smoke, sanding, vacuuming, or heavy cooking.
  • Keep doors at least partially open if you want one purifier to influence nearby rooms, but remember that each doorway adds resistance to airflow.

Safe storage and seasonal use

  • If you store the purifier between seasons, remove used filters if recommended and keep the unit in a dry, dust-free area.
  • Before restarting after storage, inspect the cord, housing, and seals, then install fresh filters if needed.
  • Do not retrofit older purifiers with aftermarket ion or UV kits that could introduce ozone or compromise safety features.

When to consider replacement

  • The housing is cracked, warped, or no longer seals tightly around the filters.
  • Replacement filters are no longer available or have become extremely costly relative to the unit’s performance.
  • The purifier lacks clear specifications (such as clean air delivery rate) and you cannot verify that it is both effective and ozone-free.

Practical Takeaways and Specs to Look For in an Ozone-Free Air Purifier

Choosing the right air purifier comes down to matching safe technology with solid performance numbers and realistic expectations for your space.

Key takeaways

  • Ozone is not needed to clean indoor air and can make breathing more difficult, especially for sensitive people.
  • Mechanical filtration (HEPA or similar plus optional carbon) is the preferred everyday method because it removes particles and many odors without adding reactive gases.
  • Be cautious with devices that rely on ionization, plasma, UV, or “activated oxygen” as their main selling point; many can create ozone or other byproducts.
  • Correct room sizing, placement, and filter maintenance are just as important as choosing an ozone-free technology.

Specs and features to look for

  • Core technology: A clear description of mechanical filtration (particle filter plus optional carbon) as the main cleaning method.
  • Ozone information: Explicit statements that the unit does not intentionally generate ozone and does not rely on ozone-based technologies.
  • Particle filter type: HEPA or equivalent high-efficiency filter with good seals around the edges to reduce bypass.
  • Gas/odor filter: A meaningful amount of activated carbon or other sorbent media if you care about cooking smells, mild chemical odors, or smoke odor.
  • Clean Air Delivery Rate (CADR): Ratings high enough for your room size so the purifier can provide multiple air changes per hour at a tolerable noise level.
  • Room size guidance: Clear recommendations based on typical ceiling heights, with realistic assumptions about fan speed.
  • Fan speed options: Multiple speeds so you can run higher during pollution events and lower for quiet, continuous background use.
  • Filter replacement indicators: Timers or sensors that remind you when particle and carbon filters are due for replacement.
  • Optional modes control: If ion or UV features exist, they should be clearly labeled and easily switched off so you can rely on filtration alone.
  • Noise and power use: Published noise levels and wattage at different fan speeds so you can balance comfort and operating cost.

By focusing on these specifications and avoiding technologies that intentionally or incidentally produce ozone, you can select an air purifier that genuinely improves indoor air quality and fits well into a broader plan that includes ventilation, humidity control, and source reduction.

Frequently asked questions

What specifications and features should I check to make sure an air purifier won’t produce ozone?

Look for a clear statement that the unit uses mechanical filtration (HEPA or equivalent) as the primary method and that it does not intentionally generate ozone. Important specs include CADR appropriate for your room size, a genuine HEPA particle filter, adequate activated carbon for odors, good seals around filters, multiple fan speeds, and filter replacement indicators. If the manual mentions ionization, plasma, or “activated oxygen,” treat it with caution and verify independent testing for ozone emissions.

Is a strong “fresh” or chemical smell a sign the purifier is working properly?

No. A sharp, metallic, or chlorine-like odor often indicates ozone or other reactive byproducts rather than cleaner air. If you notice such a smell, turn off ion/UV features, ventilate the room, and monitor symptoms; consider switching to a purely mechanical filter-based unit if the smell persists.

Are ionizers, UV, or plasma purifiers safe for people with asthma or other respiratory conditions?

People with asthma, COPD, or other respiratory issues are more sensitive to ozone and should avoid devices that produce it or other reactive byproducts. For households with vulnerable occupants, stick to filter-based purifiers (HEPA plus carbon) and avoid ionizers, ozone generators, and poorly shielded UV systems unless independent testing shows very low emissions.

Can ozone generators effectively remove smoke and fine particles?

Ozone generators are not a reliable method for removing fine particles such as smoke; they work by oxidizing some gases and odors but do not filter particulate matter. For smoke, a properly sized HEPA-equipped purifier with sufficient CADR is far more effective and avoids the health risks associated with ozone.

What should I do if I suspect my air purifier is causing respiratory irritation?

Stop using the suspected unit and ventilate the room if outdoor air quality allows. Run a clearly ozone-free, HEPA-based purifier if available, and check the device manual for mentions of ionization or ozone; disable any reactive modes and consult a healthcare provider if symptoms persist or are severe.

How to Clean and Calibrate an Air Quality Monitor (Step‑by‑Step Guide)

Person cleaning a home air quality monitor sensor cover

To clean and calibrate an air quality monitor at home, gently dust the exterior and vents, clear sensor inlets with soft air or a brush, then verify readings against stable indoor conditions or outdoor fresh air before using any built‑in calibration feature. Done regularly, this keeps PM2.5, CO2, TVOC, temperature, and humidity readings closer to what the manufacturer intended.

This guide walks through practical steps for home air quality meters and indoor air sensors, including how often to clean them, what “calibration” realistically means for consumer devices, and how to spot when a monitor is drifting. You will also see real‑world examples, common mistakes, and simple troubleshooting cues.

The goal is not to turn your device into a laboratory instrument but to keep it reliable enough to guide everyday decisions about ventilation, filtration, and moisture control in your home.

What Cleaning and Calibration Really Do (And Why They Matter)

A home air quality monitor measures pollutants and comfort indicators such as particulate matter (PM2.5 and sometimes PM10), carbon dioxide, total volatile organic compounds (TVOCs), temperature, and relative humidity. Over time, dust buildup, humidity swings, and normal sensor aging can cause readings to drift away from reality.

Cleaning mainly protects the monitor’s airflow and optics. When vents and inlets are clogged, the device may under‑report particles or respond slowly to changes in your indoor environment. Even a thin dust layer can change how air moves through a tiny sensor chamber.

Calibration in a home setting is mostly about verification and baseline checks, not precision laboratory adjustment. Most consumer air quality monitors are factory‑calibrated and may offer simple “fresh air” calibration routines for CO2 or internal self‑adjustment for VOC sensors. Your job is to make sure the monitor is clean, placed sensibly, and behaving in a way that matches how your home is actually used.

Used this way, the monitor becomes a trend tool: you watch how PM2.5, CO2, and TVOC levels rise and fall with cooking, ventilation, or humidifier use, instead of fixating on any single number.

Key Concepts: How Home Air Quality Monitors Work

Understanding the basic sensor types helps you decide what you can safely clean, what you can sanity‑check at home, and what should be left to the manufacturer.

Core sensor types inside most monitors

  • PM2.5 / PM10 particle sensors: These usually use a small fan (or passive airflow) to pull air through an optical chamber. A light source and detector measure how much light is scattered by particles, which is converted into a particle concentration.
  • CO2 sensors: Many devices use non‑dispersive infrared (NDIR) sensors that shine infrared light through the air sample and detect how much is absorbed by CO2. Some low‑cost monitors estimate “equivalent CO2” from VOC levels instead.
  • VOC / gas sensors: These often use metal‑oxide or similar sensing elements that change electrical resistance when exposed to volatile organic compounds and some gases.
  • Temperature and humidity sensors: Typically small solid‑state sensors that respond to heat and moisture in the surrounding air.

What “calibration” usually means for home devices

  • Factory calibration: Sensors are calibrated against known references before you receive the monitor. This sets the baseline performance.
  • Automatic baseline correction: Some CO2 and VOC sensors adjust themselves over days or weeks, assuming they periodically see clean or outdoor air.
  • User calibration options: A few devices let you trigger a calibration step in “fresh air,” typically for CO2. This does not make the device perfect, but it can correct obvious drift.

Typical cleaning and verification tasks

The table below summarizes common tasks and how they support more reliable readings.

Routine tasks to keep a home air quality monitor reliable
Task How often Main purpose Simple cue it is needed
Dust exterior housing and display Every 2–4 weeks Prevents dust from migrating into vents and buttons Visible dust on case or screen
Clean air inlets and outlets Every 3–6 months Maintains airflow through particle and gas sensors Readings respond slowly to obvious changes
Verify PM2.5 and CO2 trends Every 6–12 months Checks for major sensor drift Numbers seem stuck or unrealistic for days
Run any built‑in calibration routine Only when readings are clearly off or per manual Resets baseline for CO2 or other supported sensors Device prompts for calibration or support instructions say so

Example values for illustration.

Real‑World Examples: Cleaning and Checking Readings

Because every home and monitor is different, it helps to walk through realistic scenarios. These examples show how cleaning and basic “calibration” checks look in everyday use.

Example 1: PM2.5 readings that barely move

You notice your PM2.5 reading sits around the same value all day, even when you cook or vacuum. A practical approach might look like this:

  • Power down the monitor if the manual allows.
  • Use a dry microfiber cloth to wipe the housing.
  • Gently clear the air inlets with a soft brush or short bursts of compressed air held a few inches away.
  • Restart the monitor in a living area and let it run for several hours without major activities.
  • Boil water or toast bread briefly and watch whether PM2.5 rises, then falls after you ventilate.

If the monitor now shows a clear rise and gradual fall, the issue was likely dust buildup or obstructed airflow rather than a failed sensor.

Example 2: CO2 readings that always look high

Suppose your CO2 display rarely drops below a high value, even when the room is empty and windows are open. You could:

  • Confirm the sensor type in the manual (true CO2 vs. estimated “equivalent CO2”).
  • Place the monitor in a well‑ventilated area away from people for an hour or more.
  • If the device offers a fresh‑air calibration, follow the instructions exactly in that location.
  • Over the next few days, compare readings between an empty room with windows open and a crowded room with windows closed.

Healthy behavior would show lower CO2 in the ventilated, unoccupied room and higher values when several people share a closed space for a while.

Example 3: TVOC readings that spike after cleaning

After using strong cleaning products or air fresheners, your TVOC reading jumps and stays elevated for hours. In this case:

  • Ventilate the area by opening windows or running exhaust fans.
  • Avoid placing the monitor directly next to the cleaning source.
  • Clean the exterior and vents gently if you notice residue or visible film near the inlets.
  • Watch how quickly TVOC levels return toward baseline once the smell fades and the room is ventilated.

This behavior is normal for a sensitive VOC sensor. If the reading never comes back down over several days, it may indicate sensor saturation or drift that needs a reset or eventual replacement.

Example 4: Temperature and humidity that do not match the room

If your monitor shows very different temperature or humidity than other devices in the same room, consider placement first:

  • Move the monitor away from direct sun, heaters, humidifiers, or dehumidifiers.
  • Allow it to sit in its new location for at least an hour before judging readings.
  • Keep vents clear with light dusting so room air can reach the sensors.

Small differences between devices are normal, but large or persistent gaps may point to a sensor that has aged or been damaged by moisture or heat.

Common Mistakes and Troubleshooting Cues

Many problems with home air quality monitors come from well‑intentioned but risky cleaning methods, rushed calibration attempts, or poor placement. Recognizing these patterns early can save a sensor from permanent damage.

Frequent mistakes that hurt accuracy

  • Spraying cleaner directly on the monitor: Liquids can seep into vents, fog optical paths, or corrode electronics.
  • Using strong solvents or alcohol on vents: These can damage VOC and gas sensors or leave residues that change readings.
  • Pressing a vacuum nozzle against vents: High suction and static can damage delicate fans or internal circuitry.
  • Sticking cotton swabs or tools into sensor openings: This can misalign optics or scratch sensor surfaces.
  • Constantly recalibrating CO2: Repeated manual baseline adjustments can push the sensor further away from reality.
  • Judging performance from a single snapshot: One odd reading does not necessarily mean a bad sensor; trends matter more.

Troubleshooting cues and what they often mean

The table below links common symptoms to likely causes and simple next steps.

Typical symptoms and practical troubleshooting actions
What you notice Likely cause First steps to try
PM2.5 barely changes during cooking or vacuuming Blocked vents, dust on inlets, weak airflow Clean exterior and vents, verify fan noise if applicable, let device stabilize in a central room
CO2 shows very high values even in empty, ventilated rooms Baseline drift, incorrect calibration, or estimated CO2 behavior Check sensor type, run manufacturer’s fresh‑air calibration once in a truly ventilated space
TVOC stuck at maximum or zero for days Sensor saturation, damage from strong chemicals, or aging Ventilate thoroughly, power cycle, consult manual for reset or sensor life guidance
Temperature and humidity differ greatly from other devices Poor placement, localized heat or moisture sources Relocate away from sun, vents, humidifiers; wait at least an hour before re‑checking
Readings freeze or device restarts randomly Power supply issues or internal fault Inspect cables and power source, try a different outlet, review manual for error codes

Example values for illustration.

When to suspect sensor end‑of‑life

  • Readings remain unrealistic for days in different locations.
  • The monitor fails any built‑in self‑tests or shows recurring error indicators.
  • The manufacturer’s expected sensor life (often a few years for some gas sensors) has clearly passed.

At that point, cleaning and recalibration often provide only limited improvement, and sensor replacement or a new monitor may be more practical.

Safety Basics for Cleaning and Calibration

Because air quality monitors contain sensitive electronics and sometimes small fans or heaters, safe cleaning and calibration practices protect both you and the device.

Safe cleaning practices

  • Unplug when possible: If the manual permits, disconnect power before cleaning to reduce the risk of short circuits.
  • Use dry tools first: Start with a microfiber cloth, soft brush, or low‑pressure compressed air held several inches away.
  • Keep liquids away from openings: If you use a slightly damp cloth on the exterior, keep it away from seams and vents and wring it out thoroughly.
  • Avoid flammable aerosols: Do not use flammable sprays near hot components or charging cables.

Safe calibration and testing practices

  • Do not inhale test gases: If the device is ever used with calibration gases or smoke tests, follow safety instructions and avoid direct inhalation.
  • Use realistic conditions: For home checks, rely on normal activities (cooking, occupancy, ventilation) instead of improvised smoke or chemical clouds.
  • Avoid extreme environments: Do not leave the monitor outdoors in rain, direct sun, or freezing temperatures just to “test” it unless the manual specifically allows outdoor use.

Protecting sensors from long‑term damage

  • Minimize exposure to heavy oil mists or aerosols that can coat sensors.
  • Avoid placing the monitor where it is constantly hit by steam from kettles, showers, or humidifiers.
  • Keep the device away from strong magnets or high‑voltage equipment that could interfere with electronics.

Long‑Term Care, Storage, and When to Replace a Monitor

Regular light maintenance helps a monitor stay useful for years, but every sensor eventually reaches the end of its designed life. How you store and operate the device can slow or speed that process.

Routine maintenance schedule

  • Every month: Dust the exterior and display; visually check vents and power cables.
  • Every 3–6 months: Gently clean vents and inlets; review data trends for obvious changes in behavior.
  • Every 6–12 months: Perform a basic verification of PM2.5 and CO2 trends under known conditions (empty room vs. occupied, ventilated vs. closed).
  • As recommended by the manufacturer: Run any built‑in calibration routine or send the device for factory service if that option exists.

Storing a monitor you do not use every day

  • Turn the device off and disconnect power if the manual allows long‑term shutdown.
  • Store in a dry, temperature‑stable area away from direct sun and strong odors.
  • Avoid sealed containers with strong chemical products, which can age VOC sensors even when the monitor is off.
  • When you bring the monitor back into service, allow several hours of runtime for sensors to stabilize before relying on the readings.

Signs it may be time to replace

  • The monitor no longer responds to cleaning, resets, or calibration steps.
  • Sensor performance has clearly degraded and the expected service life has passed.
  • Replacement sensors or factory service are unavailable or cost‑prohibitive compared with a new device.

Replacing an aging monitor can restore confidence in your indoor air readings, especially if you are tracking issues like mold risk, persistent odors, or ventilation problems.

Practical Takeaways and Specs to Look For

Keeping an air quality monitor reliable does not require advanced tools. Gentle cleaning, thoughtful placement, and occasional trend checks go a long way toward making PM2.5, CO2, TVOC, temperature, and humidity readings more trustworthy.

  • Use your monitor as a guide for decisions about ventilation, filtration, and moisture control, not as a regulatory reference.
  • Focus on patterns over days and weeks instead of reacting to every short‑term spike.
  • When readings stop matching real‑world changes, start with cleaning and placement before assuming the sensor has failed.

Specs and features to look for in a home air quality monitor

If you are evaluating a new monitor or deciding whether to upgrade, these specifications and design details can make cleaning, calibration, and long‑term use easier:

  • Clear sensor list: PM2.5 (and ideally PM10), CO2 or equivalent CO2, TVOC, temperature, and humidity.
  • Documented sensor type: Especially whether CO2 is true NDIR or estimated from VOCs, and what kind of VOC sensor is used.
  • Accessible vents and dust screens: Grilles and any pre‑filters that can be cleaned without opening the entire device.
  • Built‑in CO2 calibration option: A simple fresh‑air calibration routine with clear instructions.
  • Data logging or trend graphs: Ability to review past readings so you can spot drift or sudden step changes.
  • Reasonable operating range: Temperature and humidity limits that match your climate and indoor conditions.
  • Stated sensor life and maintenance guidance: Manufacturer information on how long sensors typically last and how to service or replace them.
  • Stable power options: Reliable wall power or long‑lasting batteries so the monitor can run continuously without frequent interruptions.

Choosing a monitor with these features, then following the cleaning and verification steps in this guide, will help ensure your indoor air readings stay useful for everyday home comfort and air quality decisions.

Frequently asked questions

Which specifications and features should I prioritize when choosing a home air quality monitor?

Prioritize a clear sensor list (PM2.5/PM10, CO2 or equivalent, TVOC, temperature, humidity), documented sensor types (for example, true NDIR for CO2), accessible vents or prefilters, data logging or trend graphs, and a stated operating range that fits your climate. These features make cleaning and verification easier and help ensure useful long‑term data.

What common cleaning mistake is most likely to damage a monitor?

Spraying liquids or using strong solvents directly into vents is a frequent and damaging mistake, as fluids can reach optics or electronics and solvents can alter gas sensors. Use dry tools first and only lightly dampen an exterior cloth while avoiding seams and openings.

Are there safety precautions I should follow when calibrating or testing my monitor?

Yes. Do not inhale test gases or deliberately create heavy smoke or chemical clouds for testing, and avoid exposing the device to extreme temperatures or moisture. When cleaning, unplug the device if the manual permits and use low‑pressure, dry cleaning methods first.

Can I reliably calibrate CO2 or VOC sensors at home?

Home calibration can correct obvious drift but rarely achieves laboratory accuracy. CO2 fresh‑air calibration routines can help if performed in a truly ventilated area, and many VOC sensors use automatic baseline correction; both approaches are useful for trend reliability rather than precise concentrations.

How can I tell if a sensor is reaching its end of life?

Signs include persistent unrealistic readings across different locations, recurring errors or failed self‑tests, or if the sensor has passed the manufacturer’s expected service life. If cleaning and baseline checks do not improve behavior, replacement or factory service may be necessary.

Does placement really affect reading accuracy that much?

Yes. Placing a monitor near direct sunlight, heaters, humidifiers, or in tight corners can skew temperature, humidity, and pollutant readings. Move the device to a representative location and allow at least an hour for sensors to stabilize before evaluating readings.

When to Replace Carbon Filters (And How to Tell They’re Spent)

Person removing a carbon filter from a home air purifier

You should replace a carbon filter when odors start to break through sooner than they used to or when it has reached the end of its recommended service window, typically every 3–6 months in most homes. Even if it still looks clean, a saturated carbon filter can no longer capture smells or gases effectively and simply lets them pass through.

This guide explains how carbon and charcoal filters work, how long they usually last in real homes, and the clearest signs that yours is spent. You will see practical examples for kitchens, bedrooms, and whole-house systems, plus common mistakes that shorten filter life. There is also a safety section, a troubleshooting checklist, and a simple way to plan replacements without lab equipment or special tools.

Use these steps to match your carbon filter schedule to your cooking habits, occupancy, and ventilation so you can avoid lingering odors, reduce exposure to some gases, and keep your air purifier or range hood working close to its design performance.

What Carbon Filters Are and Why They Matter

Carbon filters (often called activated carbon or activated charcoal filters) are odor and gas filters used in air purifiers, range hoods, some HVAC systems, and specialty odor-control units. Instead of catching dust like a typical furnace or HEPA filter, they are designed to reduce smells and certain airborne chemicals.

In a home, carbon filters are commonly used to manage:

  • Cooking odors from frying, grilling, and strong spices
  • Pet and litter box smells
  • Garbage, bathroom, and laundry room odors
  • Some volatile organic compounds (VOCs) from cleaning products, paints, and new furnishings
  • Smoke odors from cooking, fireplaces, or nearby outdoor smoke

They matter because once the carbon is saturated, it quietly stops doing its job. Air may still move freely, but odor and VOC reduction drops off sharply. That can leave a home smelling stale even when the air purifier or hood is running, and it can also undermine any effort to reduce exposure to certain gases indoors.

Knowing when to replace carbon filters is therefore less about how dirty they look and more about time in service, odor performance, and how heavily they are used.

How Carbon Filters Work and Why They Wear Out

Carbon filters work by adsorption, not absorption. Air passes through a bed or sheet of activated carbon that has an enormous internal surface area. Gas molecules and odor compounds bump into that surface and stick to it.

Each tiny pore on the carbon has a limited number of sites where molecules can attach. Over time, those sites fill up. When most of them are occupied, the filter is considered spent or saturated. At that point, new odor molecules are more likely to pass straight through or displace older ones, which can even re-release smells the filter captured earlier.

Carbon filters also behave differently from particle filters:

  • A saturated carbon filter often still looks clean.
  • Airflow may stay normal because the carbon media is not necessarily clogged with dust.
  • Performance loss shows up as odor breakthrough, not as a noisy fan or weak airflow.

Because of this, you cannot reliably judge a carbon filter by appearance alone. You need to combine a basic time schedule with symptom-based checks.

Carbon vs. particle filters in home air cleaners
Example values for illustration.
Filter type Primary job What it does not handle well Typical replacement driver
Activated carbon filter Odors, some VOCs, smoke smells Fine particles like dust, pollen, spores Odor breakthrough and time in service
Granular carbon cartridge Higher odor and gas loads in kitchens or living areas Hair, lint, large debris Frequent odor exposure and saturation
Thin carbon-impregnated sheet Light odors, pre-filtering for purifiers Heavy smoke or high VOC concentrations Quick saturation and mechanical wear
HEPA or high-efficiency particle filter Fine particles: dust, pollen, dander, smoke particles Most gases and many odors Visible dirt buildup and airflow restriction
Pre-filter (mesh or foam) Hair, lint, large dust Odors and gases Dust loading and clogging

Because carbon stages saturate silently, manufacturers usually give a time-based guideline such as “replace every 3–6 months.” In practice, the real lifespan depends on:

  • Odor and VOC load: frequent frying, smoking, or strong cleaners shorten life.
  • Runtime and fan speed: 24/7 operation on high uses capacity faster than a few hours on low.
  • Humidity and temperature: steam and high humidity can reduce adsorption efficiency.
  • Amount of carbon: thicker, heavier carbon media usually has more capacity than a thin sheet.

Real-World Lifespans and Examples in Common Home Setups

When manuals are vague or missing, use these ranges as starting points and then adjust based on what you notice in your home.

  • Portable air purifiers in living rooms: about 3–6 months of regular use.
  • Bedroom purifiers: about 4–9 months, depending on overnight runtime and nearby odor sources.
  • Recirculating range hoods: about 3–6 months with typical cooking; heavy frying can shorten this to 1–3 months.
  • HVAC return or whole-house carbon panels: often 3–6 months, checked when you service main HVAC filters.
  • Thin carbon pre-filter sheets: sometimes 1–3 months, especially in dusty or high-odor areas.

Because every home is different, it helps to compare a few realistic households.

Illustrative carbon filter replacement timing in different homes
Example values for illustration.
Home scenario Typical setup Observed odor behavior Practical carbon replacement interval
Small apartment, heavy cooking Recirculating range hood + purifier in living room Frying several times per week, spice odors linger Range hood: about 2–3 months; purifier: about 3 months
Family home with pets Purifier in living room and near litter box Pet and litter odors increase before filter change Living room: about 4–6 months; litter area: about 3–4 months
Quiet bedroom in low-odor home Bedroom purifier on low all night Little cooking smell, no smoking, windows opened regularly About 6–9 months, checked twice per year
Whole-house HVAC with carbon panel Carbon panel at main return plus standard particle filter Odors generally low, but panel sees all circulated air About 3–6 months, inspected at every HVAC filter change
Home near busy road or wildfire region Purifiers in main living spaces Outdoor smoke and exhaust odors noticeable during events About 2–4 months during high-smoke seasons

Use these examples to calibrate your own schedule. If your home resembles the “heavy cooking” case, aim for the shorter end of the range. If your usage is closer to the “quiet bedroom” scenario, you may safely extend intervals while still monitoring for odor breakthrough.

Common Mistakes and Troubleshooting When Odor Control Is Poor

When you are trying to decide when to replace a carbon filter, it helps to know which issues to check first. Many odor problems come from a combination of filter age, installation, and basic usage habits.

Typical mistakes that shorten carbon filter life

  • Relying only on appearance: assuming the filter is fine because it is not visibly dirty.
  • Ignoring heavy odor events: not shortening replacement intervals after smoke, strong chemicals, or extended frying.
  • Blocking airflow: placing purifiers in corners or behind furniture so air does not circulate properly.
  • Skipping pre-filter cleaning: letting dust and grease clog pre-filters, which can force air to bypass the carbon stage.
  • Trying to wash non-washable carbon: rinsing or soaking carbon media that is not designed for it, which usually ruins performance.

How to troubleshoot weak odor removal

If you notice that smells are not clearing like they used to, work through these checks in order.

  • 1. Check time in service. If the carbon filter has been in use longer than the recommended window (or more than about 6 months in a typical living space), replace it first.
  • 2. Compare odor behavior. Think back to when the filter was new. If cooking or pet odors used to fade in 30–60 minutes and now linger for several hours, that is a strong saturation cue.
  • 3. Run a simple before/after test. After a normal odor event (like cooking dinner), run the purifier or hood on a higher setting for an hour. Leave the area briefly, then return and notice whether the space still smells strong. Repeat after installing a fresh carbon filter to create a baseline.
  • 4. Inspect pre-filters and particle filters. If they are visibly clogged with dust or grease, clean or replace them according to the manual. Poor airflow can make it seem like the carbon is ineffective even when it still has capacity.
  • 5. Confirm installation. Make sure the carbon filter is seated flat, with no gaps where air can bypass around the edges.
  • 6. Reassess placement and ventilation. In kitchens, move portable purifiers closer to the main odor source and use mechanical exhaust when possible.
Common odor problems and likely causes
Example values for illustration.
What you notice Likely cause What to try next
Odors that used to clear now linger for hours Carbon media saturated from normal use Replace carbon filter; note install date for future tracking
Musty or sour smell when unit first turns on Moisture and organic buildup in filters or housing Replace carbon and pre-filters; clean housing surfaces per manual
Good airflow but almost no odor reduction Carbon spent or incorrectly installed; possible bypass Check seating and orientation; install new carbon media
Loud fan, weak airflow, and poor odor control Clogged particle filters or pre-filters Clean or replace pre-filters and HEPA; then reassess carbon
Odors strongest in one area despite purifier running Poor placement or blocked airflow path Reposition unit for better circulation; avoid corners and tight alcoves

When to replace based on symptoms alone

If you have lost track of installation dates, use symptom-based triggers:

  • Odors consistently linger longer than they did with a new filter.
  • The appliance itself smells stale or musty when starting.
  • You have recently had a major odor event (such as indoor smoke) and performance seems reduced afterward.

In any of these cases, replacing the carbon filter is usually the simplest and most effective first step.

Safety Basics for Handling and Replacing Carbon Filters

Most household carbon filters are straightforward to handle, but a few simple precautions can make replacement cleaner and safer.

Before you open the unit

  • Turn the appliance off and, if possible, unplug it before opening any panels.
  • Allow hot range hoods or appliances near stoves to cool completely.
  • Have a trash bag ready so you can place the used filter directly inside.

While removing the used filter

  • Handle the filter gently to avoid spilling granular carbon or dust.
  • Hold filters upright so loose carbon does not fall into the appliance.
  • Avoid shaking, tearing, or crushing the media, which can release fine particles.

Personal protection and disposal

  • Wear light gloves if the filter is greasy, dusty, or has been near strong chemicals or smoke.
  • Change filters in a well-ventilated area if they have captured noticeable smoke or solvent odors.
  • Seal the used filter in a bag before placing it in household trash to contain smells and debris.

Most areas allow used carbon filters in regular household waste. If your local waste authority provides specific guidance for filters or odor-control media, follow that advice.

Long-Term Use: Maintenance, Storage, and Planning Ahead

Carbon filters work best when they are part of a simple, repeatable maintenance routine. A few small habits can extend useful life and make it easier to know when replacement is due.

Pair carbon changes with other maintenance tasks

  • Check carbon filters whenever you change your HVAC filter.
  • Add carbon inspections to seasonal home checklists, such as at the start of heating and cooling seasons.
  • Look at purifiers in kitchens and bedrooms during deep-cleaning days.

Track usage in a simple log

  • Write the installation date directly on the filter frame or on a small label inside the unit.
  • Note approximate daily runtime, such as “8 hours on medium” or “24/7 on low.”
  • Record any clear changes in odor performance (for example, “cooking smells lingered after 4 months”).

After a few replacement cycles, you will have a home-specific schedule that is more accurate than any generic rule.

Storing spare carbon filters

  • Keep unopened filters in their original, sealed packaging until you are ready to use them.
  • Store them in a cool, dry place away from strong odors, chemicals, or garages where fumes are present.
  • Avoid storing loose carbon media in open containers, where it can slowly adsorb background odors before it ever goes into service.

Combining carbon filters with ventilation and source control

  • Use kitchen and bathroom exhaust fans to remove steam and odors at the source.
  • Open windows when outdoor air quality allows, especially after cooking or cleaning.
  • Limit unnecessary use of strong air fresheners or solvents indoors, or use them in well-ventilated areas.
  • Place purifiers where air can circulate freely rather than in corners or behind furniture.

These steps reduce the load on your carbon filters so they last closer to the upper end of their expected range.

Putting It All Together and Key Specs to Look For

Carbon filters are consumable odor and gas filters. They do not usually clog like dust filters; instead, they quietly saturate and stop working while still looking clean. In most homes, that means replacement about every 3–6 months for living areas and kitchens, and roughly every 4–9 months in low-odor bedrooms, with shorter intervals after heavy smoke or frequent high-odor cooking.

The most reliable way to decide when to replace carbon filters is to combine a time-based plan with symptom checks: watch for odor breakthrough, musty startup smells, and any decline compared with how a new filter performed in the same situation.

When you are choosing replacement carbon filters or evaluating a new device, a few basic specs and design details can make maintenance easier and performance more predictable.

Practical specs and features to look for

  • Clear replacement interval: Look for a stated carbon filter schedule (for example, “every 3–6 months”) rather than vague “replace as needed” language.
  • Type and amount of carbon: Thicker media or granular cartridges usually contain more carbon and may last longer under the same conditions than thin, lightly coated sheets.
  • Separate carbon stage: A distinct carbon layer that can be replaced independently of the main particle filter makes ongoing costs and scheduling easier to manage.
  • Good seal and fit: Frames, gaskets, or snug-fitting panels help prevent air from bypassing around the carbon media.
  • Filter change reminder: A time-based reminder or simple hour counter is useful for staying on schedule, even if it does not directly measure saturation.
  • Accessible filter compartment: Easy-to-open panels and tool-free filter changes encourage regular maintenance.
  • Documented operating modes: Clear guidance on which fan speeds to use for odor events versus quiet background operation helps you balance performance and filter life.

By matching these specs to your home’s odor sources and habits, and by watching how long it takes for odors to return, you can build a straightforward replacement routine. That routine will keep your carbon filters working closer to their intended performance and make it much easier to tell when they are truly spent.

Frequently asked questions

Which filter specifications should I prioritize when choosing replacement carbon filters?

Look for a clear stated replacement interval, the type and amount of carbon media (thicker or granular media typically provide more capacity), and a dedicated carbon stage that can be changed independently of particle filters. Also prioritize a good seal and an accessible filter compartment to prevent bypass and make regular changes easier.

Is appearance a reliable way to tell if a carbon filter needs replacing?

No. Activated carbon often looks clean even after its adsorption sites are saturated. Rely on time in service and odor performance (odor breakthrough or musty startup smells) rather than visual inspection alone.

Do I need protective gear when replacing a used carbon filter?

Basic precautions are recommended: turn off and unplug the unit, wear light gloves if the filter is greasy or dusty, and change filters in a well-ventilated area if they contain smoke or solvent odors. Seal the used filter in a bag before disposing to contain dust and smells.

How often should I replace carbon filters in kitchens versus bedrooms?

Kitchens typically need more frequent changes—often every 1–6 months depending on cooking frequency and intensity—while bedroom purifiers in low-odor homes can often run 4–9 months. Use these ranges as starting points and shorten intervals after heavy smoke or strong-odor events.

What should I check if my purifier has good airflow but odors persist?

Check whether the carbon media is saturated (odor breakthrough), confirm the carbon is seated correctly with no bypass, and inspect or clean pre-filters that may be clogged and reducing effective contact with the carbon. If symptoms persist after those checks, replacing the carbon stage is a simple test to restore performance.

Can I extend carbon filter life by cleaning or reactivating it at home?

Generally no: washing or rinsing household carbon filters usually damages the media and reduces performance, and true reactivation requires high temperatures not practical at home. Instead, store spares sealed and follow usage-based replacement to avoid premature adsorption of background odors.

Air Purifier Maintenance Checklist: Filters, Sensors, and Cleaning Guide

Person removing air purifier filter for routine maintenance

An effective air purifier maintenance checklist tells you exactly when to clean, inspect, and replace filters so the unit keeps cleaning your air instead of just making noise. By following a simple routine, you protect airflow, reduce dust, and avoid running clogged filters that waste energy. This applies to most home air cleaners, whether you use them for allergies, smoke, or general indoor air quality.

Below you will find a practical schedule for pre-filters, HEPA and carbon filters, sensor care, and exterior cleaning, along with common mistakes to avoid. Use this as a starting point, then adjust based on your room size, pollution levels, and how many hours per day the purifier runs. Always check your specific manual for model-specific instructions and safety notes.

Why an Air Purifier Maintenance Checklist Matters

Air purifiers work by pulling room air through one or more filters, trapping particles and sometimes odors and gases. When filters are clean and air can move freely, the purifier can cycle the room air as designed. When filters are overloaded, blocked, or installed incorrectly, performance drops quickly even if the fan sounds normal.

A clear air purifier maintenance checklist helps you:

  • Keep airflow strong: Clean filters and open vents allow the unit to process more air per hour.
  • Stabilize indoor dust levels: Regular pre-filter cleaning reduces dust settling on furniture and floors.
  • Control energy use and noise: A clogged filter forces the fan to work harder, which can increase power draw and sound levels.
  • Plan filter costs: Knowing approximate replacement intervals lets you budget for cartridges and avoid surprise expenses.
  • Extend appliance life: A well-maintained fan motor and clean airflow path put less stress on internal parts.

Think of maintenance as part of owning an air purifier, similar to changing HVAC filters or cleaning a clothes dryer lint trap. A few minutes each month usually prevents bigger problems later.

Core Filter and Sensor Tasks in Your Checklist

Most home air purifiers share the same core components: a pre-filter, a main particle filter (often HEPA or HEPA-type), an optional activated carbon layer, and sometimes built-in sensors. Each piece has a specific job and its own maintenance needs.

Typical filter stack and care tasks:

  • Pre-filter: Captures hair, lint, and coarse dust. Usually cleaned every 2–4 weeks by vacuuming or rinsing if the manual allows.
  • Main particle filter: Traps fine particles like dust, smoke particles, and pollen-sized particles. Often replaced every 6–12 months, with visual checks every 1–3 months.
  • Activated carbon or odor filter: Adsorbs certain odors and gases. Commonly replaced every 3–6 months, or sooner in heavy-odor environments.
  • Built-in sensors (if present): Monitor particles or gases to drive auto mode. Typically dusted every 2–3 months so readings stay responsive.

Because actual lifespans vary, it helps to compare your home conditions to typical use. The table below summarizes baseline intervals and what might push you toward the shorter or longer end of the range.

Filter and sensor maintenance planning
Component Typical baseline interval Shortens interval Lets you stretch interval
Washable pre-filter Clean every 2–4 weeks Multiple pets, visible lint, heavy carpet dust Hard flooring, minimal shedding, light dust
Main particle filter (HEPA or similar) Replace every 6–12 months Wildfire smoke events, frequent high fan use Short daily runtime, low outdoor pollution
Carbon / odor filter Replace every 3–6 months Frequent cooking, strong indoor odors, solvents Low odor load, good kitchen and bathroom ventilation
Built-in particle or VOC sensor Dust every 2–3 months Dusty rooms, placement near floor or vents Elevated placement, regular room dusting

Example values for illustration.

Pre-Filter: First Line of Defense

The pre-filter is your easiest and most frequent task. It sits at the intake and catches larger debris before it reaches finer filters.

  • Inspect: Every 2–4 weeks. Look for visible gray film, hair mats, or lint.
  • Clean: Light vacuuming with a brush attachment is usually safe. If the manual allows rinsing, wash gently with lukewarm water and let it dry completely before reinstalling.
  • Replace: If the pre-filter tears, warps, or no longer comes clean, replace it even if the schedule suggests it should last longer.

Keeping the pre-filter clear often has the biggest impact on day-to-day airflow and fan noise.

Main Particle Filter (HEPA or HEPA-Type)

The main particle filter captures the fine particles that affect allergies and haze. It loads more slowly than the pre-filter but is critical to overall performance.

  • Inspect: Every 1–3 months. Look for darkened pleats, caked dust, or uneven discoloration.
  • Replace: Commonly every 6–12 months of typical use. Heavy smoke, construction dust, or long daily runtimes may require earlier replacement.
  • Handling: Avoid washing or aggressive vacuuming unless the manual explicitly says it is allowed. Moisture and rough handling can damage fine fibers.

Activated Carbon and Odor Filters

Carbon and other sorbent filters do not usually look obviously dirty when they are spent. Instead, you notice a gradual return of odors.

  • Inspect: Every 1–3 months for physical damage, sagging, or loose granules.
  • Replace: Often every 3–6 months. In homes with frequent cooking, strong pet or smoke odors, or solvent use, expect the shorter end of the range.
  • Do not wash: Water and detergents typically ruin the adsorption structure and can make the filter ineffective.

Filter Indicators and Timers

Many purifiers use run-time-based reminders. They estimate filter life from hours of operation and fan speed rather than measuring actual dust loading.

  • Treat indicator lights as prompts to inspect, not absolute rules.
  • Combine reminder lights with visual checks and airflow changes.
  • After installing new filters, reset the indicator according to the manual so future reminders stay accurate.

Sensor Care and Auto Mode

Built-in sensors help auto mode respond to real-time changes in particles or gases. Dust on the sensor inlet can cause sluggish or incorrect readings.

  • Find the inlet: Look for a small slot or vent on the side or back separate from the main intake.
  • Clean: With the unit unplugged, gently dust around the inlet with a soft brush or dry cotton swab every few months.
  • Watch behavior: If readings never change, or the fan never ramps up during obvious pollution events, the sensor or its inlet may need attention.

Real-World Maintenance Examples

How often you follow each step in your air purifier maintenance checklist depends on how and where you use the device. These scenarios show how you might adjust the baseline schedule.

Example 1: Allergy Relief in a Bedroom

In a bedroom used mainly at night with doors and windows closed, dust and pollen loads are often moderate.

  • Run time: 8–10 hours per night on a low or medium setting.
  • Pre-filter: Quick vacuum once a month; more often during peak pollen season.
  • Main filter: Visual check every 3 months; likely replacement around 9–12 months.
  • Carbon filter (if present): Replace every 4–6 months if odors are mild.
  • Sensor: Dust the inlet twice a year if the unit has auto mode.

Example 2: Open-Plan Living Room With Pets

A purifier in a large living space with dogs or cats often sees more hair, dander, and tracked-in dust.

  • Run time: 10–16 hours per day, varying fan speed.
  • Pre-filter: Check every 2 weeks; clean whenever you see hair mats or visible gray film.
  • Main filter: Inspect every 1–2 months; replacement closer to 6–9 months is common.
  • Carbon filter: Replace every 3–4 months if pet odors linger.
  • Sensor: Dust every 2–3 months to keep auto mode responsive.

Example 3: Small Apartment During Smoke Season

In regions with wildfire smoke or frequent outdoor burning, filters can load rapidly during certain months.

  • Run time: Often 24 hours per day on medium or high during smoke events.
  • Pre-filter: Clean weekly while outdoor smoke is heavy.
  • Main filter: Inspect monthly; replacement may be needed at 3–6 months instead of 6–12.
  • Carbon filter: Replace every 2–3 months during active smoke periods to manage odor.
  • Sensor: Dust more often if the purifier sits near open windows or doors.

Example 4: Light-Duty Office or Study

A purifier in a home office with limited foot traffic and no pets may need less frequent service.

  • Run time: 6–8 hours per weekday on low.
  • Pre-filter: Clean every 4–6 weeks as needed.
  • Main filter: Replacement may be closer to the 12-month mark.
  • Carbon filter: Replace every 6 months or when coffee and lunch odors linger longer than before.
  • Sensor: Light dusting once or twice a year.
Maintenance patterns in common use scenarios
Scenario Pre-filter care Main filter replacement Carbon filter replacement
Bedroom allergy use Vacuum monthly; more often in pollen season About every 9–12 months Every 4–6 months if odors are mild
Living room with pets Vacuum every 2 weeks About every 6–9 months Every 3–4 months
Smoke season use Clean weekly during heavy smoke About every 3–6 months Every 2–3 months
Light-duty office Clean every 4–6 weeks About every 10–12 months About every 6 months

Example values for illustration.

Common Maintenance Mistakes and Troubleshooting Cues

Even a good air purifier maintenance checklist can go off track if a few key details are missed. Recognizing early warning signs helps you fix issues before performance drops too far.

Frequent Mistakes That Reduce Performance

  • Running with missing filters: Some users remove a clogged filter and run the unit temporarily without it. This can pull dust into internal parts and does not clean the air.
  • Stacking filters in the wrong order: Reinstalling a carbon pad in front of the pre-filter, or flipping a directional filter, can restrict airflow or allow bypass.
  • Ignoring damaged gaskets: Cracked or compressed seals around the filter frame allow unfiltered air to leak around the edges.
  • Washing non-washable filters: Attempting to rinse a non-washable main filter can collapse fibers, reduce efficiency, and promote mold if it never fully dries.
  • Blocking intakes and outlets: Placing the purifier tight against walls, curtains, or furniture can severely cut effective airflow.

Performance Clues That Point to Maintenance Needs

Watch and listen for these changes as part of routine troubleshooting:

  • Increased fan noise at the same setting: Often indicates restricted airflow from a dirty pre-filter or main filter.
  • Weaker airflow from the outlet: With unchanged fan speed, this usually means filters are loaded or incorrectly seated.
  • Persistent odors: If smells linger longer than they used to, the carbon filter may be exhausted even if it looks normal.
  • Dust settling faster on nearby surfaces: Can signal that the main filter is saturated or that air is bypassing around filters.
  • Auto mode behaving oddly: If the fan never ramps up during cooking or cleaning, the sensor may be dusty or malfunctioning.

Simple Troubleshooting Steps

  • Confirm the unit is on the intended fan setting and not in a special mode that limits speed.
  • Turn off and unplug the purifier before opening panels or handling filters.
  • Remove each filter in order, check for arrows or orientation markings, and reinstall according to the manual.
  • Clean or replace the pre-filter, then recheck airflow and noise.
  • Inspect the main and carbon filters for heavy loading or damage; replace if in doubt, especially if they are beyond the recommended interval.
  • Dust the sensor inlet gently and observe whether auto mode behavior improves over the next day or two.

Safety Basics for Air Purifier Cleaning and Filter Changes

Most air purifier maintenance tasks are straightforward, but following a few high-level safety steps protects both you and the appliance.

Electrical and Handling Safety

  • Always unplug before opening: Turn the unit off and disconnect it from the outlet before removing covers, grilles, or filters.
  • Let moving parts stop: Wait for the fan to come to a complete stop before reaching near the intake or outlet.
  • Check the cord: During seasonal checks, inspect the cord and plug for cuts, frays, or heat damage. Discontinue use if you see issues.
  • Use gentle force: Do not pry panels with sharp tools; use the designated latches or handles to avoid cracking plastic housings.

Dust, Allergens, and Odor Safety

  • Avoid shaking filters indoors: Shaking or tapping loaded filters can release dust back into the room.
  • Consider a mask and gloves: If you are sensitive to dust, smoke, or pet dander, simple personal protection can reduce irritation during filter changes.
  • Bag used filters: Place spent filters directly into a trash bag, seal it, and dispose of it according to local waste rules.

Cleaning Product Safety

  • Use mild cleaners sparingly: For exterior surfaces, a slightly damp cloth with mild soap is usually enough. Avoid strong solvents or abrasive pads.
  • Never spray directly into vents: Apply any cleaner to the cloth, not into grilles, controls, or sensor inlets.
  • Keep moisture away from electronics: Do not allow water to drip into control panels, seams, or the power inlet.

Children, Pets, and Placement Safety

  • Place the purifier where children and pets cannot easily tip it over or block the vents with toys or bedding.
  • Use stable, level surfaces and avoid stacking the purifier on unstable furniture.
  • Route the power cord to minimize tripping hazards and avoid pinching under doors or furniture.

Long-Term Care, Storage, and Budget Planning

Beyond day-to-day cleaning, long-term care keeps your air purifier reliable over multiple years and helps you plan for filter costs.

Seasonal and Annual Checkups

  • Inspect the housing for cracks, warping, or loose panels that could affect seals.
  • Verify that all latches and filter doors close securely without gaps.
  • Confirm that fan speeds change smoothly and that any display or indicator lights function as expected.
  • Review the manual annually to see if there are any model-specific service notes you may have overlooked.

Storing an Air Purifier You Use Seasonally

If you only use the purifier during allergy or smoke seasons, short-term storage can help preserve filters and electronics.

  • Before storage: Clean the pre-filter, wipe exterior surfaces, and consider replacing heavily used carbon filters so odors do not concentrate inside the unit.
  • Remove or keep filters installed: Follow the manual; some models prefer filters to remain installed to protect internal surfaces, while others allow removal and separate storage in sealed bags.
  • Choose a dry location: Store in a cool, dry area away from direct sunlight and high humidity to reduce risk of mold or warping.
  • Cover lightly: A breathable cover or cloth can keep dust off without trapping moisture.

Planning Filter Replacement Costs

Filter costs are a significant part of owning an air purifier. A simple planner helps avoid surprises.

  • Write the installation date on each new filter with a permanent marker.
  • Note expected replacement month based on your typical intervals.
  • Group maintenance for multiple purifiers on the same weekend to streamline tasks and ordering.
  • Track how long your first set of filters actually lasts; adjust your calendar and budget based on real experience.

Coordinating With Other Indoor Air Strategies

  • Pair purifier maintenance with changing HVAC filters to keep whole-home airflow clean.
  • Use kitchen and bathroom exhaust fans to reduce the load on carbon filters from cooking and moisture-related odors.
  • Manage humidity so filters and internal surfaces stay dry and less hospitable to mold growth.

Putting It All Together: Practical Takeaways and Specs to Watch

Once your air purifier maintenance checklist is in place, most tasks become quick habits that fit into regular cleaning routines. The goal is consistent airflow, predictable filter costs, and reliable sensor feedback.

Key Takeaways for Everyday Use

  • Clean or vacuum the pre-filter regularly; it has the biggest day-to-day effect on airflow and noise.
  • Inspect the main particle filter every few months and replace it within the recommended 6–12 month window, sooner in heavy-use conditions.
  • Use odor return, not just appearance, to judge carbon filter replacement timing.
  • Keep intakes and outlets clear of walls, curtains, and furniture so the purifier can move air as designed.
  • Dust sensor inlets periodically so auto mode remains responsive to real changes in air quality.

Specs and Features to Look For When Maintenance Matters

If you are comparing air purifiers with long-term maintenance in mind, certain specifications and design details can make upkeep easier and more cost-effective.

  • Filter accessibility: Front or top-loading filter doors that open without tools make routine checks simpler.
  • Clear filter labeling: Arrows or markings showing airflow direction and installation order reduce mistakes after cleaning.
  • Separate pre-filter layer: A distinct, washable pre-filter can significantly extend the life of more expensive main filters.
  • Available replacement filters: Filters that are easy to source and sold individually or in multi-packs support long-term use.
  • Filter life indicators: Time-based or usage-based reminders help you stay on schedule, especially if you run the unit many hours per day.
  • Sensor access: A clearly marked sensor inlet or removable dust cover simplifies periodic cleaning.
  • Published maintenance guidance: Manuals that specify cleaning methods and intervals reduce guesswork and help you avoid damaging filters.

By combining a realistic maintenance checklist with thoughtful product choices, you can keep your air purifier working efficiently for years while keeping indoor air cleaner and more comfortable.

Frequently asked questions

Which air purifier specifications and features most reduce upkeep and ongoing filter costs?

Look for easy filter access (front or top loading), a separate washable pre-filter to trap large debris, clear installation markings, and widely available replacement filters sold individually or in multi-packs. Filter life indicators and easily accessible sensor inlets also simplify routine care and help you avoid unnecessary replacements.

Is it safe to run an air purifier if a filter is missing or installed incorrectly?

Running a purifier without a required filter or with filters installed improperly can allow unfiltered air and dust into internal components, reduce cleaning effectiveness, and potentially damage the fan or motor. Always reinstall filters in the correct order and orientation before operating the unit.

What are the key safety steps before opening or disassembling an air purifier?

Unplug the unit and wait for any moving parts to stop before opening panels or removing filters. Use gentle hand force on latches, avoid spraying liquids into vents, and consider gloves and a mask if you are sensitive to dust when handling spent filters.

How can I tell when a carbon or odor filter needs replacing if it doesn’t look dirty?

Carbon and sorbent filters often show performance loss as a gradual return of odors rather than visible dirt. Use odor persistence, heavy cooking or smoke events, and the manufacturer’s recommended intervals to decide when to replace the filter.

Can I wash or vacuum a HEPA/main particle filter to make it last longer?

Most true HEPA filters should not be washed because moisture and scrubbing can damage the fine fibers and reduce efficiency; aggressive vacuuming is also risky unless the manual specifically permits it. Follow the manufacturer’s guidance and replace the filter when visual loading or performance indicates it’s spent.

How should I maintain built-in sensors so auto mode gives accurate readings?

Periodically dust around the sensor inlet with a soft brush or dry cotton swab while the unit is unplugged, and avoid placing the purifier immediately next to floors or vents that constantly blow dust into the inlet. If auto responses remain sluggish after cleaning, inspect placement and consider professional service if the sensor appears faulty.

Air Purifier vs Ozone Generator: Safety, Effectiveness, and Myths Explained

isometric illustration comparing two indoor air cleaning devices

An air purifier is usually the safer and more effective choice for everyday home use, while an ozone generator is generally not recommended in occupied rooms. Both are marketed for cleaner air, but they work very differently and carry very different risks.

Understanding the difference between an air purifier and an ozone generator helps you match the right tool to common home air quality problems like dust, smoke, odors, and musty basements. It also helps you avoid choices that can make air quality worse, especially for children, older adults, or anyone with asthma or allergies.

This guide walks through how each technology works, what you can realistically expect from them, where they fit (and do not fit) in a home, and how to read key specs before you buy or plug anything in.

What Air Purifiers and Ozone Generators Are, and Why the Difference Matters

When people search for ways to “clean the air” at home, they often see both air purifiers and ozone generators in the same category. In reality, they belong in very different buckets.

Air purifiers for home use are usually fan-and-filter machines. They pull room air through filters that trap particles and, sometimes, adsorb gases and odors. Their goal is to remove pollutants from the air without adding new ones.

Ozone generators intentionally make ozone gas. Ozone is a reactive form of oxygen that can change the chemistry of some pollutants and odors, but it is also a lung irritant. At levels high enough to noticeably change smells in a room, ozone can bother the eyes, throat, and lungs.

This difference matters because:

  • Most people want something safe to run for hours in bedrooms and living areas.
  • Many advertisements blur the line between “fresh” and “safe” air.
  • Some devices marketed as air cleaners are actually ozone generators or include ozone-producing features.

For routine, occupied spaces, filter-based air purifiers are usually the primary option to consider. Ozone generators, if used at all, belong in very controlled, unoccupied situations.

How Each Device Works: Key Concepts That Affect Real Performance

To compare an air purifier vs an ozone generator in a realistic way, it helps to understand the basics of how each one works and how that translates into cleaner (or not-so-clean) air.

How Air Purifiers Clean the Air

Most residential air purifiers use a simple sequence:

  • Fan draws air in through an intake grille.
  • Air passes through multiple filters, often in layers.
  • Filtered air returns to the room through an outlet.

Common filter layers include:

  • Prefilter to catch hair, lint, and larger dust so the main filter does not clog quickly.
  • HEPA or HEPA-style filter (dense fibers) to capture fine particles such as pollen, pet dander, and smoke particles.
  • Activated carbon filter (porous carbon) to adsorb some odors and volatile organic compounds (VOCs).

Performance is driven by two main ideas:

  • Clean Air Delivery Rate (CADR): How much clean air the purifier produces per minute. Higher CADR usually means faster reduction of particle levels.
  • Air changes per hour (ACH): How many times per hour the purifier can theoretically move a room’s volume of air through its filters. Higher ACH generally means more aggressive cleaning.

Room size, ceiling height, and where you place the purifier all affect whether the theoretical numbers match what you experience.

How Ozone Generators Work

Ozone generators use high voltage or ultraviolet light to convert some of the oxygen in the air (O2) into ozone (O3). That ozone then spreads through the room and reacts with substances in the air and on surfaces.

Once released, ozone can:

  • React with odor-causing gases, sometimes reducing the smell.
  • React with materials such as carpets, rubber, paints, and upholstery.
  • Form new chemicals when it reacts with indoor pollutants, some of which may be irritating.

Unlike a HEPA filter, ozone does not physically remove particles from the air. It changes chemistry instead of capturing contaminants in a filter.

Side-by-Side Comparison of Typical Home Use

Table 1. Air purifier vs ozone generator for common home goals – Example values for illustration.
Home air goal Filter-based air purifier Ozone generator
Reduce dust, pollen, pet dander Directly captures particles with HEPA-type filter; can run continuously in occupied rooms. Does not filter particles; may change chemistry of some components but leaves particles present.
Handle everyday cooking and household odors Activated carbon can reduce many common odors when sized and replaced properly. May temporarily change or mask odors; results can be uneven and create new byproducts.
Help during outdoor smoke or wildfire events Higher CADR and ACH can significantly lower indoor smoke particle levels. Does not remove smoke particles; ozone can add respiratory irritation.
Use in bedrooms and living rooms Designed for occupied spaces when ozone-free; often run for many hours per day. Generally not recommended in occupied rooms because ozone is a lung irritant.
Address musty or moldy smells Can reduce airborne spores and some odors, but root moisture issues must be fixed separately. May change odor for a short time but does not correct moisture; can be harsh in tight spaces.
Ease of use for non-technical users Set fan speed, replace filters as scheduled, and keep vents unblocked. Requires strict control of exposure time, vacancy, and post-treatment ventilation.

Real-World Home Scenarios: What Actually Works Where

Marketing claims can make almost any device sound like a cure-all. Looking at specific home situations makes the difference between an air purifier and an ozone generator much clearer.

Bedroom for an Allergy or Asthma-Prone Occupant

Goal: Reduce pollen, pet dander, and fine dust to help with nighttime symptoms.

  • More appropriate: A filter-based air purifier sized for the room, running on a steady setting to achieve multiple air changes per hour.
  • Why: HEPA-type filtration directly removes airborne allergens. The device can run safely for long stretches in an occupied room when it does not intentionally produce ozone.
  • Supporting steps: Regular vacuuming with good filtration, washing bedding, and keeping pets out of the bedroom if possible.

An ozone generator does not remove allergen particles and may irritate sensitive lungs, so it does not fit this scenario.

Kitchen and Open Living Area with Cooking Odors

Goal: Keep lingering cooking smells and light smoke from building up in the main living space.

  • More appropriate: A purifier with a particle filter and a meaningful activated carbon layer, used along with range hoods or exhaust fans.
  • Why: The purifier can reduce grease particles and some cooking odors as air circulates, especially when run on higher speed during and shortly after cooking.
  • Supporting steps: Use lids on pans, run exhaust fans that vent outdoors, and wipe surfaces where grease can settle.

Ozone is not needed to manage everyday cooking smells and adds unnecessary risk if used where people are present.

Damp Basement with Musty Smell

Goal: Reduce musty odor and mold-related concerns in a cool, damp basement.

  • Core solution: Moisture control using dehumidification, drainage fixes, and sealing obvious leaks or seepage.
  • Helpful add-on: A HEPA-type purifier to reduce airborne spores and dust while moisture issues are being addressed.
  • Why: Mold problems are driven by moisture, not just what is in the air. Filtration helps with what you breathe but does not dry the space.

Ozone might temporarily change the smell, but it does not dry walls or carpets. In a tight, poorly ventilated basement, ozone can build up and make the air more irritating.

Short-Term Odor Incident (Burnt Food, Hobby Chemicals)

Goal: Clear out a one-time strong odor from burnt food, craft glues, or paints.

  • First step: Stop the source and ventilate by opening windows or running exhaust fans when outdoor conditions allow.
  • Second step: Run an air purifier with carbon filtration on higher speed to help reduce residual odors and particles.
  • Optional step: Temporarily avoid the room until the strongest odor dissipates.

Ozone is not required for these common situations and can be an unnecessary complication compared with simple ventilation plus filtration.

Common Mistakes and Troubleshooting Cues

Many people buy an air cleaner, plug it in, and assume it is working as advertised. Several common mistakes can limit effectiveness or increase risk, depending on the device.

Air Purifier Mistakes

  • Undersizing the purifier: A small unit in a large open-plan area may only clean the air close to it. If you still see dust buildup or smell smoke far from the purifier, it may not be moving enough air for the space.
  • Running only on the lowest fan speed: Quiet modes are comfortable but may not deliver enough clean air during high-pollution events like cooking or wildfire smoke. If the air looks hazy or smells smoky, temporarily use a higher speed.
  • Ignoring filter replacement: Overloaded filters restrict airflow and reduce cleaning. Signs include reduced air coming from the outlet, more noise at the same setting, or dust visible on the filter surface.
  • Blocking intake or outlet: Placing the purifier behind furniture or too close to walls can short-circuit airflow. If you feel only a weak air stream from the outlet, check that nothing is blocking vents.

Ozone Generator Mistakes

  • Using ozone in occupied rooms: Running an ozone generator where people or pets are present increases the chance of irritation, especially for those with respiratory issues.
  • Confusing “no smell” with “no ozone”: Not smelling ozone does not guarantee safe levels. People vary widely in sensitivity, and odor fatigue can occur.
  • Relying on ozone for mold removal: Treating a moldy room with ozone without fixing leaks or humidity leads to recurring problems once moisture returns.
  • Skipping post-treatment ventilation: After using ozone in an unoccupied space, failing to air out the area can leave higher ozone levels and reaction products indoors.

Troubleshooting Cues to Watch For

Table 2. Practical cues that something is wrong and likely causes – Example values for illustration.
What you notice Likely cause Practical next step
Dust still settles quickly on surfaces near a purifier. Purifier is undersized, on too low a setting, or filters are clogged. Check room size vs specs, increase fan speed, and inspect or replace filters.
Strong cooking or pet odors linger even with a purifier running. Carbon filter is saturated or too small for the odor load. Replace carbon filter and improve source control and ventilation.
Purifier becomes louder over time at the same fan speed. Dust buildup restricting airflow through filters or grille. Clean prefilters and grilles; replace main filters if past their service life.
Eyes or throat feel irritated when an ozone-producing device runs. Ozone concentration is high enough to cause discomfort. Turn the device off, ventilate the area, and avoid using ozone in occupied spaces.
Musty odor returns soon after a “treatment” session. Moisture problem remains; odor source was never removed. Investigate leaks, humidity, and drainage; use dehumidification and drying.

Safety Basics: Ozone Exposure vs Filter-Based Purification

Safety is the most important difference between an air purifier and an ozone generator in everyday homes.

Why Ozone Exposure Is a Concern

Ozone at ground level is a known respiratory irritant. At concentrations high enough to aggressively change or mask odors indoors, it can:

  • Cause coughing, throat irritation, or chest tightness in some people.
  • Aggravate asthma or other lung conditions.
  • Affect children, older adults, and people with breathing sensitivities more strongly.

In closed or poorly ventilated rooms, ozone from generators can build up more easily, especially if the device is left running for long periods.

Safer Approaches to Everyday Air Cleaning

Mechanical filter-based air purifiers are designed to remove particles and some gases without adding reactive chemicals to the air. For routine use in bedrooms, living rooms, and home offices:

  • Favor devices that clearly rely on filters and do not intentionally produce ozone.
  • Be cautious with add-on features labeled as ionizers, plasma, or UV that may produce small amounts of ozone as a byproduct if not carefully engineered.
  • Combine filtration with ventilation, source control, and moisture management for a complete indoor air strategy.

In most homes, there is no need to introduce ozone to achieve meaningful improvements in indoor air quality.

Long-Term Use, Maintenance, and Storage

Whether you choose a filter-based air purifier or are evaluating an existing ozone-producing device, long-term performance depends on maintenance and how the device is stored and operated over time.

Keeping Air Purifiers Effective

  • Follow filter schedules: Replace HEPA and carbon filters according to hours of use and local air conditions. Heavy smoke or dust may shorten the useful life of filters.
  • Clean prefilters and grilles: Many prefilters can be vacuumed or gently washed. Keeping them clean protects the main filter and maintains airflow.
  • Check placement periodically: As furniture moves or clutter builds, make sure intakes and outlets remain unblocked.
  • Seasonal adjustments: During pollen or wildfire seasons, you may run the purifier more hours per day and on higher settings than in milder months.

Storing Devices Between Seasons

  • Dry environment: Store purifiers in a dry, clean area to prevent mold growth on filters or internal parts.
  • Cover against dust: A simple cover or bag (with the power cord outside) helps keep dust off while stored.
  • Inspect before reuse: At the start of a new season, check filters for odor, discoloration, or visible buildup and replace if needed.

Ozone Generators and Long-Term Considerations

If you already own an ozone generator:

  • Review how often it is actually needed versus safer alternatives like ventilation and filtration.
  • Store it unplugged, labeled clearly, and out of reach of children to prevent accidental use.
  • Reconsider using ozone in any regularly occupied space, even for short “freshening” runs.

Practical Takeaways and Specs to Look For

Choosing between an air purifier and an ozone generator becomes much simpler when you focus on your actual goal and who is breathing the air.

  • For everyday particle reduction (dust, pollen, smoke), choose a filter-based air purifier sized correctly for the room.
  • For odors and VOCs, use source control and ventilation first, then support with a purifier that includes meaningful activated carbon.
  • For mold and musty smells, prioritize moisture control; use HEPA filtration as a support, not a substitute.
  • Reserve ozone, if used at all, for carefully controlled, unoccupied situations and recognize that it does not fix underlying moisture or contamination sources.

Specs to Look For on an Air Purifier Label

When evaluating a filter-based air purifier for home use, focus on these practical details:

  • Room size match: Look for a recommended room size or calculate whether the CADR can provide multiple air changes per hour in your actual room dimensions.
  • Particle filtration: Confirm the presence of a HEPA or HEPA-type main filter designed to capture fine particles such as smoke and pollen.
  • Gas and odor reduction: If odors are a concern, check that there is a dedicated activated carbon or other gas-phase filter, not just a thin scented pad.
  • Noise levels: Review sound levels at different fan speeds, especially for bedrooms and home offices where you may run the device for many hours.
  • Filter replacement indicators: A clear indicator or hour counter helps you replace filters based on actual use rather than guesswork.
  • Energy use: Consider power consumption at the fan speeds you are likely to use most often, since purifiers may run many hours per day.
  • Ozone-related claims: Prefer products that state they do not intentionally generate ozone and that rely on mechanical filtration as the primary cleaning method.

By focusing on these specs and on the real conditions in your home, you can choose equipment that improves indoor air quality without introducing avoidable risks.

Frequently asked questions

Which technical specs and features matter most when choosing an air purifier?

Prioritize CADR and recommended room size to ensure the unit can handle your space, and confirm it has a true HEPA (or HEPA-type) filter for particles. If odors or VOCs are a concern, look for a substantial activated carbon or gas-phase filter, and consider noise levels and filter-replacement indicators for practical long-term use.

How can I avoid common mistakes that make air purifiers less effective?

Match the purifier size to the room, run it at higher fan speeds during high-pollution events, and replace or clean filters on schedule. Also avoid blocking intake or outlet vents by placing the unit where air can circulate freely.

Are ozone generators safe to use around people and pets?

Ozone generators are not recommended for occupied spaces because ozone is a lung irritant that can cause coughing, throat irritation, and worsen asthma. If they are used at all, it should be only in controlled, unoccupied situations with thorough post-treatment ventilation.

Can an air purifier help during wildfire smoke events?

A purifier with a high CADR and a true HEPA filter can substantially reduce indoor smoke particle levels when run continuously and used in a closed room. Keep doors and windows closed and avoid relying on ozone generators, which do not remove particles and can add respiratory risk.

Will an air purifier eliminate mold smells in a damp basement?

An air purifier can reduce airborne spores and some odors, but it will not fix underlying moisture or mold in walls and carpets. Address humidity, leaks, and drying first, and use filtration as a supplemental measure while remediation is underway.

How long should I run a purifier after a short-term odor incident like burnt food?

Ventilate the room first if possible, then run a purifier with activated carbon on a higher setting for several hours until the smell subsides. The exact time depends on odor strength and room size, but continuous operation until air changes reduce the concentration is a practical approach.

Humidifier vs Dehumidifier: How to Tell Which One You Actually Need

Isometric comparison of humidifier and dehumidifier in a living room

You use a humidifier when your indoor air is consistently too dry and a dehumidifier when it is consistently too damp, and the easiest way to know which you need is to measure your room’s relative humidity with a hygrometer. If readings sit mostly below about 30%, you typically add moisture; if they sit above about 55–60%, you usually remove it.

This guide walks through how humidifiers and dehumidifiers work, what indoor humidity range to aim for, and how to match the right tool to real rooms in your home. You will see practical examples for bedrooms, basements, bathrooms, and open living spaces, plus simple checks you can do before buying anything.

Whether you are dealing with static shocks and dry air in winter or musty, clammy rooms in summer, the goal is the same: keep humidity in a moderate band that supports comfort, protects your home, and reduces moisture-related risks without overcorrecting in either direction.

What Humidifiers and Dehumidifiers Do and Why Humidity Matters

Humidity is the amount of water vapor in the air. Indoors, that moisture level has a direct impact on comfort, how warm or cool a room feels, and how easily surfaces stay dry. Too little moisture feels harsh and drying; too much can make spaces feel heavy, sticky, and slow to dry out.

Most homes are most comfortable and manageable somewhere around 30–50% relative humidity (RH). The exact number is less important than avoiding long stretches at the extremes:

  • Below about 30% RH: air is considered very dry. Static shocks are common, wood can shrink, and some people notice dry skin, throat, or eyes.
  • Above about 55–60% RH: air is considered damp. Rooms can feel clammy, condensation may appear on windows or cold walls, and damp spots can stay wet longer than they should.

Humidifiers and dehumidifiers are tools for nudging indoor humidity back toward the middle when your heating, cooling, and building design are not enough on their own. A humidifier adds water vapor to dry air; a dehumidifier removes water vapor from damp air.

Because humidity changes with weather, season, and daily habits like showering or cooking, the most reliable way to decide between a humidifier vs dehumidifier is to measure humidity over time in the rooms you actually use.

Key Concepts: How Humidifiers and Dehumidifiers Work

Both devices are designed to move moisture between air and water, just in opposite directions. Understanding the basics helps you choose the right type and size for your space.

How a Humidifier Works

A humidifier adds moisture to indoor air. Common designs include:

  • Evaporative units: a fan blows air across a wet wick or filter so water evaporates naturally into the room.
  • Ultrasonic units: a vibrating plate turns water into a fine mist that is released into the air.
  • Warm mist units: water is heated to create steam or warm vapor before it mixes with room air.

All types draw water from a tank or reservoir and release it into the air until the room’s humidity rises. Many have built-in humidistats that cycle the unit on and off around a target RH.

How a Dehumidifier Works

A dehumidifier pulls moist air in, removes water, and sends drier air back into the room. Two common approaches are:

  • Refrigerant (compressor) units: air passes over cold coils, water condenses and drips into a tank or drain hose, and slightly warmed, drier air is returned to the room.
  • Desiccant units: air passes over or through a moisture-absorbing material that is periodically dried out, releasing collected water to a tank or drain.

Dehumidifiers are usually rated by how many pints or liters of water they can remove from the air per day under specific test conditions. In practice, performance depends on how damp and how warm the room is, plus airflow around the unit.

Deciding Direction: Add Moisture or Remove It?

Instead of guessing based on how a room feels, use a hygrometer to measure RH over several days. Then use those readings, plus simple comfort clues, to decide which direction you need to go.

Humidifier vs dehumidifier decision guide by room condition
Example values for illustration.
Measured RH pattern Typical room feel More suitable device What to check first
Often below 25–30% for many hours Dry, cool, frequent static shocks Humidifier Look for over-ventilation or gaps letting in very cold outdoor air.
Mostly 30–50% with short swings Generally comfortable Usually none Focus on normal cleaning and ventilation; monitor during season changes.
Frequently 55–65% Slightly clammy, slow-drying towels Dehumidifier Check for weak exhaust fans and high-moisture habits like indoor drying.
Often above 65–70% Very muggy, musty smells, condensation Dehumidifier (plus source fixes) Inspect for leaks, seepage, or standing water before relying on a device.
Switches between very dry in winter and damp in summer Dry during heating season, muggy in warm months Humidifier in winter, dehumidifier in summer Use the same hygrometer year-round to time when to switch tools.

Real-World Examples: Matching Tools to Rooms

Most homes have a mix of dry and damp areas. Instead of treating the whole house the same way, it often works better to match humidity tools to specific rooms or zones.

Dry-Air Examples Where a Humidifier Helps

  • Heated bedroom in a cold climate: In mid-winter, a small bedroom with forced-air heat might sit at 20–25% RH for days. You notice dry lips, static shocks when touching metal, and creaking wood floors. A small room humidifier, run with a hygrometer nearby and adjusted to stay around 35–40% RH, can smooth out that dryness.
  • Home office with electronics and paper: In a well-insulated house, a home office can still get very dry in winter. Paper files feel brittle and you get tiny shocks when touching your computer case. A modest evaporative humidifier can raise humidity into the low 30s, which often reduces static while still staying comfortably dry.
  • Rooms with wood furniture or instruments: Display cabinets, wood floors, and musical instruments can shrink or crack over repeated dry seasons. Keeping those rooms from dropping below the low-30% range for long stretches with a controlled humidifier can help limit seasonal movement.

Damp-Air Examples Where a Dehumidifier Helps

  • Basement in a humid summer: The basement smells musty, cardboard boxes feel soft, and a hygrometer reads 65–70% RH most afternoons. A basement dehumidifier set to about 50% RH, combined with better drainage and airflow, can bring readings down and help stored items stay drier.
  • Bathroom without strong exhaust: After showers, mirrors stay fogged and walls feel damp for hours. Even with the door open, RH stays above 60% much of the day. Improving exhaust and using a small dehumidifier just outside the bathroom door can help moisture clear faster.
  • Laundry or utility room: Indoor drying racks, unvented dryers, or frequent washing can push RH well above 60%. A dehumidifier placed where air can circulate, plus habits like running a fan until clothes are dry, can prevent persistent dampness.

Rooms That May Need Both Over the Year

  • Open-plan living area: In winter, heating can bring RH down below 30%, so you might use a larger-capacity humidifier to keep the main area in the mid-30s. In summer, if the same space tends to hover above 60% RH despite air conditioning, a dehumidifier can help keep things closer to 45–50%.
  • Spare bedroom or guest room: Little-used rooms sometimes become either very dry (if supply vents blast heated air) or very damp (if doors stay closed and air is still). Periodically checking humidity and running a humidifier or dehumidifier as needed helps keep the room ready for use and protects stored items.
Examples of room problems and likely humidity fixes
Example values for illustration.
Room and symptom Typical RH readings Probable issue Likely tool or action
Bedroom: static shocks, dry nose 22–28% in winter evenings Air too dry Humidifier plus sealing drafts to reduce over-drying.
Basement: musty smell, damp boxes 60–70% most afternoons Chronic dampness Dehumidifier plus checking for seepage and improving drainage.
Bathroom: fogged mirror for an hour after shower Spikes to 75% then slowly drops Moisture not vented quickly Stronger exhaust, door open after use, dehumidifier if RH stays high.
Living room: comfortable most of the year 35–45% with short swings Stable humidity No device needed; keep monitoring during extreme weather.
Closet on exterior wall: musty clothes Not measured, but room next door at 60% Trapped humid air Increase airflow, avoid overstuffing, consider whole-room dehumidification.

Common Mistakes and Troubleshooting Humidity Problems

Even when you choose the right type of device, a few common missteps can keep humidity from improving or can create new problems. Watching for these issues early can save time and frustration.

Common Humidifier Mistakes

  • Running without measuring: Using a humidifier based only on how air feels can easily lead to over-humidifying. If windows start to fog or nearby surfaces feel damp, reduce output or run the unit for fewer hours and confirm with a hygrometer.
  • Placing the unit in a corner: Tucking a humidifier into a tight corner can cause local condensation while the rest of the room stays dry. Move it toward the center of the room, on a stable surface with some space around it, and keep it away from delicate electronics.
  • Ignoring mineral buildup: Hard water can leave white dust or scale inside the unit. If you see visible deposits, clean according to the manual and consider using cleaner water sources to reduce buildup.

Common Dehumidifier Mistakes

  • Trying to dry a space with active leaks: A dehumidifier cannot keep up with ongoing roof, wall, or plumbing leaks. If the tank fills rapidly and humidity barely drops, inspect for water intrusion and fix those sources first.
  • Blocking airflow: Placing a dehumidifier tight against a wall or furniture can choke its air intake and exhaust. Leave several inches of clearance on all sides so air can circulate freely.
  • Leaving windows open: In humid weather, an open window can supply more moisture than the dehumidifier can remove. Keep doors and windows mostly closed in the area you are trying to dry.

Troubleshooting Clues to Watch For

  • Humidity not changing: If RH readings stay almost the same after hours of running a device, check for undersized capacity, open windows, or nearby rooms feeding in very dry or very humid air.
  • Uneven readings in different spots: Large rooms and multi-level spaces can have pockets of different humidity. Take readings in multiple locations and consider using more than one device or improving airflow with fans.
  • Short cycling: If a unit turns on and off rapidly, the built-in sensor may be too close to the moisture source or blocked by furniture. Reposition the device and make sure vents are clear.

Safety Basics for Humidifiers and Dehumidifiers

Humidifiers and dehumidifiers are everyday appliances, but they combine water and electricity, so basic safety habits matter. Good placement, wiring, and use can reduce risk and help the devices last longer.

Electrical and Placement Safety

  • Use appropriate outlets: Plug units directly into properly grounded wall outlets. Avoid daisy-chaining power strips or using light-duty extension cords that are not rated for the device’s load.
  • Keep cords out of traffic paths: Route power cords where they will not be tripped over or pinched under doors, furniture, or rugs.
  • Protect from splashes: For humidifiers, keep the base and cord away from sinks, tubs, and other sources of accidental splashing. For dehumidifiers, avoid placing them where they can be sprayed directly with water.

Water Handling and Spill Prevention

  • Fill and empty carefully: Carry water tanks with two hands and avoid overfilling. Wipe up spills promptly so floors do not become slippery.
  • Secure drain hoses: If using a continuous drain on a dehumidifier, route the hose so it slopes steadily downward into a suitable drain and is not kinked or easily dislodged.
  • Avoid standing water: Do not let water sit in tanks for long periods when the unit is off. Empty and dry tanks if you will not use the device for several days.

Operating Within Reasonable Ranges

  • Do not chase extreme targets: Trying to maintain very low humidity (below about 30%) or very high humidity (above about 50–55%) for long periods typically offers little benefit and can create new problems.
  • Respect temperature limits: Many dehumidifiers are designed for use in spaces above a certain temperature. Running them in very cold rooms can cause frost buildup on coils and reduce performance.
  • Follow manufacturer instructions: Always read and follow the specific safety guidelines, including placement, maximum extension cord length if allowed, and recommended room types.

Maintenance and Long-Term Use

Regular maintenance keeps both humidifiers and dehumidifiers working reliably and helps you avoid unwanted side effects like mineral deposits, odors, or reduced performance. Most tasks are simple and take only a few minutes when done consistently.

Humidifier Care and Storage

  • Daily or frequent tasks: Refill the tank with clean water, empty any leftover water before refilling, and quickly inspect for visible buildup or film.
  • Weekly or periodic cleaning: Follow the cleaning schedule in your manual, which often includes rinsing or wiping the tank, cleaning the base, and checking wicks or filters for discoloration or deposits.
  • Seasonal storage: At the end of the dry season, empty all water, let the unit dry thoroughly, clean removable parts, and store it in a dry location where dust will not clog vents.

Dehumidifier Care and Storage

  • Tank and drain maintenance: Empty and rinse the water tank regularly. If using a drain hose, check occasionally for clogs, kinks, or buildup at the drain point.
  • Filter and coil care: Many dehumidifiers have washable or replaceable air filters. Clean or replace them as recommended so airflow stays strong. If the unit has accessible intake grilles, gently remove dust buildup.
  • Off-season storage: When the damp season ends, turn the unit off, let any remaining ice or condensation clear, empty the tank, wipe surfaces dry, and store it upright in a cool, dry place.

Signs It May Be Time to Replace or Upsize

  • Persistent high or low RH despite regular use: If your hygrometer still shows out-of-range readings after trying different settings and placements, your device may be undersized for the space.
  • Unusual noises or smells: Grinding, rattling, or burning odors are cues to unplug the unit and inspect or consider replacing it.
  • Very old units with poor efficiency: Older devices may use more energy and deliver less moisture control than newer designs. If your unit runs constantly without much impact, an upgrade in capacity or efficiency may help.

Practical Takeaways and Specs to Look For

Choosing between a humidifier vs dehumidifier becomes much easier when you focus on measured humidity, not just how a room feels. Measure first, fix obvious moisture sources or drafts, then use the right tool in the right room.

In many homes, a simple strategy works well: use a humidifier in dry winter bedrooms or offices, a dehumidifier in damp basements or laundry rooms, and rely on good ventilation in kitchens and bathrooms to handle short moisture spikes.

Quick Takeaways

  • Use a hygrometer to track RH in key rooms for several days before buying devices.
  • Aim to keep most rooms roughly in the 30–50% RH range over time.
  • Choose a humidifier when readings are consistently low; choose a dehumidifier when readings are consistently high.
  • Address leaks, poor drainage, and weak exhaust fans before relying on a dehumidifier alone.
  • Place devices where air can circulate and adjust settings gradually while watching for condensation or persistent dampness.

Specs to Look For When Comparing Devices

  • Capacity matched to room size: For humidifiers, check the recommended room area or volume. For dehumidifiers, look at pints or liters per day and match it to room size and how damp the space tends to be.
  • Built-in humidity control: A digital humidistat or adjustable dial lets the device cycle around a target RH instead of running at full power constantly.
  • Noise level: For bedrooms and living areas, consider models with lower sound output or multiple fan speeds so you can run them comfortably at night.
  • Tank size and drainage options: Larger tanks or continuous drain connections reduce how often you need to empty water, especially for dehumidifiers in very damp spaces.
  • Filter or wick type and replacement cost: Check whether the unit uses disposable or washable parts and how often they need attention.
  • Power use: Compare wattage or estimated energy use, especially for devices that will run many hours a day in basements or main living areas.
  • Operating temperature range: Make sure the device is rated for the conditions in your space, particularly for basements, garages, or unheated rooms.

With clear measurements, realistic expectations, and attention to a few key specifications, you can choose and use humidifiers or dehumidifiers in a way that keeps your indoor air more stable and your home more comfortable across the seasons.

Frequently asked questions

What specs or features should I look for when choosing between a humidifier and a dehumidifier?

Match capacity to the room (humidifiers list room size; dehumidifiers list pints or liters removed per day), and look for a built-in humidistat so the unit cycles around a target RH. Consider noise level, tank size or continuous-drain options, filter or wick maintenance needs, operating temperature range, and estimated power use when comparing models.

Is it a mistake to operate a humidifier or dehumidifier without measuring room humidity?

Yes. Running a device without a hygrometer can lead to over- or under-correcting humidity; measure RH over several days to confirm patterns and adjust settings accordingly. A small sensor is inexpensive and helps avoid condensation, mold risk, or wasted energy.

Are humidifiers and dehumidifiers safe to use around children and pets?

Generally they are safe if used per the manufacturer’s instructions and with basic precautions: plug into grounded outlets, keep cords and units out of reach, place devices on stable surfaces, and clean tanks regularly to prevent microbial growth. Avoid placing humidifiers where hot steam could scald and keep dehumidifier drain hoses secured so pets cannot chew or dislodge them.

How often should I clean or maintain my unit to avoid odors and buildup?

For humidifiers, refill daily or as recommended, and follow a weekly cleaning schedule to remove mineral film and biofilm; empty tanks when not in use. For dehumidifiers, empty and rinse the water tank regularly, clean or replace air filters per the manual, and check drain hoses for clogs before storing the unit for the season.

Can I use a dehumidifier to fix leaks or standing water?

No. A dehumidifier can help dry air and reduce dampness but cannot keep up with active leaks or standing water; repair the source of intrusion and improve drainage before relying on a dehumidifier alone. If water appears faster than the unit can remove it, investigate and fix plumbing, roof, or foundation issues.

Will a single unit control humidity for an open-plan home, or do I need multiple units?

It depends on the space and how uniform humidity is; a single, appropriately sized unit may manage an open-plan area, but very large or multi-zone homes often need multiple devices or a whole-house solution. Take multiple hygrometer readings and consider airflow and occupancy patterns when deciding whether one unit is enough.

Air Purifier vs Dehumidifier: Best Way to Fix Musty Air at Home

isometric illustration of an air purifier and dehumidifier indoors

If the air in your home smells musty, a dehumidifier is usually the first tool to fix it, and an air purifier is often the second. Musty air is almost always tied to excess moisture plus stagnant, particle-filled air, so deciding between an air purifier vs dehumidifier comes down to which problem is bigger in your space.

This guide walks through what actually causes musty smells, how air purifiers and dehumidifiers work, and how to match each device to basements, bedrooms, bathrooms, and closets. You will see concrete examples, warning signs to watch for, and specs that matter when you are ready to buy. The goal is simple: turn a damp, stale room into a space that smells neutral and feels comfortable, without wasting money on the wrong device.

Use this as a practical checklist-style reference as you track humidity, test different settings, and fine-tune your home’s air quality over time.

What Musty Air Really Means and Why It Matters

Musty air is the stale, earthy, sometimes “wet basement” smell that lingers in closed rooms. It often shows up in basements, bathrooms, laundry areas, and older homes, but even newer houses can develop it in closets, under-stair storage, or rooms that stay closed up.

Under the surface, musty air usually means some combination of:

  • Elevated humidity that keeps surfaces and fabrics slightly damp
  • Poor ventilation, so odors and moisture are trapped
  • Dust, spores, and other particles hanging in the air
  • Past or ongoing moisture events (minor leaks, condensation, or flooding)

When these conditions persist, odors soak into carpets, drywall, cardboard boxes, and stored fabrics. That is why a quick spray of fragrance or a short burst of fresh air rarely solves the problem for long.

Understanding whether moisture or airborne particles and odors are driving your musty smell is the key to choosing between an air purifier and a dehumidifier—and knowing when you actually need both.

How Air Purifiers and Dehumidifiers Work on Musty Air

Air purifiers and dehumidifiers both improve indoor air quality, but they act on different parts of the problem. One targets what is floating in the air; the other targets how wet the air is.

What an air purifier actually does

An air purifier pulls room air through internal filters and pushes cleaner air back out. Typical stages include:

  • Pre-filter: Catches larger debris like hair and lint.
  • Fine particle filter (often HEPA-type): Traps small particles such as dust, pollen, and many airborne spores.
  • Odor or gas filter (often carbon-based): Adsorbs some odor-causing molecules that contribute to musty smells.

For musty air, an air purifier helps by:

  • Reducing the “dusty” or “stale” feel of the air
  • Lowering airborne spores and fine debris stirred up from damp materials
  • Softening light musty odors if an odor filter is included

However, an air purifier does not remove moisture. If walls, carpets, or storage boxes are damp, a purifier alone will not dry them out or stop new musty odors from forming.

What a dehumidifier actually does

A dehumidifier pulls in room air, cools it so water condenses out, then reheats and releases drier air. The collected water drains into a tank or hose.

For musty air, a dehumidifier helps by:

  • Lowering relative humidity so surfaces gradually dry
  • Reducing condensation on windows, pipes, and cool walls
  • Making rooms feel less clammy and reducing the conditions that create musty odors

But a dehumidifier is not a fine air filter. Its built-in screen or filter is mainly there to protect the machine, not to clean the air the way an air purifier does.

Side-by-side comparison for musty rooms

Table 1. Air purifier vs dehumidifier for common musty-room symptoms – Example values for illustration.
Symptom you notice Likely main problem More helpful first device What to check
Strong earthy smell, cool damp walls, sticky floors High humidity and damp materials Dehumidifier Measure humidity; look for leaks or past water damage.
Air feels stale, dust on surfaces, mild musty hint Particles and light odor Air purifier Check if humidity is normal but dust builds quickly.
Basement smells musty after rain, better in dry weather Seasonal moisture swings Dehumidifier Track humidity after storms vs dry spells.
Bedroom smells musty only with windows closed Poor ventilation and particles Air purifier Note if smell improves quickly when aired out.
Closet smells musty, especially near outside wall Localized dampness and low airflow Dehumidifier for room Feel wall and floor; check for cold spots and clutter.
Finished basement: damp in summer, dusty in winter Humidity plus particles Dehumidifier, then air purifier Use dehumidifier in humid months; add purifier for daily use.

Real-World Musty Room Scenarios and What Works

Seeing how these tools behave in real rooms makes the choice clearer. Below are typical home situations and what usually helps most.

Musty basement or lower level

Basements often have:

  • Humidity that stays high, especially in warm months
  • Concrete or masonry that absorbs and releases moisture
  • Stored cardboard boxes, seasonal clothes, and soft furniture

In this case, a dehumidifier is almost always the first purchase. Over a few days to weeks, lower humidity helps:

  • Dry out carpets and area rugs
  • Reduce that “wet concrete” smell
  • Cut down on condensation on windows or metal surfaces

If people spend a lot of time in the basement (TV room, playroom, home gym), an air purifier can then be added to reduce dust, spores, and any remaining stale odor in the air.

Stuffy bedroom with light musty smell

Bedrooms often develop a mild musty or stale odor when:

  • Windows stay closed for long periods
  • Doors are kept mostly shut
  • Soft furnishings (bedding, curtains, rugs) collect dust

If a hygrometer shows humidity in a comfortable range, an air purifier is usually more helpful than a dehumidifier. It can:

  • Capture dust and fine particles kicked up when you move around
  • Reduce light musty or body odors when paired with an odor filter
  • Help sensitive sleepers breathe easier at night

Small bathroom or laundry area

Bathrooms and laundry rooms create moisture quickly. Mustiness here often comes from:

  • Steam from showers or hot water
  • Damp towels and laundry piles
  • Limited or no exhaust ventilation

Practical steps include longer exhaust fan use, hanging towels to dry, and cracking a door after showers. If humidity still spikes and lingers, a small dehumidifier in or near the room usually helps more than an air purifier, because it directly removes the excess moisture that keeps smells hanging around.

Closets and storage spaces

Closets and under-stair storage often smell musty even when the rest of the house seems fine. Common patterns include:

  • Closet backs up to an exterior or foundation wall
  • Cardboard boxes and packed clothing with no airflow
  • Cooler temperatures that encourage condensation

Here, a room dehumidifier plus decluttering usually beats putting a small purifier inside the closet. Elevate boxes off the floor, switch to sealed plastic storage where possible, and leave closet doors slightly open when practical so drier room air can circulate.

Common Mistakes and Troubleshooting Musty Air

Many people buy a device, plug it in, and hope the smell disappears. When that does not happen, it is usually because of one of these common mistakes.

Using the wrong device for the main problem

  • Mistake: Buying an air purifier when the room is clearly damp.
  • Result: Air may feel a bit cleaner, but surfaces stay wet and odor soon returns.
  • Better approach: Measure humidity; if it regularly runs high, prioritize a dehumidifier first.
  • Mistake: Buying a dehumidifier for a room that is dusty but not humid.
  • Result: Humidity readings stay normal, musty or stale smell remains because particles and odors are not being filtered.
  • Better approach: Add an air purifier and improve cleaning and ventilation.

Undersizing or misplacing the device

  • Undersized dehumidifier: Struggles to bring humidity down in a large or very damp basement. Tank fills quickly, but readings barely change.
  • Undersized air purifier: Only cleans the air very close to it; the rest of the room still feels stale.
  • Poor placement: Units shoved into corners, behind furniture, or in closets where air cannot circulate freely.

As a rule of thumb, place devices where air can move around them and choose capacities that match the room size and typical moisture level, not just the purchase price.

Ignoring moisture sources and surface contamination

Even the best dehumidifier or air purifier cannot fully overcome:

  • Active leaks from plumbing, roofs, or foundations
  • Standing water in crawlspaces or sump pits
  • Heavily water-damaged carpets, drywall, or insulation

If you see stains, peeling paint, soft drywall, or warped flooring, address those issues directly. Devices are most effective after obvious moisture sources are controlled and damaged materials are evaluated or replaced as needed.

Maintenance mistakes that bring musty smells back

  • Running an air purifier with clogged filters until airflow drops and odors return.
  • Letting a dehumidifier bucket overflow or stay dirty, adding its own stale smell.
  • Allowing dust to build up on intakes and outlets so devices cannot move enough air.

Consistent, simple maintenance often makes the difference between “it helped a little” and “the room finally smells neutral.”

Troubleshooting guide: when results are disappointing

Table 2. Troubleshooting musty air when devices are already running – Example values for illustration.
What you notice Likely cause Practical next steps
Dehumidifier runs nonstop, humidity barely drops Room too large or very wet; unit undersized Close doors to limit area, check for leaks, consider higher-capacity unit.
Air still smells musty even though humidity looks normal Odor embedded in materials or poor filtration Add or upgrade air purifier, deep clean fabrics, remove damaged items.
Odor gets better, then slowly returns Filters or tank not maintained Replace filters, clean dehumidifier bucket and intakes, recheck settings.
Musty smell stronger in corners, closets, behind furniture Trapped moisture and limited airflow Pull furniture off exterior walls, declutter, allow air to circulate.
Smell worse after heavy rain or humid weather Moisture entering from outdoors or foundation Run dehumidifier proactively, inspect drainage and weather sealing.

Safety Basics When Using Air Purifiers and Dehumidifiers

Air purifiers and dehumidifiers are generally safe household appliances, but a few habits help you avoid problems and keep indoor air healthy.

Electrical and placement safety

  • Plug units directly into wall outlets, not overloaded power strips.
  • Keep cords out of walkways to prevent tripping or pulling units over.
  • Allow recommended clearance around air inlets and outlets so motors do not overheat.
  • Avoid placing dehumidifiers where leaks from the tank or hose could damage flooring.

Water handling and spill prevention

  • Empty dehumidifier tanks before they are completely full to reduce spill risk.
  • If you use a drain hose, route it downhill and secure it so it cannot slip out.
  • Inspect hoses and connections periodically for drips that could create new damp spots.

Air quality and filter safety

  • Use only the filter types the manufacturer specifies for your air purifier.
  • Do not run devices with missing or improvised filters that could shed fibers or dust.
  • Replace odor or gas filters before they are fully saturated to avoid re-releasing smells.

Humidity targets and comfort

  • Aim for a moderate humidity range rather than extremes to avoid overly dry air.
  • In very cold climates, slightly higher indoor humidity can help prevent overly dry conditions, but watch for window condensation as a warning sign.
  • In very humid climates, using a dehumidifier too aggressively can feel uncomfortable if air becomes too dry; adjust settings seasonally.

Long-Term Use, Maintenance, and Storage

Musty air problems are rarely solved in a single day. Long-term improvement comes from steady moisture control, regular filtration, and simple maintenance routines.

Routine care for air purifiers

  • Pre-filters: Check monthly; vacuum or wash if the design allows.
  • Fine particle filters: Replace according to usage and visible dirt buildup.
  • Odor filters: Replace when musty or household odors start to return sooner than before.
  • Housing and vents: Wipe dust from grills and exterior surfaces so airflow stays strong.

Routine care for dehumidifiers

  • Empty and rinse the water tank regularly to prevent slime or film buildup.
  • Clean the intake screen or filter to keep airflow high.
  • Inspect coils and vents for dust; follow manufacturer steps for safe cleaning.
  • Check drain hoses for kinks, clogs, or slow drips.

Seasonal adjustments

  • Humid seasons: Run dehumidifiers more continuously in basements and lower levels; monitor humidity and adjust setpoints.
  • Dry seasons: You may be able to reduce dehumidifier use or turn it off; keep air purifiers running as needed for dust and odor control.
  • Transitional weather: Open windows when outdoor air is dry and fresh, then close them and run devices when outdoor air is damp or polluted.

Storing devices when not in use

  • Before storing a dehumidifier, empty and dry the tank, run it on fan-only (if available) to dry internal parts, and coil the hose.
  • Store both devices in a clean, dry area so dust and moisture do not accumulate inside.
  • When bringing them out of storage, inspect cords, filters, and housings before plugging in.

Putting It All Together: Choosing the Right Device and Key Specs

By this point, you should have a clearer sense of whether humidity or airborne particles are driving the musty air in your home. The final step is turning that insight into a smart purchase and setup plan.

A simple way to decide is:

  • If surfaces feel damp, humidity readings run high, or smells spike after rain, start with a dehumidifier.
  • If humidity is moderate but air feels stale, dusty, or lightly musty, start with an air purifier.
  • If you have both issues and the room is frequently used, plan to use both devices in stages.

Specs to look for in a dehumidifier for musty air

  • Capacity matched to room size and dampness: Larger spaces or very damp basements need higher moisture removal per day.
  • Adjustable humidity setpoint: Lets you choose a target range instead of running full power all the time.
  • Continuous drain option: Helpful for basements so you are not constantly emptying the tank.
  • Auto restart: So the unit resumes operation after power interruptions.
  • Easy-to-clean tank and filter: Smooth surfaces and accessible screens make maintenance simpler.
  • Noise level appropriate for the space: Lower noise if the unit will be near living or sleeping areas.

Specs to look for in an air purifier for musty air

  • Clean air delivery matched to room size: Enough airflow to cycle the room’s air several times per hour.
  • Fine particle filter: A high-efficiency filter for dust, spores, and small particles.
  • Dedicated odor or gas filter: A separate stage designed to adsorb musty and household odors.
  • Multiple fan speeds: Higher settings for quick cleanup, lower settings for quiet nighttime use.
  • Filter replacement indicators: Simple reminders so performance does not quietly decline.
  • Straightforward filter access: Panels or doors that make it easy to change filters without tools.

Practical takeaways for fresher, less musty air

  • Start with observation: measure humidity, note where and when smells are strongest, and look closely for moisture clues.
  • Match the device to the dominant problem: moisture control first for dampness, air cleaning first for dust and light odor.
  • Use ventilation, cleaning, and decluttering alongside any device to prevent musty odors from building back up.
  • Plan for maintenance from the start so filters, tanks, and intakes stay clean and effective.
  • Adjust settings seasonally as weather and household habits change.

With the right combination of moisture control, filtration, and simple habits, most musty rooms can be transformed into spaces that smell neutral, feel comfortable, and stay that way over time.

Frequently asked questions

Which specs or features should I prioritize when buying an air purifier or dehumidifier for musty air?

For dehumidifiers, prioritize capacity matched to the room size and moisture level, an adjustable humidity setpoint, and a continuous drain option if you expect heavy use. For air purifiers, focus on clean air delivery appropriate for the room, a high-efficiency fine particle filter, and a dedicated odor or gas filter plus clear filter-replacement indicators. Also consider noise level and ease of maintenance for either device.

What is the most common mistake people make when trying to eliminate musty air?

The most common mistake is choosing the wrong device for the main problem—buying an air purifier when the room is clearly damp or a dehumidifier when the issue is dust and stale air. Always measure humidity and inspect for moisture sources first, then match the tool to whether moisture or airborne particles are the dominant issue.

Are there any safety concerns when running an air purifier or dehumidifier continuously?

Both types of devices are generally safe to run continuously if used as instructed, but follow basic electrical and placement guidance: plug directly into a properly rated outlet, allow clearance around vents, and avoid overloading circuits. For dehumidifiers, manage water safely (empty tanks or use a secure drain) and inspect hoses periodically to prevent leaks.

Can an air purifier remove the smell of mold or mildew by itself?

An air purifier with a good odor or carbon stage can reduce airborne odor-causing molecules and lower airborne spores, which may soften moldy smells. However, smells embedded in carpets, drywall, or stored items usually require cleaning, drying, or removal of the contaminated materials plus humidity control to stop the odor from returning.

Will using a dehumidifier prevent mold and musty odors long-term?

Lowering and maintaining indoor humidity reduces the conditions that allow mold to grow and can prevent many musty odors from recurring. Long-term prevention also requires fixing leaks, drying or replacing water-damaged materials, and keeping airflow adequate so pockets of trapped moisture do not persist.

Do I need both an air purifier and a dehumidifier to fix musty air?

Some situations benefit from both devices: use a dehumidifier first where dampness and high humidity are the main problem, and add an air purifier when airborne dust, spores, or lingering odors remain. In many rooms you can start with the device that targets the dominant issue and add the other if symptoms persist.

HEPA vs Activated Carbon: Best Setup for Allergies, Odors, and Smoke

Isometric illustration comparing HEPA and carbon air filters

HEPA filters are best for particles like pollen and smoke, while activated carbon is best for odors and many gases; most homes do best with a combination. If you are comparing HEPA vs activated carbon for allergies, pet smells, wildfire smoke, or general indoor air quality, it helps to match the filter type to the specific problem you are trying to solve. This guide explains what each filter can and cannot do so you can choose a setup that fits your rooms and routines.

We will walk through how HEPA and carbon filters work, real-world examples of effective setups, common mistakes, and basic safety and maintenance tips. By the end, you will know how to size a purifier, what specs to look for, and how to avoid wasting money on filters that do not address your main concern.

What HEPA and Activated Carbon Actually Do (and Why It Matters)

High-efficiency particulate air (HEPA) filters and activated carbon filters target different types of indoor air pollutants. HEPA focuses on solid particles; activated carbon focuses on many gases and odors. Understanding this difference is the key to choosing the right configuration for allergies, odors, and smoke.

In most homes, both filter types are used inside a portable air purifier or HVAC system. They sit in the same cabinet, but they do different jobs:

  • HEPA filter: Captures airborne particles such as dust, pollen, pet dander, mold spores, and smoke particles.
  • Activated carbon filter: Adsorbs certain gases and vapors responsible for odors and some components of smoke.

This division of labor matters because no single filter can remove everything. If you mainly struggle with sneezing and visible dust, HEPA is the priority. If your main complaint is lingering cooking smells or a musty odor, activated carbon becomes more important. For wildfire smoke or tobacco smoke, you typically need both.

Another practical point: stronger or denser filters create more resistance to airflow. If the fan is not powerful enough, the clean air delivery rate (CADR) and air changes per hour (ACH) will drop, and the real-world benefit will be smaller than the filter label suggests.

How HEPA and Activated Carbon Filters Work in Practice

Both HEPA and activated carbon filters sit in the path of moving air, but they work through different physical processes.

How HEPA Filters Work

HEPA filters are dense mats of fibers folded into pleats. As air passes through, particles collide with or stick to the fibers through mechanisms such as interception, impaction, and diffusion. The result is a high capture rate for fine particles, especially in the PM2.5 range that affects lungs and visibility.

  • What HEPA targets: Dust, pollen, pet dander, dust mite debris, mold spores, and fine smoke particles.
  • What HEPA does not do well: Gases and most odors, because gas molecules are much smaller and do not behave like particles.
  • Efficiency labels: Terms like “true HEPA” or higher-grade HEPA media usually mean better capture of very small particles, but they also tend to increase resistance to airflow.

In a real room, a moderately efficient HEPA filter running at a higher airflow can sometimes outperform a very high-grade filter that only runs on a low, quiet setting. Airflow and run time matter as much as the label on the filter media.

How Activated Carbon Filters Work

Activated carbon is a form of carbon that has been processed to create a huge internal surface area full of tiny pores. When air passes through a carbon bed, many gas molecules and odor compounds stick to the surface in a process called adsorption.

  • What carbon targets: Many odors from cooking, pets, smoke, and some volatile organic compounds (VOCs) from cleaners, paints, or furnishings.
  • What carbon does not do: It does not capture solid particles, so it is not a substitute for a particle filter like HEPA.
  • Capacity and thickness: Thicker, heavier carbon filters usually have more capacity and last longer before they saturate, but they also add more resistance to airflow.

Once carbon is saturated, it cannot hold additional gases effectively. At that point, odors break through more quickly, even if the filter still looks clean to the eye.

Choosing the Right Tool for the Job

Because HEPA and activated carbon target different pollutants, your ideal setup depends on your main concern. The table below summarizes typical priorities for common home air quality problems.

Table 1. Matching HEPA and activated carbon to common home concerns – Example values for illustration.
Main concern Priority filter type Support filter type Typical best setup idea
Seasonal allergies (pollen) HEPA or similar high-efficiency particle filter Optional carbon for minor odors Strong HEPA coverage in bedroom and main living area
Dust and pet dander HEPA plus pre-filter for hair and larger dust Carbon if pet odors are noticeable HEPA purifier with washable pre-filter near pet areas
Cooking odors (light smoke) Carbon for gases and smells Fine particle filter for grease and droplets Ventilation plus purifier with meaningful carbon stage
Wildfire smoke HEPA for fine smoke particles (PM2.5) Thicker carbon for smoke gases and smell Combined HEPA + carbon purifier sized for high ACH
Tobacco or incense smoke HEPA while smoke is present in the air Carbon for lingering odor and some gases Combined HEPA + carbon plus strong source control
General musty or chemical odor Carbon for gases; HEPA if dust is also an issue HEPA if visible dust or spores are present Carbon filtration plus moisture and source investigation

Real-World Examples: Allergies, Odors, and Smoke Scenarios

Translating HEPA vs activated carbon into daily life is easier with concrete examples. The following scenarios show how different setups can work in typical homes and apartments.

Scenario 1: Bedroom Allergies and Dust

A person with seasonal allergies wakes up congested and notices visible dust on furniture. The main pollutants are pollen, dust, and pet dander.

  • Primary tool: HEPA or similar high-efficiency particle filter in a bedroom air purifier.
  • Optional add-on: Thin carbon layer for minor odors from laundry or nearby bathroom.
  • Practical setup: Run the purifier on medium all night, with the unit placed so it is not blocked by furniture and can circulate air across the room.

In this case, upgrading the HEPA coverage or improving room air changes per hour will usually make more difference than adding a very thick carbon filter.

Scenario 2: Open-Plan Living Area with Cooking Odors

A family cooks frequently in an open kitchen that flows into the living room. Even with a range hood, food smells linger for hours. The main complaint is odor, not sneezing or visible dust.

  • Primary tool: Activated carbon filter with enough thickness and weight to handle recurring cooking odors.
  • Support filter: Fine particle filter to capture grease droplets and smoke particles when frying or searing.
  • Practical setup: Run the purifier on a higher speed during cooking and for 30–60 minutes afterward, then switch to a quieter setting.

Here, investing in more carbon capacity and using kitchen exhaust effectively typically brings more benefit than upgrading to an ultra-high-grade HEPA filter.

Scenario 3: Wildfire Smoke Infiltrating a Small Apartment

During wildfire season, outdoor air quality is poor, and smoke smell seeps into a small apartment. Windows are kept closed, but a haze is visible near windows and doors.

  • Primary particle control: HEPA filter sized to provide several air changes per hour in the main living/sleeping area.
  • Gas and odor control: A reasonably thick activated carbon stage to reduce smoke smell and some gases.
  • Practical setup: Seal gaps as well as possible, run the purifier on a higher setting when smoke is heavy, and move it between the main room and bedroom as needed.

In this situation, both filter types matter. Without HEPA, fine particles remain high; without carbon, the smoke smell may linger even when particle readings improve.

Scenario 4: Musty Basement with Mild Odor

A finished basement smells slightly musty, but there is no visible mold. The main concerns are odor and long-term moisture.

  • Primary tool: Carbon filter to reduce musty odor compounds in the air.
  • Support strategies: Humidity control and inspection for hidden moisture sources.
  • Practical setup: Use a purifier with carbon plus a dehumidification or ventilation strategy to keep humidity in a moderate range.

HEPA may still help if dust or spores are present, but it will not fix the underlying moisture problem that often drives musty smells.

Common Mistakes and Troubleshooting HEPA vs Carbon Setups

Many people buy a purifier with good filter media but use it in a way that limits its benefit. Recognizing common mistakes can help you troubleshoot poor results.

  • Relying on HEPA for odors: Expecting a HEPA-only purifier to remove strong cooking or pet smells, then being disappointed when the room still smells the same.
  • Undersizing the purifier: Using a small unit in a large open-plan space, leading to low ACH and only modest particle reduction.
  • Running only on the quietest speed: Keeping the fan on low at all times, especially during high-pollution events, which limits how quickly the air is cleaned.
  • Ignoring filter bypass: Not seating the filter properly or leaving gaps around the frame, so air leaks around the filter instead of through it.

Frequent Activated Carbon Mistakes

  • Using very thin carbon for heavy smoke: Expecting a thin carbon sheet to handle prolonged wildfire or tobacco smoke, leading to rapid saturation and quick odor return.
  • Not replacing saturated carbon: Assuming the filter is fine because it looks clean, even though it no longer adsorbs gases effectively.
  • Ignoring source control: Relying on carbon to fix strong, ongoing odor sources such as indoor smoking or chronic moisture instead of reducing the source.

Simple Troubleshooting Cues

The table below pairs common symptoms with likely causes and practical next steps.

Table 2. Troubleshooting HEPA and carbon performance issues – Example values for illustration.
Symptom Likely cause What to check or adjust
Room still smells smoky after hours of use Insufficient or saturated carbon; strong outdoor infiltration Check carbon thickness and age, seal gaps, increase fan speed or run time
Odor disappears briefly, then returns quickly Carbon reaching saturation Replace carbon filter sooner; consider a thicker carbon stage
Visible dust settles quickly despite purifier Low ACH or bypass around HEPA Confirm room size vs purifier rating, increase speed, check filter seating and seals
Purifier is loud but air still feels stuffy Undersized unit or blocked airflow Move away from walls, clear intake/outlet, consider additional unit for large spaces
Musty odor persists even with carbon filter Underlying moisture or hidden mold Check humidity, look for leaks, improve dehumidification and ventilation
Allergy symptoms worse in morning Insufficient overnight filtration in bedroom Run purifier continuously at moderate speed, verify filter condition, close windows during high pollen

Safety Basics When Using HEPA and Activated Carbon Filters

Properly used, HEPA and activated carbon filters are generally safe and can improve comfort and perceived air quality. A few simple precautions help you avoid unintended issues.

Avoid Ozone-Producing Add-Ons

Some devices combine particle or carbon filters with technologies that intentionally generate ozone or reactive gases. While HEPA and carbon are mechanical and adsorptive processes, ozone is a lung irritant and is not needed for effective filtration.

  • Prefer filtration-based devices that rely on filters rather than chemical reactions in occupied spaces.
  • If a device has an optional ionizing or ozone-generating mode, use it cautiously or leave that feature off in regularly occupied rooms.

Maintain Adequate Airflow and System Health

Overly clogged filters can restrict airflow. In a portable purifier this mainly reduces performance; in an HVAC system it can also stress the blower motor and reduce efficiency.

  • Replace or clean filters on the schedule recommended for your environment, not just the maximum interval listed on the package.
  • Listen for changes in fan noise that might indicate excessive strain or blockage.

Handle Used Filters Carefully

Used filters can hold captured dust, allergens, and smoke residue.

  • Turn off the purifier before opening the housing.
  • Remove filters slowly to avoid shaking out dust.
  • Place used filters directly into a bag before disposal, especially after heavy smoke events or in allergy season.

Consider Ventilation and Moisture

Filters reduce certain pollutants but do not add oxygen or remove humidity. In some situations, relying on filtration alone without ventilation or humidity control can leave air feeling stale or damp.

  • When outdoor air quality is reasonable, use ventilation to dilute indoor pollutants and carbon dioxide.
  • Use dehumidification or moisture control if you notice condensation, musty smells, or persistently high humidity.

Maintenance and Long-Term Use

Consistent, moderate use and timely filter changes usually provide better results than occasional, high-speed bursts. Planning ahead for replacement intervals can keep both HEPA and carbon working as intended.

Typical Filter Lifespans (Adjust for Your Home)

  • Pre-filters: Often washable or vacuumable; cleaning every few weeks helps protect the HEPA filter from clogging with hair and large dust.
  • HEPA filters: Commonly last many months to over a year, depending on dust levels, run time, and fan speed.
  • Thin carbon sheets: May need replacement every few months in homes with frequent cooking or odor sources.
  • Thicker carbon cartridges: Can last longer but may still require more frequent replacement during wildfire season or in homes with ongoing smoke exposure.

Usage Patterns That Extend Filter Life

  • Use a pre-filter to catch larger particles and protect the HEPA stage.
  • Run on low or medium most of the time and reserve maximum speed for events such as cooking, vacuuming, or nearby outdoor smoke.
  • Keep doors and windows closed during high outdoor pollution to reduce the load on filters.

Storage Between Seasons

If you use a purifier mainly during allergy or wildfire seasons, off-season storage can affect filter condition.

  • Store the unit in a dry area to avoid moisture exposure to HEPA and carbon media.
  • Seal spare filters in their packaging until needed to prevent them from slowly adsorbing ambient odors.
  • When restarting after storage, inspect filters for visible dust, damage, or odor before relying on them for heavy use.

Putting It All Together: Practical Takeaways and Specs to Look For

Choosing between HEPA vs activated carbon is really about matching the filter setup to your main indoor air concerns, then making sure the purifier is sized and used correctly.

  • If you mainly have allergies and dust, prioritize HEPA coverage and adequate ACH in bedrooms and main living areas.
  • If you mainly have odors from cooking, pets, or mild chemical smells, prioritize a meaningful activated carbon stage and use ventilation whenever outdoor air allows.
  • If you are dealing with wildfire or tobacco smoke, use both HEPA and carbon, and focus on sealing, higher fan speeds during events, and timely filter replacement.

Specs to Look For When Comparing HEPA and Carbon Setups

When you compare air purifiers or filtration setups, these practical specs and design details can help you choose a system that matches your home and health priorities:

  • Filter types included: Confirm that there is a dedicated high-efficiency particle filter and a separate or layered activated carbon stage if you care about both particles and odors.
  • Carbon amount and thickness: Look for information on the weight or thickness of the carbon media, especially if you expect regular smoke or strong odors.
  • Clean Air Delivery Rate (CADR): Check that the CADR is appropriate for your room size and ceiling height; higher CADR generally means more air can be cleaned per minute.
  • Air changes per hour (ACH): Aim for several air changes per hour in priority rooms, especially during allergy or smoke seasons.
  • Fan noise vs usable speeds: Consider whether you can comfortably use medium or higher speeds for extended periods; a powerful unit that is always stuck on low will not deliver its full potential.
  • Sealing and construction: Look for gaskets, rigid filter frames, and solid latches that help prevent air from bypassing the filters.
  • Filter access and replacement cost: Check how easy it is to access and replace filters and estimate ongoing costs for both HEPA and carbon stages.
  • Pre-filter design: A washable or easily replaceable pre-filter can extend the life of the more expensive HEPA and carbon filters.

With a clear understanding of how HEPA and activated carbon work together, plus a focus on room size, airflow, and realistic maintenance, you can build a balanced setup that addresses your particular mix of allergies, odors, and smoke without overspending on features you do not need.

Frequently asked questions

Which specs or features should I prioritize when choosing between HEPA and activated carbon?

Prioritize a dedicated HEPA particle stage plus a meaningful carbon stage if you care about odors or gases. Also check CADR or ACH ratings for your room size, the amount/thickness of carbon media, fan performance at usable speeds, and filter sealing and replacement costs.

Can I rely on a HEPA-only purifier to remove odors and gases?

No. HEPA filters capture particles but do not adsorb most gases or odor molecules; an activated carbon stage or other adsorbent is needed to reduce smells and many VOCs. For persistent odors or smoke gases, combine HEPA with sufficient carbon capacity.

What is a common mistake people make when using carbon filters?

A common mistake is relying on very thin carbon sheets for heavy or prolonged smoke and odor sources, which leads to rapid saturation and quick odor return. Match carbon capacity to the expected load and replace it promptly when adsorption performance declines.

Are HEPA and activated carbon air purifiers safe to use around children, pets, and people with respiratory conditions?

Yes when used as intended: HEPA and carbon work mechanically or by adsorption and do not produce ozone. Avoid devices that intentionally generate ozone or other reactive gases, follow basic handling precautions for used filters, and keep units properly maintained.

How often should I replace HEPA and carbon filters in a typical home?

HEPA filters often last many months to over a year depending on dust levels and run time, while thin carbon layers may need replacement every few months in homes with frequent cooking or smoke. Use manufacturer guidance as a baseline and replace sooner during heavy-use periods like wildfire season.

Where is the best place to put an air purifier for optimal results?

Place the purifier in the room where pollutants originate or where occupants spend the most time, and keep it away from walls or obstructions so intake and outlet airflow are clear. For bedrooms, position it near the bed; for open-plan areas consider multiple units or a centrally located high-CADR unit.