Basement Dampness 101: RH Targets and Fixes Explained

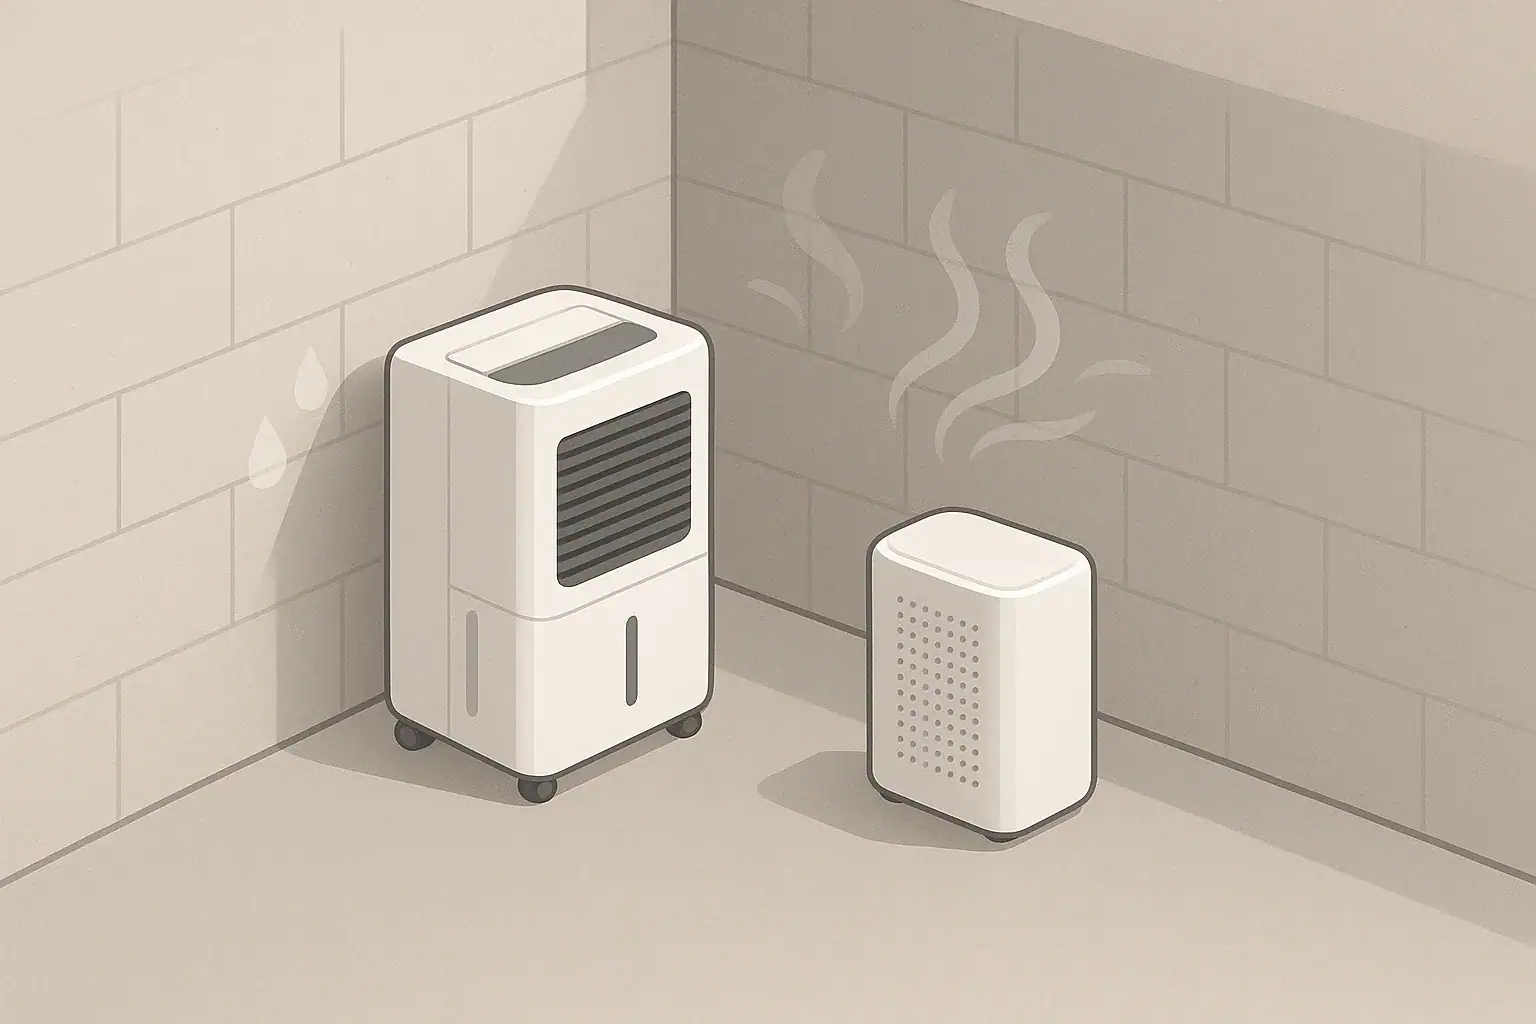
Isometric illustration of dehumidifier managing basement humidity

Basement dampness is best controlled by keeping relative humidity (RH) around 40–50% in most seasons using a mix of dehumidification, drainage fixes, and careful ventilation.

Basements in the U.S. often feel clammy because cooler surfaces meet moist air, leading to condensation, mold risk, and musty odors. You can usually improve conditions with simple measurements, clear RH targets, and matching a dehumidifier and ventilation approach to the actual moisture sources rather than guessing.

Quick answer
  • Target basement RH around 40–50% in most conditions; stay under about 60% for general mold prevention.
  • Use a hygrometer to monitor RH in more than one spot, including near problem walls or corners.
  • Choose a dehumidifier sized for the whole basement floor area, and run it continuously in damp seasons.
  • Ventilate carefully: bring in outdoor air when it is cooler and drier than basement air, not on hot, humid days.
  • Address bulk water first (leaks, gutter issues, grading) before relying on equipment alone.
  • Combine dehumidification with basic air circulation to reduce cold spots and stagnant, damp pockets.

What Basement Dampness Really Means and Why It Matters

“Dampness” in a basement is a mix of elevated relative humidity, cool surfaces, and sometimes visible moisture. It can show up as a musty smell, condensation on pipes or walls, tacky cardboard boxes, or darkened concrete. Even if you do not see standing water, consistently high RH is enough to support mold growth on porous materials and can make the space feel uncomfortable.

Basements tend to be cooler than the rest of the house. When warm, moist air from outdoors or upstairs meets these cooler surfaces, the air’s relative humidity increases and can reach the dew point, where water condenses. That is why a basement can feel damp even when the rest of the house feels fine.

Managing basement dampness is mostly about controlling three things:

  • Bulk water – leaks, seepage through walls or floor, plumbing drips.
  • Humidity – water vapor from soil, outdoor air, laundry, showers, and people.
  • Air movement – how air flows between the basement, outdoors, and the upper floors.

Once you understand which of these is driving your situation, you can decide how much to rely on dehumidifiers, how to use ventilation, and where building or drainage improvements are needed.

Key Concepts: RH Targets, Moisture Sources, and Equipment Basics

Relative humidity is the percentage of water vapor in the air compared with the maximum the air could hold at that temperature. Cooler air holds less moisture, so RH rises as air cools even if the actual water content stays the same. That is why basements can reach high RH without any obvious water leak.

Practical basement RH targets

  • General comfort range: roughly 40–50% RH.
  • Upper limit for most basements: try to stay under about 60% RH for mold prevention.
  • In very cold weather: 35–45% RH can be acceptable, as air is naturally drier.

It is useful to measure RH with a simple hygrometer or indoor air quality monitor. Place at least one near the center of the basement and another near known damp areas (north wall, sump pit, or near a crawlspace opening) to see if there are problem zones.

Common moisture sources in basements

  • Ground moisture: water vapor coming through concrete walls and slabs, especially without effective vapor barriers.
  • Rain and drainage: poor grading, short downspouts, clogged gutters, or window wells that hold water.
  • Indoor activities: line-drying clothes, unvented dryers, showers in basement bathrooms, or exercise causing more perspiration and moisture.
  • Outdoor air: opening windows on hot, humid days can flood a cool basement with moisture.

How dehumidifiers fit into the picture

Portable dehumidifiers pull air over cold coils, condensing moisture into a tank or drain and returning drier air to the room. Their capacity is often listed in pints per day and assumes certain temperature and humidity conditions. For a typical U.S. basement, many homeowners choose a unit intended for a medium or large area, but the right size depends on:

  • Total square footage and ceiling height.
  • How damp it is (slightly musty vs. obvious moisture on surfaces).
  • Whether walls are unfinished concrete or insulated and finished.

Ventilation complements dehumidification by exchanging indoor air with outdoor air. When outdoor air is cooler and drier than basement air, ventilation can help remove moisture. When it is warmer and more humid, ventilation can make the problem worse.

Figure 1. Basement dampness decision matrix – Example values for illustration.
Choosing between drainage fixes, dehumidifiers, and ventilation
Observed situation Primary action Supporting actions
Standing water after rain Address exterior drainage and leaks first Check gutters, downspouts, grading; dehumidifier only after water is controlled
Visible wall damp spots, no puddles Improve drainage and wall sealing Run dehumidifier to keep RH under ~50–55%
Musty smell, RH 55–65% Use dehumidifier sized for full basement area Improve air circulation; ventilate when outdoor air is drier
RH high only on humid summer days Limit window opening during hot, humid periods Short dehumidifier runs during peaks; run central AC if available
Cold basement, RH ~45–55%, no odor Likely acceptable; monitor only Adjust setpoint seasonally; insulate cold surfaces if needed
Sump pit, unfinished walls, RH consistently >60% Continuous dehumidifier operation Seal lid on sump if allowed; consider wall or slab sealing

Common Basement Humidity Mistakes and Troubleshooting Cues

Many basement dampness problems persist not because they are difficult to solve, but because some common habits quietly work against moisture control.

Mistakes that keep basements damp

  • Running a dehumidifier with the windows open: this invites a constant supply of humid air, forcing the dehumidifier to run longer and sometimes never reach the setpoint.
  • Assuming dry-looking concrete is dry: concrete can transmit water vapor even when it looks solid and clean; RH readings tell the real story.
  • Ignoring cold corners and behind-storage areas: boxes pushed against exterior walls trap moisture and can hide mold growth.
  • Relying on central HVAC alone: many systems move less air through basements or have closed registers, so they do not remove enough moisture from that zone.
  • Setting unrealistic RH targets: trying to maintain very low RH (around 30%) in a humid climate can waste energy and be hard to achieve in a basement.

Troubleshooting moisture with simple observations

You can learn a lot about the nature of your basement dampness with basic checks:

  • Compare RH upstairs vs. basement: if the basement is much higher, suspect ground/moisture entry or cool surfaces; if they track together, whole-house humidity may be high.
  • Check RH throughout the day: if it spikes when outdoor humidity rises and windows are open, ventilation strategy may need adjustment.
  • Look at where condensation forms: near the floor or on lower walls often points to ground-related moisture; on metal ducts or pipes, it may be more about temperature differences and air contact.
  • Smell test: musty odor, especially after rain, suggests chronic dampness even if surfaces feel only slightly cool.

Practical Steps: Setting RH Targets, Using Dehumidifiers, and Ventilating Wisely

A straightforward process helps bring a damp basement under control without overcomplicating things.

Step 1: Measure and set realistic RH goals

  1. Place at least one hygrometer in the basement, away from direct airflow from vents or dehumidifiers.
  2. Record RH and temperature at several points in the day for a week.
  3. Aim for around 40–50% RH, with an upper cap near 60% if conditions are challenging.

Step 2: Fix bulk water and obvious moisture paths

  • Keep gutters clear and direct downspouts several feet away from the foundation.
  • Ensure ground slopes away from the house where practical.
  • Seal around plumbing penetrations and check for dripping pipes.
  • Use covers on sump pits where codes and manufacturer guidance allow.

Step 3: Size and place the dehumidifier

  • Match capacity to the approximate floor area and dampness level (larger area or wetter basements generally need higher capacity).
  • Place the unit in a relatively open spot, not inside a tight storage room, so air can circulate.
  • If possible, use a continuous drain to a floor drain or condensate pump to avoid frequent bucket emptying.
  • Set the RH target on the dehumidifier slightly below your goal (for example, 45–50%) and monitor actual readings.

Step 4: Use ventilation strategically

Ventilation can either help or hurt, depending on outdoor conditions and how air moves through the basement.

  • On cool, dry days, opening a window or using a small exhaust fan can remove stale, moist air.
  • On hot, humid days, keep windows mostly closed and rely on dehumidification and central AC if available.
  • In some homes, a small, continuous exhaust fan in the basement can gently move air out, but this should be balanced with overall house ventilation so it does not draw in unconditioned humid air from other leaks.

Step 5: Improve air circulation

  • Use a small fan to move air across cold walls or into corners where the dehumidifier’s air may not reach well.
  • Avoid stacking cardboard boxes and soft materials directly against exterior walls.
  • Where safe and practical, keep basement doors partially open so the space is not isolated from the rest of the home’s air movement.

Real-World Basement Scenarios

Thinking through a few common scenarios can clarify how RH targets, dehumidifiers, and ventilation interact.

Scenario 1: Finished basement with slight musty odor

A carpeted, finished basement feels comfortable but has a faint musty smell in late summer.

  • Measured RH: 55–65% on humid days, around 45% in cooler weather.
  • Actions: run a dehumidifier set around 45–50% in the humid season; limit window opening when outdoor dew point is high; monitor behind furniture along exterior walls.

Scenario 2: Unfinished storage basement with visible wall moisture

An older home has exposed concrete walls with darkened areas near the floor after heavy rain.

  • Measured RH: 60–70% during wet periods.
  • Actions: improve exterior drainage; consider sealing interior wall surfaces following building guidance; install a dehumidifier for continuous operation to keep RH closer to 50–55%.

Scenario 3: Walkout basement connected to living space

A walkout basement with large doors is often left open on summer evenings.

  • Measured RH: jumps from 45% to near 70% after doors are left open on humid nights.
  • Actions: limit wide-open periods to cooler, drier times; use dehumidification overnight; consider using the home’s central cooling more consistently when the basement is regularly occupied.

Safety, Standards, and Equipment Considerations

Moisture control equipment interacts with electrical systems and sometimes air treatment technologies, so basic safety awareness is important.

Dehumidifier safety basics

  • Follow manufacturer instructions for clearance around the unit to ensure good airflow and avoid overheating.
  • Plug directly into a properly grounded outlet; avoid long, undersized extension cords.
  • Keep dehumidifiers upright; if they are moved or tipped, allow time for the refrigerant to settle before use.
  • Locate units where accidental splashing from sinks or laundry is unlikely.

Air purifiers and add-on technologies

Some people use air purifiers in basements to reduce particles and odors that accompany dampness. Purifiers that rely on high-efficiency particulate filters and activated carbon can reduce airborne dust and smells, but they do not remove moisture. When considering devices that use ionization or UV-C components, it is helpful to review independent information about their design, potential byproducts like ozone, and any certifications regarding ozone limits. Moisture control should still rely on dehumidification, drainage improvements, and ventilation rather than air cleaning alone.

Maintenance and Long-Term Upkeep

Basement moisture control is not a one-time project. Conditions change with seasons, weather patterns, and how you use the space.

Dehumidifier and fan maintenance

  • Clean or replace dehumidifier air filters according to the manual to maintain efficiency and airflow.
  • Inspect and clean the water collection bucket or drain path periodically to prevent slime buildup.
  • Check that drain hoses slope correctly and are free of kinks or clogs.
  • Dust off fan blades and grilles so air circulation remains effective.

Building and drainage checks

  • Inspect gutters and downspouts at least a couple of times per year.
  • Watch for new cracks, efflorescence (white mineral deposits), or changing damp patterns on walls and floors.
  • Review RH data at the start of each humid season to catch rising trends early.

Energy and cost considerations

  • Dehumidifiers use electricity continuously in humid periods; keeping doors and windows closed during operation reduces wasted energy.
  • Moderate RH targets (around 45–50%) often balance comfort, mold prevention, and energy use better than very low targets.
  • If your basement conditions improve over time due to drainage and sealing work, you may be able to shorten dehumidifier run times while maintaining similar RH.

Basement Humidity FAQs

Is it normal for a basement to feel cooler but still be damp?

Yes. Cool air holds less moisture, so as air cools in the basement, its relative humidity rises even if the total water content stays the same. That is why a space can feel both cool and clammy at once.

Should I run a dehumidifier year-round?

It depends on your climate and home. In many climates, dehumidifiers run most in late spring through early fall and are needed less in winter when outdoor air is very dry. Using a hygrometer is the best way to decide; if RH stays in the 40–50% range without help, continuous operation may not be necessary.

Is opening basement windows always good for moisture?

No. Opening windows when outdoor air is warm and humid can raise basement RH quickly. It is more effective to ventilate when outdoor air is cooler and drier than basement air, especially in the evenings or during drier weather fronts.

Can air purifiers solve basement dampness?

Air purifiers can reduce dust and some odors, but they do not remove water vapor from the air. For dampness itself, you need drainage improvements, dehumidification, and appropriate ventilation.

Figure 2. Basement humidity and mold quick plan – Example values for illustration.
Quick basement humidity and mold-prevention planner
Goal Simple actions Tools Note
Keep RH under ~60% Run dehumidifier in humid months; keep windows closed on muggy days Dehumidifier, hygrometer Adjust setpoint seasonally to around 40–50% for comfort
Reduce musty odors Dry out space, discard moldy cardboard, improve air circulation Dehumidifier, fan, optional air purifier Odors often fade over several days of stable RH
Limit new mold growth Monitor RH; keep porous items away from damp walls Hygrometer, shelving Consistent RH control is more effective than short, intense drying
Manage after heavy rain Check for leaks, run dehumidifier, use fans to dry wet spots Dehumidifier, towels, fans Address standing water promptly before closing up the space
Simplify daily operation Use continuous drain and set-and-forget RH level Drain hose, condensate pump if needed Inspect equipment periodically to ensure it is still performing well
Track seasonal patterns Log RH once or twice a month Simple hygrometer Helps anticipate when to start or stop dehumidifier use

Related guides: Basement Dehumidifier Guide: Targets, Drainage, and Energy UseBest Indoor Humidity Level to Prevent Mold (With Seasonal Targets)Air Purifier vs Dehumidifier: Which One Solves Musty Air?

Frequently asked questions

How do I choose the right dehumidifier capacity for my basement?

Match capacity to the basement’s floor area, ceiling height, and how damp the space is; manufacturers list pints per day under specific temperature/humidity conditions. For very damp or large basements, choose a higher-capacity unit and consider a continuous drain or condensate pump to avoid frequent emptying.

What RH should I set my dehumidifier to in summer versus winter?

Aim for about 40–50% RH for comfort and mold prevention in most seasons, with an upper cap near 60% if conditions are challenging. In very cold weather a slightly lower setpoint (about 35–45%) can be acceptable; adjust seasonally and rely on actual hygrometer readings rather than a fixed schedule.

Can ventilation alone solve basement dampness?

Ventilation can help only when outdoor air is cooler and drier than basement air; when outdoor humidity is higher it will make the problem worse. Always address bulk water (drainage, leaks) first and use ventilation as a complement to dehumidification, not a sole solution.

How can I tell if moisture is coming from the ground or from indoor activities?

Ground-related moisture often shows as darkened concrete near floors, persistent RH even with windows closed, and condensation forming low on walls. Moisture from indoor activities usually causes RH spikes that track cooking, laundry, or showers and often affects upper areas and the rest of the house similarly.

Is it necessary or safe to run a dehumidifier continuously?

Continuous operation is often necessary when RH stays above about 60% or where a sump pit or wet walls constantly add moisture; using a continuous drain reduces maintenance. It increases energy use, so prioritize fixing drainage and sealing to reduce runtime and follow safety guidance for clearances and proper electrical connections.

Summary: A Calm, Measured Approach to Basement Dampness

Managing basement dampness comes down to understanding how temperature, relative humidity, and moisture sources interact. Practical RH targets around 40–50%, supported by a correctly sized dehumidifier, basic drainage improvements, and thoughtful ventilation, can keep most basements more comfortable and less musty. Regular measurement with a simple hygrometer, combined with small adjustments in how you use windows, fans, and storage, helps you stay ahead of moisture before it becomes a larger problem.
Wood Stove and Fireplace Particles Explained: Safer Air at Home

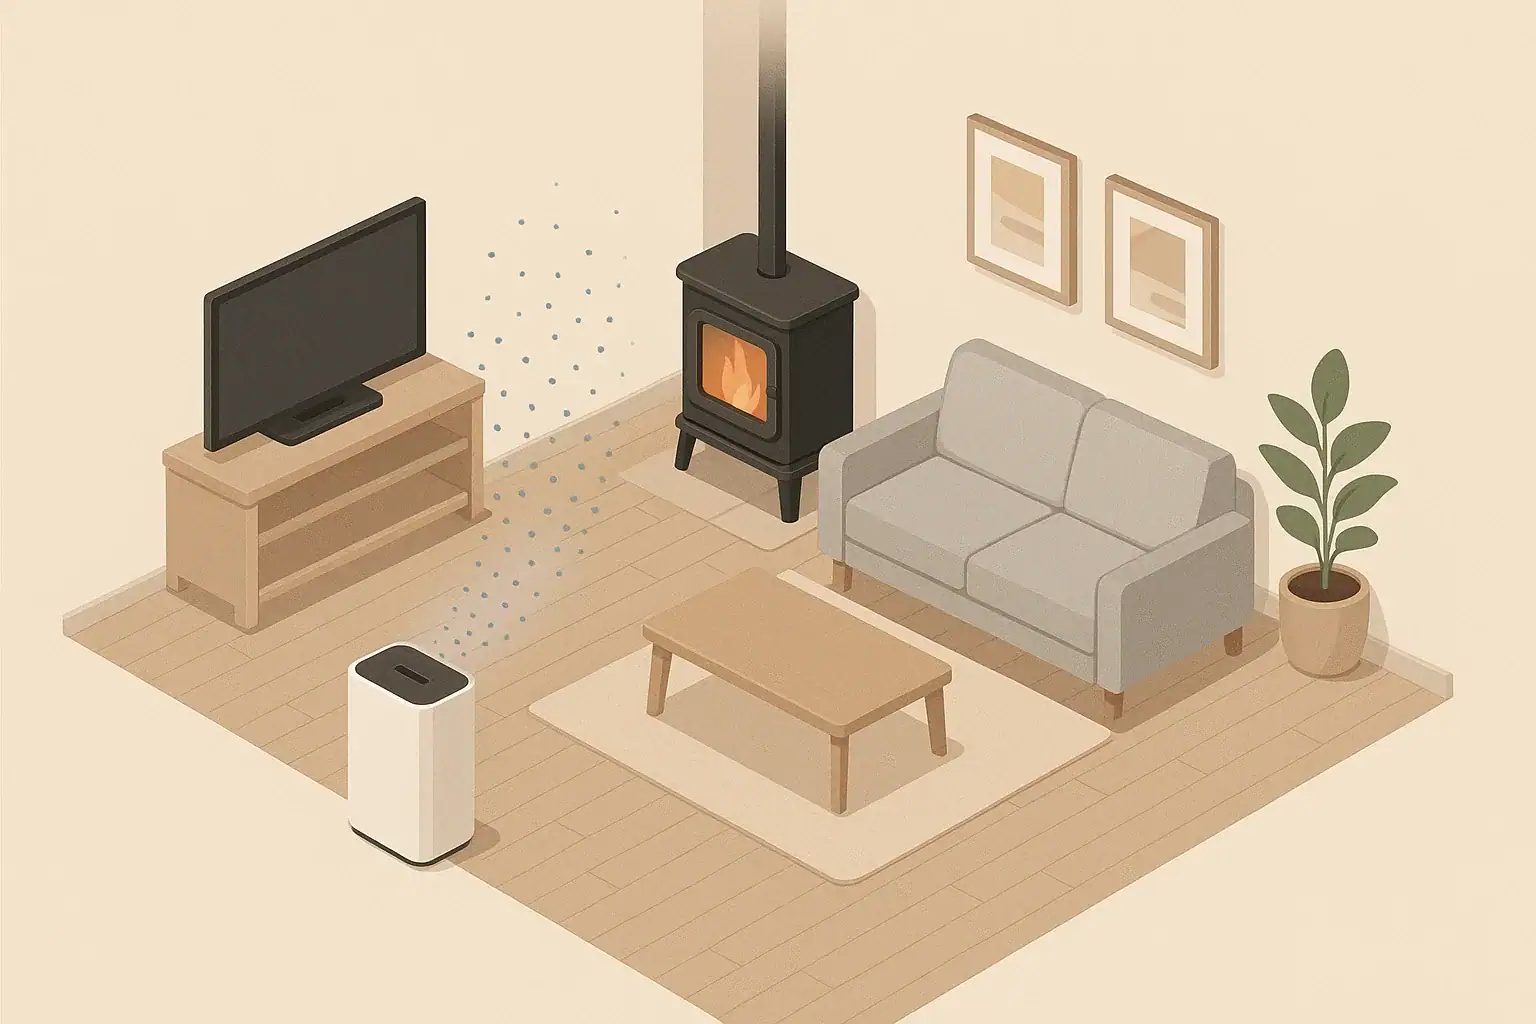
Air purifier reducing particles from a home wood stove

Wood stove and fireplace particles can raise indoor particle levels significantly, but careful burning, ventilation, and filtration can keep indoor air safer and more comfortable.

Using a wood stove or fireplace changes indoor air quality because burning wood creates fine particles and gases that can drift into your living space. You do not have to stop using these appliances to care about indoor air, but it helps to understand where particles come from, how they move, and what simple steps reduce them to more comfortable levels.

Quick answer
  • Aim to keep indoor PM2.5 averages generally below about 10–15 µg/m³ when possible, and avoid long periods above 35 µg/m³.
  • Use only dry, seasoned wood and hot, efficient burns to reduce visible smoke and particle output.
  • Make sure chimneys and flues are clean and draft well so smoke goes outside, not into rooms.
  • Run a HEPA-based air purifier in the same room as the stove or fireplace, sized for at least 4–5 air changes per hour as a planning target.
  • Ventilate briefly with outdoor air when conditions allow, especially after lighting or refueling the fire.
  • Keep doors, gaskets, and seals in good condition and avoid smoldering fires.

What wood stove and fireplace particles are and why they matter

When wood burns, it produces a mixture of gases and solid and liquid particles. Some of these particles are large enough to see as smoke; others are microscopic and remain suspended in the air as fine particulate matter (PM).

Key particle types from wood burning

  • Coarse particles (PM10): Larger pieces of ash and soot; they tend to settle more quickly on surfaces.
  • Fine particles (PM2.5): Smaller than 2.5 micrometers in diameter, they stay airborne longer and can move with indoor air currents.
  • Ultrafine particles: Even smaller particles that form in combustion; most simple home monitors do not measure them directly, but they are part of smoke.

Besides particles, wood burning can release gases, including carbon monoxide (CO), nitrogen oxides (NOx), and volatile organic compounds (VOCs). Good draft and correct operation help move combustion products outdoors through the flue rather than into the room.

Why indoor wood smoke behaves differently

Outdoor smoke from neighborhood wood burning or wildfires can drift indoors, but a wood stove or fireplace brings the combustion source inside the building. Even if most smoke goes up the chimney, small leaks, back-drafting, or opening doors can increase indoor particulate levels. Particles can then spread to adjacent rooms, especially in open-plan spaces.

Key concepts: particles, draft, and simple sizing logic

Keeping indoor air safer around wood stoves and fireplaces is mostly about managing three things: how cleanly the fire burns, how reliably exhaust goes outdoors, and how quickly indoor air is filtered or exchanged.

Burn quality and fuel

  • Seasoned wood only: Dry logs (typically stored at least 6–12 months) burn hotter and cleaner than freshly cut (“green”) wood.
  • Avoid trash and treated wood: These fuels can produce more smoke and unwanted byproducts.
  • Hot, bright flames vs smoldering: A hot, active fire with plenty of combustion air produces fewer particles than a low, smoldering fire.

Draft and room pressure

Draft is the upward flow of hot combustion gases through the chimney or flue. Weak draft can let smoke spill into the room. Common influences include:

  • Outdoor temperature and wind: Colder outside air and adequate chimney height generally help draft.
  • House tightness: Very tight homes may struggle to supply makeup air, pulling smoke back in.
  • Competing exhausts: Kitchen range hoods, bathroom fans, and dryers can create negative pressure that fights chimney draft.

Air cleaning and ventilation basics

Two main tools help you manage wood smoke particles indoors:

  • Filtration: HEPA-type air purifiers remove a large share of fine particles as air passes through them.
  • Ventilation: Bringing in outdoor air and exhausting indoor air dilutes indoor particles.

For planning, many households aim for an air purifier that can turn over the room air 4–5 times per hour (4–5 ACH) in the stove or fireplace room, especially during active burning. This is only a rule of thumb but offers a starting point when estimating capacity.

Table 1. Common wood-burning issues and indoor air responses – Example values for illustration.
Situation Likely particle behavior Practical response idea
Lighting a cold stove or fireplace Short spike of PM2.5 from smoke and kindling Pre-warm flue if safe, open damper fully, run nearby purifier on high
Adding logs to a hot fire Brief increase in particles when door opens Open door slowly, add wood quickly, close door promptly
Smoldering, low-air fire Higher continuous particle output Increase combustion air within safe limits, use seasoned wood only
Back-drafting during windy weather Visible smoke and odor entering room Check flue, reduce other exhaust fans, consider outside-air supply
Dirty glass and heavy soot buildup Sign of frequent smoky burns Inspect chimney, adjust firing technique, schedule professional service
Lingering smoky smell after fire is out Particles settled on surfaces and in fabrics Ventilate when outdoor air is acceptable, clean surfaces and textiles

Example values for illustration.

Common indoor air mistakes with wood stoves and fireplaces

Many indoor air issues from wood burning come from avoidable habits or overlooked maintenance rather than from the appliance itself.

Using wet or poor-quality fuel

  • Unseasoned wood generates more smoke and creosote, raising particle levels and building up deposits in the flue.
  • Painted or treated wood can introduce unwanted chemicals into smoke; avoid it entirely.

Running constant low, smoldering fires

Keeping a fire barely alive for long periods may seem convenient, but it often increases particle output. Shorter, hotter burns using correctly sized loads of wood are usually cleaner.

Ignoring small smoke leaks

It is easy to accept a small puff of smoke when you open the stove door or adjust logs. Over time, these brief events can contribute a noticeable share of indoor particles, especially in smaller or tighter homes.

Overlooking room airflow

Placing a wood stove in an open-plan space without thinking about airflow can allow smoke particles to spread quickly. Ceiling fans, central HVAC returns, and open staircases all move air—and particles—around the home.

Practical steps to keep indoor air safer around wood burning

You can often reduce indoor particle levels significantly with a combination of burn practices, basic ventilation, and filtration. These do not replace safety rules for wood appliances but complement them.

Before burning

  • Service the system: Have the chimney and stove or fireplace inspected and cleaned regularly by a qualified professional, following local guidance.
  • Check gaskets and doors: Look for worn seals on stove doors, glass, and ash pans, and have them replaced if they leak.
  • Prepare dry fuel: Store firewood off the ground and protected from rain so it has time to dry thoroughly.

Lighting and refueling

  • Open the damper fully before lighting or opening doors to encourage strong draft.
  • Build small, hot fires using dry kindling rather than large, smoky piles of wood.
  • Open the door slowly when adding logs to minimize smoke spilling into the room.
  • Close the door securely as soon as wood is loaded.

Managing indoor air during burning

  • Run a HEPA-based air purifier in the same room, set to a higher speed during lighting and refueling.
  • Use local ventilation if available, such as a nearby window opened slightly for makeup air when outdoor conditions are reasonable.
  • Avoid competing exhausts (range hoods on high, powerful bath fans) during critical times if they appear to cause back-drafting.

After the fire

  • Keep the damper open until visible embers are out and smoke has cleared.
  • Ventilate briefly with outdoor air if temperature and outdoor air quality permit, then resume normal operation.
  • Continue air purification for a while after the fire is out, as particles can remain suspended.

Real-world examples of managing particles from wood burning

These scenarios illustrate how wood stoves and fireplaces interact with indoor air, and how simple changes can help.

Small living room with a wood stove

A small, tight living room with a freestanding wood stove can see quick particle spikes when the door opens. Practical responses might include:

  • Placing a HEPA-based air purifier in the same room, not hidden behind furniture.
  • Scheduling wood loading for times when occupants can briefly leave the room or sit farther away.
  • Checking for negative pressure from a powerful kitchen hood and adjusting use during lighting and refueling.

Open-plan home with a fireplace

An open living, dining, and kitchen area with a decorative fireplace can distribute smoke smells widely. Strategies could include:

  • Using well-seasoned wood and avoiding decorative materials that smoke.
  • Keeping the fireplace doors closed when not actively tending the fire.
  • Running an air purifier in a location where airflow from the main area naturally passes through it.
  • Being cautious with ceiling fans if they seem to push smoke out of the firebox.

Occasional versus frequent burning

Households that burn wood only a few times per season may focus on minimizing short, intense particle peaks. Frequent daily users may place more emphasis on efficient appliances, consistent burn practices, and more robust filtration to keep average particle levels lower over time.

Safety, standards, and cautious use of add-on technologies

Standard wood stove and fireplace safety practices remain the first priority. Indoor air strategies should never conflict with basic fire safety.

Basic combustion safety

  • Install and maintain CO alarms on each level of the home, following manufacturer and local guidance.
  • Keep clearances between the stove or fireplace and nearby combustibles as required.
  • Use appropriate screens or doors to prevent sparks from escaping.

Air cleaning technologies: keep it simple and cautious

For wood smoke particles, mechanical filtration (such as HEPA-type filters) is usually the most straightforward and well-understood tool. Other technologies may be marketed for smoke, including ionizers and UV-C lamps. Consider the following points:

  • Ionizers and electrostatic devices can cause particles to settle more quickly but may generate small amounts of ozone as a byproduct, depending on design.
  • UV-C lamps target microorganisms rather than particles and do not remove smoke on their own.
  • Ozone generators marketed for “air cleaning” are not appropriate for occupied spaces, as intentional ozone production indoors is generally discouraged.

When choosing equipment, many households prefer devices clearly identified as not producing intentional ozone and rely on mechanical filtration as the primary tool for wood smoke particles.

Maintenance and upkeep: stoves, chimneys, and filters

Good indoor air around wood burning depends heavily on consistent maintenance. Both the combustion system and any filtration equipment benefit from regular attention.

Chimneys and flues

  • Annual inspections by a qualified professional help identify creosote buildup, blockages, and draft issues.
  • Cleaning schedules vary with how much wood you burn and how you burn it; more frequent smoky or low-temperature fires usually require more frequent cleaning.

Stove and fireplace components

  • Door gaskets and seals should be checked for wear and replaced when they no longer seal tightly.
  • Glass doors that darken quickly may signal incomplete combustion or poor draft.

Air purifier filters

Filters that capture wood smoke particles gradually load with material and become less effective over time. Replacement timing depends on the amount of smoke exposure, fan speed, and overall use pattern. Heavier use during a long heating season usually means shorter intervals between filter changes compared with light, occasional use.

Table 2. Example filter replacement planning for wood smoke – Example values for illustration.
Filter type Typical interval range (example) What shortens the interval Reminder idea
Pre-filter (mesh or foam) Clean every 1–4 weeks Visible ash, pet hair, heavy dust Check whenever you refill wood or clean stove
HEPA-type main filter Replace about 6–18 months Frequent smoky days, high fan speeds Note start date at beginning of burning season
Activated carbon filter Replace about 3–12 months Persistent odors, VOCs, cooking smoke Replace when smoke or odor lingers longer
HVAC furnace filter Replace about 1–3 months Running fan continuously, dusty house Align changes with energy bill due dates
Portable filter with indicator Follow device indicator Continuous operation, high pollution events Confirm visually if indicator lights appear

Example values for illustration.


Related guides: Best Air Purifiers for Wildfire Smoke: What Specs Matter MostAir Purifier Placement: Where to Put It for Best ResultsPM2.5 Explained: What the Numbers Mean and What’s a Safe Level Indoors

Key takeaways for safer indoor air with wood stoves and fireplaces

Wood stoves and fireplaces add warmth and comfort but also generate fine particles that can raise indoor levels, especially during lighting, refueling, and smoldering burns. Using seasoned wood, encouraging strong draft, and avoiding long, smoky fires reduces particle production at the source.

Complementing good burn practices with well-placed HEPA-based air purifiers, thoughtful ventilation, and regular maintenance of chimneys and filters helps keep particle levels more stable and comfortable. Monitoring basic indicators like visible smoke, odor, and, if available, simple PM2.5 readings can guide everyday adjustments without needing complex systems.

Frequently asked questions

How well do HEPA air purifiers reduce particles from wood stoves and fireplaces?

HEPA-type air purifiers remove a large portion of fine particles (including PM2.5) when sized and placed correctly in the room with the stove or fireplace. They reduce airborne particle concentration but do not remove combustion gases like carbon monoxide or many VOCs, so they should be used alongside good combustion practices and ventilation. Replace or clean filters on the schedule recommended for your level of use.

Will opening a window while burning lower indoor particle levels?

Briefly introducing outdoor air can dilute indoor particle concentrations, especially right after lighting or refueling. However, only ventilate this way when outdoor air quality is acceptable and it does not disrupt chimney draft; a small, controlled opening for makeup air is usually preferable to wide-open windows.

What signs show my wood stove or fireplace is raising indoor particle levels?

Visible smoke or soot in the room, persistent smoky odors, darkened glass, and frequent creosote buildup are practical indicators that particles are entering the living space. Portable PM2.5 monitors, if available, will show spikes during lighting, refueling, or smoldering fires and can confirm elevated indoor levels.

Are ionizers, electrostatic cleaners, or ozone generators safe and effective for wood smoke?

Mechanical filtration (HEPA) is the preferred option for removing wood smoke particles; ionizers or electrostatic devices may reduce airborne particles but can produce small amounts of ozone depending on design. Ozone generators are not appropriate for occupied spaces and UV-C lamps do not remove smoke particles on their own.

How often should I replace or clean air purifier filters if I burn wood regularly?

Filter intervals depend on smoke exposure and device operation; pre-filters may need cleaning every 1–4 weeks while HEPA cores often require replacement anywhere from several months to over a year under light use. Monitor visual loading, follow device indicators, and shorten intervals during heavy burning seasons to maintain performance.

Vacuuming and Dust Clouds: Why PM Spikes and What Helps

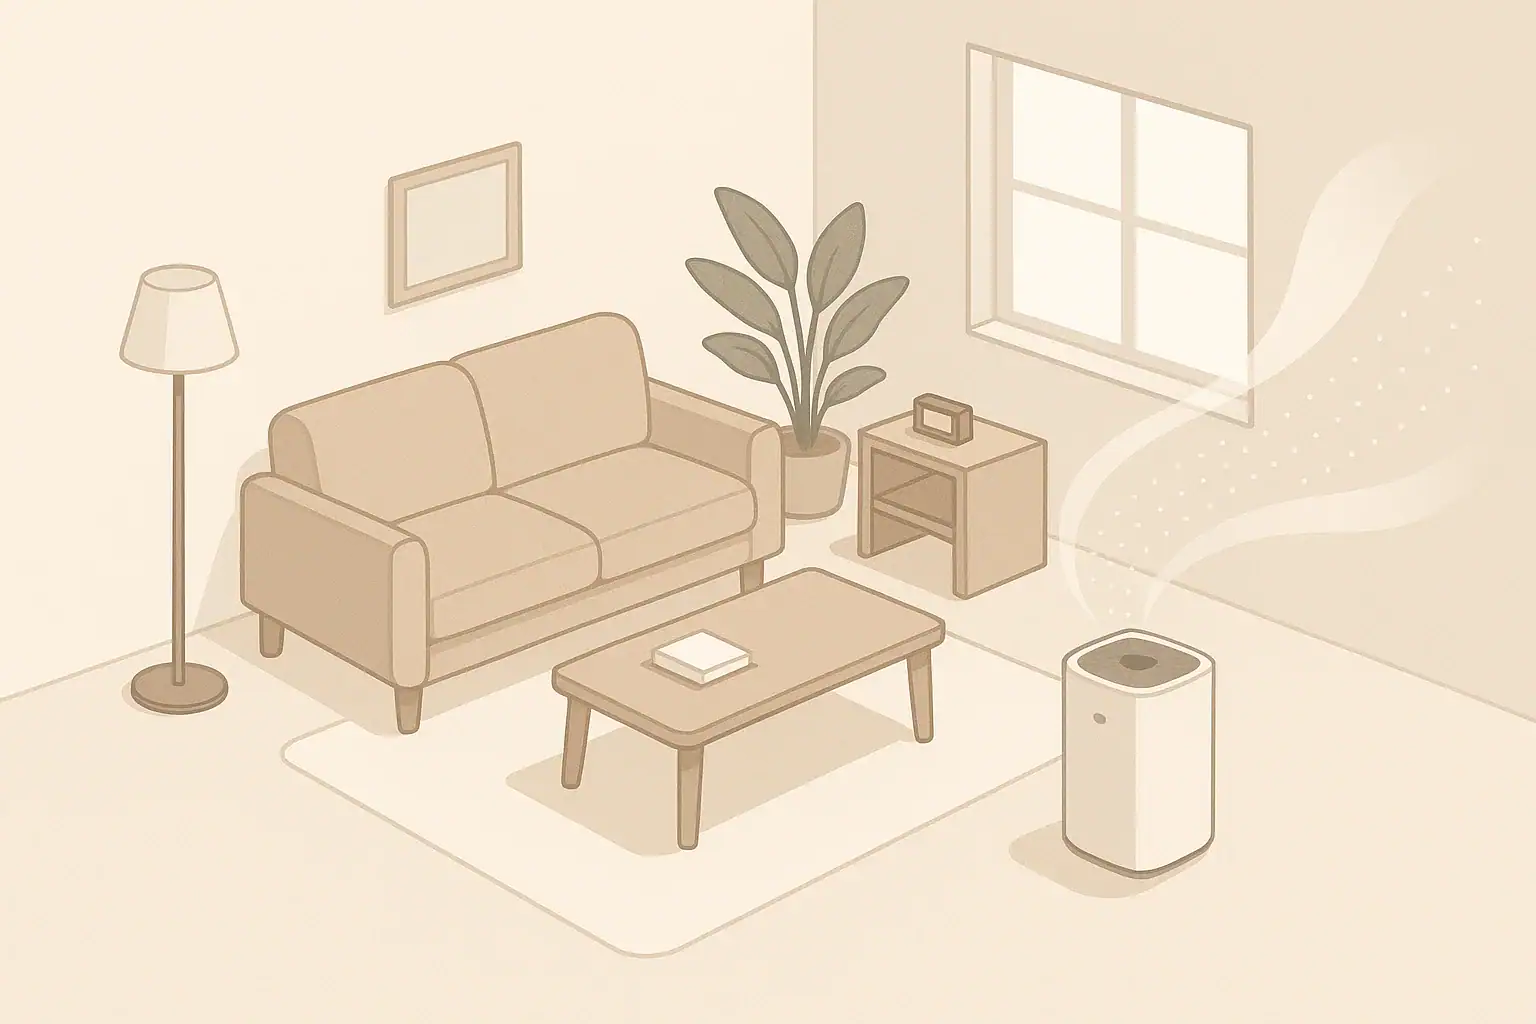
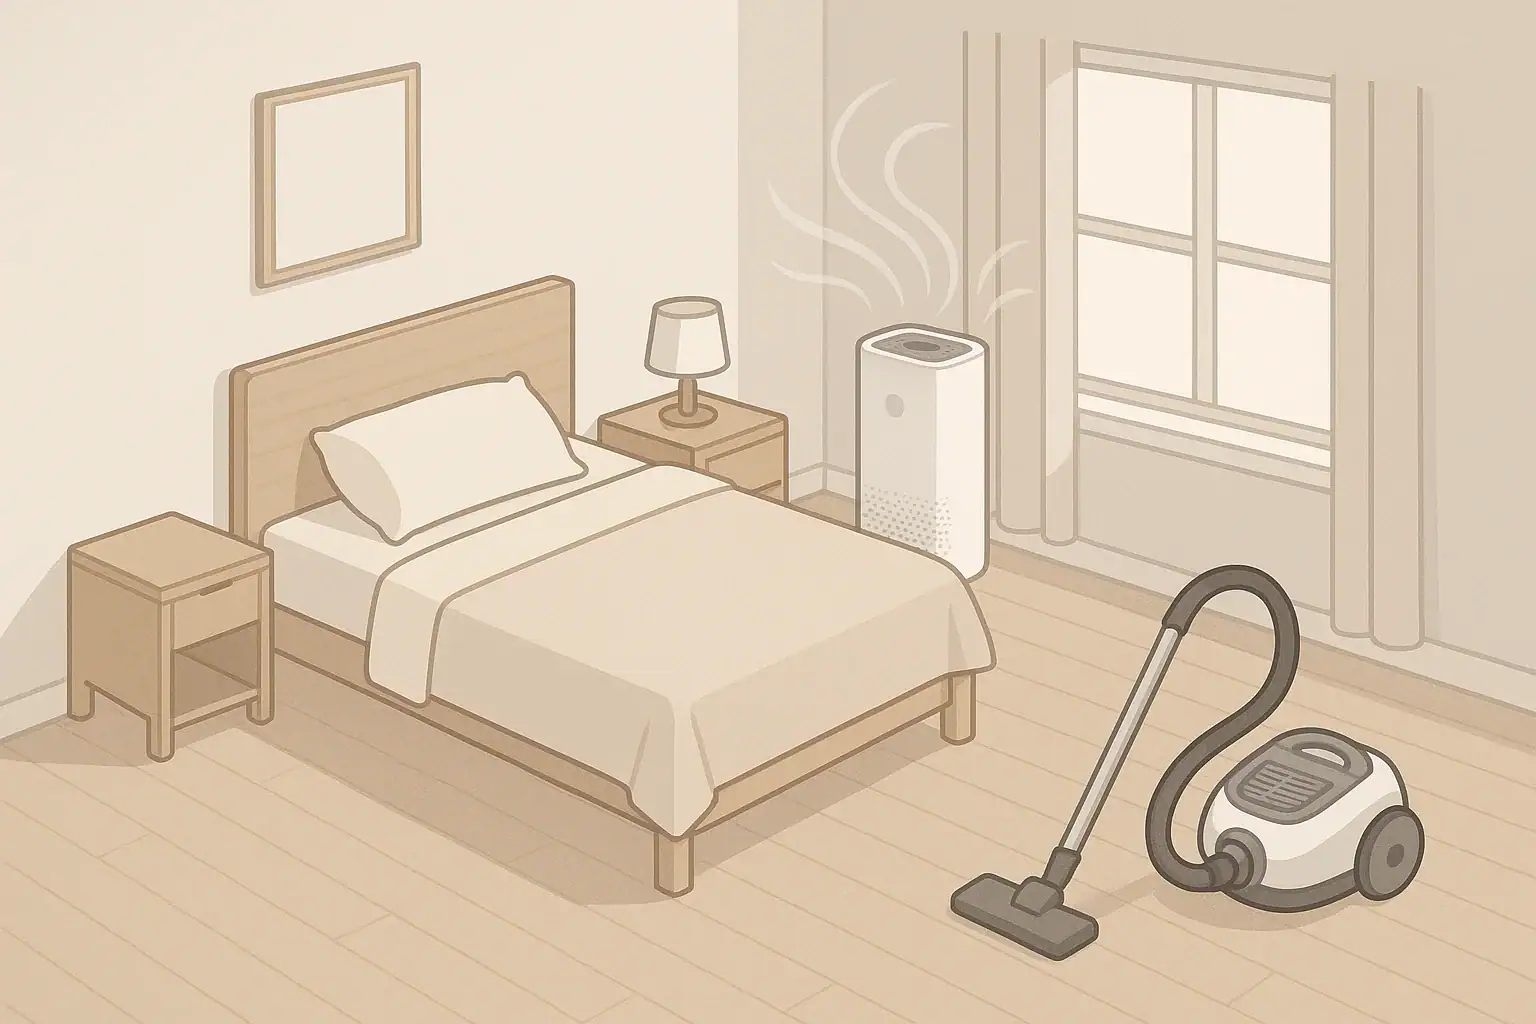
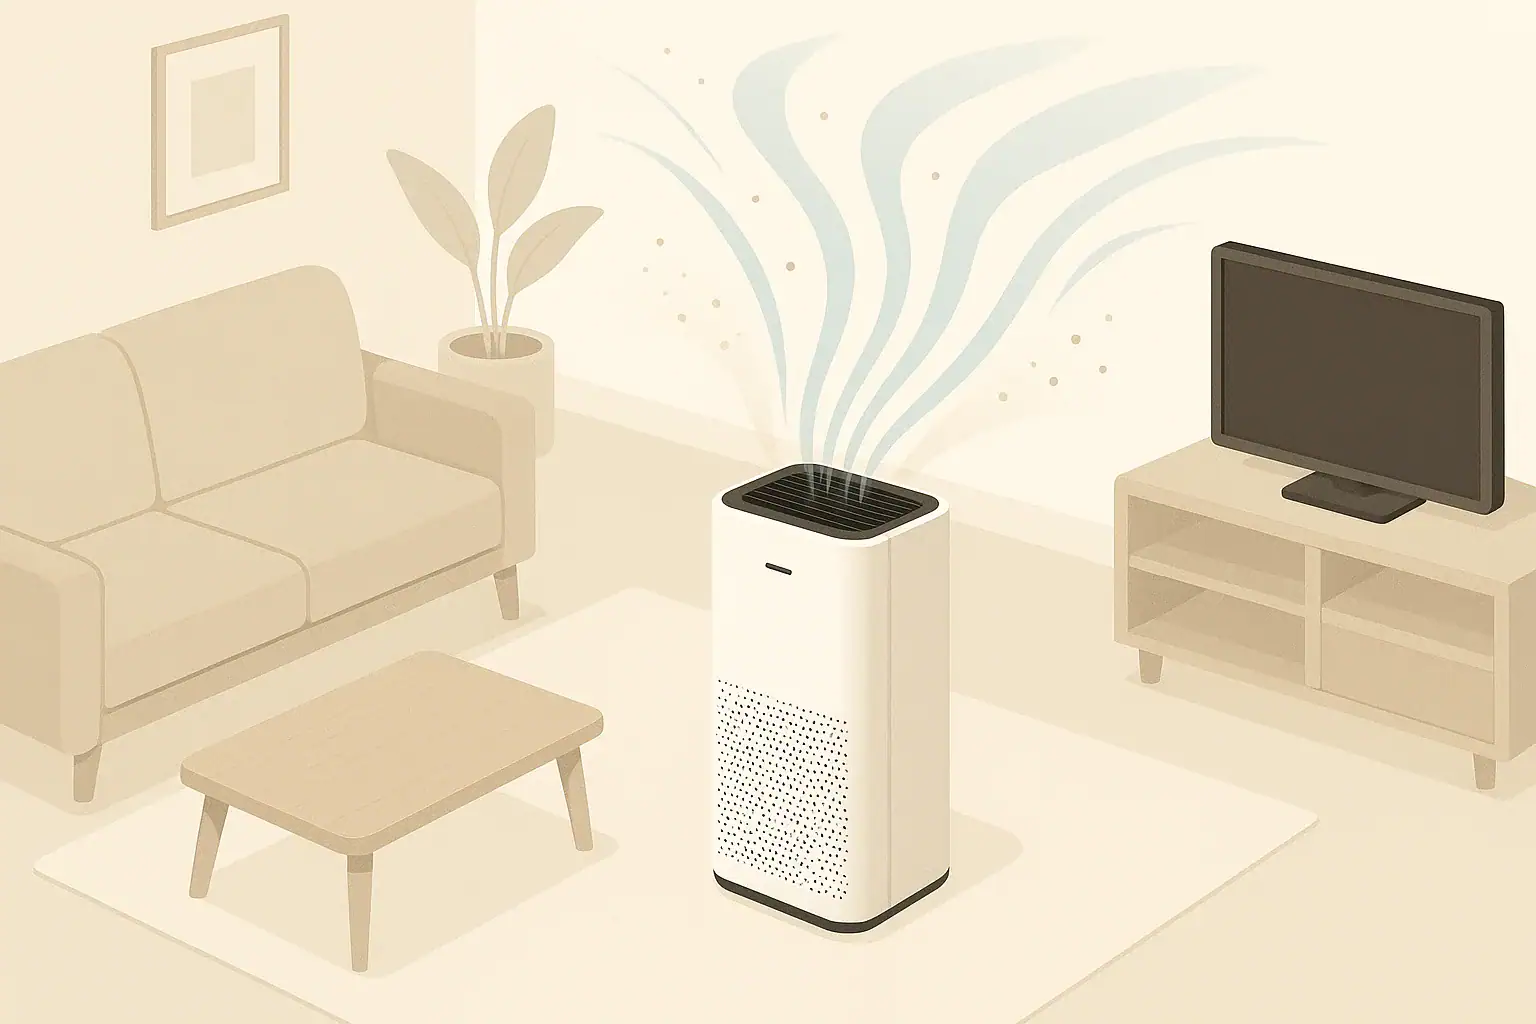
Air purifier reducing dust particles in a modern living room

Vacuuming often makes particle readings (PM2.5 and PM10) rise temporarily because the vacuum and your movement stir settled dust back into the air.

Seeing your air quality monitor spike when you clean can be confusing, but it is a normal short-term effect of disturbing dust, fibers, and other particles on floors and furniture. Understanding why this happens helps you choose better tools, adjust your cleaning routine, and keep your home’s air clearer overall.

Quick answer
  • Expect PM2.5 and PM10 to rise for 30–90 minutes after vacuuming, especially on carpets.
  • Use a vacuum with a sealed body and a genuine fine-particle filter (often labeled HEPA-level).
  • Run an air purifier in the same room for 1–2 hours before and after vacuuming.
  • Vacuum slowly and avoid shaking rugs or cushions indoors to limit dust clouds.
  • If practical, leave recently vacuumed rooms for 20–30 minutes to let particles settle or be filtered.

Why Vacuuming Makes Dust Clouds and PM Levels Rise

Vacuuming changes dust from a settled problem into a short-lived airborne one. Dust that normally rests on carpets, rugs, and hard floors is lifted by the vacuum’s airflow and by your footsteps and motion. Some of that dust goes into the vacuum bag or bin, but some becomes a cloud of fine particles in the room air.

PM (particulate matter) readings usually reflect this cloud. Many home monitors show spikes in PM2.5 and PM10 during and right after vacuuming, even if they were low beforehand. This spike does not necessarily mean your home is dirtier overall; it usually means you are briefly moving dust from surfaces into the air on its way to being removed.

Key reasons PM rises while you vacuum include:

  • Airflow at the floor: The strong suction and exhaust air disturb fibers and debris.
  • Brush agitation: Rotating brushes beat carpets and rugs, releasing embedded particles.
  • Foot traffic: Walking and dragging the vacuum resuspend settled dust.
  • Vacuum leakage: Poor seals or low-grade filters allow fine dust to blow back out.

Key Concepts: Dust, PM2.5, and How Vacuums Affect Them

To understand vacuum-related dust clouds, it helps to know the basics of particle sizes and how vacuums and filters interact with them.

What PM2.5 and PM10 Mean in Everyday Terms

  • PM10: Particles roughly the size of coarse dust and larger pollen grains.
  • PM2.5: Finer particles, including very small dust, smoke, and some fibers.

Vacuuming tends to increase both sizes. Coarse particles may settle again fairly quickly, but some finer particles can stay suspended for longer and are more easily measured by air quality monitors.

How Vacuums Move and Release Particles

A vacuum cleaner is essentially a small, powerful fan. It pulls air (with dust) in through the floor head and pushes it out through its exhaust. Between intake and exhaust, the dust should be trapped by bags and filters. If those filters or seals are not effective, some fine particles escape and contribute to elevated PM levels.

Main factors that influence how much dust becomes airborne include:

  • Brush design: Aggressive beater bars can release more embedded dust from carpets.
  • Filtration quality: Better filtration reduces how much fine dust exits the exhaust.
  • Sealing: Gaps in the body or hose joints can leak unfiltered dust.
  • Bag or bin fullness: Overfilled bags and bins may reduce filtration performance.

Why Air Purifiers Often Show Spikes While You Clean

If you use an air purifier with a particle sensor or a separate monitor in the same room, you will often see readings climb when you start vacuuming. This reflects the genuine increase in airborne particles, not a sensor malfunction. After you stop vacuuming, a reasonably sized purifier can usually bring readings back down over the next 30–120 minutes, depending on room size, airflow, and how much dust was disturbed.

Table 1. Common dust sources disturbed by vacuuming and simple responses. Example values for illustration.
Surface or activity Typical particle effect Helpful response
Thick carpet Large PM10 + noticeable PM2.5 spike Vacuum slowly, use strong filtration, run purifier after
Thin rug on hard floor Short PM spike while rug is agitated Shake or beat rug outdoors if possible
Upholstered furniture Localized dust cloud near seating Use upholstery tools gently, ventilate or filter air
Pet beds and blankets Hair and dander particles released Wash textiles regularly, vacuum around area with good filter
Baseboards and corners Resuspended fine dust Use crevice tools, damp-dust first if practical
Overfilled vacuum bag/bin Higher fine dust leakage Empty or replace before it gets too full

Typical Mistakes That Make Dust Clouds Worse

Many everyday cleaning habits unintentionally increase how long particles stay airborne or how much dust escapes into the room.

Using a Vacuum Without Effective Fine-Particle Filtration

Some vacuums rely mainly on coarse filters or bags that capture larger debris but allow more fine dust to pass. If you notice a dusty smell or visible haze in sunbeams when vacuuming, your machine may be releasing more particles than it should.

Common issues include:

  • Filters not seated correctly, leaving gaps.
  • Filters that are dirty or damaged.
  • Low-grade exhaust filters that do not target fine particles.

Vacuuming Too Fast or Aggressively

Moving quickly or repeatedly going back and forth in short, fast strokes can stir up more dust without giving the vacuum enough time to pull it in. Slow passes with overlapping strokes tend to remove more dust and create slightly less airborne disturbance.

Shaking or Beating Textiles Indoors

Shaking throw rugs, pet blankets, or cushions inside can launch a concentrated dust cloud, especially near eye and breathing level. This often creates higher short-term readings than floor vacuuming alone.

Skipping Pre-Dusting and Relying Only on the Vacuum

If surfaces above the floor are dusty, vacuuming the floor first may cause dust from shelves, window sills, and furniture to fall later and undo some of your work. That extra dust can also be stirred into the air as you finish cleaning.

Practical Ways to Reduce PM Spikes When Vacuuming

You cannot completely avoid some particle rise during vacuuming, but you can reduce both the peak and how long it lasts. The goal is less leakage, less stirring, and more capture.

1. Upgrade Filtration and Seals on the Vacuum You Use

Look for vacuums designed to capture fine particles with:

  • A sealed body or sealed system to minimize leaks.
  • High-efficiency exhaust filtration (often described as HEPA-level).
  • Clean, intact gaskets around filter housings and doors.

Even without technical labels, you can check performance practically: vacuum in a sunlit room and watch near the exhaust; visible dust plumes suggest poor containment.

2. Coordinate Vacuuming With Air Purifier Use

Pairing vacuuming with a room air purifier can significantly lower the duration and intensity of PM spikes. General approaches:

  • Run the purifier on a higher setting for 30–60 minutes before vacuuming to lower background PM.
  • Keep it running for 1–2 hours afterward to capture resuspended particles.
  • Place the purifier where airflow can circulate (e.g., not blocked behind furniture).

In open-plan areas, a purifier sized for the main space may still show some delay before readings fall, simply because of the larger air volume.

3. Adjust Your Cleaning Sequence

Simple order changes can reduce how much dust is kicked up repeatedly:

  • Start with higher surfaces (shelves, blinds, window sills) using damp cloths where appropriate.
  • Dust furniture and electronics next, again favoring slightly damp methods rather than dry feather dusters.
  • Vacuum last, moving toward the exit of the room if possible.

When you are done, leaving the room for 20–30 minutes while a purifier runs or while windows are briefly opened (when outdoor air is reasonably clean) can help particles clear.

4. Use Gentler Methods on High-Dust Items

For items that tend to release large dust clouds:

  • Take small rugs or pet blankets outdoors to shake or beat when weather and local outdoor air quality allow.
  • Wash textiles like throws, cushion covers, and pet bedding regularly so they hold less loose dust.
  • Use upholstery tools with moderate suction on furniture rather than vigorous brushing.

5. Manage Frequency Rather Than Intensity

Vacuuming more frequently but less aggressively can reduce the amount of dust that accumulates between cleanings. With less buildup, each cleaning session releases fewer particles overall, even if the monitor still shows a temporary bump.

Real-World Scenarios: What to Expect From PM Readings

PM behavior during vacuuming can vary widely depending on your home, flooring, and tools. These simplified examples illustrate typical patterns.

Small Carpeted Bedroom With Portable Purifier

In a modest bedroom with wall-to-wall carpet and a reasonably sized air purifier:

  • PM2.5 and PM10 may climb quickly within the first 5–10 minutes of vacuuming.
  • Once you stop, readings often start dropping within 15–30 minutes if the purifier is on a moderate or higher setting.
  • Within about an hour, many monitors show values returning close to your starting point, assuming doors and windows stay mostly closed and no new dust is added.

Open-Plan Living Room With Mixed Flooring

In a large area with both rugs and hard flooring:

  • PM spikes may be more gradual but can reach higher peaks, especially when rugs or upholstered seating are cleaned.
  • Because of the greater volume of air, it can take 1–2 hours or more for readings to fall, even with a well-sized purifier.
  • If windows or doors are opened to less clean outdoor air, the pattern may blend vacuum-related spikes with outdoor sources.

Home With Pets and High-Shedding Surfaces

Where pets shed heavily and spend time on rugs, sofas, and beds:

  • PM spikes from vacuuming may be stronger and more frequent, as more dander and hair become airborne.
  • Regular washing of pet bedding and grooming can reduce the amount of material to stir up.
  • An air purifier placed near common pet areas may help smooth out day-to-day fluctuations.

Safety and Device Considerations Around Dust and PM

Reducing vacuum-related PM spikes does not usually require special technologies, but some devices marketed for air cleaning raise additional questions.

Ionizers, Ozone, and UV-C Features

Some air-cleaning products include ionizers, ozone generators, or UV-C lamps. These are sometimes promoted as ways to reduce particles or address germs. Considerations:

  • Ozone: Intentional ozone generation indoors is generally discouraged due to potential respiratory irritation; many consumers prefer ozone-free devices.
  • Ionizers: Ionization can cause particles to clump and settle, but may also lead to dust deposition on walls and surfaces; it is not a substitute for filtration.
  • UV-C: UV-C is typically aimed at microbes, not dust, and requires careful design to avoid direct exposure to people.

For most households focused on dust and PM from vacuuming, a conventional mechanical filter-based purifier (for example, one using HEPA-type media) combined with good cleaning habits is often the most straightforward approach.

Ventilation and Outdoor Air

Opening windows during or after vacuuming can either help or hinder, depending on outdoor conditions. If outdoor air is relatively clean (no visible smoke, low local pollution), short ventilation periods can dilute indoor dust. If outdoor PM is high, it may be better to rely mainly on filtration indoors and limit open windows while levels are elevated outside.

Maintenance Basics: Vacuum and Filter Care

Well-maintained equipment reduces the amount of dust that escapes during cleaning and improves how quickly the air clears afterward.

Vacuum Maintenance Habits

  • Empty or replace bags and bins regularly: Do not wait until they are packed tight; this can reduce suction and filtration quality.
  • Inspect and clean filters: Follow the manufacturer’s schedule for washing or replacing filters; clogged filters can leak or reduce performance.
  • Check seals and gaskets: Ensure doors close firmly and rubber seals are not cracked or missing.
  • Clean brush rolls: Remove hair and threads that can interfere with effective dust pickup.

Air Purifier Filter Care

If you use an air purifier to help manage dust:

  • Follow typical replacement intervals for the main particle filter (often months to a couple of years, depending on use and environment).
  • Vacuum or gently wipe pre-filters if they are designed for that; this helps protect the finer filter layers.
  • Listen for changes in noise or airflow that may suggest filters are clogged and need attention.
Table 2. Example filter replacement planner for dust-focused homes. Example values for illustration.
Filter type Typical interval range What shortens the interval Simple reminder
Vacuum bag 1–2 months of regular use Heavy shedding pets, lots of carpet Check when suction feels weaker
Vacuum pre-filter (foam/mesh) Clean monthly, replace as needed Very dusty homes, renovation dust Rinse or tap out dust if allowed
Vacuum exhaust fine filter 6–24 months Frequent cleaning, clogged pre-filters Replace when visibly gray or damaged
Air purifier pre-filter Clean every 1–3 months High dust, pet hair near intake Mark calendar for quick checks
Air purifier main particle filter 6–24 months Daily use, high indoor/outdoor PM Follow device indicator or schedule
Furnace or central HVAC filter 1–3 months for finer filters Continuous fan use, construction season Check monthly during heavy use

Related guides: Best Air Purifiers for Allergies: What to Look For (CADR, HEPA, Carbon)PM2.5 Explained: What the Numbers Mean and What’s a Safe Level IndoorsHow to Reduce Dust in Your Home (Without Constant Cleaning)

Summary: Vacuuming, PM Spikes, and Cleaner Indoor Air

Vacuuming almost always makes particle levels rise briefly because it disturbs settled dust and fibers. This effect is most noticeable on monitors in carpeted rooms and homes with pets or lots of textiles. While the spike can look dramatic, it is usually temporary and reflects dust in motion rather than a long-term worsening of your indoor air.

You can reduce these spikes and help them clear faster by using a well-sealed vacuum with effective filtration, coordinating vacuuming with air purifier use, cleaning from top to bottom, and maintaining your filters regularly. Over time, consistent, gentle, and frequent cleaning tends to lower the total dust load in your home, leading to fewer and smaller PM jumps when you vacuum.

Frequently asked questions

How long do PM2.5 and PM10 spikes usually last after vacuuming?

Spikes commonly last 30–90 minutes and can extend up to 1–2 hours in large or open-plan spaces. Duration depends on room volume, how much dust was disturbed, vacuum filtration quality, and whether an air purifier or ventilation is used.

Can a vacuum with HEPA-level filtration prevent dust clouds entirely?

HEPA-level or fine-particle filters significantly reduce exhausted particles but won’t prevent all resuspension caused by brush agitation and foot traffic. A well-sealed vacuum with good filtration combined with gentle technique minimizes leakage and airborne dust, but some temporary rise in PM is still normal.

Should I run an air purifier while vacuuming or only afterward?

Run a purifier on a higher setting for 30–60 minutes before vacuuming to lower background PM and keep it running for 1–2 hours afterward to capture resuspended particles. Position the purifier where airflow can circulate and avoid blocking its intake or exhaust.

Is it better to open windows when vacuuming to reduce indoor PM?

It depends on outdoor air quality—opening windows can dilute indoor dust if outdoor PM is low, but it can worsen indoor levels if outdoor pollution is high. Check local outdoor air quality and favor filtration indoors when outside PM is elevated.

How can I reduce pet dander and hair becoming airborne during cleaning?

Vacuum frequently with proper filtration, wash pet bedding regularly, groom pets to reduce loose hair, and use upholstery tools gently on furniture. Taking small rugs and blankets outdoors to shake or wash them prevents concentrated indoor dust clouds.

Candles and Incense: What They Mean for Indoor Air

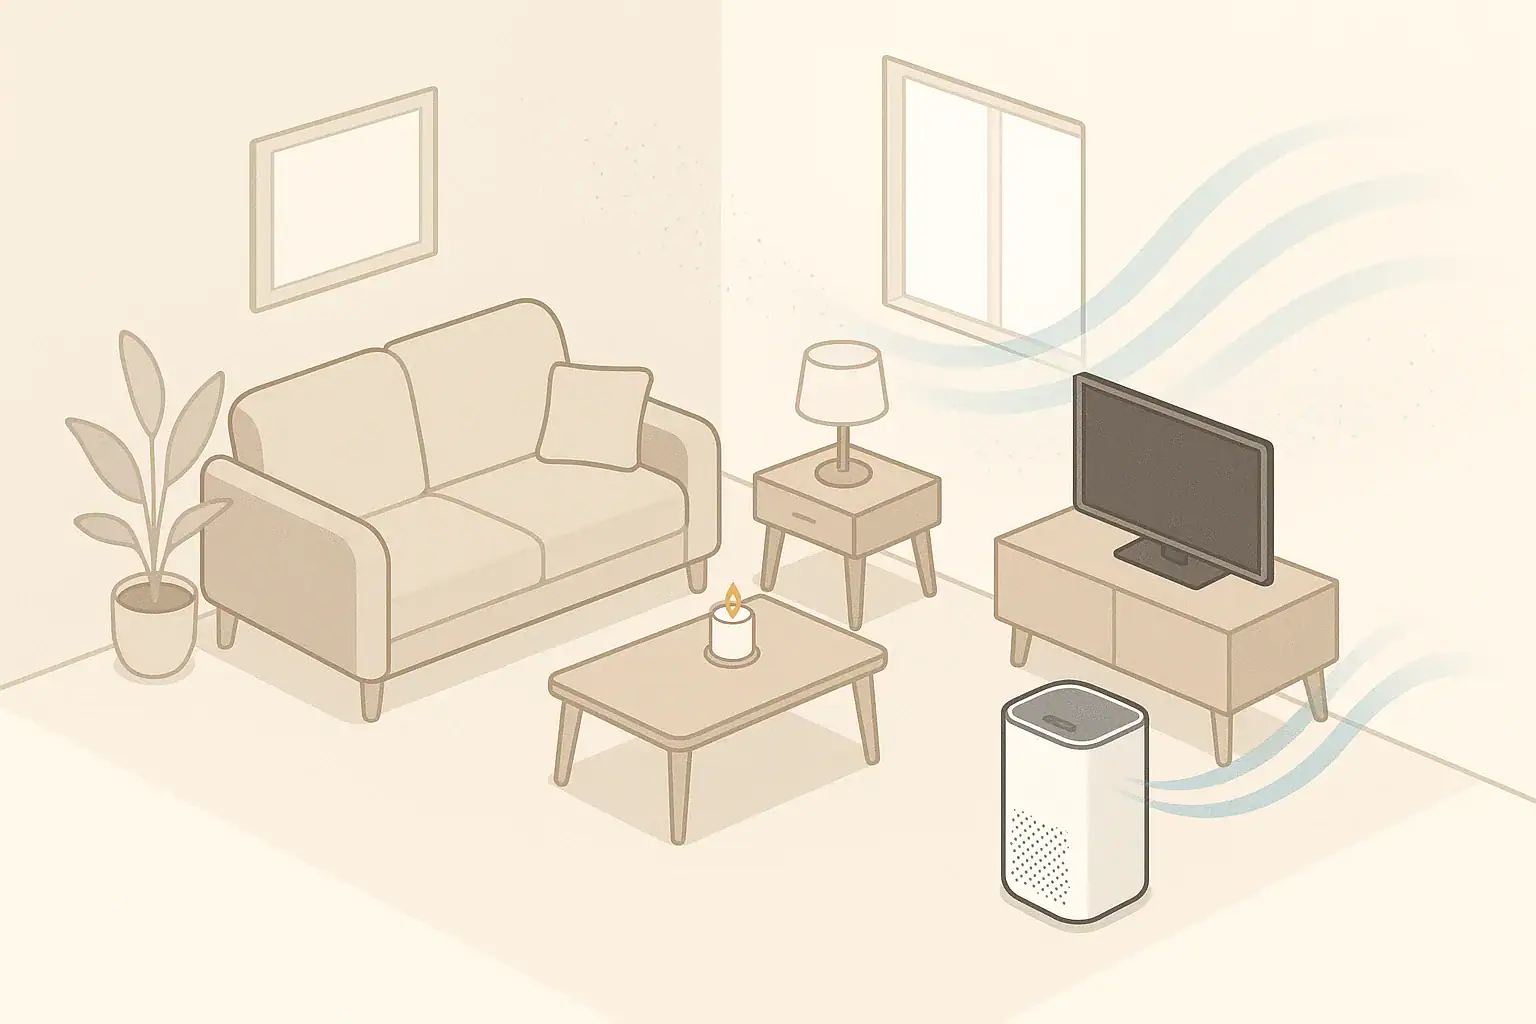
Isometric living room with candle and air purifier

Candles and incense can briefly raise indoor particulate levels to many times above normal background, especially for fine particles like PM2.5, in a small room with limited ventilation.

That does not mean you must avoid them entirely, but it does mean they behave more like a small combustion source than a simple “scent,” and their impact depends heavily on room size, ventilation, and how often you use them.

Quick answer
  • Lighting a single candle or stick of incense in a small, closed room can raise PM2.5 from typical indoor background (often under ~10–15 µg/m³) to tens or even hundreds of µg/m³ while burning.
  • Incense generally emits more particles per hour than most candles because it smolders continuously, often producing visible smoke.
  • Short, occasional use in a well-ventilated space usually keeps average exposure lower than daily, long burns in a closed room.
  • Opening windows, running an effective particle filter, and trimming wicks can substantially reduce particle build-up.
  • If you monitor indoor PM2.5, you will typically see sharp spikes during burning and a gradual decline over 1–3 hours after extinguishing.

Why candle and incense smoke matters for indoor air

Candles and incense are combustion sources: they burn fuel and produce gases and microscopic particles. Indoors, those emissions can accumulate because there is less air volume and less dilution than outdoors.

The main concern in this context is particulate matter, especially fine particles called PM2.5 (particles with diameters of 2.5 micrometers and smaller). These particles are small enough to stay suspended in air for hours and are easily carried into other rooms through normal airflows.

Unlike dust that you can see and clean up, much of the smoke from a candle or incense stick is invisible after it disperses. You may smell the fragrance long after visible smoke seems gone, and particle counters often continue to register elevated levels well after you extinguish the flame or ember.

Key concepts: PM2.5, particle spikes, and averages

To understand how much particulate pollution candles and incense create, it helps to look at a few basic concepts used in air quality measurements.

PM2.5 and particle number

PM2.5 is a mass-based metric: it measures the combined mass (in micrograms) of small particles in a cubic meter of air (µg/m³). A burning candle or incense stick emits a wide range of particle sizes; many of them fall into the PM2.5 category.

Some monitors instead track particle count (number of particles in a given volume of air). Combustion sources often produce huge numbers of tiny particles, so both mass and count can rise sharply during burning.

Spikes vs average exposure

A key point is the difference between short-term spikes and longer-term average exposure:

  • A single candle burned for 30–60 minutes might cause a high but brief PM2.5 spike, then levels decay as fresh air dilutes the smoke or a filter removes particles.
  • Daily incense burning in a small, poorly ventilated space can keep background levels elevated for much of the day, turning spikes into extended periods of exposure.

When people share measurements from home monitors, they often show short-term PM2.5 values jumping from a relatively low baseline to tens or hundreds of µg/m³ during burning. Exact values vary with the device, room, and habits, but the pattern of a sharp spike is very common.

Example contribution compared with normal indoor levels

In many homes without combustion sources and with basic ventilation, indoor PM2.5 tends to track outdoor air and household activities such as cooking and cleaning. Candles and incense add another layer:

  • Background indoors (no burning, light activity) can often be in the single-digit to low double-digit µg/m³ range, depending on outdoor air and dust.
  • Single candle or incense stick burning can raise readings to several times that baseline for the duration of use, especially in small, closed rooms.

These are general, illustrative ranges, not strict limits. The important point is that candles and incense behave more like mini fireplaces or smoldering sources than like neutral décor items from an air quality perspective.

Table 1. Example sources of indoor fine particles and how candles and incense compare. Example values for illustration.
Illustrative comparison of indoor PM2.5 sources
Source type Typical duration PM2.5 pattern (example) Notes
Light cooking (boiling, toasting) 10–30 min Short, sharp spike; returns toward baseline within 1–3 hours Can exceed candle/incense spikes for a brief period
Pan frying or broiling 10–30 min Often large spike; may dominate daily average Strongly influenced by exhaust fan use
Single scented candle 1–3 hours Moderate spike lasting as long as the burn Higher with multiple candles or poor ventilation
Single stick of incense 30–60 min Often strong, visible smoke; higher sustained PM2.5 than many candles Background can stay elevated for hours
Multiple incense sticks daily Hours per day Repeated spikes; may keep PM2.5 above baseline most of the day Heavily affected by room size and air exchange
Outdoor air infiltration (urban) Continuous Baseline that rises and falls with outdoor pollution Candles/incense add to this background indoors

Example values for illustration.

Common mistakes that increase particulate pollution

Several everyday habits can significantly increase the particulate impact of candles and incense without people realizing it.

Burning in small, poorly ventilated rooms

Using candles or incense in a small, closed room concentrates particles in a limited air volume. Without any fresh air coming in or filtration running, PM2.5 builds up until burning stops and then slowly declines.

Clues that ventilation is limited include heavy lingering odors, visible smoke that hangs in the air, or monitors that show a slow decline in particle levels even an hour after extinguishing the source.

Multiple sources at once

Burning several candles or multiple incense sticks compounds the emissions. Even if each one is small, they add up, especially over time. Using them at the same time as other combustion sources (like cooking without a range hood) can push indoor particulate levels much higher than any single source would alone.

Poor wick maintenance and drafts

For candles, long or curled wicks often create a larger, flickering flame and more soot. Drafts from windows, fans, or walking by can also cause candles to flicker, which tends to increase visible smoke and fine particle production.

Assuming “natural” always means low emission

Ingredients and labels may influence fragrance type, but combustion itself still generates particles. Whether the fuel is paraffin, plant-based wax, wood powder, or resin, the burning process produces smoke particles and gases. The way you burn and the room conditions usually have more influence on indoor levels than marketing terms.

Practical ways to reduce particulate pollution from candles and incense

If you wish to keep using candles or incense while paying attention to indoor air quality, a few practical steps can significantly reduce particulate build-up.

Reduce duration and frequency

  • Limit continuous burning times, especially in small or enclosed rooms.
  • Consider reserving incense or heavy candle use for occasional events rather than daily routine.
  • Extinguish candles once you have the ambiance or fragrance you want rather than leaving them burning for many hours.

Improve ventilation during and after burning

  • Open a window slightly if outdoor air quality is reasonable.
  • Use mechanical ventilation if available (bath fan, balanced ventilation, or HRV/ERV systems) to increase air exchange.
  • Allow extra ventilation time after extinguishing; particles often remain elevated for 30–90 minutes or longer.

Use particle filtration strategically

Filtration that targets fine particles can help reduce indoor concentrations:

  • Run a particle-focused air cleaner in the same room while burning and for some time afterward.
  • Ensure the air cleaner’s intake and exhaust are not blocked and that air can circulate across the room.
  • Position it so that it captures room air generally, rather than trying to place it directly over the flame or ember.

Burn more cleanly

  • Trim candle wicks to a modest length according to the manufacturer’s general guidelines to reduce soot.
  • Avoid letting candles burn in a strong draft that causes constant flickering and smoking.
  • For incense, ensure the holder catches ash safely, and avoid leaning sticks over soft furnishings.

Real-world scenarios: what to expect from candles and incense

Every home is different, but a few generalized scenarios can help set expectations for particulate behavior from candles and incense.

Scenario 1: Single candle in a medium living room

A small candle burned for 1–2 hours in a medium-sized living room with a slightly open window and an air cleaner running at a moderate setting might produce a noticeable but modest PM2.5 rise. A monitor in the room could show a gentle hump on the graph rather than a sharp peak, with levels generally returning toward pre-burn values within about an hour after extinguishing.

Scenario 2: Daily incense in a small bedroom

Burning one incense stick nightly in a small bedroom with closed windows and no mechanical ventilation or filtration may cause repeated PM2.5 spikes. If the door is closed, the room can hold smoke longer and readings may stay elevated well into the night, especially if windows remain shut.

Scenario 3: Multiple candles during a gathering

Lighting several candles in an open-plan living and dining space for a few hours, combined with cooking and guests moving around, tends to produce overlapping particulate sources. Even if each activity is moderate on its own, the combined effect can keep PM2.5 higher for the duration of the event, especially if windows stay closed. Venting the space with a brief window-open period after the gathering and running filtration can help levels drop back closer to baseline.

Safety, standards, and broader considerations

Indoor air quality guidance often focuses on average exposure over time rather than single brief peaks. Candles and incense contribute to short-term peaks and, if used heavily, can influence daily averages as well.

Combustion sources in the home context

From an indoor air perspective, candles and incense are grouped conceptually with other combustion sources such as cooking flames, fireplaces, and smoking, though their typical scale is smaller. Reducing the total amount of indoor combustion, or improving how well it is ventilated, generally lowers indoor particle levels.

Ionizers, ozone, and UV-C devices

Some devices marketed for air “freshening” or purification may generate ions or ozone, or use UV-C light. These approaches can have complex interactions with indoor air chemistry, and they are not necessary to manage candle or incense particles. For most homes, combining source control (shorter burns, fewer sources), ventilation, and well-designed particle filtration is a more straightforward and widely recommended strategy.

Fire and burn safety

In addition to air quality, basic fire safety remains essential:

  • Place candles and incense on stable, nonflammable surfaces, away from curtains, paper, and upholstery.
  • Never leave open flames or smoldering sticks unattended.
  • Ensure embers are fully extinguished before leaving the room or going to sleep.

Maintenance: filters, cleaning, and cost considerations

Using filtration to manage particles from candles and incense requires regular upkeep to stay effective.

Filter maintenance

  • Mechanical particle filters gradually load with dust and smoke particles, which can reduce airflow and efficiency over time.
  • Check and replace filters according to general time ranges and usage level, and more often if you notice visibly darkened filters or reduced airflow.
  • Running a filter more during high-particle activities (cooking, burning candles or incense) may increase how quickly it needs replacement.

Cleaning surfaces

Some fraction of smoke particles from candles and incense eventually deposit onto surfaces and fabrics:

  • Regular dusting with a slightly damp cloth and vacuuming with a good filter helps remove settled particles.
  • Soft furnishings such as curtains and upholstery can retain fragrance compounds and particles; periodic laundering or vacuuming helps manage buildup.

Energy and noise

Running filtration and ventilation has energy and noise implications. It may be helpful to:

  • Use higher airflow settings during or immediately after burning, then step down to quieter settings when the room is unoccupied or at night.
  • Coordinate window opening with outdoor conditions to balance air quality, temperature, and energy use.

Common questions about monitors and readings

Low-cost indoor air quality monitors have become more common, leading many people to see candle- and incense-related spikes for the first time. Understanding what those readings mean can help you respond calmly and practically.

Why does my PM2.5 reading jump so much when I light a candle?

Combustion produces many fine particles very quickly. Even if the candle flame looks small, the local particle concentration around it is high. As room air mixes, a sensitive monitor detects the increased fine particle mass or count, which appears as a spike. This behavior is typical and largely reflects the instrument’s sensitivity to combustion aerosols.

How long should I expect elevated readings after burning?

In a closed room without filtration or ventilation, elevated PM2.5 from a short burn can persist for an hour or more. With effective ventilation and filtration, levels often drop significantly within 30–60 minutes. The exact timing depends on room volume, air exchange rate, and how much was burned.

What about VOC or odor readings?

Some monitors display a total volatile organic compounds (TVOC) estimate. Fragrances from candles and incense, and combustion byproducts, can contribute to this reading. VOC and odor behavior is not identical to particles: smells can linger even as PM2.5 drops, or the opposite. Strategies like ventilation and adsorption-based filtration are typically used for odors, while mechanical filtration targets particles.

Table 2. Example indoor monitor metrics and how to interpret them around candle and incense use. Example values for illustration.
Illustrative guide to common indoor monitor metrics
Metric What it indicates Common pitfalls Action idea
PM2.5 (µg/m³) Mass of fine particles from smoke, dust, and other sources Short spikes may look alarming but can be brief; sensors differ in accuracy Note patterns over days; ventilate and filter to reduce peaks
Particle count Number of particles in certain size ranges Very small particles may dominate counts without large mass changes Compare relative changes between activities (candles vs cooking)
TVOC estimate Approximate level of total volatile organic compounds Highly sensor-specific; influenced by many household products Track trends; ventilate after strong fragrance or cleaning product use
CO₂ (ppm) Indicator of occupancy and ventilation, not candle smoke itself Can rise in closed rooms even without any burning Use to judge when fresh air is needed, especially in bedrooms
Humidity (%) Moisture level in the air Candles/incense have minor effect compared with cooking or showers Keep within a comfortable moderate range to limit other issues
Temperature (°F/°C) Thermal comfort Small flames barely change room temperature overall Adjust heating/cooling separately from air cleaning decisions

Example values for illustration.


Related guides: Best Air Purifiers for Allergies: What to Look For (CADR, HEPA, Carbon)How to Choose the Right Air Purifier for Your Room SizeAir Purifier Placement: Where to Put It for Best Results

Summary: candles, incense, and practical air quality choices

Candles and incense are meaningful contributors to indoor particulate pollution because they are combustion sources, even when used for ambiance or ritual. In many homes, their impact takes the form of short-term PM2.5 spikes that stack on top of other particle sources such as cooking and outdoor air.

You can meaningfully reduce particulate exposure without eliminating these products entirely by shortening burn times, burning fewer items at once, ventilating during and after use, and running effective particle filtration in the same room. Paying attention to room size, air exchange, and basic burn practices helps you balance atmosphere, fragrance, and indoor air quality in a calm, informed way.

Frequently asked questions

How much can lighting a single candle or incense stick increase indoor PM2.5 levels?

Lighting a single candle or incense stick in a small, closed room can raise PM2.5 from a typical background (often under roughly 10–15 µg/m³) to tens or even hundreds of µg/m³ while burning. The exact increase depends on fuel type, room volume, ventilation rate, and how many items are burning.

Is incense generally worse than candles for particulate pollution?

Incense often emits more particles per hour than many candles because it smolders continuously and commonly produces visible smoke. That said, multiple candles, poor wick maintenance, or burning in a very small space can produce similar particulate burdens, so ventilation and burn practices matter more than product category alone.

How long do elevated particle concentrations usually last after I extinguish a candle or incense?

In a closed room without ventilation or filtration, elevated PM2.5 from a short burn often persists for an hour or more and can sometimes remain detectable for several hours. With good ventilation and a particle-focused filter running, concentrations commonly fall substantially within 30–60 minutes.

What are the most effective steps to reduce particulate pollution while still using candles or incense?

Limit burn duration and frequency, use fewer items at once, and ventilate during and after burning. Running a particle-focused air cleaner in the same room and trimming candle wicks also reduces soot and shortens the time particles remain elevated.

Do “natural” or plant-based candles and incense produce much less particulate pollution?

Combustion produces particles regardless of whether the fuel is paraffin or plant-based, so “natural” labeling does not guarantee low particle emissions. Emissions are often more strongly affected by how the item is burned, the number burned, and room ventilation than by marketing terms.

Cooking PM2.5 Spikes: What to Do Before and After

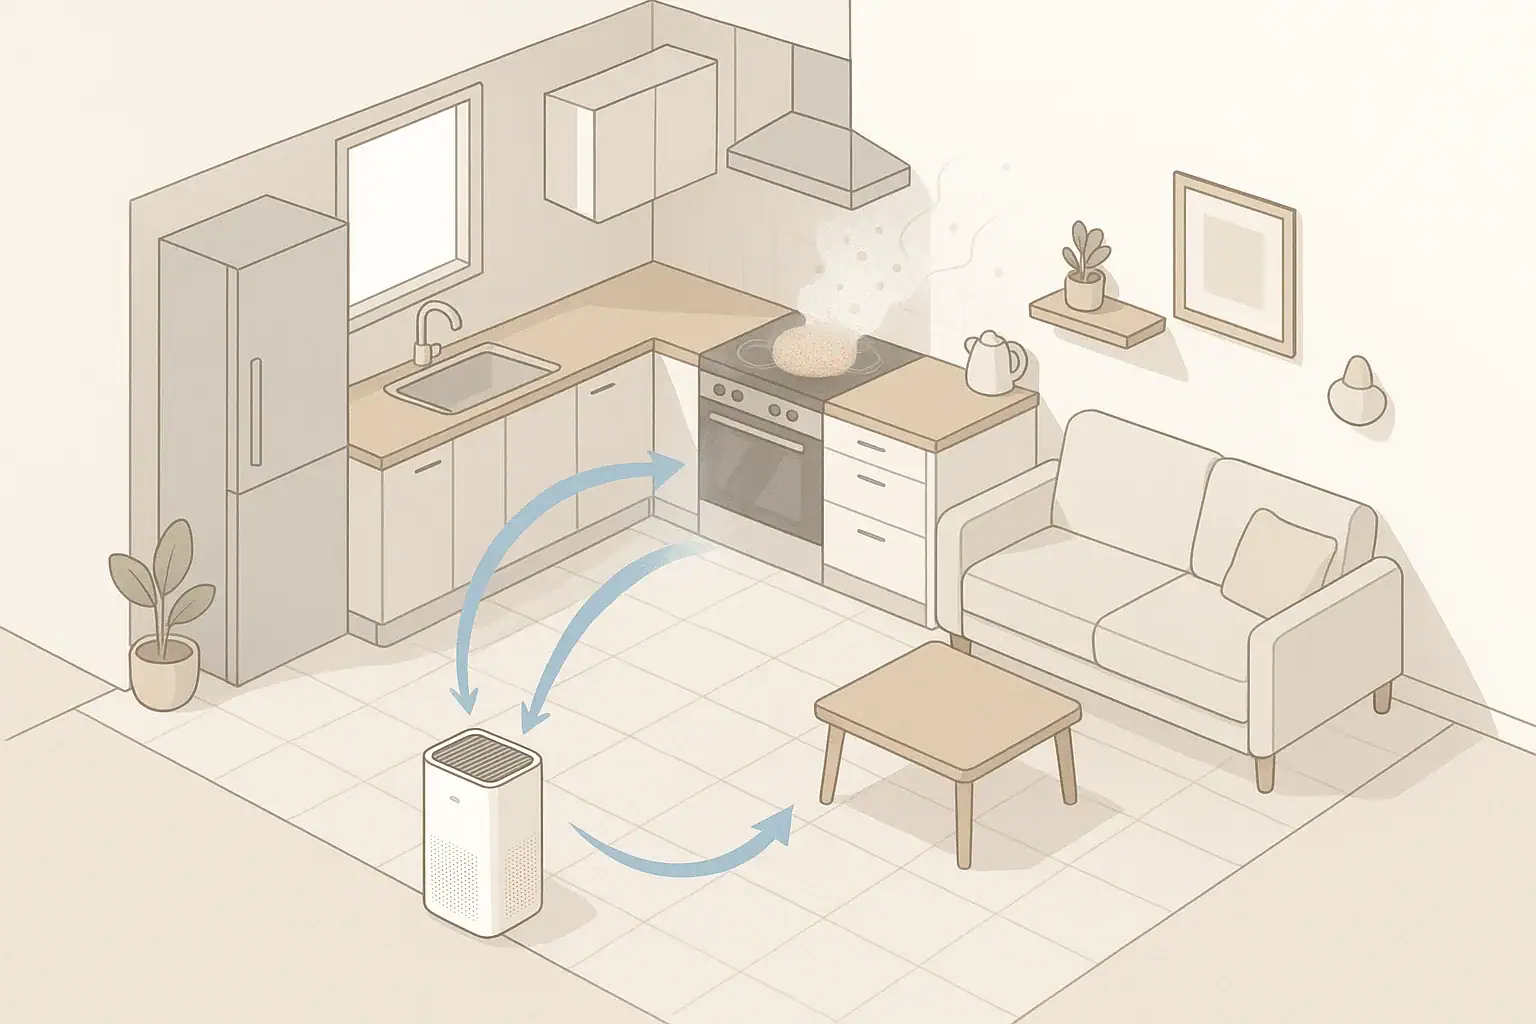
Kitchen scene with purifier reducing cooking particle levels

When cooking causes PM2.5 spikes, the goal is to limit particle buildup by using ventilation, managing heat and oil, and cleaning the air during and after cooking.

Indoor PM2.5 often rises sharply when frying, sautéing, or using high heat, especially in smaller or tightly sealed homes. You can’t avoid all particles from cooking, but you can keep levels more moderate with a few routine steps before, during, and after you cook.

Quick answer
  • Before cooking: Turn on the range hood to its higher setting and open a nearby window if practical.
  • During cooking: Prefer medium heat, use lids and back burners, and ventilate continuously.
  • Air cleaning: Run an air purifier with a HEPA-type filter in or near the kitchen on higher speed during and 30–60 minutes after cooking.
  • Monitoring: If you use a PM2.5 monitor, note typical peaks and how long they take to drop back toward your everyday baseline.
  • After cooking: Keep ventilation and purifiers running until visible haze and cooking odors are much lower.

PM2.5 refers to airborne particles that are about 2.5 micrometers in diameter or smaller. Many cooking methods, especially frying, broiling, searing, and toasting, generate a lot of these fine particles. You may notice them as a visible haze near the stove or as lingering smells in nearby rooms.

Common sources of PM2.5 during cooking include:

  • Oil droplets from frying or sautéing
  • Smoke and char from high-heat searing and broiling
  • Fine particles from toasting bread or baking items that brown strongly
  • Burned food residue on pans, oven walls, or drip trays

These particles can travel beyond the kitchen into bedrooms and living areas, especially in open-plan homes. Even if they are not visible, monitors often show that higher levels can linger for an hour or more without active ventilation or air cleaning.

Key Concepts: PM2.5, Ventilation, and Air Cleaning

Managing PM2.5 from cooking usually involves three ideas working together: source control (how you cook), ventilation (moving air out and bringing fresher air in), and air cleaning (removing particles from indoor air).

Source control

  • Heat level: Higher heat tends to produce more particles and smoke. Medium or medium-high heat usually produces fewer spikes than maximum heat.
  • Oil choice and amount: More oil and hotter oil create more aerosolized droplets. Shallow frying and careful temperature control can reduce particle generation.
  • Cooking methods: Baking, simmering, and steaming generally produce fewer fine particles than deep-frying, pan-frying, or broiling.

Ventilation

  • Range hoods: A ducted hood that exhausts outdoors can remove a substantial portion of cooking particles when used on an adequate speed setting and positioned correctly over the stove.
  • Recirculating hoods: These usually pass air through a grease or small filter and blow it back into the room. They can help with some grease and odor but typically do less for fine particles.
  • Windows and cross-breezes: Opening a window near the kitchen and another elsewhere in the home can create a path for smoke and particles to leave.

Air cleaning

  • Particle filters: Portable air purifiers with HEPA or similar particle filters can capture PM2.5 as air circulates through the device.
  • Placement: Locating the purifier in or near the cooking area or in the main airflow path between the kitchen and the rest of the home can improve effectiveness.
  • Run time: Running the purifier before, during, and 30–60 minutes after cooking allows more of the air volume to pass through the filter multiple times.
Figure 1. Options for managing cooking-related PM2.5. Example values for illustration.
Decision matrix: ventilation, behavior changes, and air cleaning
Situation Primary action Secondary support Notes
No range hood, small kitchen Open window near stove Use portable air purifier nearby Aim for cross-breeze using another open window or door.
Ducted hood, open-plan layout Use hood on higher setting while cooking Run purifier in living area Start hood a few minutes before heating pans.
Frequent frying Lower heat, use splatter guard or lid Ventilate and run purifier on high Shorten cooking time and avoid reusing burnt oil.
Gas stove without strong hood Maximize window ventilation Purifier in kitchen or nearby room Use back burners to align better with hood intake.
Apartment with limited window opening Use existing fan/hood consistently Place purifier on higher fan setting Keep interior doors open for better mixing and cleaning.
Cooking late at night Use medium heat, cover pans Run purifier longer after cooking Helpful when you cannot open windows due to noise or weather.

Example values for illustration.

Common Patterns and Mistakes That Worsen Cooking Spikes

Many everyday habits unintentionally let cooking-related PM2.5 build up or linger. Recognizing these patterns makes it easier to adjust your routine without major changes.

Waiting too long to turn on ventilation

Turning on the range hood only after visible smoke appears means the highest burst of particles has already spread. Starting ventilation a few minutes before you heat the pan helps capture the early plume.

Using low fan settings by default

Quiet, low-speed settings can be comfortable but may move less air than needed during high-heat cooking. Using medium or higher speeds during frying or searing, then reducing speed afterward, can strike a balance between noise and particle removal.

Keeping doors and windows closed the whole time

In tightly sealed homes, particles have nowhere to go without mechanical ventilation or air cleaning. Even a partial window opening or slightly opened interior doors can create enough flow to reduce how long PM2.5 stays elevated.

Running air purifiers too briefly

Turning a purifier on for only a few minutes often does not allow enough air exchanges through the filter. Running it at a higher setting during cooking and then at a comfortable speed for 30–60 minutes afterward helps more of the room’s air volume pass through the filter.

Before You Cook: Setup to Limit PM2.5 Spikes

Small changes before you start cooking can prevent the sharpest spikes in PM2.5. This preparation stage usually adds only a minute or two to your routine.

Pre-ventilate the cooking area

  • Turn on the range hood 2–3 minutes before heating pans.
  • Set the fan to a medium or higher speed if you plan to fry, broil, or sear.
  • Open a nearby window, if practical, to create an exit path for air.
  • Open interior doors to nearby rooms so that cleaner air can mix and be cleaned.

Position your air purifier

  • Place the purifier in or near the kitchen, but not so close to the stove that it is exposed to splashes or heat.
  • Keep it a bit away from walls or corners so it can draw and exhaust air freely.
  • Turn it to a higher setting a few minutes before you start cooking to begin circulating air.

Plan your cooking method

  • Choose lower-splatter methods when possible (e.g., baking or covered simmering instead of open, high-heat frying).
  • Use lids or splatter screens to contain oil droplets.
  • Make sure pans are clean; burned residue tends to smoke more quickly.

During Cooking: Actions That Reduce Peaks and Spread

During cooking, focus on controlling heat, capturing the plume near the source, and keeping airflow moving in a controlled direction. These steps aim to minimize how far and how high PM2.5 rises in the home.

Keep heat at the minimum that does the job

  • Use medium or medium-high heat instead of maximum when frying or searing, if the recipe allows.
  • If you see visible smoke quickly, reduce the heat and allow the pan to cool slightly before continuing.
  • When using a gas stove, adjust flame size so it stays under the pan and does not wrap around the sides.

Use your range hood effectively

  • Cook on back burners when possible so the hood can capture more of the rising plume.
  • Keep the hood on for the entire cooking process, not just when smoke is visible.
  • If noise is a concern, try using a higher setting for the smokier phases and a lower setting during calmer phases.

Guide airflow and contain particles

  • Keep kitchen doors open to give air a path to the range hood or window, unless you are intentionally containing odors in one area.
  • If using windows, try to create a gentle flow from a cleaner area of the home toward the kitchen and then out.
  • Keep the air purifier running on a higher speed to circulate more air through the filter.

If you use a PM2.5 monitor

  • Place the monitor away from direct steam or smoke so it does not overreact to localized plumes.
  • Observe how quickly PM2.5 rises when you use certain techniques, such as pan-frying versus baking.
  • Use this feedback to adjust heat levels or ventilation settings next time.

After Cooking: Clearing the Air Efficiently

After you turn off the stove or oven, particles and odors can stay in the air for quite a while. A short “clear-out” phase helps bring PM2.5 levels back closer to your usual indoor baseline.

Keep ventilation running

  • Leave the range hood running for 10–20 minutes after you finish cooking, especially after higher-heat methods.
  • Keep windows open for at least the same amount of time, weather and outdoor conditions permitting.
  • If outdoor air quality is poor, rely more on the range hood and air purifier instead of wide-open windows.

Use your air purifier strategically

  • Run the purifier at a moderate or higher fan speed for 30–60 minutes after cooking to process more air volume.
  • In open-plan spaces, consider leaving the purifier in an area where air naturally flows from the kitchen.
  • If noise is a concern at night, run the purifier on a higher speed right after cooking, then shift to a quieter setting later.

Simple cleanup that helps air quality

  • Wipe up visible grease on the stovetop and nearby surfaces; less residue tends to mean less smoke next time.
  • Clean or replace range hood grease filters according to the manufacturer’s instructions so they can capture more particles.
  • Allow pans and oily dishes to cool under a lid before washing to reduce additional vapors and aerosols.

Example Scenarios: Putting It All Together

The best routine for managing cooking-related PM2.5 depends on your home layout, equipment, and habits. Here are a few practical examples that illustrate how the pieces fit together.

Scenario 1: Small apartment kitchen with a recirculating hood

You often fry food on the stovetop, and there is a single window near the sink. In this case, a typical routine might be:

  • Before: Open the kitchen window slightly and turn on the hood on medium. Turn on a portable air purifier at a higher setting in the main living area.
  • During: Use medium heat and a lid or splatter screen. Keep the hood and window open throughout.
  • After: Leave the hood and window open for 15–20 minutes. Keep the purifier on higher speed for 30–45 minutes, then reduce it.

Scenario 2: Open-plan house with a ducted range hood

You have a large kitchen that opens into a living room and hallway. You frequently bake and occasionally broil. A typical approach:

  • Before: Turn on the range hood a few minutes before preheating the oven or starting the stovetop. Open an interior door at the far end of the house to improve overall flow.
  • During: Use the hood on higher speed when broiling or searing. Run an air purifier in the living room on a moderate speed.
  • After: Keep the hood and purifier running while the oven cools and for at least 20–30 minutes after turning off the heat.

Scenario 3: Shared home with sensitivity to smoke and smells

Someone in the home is particularly sensitive to strong cooking odors or visible smoke, so the goal is to keep spikes as low and short as reasonably possible.

  • Before: Plan lower-splatter meals on days when ventilation is limited (e.g., poor outdoor air). Pre-ventilate with range hood and purifier.
  • During: Use lower heat, lids, and back burners. Keep sensitive individuals in rooms farther from the kitchen with their own door closed and a purifier running.
  • After: Run ventilation and purifiers longer than usual until cooking odors are very faint.

Safety and Technology Considerations Around Cooking Air

Some air-cleaning and ventilation technologies are marketed for handling cooking smoke and particles. It is helpful to understand what they do and what to watch for.

Particle filtration vs. gas and odor reduction

  • HEPA or similar filters: These are designed to remove particles, including many from cooking, as air passes through. They do not remove gases or all odors by themselves.
  • Activated carbon or similar media: These can help reduce some cooking odors and certain gases by adsorption. Their effectiveness depends on the amount of carbon, airflow, and how saturated the filter already is.

Ozone and reactive technologies

  • Some devices may intentionally produce ozone or use technologies that can generate small amounts of reactive species. Ozone is generally not recommended as a primary way to treat indoor air in homes.
  • If a device mentions ionization, plasma, or similar features, look for information on ozone emissions and indoor air standards that apply in your area.
  • For most households, focusing on mechanical filtration (HEPA-type filters) and good ventilation is a straightforward, widely used approach.

Range hood venting and building considerations

  • In many homes, it is common for range hoods to recirculate air rather than venting it outdoors. This affects how much they can reduce PM2.5 levels.
  • Where allowed, ducted hoods that exhaust outside typically remove more cooking-related pollutants than recirculating models.
  • If you are considering changes, local building codes, safety rules, and professional installation guidelines are important.

Maintenance, Cleaning, and Long-Term Habits

Keeping ventilation and air-cleaning equipment in good condition supports more consistent control of cooking-related PM2.5 spikes over time.

Range hood and kitchen upkeep

  • Clean or replace hood grease filters as recommended; clogged filters move less air and capture fewer particles.
  • Wipe grease and residue from the stovetop, backsplash, and nearby surfaces to reduce future smoke and odors.
  • Clean oven interiors, drip trays, and toaster or toaster oven crumb trays regularly to prevent burning buildup.

Air purifier and filter maintenance

  • Replace particle filters and any activated carbon components according to general manufacturer timelines or more often if you cook heavily and notice stronger odors.
  • Vacuum or wipe the purifier’s exterior and intake grills to maintain airflow.
  • Keep a simple log or reminder so filters are not used far beyond their intended life.

Monitoring and adjusting your routine

  • If you use a PM2.5 monitor, track how long typical spikes last and which cooking methods create the largest increases.
  • Adjust heat settings, ventilation runtimes, and purifier placement based on this feedback.
  • Revisit your routine when seasons change, since windows may be open more often in some months than others.
Figure 2. Example monitor metrics for everyday cooking. Example values for illustration.
Monitor metric guide for typical home cooking situations
Metric What it indicates Common pitfalls Action idea
PM2.5 Fine particle concentration from cooking and other sources Short spikes near the stove can look alarming but may be very localized. Place monitor in a typical breathing zone and watch how quickly levels drop after cooking.
PM10 Larger particles such as coarse dust or crumbs Steam or water droplets can sometimes influence readings if very close. Use as supporting information; focus on trends alongside PM2.5.
CO2 How much exhaled and indoor air has built up Does not directly measure cooking smoke but is linked with ventilation rate. If CO2 stays high for long periods, consider more frequent airing out.
TVOC A broad signal for various gases and vapors Can respond to cleaning products, sprays, or new furnishings as well as cooking. Note which activities cause strong jumps; ventilate more during those tasks.
Temperature Heat buildup from cooking and appliances Heat alone does not indicate pollutant levels. Use extra ventilation when both temperature and PM2.5 increase.
Relative humidity Moisture level, which can rise with boiling and steaming High humidity can cause window fogging but is separate from smoke. Vent steam to keep humidity in a comfortable range.

Example values for illustration.


Related guides: How to Choose the Right Air Purifier for Your Room SizeActivated Carbon Filters Explained: VOCs, Odors, and What They Can’t DoCooking Odors: Carbon Filters, Range Hoods, and Practical Strategies

Cooking will always create some particles, especially with higher-heat methods, but everyday habits can keep PM2.5 spikes shorter and less intense. Turning on range hoods early, using windows and cross-breezes when available, moderating heat, and running a well-placed air purifier all contribute meaningfully.

For most households, the most effective approach is consistent, not complicated: prepare the space before you cook, keep ventilation and air cleaning going during the smokier moments, and give your home a short “clear-out” phase afterward. Over time, simple adjustments add up to a calmer pattern of indoor air quality around your kitchen.

Frequently asked questions

What should I do immediately if I notice a sudden PM2.5 spike while cooking?

Turn on your range hood to a higher setting and, if safe, open a nearby window to create an exit path for smoke and particles. Move to a back burner or cover the pan with a lid or splatter screen if that will safely reduce aerosol generation, and run a portable air purifier on high in or near the kitchen.

How long do I need to run an air purifier and range hood after cooking to reduce PM2.5?

Run a range hood for about 10–20 minutes after finishing cooking, and operate an air purifier at a moderate or higher speed for roughly 30–60 minutes to allow more of the room’s air to pass through the filter. If visible haze or odors persist, continue running the equipment until air quality appears and reads closer to baseline.

If I can’t open windows, what ventilation options help reduce cooking PM2.5 spikes?

Use a ducted range hood that exhausts outdoors when available, or run a recirculating hood at a higher speed combined with a nearby HEPA-type air purifier. Opening interior doors to improve mixing and placing the purifier in the main airflow path from kitchen to living areas will also help when window ventilation isn’t possible.

Which cooking methods produce the largest PM2.5 spikes and how can I modify them?

High-heat methods such as frying, searing, broiling, and toasting typically create the biggest PM2.5 spikes. To reduce emissions, use lower heat when possible, employ lids or splatter screens, keep pans clean of burned residue, and prefer steaming or baking on days when ventilation is limited.

Are ozone generators or ionizers recommended for reducing cooking-related PM2.5?

Ozone generators are generally not recommended for indoor air cleaning because ozone can be harmful and is ineffective at safely removing particles. Rely on mechanical filtration (HEPA-type filters) and good ventilation instead, and avoid devices that may produce reactive species unless you have clear, safe performance data for indoor use.

PM2.5 Indoors Explained: Sources and Fast Fixes

Isometric living room with air purifier reducing indoor particles

PM2.5 indoors mostly comes from cooking, combustion, outdoor air leaking in, and resuspended dust, and the fastest fixes are ventilation and high-efficiency filtration used correctly.

At home, PM2.5 refers to very small airborne particles that are 2.5 micrometers or smaller. These fine particles stay suspended for hours and can spread throughout open-plan spaces. Managing them is mainly about how you cook, ventilate, clean, and filter the air, not about one single device.

Quick answer
  • Aim to cook on back burners with a vented range hood on high and a nearby window slightly open when frying or searing.
  • Use a HEPA-based air purifier sized for at least 4–5 air changes per hour in the room you occupy most.
  • Keep windows closed during nearby wildfires or heavy traffic periods and rely on recirculating filtration instead.
  • Vacuum with a sealed HEPA vacuum 1–2 times a week to reduce dust that becomes airborne PM2.5.
  • Check and replace filters on purifiers and HVAC systems as often as the manufacturer suggests, or sooner in smoky seasons.

What PM2.5 Indoors Means and Why It Matters

PM2.5 stands for particulate matter with a diameter of 2.5 micrometers or less. These particles are smaller than a typical grain of dust and remain suspended in the air for long periods, especially in closed rooms with limited ventilation.

Indoors, PM2.5 is not one single substance. It is a mix that can include cooking smoke and grease, combustion byproducts from candles or fireplaces, outdoor pollution that leaks in, and fragments of dust, skin flakes, fibers, and other small particles. While health research is ongoing, higher fine particle levels are generally considered undesirable from a comfort and air quality standpoint.

For home decisions, the key idea is practical: reduce what you generate, dilute what you cannot avoid, and filter what remains. This is where simple habits (like using your range hood and closing windows at the right times) interact with equipment choices (like HEPA filtration and ventilation strategies).

Key Concepts: Sources, Size, and Simple Measurement

Understanding PM2.5 indoors starts with three ideas: where it comes from, how it behaves, and how people typically keep an eye on it.

Common indoor sources of PM2.5

  • Cooking: Frying, grilling, broiling, and toasting can all release fine particles and grease aerosols.
  • Combustion indoors: Candles, incense, fireplaces, wood stoves, and smoking all generate PM2.5.
  • Outdoor air infiltration: Traffic pollution, wildfires, and neighborhood burning can enter through windows, doors, and leaks.
  • Resuspended dust: Walking, making beds, and vacuuming without adequate filtration can re-entrain fine dust.
  • Some hobbies and tools: Soldering, 3D printing, and certain craft activities can produce fine particles.

How PM2.5 behaves indoors

Fine particles tend to float and mix through connected spaces. They settle more slowly than larger dust, so activities in one room can influence a nearby hallway or open-plan living area. Air currents from fans, HVAC vents, and open doors help spread or remove them depending on where fresh air and filters are located.

Because PM2.5 is so small, filtration efficiency matters. High-efficiency filters (often labeled HEPA or similar performance) capture these particles more effectively than coarse pre-filters meant mainly for hair and large dust.

Basic home PM2.5 monitoring concepts

Many low-cost indoor air quality monitors show PM2.5 as a number, often in micrograms per cubic meter (µg/m³). These devices vary in accuracy, but they are useful for trends:

  • Note how levels spike when you cook or burn candles.
  • Watch how quickly levels drop when you open windows or run a purifier on high.
  • Compare patterns at different fan speeds or purifier modes.

The goal is not to chase a single perfect number but to learn which actions consistently lead to lower readings in your specific home.

Table 1. Common indoor PM2.5 sources and practical responses – Example values for illustration.
Source type Typical trigger Fastest practical response Longer-term habit
Cooking aerosols Frying, broiling, toasting Run vent hood on high, crack a window, use purifier on high Favor back burners, use lids, shorten high-heat cooking time
Indoor combustion Candles, incense, fireplaces Extinguish source, ventilate, use filtration Limit frequency and duration, prefer flameless alternatives
Outdoor smoke Wildfires, nearby burning Close windows/doors, seal obvious leaks, run purifier Identify tightest room as a cleaner-air space during smoke events
Traffic pollution Rush-hour near busy roads Keep street-facing windows closed at peak times Use filtration in street-facing rooms, ventilate from cleaner side
Resuspended dust Vacuuming, bed-making Use HEPA vacuum, run purifier while cleaning Vacuum and dust regularly, reduce clutter and dust reservoirs
Hobbies and tools Soldering, some crafts Ventilate to outside, use local exhaust if available Dedicate a well-ventilated area, limit indoor use

Common Mistakes That Keep PM2.5 Levels High

Many homes have reasonable equipment but still experience elevated PM2.5 during everyday activities. Often, the issue is how and when tools are used rather than what is installed.

Underusing existing ventilation

  • Range hoods not used or set too low: Running the fan only after visible smoke appears lets fine particles spread first.
  • Recirculating hoods misunderstood: Some hoods filter and recirculate back into the room instead of venting outside; they may reduce odors but are less effective at removing PM2.5.
  • Bathroom or utility fans ignored: These can assist with general air exchange even outside showers.

Misplaced or undersized air purifiers

  • Purifier too small for the room: A unit sized for a small bedroom will struggle in an open-plan living area.
  • Blocked airflow: Placing purifiers behind furniture or heavy curtains reduces circulation and cleaning speed.
  • Always on lowest speed: Quiet modes are useful for background use but may not provide high enough air changes during active pollution events like cooking.

Indoor sources overlooked

  • Frequent candle or incense use: These can significantly raise PM2.5 even if the room looks clear.
  • Smoking indoors: A major contributor to fine particles; smoking outside and away from entrances significantly reduces indoor load.
  • Dust buildup: Rare vacuuming or dusting gives more material that can be resuspended as PM2.5 during daily activity.

Fast Fixes: What to Do When PM2.5 Spikes

When a monitor reading jumps or you know you have just created pollution (for example, from searing food), there are a few reliable ways to bring levels down faster.

1. Use targeted ventilation

  • During cooking: Turn on your range hood to its higher setting before you start heating oil, and keep it running for several minutes after you finish.
  • Window strategies: In good outdoor air, opening opposite windows (cross-ventilation) can dilute indoor PM2.5 quickly.
  • Spot fans: Bathroom or utility fans that exhaust outside can support air exchange when a kitchen hood is weak or absent.

In poor outdoor air (such as wildfire smoke), do the opposite: close windows and rely more on recirculating filtration.

2. Turn filtration up temporarily

  • Set your air purifier to a higher fan speed in the room where pollution was generated.
  • If your central HVAC system has a reasonably efficient filter and a fan-only mode, running the fan can help circulate and filter air throughout the home.
  • Keep doors open between connected spaces if a single purifier is handling multiple areas.

3. Tidy the immediate source area

  • Cover or move hot pans off active burners once cooking is complete.
  • Extinguish candles or other combustion sources.
  • Wipe up visible grease splatter that might later release odors and particles when reheated.

4. Use simple rules of thumb

Some practical, non-medical targets many people adopt for comfort and air quality:

  • Aim for visibly faster PM2.5 drop after cooking: readings trending down within 15–30 minutes with ventilation and filtration running.
  • In rooms used for sleeping, try to keep routine PM2.5 readings lower than in heavily used cooking spaces by using filtration and keeping windows closed during peak outdoor pollution.

Real-World Scenarios: How PM2.5 Builds Up at Home

Looking at common setups helps translate concepts into everyday adjustments.

Scenario 1: Apartment with recirculating range hood

An apartment kitchen often has a hood that filters air through a simple grease or carbon pad and returns it to the room. This may reduce odors but usually does not remove much PM2.5.

Practical steps:

  • Use the back burners, which sit closer to the hood intake.
  • Open a nearby window a small amount during high-heat cooking if outdoor air quality is acceptable.
  • Place a HEPA-based purifier in the living area near the kitchen doorway and use higher fan speed while and after cooking.

Scenario 2: Suburban home near a busy road

Homes close to traffic can experience elevated outdoor PM2.5, especially during rush hours.

Practical steps:

  • Favor opening windows on sides of the house that face away from major roads.
  • Ventilate more during periods of lighter traffic if possible.
  • Use filtration in street-facing bedrooms and living rooms, and consider keeping windows closed during the busiest times while purifiers run.

Scenario 3: Wildfire smoke season

Wildfire smoke can push outdoor PM2.5 very high, even far from active fires. In these conditions, the usual advice to open windows for fresh air changes.

Practical steps:

  • Keep windows and exterior doors closed as much as practical when smoke is noticeable or reported to be high.
  • Identify one or two rooms that can act as cleaner-air spaces, such as a bedroom and a family room.
  • Run air purifiers continuously in those rooms on medium or higher settings, and reduce indoor particle sources like candles and high-heat cooking.

Safety, Standards, and Technology Options

When looking for ways to cut PM2.5 indoors, it is common to encounter a range of technologies and claims. A few core concepts help keep choices grounded.

Filtration vs. air cleaning technologies

  • Mechanical filtration (HEPA-type filters): Uses dense fiber mats to capture particles, including PM2.5, as air passes through.
  • Activated carbon filters: Target gases and odors more than fine particles; often used in combination with particle filters.
  • Electrostatic and ionizing devices: Use electric charges to cause particles to stick to plates or surfaces. Some designs may produce ozone as a byproduct; many people prefer to avoid intentional ozone indoors.
  • UV-C lamps: Aim to inactivate microorganisms rather than capture particles; they do not substitute for mechanical filtration when the goal is reducing PM2.5.

For reducing PM2.5 specifically, high-efficiency mechanical filtration is typically the primary tool. Other technologies may address different concerns but do not replace the need for filters that physically capture particles.

Ventilation and building standards concepts

Building and ventilation standards focus on overall air exchange and contaminant control but vary by region and building type. For homes, practical takeaways include:

  • Balanced ventilation (supplying and exhausting air) tends to provide more consistent air quality than unbalanced exhaust-only or supply-only approaches.
  • Mechanical ventilation with filtration allows fresh air exchange even when outdoor air quality is variable, by passing incoming air through filters.
  • In older, leakier homes, incidental air exchange through gaps and cracks can be significant, while in newer, tighter homes, intentional ventilation becomes more important.

Maintenance and Long-Term PM2.5 Control

Short bursts of ventilation and high-speed filtration help with spikes, but managing PM2.5 day to day relies on steady habits and upkeep.

Filter replacement and system checks

  • Air purifier filters: Replace according to the manufacturer’s schedule, or sooner if you use the unit heavily during events like wildfire smoke.
  • HVAC filters: Choose a filter that your system can handle without excessive resistance and change it regularly based on run-time and dust load.
  • Range hood and exhaust fans: Clean or replace grease filters so airflow stays strong.

Cleaning practices that support low PM2.5

  • Vacuum carpets and rugs with a sealed, high-efficiency vacuum to avoid re-releasing fine particles.
  • Damp dust hard surfaces to trap dust instead of pushing it into the air.
  • Reduce clutter and soft furnishings that trap dust where practical.

Planning rooms around airflow

Furniture layout and door positions influence how well filtration and ventilation work:

  • Keep a clear intake and outlet path for purifiers; avoid placing them directly behind sofas or large objects.
  • Allow a few inches of space around wall registers and returns so your HVAC system can move air freely.
  • Consider the main sources in each room and place filtration so air flows from cleaner zones toward source areas and then through filters.

Filter Replacement Planning for Ongoing PM2.5 Control

Because PM2.5 management depends heavily on filtration performance, planning when to replace filters helps keep removal efficiency closer to what the device can deliver.

Table 2. Example filter replacement planner for particle control – Example values for illustration.
Filter type Typical replacement interval example What shortens the interval Reminder
Portable purifier HEPA filter 6–12 months of regular use Wildfire season, heavy cooking aerosols, dusty homes Check for reduced airflow or odor; follow device indicators if present
Portable purifier pre-filter 1–3 months for cleaning or replacement Pets, visible hair and lint, high outdoor dust Rinse or replace as allowed to protect main filter
HVAC system main filter 1–3 months for many homes Continuous fan use, renovations, nearby construction Inspect monthly at first to learn your home’s pattern
Range hood grease filter Monthly wipe or wash when cooking often Frequent frying, visible residue buildup Cleaner filters help maintain strong capture near the stove
Room air conditioner filter 1–2 months during heavy use Dusty environments, always-on operation Clogged filters reduce both cooling and particle capture
Standalone fan pre-screens Check each season Pet hair, lint, visible dust mats Clean screens keep airflow high for dilution of PM2.5

Related guides: How to Choose the Right Air Purifier for Your Room SizeAir Purifier Placement: Where to Put It for Best ResultsWildfire Smoke Indoors: Step-by-Step Plan to Lower PM2.5 Fast

Key Takeaways: A Simple PM2.5 Indoor Playbook

Managing PM2.5 indoors is mainly about combining three strategies: reduce what you create, exchange air wisely, and filter what is left. In practice, that means using exhaust fans whenever you cook, keeping combustion sources modest and well-ventilated, and running appropriately sized air purifiers where you spend the most time.

Short monitoring sessions, even with basic sensors, can reveal which actions make the biggest difference in your home. By adjusting daily habits, maintaining filtration systems, and paying attention to outdoor conditions, most households can keep indoor fine particle levels more stable and comfortable over time without relying on complex or risky interventions.

Frequently asked questions

What are the fastest ways to reduce PM2.5 indoors after cooking?

Turn on a vented range hood to high before and during cooking, open a nearby window if outdoor air is clean, and run a HEPA-based air purifier on a high setting in the cooking or adjacent room. Wiping up grease and removing hot pans from heat also reduces continued particle release.

How can I keep wildfire smoke from raising indoor PM2.5?

Keep windows and doors closed, seal obvious gaps, and run recirculating filtration such as HEPA purifiers or an HVAC system with a high-efficiency filter; avoid ventilating from outdoors when smoke is heavy. Identify one or two rooms to act as cleaner-air spaces and run purifiers continuously there.

Do candles and incense significantly increase indoor PM2.5?

Yes—indoor combustion from candles and incense produces fine particles that raise PM2.5 even if visible smoke is minimal. Limiting use, extinguishing sources promptly, or choosing flameless alternatives reduces indoor particle load.

How do I size an air purifier for effective PM2.5 control?

Choose a purifier rated to provide several air changes per hour for your room volume—commonly aiming for about 4–5 ACH in the primary occupied room. Check the device’s clean air delivery rate (CADR) or the manufacturer’s room-size guidance and place the unit where airflow is unblocked.

Will opening windows always lower indoor PM2.5?

No—opening windows only dilutes indoor PM2.5 when outdoor air quality is better than indoors. If outdoor PM2.5 is high (for example during wildfires or heavy traffic), keep windows closed and rely on filtration instead.

Allergy-Friendly Nursery: Humidity, Ventilation, Filter Tips

Calm nursery with air purifier and humidifier

An allergy-friendly nursery balances humidity, ventilation, and filter safety to keep indoor air calm, clean, and comfortable for a baby.

Creating this balance does not need to be complicated. It means keeping humidity in a comfortable mid-range, providing gentle fresh air flow, and choosing filtration that removes particles without adding new irritants. The goal is to reduce common triggers like dust, pollen, and dampness while keeping the room safe, quiet, and easy to maintain.

Quick answer
  • Aim for nursery humidity around 40–50% relative humidity most of the time.
  • Use simple ventilation: slightly open interior doors, crack a window when outdoor air is reasonable, or use existing fans on low.
  • Choose an air purifier with a sealed HEPA or equivalent filter and no ozone-generating features.
  • Keep devices and cords out of reach, stable, and at least a few feet from the crib.
  • Change filters and clean humidifiers on the schedule recommended by the manufacturer to avoid buildup.

What an Allergy-Friendly Nursery Really Means

When people talk about an allergy-friendly nursery, they generally mean a room where common airborne triggers are reduced and air conditions stay stable. This is more about good habits and simple tools than about special products.

The main elements are:

  • Humidity that is not too dry or too damp, to limit dust and mold growth.
  • Ventilation that brings in some fresh air and dilutes indoor pollutants.
  • Filtration that quietly captures particles like dust, pet dander, and pollen.
  • Safety so that devices do not add irritants, overheating risks, or small-parts hazards.

None of these factors can guarantee an allergy outcome, but together they help create a calmer environment that many families find more comfortable, especially for sensitive babies.

Key Concepts: Humidity, Ventilation, and Filters

Understanding a few basic air quality concepts helps you make practical decisions in a nursery without guesswork.

Humidity: Finding the Comfortable Middle

Humidity is the amount of moisture in the air, usually described as relative humidity (RH). For most homes, a 40–50% RH range is often considered a reasonable comfort target.

Why this range is often chosen:

  • Below ~30%: Air can feel very dry, which may be uncomfortable for skin and airways.
  • Above ~60%: Air can feel damp, and surfaces can stay moist longer, which tends to support mold and dust mite growth.

In a nursery, staying in the mid-range reduces the chance of very dry or very damp conditions. A basic digital hygrometer can help you check humidity without guessing.

Ventilation: Getting Fresh Air In and Stale Air Out

Ventilation is the exchange of indoor air with outdoor air. It dilutes indoor particles and gases, including those from people, furniture, and cleaning products. In a nursery, the aim is gentle, steady air exchange without drafts blowing directly on the baby.

Common ventilation options include:

  • Keeping the nursery door slightly open so air can move through the home.
  • Cracking a window when outdoor air quality is reasonable and weather allows.
  • Using bathroom or kitchen exhaust fans in the home to help pull stale air out and fresh air in.
  • In some homes, relying on central HVAC that already brings in and filters air.

The best option depends on the home’s layout and local outdoor air, but the principle is consistent: avoid sealing the nursery so tightly that the same air just recirculates for long periods.

Filters and Purifiers: What They Actually Do

An air purifier for a nursery is usually a portable device with a fan and one or more filters. The core filter types to understand are:

  • Particle filter (often called HEPA or equivalent): Designed to capture fine particles like dust, pet dander, and many pollen particles.
  • Activated carbon filter: A porous material that can help reduce some odors and certain gases (VOCs), though capacity is limited and it saturates over time.

Key ideas for nursery use:

  • Look for a sealed filter path (so air flows through the filter, not around it).
  • Choose a size matched to the nursery so air cycles through several times per hour at a low or medium fan speed.
  • Confirm the device does not intentionally produce ozone, since ozone is an irritant.

Ventilation does not replace humidity control, but filtration can complement them by reducing particle levels in the room.

Table 1. Nursery air quality choices: which tool addresses what – Example values for illustration.
Situation in nursery Most helpful tool Why it helps Notes
Visible dust on surfaces, sneezing around pets Air purifier with particle filter Reduces suspended dust and dander Still need regular dusting and washing bedding
Room feels stuffy, air smells “used” Ventilation (window, open door, exhaust fan) Brings in fresher air and dilutes buildup Check outdoor air quality and temperature
Dry skin, very low winter humidity Humidifier Adds moisture to reach mid-range RH Clean frequently to avoid mineral and biofilm buildup
Damp smell, condensation on windows Dehumidifier or improved ventilation Lowers humidity to discourage mold Also check for leaks or water intrusion
Cooking or smoke from other rooms drifting in Ventilation plus purifier Removes particles and refreshes air Try to control source outside nursery when possible
New furniture or paint odors Ventilation plus carbon filter Helps dilute and adsorb some VOCs Off-gas furniture before baby spends long hours in room

Example values for illustration.

Common Mistakes in Nursery Air Management

Most nursery air issues come from aiming for comfort but overshooting in one direction. Recognizing common patterns can help you adjust early.

Over-Humidifying with a Humidifier

Running a humidifier continuously on a high setting can push humidity above 60%, especially in a small room with the door closed. This can leave soft furnishings and window frames slightly damp, which may support mold and dust mites.

Signs of over-humidification include:

  • Condensation on windows, especially in cooler weather.
  • Damp or musty smells.
  • Visible moisture on walls or nearby surfaces.

Using a hygrometer and setting the humidifier to a lower level, or turning it off once the mid-range is reached, usually resolves this.

Sealing the Nursery Too Tightly

Closing doors and windows to keep noise and outdoor air out is understandable, but overly sealed rooms can become stuffy and accumulate indoor pollutants from people, materials, and cleaning products.

Simple cues that ventilation may be limited:

  • Air feels stale or heavy when entering the room.
  • Lingering smells from diapers or cleaners that do not clear.
  • Fogged windows with no obvious moisture source.

Even a slightly open door or occasional window airing can improve this without creating drafts on the crib.

Placing Devices Too Close to the Crib

Fans, purifiers, and humidifiers work better when they have space. Placing them right next to the crib can create unwanted air currents, noise, or moisture buildup on bedding or the baby’s face.

In most nurseries, a more suitable placement is:

  • At least 3–6 feet away from the crib, when space allows.
  • Off to the side of the room, not blowing directly on the sleeping area.
  • On a stable surface or the floor, with cords secured out of reach.

Choosing Complex Features Over Simple Safety

Some air devices offer ionizers, UV-C lamps, or other advanced-sounding features. These can have specific uses, but they also add complexity and sometimes maintenance steps. For a nursery, many families prefer devices that simply filter air without additional byproducts such as ozone.

Reviewing the device’s documentation for statements about ozone or emissions is a useful step before placing it in a baby’s room.

Practical Steps: Setting Up an Allergy-Friendly Nursery

Putting all the concepts together, you can follow a simple sequence when preparing or adjusting a nursery.

Step 1: Check the Room’s Baseline

  • Use a hygrometer to measure humidity across a day or two.
  • Notice how often the room feels stuffy, and whether windows fog or smell musty.
  • Identify any visible dust buildup, vents blocked by furniture, or potential moisture sources.

Step 2: Adjust Humidity Gradually

  • If humidity is often below ~30–35%, consider adding a humidifier and run it on a low or intermittent setting.
  • If humidity is frequently above ~55–60%, reduce humidifier use, increase ventilation, or consider a dehumidifier in damp seasons.
  • Recheck humidity regularly, especially when seasons change.

Step 3: Improve Gentle Ventilation

  • Keep the nursery door slightly open when safe and practical.
  • Use whole-home exhaust fans (like bathroom fans) periodically to promote air exchange.
  • Open a window for brief periods when outdoor conditions are comfortable and local outdoor air quality is acceptable.

Step 4: Add Filtration if Needed

  • Select a purifier with a particle filter and, optionally, a carbon layer for odors.
  • Match the purifier’s capacity to the nursery’s approximate size so it can turn the air over several times per hour at a lower fan speed.
  • Place it where nothing blocks its intake and outlet, typically on the floor or a low table and away from the crib.
  • Run it on a quiet setting that can stay on consistently, rather than cycling loudly.

Step 5: Reduce Dust Collectors

Even the best purifier and ventilation cannot fully compensate for significant dust reservoirs. In a nursery, consider:

  • Choosing simple window coverings that are easy to wash or wipe.
  • Keeping soft toys to a manageable number and washing them periodically.
  • Vacuuming or damp-dusting floors and surfaces regularly, ideally when the baby is not in the room.

Example Nursery Scenarios

These common situations illustrate how to combine humidity, ventilation, and filtration choices in practical ways.

Dry Winter Nursery in a Heated Home

In many heated homes, winter air becomes very dry. A nursery might sit at 25–30% RH for weeks.

Possible steps:

  • Add a cool-mist humidifier and run it on low, checking that humidity gradually rises toward the mid-range.
  • Ensure some air movement by keeping the door slightly open and using central HVAC if available.
  • Clean the humidifier as directed to avoid mineral deposits and microbial growth.

Humid Summer Nursery in a Damp Climate

In humid climates, especially without strong air conditioning, nursery humidity can stay above 60% for long stretches.

Possible steps:

  • Use air conditioning or a dehumidifier to reduce moisture in the home.
  • Run bathroom or kitchen exhaust fans when cooking or showering to lower indoor humidity load.
  • Avoid running a humidifier unless humidity drops below comfort range.

Nursery in a Home with Pets

When pets share the home, dander and tracked-in pollen are common concerns.

Possible steps:

  • Place an air purifier with a particle filter in the nursery and run it continuously on low.
  • Keep pets out of the nursery as much as practical to limit direct shedding in the room.
  • Vacuum and launder fabrics regularly to keep reservoirs low.

Newly Furnished Nursery with Odors

Fresh paint, new furniture, and new mattresses can emit odors and some volatile organic compounds (VOCs) as they off-gas.

Possible steps:

  • Allow furniture to off-gas in a well-ventilated space before heavy use by the baby, when possible.
  • Increase ventilation for days or weeks after setup, such as by opening windows periodically.
  • Use a purifier with an activated carbon component to help with some odors, understanding it will need replacement as it saturates.

Safety and Standards in Nursery Devices

When placing any electrical appliance in a baby’s room, safety is as important as performance. For air devices, focus on both physical and air quality safety.

Ozone, Ionizers, and UV-C Features

Some air cleaners intentionally generate ozone or use ionizers and UV-C lamps. In a nursery, families often prefer avoiding intentional ozone generation, since ozone is an irritant and does not need to be present to filter particles effectively.

Neutral considerations for extra features:

  • Ionizers: May cause particles to settle faster but can also generate small amounts of ozone, depending on design.
  • UV-C lamps: Used inside some devices to inactivate microbes on surfaces or in air streams, but require proper housing and maintenance to work as intended.
  • Ozone generators: Sometimes marketed for odor removal, but are not suitable for occupied nurseries.

Checking product documentation for statements about ozone and safety certifications can help you decide whether added features fit your comfort level.

Placement, Cords, and Tip-Over Risks

Babies grow quickly, and what is out of reach one month may be reachable the next. Consider:

  • Locating devices outside the crib and play area.
  • Routing cords behind furniture or using cord covers so they are not easy to pull.
  • Choosing placements with a low tip-over risk, such as the floor or a sturdy low shelf.
  • Leaving adequate space around intakes and outlets so devices can operate without overheating.

Noise Levels and Sleep

Some families appreciate a low, consistent fan sound as white noise; others prefer near silence. Either way, very loud settings close to the crib can be disruptive.

For most nurseries, a reasonable approach is to:

  • Run purifiers and fans on a lower, steady setting overnight.
  • Avoid positioning noisy devices directly next to the crib.
  • Test noise levels while standing near the crib to ensure they feel comfortable to you.

Maintenance and Upkeep: Keeping Things Working Safely

Devices that manage air quality only stay helpful if they are kept clean and maintained. In a nursery, simple routines matter.

Filter Replacement

Particle and carbon filters gradually load with material. Over time, this can reduce airflow and effectiveness, and in some cases may contribute to odors if not replaced.

Useful habits include:

  • Marking installation dates on a small sticker or in a note on your phone.
  • Checking indicator lights if the device has them, but also using time-in-use as a guide.
  • Vacuuming pre-filters (if washable or vacuum-safe) to remove coarse dust, away from the baby’s space.

Humidifier Cleaning

Standing water and warm conditions in humidifiers can support mineral buildup and microbial growth if not cleaned. To reduce this:

  • Empty and refill with fresh water regularly.
  • Follow the cleaning schedule and methods in the manual, which may include descaling and disinfecting steps.
  • Avoid using additives unless they are specifically allowed by the manufacturer.

Room-Level Cleaning

Routine cleaning of the nursery also helps keep particle levels manageable.

  • Dust surfaces with a damp cloth or microfiber to trap dust, rather than spreading it.
  • Vacuum or mop floors regularly, ideally when the baby is in another room.
  • Wash crib sheets and commonly used textiles frequently.

FAQ: Everyday Decisions About Nursery Air

Some questions come up repeatedly when parents think about nursery air quality. These general answers focus on comfort and practicality.

Should the air purifier run all night?

Many people choose to run a nursery purifier continuously on a low setting so air is filtered steadily and noise stays consistent. If you prefer to turn it off, consider whether any nearby activities (like cooking or vacuuming) might add particles when it is not running.

Is a humidifier necessary in every nursery?

Not necessarily. A humidifier is more of a seasonal tool. In some homes, humidity naturally stays in a comfortable range without added moisture. Measuring humidity first helps you decide whether a humidifier is truly needed.

What if outdoor air quality is sometimes poor?

On days with poor outdoor air, you might rely more on closed windows plus indoor filtration and minimize window opening. When outdoor conditions improve, brief ventilation can help refresh the indoor air. A simple air quality index for your area, if available, can guide window use over time.

Do I need a monitor in the nursery?

A basic humidity or air quality monitor can be helpful for awareness, but it is not mandatory. If you do use one, treat readings as general indicators rather than precise medical information. Look for patterns (such as consistently high humidity) rather than reacting to every small change.

Table 2. Humidity and mold quick plan for nurseries – Example values for illustration.
Goal Simple actions Tools Note
Keep humidity roughly in mid-range Measure RH, adjust humidifier or dehumidifier use Hygrometer, humidifier or dehumidifier Check during different seasons and weather changes
Reduce risk of damp corners Keep furniture slightly off exterior walls Room layout planning Helps air circulate behind cribs and dressers
Clear condensation on windows Wipe moisture, improve ventilation, adjust humidity Exhaust fans, window airing Persistent condensation may signal high RH overall
Address musty smells Inspect for leaks, dry wet materials quickly Dehumidifier, fans Sources like leaks need repair, not just devices
Avoid over-humidifying Use low settings, turn off when RH is adequate Humidifier with adjustable output Recheck readings after adjustments
Maintain airflow around walls and floors Limit tightly packed storage on floors and in corners Simple decluttering Improves drying after routine cleaning

Example values for illustration.


Related guides: Best Air Purifiers for Allergies: What to Look For (CADR, HEPA, Carbon)How to Choose the Right Air Purifier for Your Room SizeActivated Carbon Filters Explained: VOCs, Odors, and What They Can’t DoHow to Clean a Humidifier Properly (And How Often)

Summary: Calm Air Habits for an Allergy-Friendly Nursery

An allergy-friendly nursery comes from a set of small, steady habits rather than a single device. Keeping humidity near the middle range, ensuring gentle but consistent ventilation, and using safe, sealed filtration where helpful all contribute to calmer air.

By watching for simple cues—like condensation, lingering odors, or visible dust—and making gradual adjustments, you can maintain a nursery environment that is comfortable, low in common airborne irritants, and aligned with general safety practices for a baby’s room.

Frequently asked questions

What relative humidity should I aim for in an allergy-friendly nursery?

Aim for roughly 40–50% relative humidity most of the time; this mid-range limits problems associated with both very dry air and excess moisture that encourages mold and dust mites. Use a simple digital hygrometer to monitor levels and adjust a humidifier or dehumidifier gradually as seasons change.

How should I ventilate the nursery when outdoor air quality is poor?

When outdoor air is poor, keep windows closed and rely on indoor filtration and whole-home exhaust fans to reduce indoor particle buildup. Open windows briefly only when local air quality improves, and check an air quality index if available to time ventilation safely.

Which features matter most when choosing an air purifier for a nursery?

Prioritize a purifier with a sealed particle filter (HEPA or equivalent) sized for the room so it can circulate air quietly at a low speed, and confirm the unit does not intentionally generate ozone. An optional activated carbon layer can help with odors but will need replacement over time.

How far should I place a humidifier or purifier from the crib?

Place devices at least 3–6 feet from the crib when possible, off to the side and not blowing directly on the baby, so you avoid strong air currents, moisture buildup on bedding, and excessive noise near the sleeping area. Ensure the device sits on a stable surface and cords are routed out of reach.

How often should filters and humidifier water be cleaned or replaced?

Follow the manufacturer’s replacement schedule for particle and carbon filters—often several months to a year depending on use—and use indicator lights or time-in-use notes to track them. For humidifiers, refill with fresh water daily and perform the recommended cleaning and descaling at least weekly or as the manual indicates to prevent mineral and microbial buildup.

HEPA Vacuum vs Air Purifier: What Works for Allergies

Bedroom scene with air purifier and HEPA vacuum for allergies

For most indoor allergies, a good air purifier does more continuous work on airborne particles, while a HEPA vacuum is better for removing allergens trapped in carpets, upholstery, and dust.

Both tools handle different parts of the problem: air purifiers reduce particles floating in the air, and HEPA vacuums remove settled dust and allergen reservoirs. Using them together usually gives more benefit than choosing only one, especially in carpeted homes or where pets and dust build up quickly.

Quick answer
  • For airborne allergens (pollen, fine dust, smoke), an air purifier with a high-efficiency HEPA-type filter and enough CADR for the room usually helps more.
  • For carpets, rugs, and upholstery allergens (dander, dust mite debris), a vacuum with a sealed HEPA system and strong suction is more effective.
  • General target: aim for about 4–5 air changes per hour (ACH) from a purifier in bedrooms and main living areas, if noise and cost allow.
  • Vacuum high-traffic and sleeping areas at least once per week; 2–3 times per week if you have pets or heavy dust.
  • For many homes, the most practical setup is: a correctly sized air purifier running most of the time plus regular HEPA vacuuming and dusting.

How HEPA Vacuums and Air Purifiers Help with Allergies

Indoor allergies are often triggered by particles such as dust mite debris, pet dander, and pollen that enter the home or build up on surfaces. These allergens can float in the air for a while, then settle on floors, beds, and furniture, and later get stirred back up.

Air purifiers and HEPA vacuums both target particles but in different locations and time frames:

  • Air purifiers continuously pull room air through filters to remove particles while they are airborne.
  • HEPA vacuums focus on removing dust and allergen reservoirs from carpets, rugs, mattresses, and upholstery.

Because allergens move between air and surfaces, managing them usually requires attention to both. The question is not only which one helps more overall, but which is more important for your specific home and allergy triggers.

Key Concepts: What Each Device Actually Does

Understanding the basics of how HEPA vacuums and air purifiers work makes it easier to choose where to invest and how to size or use them.

HEPA Air Purifiers: Focus on Airborne Particles

An air purifier for allergies typically includes:

  • A pre-filter to catch larger dust and hair
  • A HEPA or HEPA-type filter to capture fine particles (dust, pollen, pet dander, many smoke particles)
  • Sometimes an activated carbon filter to reduce some odors and gases (not a particle filter)

Key performance ideas:

  • Clean Air Delivery Rate (CADR): An estimate of how much clean air the purifier delivers per minute for particles. Higher CADR generally means faster cleaning, if noise and energy use are acceptable.
  • Air changes per hour (ACH): How many times per hour the purifier can theoretically filter the air in a room. For allergy-focused use, many people aim for around 4–5 ACH as a practical starting point.
  • Filter quality and seals: A high-grade filter only works well if air is forced through it instead of leaking around it.

HEPA Vacuums: Focus on Surfaces and Dust Reservoirs

A vacuum marketed with HEPA filtration is more useful for allergies when it has a sealed system, meaning the air entering the vacuum leaves only through the filters, not through gaps in the body or hose.

Important features and concepts for vacuuming allergy-related dust:

  • Sealed HEPA filtration: Captures fine dust instead of blowing it back into the room.
  • Suction and agitation: Strong suction plus a brush roll or other agitation helps lift particles from carpet fibers and upholstery.
  • Bagged vs bagless: Bagged systems can be less messy when emptying, while bagless bins may release more dust if not handled carefully.

Vacuuming is particularly important for homes with wall-to-wall carpet, thick rugs, or fabric upholstery, where allergens can accumulate deeply and remain for long periods if not removed.

Table 1. HEPA Vacuum vs Air Purifier: How They Compare

Example values for illustration.

Comparison of typical roles for HEPA vacuums and air purifiers in managing indoor allergens.
Aspect HEPA Air Purifier HEPA Vacuum
Main target Airborne particles (pollen, fine dust, some dander) Settled dust and embedded allergens (carpets, fabrics)
Where it works Open air in a room Floors, rugs, furniture, mattresses
How often it runs Often many hours per day Typically 1–3 times per week per area
Key spec to check CADR and ACH example targets Sealed HEPA system and suction performance
Best suited for Bedrooms, living rooms, open-plan spaces Carpeted rooms, pet areas, beds, sofas
Typical limitation Does not clean dust from carpets or surfaces Works only where you physically vacuum
Noise pattern Continuous, lower-level fan sound Louder, short sessions while cleaning

Where Each Helps More: Common Home Scenarios

Which helps more for allergies depends on your surfaces, layout, and main triggers. Some typical situations:

Mostly Hard Floors, Minimal Fabrics

If your home has hard flooring with limited rugs and simple fabric furniture:

  • Air purifier often gives the most noticeable improvement for airborne pollen, dust, and smoke.
  • Vacuuming still matters but may be less central than in a heavily carpeted home.

Wall-to-Wall Carpet or Thick Rugs

Carpet and plush rugs act as large dust and allergen reservoirs:

  • HEPA vacuum becomes essential for pulling allergens out of fibers.
  • Air purifier complements vacuuming by reducing particles that become airborne when people walk or play on the carpet.

Pets That Shed Dander or Hair

With indoor cats or dogs, both devices often have clear roles:

  • HEPA vacuum for removing hair, dander, and tracked-in outdoor pollen from floors, pet beds, and furniture.
  • Air purifier for reducing airborne dander and fine particles stirred up by movement.

Seasonal Pollen or Outdoor Air Issues

When outdoor air has high pollen or smoke levels and you keep windows mostly closed:

  • Air purifier usually provides the primary benefit for indoor allergen and fine particle reduction.
  • Vacuuming helps remove pollen that settles after entering through doors, clothing, or ventilation.

Common Mistakes When Relying on Just One Device

Many homes rely heavily on either vacuuming or purification and overlook the other. A few frequent issues:

  • Using a non-HEPA or unsealed vacuum that stirs up fine dust and re-releases it into the air.
  • Running a small air purifier in a large room and assuming it covers the whole space when it is undersized.
  • Placing an air purifier in a corner with blocked airflow, reducing its effective reach.
  • Rare or rushed vacuuming, allowing dust and allergens to build up deep in carpets and upholstery.
  • Infrequent filter replacement, which can reduce performance for both vacuums and purifiers.

A combination approach—properly sized purifier plus consistent HEPA vacuuming—usually addresses both airborne and settled allergens more effectively than focusing entirely on one device.

Practical Checklist: Choosing and Using Each Tool

A simple way to decide where to focus is to look at your rooms, surfaces, and how sensitive you are to dust and pollen levels.

When to Prioritize an Air Purifier

Consider making the air purifier your first purchase or upgrade if:

  • Your main concern is airborne pollen, fine dust, or smoke.
  • You spend long periods in a few key rooms (bedroom, office, living room).
  • Windows are often closed, so indoor air changes slowly without mechanical help.
  • Floors are mostly hard surfaces, and dust is easy to mop or wipe.

Basic sizing idea:

  • Estimate room area (length × width in feet) and ceiling height.
  • Decide a target ACH, such as around 4–5 for allergy-oriented use, if practical.
  • Use this to estimate the CADR you might need, keeping in mind that manufacturer numbers are examples and real performance depends on layout and placement.

When to Prioritize a HEPA Vacuum

Consider focusing on a HEPA vacuum if:

  • You have carpeted bedrooms or living areas.
  • There are pets that shed hair and dander on floors and furniture.
  • You notice dust returning quickly to surfaces even with some air filtration.
  • You have many fabric surfaces like upholstered furniture, thick curtains, and rugs.

Usage tips:

  • Vacuum high-traffic rooms and bedrooms at least once a week; more frequently if you notice dust building up.
  • Use tools designed for mattresses and upholstery for beds and sofas.
  • Empty bags or bins carefully, ideally outdoors or over a lined trash can, to limit dust escape.

Combining Both for Better Results

For many households, the most balanced approach is:

  • A suitably sized, properly placed air purifier running many hours per day in sleeping and main living areas.
  • Regular HEPA vacuuming of floors, rugs, and upholstered furniture, plus periodic cleaning of mattresses and under beds.
  • Basic dust control (damp dusting, washing bedding, and controlling clutter where dust collects).

Examples: How This Looks in Real Homes

Below are non-brand, simplified scenarios to show how HEPA vacuums and air purifiers might be used together.

Small Apartment with Mostly Hard Floors

  • Surfaces: Hard floors, one rug in the living room, fabric sofa, standard bedding.
  • Air purifier: One unit sized for the open living area and one smaller unit for the bedroom, aiming for around 4–5 ACH if noise is acceptable.
  • Vacuuming: Weekly HEPA vacuuming of the rug, mattress, and sofa; sweeping or mopping hard floors.

Carpeted Suburban Home with Pets

  • Surfaces: Wall-to-wall carpet upstairs, area rugs downstairs, two indoor pets.
  • Air purifier: Units in bedrooms and the main living area, sized to provide multiple air changes per hour.
  • Vacuuming: HEPA vacuum used 2–3 times per week in high-traffic paths, pet areas, and bedrooms; pet beds washed as part of routine.

Seasonal Pollen in a Bedroom-Focused Setup

  • Surfaces: Mixed flooring, main concern is pollen during certain months.
  • Air purifier: Focus on the bedroom, running before bedtime and overnight, with enough CADR to turn over the room air several times per hour.
  • Vacuuming: Weekly HEPA vacuuming of bedroom carpets or rugs, especially near doors and windows; frequent washing of bedding.

Safety, Noise, and Standards Considerations

Safety and comfort are key when running equipment many hours per week.

  • Ozone: For air purifiers, many people prefer units that do not intentionally generate ozone. Check that the device is intended for particle filtration rather than ozone-based air treatment.
  • Ionizers and UV-C: Some purifiers include ionizer or UV-C features. These can change particle behavior or act on microorganisms, but they are not a replacement for good mechanical filtration. Use manufacturer controls as directed and disable optional features if they cause irritation or concern.
  • Noise levels: Higher fan speeds increase CADR but also noise. In bedrooms, people commonly use lower speeds at night and higher speeds during the day.
  • Electrical safety: For both vacuums and purifiers, use grounded outlets where appropriate, avoid pinching cords under furniture, and follow all basic safety instructions.

Maintenance and Cost Planning for HEPA Vacuums and Purifiers

Both devices depend heavily on maintenance. Clogged filters or full bags reduce performance and can stress motors.

Air Purifier Maintenance

  • Pre-filters: Often washable or vacuumable. Cleaning them regularly can extend the life of the main filter.
  • HEPA filters: Have a recommended replacement interval (for example, every 6–12 months in typical use), but real life depends on dust levels and run time.
  • Carbon filters: Typically need more frequent replacement than HEPA filters to remain effective for odors and some gases.
  • Exterior cleaning: Wipe grilles and intakes gently to keep airflow unobstructed.

Vacuum Maintenance

  • Bags or bins: Replace or empty before they are packed full; suction often drops as they fill.
  • Filters: Many vacuums have pre-motor and exhaust filters in addition to a HEPA filter; follow replacement or cleaning directions.
  • Brush roll: Remove hair and fibers that wrap around the brush to maintain agitation and prevent motor strain.

Factoring in filter and bag costs ahead of time helps avoid stretching replacement intervals too far, which can reduce the effectiveness of both vacuums and air purifiers.

Simple Planner: Filter Replacement for Allergy-Focused Use

The table below shows general, non-brand examples of how often filters might be replaced under typical home conditions; actual needs vary based on dust, pets, and runtime.

Table 2. Example Filter Replacement Planner

Example values for illustration.

Illustrative ranges for filter replacement and what can change them in real homes.
Filter type Typical interval range What changes it Reminder idea
Air purifier pre-filter Clean every 1–3 months Heavy dust, pet hair, nearby roads Check when you notice visible dust buildup
Air purifier HEPA filter About 6–12 months Daily runtime hours, indoor dust level Set a calendar reminder twice per year
Air purifier carbon filter About 3–6 months Cooking odors, smoking, chemicals used indoors Replace when odors linger more than usual
Vacuum bag When 1/2–3/4 full Pet hair, large debris, carpeted area size Check bag level every few uses
Vacuum HEPA exhaust filter About 6–12 months Frequency of vacuuming, fine dust load Review at the same time as purifier HEPA filters
Vacuum pre-motor filter Clean or replace every 3–6 months How often you vacuum and dust level Inspect when suction seems reduced

Related guides: How to Choose the Right Air Purifier for Your Room SizeAir Purifier Placement: Where to Put It for Best ResultsBedroom Allergy Setup: The Fastest Changes That Reduce Symptoms

Summary: HEPA Vacuum vs Air Purifier for Allergies

For allergies related to indoor air quality, an air purifier and a HEPA vacuum address different but connected sources of exposure. Air purifiers work best on airborne particles, especially in rooms where you spend many hours, while HEPA vacuums are critical for removing allergen reservoirs in carpets, rugs, and upholstery.

If you must choose one, think about your floors, fabrics, and main concerns: a well-sized air purifier often stands out in homes with hard floors and strong pollen or smoke seasons, while a sealed HEPA vacuum can be more impactful in carpeted, pet-friendly homes. Whenever possible, combining a properly sized purifier with regular HEPA vacuuming and basic dust control creates a more comprehensive approach to managing indoor allergens over time.

Frequently asked questions

Can an air purifier replace HEPA vacuuming for carpeted rooms?

No. Air purifiers reduce airborne particles but do not remove allergens embedded in carpets, rugs, and upholstery. In carpeted rooms a sealed HEPA vacuum is needed to extract settled allergens; using both provides the best control.

How do I calculate the right size air purifier for allergy relief?

Estimate the room volume (area times ceiling height) and choose a purifier that can deliver your target ACH—many people aim for about 4–5 ACH for allergy-focused use. You can use CADR ratings or manufacturer room coverage as a guide and place the unit with unobstructed airflow for best results.

Are all “HEPA” vacuums equally effective for allergies?

No. Effectiveness depends on having a true HEPA filter plus a sealed airflow path so dust doesn’t escape around gaps, and adequate suction and agitation to lift particles from fibers. Bagged designs can reduce exposure during disposal, but regular maintenance and correct filter replacement are important for any model.

How often should I run an air purifier and vacuum to control allergies?

Run an air purifier for many hours per day in key rooms, including overnight in bedrooms if practical, to maintain lower airborne particle levels. Vacuum high-traffic and sleeping areas at least once a week, increasing to 2–3 times weekly if you have pets or heavy dust loads.

Will an air purifier help with pet dander if I can’t vacuum frequently?

An air purifier will reduce airborne pet dander but cannot remove dander that has settled into carpets and upholstery. For the best results, combine continuous air filtration with periodic HEPA vacuuming and washing of pet bedding.

Pets and Allergies: Air Purifier and Cleaning That Work

Bedroom with air purifier and pet bed for allergy control

For most people with pet-related allergies, a HEPA air purifier plus a consistent, low-dust cleaning routine can noticeably reduce airborne pet dander and hair in the home.

This does not remove all allergens or replace medical advice, but it can lower the amount of pet particles floating in the air and settling on surfaces. The key is combining the right purifier size and placement with regular vacuuming, washing, and simple habits to keep fur and dander from constantly recirculating.

Quick answer
  • Use a HEPA air purifier that can give around 4–5 air changes per hour in main living and sleeping rooms where pets spend time.
  • Run the purifier on a steady low or medium setting for at least 12–16 hours per day, more if windows are closed and pets are indoors.
  • Vacuum carpets, rugs, and upholstery 2–3 times per week with a vacuum that has a HEPA or fine-particle filter.
  • Wash pet bedding and washable throws weekly in warm or hot water if the fabric allows.
  • Keep indoor humidity roughly in the 30–50% range to help reduce dust and support general comfort.
  • Consider making at least one low-pet room (often the bedroom) and focus your purifier and cleaning effort there.

Pets, Allergies, and Indoor Air: What You Can Control

Pet allergies are usually triggered by proteins in pet dander (tiny skin flakes), saliva, and urine, not just fur itself. These proteins can attach to fur and dust, float in the air, and settle on soft furnishings and hard surfaces throughout the home.

Because these particles are light and easily stirred up, the environment around your pet matters as much as the pet. You cannot fully remove allergens from a home that has animals, but you can lower the overall load by:

  • Capturing more particles from the air (air purifiers and ventilation)
  • Removing settled dust and hair before it gets disturbed again (vacuuming and wiping)
  • Managing fabrics and surfaces that collect pet dander (bedding, blankets, rugs)
  • Keeping an eye on humidity and overall cleanliness (less dust sticking around)

Thinking in terms of “sources, air, and surfaces” helps: you will get the best results by doing a little in each of these areas rather than over-relying on any single tool.

How Air Purifiers Help With Pet Allergens: Key Concepts

Air purifiers for pet-related allergies work mainly by filtering the air, not by adding chemicals or fragrances. The most useful technology for this purpose is mechanical filtration, especially HEPA-type filters.

HEPA and particle filtration basics

  • HEPA filters are designed to capture very small particles, including many types of dust, dander, and pollen.
  • Pre-filters catch larger debris such as pet hair and fluff so the HEPA filter does not clog quickly.
  • Carbon filters can help with pet odors and some gases, but they do not replace HEPA for particles.

For pet-related allergies, the particle filter is the main priority. If you also notice strong pet odors, a purifier with a separate carbon stage can be useful, but odor control is separate from allergen reduction.

Size, CADR, and air changes per hour

To help with allergens, an air purifier needs to move enough air for the room size. Two common planning ideas are CADR (clean air delivery rate) and ACH (air changes per hour):

  • CADR: a general measure of how much filtered air a purifier can provide. Higher CADR usually means it can handle a larger room or give more air changes.
  • ACH: how many times per hour the purifier can theoretically filter the full volume of air in the room. For homes with pets and typical dust, many people aim for around 4–5 ACH in rooms that matter most, such as bedrooms.

You can roughly estimate your needs by looking at the room’s floor area, ceiling height, and the purifier’s published performance examples. In practice, choosing a model sized for slightly larger rooms than yours often allows you to run it at a quieter setting while still moving enough air.

Table 1. Air cleaner options and what they do for pet homes. Example values for illustration.
Option Main strength Limitations Best use with pets
HEPA air purifier Captures fine pet dander, dust, and other small particles from air Does not remove allergens already embedded in fabrics or carpets Run daily in bedroom and main living area where pets spend time
Purifier with carbon filter Reduces some pet-related odors and certain gases Carbon saturates over time and does not trap particles by itself Combine with HEPA when pet smell is a concern
Ventilation (open windows, fans) Dilutes indoor air with outdoor air when conditions are good Depends on outdoor air quality, weather, and noise Use when outdoor air is relatively clean and temperatures are comfortable
Dehumidifier Manages excess moisture that can worsen dust and musty odors Does not directly remove pet allergens Helpful in damp basements or humid climates
Humidifier Adds moisture when indoor air is very dry Overuse can increase dust settling and moisture issues Use cautiously to keep humidity in a moderate range
Central HVAC filter upgrade Helps capture particles when the system runs Less impact in rooms far from vents or with infrequent runtime Pair with room purifiers in key spaces

Common Mistakes When Using Air Purifiers With Pets

Even a good air purifier will underperform if used in ways that fight basic airflow or ignore other sources of dust and hair. Some frequent issues include:

  • Undersizing the purifier: A small purifier in a large, open-plan living area may only clean the air close to it.
  • Poor placement: Tucking a purifier behind furniture, under a table cloth, or in a corner with blocked intake and exhaust reduces its ability to circulate air.
  • Short runtime: Running the purifier for only an hour or two occasionally does little against constant shedding.
  • Clogged filters: Pet hair and dust can load pre-filters and HEPA filters faster than in pet-free homes.
  • Relying on purifiers alone: Ignoring carpets, upholstery, and pet beds that hold most of the allergen material leads to ongoing problems.

Simple adjustments—better sizing, open airflow around the device, longer runtime, and filter maintenance—often make more difference than switching to a different machine.

A Practical Cleaning and Air Purifier Routine for Pet Homes

Combining air cleaning with a manageable routine is more effective than large, occasional cleaning days. Below is a practical pattern you can adjust to your schedule and sensitivity level.

Daily or every day you are home

  • Run purifiers on low or medium in bedrooms and main living areas whenever you and the pets are indoors.
  • Keep doors partially open if you want a purifier to influence more than one small connected room, or close doors to focus on a single room.
  • Do a quick hair sweep with a dry mop or microfiber cloth on visible pet hair zones (hard floors, near litter boxes or pet beds).
  • Use washable throws or covers on sofas and favorite pet spots, shaking them outside gently when possible.

Two to three times per week

  • Vacuum carpets and rugs, especially hallways, living rooms, and pet paths. A vacuum with a good filter and sealed body reduces what it blows back into the room.
  • Vacuum upholstered furniture where pets sit or sleep.
  • Wipe hard surfaces (end tables, window sills, baseboards) with a slightly damp microfiber cloth to capture dust rather than spread it.

Weekly

  • Wash pet bedding and washable covers in warm or hot water if fabric instructions allow.
  • Wash human bedding in bedrooms where pets enter or sleep.
  • Rinse or gently vacuum purifier pre-filters if the manufacturer allows it, to remove hair and large dust.
  • Check indoor humidity with a simple hygrometer and adjust humidifiers or dehumidifiers to stay roughly within 30–50% if feasible.

Monthly or as needed

  • Look over HEPA filters through any viewing panels or during scheduled maintenance; heavy discoloration or visible hair mats suggest higher loading.
  • Dust or gently wipe the purifier’s exterior to keep intake vents clear.
  • Review habits: if you notice more dust on surfaces or stronger pet smells, increase vacuum frequency or washing in the highest-use areas.

Keeping the routine realistic is important. It is usually better to maintain a simple schedule you can actually follow than a perfect but overwhelming plan you abandon.

Real-World Pet Scenarios and How to Plan Your Setup

Different homes, pets, and sensitivities call for slightly different combinations of air cleaning and housekeeping. Here are some common patterns.

Apartment with one indoor cat

  • Main tools: HEPA purifier in the bedroom, regular vacuuming, covered couch.
  • Routine idea: Run a properly sized purifier on low 24/7 in the bedroom; vacuum carpets and couch cushions twice a week; wash bedding weekly; place a washable mat under the litter box to catch tracked particles.
  • Extra step: If the living area is open-plan and you are sensitive, consider a second purifier there, even on a low setting.

House with two dogs and mixed flooring

  • Main tools: Larger purifier in living room, smaller purifier in bedroom, strong vacuum with brush roll.
  • Routine idea: Vacuum high-traffic carpets and runners every other day; wash dog beds weekly; run purifiers whenever the household is home; encourage dogs to sleep on washable blankets that can be laundered often.
  • Extra step: Brush dogs outdoors when possible so loose hair and dander are not released inside.

Pet-free bedroom in a pet-owning home

  • Main tools: Bedroom door mostly closed, purifier sized for the room, regular linen washing.
  • Routine idea: Do not allow pets into the bedroom or onto the bed; run a HEPA purifier continuously in that room; vacuum carpets and mattress surface weekly; use simple, washable bedding.
  • Extra step: Remove clutter that collects dust such as heavy fabrics and unnecessary soft furnishings.

In all cases, choosing one or two “priority rooms” and focusing both purification and cleaning there is often more effective than spreading effort thinly throughout the entire home.

Safety, Extra Features, and What to Avoid

Many air cleaners include optional technologies beyond basic mechanical filtration. These can have pros and cons, especially in homes with pets and people who are sensitive to irritants.

Ozone and ionizers

  • Ozone-generating devices are generally not recommended for occupied homes, as ozone itself is a lung irritant. Avoid using any device designed to intentionally emit significant ozone indoors.
  • Ionizers and electrostatic features can cause particles to stick to surfaces or collection plates. Some designs may produce small amounts of ozone as a byproduct. If you use these features, check whether the device is described as low-ozone or ozone-free and consider disabling optional ion modes if you notice irritation or strong smells.

UV-C and other add-ons

  • UV-C lamps inside some purifiers are intended to act on microorganisms passing near the lamp. Their effect on pet allergens is indirect at best.
  • Maintenance matters: UV lamps and plates need replacement or cleaning to work as intended; dirty or aging parts may offer little benefit.
  • Focus on basics first: For pet-related particles and everyday air quality, a well-sized HEPA filter, appropriate carbon stage (if odors bother you), and good airflow are usually the main pieces to prioritize.

Simple, mechanical systems with clear maintenance steps are often easier to manage over time than complex devices with many modes.

Filter and Cleaning Maintenance: Planning Ahead

Pet hair and dander can cause filters, vacuums, and pre-filters to load up faster than manufacturer examples based on average homes. Planning for a slightly more frequent replacement cycle keeps air and cleaning tools working properly.

Air purifier filter upkeep

  • Pre-filters: Many are washable or vacuum-safe. Cleaning them every 2–4 weeks in homes with pets can extend the life of the HEPA filter behind them.
  • HEPA filters: Replacement intervals often range from about 6–12 months in typical use, but heavy shedding, multiple pets, or visible darkening may justify earlier changes.
  • Carbon filters: Odor control media may need replacement more often than HEPA because odor-absorbing capacity is limited.

Vacuum and home maintenance

  • Vacuum bags and bins: Empty them before they are completely full to maintain suction and reduce dust blowback.
  • Vacuum filters: Clean or replace according to instructions; pet hair can quickly clog fine filters.
  • Fabrics: Using washable throws and pet covers reduces wear on furniture and makes it easier to launder allergens away regularly.

Tracking filter changes on a simple calendar or note can help avoid the gradual performance drop that comes from overused filters and neglected tools.

Table 2. Example filter replacement planner for pet homes. Example values for illustration.
Filter or part Typical interval range What can shorten the interval Reminder tip
Air purifier pre-filter Clean every 2–4 weeks Multiple shedding pets, visible hair mats, dusty location Check when you notice dust on the purifier’s intake grille
HEPA filter (room purifier) Replace about every 6–12 months Running 24/7, heavy pet dander, nearby construction dust Set a reminder at the halfway point to visually inspect
Carbon odor filter Replace about every 3–6 months Strong pet odors, smoking indoors, cooking fumes Replace when odors stop improving even with cleaning
Central HVAC filter Replace about every 1–3 months High fan use, multiple pets, dusty climate Check monthly; write the date on the filter frame
Vacuum dust bag or bin Empty when 1/2–2/3 full Thick pet hair, carpets that shed fibers Look after every full-house vacuum session
Vacuum exhaust filter Clean or replace every 3–6 months Frequent vacuuming, lots of fine dust and dander Note it with seasonal cleaning tasks

Related guides: Best Air Purifiers for Allergies: What to Look For (CADR, HEPA, Carbon)Air Purifier Placement: Where to Put It for Best ResultsHow Long Should You Run an Air Purifier Each Day? Practical Schedules

Key Takeaways for Managing Pets, Allergies, and Air Quality

Living with pets while trying to manage allergies is often about reducing exposure rather than eliminating it. A HEPA-based air purifier that is appropriately sized for key rooms, run for many hours per day, can meaningfully cut down on airborne pet dander and hair. However, its impact is strongest when paired with consistent, realistic cleaning habits.

Vacuuming carpets and upholstery several times per week, washing bedding regularly, managing humidity around 30–50% when feasible, and giving yourself at least one lower-pet room—often the bedroom—can all contribute to a more comfortable indoor environment. Regular filter maintenance for purifiers, HVAC systems, and vacuums keeps the whole system working as intended.

Because sensitivities vary widely, it can help to adjust frequency and tools based on how you feel and what you observe in your home, while seeking personalized medical advice as needed. The combination of thoughtful air movement, filtration, and simple housekeeping changes is usually more effective than any single device on its own.

Frequently asked questions

How long should I run an air purifier each day to reduce pet dander?

Run purifiers for many hours per day—typically at least 12–16 hours—on a low or medium setting in rooms you and your pets use most; continuous operation is preferable for people with higher sensitivity. Longer runtime reduces the chance that settled dander will be repeatedly stirred up and recirculated into the air.

What ACH or CADR should I look for in a room used by pets?

Aim for roughly 4–5 air changes per hour (ACH) in priority rooms such as bedrooms and main living areas. CADR values vary by model, so choose a purifier with a CADR or published room-size rating that matches your room volume and supports that ACH target; sizing up slightly lets you run quieter while still moving enough air.

Can an air purifier remove allergens embedded in carpets and upholstery?

No—air purifiers reduce airborne particles but cannot remove allergens already trapped deep in fabrics or carpets. Regular vacuuming, washing of bedding and throws, and periodic deep cleaning of upholstery or carpets are needed to address those reservoirs.

How often should I clean or replace air purifier filters in a home with pets?

Clean or vacuum pre-filters every 2–4 weeks in homes with pets to prevent hair build-up. HEPA filters commonly need replacement every 6–12 months but may require earlier changes with heavy shedding; carbon odor filters often require replacement more frequently, around every 3–6 months depending on use.

Are ozone generators or ionizers safe to use around pets and allergy sufferers?

Avoid ozone-generating devices because ozone is a lung irritant and can worsen symptoms. Ionizers can reduce airborne particles but may cause particles to adhere to surfaces and some designs produce small amounts of ozone; if used, choose low-ozone devices and disable ion modes if irritation occurs.

Allergy vs Asthma Triggers: PM2.5, VOCs, What Matters

Bedroom with air purifier illustrating allergy and asthma triggers

For most homes, fine particles (PM2.5) are usually the higher priority trigger for both allergies and asthma, while VOCs matter mainly for odors, chemical sensitivity, and long-term air quality comfort.

Allergy and asthma symptoms can be affected by many things in indoor air, but you cannot see most of them directly. Understanding the difference between particles like dust and smoke (PM2.5) and gases like cleaning fumes (VOCs) helps you decide what to focus on first. From there, you can choose filters, ventilation, and everyday habits that match your household’s main triggers.

Quick answer
  • For most households, prioritize particle control (PM2.5) first, then VOCs and humidity.
  • A practical indoor PM2.5 target is to keep typical readings below about 10–15 µg/m³ when possible.
  • Use a HEPA-type filter for dust, pollen, pet dander, and smoke; use activated carbon for common VOCs and odors.
  • Ventilate (open windows, exhaust fans) during and after activities that create VOCs, like cleaning or painting.
  • Keep indoor relative humidity roughly in the 30–50% range to limit mold and dust mite growth.
  • Choose air purifier capacity using room size and a target of about 4–8 air changes per hour for allergy/asthma-focused use.

Allergy vs Asthma Triggers: How Air Pollutants Fit In

Allergies and asthma are medical conditions, but many people notice that their comfort is affected by what is in the air. Three major home air categories matter here:

  • Particles (dust, pollen, pet dander, smoke, mold spores), often measured as PM2.5 and PM10.
  • Gases such as volatile organic compounds (VOCs) from cleaners, paints, cooking, and building materials.
  • Moisture and related biological growth (mold, dust mites).

Both allergies and asthma can be influenced by more than one of these at the same time. For example, someone might react to pet dander (particle) and also be bothered by strong cleaning sprays (VOCs). Because of this overlap, it helps to think in layers: first control particles, then humidity and mold, and then VOCs and odors, adjusting based on what seems to bother your household most.

Key Concepts: PM2.5, VOCs, and Humidity in Everyday Terms

What PM2.5 Means in a Home

PM2.5 refers to particles smaller than 2.5 micrometers in diameter. They are invisible to the naked eye and can stay suspended in the air for hours. Common indoor sources include:

  • Cooking (especially frying, grilling, toasting)
  • Candles and incense
  • Tobacco or other smoke
  • Fine dust, pet dander, and outdoor pollution that leaks indoors

Home air quality monitors often show PM2.5 as a number in micrograms per cubic meter (µg/m³). Lower is generally better. You may see short spikes when cooking or cleaning; the goal is to keep daily levels as low and as brief as reasonably achievable, not to chase perfection.

What VOCs Are and Where They Come From

VOCs (volatile organic compounds) are gases that evaporate from liquids and solids. Indoors, typical VOC sources include:

  • Cleaning sprays and disinfectants
  • Air fresheners and scented products
  • Paints, glues, and hobby materials
  • New furniture, flooring, and building materials
  • Cooking vapors and some personal care products

Many consumer air quality monitors report a simplified number called TVOC (total VOC), which is an estimate based on sensor response. This number does not identify specific chemicals but gives a rough idea of how much VOC activity is present. Ventilation and source control (choosing low-emission products, limiting use) are the main tools for managing VOCs.

Humidity, Mold, and Dust Mites

Humidity does not show up as PM2.5 or VOCs, but it strongly affects allergy and asthma triggers:

  • Mold tends to thrive in damp areas, especially where humidity is frequently high.
  • Dust mites prefer more humid environments, particularly in bedding and upholstered furniture.

Keeping indoor relative humidity around 30–50% is a common comfort-oriented range that helps limit mold growth and dust mite activity while avoiding overly dry air that can feel irritating for some people.

Table 1. PM2.5, VOCs, and Humidity: What Each Affects and Typical Controls — Example values for illustration.
Factor Typical sources at home Common comfort impacts Main control approaches
PM2.5 (fine particles) Cooking, smoke, outdoor pollution, dust, pet dander Can aggravate respiratory sensitivity and eye/nose irritation HEPA-type filtration, reducing smoke, kitchen exhaust, cleaning dust
Larger particles (PM10) Pollen, coarse dust, debris Common allergy triggers, visible dust buildup Vacuuming with good filtration, HEPA-type filters, limiting tracking in
VOCs Cleaners, paints, air fresheners, new furnishings, cooking Odors, chemical sensitivity, stale or “fumes” smell Source reduction, ventilation, activated carbon or sorbent filters
Humidity (too high) Bathrooms, cooking steam, leaks, poor ventilation Mold growth, dust mites, musty odor Dehumidification, exhaust fans, fixing leaks, ventilation
Humidity (too low) Cold, dry climates with heating Dry nose/throat, static electricity, dry skin Humidifiers, adjusting heating, sealing excessive drafts
CO₂ buildup People breathing in poorly ventilated spaces Stuffy feeling, reduced perceived freshness Opening windows when outdoor conditions allow, mechanical ventilation

Example values for illustration.

Common Mistakes When Prioritizing Allergy vs Asthma Triggers

It is easy to get overwhelmed by air quality data and products. These are frequent missteps that can lead to frustration or wasted effort.

Focusing Only on VOCs Because the Monitor Shows a High TVOC

Many people buy an inexpensive monitor, see a high TVOC number, and then center everything on VOCs. In reality:

  • TVOC readings are approximate and can fluctuate with cooking, cleaning, or even humidity changes.
  • For many households, dust, pet dander, pollen, and smoke (particles) are more important everyday triggers than most routine VOC levels.

Instead of chasing every TVOC spike, it usually makes more sense to keep an eye on PM2.5, humidity, and obvious odor sources first.

Buying a Carbon Filter but Ignoring Particle Filtration

Activated carbon or other sorbent filters can help reduce some odors and VOCs, but they do not remove particles. Prioritizing a thick carbon filter without adequate particle filtration can leave common triggers like pet dander and pollen largely untouched.

Using an Undersized Purifier for a Large Space

An air purifier that is too small for a room will not provide meaningful reductions in PM2.5 or allergens. If you expect the purifier to handle a whole floor but it is sized for a single small bedroom, particle levels may barely change. Matching purifier capacity to room size and a target air changes per hour (ACH) is essential.

Ignoring Humidity and Mold in Basements and Bathrooms

Even with excellent particle filtration, a damp basement, bathroom, or closet can support mold growth that releases spores (particles) and musty VOCs. Overlooking humidity can lead to persistent odors and visible growth that keeps re-seeding the rest of the home with spores and debris.

Practical Priorities: Step-by-Step for Typical Households

The right order of priorities varies by person, but the following sequence is useful for many homes where allergies or asthma are a concern.

1. Control Fine Particles (PM2.5 and Allergens)

  • Focus tools: HEPA or equivalent high-efficiency particulate filters, regular vacuuming with good filtration, dusting with damp cloths or microfiber.
  • Target areas: bedrooms and main living spaces where you spend the most time.
  • Monitor idea: If you use a PM2.5 monitor, aim for everyday values generally below about 10–15 µg/m³ when outdoor conditions allow, understanding that brief spikes during activities like cooking are common.

2. Keep Humidity in a Comfortable Range

  • Use a simple hygrometer to track humidity.
  • Aim for roughly 30–50% relative humidity in living spaces.
  • Use bathroom and kitchen exhaust fans during and after showers or cooking.
  • Consider a dehumidifier in damp basements or closets, or a humidifier in very dry climates when heating is in use.

3. Address VOCs with Source Control and Ventilation

  • Choose low-odor or low-emission products where practical.
  • Open windows or increase ventilation when painting, cleaning with strong products, or using solvents.
  • Use kitchen range hoods and bathroom fans, vented to the outdoors if possible.
  • Carbon or other sorbent filters can supplement ventilation but usually do not replace it.

4. Match Air Purifier Capacity to Room Size and ACH

To size an air purifier for particle control:

  1. Calculate room volume: length × width × height.
  2. Decide on a target ACH (air changes per hour). For allergy or asthma-oriented use, many people aim around 4–8 ACH as a planning range.
  3. Estimate the clean air delivery rate (CADR) you need: (room volume × ACH) ÷ 60.

This gives an approximate CADR (in cubic feet per minute) to look for, recognizing that manufacturer ratings and real-world performance can differ and that doors, open floor plans, and furniture also influence results.

Everyday Scenarios: How to Decide What to Tackle First

Different households face different mixtures of particles, VOCs, and moisture. Here are a few non-medical, comfort-focused examples.

Scenario 1: Seasonal Pollen and Outdoor Smoke

If your main concerns are spring pollen and seasonal wildfire smoke drifting indoors:

  • Highest priority: Particle control (PM2.5 and larger pollen grains).
  • Actions: Run a HEPA-type purifier in bedrooms and main living areas; keep windows closed when outdoor air is visibly smoky or pollen counts are high; use central HVAC filtration if available and appropriately rated.
  • Secondary: Brief ventilation when outdoor air improves to clear indoor VOCs and CO₂.

Scenario 2: Pets in a Small Apartment

For a small apartment with dogs or cats and no smoking:

  • Highest priority: Pet dander (particles), hair, and general dust.
  • Actions: Regular vacuuming with good filtration; HEPA-type air purifier sized for the combined living/sleeping area; washable covers on frequently used seating and bedding.
  • Secondary: Odors and VOCs from cleaning after pets, addressed by ventilation and moderate use of carbon filters if desired.

Scenario 3: Newly Renovated Home with Strong Odors

After painting, new flooring, or new furniture, VOCs may be temporarily higher:

  • Highest priority: VOC and odor control, plus ongoing particle control from construction dust.
  • Actions: Increase ventilation when outdoor conditions allow; run exhaust fans; avoid adding unnecessary scented products; use sorbent filters as a supplement; keep HEPA-type filtration running for dust and debris.
  • Ongoing: Over time, VOC emissions usually decline; maintaining good ventilation and routine cleaning remains helpful.

Scenario 4: Damp Basement with Musty Smell

In a basement with a persistent musty odor:

  • Highest priority: Moisture control and mold prevention.
  • Actions: Identify and address water entry or leaks; use a dehumidifier to keep humidity in a comfortable range; ventilate where feasible.
  • Secondary: Particle filtration to capture mold spores and dust; carbon filtration may help with musty odors, but only after moisture is better controlled.

Safety and Standards: Ozone, Ionizers, and UV-C

Some air-cleaning technologies target particles and VOCs indirectly but may introduce other considerations.

Ozone-Generating Devices

Devices that intentionally generate ozone are sometimes marketed for odor removal or air cleaning. Ozone is a reactive gas, and adding it to indoor air is generally discouraged in occupied spaces. For a home focused on allergy and asthma triggers, most people prefer equipment that does not intentionally produce ozone.

Ionizers and Electrostatic Devices

Ionizers charge particles so they stick to surfaces or collection plates. Some models may create small amounts of ozone as a byproduct. If considering such devices, check whether they are designed to limit ozone production and understand that they may reduce airborne particles but do not remove them from the room surfaces where they settle.

UV-C Lamps

UV-C lamps are used in some systems to irradiate coil surfaces or air streams. They can help manage microbial growth on internal surfaces of HVAC equipment. They do not replace the need for particle filtration, humidity control, or ventilation. Any UV-C installation should follow manufacturer safety guidelines to avoid direct eye or skin exposure.

Maintenance: Filters, Cleaning, and Cost Planning

Good equipment only works well if it is maintained. A simple plan can reduce both particle and VOC levels more reliably.

Filter Changes

  • Follow the manufacturer’s suggested replacement intervals as a starting point.
  • Expect to replace HEPA-type filters at intervals ranging from about once to a few times per year, depending on use and pollution levels.
  • Expect to replace or recharge carbon/sorbent filters more often if you rely on them heavily for odor control, as they saturate over time.

Cleaning and Dust Management

  • Vacuum carpets, rugs, and upholstery regularly using a vacuum with effective filtration.
  • Dust with damp cloths or microfiber instead of dry feather dusters, which can re-suspend particles.
  • Clean air purifier grilles and pre-filters gently according to instructions to maintain airflow.

Budgeting for Ownership

When choosing air cleaning and dehumidification equipment, consider not only purchase price but also:

  • Ongoing filter and sorbent replacement costs.
  • Electricity use, especially for devices that run many hours per day.
  • Occasional professional servicing of central HVAC systems, if applicable.
Table 2. Filter Replacement Planner for Common Home Setups — Example values for illustration.
Filter or component Illustrative interval range What can shorten the interval Reminder
HEPA-type purifier filter About 6–18 months of typical home use Heavy smoke, multiple pets, continuous high-speed use Check for visible darkening and reduced airflow or noise changes.
Carbon/sorbent purifier filter About 3–12 months, depending on odor/VOC load Frequent cooking fumes, strong cleaners, new materials off-gassing Replace when odors linger longer even with regular ventilation.
HVAC return air filter About 1–3 months for many homes High dust, shedding pets, construction dust, long runtimes Inspect monthly at first to learn how quickly it loads in your home.
Dehumidifier air filter (if present) Clean every few weeks to months Dusty basements, laundry lint, nearby renovation Rinse or replace as recommended to keep airflow efficient.
Humidifier wick or cartridge Varies; often every 1–3 months in active season Hard water, continuous use, visible mineral buildup Follow cleaning and replacement guidance to limit mineral and microbial buildup.
Pre-filters on purifiers Rinse or vacuum every few weeks Pet hair, visible lint, nearby construction Keeping pre-filters clean helps protect finer filters and maintain airflow.

Example values for illustration.


Related guides: Best Air Purifiers for Allergies: What to Look For (CADR, HEPA, Carbon)How to Choose the Right Air Purifier for Your Room SizeHEPA vs Activated Carbon: Best Setup for Allergies, Odors, and SmokePM2.5 Explained: What the Numbers Mean and What’s a Safe Level Indoors

Summary: What to Prioritize for Allergy and Asthma Triggers

In most homes, particles such as dust, pet dander, pollen, and smoke (PM2.5 and larger) deserve first attention for allergy- and asthma-related comfort, followed by humidity control and then VOCs and odors. HEPA-type filtration, routine cleaning, and right-sized purifiers help reduce airborne particles. Simple humidity monitoring and moisture control limit mold and dust mite conditions. VOCs are best managed by choosing lower-emission products when practical, opening windows or using exhaust fans during high-emission activities, and using carbon or similar filters as a supplement. By addressing particles, moisture, and VOCs in that general order, you can build a calm, practical plan tailored to your household’s most noticeable triggers.

Frequently asked questions

Should I prioritize PM2.5 or VOC reduction first for asthma control at home?

For most households concerned about asthma, prioritizing particle reduction (PM2.5) is the best first step because fine particles more directly trigger airway irritation and exacerbations. After particle control and humidity management, address VOCs through source control and ventilation based on symptoms and odor levels.

What indoor PM2.5 level should I aim for to minimize allergy and asthma symptoms?

A practical everyday target is to keep PM2.5 below about 10–15 µg/m³ when outdoor conditions allow; short spikes are common during cooking or cleaning. Use HEPA-type filtration, kitchen exhaust, and limited exposure during smoky outdoor events to help maintain those levels.

Can activated carbon filters remove all harmful VOCs from a newly renovated home?

Activated carbon and other sorbent filters can reduce many common VOCs and odors but do not remove every chemical or prevent off-gassing entirely. They are most effective as a supplement to ventilation and source control, and their effectiveness depends on the amount of sorbent and the specific compounds involved.

How does indoor humidity affect mold and dust mite-related allergy triggers?

Relative humidity above about 50% favors mold growth and dust mite proliferation, while maintaining 30–50% reduces those risks in most climates. Use exhaust fans, dehumidifiers in damp areas, and repair leaks to keep humidity in a range that limits biological allergen growth.

Are inexpensive TVOC sensors reliable for deciding whether to buy a carbon filter?

TVOC sensors give a rough, aggregate indication of VOC activity but do not identify specific chemicals or their toxicity, so they should be used alongside odor observations and context (like painting or cleaning). If persistent elevated TVOC readings or strong odors coincide with symptoms, improve ventilation and consider sorbent filtration as part of a broader strategy.