Dust Mites and Humidity: The RH Range That Helps Most

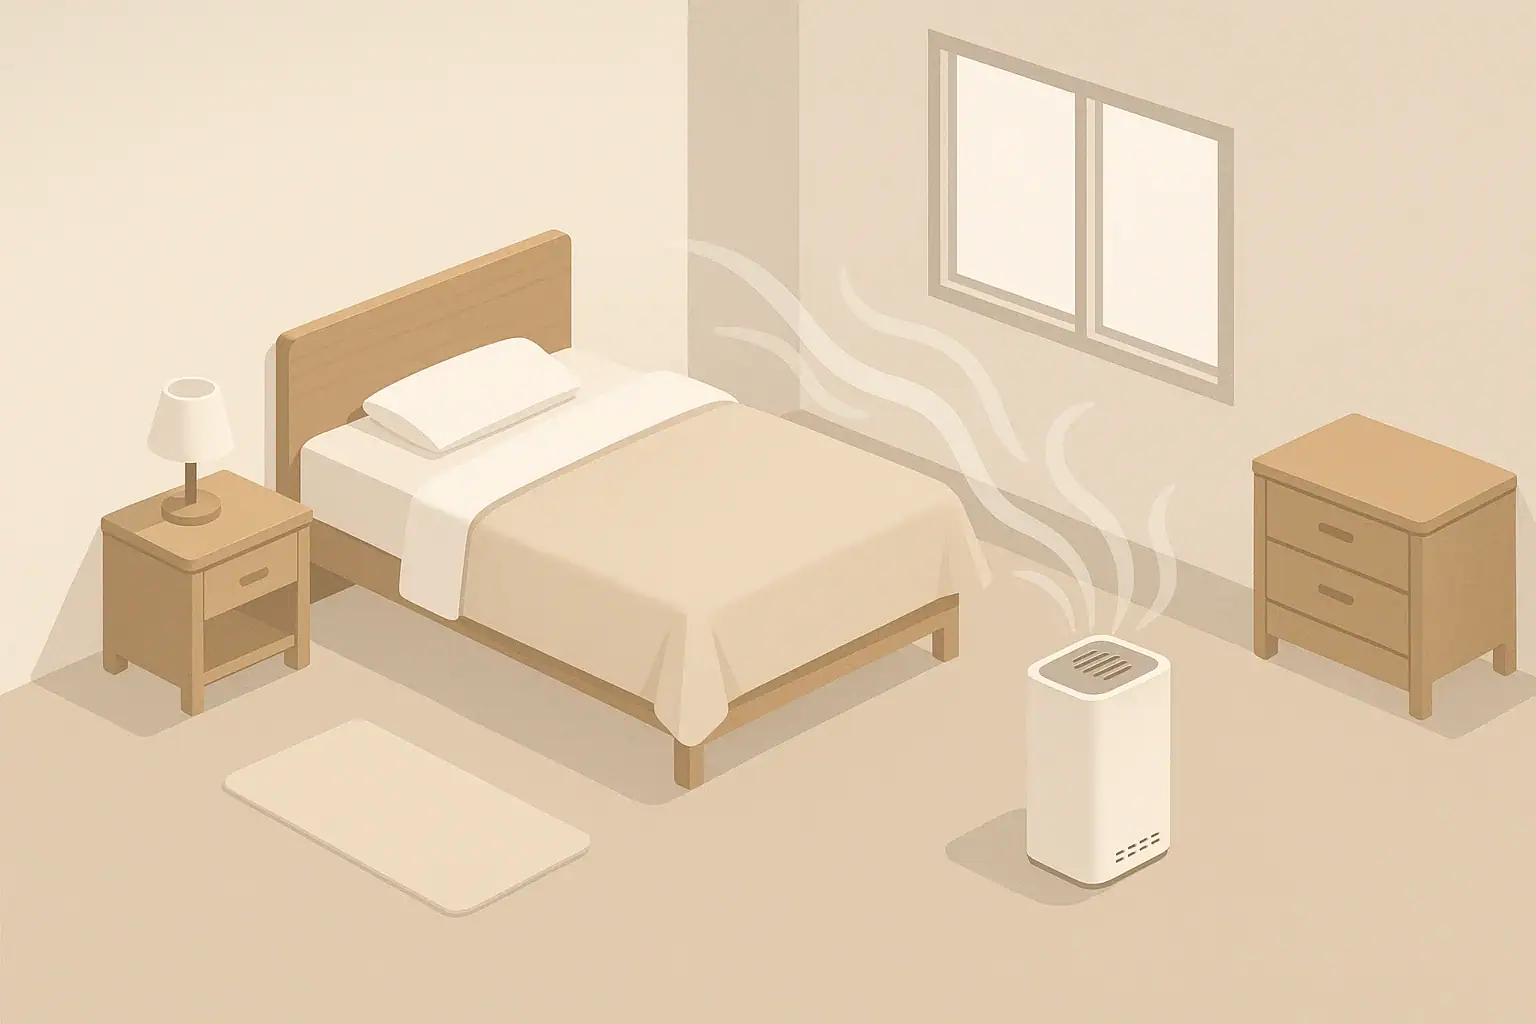
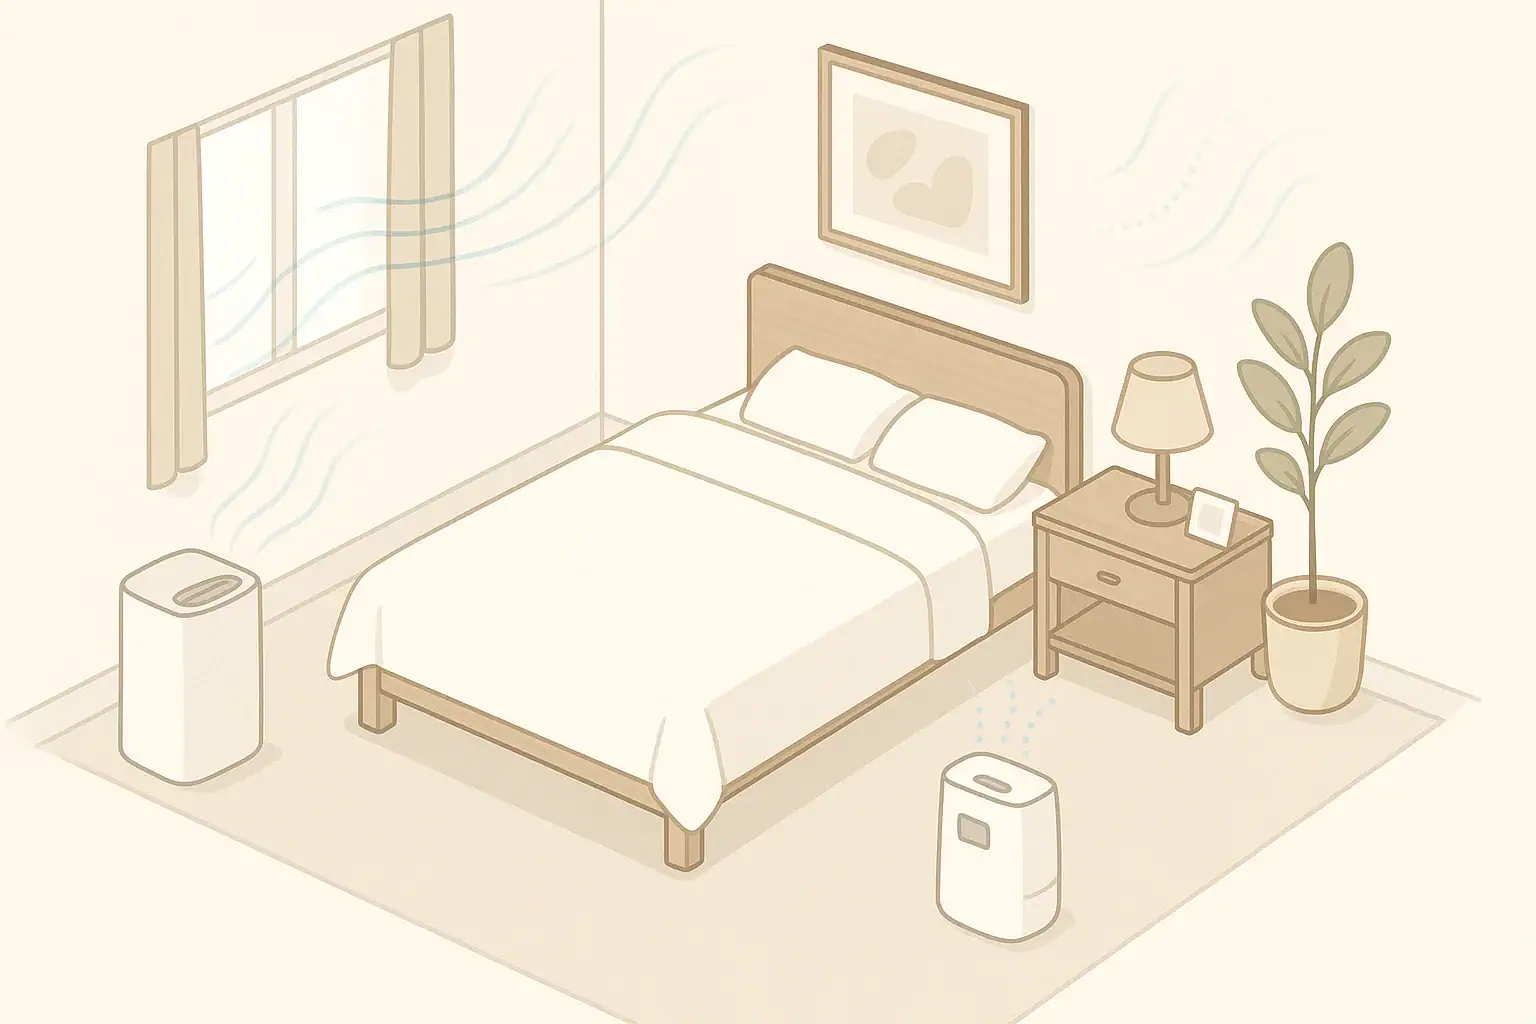
Calm bedroom with air purifier and humidity control devices

For most homes, keeping indoor relative humidity (RH) around 40–50% tends to reduce dust mite growth compared with more humid conditions while still staying comfortable for people.

Dust mites thrive in warm, damp environments, especially when humidity is high and fabrics stay slightly moist. While it is almost impossible to remove dust mites completely, you can make your home less friendly to them by managing humidity, reducing soft surfaces that trap dust, and cleaning regularly. The goal is not perfection, but steady control of moisture and dust over time.

Quick answer
  • A practical indoor target for many homes is about 40–50% RH.
  • Below roughly 50% RH, dust mite survival and reproduction generally drop compared with more humid air.
  • Avoid staying above about 60% RH indoors for long periods to limit dust mites and moisture problems.
  • Short fluctuations are normal; focus on typical daily ranges, not single readings.
  • Use a simple hygrometer (humidity meter) in bedrooms and living areas to track RH.
  • Combine humidity control with allergen covers, frequent washing, and vacuuming for broader dust reduction.

Why Dust Mites and Humidity Are Connected

Dust mites are tiny arthropods that live mainly in bedding, upholstery, and carpets where they feed on shed human and pet skin flakes. They are too small to see with the naked eye, but their presence is very common indoors.

Humidity matters because dust mites absorb moisture from the air through their bodies; they do not drink liquid water. When the air is fairly humid, they can survive, reproduce, and produce more waste. When the air is drier, they tend to dry out and their populations decline over time.

In many homes, the highest dust mite levels are found in:

  • Mattresses and pillows
  • Blankets, comforters, and fabric headboards
  • Carpets and large area rugs
  • Upholstered furniture
  • Heavy curtains and stuffed toys

These are also places where humidity can stay slightly higher around the fibers, especially if the room air is moist and the items are thick or layered.

Key Humidity Concepts: RH Ranges and Practical Targets

Relative humidity (RH) is the amount of moisture in the air compared with the maximum it can hold at a given temperature, expressed as a percentage. Warm air can hold more moisture than cool air, so RH changes with both moisture and temperature.

Typical indoor humidity bands

For dust mites and general comfort, these broad bands are often discussed:

  • Below ~30% RH: Air can feel quite dry for many people; static and dry skin are more common.
  • About 30–40% RH: Often feels slightly dry but comfortable for many; typically not favorable for dust mites.
  • About 40–50% RH: Common comfort range for many households and generally less favorable for dust mites than higher RH.
  • Above ~60% RH: Air often feels humid; conditions become more favorable for dust mites and other moisture-related issues such as mold.

Exact ranges for dust mite survival and activity vary among studies and by species, but overall, extended periods of higher humidity tend to support larger populations. Keeping indoor RH around 40–50% for much of the year is a realistic compromise for many U.S. homes: generally comfortable for people, less supportive of dust mites than more humid conditions, and also helpful for reducing other moisture issues.

Why we talk about typical range, not single numbers

Dust mites respond to longer-term humidity patterns, not a single reading in one moment. A few hours of higher humidity during cooking or showering are less important than what your bedroom humidity looks like night after night across weeks and months.

Because of this, it is more practical to:

  • Check RH at similar times each day (for example, evenings in bedrooms).
  • Look for patterns, such as consistently being above ~60% RH in certain rooms.
  • Adjust ventilation or dehumidification based on those patterns.
Table 1. Simple humidity control decision matrix for dust-mite-prone rooms

Example values for illustration.

Typical bedroom RH pattern Main issue Priority action Extra ideas
Frequently >60% day and night High moisture supports mites and mold risk Use a dehumidifier, improve ventilation Reduce fabric clutter, launder bedding more often
40–55% on average, sometimes higher Generally okay, but peaks add moisture Run bath/kitchen fans, open windows in mild weather Run dehumidifier only during humid spells
30–40% in winter, 40–50% in summer Comfort/dryness balance Consider light humidification in very dry spells Keep RH below ~50% when possible
<30% much of the time Very dry air, comfort concerns Use a humidifier carefully, monitor RH Avoid over-humidifying above ~50%
Large swings (for example 25–65%) Unstable moisture from weather or habits Check sources: leaks, ventilation, appliance use Use programmable fans and dehumidifier if needed
Basement bedroom >60% most of summer Ground moisture and poor air exchange Dedicated dehumidifier, seal bulk moisture paths Consider moving sleeping area if control is difficult

Common Humidity and Dust Mite Mistakes

Managing humidity for dust mites often comes down to everyday habits. Several common patterns work against good control, even when people own the right equipment.

Relying on comfort alone instead of measuring RH

Many people judge humidity by how the air feels or by condensation on windows. Unfortunately, comfort is subjective, and visible moisture only shows up at very high levels. A simple hygrometer is much more reliable for seeing whether your bedroom spends long periods above roughly 60% RH.

Humidifying bedrooms at night without monitoring

Humidifiers are often used for comfort in winter, but running them without checking RH can easily push a room above 50–60%, especially in small or poorly ventilated spaces. This may make the room more supportive for dust mites even while it feels cozy.

Ignoring hidden moisture sources

Even if main living spaces look dry, localized moisture can keep certain areas humid:

  • Unvented or weakly vented bathrooms near bedrooms
  • Basements and slab-on-grade rooms with cool surfaces
  • Leaky windows or roofs causing damp carpets or walls
  • Aquariums or large houseplant groupings in small rooms

If certain rooms stay more humid than others, look for these localized sources.

Relying on air cleaning alone

Air purifiers with fine particle filters can help remove dust mite particles from the air, especially during activities like making the bed or vacuuming. However, they do not control humidity or eliminate mites inside mattresses or carpets. Humidity management and surface cleaning are still necessary.

Practical Checklist: How to Use Humidity to Discourage Dust Mites

Because dust mites live mainly in soft furnishings, the most effective approach combines RH control with targeted housekeeping around those items.

1. Measure humidity where dust mites live most

  • Place a small hygrometer in each regularly used bedroom and main living area.
  • Check RH at least once or twice a day for several days to see patterns.
  • Note rooms that stay above about 60% RH for long stretches, especially at night.

2. Aim for roughly 40–50% RH in bedrooms when possible

This range often balances comfort with less favorable conditions for dust mites than more humid air. To move toward it:

  • If RH is often above ~60%: use a dehumidifier, ensure bath and kitchen fans are used consistently, and open windows when outdoor conditions are drier and comfortable.
  • If RH is often below ~30%: use a humidifier cautiously, adding moisture until readings usually fall in the 30–45% range, and try not to overshoot beyond about 50%.

3. Improve ventilation habits

  • Run bath fans during and after showers long enough to clear moisture.
  • Use kitchen exhaust when boiling water or cooking for extended periods.
  • In mild weather, open windows on opposite sides of the home for cross-ventilation when outdoor humidity is not excessively high.
  • Consider leaving bedroom doors open when possible to help air mix with the rest of the home.

4. Reduce dust reservoirs in key rooms

Humidity control makes conditions less supportive for mites, but they still need places to live. In bedrooms, especially:

  • Use washable mattress and pillow covers designed to limit dust mite penetration.
  • Wash sheets and pillowcases frequently in hot water, if appropriate for the fabric.
  • Limit the number of decorative pillows, heavy fabric throws, and stuffed toys on beds.
  • Consider smoother flooring surfaces or low-pile rugs in place of thick wall-to-wall carpet, especially in small, hard-to-dehumidify rooms.

5. Combine humidity control with regular cleaning

  • Vacuum carpets, rugs, and upholstered furniture regularly using a vacuum with efficient filtration.
  • Dust hard surfaces using slightly damp cloths to help capture particles rather than moving them into the air.
  • Schedule deeper cleanings of under-bed areas, closets, and behind furniture where dust can build up.

Real-World Scenarios: Applying RH Targets at Home

Each home has different construction, climate, and lifestyle patterns, so humidity management looks different in practice. These simplified scenarios illustrate how the 40–50% RH concept can be used.

Scenario 1: Humid coastal climate, older house

An older home near the coast may have naturally high outdoor humidity, especially in summer. Bedrooms show 60–70% RH most nights on a hygrometer. In this situation, it can be challenging to reach 40–50% RH everywhere, but you can still make progress by:

  • Using a dehumidifier in the most used bedrooms and living areas.
  • Running air conditioning in occupied rooms as needed, as it removes some moisture.
  • Sealing obvious air leaks that bring in moist outdoor air directly to bedrooms or basements.
  • Keeping bedding light and washable, and laundering it more frequently.

The goal is to bring indoor RH down where possible and reduce long stretches above roughly 60% in sleeping and lounging areas.

Scenario 2: Cold, dry winter climate with heavy humidifier use

In a cold climate, winter RH indoors can easily drop below 25–30%. Many households use whole-house or portable humidifiers for comfort. Without measurement, it is easy to push certain rooms to 50–60% RH or more, especially bedrooms with closed doors.

In this case, the most useful steps are:

  • Checking RH readings in each bedroom while the humidifier is running.
  • Adjusting setpoints or runtime so that RH typically remains in a middle range, often around 30–45%.
  • Confirming that windows and cool exterior walls are not staying damp, which can encourage mold and mites in nearby fabrics.

Scenario 3: Finished basement bedroom

Basement air is often cooler and moister than the rest of the house. A finished basement bedroom with carpet and upholstered furniture may show 65% RH much of the summer, even if upstairs stays near 45–50%.

Helpful responses include:

  • Running a dedicated dehumidifier in the basement and draining it safely.
  • Keeping closet doors slightly open so air can move more freely.
  • Using mattress and pillow covers and choosing low-pile carpet or washable rugs if renovation is possible.
  • Checking for bulk moisture sources such as wall leaks or condensation on foundation surfaces.

Safety and Equipment Considerations

Humidity control often uses dehumidifiers, humidifiers, ventilation fans, and sometimes air conditioning. Each has limitations and safety points to keep in mind.

Dehumidifiers

  • Empty or drain the water bucket as directed to prevent overflow and standing water.
  • Clean the intake grille and follow manufacturer instructions for filter cleaning or replacement.
  • Ensure adequate clearance around the unit for airflow.

Humidifiers

  • Use clean water and follow cleaning instructions to reduce mineral buildup and microbial growth in the reservoir.
  • Avoid running a humidifier continuously without checking RH to prevent overshooting into a more dust-mite-friendly range.
  • Keep humidifiers away from direct contact with walls, furniture, and bedding so surfaces do not stay damp.

Air cleaners and other add-ons

Some devices include ionizers or UV-C features intended to alter particles or microbes in the air. If you use such devices, look for information about ozone generation and follow safety guidance from manufacturers and relevant standards bodies. Many people prefer equipment that is designed to avoid producing ozone. Remember that even effective filtration or supplemental technologies do not replace the need for basic humidity and dust control measures.

Maintenance and Long-Term Habits

Humidity and dust control for dust mites is not a one-time project. Conditions change with seasons, weather, and household routines. A simple maintenance rhythm can keep things steady.

Seasonal checks

  • At the start of heating season: Check RH in multiple rooms for a few days, decide whether you truly need humidifiers, and set them to modest targets.
  • At the start of cooling or humid season: Monitor RH in basements and bedrooms, set up dehumidifiers if needed, and confirm bathroom and kitchen fans are working well.

Routine tasks

  • Wash bedding on a regular schedule suitable for your household.
  • Vacuum and dust on a consistent routine, focusing on bedrooms and living areas.
  • Inspect for condensation or damp spots on windows, basements, and exterior walls during weather changes.
  • Check hygrometers occasionally to ensure they still give reasonable readings (for example, compare two side by side).

Equipment upkeep

  • Rinse or replace dehumidifier and HVAC filters as recommended.
  • Clean humidifier tanks and components regularly following instructions.
  • Listen for unusual noises or reduced performance from fans and dehumidifiers and address issues promptly.

Humidity and Mold: Quick Planning Reference

While this article focuses on dust mites, the same humidity ranges also affect mold growth and other moisture concerns. Keeping RH in a moderate range helps with multiple issues at once.

Table 2. Humidity and mold quick-plan examples for living areas and bedrooms

Example values for illustration.

Moisture control goal Simple actions Tools involved Notes
Keep RH generally below ~60% Vent bathrooms, use kitchen exhaust, open windows when outdoor air is drier Bath fan, range hood, window use Helps limit both mold and dust mite growth
Aim for 40–50% RH in bedrooms Use dehumidifier in humid months, adjust humidifier in dry months Dehumidifier, humidifier, hygrometer Balance comfort with less favorable mite conditions
Dry out after water spills or leaks Remove wet materials, increase airflow and dehumidification Fans, dehumidifier Act within hours to reduce mold risk
Reduce basement dampness Seal obvious entry points, run dehumidifier, store items off floor Dehumidifier, basic sealing materials Helps protect carpets and stored fabrics
Avoid over-humidifying in winter Set modest humidifier targets, check windows and corners for condensation Humidifier, hygrometer Prevents damp spots that can harbor mold and mites
Support whole-home moisture balance Maintain HVAC, use balanced ventilation if available HVAC system, ventilation system Steadier RH makes local control easier

Related guides: Dust Mite Allergy: Humidity Targets, Bedding, and FiltrationBest Indoor Humidity Level to Prevent Mold (With Seasonal Targets)Basement Dehumidifier Guide: Targets, Drainage, and Energy Use

Summary: Using Humidity Ranges to Make Life Harder for Dust Mites

Dust mites rely on moisture in the air to survive, so indoor humidity plays a central role in how well they do in your home. While eliminating them entirely is unrealistic, you can make your spaces less welcoming by keeping relative humidity in a moderate range—often around 40–50% in frequently used rooms, and avoiding long periods above about 60% when you can.

The most practical approach is steady, not extreme: measure RH with simple meters, adjust ventilation and dehumidification where needed, avoid overshooting with humidifiers, and pair humidity control with good housekeeping in bedrooms and living areas. Over time, these everyday steps help reduce the conditions that support large dust mite populations while maintaining comfort and general indoor air quality.

Frequently asked questions

Can keeping indoor RH at 40–50% eliminate dust mites?

Keeping indoor RH around 40–50% makes the environment less favorable for dust mites and reduces their reproduction, but it will not completely eliminate them because mites persist in fabrics and bedding. Combine RH control with washable covers, frequent laundering, and vacuuming to achieve larger reductions in allergens.

How long must RH stay low to meaningfully reduce dust mite populations?

Dust mite populations respond to sustained humidity patterns over weeks to months rather than hours. Consistently maintaining lower RH in bedrooms and key rooms for several weeks will gradually reduce mite activity and allergen buildup, especially when paired with cleaning.

Will using a humidifier in winter increase dust mite risk?

Humidifiers can raise the risk if they push room RH above about 50–60%, particularly in small or poorly ventilated rooms. Monitor RH and set humidifiers so that typical readings stay in a modest range (often 30–45%) to balance comfort without encouraging dust mites or mold.

Is a hygrometer sufficient to manage dust mites and humidity?

A hygrometer is an essential first step because it reveals actual RH patterns, but it is not sufficient alone to control mites. Use the readings to guide actions—dehumidification, ventilation, or cautious humidification—while also addressing dust reservoirs through cleaning and protective bedding.

What RH should finished basements be kept at to limit both dust mites and mold?

Finished basements are best kept below about 60% RH, with many recommendations aiming for roughly 40–50% in living or sleeping areas. Because basements tend to be cooler and retain moisture, a dedicated dehumidifier and attention to sealing and drainage are often needed to maintain those levels.

Pollen Season Indoor Plan That Actually Works

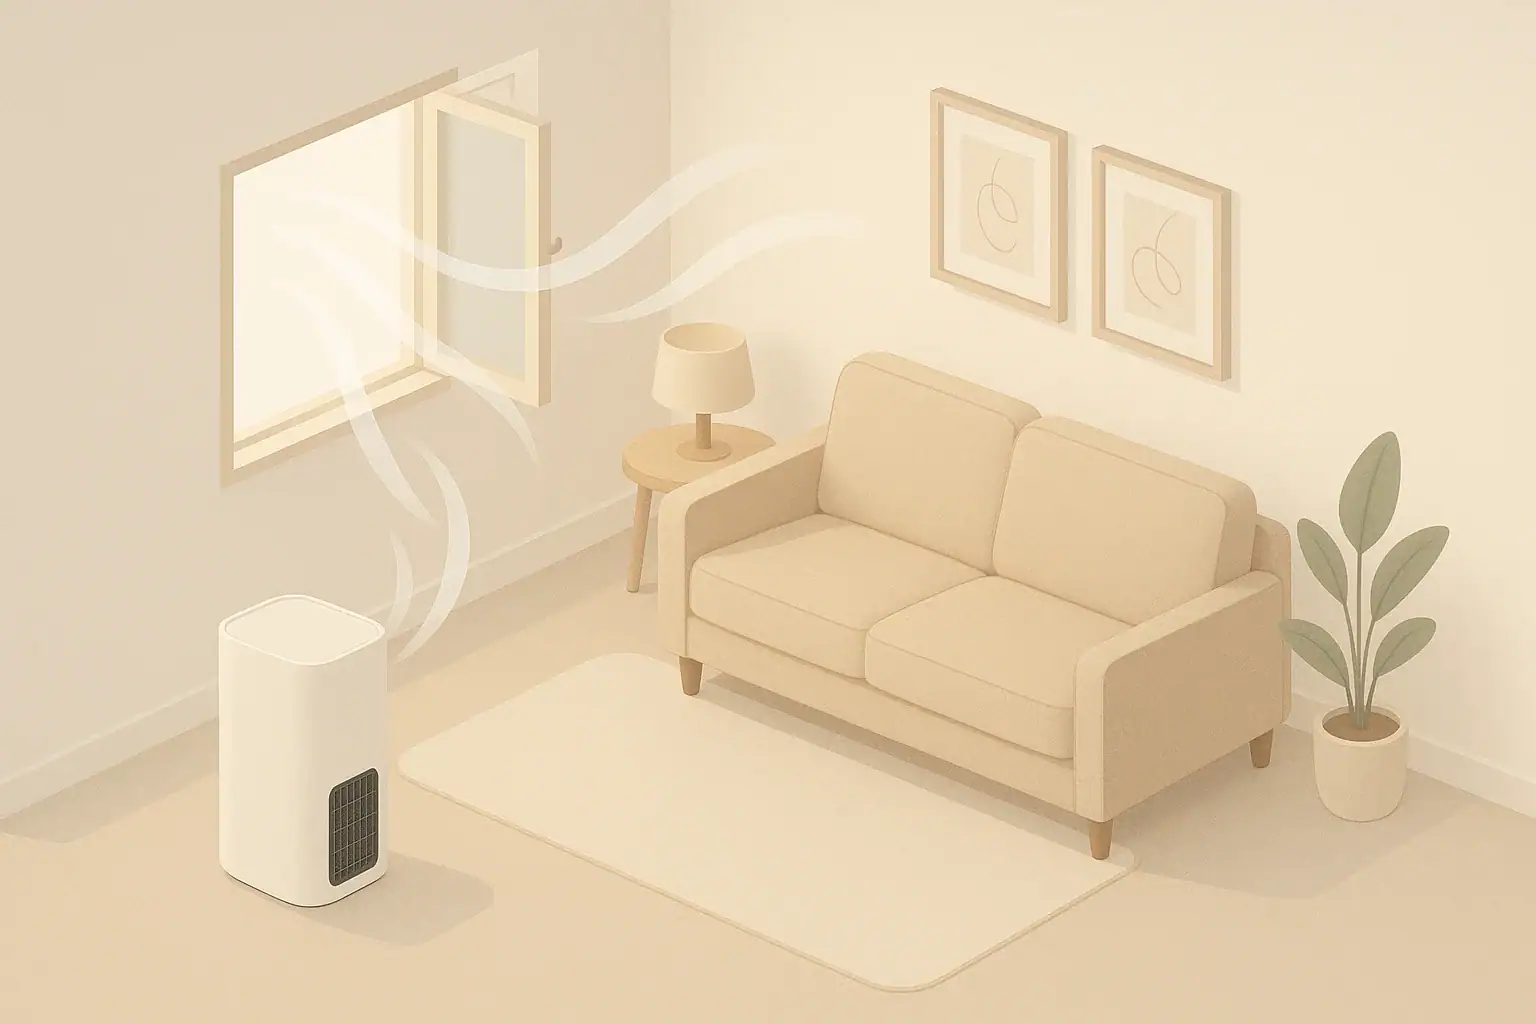
Calm bedroom with air purifier during pollen season

A practical pollen season indoor plan combines high-efficiency filters, timed ventilation, and regular low-dust cleaning to keep indoor pollen levels lower than outdoors.

Instead of trying to block every grain of pollen, focus on a few consistent habits: filter the air, manage when and how you bring outdoor air inside, and keep surfaces and fabrics from building up dust and tracked-in pollen. The goal is not perfection, but a calmer indoor baseline during high-pollen days.

Quick answer
  • Aim for at least a MERV 11–13 filter in central HVAC or a HEPA filter in room purifiers for main living and sleeping spaces.
  • Ventilate when pollen counts are typically lower (often late night to early morning) and keep windows closed during peak hours.
  • Target 4–8 air changes per hour (ACH) in bedrooms using purifiers plus HVAC circulation as an illustrative planning range.
  • Vacuum carpets and rugs 1–2 times per week with a vacuum that has a fine particle filter; damp dust hard surfaces 2–3 times per week.
  • Set a simple entry routine: shoes off at the door, coats and bags stored in one spot, and regular washing of bedding and frequently used fabrics.

What a Pollen Season Indoor Plan Really Means

Pollen season is a period when outdoor pollen concentrations are elevated, usually in spring and fall in many parts of the United States. Even with windows closed, pollen can enter through doors, leaks in the building envelope, ventilation, and on clothing, shoes, and pets.

An indoor plan for pollen season is about coordinating three things:

  • Filtration – Capturing airborne particles that do make it inside.
  • Ventilation timing – Getting enough fresh air while avoiding the worst pollen hours when possible.
  • Cleaning and habits – Reducing tracked-in pollen and dust so it does not keep re-entering the air.

Instead of relying on any single product or technique, think in layers of protection. Each layer removes a little more pollen or keeps it from building up, so your indoor air is generally calmer than outdoors during the season.

Key Concepts: Filters, ACH, and Pollen Pathways

Planning for pollen indoors starts with a few basic air-quality concepts. Understanding these helps you choose reasonable targets instead of guessing.

Filter types and ratings that matter for pollen

  • MERV rating (central HVAC filters) – On a typical 1-inch furnace or air-handler filter, a MERV 11–13 filter is often used as a practical range for capturing fine particles like pollen and many other airborne particles.
  • HEPA filters (room air purifiers) – A HEPA (high-efficiency particulate air) filter is designed to capture very small particles, including pollen-sized ones, when air passes through it.
  • Carbon filters – These mainly help with odors and some gases; they do not capture pollen, but are often paired with particle filters in the same device.

For pollen, the particle filter (MERV or HEPA) is the primary focus. Carbon filters are optional comfort add-ons, not pollen solutions.

Air changes per hour (ACH) and CADR in simple terms

ACH (air changes per hour) is a way to describe how many times per hour the volume of air in a room is theoretically filtered or replaced. It is a helpful planning idea when you are figuring out if your air purifier is sized reasonably for a space.

As a very simple illustration, you can estimate ACH from a purifier’s clean air delivery rate (CADR) if you know your room size:

  • Room volume (cubic feet) ≈ floor area (square feet) × ceiling height (feet).
  • ACH ≈ (CADR in cubic feet per minute × 60) ÷ room volume.

During pollen season, many people aim for something in the 4–8 ACH illustrative range for bedrooms or main living spaces using a combination of purifiers and HVAC circulation. This is not a strict rule, but it gives a sense of how much filtered airflow you might want.

How pollen actually enters your home

Pollen usually gets indoors through:

  • Open windows and doors – Especially during windy or peak pollen hours.
  • Building leaks – Small cracks and gaps in older homes or around window frames.
  • Mechanical ventilation – Bathroom fans, kitchen exhaust, and any dedicated fresh-air systems.
  • People and pets – Pollen on hair, clothing, shoes, fur, and gear.

The plan is not to reach zero pollen indoors, but to reduce these pathways where reasonable and then filter and clean what does get in.

Table 1. Choosing filtration focus by home situation – Example values for illustration.
Home situation Main filtration tool Why it fits Notes
Central HVAC runs daily Upgrade to MERV 11–13 filter Whole-home circulation moves air through one filter Check system compatibility and airflow; change filter regularly
Apartment with no central system Room HEPA purifier in bedroom and main room Targets the spaces where you spend most time Size for room volume and runtime, focus on quiet settings at night
Older leaky house Mix of HVAC filter and room purifiers Offsets higher infiltration by adding local filtration Seal obvious gaps around windows/doors for added benefit
Home with open-plan living area Larger purifier or multiple units Open spaces need more total CADR Consider one unit central to the space and one near seating
Bedroom near busy street trees Focused bedroom HEPA purifier Provides a lower-pollen sleeping zone Keep windows closed during peak and run purifier continuously
Home with frequent cooking and odors Purifier with HEPA plus carbon Particles plus odor/gas comfort in one device Carbon filter may need more frequent changes

Example values for illustration.

Common Pollen-Season Mistakes Indoors

Several habits can quietly undo your efforts to keep indoor pollen levels lower. Being aware of these patterns helps you set a realistic, sustainable plan.

  • Running a good filter but not enough air through it – A high-rated filter does little if your HVAC fan rarely runs or your room purifier is undersized or always on low in a large space.
  • Leaving windows open during peak hours – Enjoying fresh air is important, but wide-open windows during windy midday hours can bring in a lot of pollen in a short time.
  • Dry dusting with fluffy cloths – This can kick pollen and dust back into the air. Lightly damp cloths tend to hold particles better.
  • Ignoring textiles – Carpets, heavy drapes, throw pillows, and unwashed bedding can act as reservoirs for settled pollen and fine dust.
  • Forgetting entry habits – Wearing outdoor shoes throughout the home or shaking out clothes indoors spreads outdoor pollen across floors and furniture.
  • Not checking or replacing filters on time – Clogged or aging filters can reduce airflow and effectiveness.

Step​-​by​-​Step Indoor Plan for Pollen Season

You can build a simple plan in four parts: filters, airflow, cleaning, and daily routines. Start with bedrooms and main living spaces, then expand as needed.

1. Set up filtration where it matters most

Bedrooms are usually the top priority because of the hours spent there.

  • Use a room air purifier with a HEPA filter sized for your bedroom (aiming for something in a 4–8 ACH illustrative range when running continuously or most of the time).
  • Place it so air can circulate (for example, not tight against a wall or under heavy furniture) and avoid blocking the intake or exhaust.
  • Run it on a quieter setting continuously or at least several hours before bedtime and through the night.

Main living area comes next:

  • If you have a central HVAC system, consider a MERV 11–13 filter and set the fan to circulate more often during pollen season.
  • In homes without central systems, use one or more purifiers sized for the combined space and keep them running when you are home.

2. Time your ventilation and window use

You still need fresh air for comfort and indoor air quality, even during pollen season. The goal is to be selective about when and how you bring outdoor air in.

  • Check typical local pollen patterns – In many areas, levels are higher in the late morning and afternoon and lower late at night or early morning, but local patterns can vary.
  • Ventilate during lower-pollen hours when feasible by opening windows briefly to flush the space, then closing them and relying on filtration.
  • On very high pollen or windy days, minimize wide-open windows and consider shorter airing periods instead of leaving windows tilted or cracked all day.
  • Use kitchen and bath exhaust fans when cooking or showering to control moisture and odors; just be aware they also pull in outdoor air indirectly through leaks.

3. Adopt a light, regular cleaning routine

During pollen season, the goal is consistent, gentle cleaning rather than occasional deep-clean marathons that stir up dust.

  • Vacuum carpets and rugs 1–2 times per week with a vacuum that has a good fine-particle filter.
  • Damp dust hard surfaces like shelves, bedside tables, window sills, and baseboards 2–3 times per week.
  • Mop hard floors weekly, or more often in entry areas.
  • Wash bedding weekly in warm or hot water as fabric care allows.
  • Rotate and wash soft items like throw blankets, frequently used pillows, and pet bedding regularly.

4. Adjust daily habits to reduce tracked​-​in pollen

Small routine changes can have an outsized effect on how much pollen builds up indoors.

  • Shoes off at the door – Use a mat outside and just inside, then leave shoes in one contained spot.
  • Outer layers in one place – Hang coats, hats, and bags near the entry rather than in bedrooms.
  • Quick change after high​-​pollen time outdoors – Changing clothing and, when practical, rinsing exposed skin and hair can keep less pollen on furniture and bedding.
  • Pet routine – Wipe pets gently with a damp cloth after outdoor time and wash pet bedding regularly.

Example Pollen Plans for Different Homes

Every home is different, but a few scenarios can help you picture how the pieces fit together.

Small apartment with no central HVAC

  • Filtration: One HEPA air purifier in the bedroom, one in the living area, each sized for the room and run continuously on low or medium.
  • Ventilation: Open windows for 10–20 minutes late at night or early morning when outdoor conditions are calmer, then close and use filtration.
  • Cleaning: Vacuum rugs weekly, damp dust surfaces twice a week, wash bedding weekly.
  • Habits: Shoes off at the door; jackets kept on a wall hook near the entry.

Suburban home with central heating and cooling

  • Filtration: MERV 11–13 filter in the central system; bedroom HEPA purifiers in rooms where people spend the most time.
  • Ventilation: Use mechanical ventilation or brief window openings at times of lower outdoor pollen if needed for freshness; keep windows closed during very high-pollen days.
  • Cleaning: Vacuum carpeted areas 1–2 times weekly; dust frequently touched surfaces and electronics with a damp cloth.
  • Habits: Mudroom or entry set up as a buffer zone with mats and coat storage.

Older, drafty house in a high​-​pollen region

  • Filtration: Central filter upgrade if compatible, plus a HEPA purifier in each occupied bedroom and one in the main sitting area.
  • Ventilation: Rely more on existing leaks and controlled short window openings during lower-pollen times; avoid leaving windows cracked all day during peak season.
  • Sealing: Caulk obvious gaps around windows and doors and use weatherstripping where reasonable to reduce uncontrolled infiltration.
  • Cleaning: More frequent light vacuuming and damp dusting, especially near windows and entryways.

Safety, Devices, and Standards to Keep in Mind

Most pollen-focused strategies are straightforward, but a few safety and performance points are worth noting.

  • Avoid intentional ozone generators for everyday indoor air cleaning. Ozone is a respiratory irritant; for pollen, simple particle filtration is the key tool.
  • Be cautious with ionizers and UV​-C add​-ons. Some devices include these features; they may be marketed for air cleaning, but filters do the main work for pollen. Follow manufacturer safety instructions and avoid modifying the device.
  • Do not over-restrict HVAC airflow. Higher MERV filters can increase resistance to airflow. Make sure your system can handle an upgrade and monitor for signs like unusual noise or reduced comfort.
  • Use appliances as intended. Do not alter electrical components, bypass safety switches, or operate devices with damaged cords or housings.
  • Follow fire safety and ventilation guidance in kitchens and when using combustion appliances; pollen control should not override basic safety ventilation needs.

Filter and Cleaning Maintenance During Pollen Season

Even the best plan will lose effectiveness if filters and cleaning routines are not maintained. A few simple reminders keep your system working as intended.

Filter replacement and checks

  • Central HVAC filters: Many homes change these every 1–3 months, but the right interval depends on usage, filter type, and dust levels. Check monthly during pollen season and replace when dirty or as the manufacturer suggests.
  • Purifier HEPA filters: Replacement intervals vary widely. Use the manufacturer’s guidance as a starting point, and consider that running on higher speeds or in dusty homes may shorten the interval.
  • Pre-filters: Some purifiers have washable or replaceable pre-filters that collect larger dust and hair. Cleaning these regularly can help maintain airflow and extend HEPA filter life.

Cleaning schedule you can actually keep

Rather than aiming for perfection, plan a realistic routine that fits your household:

  • Daily (quick tasks): Put shoes and outdoor items in the same spot; do a brief tidy of surfaces that collect clutter and dust.
  • Weekly: Vacuum floors and rugs, wash bedding, and mop hard floors in main traffic areas.
  • Every 2–4 weeks: Wash curtains (if washable), launder throw blankets, and wipe baseboards and window frames.

Simple Q&A for Common Pollen Season Decisions

Should I keep windows closed all pollen season?

Many people choose to keep windows closed on the highest-pollen or windiest days and open them selectively during calmer periods, often early morning or later at night. A mix of short airing plus filtration can balance freshness and pollen control.

Is one air purifier enough for my whole home?

In smaller, open apartments, one well-sized unit in a central location can noticeably affect nearby areas. In larger or multi-room homes, separate purifiers for bedrooms and main living spaces are often more effective than a single device in a hallway.

Do I need HEPA if I already have a good HVAC filter?

A MERV 11–13 central filter can reduce pollen and other particles as air cycles through the system. Bedroom HEPA purifiers can add another layer of local filtration, especially where doors are closed or airflow from the central system is limited.

Table 2. Example filter replacement planner for pollen season – Example values for illustration.
Filter type Illustrative interval range What can shorten the interval Reminder
Central HVAC 1-inch MERV 11–13 About every 1–3 months Continuous fan use, heavy dust, shedding pets Check monthly during peak pollen and replace when visibly loaded
Thicker HVAC media filter (e.g., 3–5 inch) About every 3–9 months High system runtime, construction dust Follow system guidance and inspect if airflow feels reduced
Room purifier HEPA filter About every 6–18 months 24/7 operation, high fan speeds, smoky or dusty events Use indicator lights plus visual and odor checks as a guide
Room purifier carbon filter or cartridge About every 3–12 months Persistent cooking odors, smoke, high VOC sources Replace when odors break through even with clean HEPA
Washable pre-filter screens Rinse or vacuum every 2–8 weeks Pets, visible dust buildup Ensure completely dry before reinstallation
Vacuum cleaner fine-particle filter Check every 1–3 months Frequent vacuuming, large homes Maintain good suction to keep pollen out of carpets

Example values for illustration.


Related guides: How to Choose the Right Air Purifier for Your Room SizeACH to CADR Conversion: A Simple Formula With ExamplesHow Often Should You Replace a HEPA Filter?

Summary: A Calm, Layered Approach to Pollen Season

A practical indoor plan for pollen season does not depend on any single device. Instead, it layers a few simple strategies: effective particle filtration in the rooms where you spend the most time, thoughtful timing of window use and ventilation, regular gentle cleaning, and small daily habits that reduce tracked-in pollen.

By focusing on realistic targets—such as using MERV 11–13 or HEPA filtration, aiming for a reasonable range of filtered air changes per hour in key rooms, and keeping a consistent cleaning and filter-replacement schedule—you can generally keep indoor pollen levels lower than outdoors and make your home feel calmer during high-pollen periods.

Frequently asked questions

How do I size a HEPA air purifier to reach about 4–8 ACH in my bedroom?

Estimate your room volume (floor area × ceiling height) and use ACH ≈ (CADR × 60) ÷ room volume to solve for the required CADR. For a target ACH, pick a purifier with CADR ≈ (ACH target × room volume) ÷ 60 and run it continuously on a low–medium setting to maintain the rate. Allow extra capacity if doors are often opened or the room connects to larger spaces.

Will running my HVAC fan continuously help reduce indoor pollen if the filter is only MERV 8?

Continuous fan runtime increases the amount of air passing through the filter, which helps reduce particles compared with intermittent operation. However, a low-rated filter like MERV 8 captures fewer small particles than MERV 11–13, so combining continuous fan use with a higher-rated filter (if the system can handle it) or local HEPA purifiers gives better pollen control. Check compatibility and monitor airflow after any upgrade.

What is the best way to ventilate for freshness without importing a lot of pollen?

Ventilate briefly during local low-pollen periods (often early morning or late at night) to flush indoor air, then close windows and rely on filtration. Avoid leaving windows open during windy, high-count days and use short targeted airing rather than continuous crack openings. Use exhaust fans when needed for moisture and odors but be aware they can draw outdoor air through gaps.

How often should I wash bedding and soft textiles during peak pollen weeks?

Wash bedding weekly in the warmest setting the fabric allows, and launder frequently used throws and pet bedding every one to four weeks depending on exposure. Increase frequency if household members are symptomatic or spend a lot of time outdoors during high pollen periods. Regular rotation and washing reduce the reservoir of settled pollen.

Are ozone generators or ionizers effective and safe for reducing pollen indoors?

Ozone generators are not recommended for routine indoor air cleaning because ozone is a respiratory irritant and does not effectively substitute for particle filtration for pollen. Some ionizers and UV–C add-ons may be marketed for air cleaning, but particle filters (MERV/HEPA) provide the primary, proven removal method for pollen. Follow manufacturer safety guidance and prioritize filtration-based approaches.

Bedroom Allergy Setup: Fast Changes That Actually Help

Calm bedroom with air purifier beside bed

The fastest bedroom allergy changes are usually encasing bedding, reducing dust-holding clutter and fabrics, and improving filtration and humidity in the room you sleep in most.

Because you spend many hours in the bedroom, small air-quality changes there can make a noticeable difference in comfort. This article focuses on quick, practical steps: what to tackle first, how to set simple targets for filtration and humidity, and how to keep the space easier to breathe in over time.

Quick answer
  • Use zippered, tightly woven covers on pillows and mattress; wash bedding weekly in hot water when fabric care allows.
  • Aim bedroom relative humidity around 40–50% to reduce dust mite and mold-friendly conditions.
  • Choose a room air purifier sized for roughly 4–5 air changes per hour (ACH) based on your bedroom’s volume.
  • Place the purifier where it can pull and push air freely, not hidden under furniture or blocked by curtains.
  • Remove or reduce soft surfaces that trap dust (extra pillows, heavy drapes, unused textiles) near the bed.
  • Vacuum floors and soft furnishings regularly with a vacuum that has effective fine-particle filtration.

What a Bedroom Allergy Setup Really Means

A “bedroom allergy setup” is simply arranging the room so that common indoor triggers such as dust, pet dander, and pollen are less likely to build up where you sleep. It does not eliminate allergens, but it can reduce how much is in the air and on surfaces close to your nose and mouth at night.

Instead of focusing on individual products, it helps to think in terms of four goals:

  • Less accumulation: fewer places for dust and dander to collect, especially within a few feet of your head.
  • Better capture: filters and fabrics that trap small particles instead of letting them recirculate easily.
  • Stable conditions: humidity in a range that is less friendly to dust mites and mold growth.
  • Easy upkeep: a layout that is fast to vacuum, dust, and wash regularly.

When you look at your room through those four lenses, it becomes clearer which changes are quick wins and which are slower or optional projects.

Key Concepts: Filtration, ACH, and Humidity Targets

A few core ideas from indoor air quality make bedroom decisions easier and less about guesswork.

Air changes per hour (ACH) in a bedroom

ACH describes how many times in one hour the air in a room is filtered or replaced. For bedrooms where comfort around allergies is a concern, many people aim for around 4–5 ACH through filtration. This is a practical target, not a medical rule.

To estimate the ACH from an air purifier, you can use its clean air delivery rate (CADR) and your room volume:

  • Room volume (cubic feet) ≈ floor area (sq ft) × ceiling height (ft).
  • ACH (approximate) ≈ CADR (cfm) × 60 ÷ room volume.

Even a rough calculation helps you avoid using an undersized purifier that barely affects particle levels in a closed bedroom.

Filters and what they actually do

  • Particle filters (like HEPA-type) are mainly for solids and liquid droplets: dust, pollen, smoke particles, and pet dander. For bedroom comfort, these are usually the focus.
  • Activated carbon filters focus on some gases and odors, such as from cooking, smoke, or some household products. They do not work like particle filters and do not substitute for them.
  • Seal and bypass: for any filtration device to work well, air must be pulled through the filter media, not around the edges. In practice, that means keeping covers and housings closed and filters seated properly.

Humidity ranges and why they matter in a bedroom

Relative humidity around 40–50% is often used as a general comfort-oriented indoor target. Too dry (for example, consistently below about 30%) can mean more irritation and static; too humid (consistently above roughly 60%) can support mold growth and is friendlier to dust mites.

In many climates, this means a humidifier may be useful in winter and a dehumidifier or air conditioning may help in very humid seasons. The key is to measure with a simple hygrometer and adjust gradually rather than guessing.

Table 1. Bedroom allergy changes: where to start – Example values for illustration.
Priority area First change Why it matters Notes
Bedding Add zippered pillow and mattress covers Reduces direct exposure to dust and dander in sleep zone Choose tightly woven, washable fabrics
Textiles near bed Remove extra pillows and unused throws Fewer soft surfaces for dust to collect Keep only what you regularly wash
Flooring Clear clutter and vacuum more often Easier to remove settled dust and dander Move small items off the floor where possible
Air filtration Size a purifier to roughly 4–5 ACH Continuously reduces airborne particles overnight Run on higher setting before bed, lower at night if noisy
Humidity Measure bedroom RH for a week Shows if you need humidification or dehumidification Aim roughly for 40–50% if practical
Storage Close or move open shelving away from bed Limits dust shelves directly by the head of the bed Use bins or doors to contain items

Example values for illustration.

Common Bedroom Allergy Setup Mistakes

Many bedroom layouts make allergies feel worse without anyone realizing why. Watching for a few common patterns can help you troubleshoot.

Undersized or poorly placed air purifier

Running a small purifier in a large room, or pushing the unit into a corner where airflow is blocked, can mean only a fraction of bedroom air ever passes through the filter. Similarly, placing it behind tall furniture or thick curtains can reduce effectiveness.

Instead, position it so that intake and outlet grills face open space, a few feet from large obstacles, and ideally not blowing directly at your face while you sleep.

Lots of textiles that rarely get washed

Decorative pillows, heavy drapes, stacked blankets, and overfilled open closets all collect dust and dander. When brushed or disturbed, these surfaces release particles back into the air.

If frequent washing is not realistic, simplifying the number of items in the sleep zone is often more effective than owning many specialized fabrics.

Relying only on opening windows

Fresh air is useful, but its impact on allergens depends heavily on outdoor conditions. In high-pollen seasons, routinely sleeping with windows wide open can bring more allergens in, especially if your bed is right under the window and there is no filtration to follow.

Offering your room a mix of ventilation and filtration, and adjusting window use by season and outdoor air quality, is typically more balanced.

Ignoring humidity swings

Bedrooms over basements, with attached bathrooms, or with closed doors and little airflow can develop either very dry or very humid air. Without a simple hygrometer, it is easy to misjudge. Long periods of high humidity, particularly near exterior walls or behind furniture, can increase the risk of damp areas and mold growth.

Cluttered floors and hard-to-clean corners

Boxes, baskets, and storage under the bed can trap dust and make vacuuming difficult. Over time, these areas become reservoirs of settled material that gets stirred when you move around the room.

Practical Bedroom Allergy Checklist: Fast Changes First

Below is a stepwise way to update your bedroom with a focus on what is quickest and most impactful for most people.

Step 1: Focus on the bed itself

  • Add zippered, tightly woven covers to pillows and mattress.
  • Wash pillowcases and sheets about weekly, using the warmest water setting the fabric can handle comfortably.
  • Consider simplifying bedding: one or two pillows you use regularly, and blankets or duvets that are practical to wash on a schedule.

Step 2: Simplify the immediate “breathing zone”

The air within about 2–3 feet of your head at night matters most because you spend hours breathing it directly.

  • Move open shelves, book stacks, and fabric lampshades away from the head of the bed if possible.
  • Limit objects that collect dust on the nightstand; choose surfaces that are quick to wipe.
  • If you keep pets, consider keeping pet beds and main shedding areas outside the bedroom or at least not right next to the bed.

Step 3: Improve filtration where you sleep

  • Estimate your bedroom volume and select a purifier that can reach roughly 4–5 ACH at a medium or higher fan setting.
  • Place the purifier on the floor or a stable surface, a bit away from walls, with clear space around intake and outlet.
  • Run it on a higher setting 1–2 hours before bedtime to “clean up” the room air, then lower it to a quieter setting overnight if noise is an issue.
  • If you have whole-home filtration through a central system, make sure bedroom supply and return vents are open and filters are changed on schedule.

Step 4: Tidy surfaces and floors for easier cleaning

  • Clear under-bed storage if it blocks airflow and makes vacuuming difficult; consider closed bins that can be pulled out easily.
  • Minimize small items on the floor so the vacuum can reach all areas.
  • Use a vacuum with effective fine-particle filtration and vacuum at a schedule you can maintain (for example, once or twice a week in the bedroom).

Step 5: Check and adjust humidity

  • Place a small hygrometer in the bedroom and watch readings at different times of day for at least a week.
  • If humidity is consistently low, consider a humidifier, used with clean water and regular cleaning, to nudge levels toward roughly 40–50%.
  • If humidity is consistently high, consider improving ventilation, using exhaust fans from connected bathrooms, or adding dehumidification or air conditioning.

Real-World Bedroom Scenarios

Translating the above into concrete situations can clarify what to prioritize.

Small apartment bedroom with limited floor space

In a compact room, clutter control and purification are key. You might place a modestly sized purifier on a dresser or floor corner with clear airflow, strip down decorative textiles to those you use and wash regularly, and use storage bins under the bed that can slide out for cleaning.

If your building has central ventilation you cannot modify much, focusing on your room-level purifier and bedding choices is usually the most practical path.

Carpeted bedroom with pets

Carpet holds more dust and dander than hard floors, so cleaning frequency matters more. Vacuuming with effective filtration becomes a routine rather than an occasional task. A purifier running most of the day in the bedroom can help capture airborne pet dander, while washable throws on furniture or the bed can serve as sacrificial layers you clean often.

Some people choose to keep pets out of the bedroom altogether; others focus on keeping pets off pillows and managing fur with more frequent grooming outside the bedroom.

Basement or over-garage bedroom

These rooms can have more humidity variation and possible odor or infiltration pathways. A combined approach often works best: sealing gaps where air or dust might enter, running a dehumidifier if humidity stays high, and using a purifier to manage particles that do enter. Keeping furniture slightly away from exterior walls can help reduce the risk of hidden damp spots.

Safety and Standards Considerations

When adding devices to a bedroom, it is worth checking a few safety points beyond basic electrical safety and following manufacturer instructions.

Ozone and add-on features

Some technologies intentionally generate ozone, which is a lung irritant and generally not desirable indoors. For a bedroom, particularly where sensitive occupants sleep, many people prefer filtration-focused devices that do not intentionally release ozone into the room.

Ionizers and UV-C features are sometimes included as extras. These can have specific use cases, but they do not replace mechanical filtration. If you use them, follow instructions closely and avoid modifying devices in ways that bypass safety features.

Noise and sleep quality

White noise from a purifier is acceptable or even pleasant for some people but disruptive for others. Look for fan modes quiet enough for your sleep while still moving sufficient air. One approach is to pre-clean the room on a higher setting before bed and then use a lower setting overnight.

Electrical and placement safety

Keep devices away from water sources, avoid running cords under rugs where overheating is possible, and maintain enough clearance around intakes and outlets to prevent overheating and to maintain performance.

Maintenance and Upkeep: Keeping the Setup Working

A bedroom allergy setup is only as good as its ongoing care. The goal is a routine that fits your schedule rather than complex, high-effort protocols.

Filter replacement and cleaning

  • Check filter status indicators if present, or mark a calendar based on typical replacement intervals given in manuals.
  • Avoid running purifiers with clearly clogged or damaged filters; efficiency drops and strain on the fan may increase.
  • For vacuums, inspect and replace bags or clean bins and filters so that suction and filtration remain effective.

Textiles and surfaces

  • Keep a simple schedule: for example, bedding weekly, pillow covers every 1–2 weeks, and a deeper room clean monthly.
  • Dust hard surfaces with a damp cloth or a tool that captures dust rather than just moving it.
  • Look behind furniture and under the bed a few times a year for collected dust and signs of dampness.

Monitoring and small adjustments

  • Use a basic hygrometer to track humidity, especially when seasons change.
  • If you have an air quality monitor, track trends in particle readings when you change fan speeds or cleaning routines, using them as a relative guide rather than as medical data.
  • Adjust purifier placement or cleaning frequency if you notice dust building up in particular corners or on specific furniture.

Simple Noise and Sleep Planning for Air Devices

Balancing air cleaning with a quiet sleep environment is a common concern. Planning noise along with airflow avoids turning devices off just when you need them most.

Table 2. Bedroom device noise planning examples – Example values for illustration.
Use case Noise consideration Placement tip Note
Evening pre-clean Higher fan speed acceptable for a short time Place purifier several feet from the bed Run 1–2 hours before sleep, then reduce speed
Overnight operation Use lower, steady fan speed as background noise Avoid blowing air directly at your face Consistency is often less disruptive than cycling
Shared bedroom Compromise on speed using larger purifier if needed Place unit nearer person less sensitive to noise Larger units may reach targets at lower speeds
Very light sleeper Prioritize low-noise modes and distance Put purifier on opposite wall with clear airflow path Door position can affect both noise and airflow
Combined dehumidifier and purifier Manage multiple hum sources in small rooms Separate devices physically, not next to headboard Consider running louder device mainly outside sleep hours
Child’s bedroom Stable, not too loud background sound Keep cords and devices out of reach Check regularly that vents are not blocked by toys

Example values for illustration.


Related guides: Best Air Purifiers for Allergies: What to Look For (CADR, HEPA, Carbon)How to Reduce Dust in Your Home (Without Constant Cleaning)Best Indoor Humidity Level to Prevent Mold (With Seasonal Targets)

Summary: Key Takeaways for a Bedroom Allergy Setup

A practical bedroom allergy setup is less about special gadgets and more about a few focused changes: protect and wash the bedding closest to your face, reduce dust-collecting textiles and clutter near the bed, use filtration sized to your room for several air changes per hour, and keep humidity in a comfortable middle range when you can measure and adjust it.

When these basics are in place and maintained with simple routines, the bedroom becomes a space where airborne and surface allergens are more controlled and easier to manage over time.

Frequently asked questions

How quickly will zippered mattress and pillow covers reduce allergy exposure?

Zippered, tightly woven covers immediately block direct transfer of dust-mite allergen and pet dander from the bedding surface, reducing what is inhaled at night. When combined with a regular washing routine for sheets and pillowcases, many people see noticeable symptom improvements within days to a few weeks as existing dust is removed. Ensure covers fully enclose the item and remain closed for full benefit.

What size air purifier do I need to reach 4–5 ACH in a bedroom?

Estimate your room volume (floor area × ceiling height) and use the purifier’s CADR with the formula ACH ≈ CADR (cfm) × 60 ÷ room volume to check performance. For a practical target of about 4–5 ACH, choose a purifier whose CADR at the intended fan setting produces that result; larger rooms need higher CADR values. Running the unit on a higher setting for 1–2 hours before bed helps reduce particles more quickly.

Can I use a humidifier to help with bedroom allergies in winter?

A humidifier can reduce irritation from very dry air and help maintain relative humidity in the 40–50% range, which is less favorable for dust mites. However, over-humidifying or poor humidifier maintenance can encourage mold or bacterial growth, so monitor humidity with a hygrometer and clean the device per manufacturer guidance. Adjust gradually and prioritize cleanliness of the humidifier and water used.

How often should I wash bedding and pillow covers to reduce allergens?

Wash sheets and pillowcases about once a week and wash or remove decorative pillows, throws, and mattress protectors on schedules that fit the fabric care but aim for frequent cleaning. The article’s practical schedule suggests pillow covers every 1–2 weeks and a deeper room clean monthly. Regular washing removes accumulated dust, dander, and pollen that would otherwise be disturbed into the air.

Is it safe to keep pets in the bedroom if I have allergies?

For people with pet allergies, the most effective step is keeping pets out of the bedroom or at least off sleeping surfaces to reduce direct dander near the breathing zone. If excluding pets isn’t possible, increase grooming outside the bedroom, run a properly sized purifier in the room, and clean bedding and floors more frequently to limit allergen buildup. These measures reduce exposure but may not eliminate symptoms for highly sensitive individuals.

Smoke Odor After a Fire: What Works to Cut VOCs

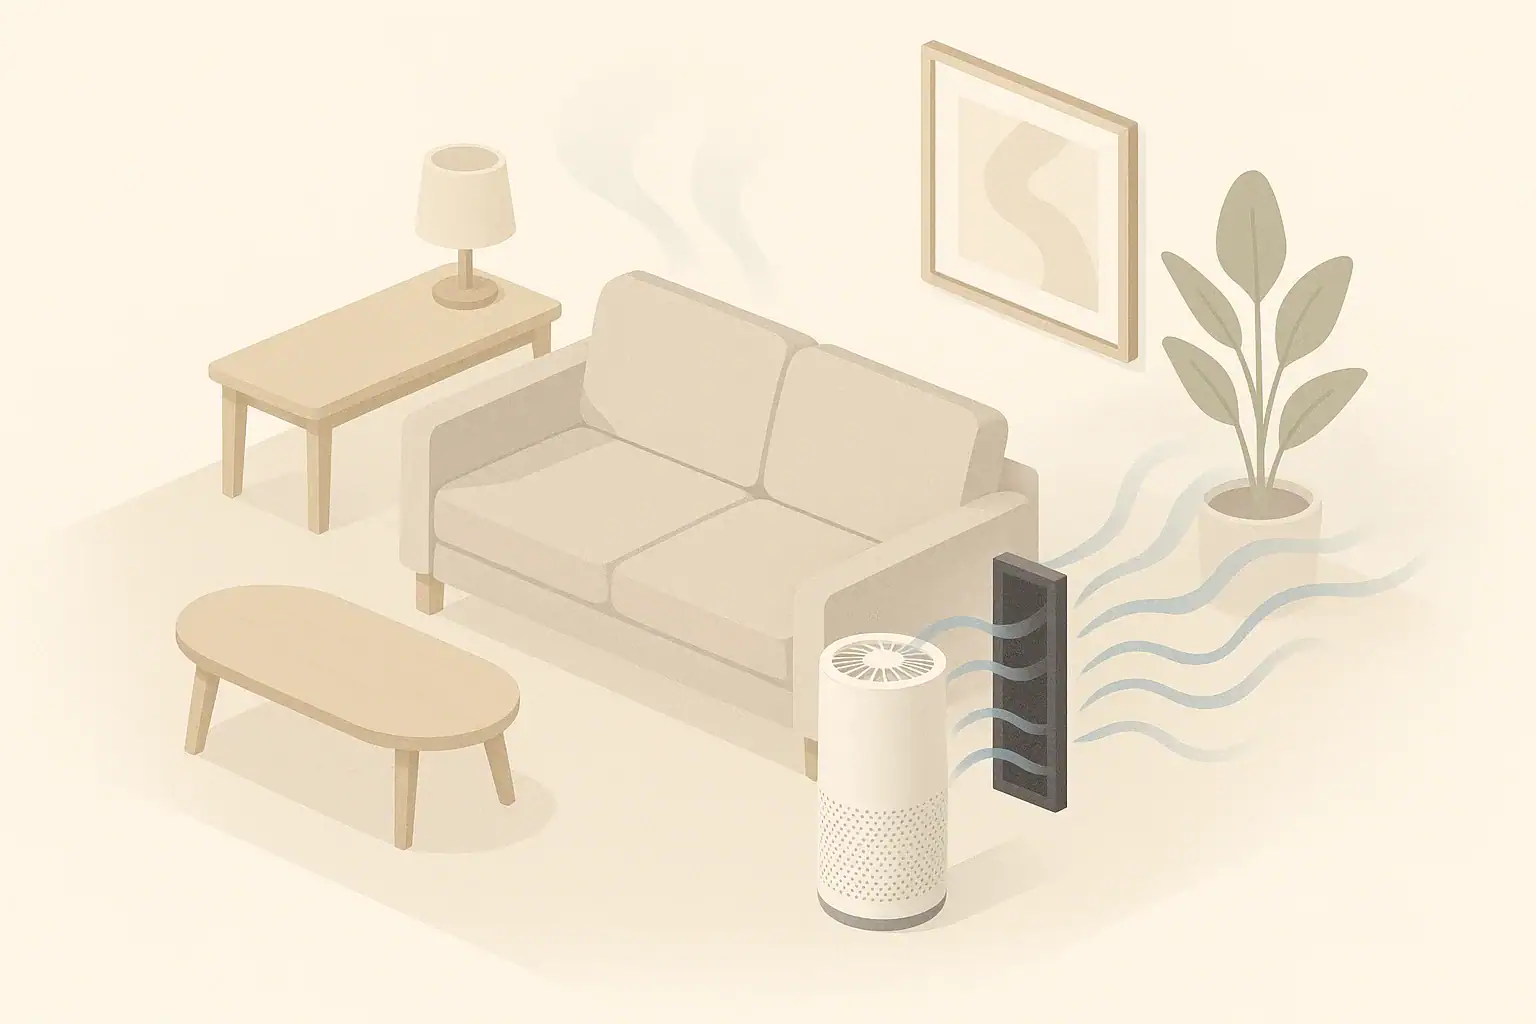
Living room air purifier reducing smoke odors with carbon filter

To reduce smoke odor after a fire and lower VOCs, you need thorough source cleaning, strong ventilation, and filtration with substantial activated carbon while avoiding new chemical sources.

Smoke from even a small fire can leave behind lingering smells and volatile organic compounds (VOCs) that cling to surfaces, soft furnishings, and dust. Managing this is less about masking odor and more about physically removing and diluting pollutants, then filtering what remains in the air over time.

Quick answer
  • Aim for several full air changes per hour (ACH 4–8 as a general post-fire cleanup target) using ventilation plus air purifiers if possible.
  • Use HEPA filtration for fine smoke particles and substantial activated carbon for VOCs and odors; larger carbon weight generally means more odor capacity.
  • Ventilate with outdoor air when conditions allow: windows open on two sides for cross-breeze, ideally 15–60 minutes at a time.
  • Deep-clean or discard porous items that hold smoke (carpets, curtains, pillows) if washing is not effective.
  • Keep indoor relative humidity around 40–50% to help comfort and avoid damp, musty conditions during restoration.
  • Avoid ozone generators and heavy fragrance cover-ups; focus on removal and dilution instead of masking.

Understanding Smoke Odor and VOCs After a Fire

When something burns inside a home, the smoke contains a mix of particles and gases. Even after visible soot is cleaned, these byproducts can remain in the air and on surfaces, causing persistent odor and potential irritation for some people.

Particles vs VOCs are useful concepts for planning cleanup:

  • Fine and ultrafine particles (including much of PM2.5) are solid or liquid droplets that can stay suspended in the air for hours and settle into dust layers.
  • VOCs are gases released from burned materials, cleaning products, paints, and even some new construction products used during repairs. They are invisible and not removed by standard particle filters alone.

Smoke odor is often a combination of both: tiny soot particles attached to surfaces and in the air, plus VOCs off-gassing from charred materials and absorbed into fabrics and building materials.

After a fire, you are dealing with two main goals:

  • Source control: remove or seal burned and heavily smoke-impacted materials so they stop emitting pollutants.
  • Air and surface cleanup: physically remove particles and VOCs from the air and surfaces, and keep levels lower over time.
  • Key Concepts: Air Changes, Filtration, and VOC Reduction

    To reduce lingering smoke odor and VOCs, it helps to think in terms of airflow and capture, not just “good” or “bad” air. Three concepts are especially useful: air changes per hour (ACH), clean air delivery rate (CADR), and filter type.

    Air changes per hour (ACH)

    ACH is how many times per hour the volume of air in a room is replaced or cleaned. Higher ACH generally means faster reduction of airborne particles and some VOCs (through dilution and filtration).

    • Typical occupied rooms may have around 0.3–0.7 ACH from natural leakage when windows are closed.
    • Mechanical ventilation systems (like central fans or HRVs/ERVs) can raise this to around 0.5–2 ACH, depending on design.
    • Post-fire, many restoration professionals aim for substantially higher effective air changes (for example, a combined effect of ventilation plus purifiers providing 4–8 ACH or more) to clear smoke more quickly. This is a practical target range, not a strict rule.

    CADR and air purifiers

    Clean air delivery rate (CADR) is a measure often used to estimate how quickly a purifier can reduce particles in a room. The basic idea is:

    • Bigger rooms or higher ceilings require more CADR for the same ACH.
    • Multiple purifiers can be used to increase total CADR in large or open-plan spaces.

    For smoke cleanup, it is common to target relatively high ACH with purifiers, especially in the first days and weeks after the fire, to keep airborne particles low while deeper cleaning and material replacement are underway.

    Filter types: HEPA vs activated carbon

    Filters work differently for particles and gases:

    • HEPA or high-efficiency particle filters are designed to capture fine particles like soot, ash, and dust. They do not substantially remove VOCs.
    • Activated carbon (or other sorbent media) is used to adsorb some VOCs and odors. The amount of carbon and contact time matter more than marketing terms alone.

    For post-fire smoke odor, you usually want both: high-efficiency particle filtration plus a substantial activated-carbon stage. Even then, carbon has limited capacity and will eventually saturate, especially when smoke levels are high.

    Table 1. Filters for smoke particles vs VOC and odor control. Example values for illustration.
    Particle and gas filter roles after a fire
    Filter type Primary role Helps with Limitations
    HEPA or similar high-efficiency particle filter Capture fine smoke particles Visible haze, soot, PM2.5 reduction Does not directly remove VOCs or odor molecules
    Medium-efficiency prefilter Catch larger dust and hair Extends HEPA life and airflow Minimal effect on deep smoke odor
    Activated carbon filter Adsorb VOCs and odors Smoke smells, some chemical vapors Capacity limited; can saturate quickly in heavy smoke
    Other sorbent media (e.g., treated carbon blends) Target certain VOC classes Solvent odors, some acidic or basic gases Performance depends on specific pollutant mix
    Electrostatic/ionization stages Charge and collect particles Supplement particle control May generate small amounts of ozone if not properly controlled
    Carbon-impregnated disposable prefilter Light odor reduction Minor everyday smells Usually too little carbon for heavy smoke

    Common Mistakes in Post-Fire Smoke and Odor Cleanup

    Certain shortcuts can prolong smoke odor and VOC issues. Avoiding these can save time and effort.

    • Relying only on fragrance sprays or candles. These may temporarily cover smell but add more VOCs and particles without removing the original smoke residue.
    • Skipping source removal. Leaving charred materials, smoke-soaked carpets, or unsealed framing in place can keep emitting odor and VOCs for months.
    • Under-sizing air purifiers. A single small unit in a large, open-plan area may provide too few effective air changes to matter for smoke cleanup.
    • Not changing filters often enough. After a fire, filters can load much faster than during normal use, reducing both odor control and airflow.
    • Neglecting hidden spaces. Smoke can travel into closets, HVAC ducts, behind trim, and inside cabinets; only treating visible areas may leave persistent odor pockets.
    • Over-wetting materials without proper drying. Aggressive wet cleaning without good drying and dehumidification can introduce musty odors on top of smoke odor.

    Step-by-Step: Practical Actions to Reduce Smoke Odor and VOCs

    Every situation is different, and significant fires may require professional fire restoration and building inspection. The steps below outline common actions used to reduce residual smoke odor and VOCs at home.

    1. Ensure safety and structural assessment

    • Confirm that the property is cleared for re-entry by relevant authorities or inspectors.
    • Have electrical, gas, and structural elements checked if they were exposed to heat or flames.

    2. Remove heavily damaged materials

    • Discard items that are charred, melted, or deeply smoke-saturated and not practically cleanable (for example, some porous furniture, mattresses, and foam items).
    • Work with restoration professionals for building materials that might need removal (drywall, insulation, flooring) in more serious incidents.

    3. Ventilate to dilute airborne VOCs and odors

    • When outdoor air quality is acceptable, open windows on opposite sides of the home to create cross-ventilation.
    • Use exhaust fans in kitchens and bathrooms to pull smoky air out, but avoid sending smoke into shared hallways or neighboring units in multifamily buildings.
    • Ventilate in intervals (for example, 15–60 minutes at a time) while monitoring indoor comfort and outdoor conditions (temperature, humidity, pollen, outdoor smoke).

    4. Deep clean surfaces and dust

    • Dry vacuuming with a HEPA vacuum: Gently vacuum soot and dust from floors, walls, and furniture before wet cleaning, using attachments that do not smear residue.
    • Wet cleaning hard surfaces: Follow manufacturer and restoration guidance for walls, ceilings, cabinets, and trim. Use mild cleaners where appropriate and avoid mixing chemicals.
    • Fabrics and textiles: Launder washable items (curtains, bedding, clothing) with multiple rinse cycles if needed. Some items may need professional cleaning.
    • HVAC cleaning: Consider professional duct and coil cleaning if smoke traveled through the central system, especially if you smell smoke when the system runs.

    5. Use air purifiers with HEPA and carbon

    • Choose purifiers sized so that each room or zone gets several effective air changes per hour. This often means higher CADR than you might use for everyday dust control.
    • Place units where airflow is not blocked by walls or furniture, ideally a bit away from corners and with a clear intake and exhaust path.
    • Run purifiers continuously for days to weeks after cleaning, then reassess odor levels and particle readings if you have a basic PM2.5 monitor.
    • Replace or augment carbon filters earlier than the usual schedule, as heavy smoke can saturate them more quickly.

    6. Manage humidity and drying

    • Keep indoor relative humidity roughly in the 40–50% range when feasible to reduce musty odors and help materials dry without excessive dryness.
    • Use dehumidifiers in damp areas if water was used extensively during firefighting or cleaning, and ensure good airflow around wet surfaces.

    7. Seal and repaint where appropriate

    • After cleaning and thorough drying, some walls and ceilings may benefit from smoke-sealing primers or coatings, applied according to manufacturer instructions.
    • Sealing is not a substitute for cleaning or removing damaged materials, but it can reduce residual odor from slightly affected surfaces.

    Real-World Scenarios: Different Types of Smoke Incidents

    Not all smoke events are alike. The practical steps you take can vary by scale and source.

    Small kitchen fire with localized smoke

    For example, a pan fire contained quickly may leave heavy smoke in the kitchen and adjacent areas but little structural damage.

    • Ventilate the kitchen and nearby rooms as soon as it is safe, using range hood and windows to exhaust smoke outdoors.
    • Clean the stovetop, hood, cabinets, and ceiling surfaces to remove grease-based soot.
    • Launder curtains and nearby textiles that absorbed odor.
    • Run a purifier with HEPA and carbon for at least several days in the affected rooms to reduce residual odor.

    Room-level fire with soot throughout a floor

    A bedroom or living room fire that is extinguished but produces widespread soot and odor often requires more extensive work.

    • Work with restoration professionals on decisions about drywall, flooring, and built-in cabinetry.
    • Remove or treat affected insulation, which can hold odor deeply.
    • Use multiple purifiers across the affected floor to achieve a higher effective ACH, especially during demolition and rebuilding when dust and odors increase.
    • Plan for repeated cleaning passes: vacuum, wipe, then re-vacuum as dust resettles.

    Wildfire smoke infiltration without direct fire damage

    Even if flames never reach your home, wildfire smoke can enter through windows, doors, and ventilation systems.

    • Once outdoor air improves, air the home out with cross-ventilation to purge trapped smoke.
    • Replace HVAC filters with higher-efficiency options the system can safely handle, following equipment guidelines.
    • Use room purifiers in bedrooms and common areas to clear residual smoke particles and odors.
    • Clean surfaces and launder fabrics; wildfire smoke can cling to soft materials in a similar way to indoor fire smoke.

    Safety, Devices, and Standards: Ozone, Ionizers, and UV-C

    Some air cleaning technologies are marketed for smoke and odor removal but require cautious use, particularly in occupied homes.

    • Ozone generators: Ozone is a reactive gas that can change odors but also reacts with materials and other VOCs. Intentional ozone generation in occupied homes is generally discouraged by many health-focused organizations. If used in professional restoration, spaces are typically unoccupied and aired out thoroughly afterward.
    • Ionizers and electrostatic devices: These may improve particle removal but can produce small amounts of ozone as a byproduct. If using such devices, look for designs that emphasize low or negligible ozone output and follow manufacturer guidance.
    • UV-C lamps: UV-C is mainly used for microbial control on coils or in ducts, not for removing smoke odor or VOCs. It does not replace filtration or cleaning.
    • Building and fire codes: Structural repairs, electrical work, and gas appliance replacement or relocation should follow local codes and be performed by qualified professionals.

    Maintenance and Long-Term Upkeep After Smoke Damage

    ongoing maintenance helps prevent smells from returning and keeps indoor air fresher even after the most noticeable odor is gone.

    • Filter replacement: Check and replace HEPA and carbon filters more frequently during the first year after a significant fire, as residual dust and VOCs can load filters faster than normal.
    • Regular vacuuming: Use a vacuum with good filtration and vacuum floors, rugs, and upholstery regularly to remove settled particles that might still carry slight odor.
    • HVAC system checks: Schedule periodic inspections of your heating and cooling system, especially if it operated during or shortly after the fire.
    • Monitor comfort and basic air metrics: Simple PM2.5 and TVOC monitors (used cautiously, without overinterpreting the numbers) can help you see general trends in particle and VOC levels over time.

    FAQs About Smoke Odor and VOC Reduction After a Fire

    Some practical questions come up often when dealing with lingering smoke.

    How long does smoke odor usually last?

    Duration can range from days to months, depending on how deeply smoke penetrated materials, how quickly cleaning and source removal were done, and how much ventilation and filtration you use. Heavily affected, unremediated materials can continue to emit odor for a long time.

    Will opening windows always help?

    Ventilation usually helps dilute indoor VOCs and odors, but it depends on outdoor conditions. If outdoor air is smoky (for example, during a wildfire episode) or highly polluted, it may be better to keep windows closed and rely on filtration until outdoor air improves.

    Do plants remove smoke VOCs?

    Houseplants can be pleasant but have relatively small effects on indoor VOC levels in typical homes compared with ventilation and activated carbon filtration. They should not be relied on as a main tool for smoke cleanup.

    Can paint alone block smoke odor?

    Standard paint is not designed to seal heavy smoke contamination. Specialized primers and sealers may help reduce residual odor on lightly affected surfaces after thorough cleaning, but they do not substitute for removing or remediating heavily damaged materials.

    Is it necessary to replace all carpets and upholstery?

    Not always. Some items can be successfully cleaned, especially if smoke exposure was limited. However, deeply infiltrated carpets, padding, and soft furniture may hold odor even after cleaning and may need replacement in more severe cases.

    Table 2. Example filter replacement planning after smoke exposure. Example values for illustration.
    Filter replacement planner for post-fire conditions
    Filter type Typical interval range (normal use) What can shorten the interval Reminder
    HVAC disposable furnace/AC filter About 1–3 months Running system during smoke event, dusty renovation, pets After a fire, check monthly until dust levels stabilize
    Room purifier prefilter (washable or replaceable) Clean or replace every 1–3 months Heavy soot, visible dust accumulation Inspect visually; keep it clear to maintain airflow
    Room purifier HEPA or main particle filter About 6–12 months High smoke load, continuous high-speed operation Post-fire, expect earlier replacement than normal
    Activated carbon or odor filter About 3–6 months Strong smoke odors, high VOC levels, 24/7 operation Replace as soon as odor control noticeably weakens
    HVAC-mounted carbon or media canister About 6–12 months Persistent odor issues, frequent system use Coordinate with HVAC service visits for inspection
    Portable dehumidifier air filter (if present) Clean every 1–2 months Damp cleanup areas, dusty construction Helps keep coils clean and odor-free

    Related guides: How Much Activated Carbon Do You Need to Remove OdorsBest Air Purifiers for Wildfire Smoke: What Specs Matter MostCADR calculator: Room Size + Ceiling Height + ACH Target

    Key Takeaways for Managing Smoke Odor and VOCs After a Fire

    Reducing smoke odor after a fire is a multi-step process: remove or remediate damaged materials, thoroughly clean surfaces and dust, use ventilation to dilute VOCs when outdoor air allows, and run appropriately sized air purifiers with HEPA plus substantial activated carbon. Pay attention to humidity, avoid relying on fragrance cover-ups or high-ozone devices, and expect to change filters more frequently than in normal conditions. With methodical cleanup and ongoing maintenance, most homes can significantly reduce lingering smoke odor and VOC levels over time.

    Frequently asked questions

    How long will smoke VOC levels and odor typically persist after a small indoor fire?

    It depends on how deeply smoke penetrated materials and how quickly you clean, ventilate, and filter the space; lightly impacted rooms can see big improvements within days, while deeply affected materials may emit odors for weeks to months. Prompt source removal, high ventilation rates, and running HEPA plus substantial activated carbon filtration accelerate reduction of VOCs and odors.

    How much activated carbon is needed in an air purifier to reduce smoke VOCs effectively?

    There is no single universal amount, but effective post-fire VOC control usually requires substantially more carbon than small consumer odor cartridges — larger carbon mass and thicker beds increase contact time and capacity. For heavy smoke, expect to replace or supplement carbon more often because adsorption capacity is finite and saturates faster under high VOC loads.

    Are ozone generators or ionizers recommended to remove smoke odor and VOCs in occupied homes?

    No. Ozone generators are generally discouraged for occupied spaces because ozone can harm respiratory health and react with materials to form additional pollutants, while some ionizers produce small amounts of ozone as a byproduct. Safer options are ventilation, HEPA filtration for particles, and activated carbon for VOCs.

    Will repainting walls alone stop smoke odor?

    Standard paint alone usually will not stop odor if smoke has penetrated drywall, insulation, or framing. After thorough cleaning and drying, smoke-sealing primers or specialty coatings can help reduce residual odor on lightly affected surfaces, but heavily contaminated materials often require removal or replacement.

    How often should I change carbon and HEPA filters after a fire?

    Expect to inspect and replace filters much sooner than normal; activated carbon often needs replacement within weeks to a few months depending on smoke severity and runtime, and HEPA/pre-filter stages can load quickly as well. Check filters visually and monitor odor and particle levels, replacing components when performance or airflow declines.

Cooking Odors: Carbon Filters, Range Hoods, What Works

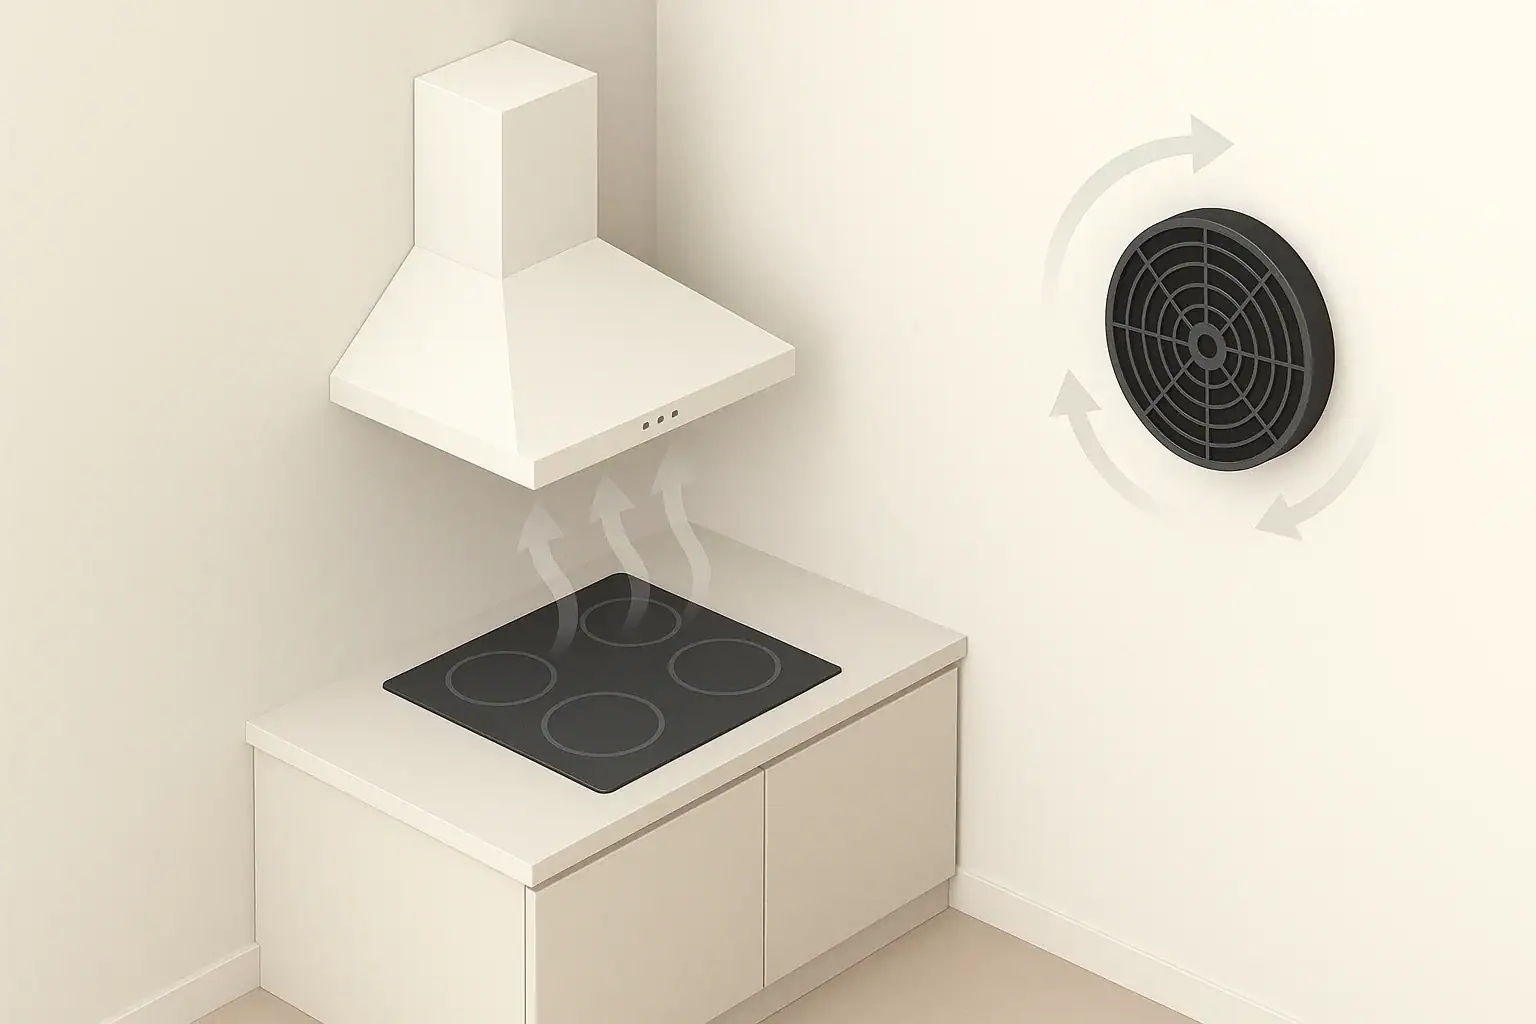
Kitchen range hood and carbon filter reducing cooking odors

Cooking odors are best controlled by combining a properly vented range hood, activated carbon filtration, and simple ventilation habits tailored to your kitchen.

Smell from frying, searing, and strong spices can linger in fabrics and surfaces even when the visible smoke is gone. Understanding how range hoods, carbon filters, and airflow work together helps you choose realistic strategies that fit your home layout, cooking style, and budget without overcomplicating your setup.

Quick answer
  • Aim for a range hood rated around 150–400 cubic feet per minute (CFM) for typical home stoves, or roughly 1–2 CFM per square foot of cooking surface as a general planning idea.
  • Use a ducted (vented) hood whenever your building layout allows; it removes moisture, particles, and most odors directly outdoors.
  • For recirculating hoods or air purifiers, choose a unit with a real activated carbon stage and plan to replace carbon filters about every 3–6 months with regular cooking.
  • Turn the hood on a few minutes before cooking and let it run 10–20 minutes afterward to clear lingering vapors.
  • Support odor control with simple steps: lids on pans, lower-heat cooking when possible, opening a window slightly, and laundering textiles that trap smells.

Why Cooking Odors Build Up and Why It Matters

Cooking odors come from a mix of particles (aerosols, smoke) and gases known as volatile organic compounds (VOCs). When oil hits high heat, it produces tiny droplets and combustion byproducts that float through the kitchen and settle on cabinets, fabrics, and walls. Spices, garlic, and onions release aromatic VOCs that cling to soft surfaces.

In a tight home with limited ventilation, these compounds can accumulate and linger for days. While occasional odor is normal, persistent smell can make a home feel stuffy, attract complaints in multi-unit buildings, and signal that particles and vapors are not being effectively diluted or removed. Managing cooking odors is essentially about managing indoor air quality: moving polluted air out, filtering what remains, and preventing buildup on surfaces.

Key Concepts: Range Hoods, Carbon Filters, and Airflow

Cooking odor control relies on three main tools: capture at the source, filtration, and dilution. Each has strengths and limits.

Range hoods: capture and exhaust

A range hood is designed to capture steam, grease, and smoke right above the cooktop and either vent it outdoors (ducted) or filter and return it to the room (ductless or recirculating).

  • Ducted hoods: Pull air from above the stove and push it outdoors through a duct. They remove moisture, particles, and much of the odor load, and are generally the most effective option.
  • Ductless (recirculating) hoods: Draw air through a grease filter and often a carbon filter, then return it to the kitchen. They help with some odors and grease but do not remove moisture and rely heavily on filter condition.

Hood effectiveness depends on capture area, height above the cooktop, CFM rating, and how consistently it is used. As a broad planning example, many homes do well with something in the 150–400 CFM range, but large gas ranges or frequent high-heat cooking may benefit from higher airflow.

Carbon filters: trapping odor molecules

Activated carbon (or charcoal) is a porous material that adsorbs many odor-causing VOCs onto its surface. You will find it in some range hoods, standalone air purifiers, and combination filters.

  • What carbon does well: Reduces many cooking smells from onions, garlic, frying, and some smoke components.
  • What carbon does not do: It does not remove particles as effectively as a particle filter (like HEPA), and it gradually becomes saturated, at which point it stops capturing odors.
  • Capacity matters: Thicker or heavier carbon beds usually have more capacity than very thin pre-filter strips, but all carbon will eventually need replacement.

Air purifiers and whole-room odor cleanup

Range hoods focus on the cooking zone. Air purifiers with activated carbon can help clear odors that have spread to nearby rooms. They pull room air through carbon and particle filters and recirculate cleaner air. Airflow ratings such as clean air delivery rate (CADR) are useful for sizing purifiers to room volume, but for odors specifically, you should also look at whether the purifier includes a substantial carbon stage and follow the manufacturer’s basic filter life guidance.

Ventilation and dilution

Even with good capture and filtration, some odor will escape. General ventilation helps dilute remaining vapors:

  • Opening windows or using trickle vents when weather and outdoor air quality allow.
  • Running bathroom or whole-house exhaust fans to promote air exchange.
  • Avoiding blocking air supply paths so the range hood can pull comfortably without struggling for make-up air.

Combining these approaches usually works better than relying on a single device.

Table 1. Comparing common cooking odor control options. Example values for illustration.
Option Main strength Main limitation Best use case
Ducted range hood Removes air, moisture, particles, and many odors outdoors Requires duct path; airflow can be noisy at high settings Homes where routing a vent to outdoors is feasible
Ductless (recirculating) hood with carbon Improves odors and captures grease without exterior duct Does not remove moisture; depends on timely filter changes Apartments and condos without access to exterior venting
Standalone air purifier with carbon Helps clear odors that have spread beyond the kitchen Does not capture steam at the stove; limited by room airflow Open-plan spaces or nearby living areas after cooking
Opening windows Simple way to dilute and vent odors Weather and outdoor air quality dependent Mild days or after high-odor cooking sessions
Grease filters (metal or mesh) Protects fans and ducts by trapping oil droplets Provides little odor reduction alone Any hood; needs regular cleaning to stay effective
Cooking technique changes Reduces odor at the source May not match every recipe or preference Frequent frying, searing, or high-spice dishes

Common Mistakes That Let Cooking Odors Linger

Many odor complaints trace back to a few predictable issues. Adjusting these often has a big impact without new equipment.

  • Using the range hood too late or not long enough: Turning it on only when smoke is visible means early vapors and moisture already escaped. Starting a few minutes before cooking and running it afterward improves capture.
  • Hood installed too high or too shallow: If the hood is far above the cooktop or does not cover front burners, rising plumes can bypass it. This is especially noticeable with powerful front burners.
  • Clogged grease filters: Greasy mesh or baffles restrict airflow and reduce capture. Metal filters need periodic cleaning to maintain performance.
  • Old or minimal carbon filters: Thin, spent carbon pads in recirculating hoods and purifiers often do little for odor. If smells persist despite airflow, carbon may be saturated.
  • No general ventilation: In tightly sealed homes, even a good hood benefits from some make-up air via a slightly open window or nearby open door.
  • Textiles soaking up smells: Curtains, upholstered chairs, and range-side towels can hold odor. If the air seems clear but the smell remains, fabrics may be the main reservoir.

Practical Strategies: Layering Solutions in Real Homes

Most kitchens benefit from a layered approach instead of relying on one device. The following steps can be adapted to apartments, small homes, and open-plan layouts.

1. Make the most of your existing range hood

  • Turn the hood on at a low or medium setting 1–3 minutes before you start heating pans.
  • Use stronger fan settings for high-heat frying, searing, or heavy spice cooking.
  • Let the hood continue running 10–20 minutes after cooking so it can pull out lingering vapors.
  • Keep pots and pans covered when possible to slow grease aerosol and steam.

2. Decide whether ducted or ductless makes sense

If you are able to choose or upgrade a hood, consider:

  • Ducted: Generally better for moisture and odor removal. Works well in single-family homes where a duct can reach an exterior wall or roof.
  • Ductless: Often the only option in some apartments and condos. If using ductless, pay special attention to maintaining effective carbon filters and supplementing with window ventilation when feasible.

3. Use air purifiers to protect nearby rooms

For open kitchens connected to living or sleeping areas, consider a purifier with both particle and activated carbon filtration in the adjoining space. General suggestions:

  • Place the purifier away from immediate splatter zones but where air can circulate freely (not jammed in a corner).
  • Run it during and after cooking at a moderate or higher fan speed, then step it down once odors fade.
  • Size it using room volume and airflow guidance, keeping in mind that odor reduction depends on both airflow and carbon capacity.

4. Simple ventilation and habit tweaks

  • Crack a nearby window slightly during strong-smelling cooking if outdoor conditions are acceptable.
  • Run an adjacent bathroom or laundry exhaust fan to assist overall air movement.
  • Keep interior doors partially open so air is not trapped in dead-end rooms.
  • Launder dish towels and nearby textiles regularly if they are exposed to grease and steam.

5. Adjust cooking methods for high-odor dishes

When cooking especially aromatic foods, small changes at the stove can help:

  • Choose covered simmering over open, high-heat frying where recipe allows.
  • Use back burners under the hood’s strongest capture zone.
  • Batch-cook high-odor foods at times when you can ventilate more easily.

Real-World Scenarios and How to Approach Them

Small apartment with recirculating hood

If you have a ductless hood and windows that do not open widely:

  • Ensure the hood actually has a carbon filter and that it is replaced on schedule.
  • Run the hood early and keep it on longer after cooking.
  • Add a carbon-equipped air purifier in the living area to handle odors that escape the kitchen.
  • Wash kitchen textiles often and consider minimizing heavy oil frying indoors.

Open-plan kitchen and living room

In large spaces where smells spread quickly:

  • Use a reasonably strong hood and cook on back burners when possible.
  • Position a purifier in the main airflow path between the kitchen and seating area.
  • Encourage gentle cross-ventilation with windows on opposite sides of the space when conditions allow.

Older home with weak or no hood

Where upgrading the hood is not practical right away:

  • Prioritize window use during cooking and for a period afterward.
  • Consider a portable air purifier with activated carbon in the kitchen or nearby room.
  • Choose lower-odor cooking methods more often and keep lids on pots.

Safety and Standards Considerations

Any device that moves or treats air should be used within its safety guidelines. For cooking odor control, a few specific points are useful.

  • Avoid intentionally adding ozone: Ozone-generating devices are sometimes marketed for odor removal, but ozone is a lung irritant and can react with indoor chemicals to form new byproducts. Many people prefer ozone-free solutions such as mechanical ventilation and carbon filtration.
  • Be cautious with add-on ionizers and UV: Some hoods or purifiers include ionization or UV-C features. These can have specific benefits and trade-offs, but they should not be necessary for routine cooking odor management. Follow manufacturer instructions and local guidance if you use them.
  • Combustion safety: Powerful ducted hoods in tight homes can create strong negative pressure that interferes with fuel-burning appliances such as older furnaces or water heaters. Where relevant, building professionals may check that makeup air and venting are adequate.
  • Heat and clearance: Maintaining the manufacturer-recommended distance between the cooktop and hood reduces fire risk and maintains effective capture.

Maintenance: Keeping Carbon Filters and Hoods Working

Odor performance declines gradually as filters clog or saturate. Regular maintenance is essential to keep your setup functioning as expected.

Range hood care

  • Grease filters: Metal mesh or baffle filters generally need cleaning roughly once a month with regular cooking, or more often with heavy frying. Let them dry fully before reinstalling.
  • Duct checks (for ducted hoods): Periodically confirm that outdoor vents are not blocked by debris and that flaps can open freely.
  • Fan speeds and noise: If a familiar fan setting suddenly seems louder or weaker, filters or ducts might need inspection.

Carbon filter care

Because carbon works by holding odor molecules on its surface, it eventually fills up.

  • Plan to replace carbon filters roughly every 3–6 months with daily cooking, or according to device guidance and your own odor observations.
  • If you notice that a previously effective hood or purifier no longer reduces smell even with good airflow, worn-out carbon is a likely cause.
  • Avoid trying to “recharge” carbon with household methods; replacement is the reliable option.

Air purifier upkeep

  • Check pre-filters for visible dust buildup and clean or replace them on schedule to keep airflow strong.
  • Replace HEPA or particle filters according to guidance, especially if you also use the purifier for smoke or general dust control.
Table 2. Example filter replacement planner for odor control. Example values for illustration.
Filter type Typical interval range What shortens the interval Reminder
Range hood carbon pad About 2–4 months with regular cooking Daily frying, strong spice use, small filter size Replace sooner if odors linger despite good airflow
Air purifier carbon filter About 3–6 months in active use Frequent high-odor cooking, smoke, strong VOC sources Follow device guidance; note odor changes over time
Combination HEPA + carbon cartridge About 6–12 months Heavy particle load (dust, smoke) plus regular cooking odors Performance may drop gradually before visible dirt appears
Metal grease filter (hood) Clean about every 1–2 months Frequent frying, visible oil film Dishwasher-safe units still need full drying before use
Pre-filter on air purifier Inspect monthly; clean as needed Dusty homes, pets, open windows near traffic Keeping it clear supports steady airflow and odor control
Recirculating hood intake grille Wipe down about monthly Sticky residue, splatter near cooktop Clean surfaces help air reach the carbon filter

Related guides: Best Air Purifiers for Allergies: What to Look For (CADR, HEPA, Carbon)How Much Activated Carbon Do You Need to Remove Odors?When to Replace Carbon Filters (And How to Tell They’re Spent)

Summary: Building a Simple, Effective Odor Plan

Managing cooking odors comes down to catching as much as possible at the stove, giving remaining vapors somewhere to go, and keeping filters fresh. A ducted range hood with good habits usually provides the strongest foundation, but recirculating hoods, carbon-equipped air purifiers, and basic ventilation can still work together effectively in apartments and small homes.

By understanding what range hoods, carbon filters, and airflow each contribute, you can set realistic expectations, notice when filters need attention, and choose small changes—like using back burners, running the fan longer, or opening a window—that make your kitchen and nearby rooms smell cleaner without major renovation.

Frequently asked questions

How often should I replace carbon filters in range hoods and air purifiers?

Replace carbon filters roughly every 3–6 months with regular daily cooking, or follow the device guidance and replace sooner if odors persist despite good airflow. Thinner carbon pads in recirculating hoods may need replacement more frequently, while larger carbon cartridges in standalone purifiers can last toward the upper end of that range.

Are ductless range hoods with carbon as effective as ducted hoods for removing cooking odors?

Ducted hoods generally remove more odor, moisture, and particles because they exhaust air outdoors, while ductless hoods filter and recirculate air and depend heavily on carbon filter capacity. Ductless units can work well in apartments but require timely carbon replacement and often need supplemental ventilation or a room purifier to manage odors that escape.

What CFM should my range hood have to control cooking odors effectively?

Many homes do well with a hood rated around 150–400 CFM for typical stoves, and a rough planning guideline is about 1–2 CFM per square foot of cooking surface. Higher CFM is beneficial for larger gas ranges or frequent high-heat cooking, but consider capture geometry and hood placement as well.

Can an air purifier remove cooking steam and grease?

Air purifiers can remove particles and many odor-causing VOCs when they include HEPA and activated carbon stages, but they do not capture steam or grease at the cooktop as a range hood does. Purifiers are best used to clean room air after odors have spread, not to replace source capture above the stove.

What simple habits reduce cooking odors without buying new equipment?

Turn the range hood on a few minutes before cooking and leave it running 10–20 minutes after, use lids on pans, prefer back burners under the hood, and crack a window or run nearby exhaust fans when conditions allow. Regularly cleaning grease filters and laundering textiles near the stove also prevents odors from building up on surfaces.

New Furniture Smell: Ventilation vs Carbon Filters Guide

Living room with new furniture purifier and window ventilation

Ventilation usually removes new furniture smell faster in the first few days, while carbon filters become more helpful for ongoing odor control and when you cannot keep windows open.

New furniture odor mainly comes from volatile organic compounds (VOCs) off-gassing from foam, glues, paints, and finishes. Getting rid of that smell efficiently is about moving VOCs out of the room (ventilation) and trapping what remains in the air (activated carbon). How quickly you notice a difference depends on room size, weather, and how aggressively you ventilate or run filtration.

Quick answer
  • First 24–72 hours: strong ventilation (windows open, fans) often gives the fastest smell reduction.
  • Typical goal: aim for several full air changes per hour when airing out a newly delivered item.
  • Carbon filters: helpful within a few hours, especially in closed rooms, but they do not remove VOCs from surfaces.
  • Best strategy: combine ventilation plus a carbon-filter air purifier for 1–2 weeks, then continue filtration as needed.
  • Timeframe: noticeable odor often drops within days, but faint smells can linger for weeks depending on materials.

What “new furniture smell” really is and why it lingers

New furniture smell is mostly VOCs slowly evaporating from materials such as foam cushions, particleboard, plywood, veneers, paints, stains, and adhesives. These compounds move from solid or liquid form into the air, especially when the furniture is new and the materials are not fully cured.

Indoors, VOCs can build up because most homes exchange air with the outside relatively slowly. That is why a new sofa or mattress can make one room smell strong even if the rest of the home seems fine. The smell gradually fades as VOCs off-gas and leave with the exhaust air, or are adsorbed to porous materials and filtration media.

Smell strength is affected by:

  • Material type: foam and particleboard often off-gas more than solid wood.
  • Surface area: larger pieces and exposed edges release more VOCs.
  • Temperature: warmer rooms generally increase off-gassing rates.
  • Airflow: still air lets vapors build up; moving air dilutes and removes them.

How ventilation and carbon filters work on new furniture smell

Ventilation and carbon filtration address new furniture smell in different ways, and they work best in combination rather than as either–or choices.

Ventilation: moving VOCs out of the home

Ventilation means replacing indoor air with outdoor air. This can be as simple as opening windows and doors or as structured as using mechanical systems with outdoor air intakes. For new furniture odor, the goal is to increase air changes per hour (ACH) temporarily so VOCs leave the building faster.

When you open opposing windows and use a fan to push air out or across the room, you are creating a path for VOCs to go outdoors. Because off-gassing is usually strongest at first, intensive ventilation in the first 24–72 hours often produces the biggest and quickest change in perceived odor.

Activated carbon filters: capturing VOCs in the air

Activated carbon is a porous material with a large internal surface area. As air passes through a carbon filter, many VOC molecules stick to that surface (adsorption). This does not stop VOCs from leaving the furniture, but it can lower the concentration that remains in the room air, especially when windows must be closed.

A carbon filter in an air purifier can start reducing odor within a few hours, but the apparent speed depends on:

  • How much carbon is in the filter (more media usually means more capacity).
  • Airflow through the purifier (more air processed per hour means faster reductions).
  • Room size and how well air mixes (dead corners clear more slowly).

Once the carbon surface fills up with VOCs, it becomes less effective and needs replacement.

Figure 1. Ventilation vs. carbon filters for new furniture smell. Example values for illustration.
Comparison of ventilation and activated carbon for new furniture odor
Aspect Ventilation (open windows, fans) Activated carbon filter in purifier
Main action Removes VOCs from the building by exhausting air outside Adsorbs VOCs from air passing through the filter
Speed in first 1–3 days Often faster if strong cross-breeze and high airflow Moderate; depends on filter size and airflow
Works with windows closed No, relies on outdoor air access Yes, useful in winter, summer, or noisy areas
Effect on surfaces Helps off-gassed VOCs leave, but does not change materials Does not affect off-gassing; only treats air that passes through
Ongoing costs Minimal; mainly comfort/energy impacts from open windows Filter replacement over time
Limitations Weather, outdoor pollution, noise, security concerns Capacity is finite; overloaded filters become less effective
Best use Intensive airing out during first days after delivery Supplement and maintain lower VOC levels afterward

Example values for illustration.

How fast to expect results: timeframes and key variables

Odor reduction is not instant, even with strong ventilation or large carbon filters. Several variables shape how fast you notice a change:

  • Room size: smaller rooms are easier to clear; large open-plan areas take longer.
  • Air change rate: higher ACH means VOCs are diluted and removed more quickly.
  • Furniture type: a solid wood table behaves very differently from a foam-heavy couch.
  • Temperature and humidity: warmer, drier air can increase some off-gassing rates.
  • How much time you spend in the room: noses often adapt; leaving and re-entering can make smells more noticeable.

As general guidance:

  • With strong cross-ventilation (windows fully open, fan assisting), you may notice a clear drop in odor within hours, and a large improvement over 1–3 days.
  • With closed windows but a suitably sized purifier with carbon, change may be more gradual: a modest improvement in a few hours, more noticeable over several days of continuous operation.
  • Residual faint odor from certain materials can linger for weeks, even after aggressive airing out.

Common mistakes when dealing with new furniture smell

Many people unintentionally slow down odor reduction by focusing on less effective tactics or underusing ventilation and filtration.

Relying only on fragrance or masking sprays

Sprays, candles, and scented products may cover the smell temporarily but add more VOCs to the air. They do not remove the compounds coming from the furniture and can make it harder to judge whether the original odor is actually fading.

Under-ventilating in the first 48–72 hours

The first few days after delivery are usually when off-gassing is strongest. Keeping windows mostly closed, or opening just a small crack without cross-breeze, allows VOCs to build up. A short but intense airing period is generally more effective than leaving one window slightly open for long periods.

Using an undersized purifier or low fan speeds

For carbon filters to help with new furniture smell, they need to move a meaningful amount of air. Running a purifier only on its lowest quiet setting in a large room may not process enough air to make a noticeable difference in odor, especially in the first days.

Placing furniture in a stagnant corner

Putting new furniture in a corner with poor airflow can trap VOCs in that part of the room. This is especially common in bedrooms where beds or large wardrobes block natural air paths. Some rearranging or placing a small fan to move air across the furniture can help.

Practical step-by-step strategy: ventilation plus carbon filters

Combining both tools usually gives faster, more reliable results than relying on either one alone. The steps below are general guidance and can be adapted to your space and climate.

1. Prepare the room before delivery

  • Clear enough space around where the furniture will sit so air can circulate on at least two sides.
  • If possible, identify windows or doors you can open safely for several hours at a time.
  • Have a fan ready to help create a cross-breeze.

2. First 24–72 hours: prioritize ventilation

  • Open windows on opposite sides of the room or home to create a path for air to move.
  • Use a fan to blow air out of the room or across the furniture toward an open window.
  • If the furniture has removable cushions or drawers, you can open or separate them slightly so air can reach more surfaces.
  • Limit other sources of VOCs (strong cleaners, new rugs, additional painting) during this period.

3. At the same time: run a carbon-filter air purifier

  • Place the purifier in the same room as the new furniture, a few feet away, with intake and exhaust not blocked.
  • Use a medium to high fan setting early on to process more air.
  • Run it continuously for the first several days, then reassess.

4. After the first week: adjust to comfort and season

  • If the outdoor conditions become uncomfortable or noisy, you can reduce window-open time and lean more on the purifier.
  • If the smell has mostly faded, you may switch the purifier to a quieter setting while continuing some daily ventilation whenever practical.
  • If odor remains strong after a week, consider whether the room is getting enough airflow or whether the item is unusually large or VOC-heavy.

Example scenarios: when ventilation or carbon feels faster

The balance between ventilation and carbon filters changes depending on the home type, climate, and furniture.

Small apartment with one new couch

In a compact living room, opening two windows and running a fan for several hours on the first day often drops odor quickly. A carbon-filter purifier helps maintain lower VOC levels after windows are closed for the night or when outdoor noise makes open windows impractical.

Bedroom with a new foam mattress

A bedroom may have only one window and limited cross-ventilation. In this case, opening the window as much as safety allows during the day, propping the mattress up for airflow, and running a carbon-filter purifier on higher settings can work together. Some people move the mattress into a better-ventilated room for the first days before sleeping on it.

Large open-plan living area

Large spaces take longer to clear simply because there is more air volume. Strong ventilation (several windows or a sliding door open, fan assistance) can still be faster initially than filtration alone. A properly sized purifier with carbon becomes more important in the evenings or when the weather does not allow open windows for long.

Safety, comfort, and equipment considerations

While managing new furniture smell is mainly about comfort, it is worth considering a few safety and standards-related points when choosing how to ventilate and filter.

Ventilation safety and comfort

  • Open windows only where it is safe to do so, especially in upper-floor apartments or homes with children or pets.
  • Check outdoor air quality and noise; if outdoor pollution or smoke is high, heavy ventilation may not be desirable at that time.
  • Be mindful of temperature and humidity; extended open-window periods can affect indoor comfort and energy use.

Air purifier features to prioritize

  • No intentional ozone generation: for residential odor control, focus on purifiers designed not to produce ozone.
  • Good carbon section: for VOCs, an activated carbon filter or similar adsorbent stage is more relevant than particle-only filtration.
  • Appropriate size: choose a device sized for the room volume, aiming for multiple air changes per hour at a moderate fan speed.

Other technologies (ionizers, UV-C, etc.)

Some devices include ionizers or UV-C lamps. These features typically target particles or microorganisms rather than VOC odors. Their effect on new furniture smell is usually secondary compared with basic ventilation and activated carbon. Consider them cautiously, and prioritize proven mechanical filtration and fresh air exchange.

Maintenance and upkeep: keeping odor control effective

Ventilation needs little maintenance beyond opening and closing windows and operating fans. Carbon filtration requires regular attention to stay effective.

Carbon filter replacement

  • Activated carbon has a finite capacity; once saturated, it no longer removes VOCs efficiently.
  • Some filters discolor or develop persistent odors when loaded, but many give few visual clues.
  • Follow the manufacturer’s general interval as a starting point, but also pay attention to whether odors linger longer than they used to.

Purifier placement and cleaning

  • Keep intake and outlet grills clear of walls, curtains, or furniture to allow good airflow.
  • Dust buildup on pre-filters reduces airflow; gently clean or replace pre-filters on the suggested schedule.
  • Avoid placing the purifier too close to the furniture surface if it restricts circulation around the item.

Long-term odor management habits

  • Try to space out large VOC sources: new flooring, fresh paint, and new furniture all at once can overload the room.
  • Use regular, moderate ventilation as part of daily routine when weather and outdoor air quality allow.
  • Plan for filter replacement costs as part of owning an air purifier, especially if you often manage odors or VOCs.
Figure 2. Example carbon filter replacement planner. Example values for illustration.
Illustrative carbon filter replacement intervals
Filter type Typical interval range (example) What can shorten the interval Reminder
Thin odor pad 1–3 months Frequent strong odors, smoke episodes Check more often if used mainly for smells
Standard carbon filter panel 3–6 months Continuous use for VOCs and cooking odors Replace when odor reduction noticeably weakens
Thicker carbon canister 6–12 months High VOC load from new materials Effective life depends on hours of operation
Combined HEPA + carbon cartridge 6–12 months Heavy particle and odor use together Particle loading can also affect airflow over time
Custom or bulk carbon setups Varies widely Very high VOC episodes or continuous off-gassing Track hours of use and changes in perceived odor

Example values for illustration.


Related guides: How Much Activated Carbon Do You Need to Remove Odors?Ventilation vs Air Purifier: When You Need One, the Other, or BothAir Purifier Maintenance Checklist: Filters, Sensors, and Cleaning

Summary: which works faster for new furniture smell?

In practical terms, strong ventilation usually reduces new furniture smell fastest in the first days, because it removes VOCs from the home entirely. Activated carbon filters in air purifiers work more quietly and continuously, especially useful when windows are closed or weather is unfavorable.

For most homes, the most efficient approach is to use both: air out the room as much as comfort and outdoor conditions allow during the first 24–72 hours, while running a carbon-filter purifier to trim VOC levels between airing sessions. Over time, off-gassing naturally declines, and regular ventilation plus periodic filter maintenance are usually enough to keep any remaining odor at a low, manageable level.

Frequently asked questions

How long does ventilation typically take to noticeably reduce new furniture smell?

With strong cross-ventilation you can often notice a clear drop in odor within hours and a large improvement over 1–3 days. Smaller rooms and higher air change rates speed this up, but faint residual odors can still linger for weeks depending on materials.

Can activated carbon filters remove VOCs emitted directly from furniture surfaces?

Activated carbon filters adsorb VOCs from the air that passes through them, lowering airborne concentrations, but they do not remove VOCs trapped inside materials or from surfaces directly. Combining filtration with ventilation gives the best overall reduction of both airborne and continuously off-gassing sources.

When should I rely mainly on a carbon-filter air purifier instead of opening windows?

Use a carbon-filter purifier primarily when outdoor air is poor, noisy, or unsafe to bring indoors, or when weather and security prevent opening windows. Choose a purifier with an ample carbon stage sized for the room and run it on medium to high settings while ventilation is limited.

How can I tell when a carbon filter is saturated and needs replacing after treating new furniture smell?

Common signs include a return or persistence of odors and a noticeable drop in odor reduction performance. Because many filters give few visual clues, follow manufacturer intervals as a baseline and replace sooner when used heavily for VOCs.

Where should I place an air purifier for fastest reduction of new furniture odors?

Place the purifier in the same room a few feet from the new furniture with intake and exhaust unobstructed, avoiding corners and walls that block airflow. Running the device on a medium-to-high setting early on helps increase air changes and improve mixing around the source.

VOC Sensors vs Real VOCs: How to Interpret “TVOC” Readings

Isometric illustration of room with carbon filter and air monitor

VOC sensors estimate total volatile organic compounds (TVOC) in the air, but they do not measure every individual VOC directly and their readings are only an approximate indicator of overall gas pollution and ventilation needs.

Many home air quality monitors now show a single “TVOC” number, which can be confusing when you learn how complex VOC chemistry really is. Understanding what these sensors can and cannot detect helps you use TVOC readings as a practical guide for ventilation, filtration, and source control rather than as a precise measure of risk.

Quick answer
  • Most consumer TVOC sensors respond mainly to alcohols and similar gases, not all VOCs equally.
  • Use TVOC trends (up, down, stable) more than any single exact number.
  • In a typical home, aim to keep TVOC in your monitor’s lowest or second-lowest “comfort” band, if it has one.
  • Spike after cooking, cleaning, or painting? Ventilate and, if possible, use activated carbon filtration.
  • Persistent high readings despite ventilation may signal a strong source (new materials, odors) to investigate.

What VOCs and TVOC Readings Really Mean

Volatile organic compounds (VOCs) are a wide group of carbon-based chemicals that evaporate easily at room temperature. They come from building materials, paints, cleaning products, scented items, cooking, and even people and pets. Some have strong odors, others are odorless; some are considered more concerning than others.

“TVOC” stands for total volatile organic compounds. On professional instruments, this might be calculated from detailed lab measurements. On most home devices, however, TVOC is a sensor-derived index: the device measures a change in an electronic sensor and then converts that into an estimated concentration or into a color/quality band.

Why this matters for a home:

  • Your monitor’s TVOC value is not a full chemical analysis of your air.
  • It is better viewed as a “gas pollution level” indicator than as an exact number.
  • It is most useful for spotting changes when you cook, clean, or open windows.

How Common Home VOC Sensors Work (and Their Limits)

Most consumer-grade VOC sensors fall into two families: metal-oxide semiconductor (MOS) and photoionization detector (PID). In home monitors, MOS sensors are more common because they are compact and relatively inexpensive.

Metal-oxide semiconductor (MOS) sensors

MOS sensors use a heated metal-oxide surface whose electrical resistance changes when certain gases are present. The device measures this change and, based on factory calibration with a reference gas (often ethanol), converts it to an estimated TVOC value.

Key characteristics:

  • Broad sensitivity: Responds to many alcohols and some other organic vapors, but not equally to all VOCs.
  • Humidity and temperature effects: High humidity or quick temperature shifts can change readings.
  • Drift over time: Sensor response can slowly change and often requires periodic auto-calibration.

Photoionization detectors (PID)

PIDs use ultraviolet light to ionize certain gases, then measure the resulting current. They are more common in professional or industrial tools and can be more sensitive across a wider VOC range.

In a typical home setting, PIDs may:

  • Offer more linear response over a range of VOCs.
  • Still require calibration and interpretation; they also use reference gases.

In both cases, the sensor is seeing a mixture of gases and converting it into a single indicator. It cannot tell you which specific VOCs are present.

Table 1. Typical VOC sensor types in home monitors (Example values for illustration.)
Common VOC sensor approaches and what to expect
Sensor type Where commonly used Strengths Limitations
Metal-oxide semiconductor (MOS) Most consumer indoor monitors Small, low power, responds to many household gases Sensitive to humidity, rough TVOC estimate, sensor drift
Photoionization detector (PID) Professional and industrial tools Higher sensitivity, better linearity across some VOCs More expensive, needs calibration, still not speciation
Electrochemical gas sensors Special gases (e.g., CO, NO2) Good for specific target gases Not used for broad “TVOC” monitoring
Laboratory analytical methods Research, detailed IAQ assessments Identifies individual VOCs and concentrations Not continuous, higher cost, needs lab support

Example values for illustration.

Why “Real VOCs” and TVOC Numbers Don’t Always Match

A TVOC reading suggests how much “sensor-detectable gas” is present, but your air can contain VOCs the sensor barely sees, and vice versa. Several factors create mismatches between readings and “real” VOC composition.

Calibration with a single reference gas

Many MOS sensors are calibrated using one gas (such as ethanol). The monitor assumes that a given signal change corresponds to a certain TVOC level, as if the air were mostly that reference gas. In a home, the actual VOC mix may include solvents, fragrances, cooking byproducts, and more, each with different sensor responses.

The result: 200 ppb on your monitor does not necessarily mean 200 ppb of any particular VOC. It is an indexed estimate, best used for relative comparison.

Strong sources vs. weak background

Short bursts of activities like cleaning or painting can produce high sensor responses. Background emissions from furniture, flooring, or stored products may keep readings elevated for hours or days, even if you do not smell much.

On the other hand, some VOCs can be present at relevant levels but have a weak response on the specific sensor in your device, so they barely change “TVOC.”

Interference from humidity and other gases

Changing relative humidity, temperature, or the presence of certain non-VOC gases can influence sensor outputs. Many monitors attempt to correct for this, but small drifts and jumps still occur.

This is why manufacturers often emphasize trends and categories such as “good,” “moderate,” or “poor” instead of exact numbers.

Common Mistakes When Interpreting TVOC Readings

Misreading a TVOC display can lead to unnecessary worry or, in some cases, a false sense of security. A few pitfalls show up repeatedly in home use.

Treating TVOC as an exact health metric

TVOC readings are not medical diagnostics. They do not tell you exactly how safe or unsafe your air is. Two homes with the same TVOC number may have very different VOC mixes and therefore different comfort implications.

Use TVOC as one input alongside odor, comfort, and ventilation habits, not as a standalone judge.

Ignoring baselines and drift

Many monitors “learn” a baseline when first powered on or after long stable periods, sometimes assuming that a long-term average equals clean air. If you set up a device in air that already contains elevated VOCs from new renovations or furniture, its future readings may understate changes.

Also, sensor output can drift over months. An apparent gradual “improvement” or “worsening” might be at least partly sensor aging rather than real air changes.

Overreacting to short spikes

Spikes when you cook with oil, use a spray cleaner, light candles, or open a solvent container are expected. Good practice is to ventilate during and after such activities, but a brief high reading is not, by itself, unusual in household life.

Practical Ways to Use TVOC Readings at Home

Despite limitations, TVOC readings are useful for shaping everyday habits. The key is to focus on trends, patterns, and practical adjustments.

Track patterns over time

  • Note what activities precede higher readings: cooking, cleaning, hobbies, new products.
  • Watch how quickly readings fall when you open windows or run exhaust fans.
  • Look for persistent elevation that does not resolve with normal airing out.

Set simple comfort-oriented targets

Because displays differ (ppb, mg/m³, “index,” or color bands), a universal number target is not realistic. Instead:

  • Aim to keep readings in whatever range your device labels as its baseline or “good” zone.
  • Try to avoid staying in its highest zone for long periods, especially if associated with strong odors.

Use TVOC to guide actions, not anxiety

When readings go up and stay high compared to your usual baseline, you can:

  • Increase natural ventilation (open windows, use cross-breezes when outdoor air is acceptable).
  • Use kitchen and bathroom exhaust fans during and after emitting activities.
  • Limit use of strong-smelling products, especially sprays and solvents, indoors.
  • Consider an air purifier with sufficient activated carbon when odors or VOC sources are hard to avoid.

Examples: Real-World Scenarios with TVOC Sensors

Seeing how TVOC behaves in typical situations makes the readings more intuitive.

Scenario 1: Evening cooking in a small apartment

You cook with oil on the stove for 30 minutes without using the range hood. The TVOC reading climbs steadily, peaks shortly after cooking stops, and gradually declines over an hour.

What to do:

  • Use the range hood when cooking if it vents outside.
  • Open a nearby window during and after cooking when outdoor conditions are reasonable.
  • If you rely on an air purifier, position it to promote airflow through or near the kitchen area.

Scenario 2: New furniture and paint in a bedroom

You have recently painted and brought in new furniture. The room smells “new,” and the TVOC reading is consistently higher than in other rooms, even with no recent activity.

What to do:

  • Increase ventilation in that room for days or weeks (windows open when possible, door open to promote mixing).
  • Run a purifier with activated carbon in or near that room to help reduce odors.
  • Store any leftover paints, adhesives, or solvents in a well-ventilated area away from sleeping spaces.

Scenario 3: Cleaning day with multiple sprays

You use several cleaning sprays and scented products around the home. The TVOC reading spikes repeatedly and stays higher for a while, particularly in bathrooms and the kitchen.

What to do:

  • Use exhaust fans while cleaning and for a short period afterward.
  • Consider less volatile or fragrance-free alternatives where practical.
  • Keep cleaning supplies sealed and stored in a ventilated or utility space if possible.

Safety, Standards, and What TVOC Does Not Show

There is no single universally accepted residential TVOC limit for all homes and situations. Organizations may publish reference ranges or guidelines for certain settings, but these are not simple pass/fail rules for every living room or bedroom.

TVOC vs. specific VOCs and gases

Some substances (for example, certain solvents or combustion byproducts) have well-studied exposure limits or guidelines. A broad TVOC sensor cannot tell if these are present individually. It may respond weakly or strongly depending on sensor chemistry.

If you have a specific concern about a certain chemical or source, a targeted measurement or professional assessment may be more appropriate than relying only on TVOC.

Ozone, ionizers, and UV-C devices

Some devices use ionization or UV-C lamps as part of their air treatment approach. These may or may not affect TVOC readings directly, depending on whether they change the kinds of gases present or interact with the sensor.

In general:

  • Follow manufacturer safety instructions carefully and do not modify devices.
  • Select equipment described as suitable for occupied spaces and avoid any product that intentionally produces notable ozone in those spaces.
  • Understand that lowering a TVOC number on a monitor does not automatically mean all byproducts are reduced; chemistry can be complex.

Maintenance: Sensors, Filters, and Long-Term Accuracy

Over time, both sensors and filters can change behavior. Light maintenance goes a long way toward keeping your readings useful.

Keeping VOC sensors reliable

  • Dust management: Gently dust around vents and openings on the monitor so air can flow freely.
  • Placement: Avoid placing the monitor directly above strong sources (like cleaners) or in dead-air corners.
  • Warm-up and stabilization: Some sensors need minutes to hours after power-up to stabilize; check the device manual.
  • Firmware or app updates: When available, updates may improve auto-calibration or interpretation of readings.

Carbon filters and VOC reduction

Carbon or other sorbent filters in purifiers can help reduce certain VOCs and odors, but their capacity is finite. Once the sorbent material becomes saturated, its effectiveness decreases and may eventually decline sharply.

Plan for:

  • Replacing carbon filters according to general manufacturer intervals, or sooner if strong odors return quickly.
  • Recognizing that extremely heavy VOC loads (for example, strong solvents, heavy smoke) can use up sorbent capacity more quickly.

Cost planning

Consider the long-term cost of maintaining both monitoring and filtration:

  • Occasional replacement of monitors or sensors over many years as performance drifts.
  • Regular filter changes for purifiers, especially carbon components, based on usage and source strength.

FAQ: Using TVOC Alongside Other Air Quality Metrics

TVOC is one piece of a broader indoor air picture that also includes particles, humidity, and carbon dioxide (CO₂) from people breathing.

How should I combine TVOC with PM2.5 readings?

Fine particles (PM2.5) and VOCs come from some of the same activities, such as cooking or burning candles, but PM2.5 monitors look at particles while VOC sensors look at gases. If both PM2.5 and TVOC increase during an activity, improving ventilation and using a purifier with both particle filtration and carbon sorbent can be helpful.

What about CO₂ and TVOC together?

CO₂ levels from people breathing are often used as a rough indicator of how much fresh air is coming in. You can use CO₂ to judge general ventilation and TVOC to judge gas emissions from products and materials. A room with low CO₂ but high TVOC may have a strong local source; a room with high CO₂ and high TVOC may simply need better overall air exchange.

Should I move the monitor around or leave it in one place?

For understanding everyday background conditions, leaving one monitor in a consistent, representative spot is helpful. For diagnosing specific issues (for example, a smelly closet or a freshly renovated room), temporarily moving the monitor for comparison can reveal relative differences.

Table 2. Interpreting common home air monitor metrics together (Example values for illustration.)
Monitor metrics guide for everyday home use
Metric What it mainly indicates Common pitfalls Action idea
TVOC Overall gas emissions from products, materials, activities Treating numbers as exact; ignoring trends and sources Ventilate after spikes; limit strong chemical products
PM2.5 Fine particles from smoke, cooking, outdoor pollution Assuming low PM2.5 means air is entirely “clean” Use high-efficiency filters; reduce indoor smoke sources
CO₂ Fresh air rate relative to number of people Confusing CO₂ with VOCs or particles Open windows or adjust ventilation if consistently high
Humidity Moisture levels affecting comfort and mold risk Forgetting that humidity affects VOC and dust perception Aim for a moderate range; use humidifier or dehumidifier as needed
Temperature Thermal comfort and VOC evaporation rate Ignoring that warmer air can increase VOC off-gassing Keep rooms at comfortable, steady temperatures when possible

Example values for illustration.


Related guides: How to Choose the Right Air Purifier for Your Room SizeAir Purifier Placement: Where to Put It for Best ResultsWhen to Replace Carbon Filters (And How to Tell They’re Spent)

Summary: Using VOC Sensors Wisely at Home

TVOC readings from home monitors provide a helpful, though imperfect, window into indoor gas pollutants and ventilation effectiveness. Sensors are calibrated to a few reference gases, drift over time, and cannot tell you exactly which VOCs are present. For that reason, it is more effective to treat TVOC as a trend indicator than as a precise measure.

Used alongside PM2.5, CO₂, humidity, and your own observations of odor and comfort, TVOC data can guide practical actions: ventilating during and after high-emission activities, selecting lower-emission products when feasible, and considering carbon-based filtration where persistent odors or sources are present. With realistic expectations, VOC sensors can support a calmer, more informed approach to indoor air quality management at home.

Frequently asked questions

What does a TVOC number on my home monitor actually represent?

A TVOC reading is a sensor-derived index estimating the combined response of volatile organic compounds that the monitor can detect, not a chemical breakdown. It reflects how the sensor’s chemistry and calibration react to the current gas mixture, so it is most reliable for showing trends rather than exact concentrations of specific compounds.

Why does TVOC jump after cooking but then fall after an hour?

Cooking releases a mix of gases and aerosols that many VOC sensors respond to, producing a temporary spike. Ventilation, dilution, and natural settling reduce concentrations over time, so readings usually decline within an hour if you ventilate or run exhaust fans.

How should I respond if my TVOC stays elevated for days?

Start by identifying likely sources (new furniture, ongoing painting, stored chemicals) and increase ventilation in that area; run a purifier with activated carbon if odors persist. If elevated readings continue despite source control and airing out, consider targeted testing or a professional indoor air assessment for specific compounds.

Can TVOC monitors detect dangerous gases like carbon monoxide or confirm formaldehyde levels?

No, carbon monoxide is not a VOC and requires a dedicated CO alarm; some important compounds like formaldehyde may not be accurately quantified by general TVOC sensors. For health-critical or legally regulated pollutants, use purpose-built sensors or laboratory analysis.

How often should I check or recalibrate my TVOC monitor and replace carbon filters?

Sensors typically need only occasional attention but can drift over months; follow device guidance for firmware updates and baseline checks, and allow warm-up time after powering on. Replace carbon filters according to usage and manufacturer guidance, often in the range of a few months to a year depending on source strength and frequency.

Formaldehyde in Homes: What Carbon Can Remove (and What It Can’t)

Isometric living room with air purifier and carbon filter

Activated carbon can reduce some formaldehyde in homes, but it is less effective for formaldehyde than for many other gases and cannot remove the source of emissions.

Formaldehyde is a common indoor gas released from building materials, furniture, and everyday activities. Activated carbon filters are often marketed for gases and odors, yet formaldehyde behaves differently from many other volatile organic compounds (VOCs). Understanding what carbon can and cannot do helps you avoid over‑relying on filters and focus on source control and ventilation first.

Quick answer
  • Activated carbon can adsorb some formaldehyde, but usually less efficiently than many other VOCs.
  • Performance depends on carbon type, amount, contact time, airflow, humidity, and total VOC load.
  • Formaldehyde control starts with source reduction, low‑emitting materials, and good ventilation.
  • Air purifiers help most when sized correctly for the room and run continuously on an appropriate speed.
  • Indoor humidity around 30–50% and regular air exchanges can help keep gas levels more stable.
  • Monitors that show TVOC trends can offer context, but do not specifically measure formaldehyde in most cases.

Formaldehyde in homes: what it is and why it matters

Formaldehyde is a colorless gas with a sharp, noticeable smell at higher levels. Indoors, it is often associated with new building materials, manufactured wood products, and some textiles and finishes. It is also produced in smaller amounts by everyday activities such as cooking, candle burning, and certain hobbies.

Unlike dust or smoke particles that can be captured by HEPA filters, formaldehyde is a gas. This means it requires a different approach to control. It moves with air currents, diffuses through rooms, and can continue to be released slowly from building products for months or years (off‑gassing).

Managing formaldehyde typically involves three elements working together:

  • Source control – choosing low‑emitting building materials and furnishings where possible, and avoiding unnecessary combustion indoors.
  • Ventilation – bringing in outdoor air to dilute indoor gases and exhausting indoor air where pollutants are generated.
  • Filtration/adsorption – using appropriate gas‑phase filters, including activated carbon, as a supplemental tool.

How activated carbon works with formaldehyde (and its limits)

Activated carbon is a highly porous form of carbon with a large internal surface area. Gas molecules can stick to these surfaces in a process called adsorption. This is why carbon filters are commonly used to reduce odors and many VOCs in air purifiers and HVAC systems.

However, formaldehyde is a small, very reactive molecule, and it behaves differently from many larger organic vapors (such as some solvent or fragrance compounds). Standard activated carbon tends to adsorb larger, less polar molecules more readily. As a result, traditional carbon filters often remove formaldehyde less efficiently and may reach saturation more quickly when exposed to a mix of gases.

Several factors influence how well carbon can reduce formaldehyde indoors:

  • Carbon formulation – some carbon is chemically treated or combined with other media to improve performance for specific gases, including formaldehyde. Untreated general‑purpose carbon may be less effective.
  • Carbon mass – thicker, heavier carbon beds with more material generally hold more gas before becoming saturated.
  • Contact time – slower airflow through the carbon layer can increase the opportunity for gas molecules to adsorb.
  • Humidity – high relative humidity can compete with or displace certain gases on carbon surfaces.
  • Mixed VOC load – other VOCs often compete with formaldehyde for adsorption sites, affecting how quickly the filter fills up.

Because of these limitations, activated carbon should be viewed as a support tool for formaldehyde reduction, not the primary solution. It does not stop materials from emitting, and once the filter is saturated, it will no longer remove gases effectively.

Table 1. HEPA vs activated carbon: what each can (and cannot) remove

Example values for illustration.

Feature HEPA filter Activated carbon filter
Main target Solid particles (dust, pollen, smoke particles) Gases and many VOCs (odors, some chemicals)
Formaldehyde removal Not designed for gases Partial, depends on carbon type and amount
What it cannot handle well Individual gas molecules Particles, very high or continuous emissions
Key sizing idea Match CADR to room size and desired air changes Look for substantial carbon mass and coverage
When most helpful Dusty, smoky, or high‑particle spaces Spaces with noticeable odors or VOCs
Maintenance focus Replace when airflow drops or indicated by maker Replace when odors return or at suggested interval

Common misunderstandings about carbon and formaldehyde

Because carbon filters are widely associated with “chemical and odor” control, several misunderstandings arise around formaldehyde.

Myth 1: Any carbon filter will fully remove formaldehyde

General‑purpose carbon filters are not optimized for every gas. Their performance for formaldehyde can be modest, especially in spaces with continuous emission sources like new flooring, cabinetry, or composite wood furniture. Relying solely on such a filter without addressing sources and ventilation often leads to disappointment.

Myth 2: If the smell is gone, the formaldehyde is gone

Smell is an unreliable guide for gas levels. Some people smell formaldehyde at relatively low levels, others adapt quickly, and mixtures of VOCs can mask or alter perception. Air may smell “cleaner” after filtration or ventilation, while some formaldehyde remains present.

Myth 3: One purifier cleans the whole home for gases

Gases disperse through the home, but airflow is often constrained by closed doors, room layouts, and HVAC patterns. A single purifier in one room may have limited impact on formaldehyde sources in other rooms, especially if that purifier’s clean air delivery rate (CADR) and carbon capacity are modest.

Myth 4: Higher fan speed always means better gas removal

Higher fan speeds increase the volume of air moving through the purifier but can reduce contact time with the carbon media. The ideal setting balances sufficient airflow for mixing with enough contact time and reasonable noise. Medium settings are often used for continuous operation, with higher speeds reserved for temporary boosts.

Practical strategies to reduce formaldehyde at home

A layered approach usually works best for controlling formaldehyde indoors. Carbon filters play one role but are not the starting point.

1. Focus on sources first

  • New materials – when renovating or furnishing, look for information about low‑emitting products where feasible.
  • Allow off‑gassing – air out new furniture, carpets, or cabinets when possible, ideally in well‑ventilated areas.
  • Limit unvented combustion – minimize burning candles, incense, or other open flames indoors, and never disable safety features on appliances.

2. Use ventilation strategically

  • Mechanical exhaust – use kitchen and bathroom fans during and after activities that generate moisture or combustion by‑products.
  • Planned window opening – when outdoor conditions are reasonable, opening windows for even short periods can dilute indoor gases.
  • Whole‑home airflow – interior doors propped open and ceiling fans on low can help mix air so fresh air reaches more spaces.

3. Add gas‑phase filtration thoughtfully

  • Check for both particle and gas filters – for general indoor air quality, a combination of HEPA (or equivalent) for particles and a substantial carbon layer for gases is common.
  • Size to the room – as a rough guide, many people aim for several air changes per hour (ACH) in bedrooms and main living areas. This depends on room volume, clean air delivery, and noise tolerance.
  • Placement – position the purifier so that airflow is not blocked by walls or large furniture. A few inches to a foot of clearance around intake and exhaust is typically recommended.
  • Run time – formaldehyde and other gases are often emitted continuously, so continuous or long daily runtimes on a moderate setting usually outperform short bursts.

4. Manage humidity and indoor conditions

  • Relative humidity – maintaining indoor humidity in the general 30–50% range helps with comfort and can support stable performance of filters and building materials.
  • Temperature – higher temperatures can increase emission rates from some materials. Moderating indoor temperatures where feasible can help.

Examples of formaldehyde and carbon use in real homes

The way formaldehyde behaves, and the role of carbon filters, can vary widely depending on the situation.

Newly renovated apartment

After installing new engineered wood flooring and cabinets, an apartment may have an increased formaldehyde load. Even with an air purifier that includes a carbon filter, levels may remain elevated if windows stay closed and exhaust fans are rarely used. In this scenario, regular window ventilation (weather permitting), running kitchen and bathroom fans, and allowing time for off‑gassing often make a larger difference than filtration alone, while carbon provides supplemental reduction in key rooms.

Bedroom with older pressed‑wood furniture

In a bedroom with older composite wood furniture, emissions are typically lower than when items were new but may still contribute to background levels. A correctly sized air purifier with HEPA plus carbon, placed so it circulates the room air, can help manage overall VOCs and odors. Running it continuously on a low or medium speed and occasionally airing out the room can offer a more stable environment than either measure alone.

Cooking and seasonal activities

Cooking, especially at high heat, and some seasonal activities like crafting, using certain adhesives, or hobby wood finishing can temporarily increase gases indoors. Ventilating during and after the activity using range hoods or window openings, supported by an air purifier with carbon in adjacent spaces, can help bring levels down more quickly than filtration or ventilation alone.

Safety, standards, and what to look for

While many people focus on device features, it is useful to be aware of safety and basic performance concepts when choosing equipment for gas management.

Avoid intentional ozone generators

Some devices sold for “air cleaning” intentionally produce ozone, which is itself an indoor air pollutant. For typical homes, guidance generally favors technologies that do not intentionally generate ozone. Ionizers and certain photocatalytic or plasma devices may produce small by‑products; product literature sometimes discloses this. If you are concerned, prioritize technologies described as not intentionally producing ozone and follow manufacturer instructions.

Understand basic ratings and claims

  • CADR (Clean Air Delivery Rate) – commonly used for particle removal. Gas removal may be less clearly rated. When gas CADR is provided, treat it as a comparative reference rather than an absolute guarantee.
  • Filter descriptions – look for clear descriptions of filter types (HEPA or equivalent and carbon) and approximate replacement intervals. Avoid over‑interpreting marketing terms that lack specific test descriptions.
  • Certification and testing – some devices are tested under standardized procedures for particle removal and ozone safety. These tests may not directly reflect long‑term formaldehyde performance but can still provide general quality signals.

Use monitors carefully

Many consumer air quality monitors display particle levels (such as PM2.5) and an overall TVOC number. Most of these devices do not separately quantify formaldehyde, and TVOC readings can be influenced by many chemicals at once. They are useful for seeing trends (for example, levels rising when cooking and dropping after ventilation) but should not be treated as precise measurements of any single gas.

Filter upkeep and long‑term planning

Carbon filters and particle filters both require maintenance to stay effective. Planning ahead helps avoid running a purifier with exhausted media that no longer provides meaningful gas reduction.

Recognizing when carbon may be saturated

Saturated carbon often looks unchanged. Possible clues that it is time for replacement include:

  • Odors or VOC‑type smells return more quickly after starting the purifier.
  • There is no noticeable difference in odor or general air freshness even after hours of operation, compared to earlier performance.
  • You have reached or exceeded the manufacturer’s suggested time interval for replacement under similar use conditions.

Budgeting for filter changes

Owning an air purifier includes ongoing filter costs. Roughly estimating annual replacement for both HEPA and carbon layers can avoid surprises. Heavier use (high fan speeds, continuous operation, or high pollutant load) often shortens filter life compared with lighter use. In some designs, carbon and HEPA are replaced together; in others, they are separate components.

Cleaning around the device

Keeping intake and exhaust grilles free from dust buildup ensures air can move freely through the filters. Wiping exterior surfaces according to manufacturer instructions and keeping nearby floors and surfaces reasonably clean helps the purifier circulate air efficiently and reduces overall particle load.

Table 2. Example filter replacement planning for home air purifiers

Example values for illustration.

Filter type Typical interval range What changes it Reminder
Pre‑filter (mesh or foam) Clean every 1–3 months Dusty homes, pets, smoking, open windows Rinse or vacuum if the maker allows; replace if worn
HEPA or equivalent Replace about every 6–18 months Fan speed, total runtime, particle load Check airflow and any indicator lights or schedules
General activated carbon Replace about every 3–12 months Odor/VOC intensity, continuous emissions, humidity Note when odors return sooner than before
Thick or high‑capacity carbon bed Replace about every 6–24 months VOC levels, usage pattern, room size Plan earlier changes in high‑VOC environments
Combined HEPA + carbon cartridge Replace according to the shorter of the two needs Whether particles or gases load up first Follow the maker’s recommended interval as a ceiling
HVAC return filters with carbon Replace about every 1–3 months System runtime, home size, occupant activities Check monthly at first to find a suitable schedule

Related guides: Activated Carbon Filters Explained: VOCs, Odors, and What They Can’t DoWhen to Replace Carbon Filters (And How to Tell They’re Spent)Indoor Air Quality Monitors: What to Measure (PM2.5, CO2, VOCs, Humidity)

Key takeaways on formaldehyde and carbon filters

Formaldehyde in homes comes primarily from building materials, furnishings, and certain indoor activities. Because it is a gas, it cannot be captured by particle filters like HEPA. Activated carbon can reduce some portion of formaldehyde, especially when designed and sized appropriately, but it is generally less effective for this gas than for many other VOCs and will not eliminate ongoing emissions.

For most households, the most reliable approach is to prioritize source control and ventilation, then add properly sized air purifiers with both particle and gas‑phase filtration as a supporting measure. Consistent operation, reasonable humidity control, and timely filter replacement help maintain stable performance over time. Understanding these limits and interactions allows you to set realistic expectations for what carbon can remove—and where other strategies must do the heavier work.

Frequently asked questions

Can activated carbon completely remove formaldehyde from my home?

Activated carbon can adsorb some formaldehyde but usually cannot remove it completely, especially when emissions are continuous. Its effectiveness depends on carbon type, bed mass, contact time, humidity, and competing VOCs, so carbon is best used as a supplemental measure alongside source control and ventilation.

What is the most effective way to lower formaldehyde levels indoors?

Prioritize source control (choose low‑emitting materials and allow new items to off‑gas), increase ventilation to dilute indoor concentrations, and use gas‑phase filtration as a supplement. Continuous, appropriately sized air cleaning and maintaining moderate humidity and temperature help stabilize indoor levels.

Will a HEPA filter remove formaldehyde?

No. HEPA and similar particle filters capture solid particles like dust and smoke but do not remove gas‑phase pollutants such as formaldehyde. For gases you need gas‑phase media (for example, activated carbon formulated for VOCs) or other targeted controls.

How can I tell when a carbon filter has stopped working for formaldehyde?

Saturated carbon often looks unchanged, so watch for clues like odors or VOC‑type smells returning faster, a lack of noticeable air freshness after extended run time, or reaching the manufacturer’s recommended replacement interval. Heavy use, continuous emissions, and high humidity can shorten a carbon filter’s useful life.

Do typical consumer air quality monitors measure formaldehyde specifically?

Most consumer monitors report particle levels and a general TVOC index rather than formaldehyde specifically. If you need formaldehyde concentration data, look for specialized formaldehyde sensors or laboratory testing; TVOC readings are useful for trends but not a precise measure of a single gas.

How Much Carbon Do You Need for Odors? Weight, Depth, and Contact Time

Isometric illustration of an air purifier with a carbon filter

The amount of activated carbon you need for odors depends mainly on carbon weight, filter depth, and how long air stays in contact with the carbon (contact time).

In home use, more carbon and a deeper, slower-flowing bed generally give better odor reduction, but there is no single “right” number that fits every situation. Needs vary by room size, airflow, and how strong or continuous the odor sources are. Understanding how carbon works helps you choose realistic targets and avoid overpromising expectations.

  • Quick answer:
  • For general home odor control, a carbon filter with at least a few hundred grams of activated carbon is a practical starting point.
  • Deeper beds (around 1–2 inches of packed carbon) usually outperform thin sprayed-on or foam-coated layers for persistent odors.
  • Longer contact time (slower air speed through the carbon) improves adsorption but reduces airflow; balance both.
  • Larger rooms or stronger odor sources benefit from more total carbon and higher clean air delivery (CADR).
  • Expect gradual odor reduction, not instant removal, and plan on regular filter replacement when odors start to persist.

What “enough carbon” really means and why it matters

When people ask how much carbon they need, they usually want to know if a given air purifier or filter will meaningfully reduce odors in a specific space. Odor control relies on adsorption: gas molecules stick to the surface of activated carbon. More usable surface area and more time for contact usually mean more odor capture.

Unlike particle filters (like HEPA) that can be rated by simple efficiency percentages, gas and odor performance depends on several combined factors:

  • How much carbon is present (weight or volume)
  • How deep and dense the carbon bed is
  • The airflow rate passing through that bed
  • How long odors are generated and at what intensity
  • Room size, mixing, and how well air circulates

Because of these variables, there is no strict household standard for “X grams of carbon equals Y odor removal.” Instead, you work with practical ranges, look at design clues (bed depth, carbon type), and match them to your room and odor sources.

Key concepts: carbon weight, bed depth, and contact time

Three ideas are central to deciding how much carbon you need: the total mass of activated carbon, how it is arranged (depth and density), and how quickly air passes through (contact time).

Carbon weight (mass)

Carbon weight is the total amount of activated carbon in the filter, usually measured in grams or kilograms. More weight generally means:

  • More available surface area for gases to stick to
  • Higher capacity before the carbon becomes saturated
  • Longer service life before noticeable performance drop

In home purifiers, you may see everything from thin foam layers with a light dusting of carbon up to canisters or trays filled with granular or pelletized carbon. Practical, non-brand-specific ranges for a single room unit are often in the hundreds of grams rather than just tens of grams when the goal is meaningful odor reduction.

Bed depth and packing

Bed depth is the thickness of the carbon layer that air passes through. It matters because gases need a chance to diffuse into the pores of the carbon, not just skim the surface. As a general principle:

  • Very thin coatings or meshes: good mainly for light, short-term odor polishing.
  • Moderate to deep beds (around 1–2 inches): better for more persistent or heavier odor loads.
  • Overly dense packing: can restrict airflow and reduce total CADR.

Granular or pellet carbon beds often provide more consistent depth and capacity than sprayed-on or impregnated nonwoven layers, although both can play a role depending on expectations.

Contact time and airflow

Contact time (often called residence time) is how long a volume of air spends passing through the carbon. Longer contact time allows more adsorption, but there is a trade-off: if air moves too slowly, the overall room air exchange rate drops.

In practical home terms:

  • Higher fan speeds increase room air circulation but shorten contact time per pass.
  • Lower fan speeds increase contact time but may not circulate enough air in larger rooms.
  • A deeper, well-designed carbon bed lets you keep reasonable airflow while maintaining decent contact time.

The goal is balance: enough carbon and depth so that even with a moderate fan speed, air has a realistic chance to interact with the carbon before exiting the filter.

Table 1. Simplified comparison of common carbon filter formats

Example values for illustration.

Generalized carbon filter format comparison
Filter format Typical carbon amount (example) Bed depth Odor control expectation Notes
Thin foam with carbon dusting Low (tens of grams) Very thin Light, short-term odor polishing Often used as pre-odor layer; limited capacity
Carbon-impregnated nonwoven sheet Low–moderate Thin Helps with mild everyday odors Common in compact purifiers and combo filters
Granular carbon tray Moderate (hundreds of grams) Medium More noticeable odor reduction Better suited for regular cooking or pet odors
Pellet carbon canister Moderate–high Medium–deep Improved handling of persistent odors Heavier; may be used in larger room units
Multi-stage gas media bed High (carbon plus other sorbents) Deep Broader range of gases, longer life More common in higher-capacity or specialty systems
DIY loose carbon pouch Variable Variable Unpredictable, may restrict airflow Not recommended to alter devices beyond design

Common mistakes when choosing carbon for odors

Odor complaints are often linked to mismatches between expectations and what the carbon filter can realistically handle. Some recurring issues include:

Relying on very thin or token carbon layers

It is common for a filter to be marketed as having “activated carbon” even when the actual amount is small. Thin, lightly coated layers may help reduce mild, short-lived odors but are easy to saturate. If you cook frequently, have strong pet odors, or are dealing with lingering smoke smells, a minimal layer may not be enough.

Ignoring room size and odor intensity

A unit with modest carbon capacity can be reasonably effective in a small bedroom with light odors but feel underpowered in a large open-plan living room. Continuous odor sources such as regular cooking, indoor smoking, or strong hobby-related fumes will load carbon much faster than occasional kitchen smells.

Expecting instant or complete elimination

Even with a good carbon bed, odor reduction is typically gradual as the purifier cycles air through the room. Strong, embedded smells in fabrics, carpet, or walls may persist unless sources are reduced and surfaces are cleaned. Air cleaning is one tool among several (ventilation, cleaning, source control), not a total solution by itself.

Running at the lowest fan speed only

Low fan speeds are quieter and improve contact time per pass, but if the total volume of air cleaned per hour is too low, overall odor reduction will be slow. Sometimes using a higher speed for an initial period, then dropping to a quieter setting, gives a better balance between comfort and performance.

Practical guidance: estimating how much carbon you need

While you cannot calculate an exact carbon requirement for every home, you can use practical guidelines to decide what is likely to be sufficient for your situation.

Step 1: Consider room size and air changes

Start with basic sizing: an air cleaner should be able to provide enough clean air delivery rate (CADR) to circulate the room several times per hour. Once you know roughly how much air the unit will move, look at how much carbon it offers to handle the corresponding odor load.

Step 2: Match carbon level to odor intensity

  • Light, occasional odors (mild cooking smells, light household odors): modest carbon amounts may be acceptable, especially in smaller rooms.
  • Regular everyday odors (frequent cooking, multiple pets): aim for a filter with a substantial carbon section, generally moving beyond very thin, coated layers.
  • Persistent or strong odors (tobacco smoke in the home, strong hobby fumes): look for deeper, heavier carbon beds and consider additional strategies like localized ventilation and source control.

Step 3: Look for clues about depth and design

If you can inspect or see diagrams of the filter, note whether the carbon is:

  • A thin, flat sheet attached to a prefilter
  • A thicker cassette with visible pellets or granules
  • A dedicated canister or tray with a clearly defined depth

Deeper, more substantial sections are more likely to provide meaningful odor control in real rooms, assuming the fan and overall design support good airflow.

Step 4: Balance noise, airflow, and odor goals

You may need to experiment with fan settings:

  • Use higher speeds when cooking or when odors are first noticed.
  • Switch to medium or lower speeds once odors have reduced for quieter operation.
  • Place the purifier where air can circulate freely, not hidden behind furniture or curtains.

Real-world scenarios: how carbon needs can vary

Different households place different demands on carbon filters. Here are example scenarios to illustrate how weight, depth, and contact time interact (values are illustrative, not product specifications).

Small bedroom with light odors

A compact bedroom with occasional mild odors from laundry, body smells, or distant kitchen activity typically has a modest odor load. A purifier sized to the room with a small-to-moderate carbon section can often keep odors from becoming noticeable, especially if doors are kept partly open to allow air mixing with the rest of the home.

Open-plan living room with cooking odors

A large combined kitchen–living area with frequent cooking produces ongoing odors and sometimes smoke. Here, simply having a token carbon layer can feel inadequate. You may benefit from:

  • A purifier with a deeper, higher-mass carbon bed
  • Higher fan speeds during and after cooking
  • Supplementary measures, such as using the range hood and opening windows when weather and outdoor air quality allow

Home office with light VOCs and odors

Office spaces might have mild odors from equipment, light solvents, or craft supplies. Carbon can help reduce these, but strong or specialized chemical use may require additional ventilation or more specialized filtration. For typical home office conditions, a moderate carbon bed with steady airflow can make the air feel fresher over time.

Pet-heavy household

Homes with multiple pets may experience ongoing odor generation. Carbon helps, but it is also important to:

  • Clean litter boxes or cages frequently
  • Wash pet bedding and soft furnishings
  • Vacuum with good filtration to remove dander and hair that can hold odors

In this situation, more total carbon, deeper beds, and regular replacement intervals are especially important because saturation can happen relatively quickly.

Safety, ozone, and add-on technologies

Some devices combine carbon with other technologies. It is useful to understand what each component does and where caution is appropriate.

Carbon plus HEPA or particle filtration

This is a common and generally straightforward combination: particle filters capture dust, dander, and smoke particles, while carbon adsorbs gases and odors. The two functions complement each other and do not usually introduce safety concerns when used as designed.

Ionizers and similar features

Some units include ionization or electrostatic features, either as a main mechanism or as an add-on. These are typically intended to enhance particle removal. If included, it is helpful to confirm that the device is designed to operate within recognized limits for ozone generation and to use any optional features according to manufacturer guidance.

UV-C and photocatalytic systems

UV-C and photocatalytic oxidation (PCO) may be added for microbial control or gas breakdown. Designs vary widely. When present, it is important that they are integrated safely within the device so that UV-C exposure is confined inside the housing and byproducts remain within acceptable limits for everyday indoor use.

For basic home odor management, a well-sized carbon and particle filtration system, combined with good ventilation and cleaning practices, is often sufficient without relying on more complex technologies.

Maintenance: when carbon stops working for odors

Activated carbon has a finite capacity. Once its pores are filled with adsorbed gases, odor performance drops even though the filter may still look clean. Recognizing when to replace it is key to maintaining effectiveness.

Signs that carbon is saturated

  • Odors that used to clear now linger much longer.
  • The purifier smells neutral or slightly stale at the outlet when running.
  • You notice no improvement in odor even at higher fan speeds.

Carbon usually cannot be reliably regenerated at home. Exposing it to sun or air may remove some light surface smells but does not restore its original capacity.

Typical replacement timing

Replacement intervals depend on:

  • How much carbon the filter contains
  • How often the purifier runs and at what fan speed
  • How strong and continuous your odor or VOC sources are

In a lightly used bedroom, a carbon filter might last many months. In a busy kitchen or smoking environment, you may notice performance decline much sooner. Following general time-based guidance from the device manual, then adjusting based on your own odor observations, is a practical approach.

Table 2. Example carbon filter replacement planner for home use

Example values for illustration.

Illustrative carbon filter replacement planner
Filter type Typical interval range (example) What changes it Reminder
Thin carbon-coated prefilter 1–3 months High cooking frequency, pets, smoking Often replaced or washed more frequently
Carbon-impregnated sheet in combo filter 3–6 months Continuous odor sources, small carbon mass Watch for gradual odor return as a cue
Granular carbon tray 6–12 months Room size, everyday odor load Heavier cooking or pets shorten this range
Pellet carbon canister 6–18 months Fan speed, hours of daily use Check earlier if odors are frequent or strong
Multi-stage gas media module 12–24 months Presence of VOCs, smoke, other gases Follow device guidance and monitor odor levels
Vehicle or small desktop carbon inserts 1–6 months Limited carbon volume, intermittent use Replace when odor benefits fade

Related guides: When to Replace Carbon Filters (And How to Tell They’re Spent)Air Purifier for Cat Litter Odor: Carbon Filters That Actually HelpAir Purifier for Cigarette Smoke: Carbon Needs and Limitations

Key takeaways: putting carbon weight, depth, and contact time together

Deciding how much carbon you need for odors is less about hitting a single magic number and more about matching a reasonable amount of carbon and bed depth to your room size, odor sources, and airflow. Heavier, deeper carbon sections with adequate fan power generally offer better, longer-lasting odor reduction than very thin coatings, especially in larger rooms or where odors are frequent.

To make an informed choice, check how substantial the carbon filter actually is, think about how strong and continuous your odor sources are, and be realistic about the need for ventilation and routine filter replacement. With those basics in mind, carbon filtration can become a reliable part of a broader indoor air quality plan focused on everyday comfort and odor control.

Frequently asked questions

How much activated carbon should I use for a medium-sized living room with frequent cooking odors?

For a medium living room with frequent cooking, aim for a filter with at least several hundred grams of activated carbon and a bed depth around 1–2 inches to provide meaningful capacity and contact time. Also use higher fan speeds during and shortly after cooking and supplement with range-hood ventilation when possible. The actual need depends on room size, how often you cook, and airflow.

Does a thicker carbon bed always remove odors better?

Thicker carbon beds generally improve adsorption and handle persistent odors more effectively, but excessively dense packing can restrict airflow and reduce overall clean air delivery. The best performance comes from a balanced design that combines sufficient depth with adequate fan power. So thickness helps until it begins to impede airflow.

How does contact time influence odor removal and how can I increase it without losing airflow?

Longer contact time increases adsorption because air spends more time in the carbon pores, but slowing airflow too much reduces room air exchange. To improve contact time without a big airflow loss, choose a deeper, well-packed carbon bed and run moderate fan speeds; use higher speed for initial odor spikes then lower it. Proper placement so the purifier isn’t blocked also helps maintain effective circulation.

When should I replace carbon filters in a home with pets and regular cooking?

Pet-heavy or frequent-cooking homes typically shorten filter life: thin prefilters may need replacement every 1–3 months, while granular or pellet canisters often last 6–12+ months depending on use. Replace filters sooner if odors persist, the outlet smells stale, or higher fan speeds no longer improve odor. Follow device guidance and monitor based on your odor observations.

Is it effective and safe to add loose carbon pouches or DIY carbon to my air purifier to boost odor control?

Adding loose carbon pouches or DIY inserts is unpredictable and can restrict airflow, create bypass paths, or reduce device performance; such modifications may also affect safety or warranty. It’s generally better to use filters or cartridges designed for the unit or select a higher-capacity purifier. For targeted odor reduction, combine proper filtration with ventilation and cleaning.

Activated Carbon Types: Pellet vs Granular vs Impregnated Carbon

Isometric illustration of activated carbon filter cartridge in a room

Activated carbon is widely used in home air purifiers to reduce odors and certain gases, often grouped under the term VOCs (volatile organic compounds). Unlike HEPA filters, which trap solid particles such as dust and smoke, activated carbon targets chemicals in gas form.

The key concept is adsorption. Activated carbon is processed to create a vast network of pores. These pores give the material a very high internal surface area relative to its size. Gas molecules passing over that surface can stick to it, reducing their concentration in the air that leaves the filter.

In a typical home air purifier, air first passes through a pre-filter for larger particles, then through a HEPA or HEPA-type filter for fine particles, and finally through an activated carbon layer to address odors and some VOCs. The carbon layer does not usually change airflow as much as HEPA does, but it does add resistance and eventually becomes saturated, meaning it can no longer adsorb additional gases effectively.

There are several forms of activated carbon used in home filtration. The three common types for air applications are:

  • Pellet (extruded) activated carbon
  • Granular activated carbon (GAC)
  • Impregnated activated carbon (carbon treated with additional chemicals)

Understanding the differences between these forms helps you choose a filter that fits your indoor air goals, maintenance expectations, and noise and airflow preferences.

How Activated Carbon Works in Home Air Filters

Activated carbon is widely used in home air purifiers to reduce odors and certain gases, often grouped under the term VOCs (volatile organic compounds). Unlike HEPA filters, which trap solid particles such as dust and smoke, activated carbon targets chemicals in gas form.

The key concept is adsorption. Activated carbon is processed to create a vast network of pores. These pores give the material a very high internal surface area relative to its size. Gas molecules passing over that surface can stick to it, reducing their concentration in the air that leaves the filter.

In a typical home air purifier, air first passes through a pre-filter for larger particles, then through a HEPA or HEPA-type filter for fine particles, and finally through an activated carbon layer to address odors and some VOCs. The carbon layer does not usually change airflow as much as HEPA does, but it does add resistance and eventually becomes saturated, meaning it can no longer adsorb additional gases effectively.

There are several forms of activated carbon used in home filtration. The three common types for air applications are:

  • Pellet (extruded) activated carbon
  • Granular activated carbon (GAC)
  • Impregnated activated carbon (carbon treated with additional chemicals)

Understanding the differences between these forms helps you choose a filter that fits your indoor air goals, maintenance expectations, and noise and airflow preferences.

Pellet (Extruded) Activated Carbon

Pellet, or extruded, activated carbon is formed into small cylindrical pieces. These pellets are relatively uniform in shape and size, which helps create predictable airflow paths through a filter cartridge or canister.

Characteristics of Pellet Carbon

Common characteristics of pellet activated carbon in home applications include:

  • Uniform shape: Cylindrical pellets (often a few millimeters in diameter) create consistent packing in a filter bed.
  • Moderate pressure drop: Air can pass between pellets with less resistance compared with very tightly packed fine powders.
  • Durability: Pellets typically resist crushing and generate less dust than some other forms.

Pellet carbon is often used where steady airflow and predictable performance are important. The bed depth (how thick the carbon layer is) and contact time (how long air stays in contact with carbon) matter just as much as the carbon type itself.

Advantages for Home Air Use

  • Consistent airflow: The open spaces between pellets can support higher airflow rates, which may help maintain clean air delivery rate (CADR) in a purifier.
  • Lower dust generation: Less shedding of carbon dust means less risk of black residue inside the device or on nearby surfaces.
  • Good fit for deeper beds: If a purifier uses a thick carbon canister, pellets can provide manageable resistance while offering substantial carbon mass.

Limitations and Considerations

  • Weight and cost per volume: A cartridge filled with pellets may be heavier and can be more costly per filter change than thin, lightweight carbon sheets.
  • Not magic for all VOCs: Even with pellet carbon, some gases adsorb poorly, and performance depends strongly on how much carbon is present and how long air stays in contact with it.
  • Noise trade-offs: Designs that push a lot of air through deep pellet beds sometimes require stronger fans, which can increase noise at higher speeds.
Comparison of common activated carbon types for home air use

Example values for illustration.

Pellet vs granular vs impregnated activated carbon at a glance
Carbon type Typical form in home filters Airflow & resistance (general) Main strengths Key considerations
Pellet (extruded) Deeper canisters or trays Moderate resistance, stable airflow Durable, lower dust, consistent performance Heavier cartridges, may cost more per change
Granular (GAC) Loose-filled panels or pouches Varies by packing density Flexible designs, good odor reduction when well-sized Can settle unevenly, potential for dust if poorly contained
Impregnated carbon Pellets or granules with additives Similar to base form Enhanced adsorption for specific gases Typically higher cost, may have narrower target use
Thin carbon sheet Bonded to fiber pre-filters Low resistance, low mass Lightweight, inexpensive, fits slim devices Limited capacity, saturates relatively quickly
Deep-bed pellet canister Cartridge with thick carbon layer Higher resistance, robust removal High capacity for odors/VOCs (by volume) May need stronger fan, potentially more noise
Carbon blend media Mixture of sizes or additives Designed per manufacturer goals Balanced performance across pollutants Not always transparent which gases it targets

Granular Activated Carbon (GAC)

Granular activated carbon consists of irregularly shaped particles, often resembling small grains or crushed pellets. It is widely used in both water and air treatment and appears in many consumer air filters.

Characteristics of Granular Carbon

In home air filtration, granular activated carbon is usually contained in a sealed or semi-sealed compartment, often behind mesh or nonwoven fabric. Its characteristics include:

  • Irregular shapes: Particle sizes can vary, affecting how tightly the media packs together.
  • Flexible fill configurations: Manufacturers can use shallower beds or fill pockets to fit slim filter frames.
  • Potential settling: Over time, vibration and airflow can cause granules to settle, slightly changing airflow patterns.

Advantages for Home Air Use

  • Design flexibility: Granules can be used in a wide range of filter shapes and thicknesses, from modest panels to relatively deep trays.
  • Odor reduction: When sufficient carbon mass is used, GAC can be effective at reducing common household odors from cooking, pets, and mild chemical smells.
  • Availability: Many replacement filters rely on granular carbon, making them relatively easy to find for a variety of purifiers.

Limitations and Considerations

  • Variable packing density: If granules are packed too tightly, airflow resistance can increase; if packed too loosely, air may take easier paths and reduce contact time.
  • Dust potential: Poorly contained GAC can release fine carbon particles, although many modern filters use liners or meshes to minimize this.
  • Capacity depends on thickness: Thin filters that include only a small volume of GAC may have limited odor and VOC reduction capacity and can saturate relatively quickly.

Impregnated Activated Carbon

Impregnated activated carbon is standard activated carbon that has been treated with additional substances to enhance its ability to adsorb or chemically interact with specific gases. For example, certain impregnations are designed to better address acidic gases, basic gases, or particular industrial contaminants.

What “Impregnated” Means in Practice

The impregnation process adds small amounts of other materials to the carbon surface. These can:

  • Change how certain gases interact with the carbon surface
  • Support chemical reactions that convert a gas into a less volatile form
  • Target a narrower group of pollutants more strongly than untreated carbon

In home air purifiers, impregnated carbon may be used in environments with more challenging gases, such as strong odors from hobbies, certain cleaning products, or other chemical sources. Some designs also combine different impregnated carbons to cover a wider range of gases.

Advantages for Home Air Use

  • Enhanced specificity: Can improve removal of certain gases that plain carbon handles less effectively.
  • Potential for smaller filters: Because of higher effectiveness for target gases, some applications may achieve goals with less media compared with untreated carbon.
  • Compatibility with pellet or granular forms: Impregnation can be applied to both pellets and granules, giving flexibility in filter design.

Limitations and Considerations

  • Cost: Impregnated carbon usually costs more than untreated carbon, and replacement filters may be priced accordingly.
  • Targeted performance: Additives may significantly improve performance for some gases but offer little change for others; marketing descriptions may not always specify which gases are targeted.
  • Lifespan variability: Depending on the exposure to specific chemicals, impregnated carbon can saturate quickly in some situations, requiring closer attention to replacement intervals.

Pellet vs Granular vs Impregnated: Practical Home Comparisons

For typical residential indoor air, the main concerns around activated carbon are usually:

  • General odors from cooking, pets, and everyday activities
  • Smells from occasional activities such as painting or light DIY projects (with proper ventilation)
  • Low-level VOCs from household products and furnishings

When comparing pellet, granular, and impregnated carbon for home use, the most practical questions are:

  • How much carbon is in the filter (carbon mass and bed thickness)?
  • How much airflow does my room require for reasonable air changes per hour (ACH)?
  • How often am I willing to replace carbon filters?

When Pellet Carbon May Make Sense

Pellet carbon may be well suited if:

  • You use an air purifier in a space with persistent odors (for example, near a kitchen or a hobby area).
  • Your purifier offers a deep carbon cartridge and you are comfortable with a somewhat larger, heavier filter.
  • You want a relatively robust solution that can handle longer operation between filter changes, assuming adequate carbon mass.

When Granular Carbon May Make Sense

Granular carbon is often appropriate if:

  • You mainly want to reduce everyday household odors and mild VOC sources.
  • You prefer a lighter filter design that is easier to handle and replace.
  • Your purifier has limited space and uses thinner panels or pouches.

When Impregnated Carbon May Make Sense

Impregnated carbon might be useful when:

  • Your indoor environment includes more noticeable chemical smells (for example, you store stronger cleaners or solvents in a nearby area and ensure ventilation).
  • You need improved performance for certain odors that seem to persist despite using standard carbon.
  • You are aware of the higher cost and are willing to monitor how quickly filters become saturated.

In many typical homes, well-sized untreated pellet or granular carbon with sufficient mass and reasonable air contact time can address common odor and low-level VOC concerns. Impregnated carbon tends to be more specialized.

Choosing Activated Carbon for Indoor Air Goals

Selecting the right activated carbon type is only one part of planning for indoor air quality. It should fit into your overall strategy, which may also include ventilation, humidity control, and particle filtration.

Match Carbon Type to Room and Use Case

Consider how and where you will use the purifier:

  • Bedrooms: Often benefit from quieter operation. A moderately deep carbon filter (pellet or granular) on a low to medium fan speed can balance odor control and noise.
  • Living rooms and open-plan areas: Typically require more airflow. Look for designs where the carbon layer does not excessively restrict airflow, and note the total carbon mass.
  • Kitchens or hobby rooms: May see stronger, intermittent odors. A deeper pellet or granular bed, or specialized impregnated carbon, can be helpful when paired with good source control and ventilation.

Carbon Filters and Overall Airflow

Air purifiers are often rated with particle CADR values based on their HEPA or particle filter performance. Adding deeper carbon media may reduce airflow compared with running the same fan without carbon. When evaluating filters:

  • Recognize that very thin, light carbon sheets may have limited odor capacity but preserve airflow.
  • Understand that deeper pellet or granular beds can improve odor and VOC reduction potential but may require higher fan speeds for similar particle CADR.
  • Balance your need for odor control with your tolerance for fan noise and energy use.

Filter Saturation and Replacement Timing

Once carbon is saturated, it can no longer effectively adsorb gases, and in some cases it may slowly release some previously adsorbed compounds back into the air. Because there is usually no simple built-in indicator for saturation, replacement is typically based on:

  • Manufacturer’s time-based guidance (for example, every few months under typical use)
  • Noticeable return of odors even when the purifier is running
  • Usage patterns, such as frequent cooking or use of strong-smelling products

It is common for carbon filters to need replacement more frequently than HEPA filters, especially in homes with stronger odor sources or continuous use.

Filter replacement planning for common home air filter types

Example values for illustration.

Typical filter replacement intervals and what affects them
Filter type Typical interval range (example) What changes the interval Reminder
Pre-filter (mesh or washable) Clean every 2–8 weeks Dust levels, pets, smoking, nearby outdoor pollution Rinse or vacuum regularly to maintain airflow.
Thin carbon sheet / carbon-coated pre-filter Replace about every 1–3 months Cooking frequency, strong odors, continuous fan use Odor return often signals saturation.
Granular carbon panel Replace about every 3–9 months Carbon mass, room size, VOC and odor load Heavier odor use shortens the interval.
Pellet carbon canister Replace about every 6–12 months Bed depth, fan speed, continuous vs intermittent use Check guidance for your specific cartridge.
Impregnated carbon media Replace about every 3–9 months Exposure to targeted gases, concentration peaks Stronger chemical odors can consume capacity faster.
HEPA or true HEPA filter Replace about every 6–18 months Dust load, fan speed, hours of use per day Watch for reduced airflow or persistent dust levels.

Putting Carbon Filters in Context with Overall Air Quality

Activated carbon is one useful tool within a broader indoor air quality strategy. For most homes, a combination of approaches works best:

  • Source control: Reducing strong odor or VOC sources where practical, storing chemicals away from living areas, and using low-odor products when possible.
  • Ventilation: Using kitchen and bathroom exhaust fans, opening windows when outdoor conditions are reasonable, and considering building-specific ventilation options.
  • Particle filtration: Using HEPA or equivalent filters to address particles such as dust, smoke, and pet dander.
  • Humidity management: Keeping indoor humidity within a generally comfortable range to discourage dampness and musty smells.
  • Carbon filtration: Adding appropriately sized pellet, granular, or impregnated carbon filters as needed for odors and certain VOCs.

When choosing between pellet, granular, and impregnated activated carbon, focus on the match between your typical indoor air conditions, the amount of carbon in the filter, how the filter affects airflow and noise, and how often you are prepared to replace it. This practical approach helps integrate carbon filtration into an overall plan for a more comfortable and manageable home indoor air environment.

Frequently asked questions

How do pellet, granular, and impregnated activated carbon types differ in real-world odor and VOC removal?

Pellet and granular activated carbon both rely on surface area and contact time; pellets offer more uniform packing for predictable airflow while granular media provide flexible form factors. Impregnated carbon contains additives that can chemically enhance removal for specific gases, so it can outperform untreated carbon for targeted contaminants but not necessarily for all VOCs.

What are typical replacement intervals for different activated carbon types in home air purifiers?

Replacement depends on carbon mass and pollutant load, but general ranges are: thin carbon sheets ~1–3 months, granular panels ~3–9 months, pellet canisters ~6–12 months, and impregnated media ~3–9 months. Heavy or continuous exposure to strong odors and chemicals will shorten these intervals.

Can impregnated activated carbon remove strong chemical fumes or solvents better than untreated carbon?

Impregnated carbon can be more effective for certain classes of gases (for example, acidic or basic compounds) because the additives promote chemical interactions, but effectiveness depends on matching the impregnant to the contaminant. Very high concentrations of solvents or industrial chemicals may still require source control, ventilation, or specialized treatment beyond typical home purifier media.

Will adding more carbon always improve my air purifier’s performance?

Increasing carbon mass and bed depth usually raises odor and VOC capacity by increasing contact time, but deeper beds can also increase airflow resistance and require stronger fans, which may increase noise. Additionally, if the carbon type or impregnation is not suited to the pollutant, adding more of it may not yield better removal for that specific gas.

How should I choose between pellet, granular, or impregnated carbon for different rooms?

Match the carbon type to the room’s typical sources: kitchens and hobby areas with stronger or intermittent odors benefit from deeper pellet or granular beds and, for specific chemicals, impregnated carbon; bedrooms often prioritize quieter operation so a moderate carbon bed with lower resistance is appropriate; space-limited units may use granular or thin sheets but will require more frequent replacement.