Exhaust Fan Best Practices for Bathrooms and Kitchens

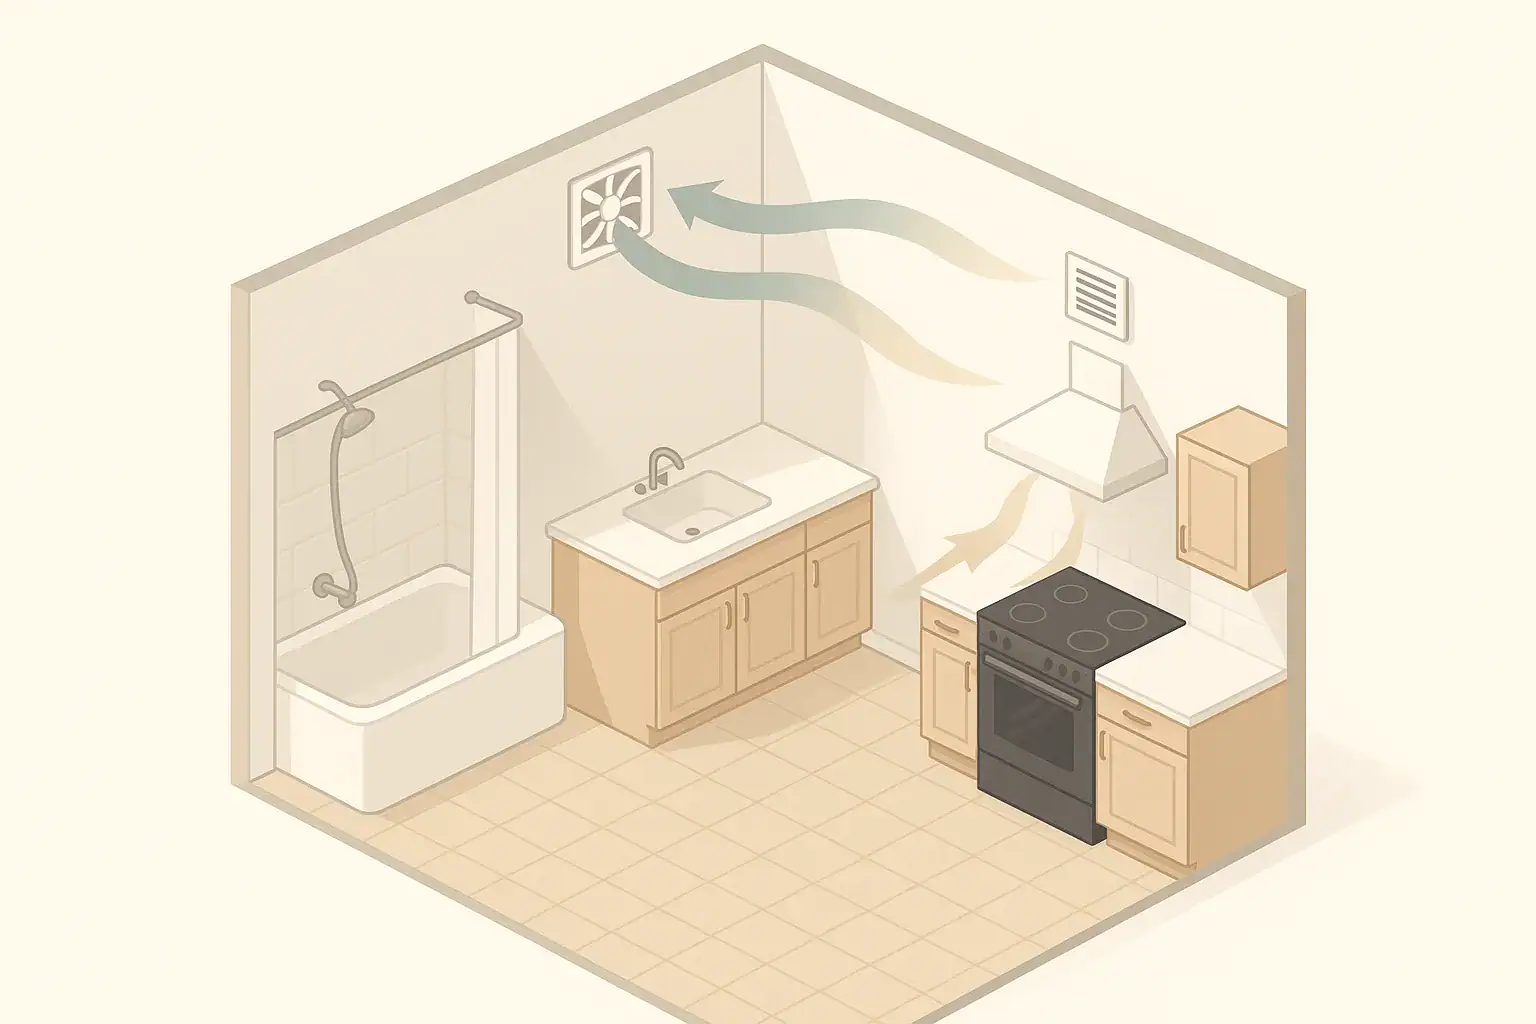
isometric illustration of bathroom and kitchen exhaust ventilation

Exhaust fan best practices for bathrooms and kitchens focus on correct sizing, smart placement, adequate runtime, and regular cleaning so moisture and cooking pollutants are actually removed from indoor air.

In many homes, fans are either too small, too weakly ducted, or not run long enough to make a real difference. With a few simple rules of thumb and checks, you can turn a noisy, decorative fan into one that noticeably clears fog, steam, and cooking odors while supporting overall indoor air quality.

Quick answer
  • Size bathroom exhaust fans around 1 CFM per square foot (minimum ~50 CFM), more for large or very humid spaces.
  • Run bathroom fans during showers and for about 20–30 minutes afterward to clear moisture.
  • Use kitchen exhaust on at least a medium setting whenever cooking, especially frying, searing, or boiling.
  • Vent fans outdoors with short, smooth duct runs; avoid venting into attics, crawlspaces, or closed cavities.
  • Clean fan grilles and accessible blades every few months to keep airflow and noise performance stable.
  • Check that air is exhausted outside by feeling for airflow at exterior caps and watching how quickly fog or odors clear.

Why Bathroom and Kitchen Exhaust Fans Matter for Indoor Air

Bathroom and kitchen exhaust fans are simple mechanical ventilation tools designed to move polluted or humid indoor air directly outdoors. They work alongside natural ventilation (like open windows) and whole-house systems to manage moisture and pollutants at their source.

In bathrooms, the main concern is excess humidity from bathing that can lead to condensation, musty smells, and mold-friendly conditions. In kitchens, the focus is cooking byproducts: grease aerosols, smoke, fine particles, and cooking odors, as well as heat and water vapor from boiling or dishwashing.

When fans are correctly sized, installed, and used, they help with:

  • Moisture control: Reducing foggy mirrors, condensation on windows, and damp surfaces after showers or cooking.
  • Odor removal: Moving bathroom and kitchen odors outdoors instead of letting them spread through the home.
  • Particle and fume reduction: Limiting buildup of smoke and cooking-related particles in living spaces.
  • Comfort and building durability: Supporting comfortable humidity and reducing the risk of moisture-related building material issues over time.

Bathroom and kitchen exhaust fans do not filter and recirculate air the way air purifiers do; instead, they remove indoor air and rely on replacement air from other parts of the house or from outdoors. That makes their design and operation slightly different from filtration-focused devices.

Key Concepts: Sizing, Airflow, and Ducting That Actually Work

Two main ideas govern exhaust fan performance: how much air the fan can move (airflow) and how effectively that air is routed outdoors (ducting and termination). The common rating used for fans is cubic feet per minute (CFM), an estimate of the volume of air moved each minute under standardized test conditions.

Bathroom exhaust fan sizing basics

A common starting rule for bathroom fans is about 1 CFM per square foot of floor area with a minimum rating of roughly 50 CFM. For example, an 8 ft by 10 ft bathroom (80 square feet) might use a fan in the 80 CFM range.

Additional factors that may justify higher airflow include:

  • A jetted tub or very frequent hot showers.
  • Enclosed toilet compartments or separate water closets.
  • High ceilings (significantly above 8 ft) or complex room layouts.

For these conditions, some homeowners choose a fan modestly above the 1 CFM per square foot rule or install multiple fans serving different areas of the same large bathroom.

Kitchen exhaust concepts: capture and flow

Kitchen ventilation focuses on capturing cooking plumes directly above or near the source. Range hoods or wall-mounted exhausts above stoves and cooktops are typically sized based on the stove width and the intensity of cooking. Higher heat and more frequent frying or stir-frying usually benefit from higher airflow and better hood coverage.

Recirculating hoods with simple grease filters can reduce some grease and odors but do not remove moisture and combustion byproducts outdoors. Whenever possible, a ducted, externally vented kitchen fan does more to clear indoor air.

Ducting and termination: where the air actually goes

Even a well-sized fan can perform poorly if its duct run is long, restrictive, or improperly terminated. Good practices generally include:

  • Routing ducts to the outside through a roof, wall, or soffit, not into attics, crawlspaces, or garages.
  • Keeping duct runs as short and straight as reasonably possible.
  • Using smooth-walled ducts with gentle bends, securely sealed joints, and appropriate insulation in unconditioned spaces.
  • Ensuring the exterior cap has a functioning damper that opens when the fan runs and closes when off.

The real performance you experience is the combination of fan CFM rating plus duct design plus how long and when you operate the fan.

Bathroom and kitchen exhaust checklist by topic — Example values for illustration.
Task Why it matters Practical notes
Estimate bathroom fan CFM from room size Ensures enough airflow to clear steam Use ~1 CFM per sq ft, minimum about 50 CFM
Confirm kitchen hood vents outdoors Removes moisture and pollutants instead of recirculating Look for a duct leading outside, not just a filter grille
Check duct length and bends Excessive resistance reduces real airflow Straighter, shorter ducts with gentle bends work better
Inspect exterior vent caps Stuck dampers and debris block exhaust Damper should move freely when fan is running
Run bathroom fan after showers Helps dry surfaces and lower humidity Target about 20–30 minutes of post-shower runtime
Use kitchen exhaust during high-heat cooking Captures smoke, particles, and odors at the source Turn fan on before cooking and leave on until air clears
Clean grilles and accessible parts Dirt and grease buildup cut airflow Wipe or vacuum every few months as needed

Example values for illustration.

Common Exhaust Fan Mistakes and How to Spot Them

Many homes have exhaust fans that are installed but do not perform their intended job. Recognizing typical issues helps you decide what to adjust, repair, or upgrade.

Bathroom fan issues

  • Fan is too weak: If the mirror stays fogged for more than 10–15 minutes after a shower despite running the fan, airflow may be insufficient or blocked.
  • Fan is noisy but ineffective: Loud operation can signal poor-quality bearings or resonance, but more importantly, noise does not always mean good airflow. A clogged grille, dirty blades, or restrictive duct can make a fan sound busy while moving little air.
  • Fan is placed far from the shower: A fan mounted on the opposite side of the room, with no air path over the shower, may leave steam lingering.
  • No clearance for make-up air: A tightly sealed bathroom with the door closed and no undercut may prevent enough replacement air from entering, reducing exhaust rate.

Kitchen exhaust problems

  • Recirculating hood used as primary ventilation: These units can reduce some grease and odors but cannot remove moisture or combustion byproducts outdoors.
  • Hood too shallow or placed too high: If the hood does not cover the burners or is far above them, cooking plumes can escape into the room before being captured.
  • Running fan only after smoke appears: Waiting until the kitchen is visibly smoky is less effective than running the fan from the start of cooking.
  • Grease-clogged filters: Metal or mesh filters can become coated with grease, which reduces airflow and capture efficiency.

Duct and termination warning signs

  • Warm, humid attic or crawlspace from exhaust: This can indicate that bathroom or kitchen fans are venting into enclosed spaces instead of outdoors.
  • Backdrafts or whistling vents: Exterior caps that vibrate, whistle, or allow noticeable reverse airflow during wind events may need inspection.
  • Visible lint, grease, or staining at vent outlets: Heavy buildup can suggest long-term exhaust of unfiltered or high-moisture air.

Practical Best Practices: Using Bathroom and Kitchen Fans Effectively

Once your fans are reasonably sized and properly ducted, how you use them determines most of the day-to-day impact on indoor air.

Bathroom fan operation tips

  • Turn on before showering: Start the fan several minutes before creating steam to establish steady airflow.
  • Run during and after showers: Keep the fan on throughout bathing and for roughly 20–30 minutes afterwards to help dry surfaces and reduce lingering humidity.
  • Allow make-up air: Slightly undercut doors or leave them slightly open so replacement air can enter the bathroom while the fan is running.
  • Consider timers: A wall timer or humidity-sensing control can help ensure consistent post-shower runtime without requiring manual shutoff monitoring.

Kitchen exhaust fan operation tips

  • Use for most cooking, not just smoke events: Even boiling water and simmering sauces add moisture and particles to indoor air.
  • Turn on early: Start the hood before heating pans so it captures the rising plume from the beginning.
  • Match fan speed to cooking intensity: Use higher speeds for frying, searing, or grilling, and moderate speeds for simmering or low-heat tasks.
  • Run fan after cooking: Keep it on for several minutes after turning off burners to clear residual fumes and heat.

Balancing exhaust with overall home ventilation

Because exhaust fans remove indoor air, they rely on replacement air coming from elsewhere in the home or from outdoors. In very airtight homes or in extremely cold or hot weather, continuous high exhaust rates can increase the load on heating or cooling systems or create noticeable drafts from entry points.

In most typical U.S. homes, short bursts of bathroom and kitchen exhaust during activities are well within normal ventilation needs. If you notice persistent drafts or pressure imbalance issues, a ventilation professional can help evaluate whole-house airflow and make adjustments.

Real-World Scenarios: Applying Best Practices

Putting all the ideas together can be easier when you think in terms of homes and rooms you might recognize.

Small interior bathroom with no window

Consider a 5 ft by 8 ft interior bathroom (40 square feet) with a tub-shower. A fan rated around 50–80 CFM is a common choice. Best practices would include:

  • Ensuring the fan ducts directly outdoors with a short, insulated duct run if it passes through unconditioned space.
  • Mounting the fan near the shower area, not at the far corner.
  • Using the fan for the entire shower duration and at least 20 minutes afterward.
  • Checking that the door has enough gap at the bottom to allow incoming air.

Open kitchen with gas range

In an open-plan kitchen with a gas range and frequent high-heat cooking, a ducted hood that fully covers the cooktop and vents outdoors can make a noticeable difference in odors and visible smoke. Good practice includes:

  • Running the hood on an appropriate speed setting whenever the burners are on.
  • Cleaning or replacing grease filters regularly so airflow remains strong.
  • Checking that the roof or wall termination is in good condition and clear of obstructions.

Older home with fans venting into attic

Some older installations route bathroom fans or kitchen exhaust into an attic or soffit cavity. While this may move odors away from living spaces, it can introduce moisture and pollutants into building cavities. In many cases, a better approach is to extend or re-route ductwork to a proper exterior termination while observing local building codes.

Safety, Standards, and Special Features

While exhaust fans are relatively simple devices, a few safety and standards-oriented topics are relevant when planning or improving systems.

Code considerations and moisture management

Building codes in many U.S. jurisdictions have basic requirements for bathroom and kitchen ventilation, including minimum airflow rates, discharge locations, and electrical safety rules. When modifying ducting, adding fans, or relocating terminations, it is useful to check local requirements or consult a qualified professional.

For moisture management specifically, codes and best-practice documents often emphasize venting directly outdoors, sealing ducts against condensation, and avoiding discharge into insulation-filled spaces where moisture could accumulate.

Noise ratings and comfort

Bathroom fans are often labeled with a sound rating (commonly in sones). Lower sone ratings generally indicate quieter operation. Quieter fans can encourage longer and more consistent use because they are less intrusive. However, a very quiet fan that does not move enough air is not necessarily better, so it is worth balancing airflow performance with noise when choosing or evaluating units.

Additional technologies in fans

Some modern fans integrate features such as motion sensors, humidity sensors, or built-in heaters and lights. These can support more automatic or comfortable use, but the core goals remain the same: providing sufficient airflow, vented outdoors, during and after moisture-generating or pollutant-generating activities.

Other air-cleaning technologies, such as ionizers or UV-C lamps, may appear in various ventilation or air quality products. For exhaust fans whose main role is moving air outside, these additions are generally secondary. When considering any device that actively changes air chemistry, it is prudent to review independent information about byproducts like ozone and to follow manufacturer and safety guidance.

Maintenance and Long-Term Upkeep

Even a well-designed exhaust system will gradually lose effectiveness without routine upkeep. Dust, lint, and grease accumulate over time, and mechanical parts can wear or loosen.

Cleaning schedules

  • Bathroom fans: Every few months, turn off power to the fan, remove the grille, and gently vacuum or wipe away dust from the grille and accessible parts. In many units, the motor and blower can be partially accessed for careful cleaning following manufacturer instructions.
  • Kitchen hoods: Metal or mesh filters can usually be removed and washed with warm, soapy water, then fully dried before reinstallation. The hood interior around the filters may also need periodic degreasing. Paper or carbon filters, if present, are typically replaced on a schedule suggested by the manufacturer or when visibly dirty.
  • Exterior vents: Inspect once or twice a year to clear leaves, lint, or insect nests and confirm the damper moves freely.

Checking performance over time

Simple observation can indicate when maintenance or upgrades are needed:

  • Mirrors and surfaces remain wet much longer than they used to after showers, despite running the fan.
  • Cooking odors linger in nearby rooms long after using the kitchen exhaust.
  • Fan noise changes noticeably (rattling, grinding, or new vibration).

In some cases, upgrading to a more efficient, properly sized, quiet fan or improving ductwork can significantly improve performance while keeping noise and energy use reasonable.

Filter and cleaning planner for exhaust-related components — Example values for illustration.
Component Typical service interval What changes it Reminder
Bathroom fan grille and visible dust About every 3–6 months Dust levels, pet hair, fan usage Vacuum or wipe when buildup is visible
Bathroom fan internal cleaning (accessible parts) About every 1–2 years Fan design, noise changes, heavy use Turn off power before any internal cleaning
Kitchen hood metal or mesh grease filters About every 1–3 months Frequency of frying and high-heat cooking Wash with warm, soapy water and fully dry
Kitchen hood carbon or odor filters (if present) Commonly every few months Cooking intensity, manufacturer guidance Replace when odors persist sooner than usual
Exterior vent caps and dampers At least once or twice a year Local climate, foliage, insect activity Clear debris and confirm damper moves freely
Overall fan performance check At least annually Age of fan, noise changes, moisture issues Evaluate if upgrades or duct fixes may help

Example values for illustration.


Related guides: Bathroom Mold Prevention: Exhaust Fan Timing and Humidity ControlCooking Odors: Carbon Filters, Range Hoods, and Practical StrategiesDo Air Purifiers Help With Smoke and Odors?

Key Takeaways for Effective Bathroom and Kitchen Exhaust

Effective bathroom and kitchen exhaust relies on four main elements: adequate fan sizing, outdoor venting with sensible duct runs, consistent use during and after moisture or cooking events, and straightforward cleaning and inspection. When these pieces are in place, fans do more than make noise—they contribute meaningfully to managing humidity, odors, and everyday indoor air pollutants.

By periodically observing how quickly steam and cooking residues clear, checking visible components, and making modest adjustments to runtime and maintenance habits, most households can significantly improve exhaust performance without major complexity.

Frequently asked questions

How long should I run a bathroom exhaust fan after taking a shower?

Run the fan during the shower and continue for about 20–30 minutes afterward to clear lingering humidity and help surfaces dry. Starting the fan a few minutes before showering also helps establish steady airflow and capture incoming steam more effectively.

How do I size a bathroom exhaust fan for my space?

A common rule of thumb is about 1 CFM per square foot of bathroom floor area with a minimum of roughly 50 CFM. Larger rooms, high ceilings, or fixtures like jetted tubs typically require higher CFM or multiple fans to maintain good moisture control.

Should my kitchen range hood vent outdoors or is recirculating acceptable?

Venting outdoors is preferred because it removes moisture, grease particles, and combustion byproducts from the home. Recirculating hoods can filter some grease and odors but do not eliminate moisture or gases, so they are less effective, especially with frequent high-heat or gas cooking.

Can I vent an exhaust fan into the attic or crawlspace?

No, venting into attics, crawlspaces, or other enclosed cavities is not recommended because it can deposit moisture and contaminants into building assemblies, increasing mold and deterioration risk. Rerouting ducts to a proper exterior termination is the safer, code-compliant solution in most cases.

How often should I clean bathroom and kitchen exhaust components?

Wipe or vacuum bathroom fan grilles every 3–6 months and consider internal cleaning every 1–2 years depending on use. Kitchen grease filters generally need cleaning every 1–3 months, and exterior vent caps should be checked once or twice a year for debris and damper function.

How to Ventilate in Winter Without Freezing

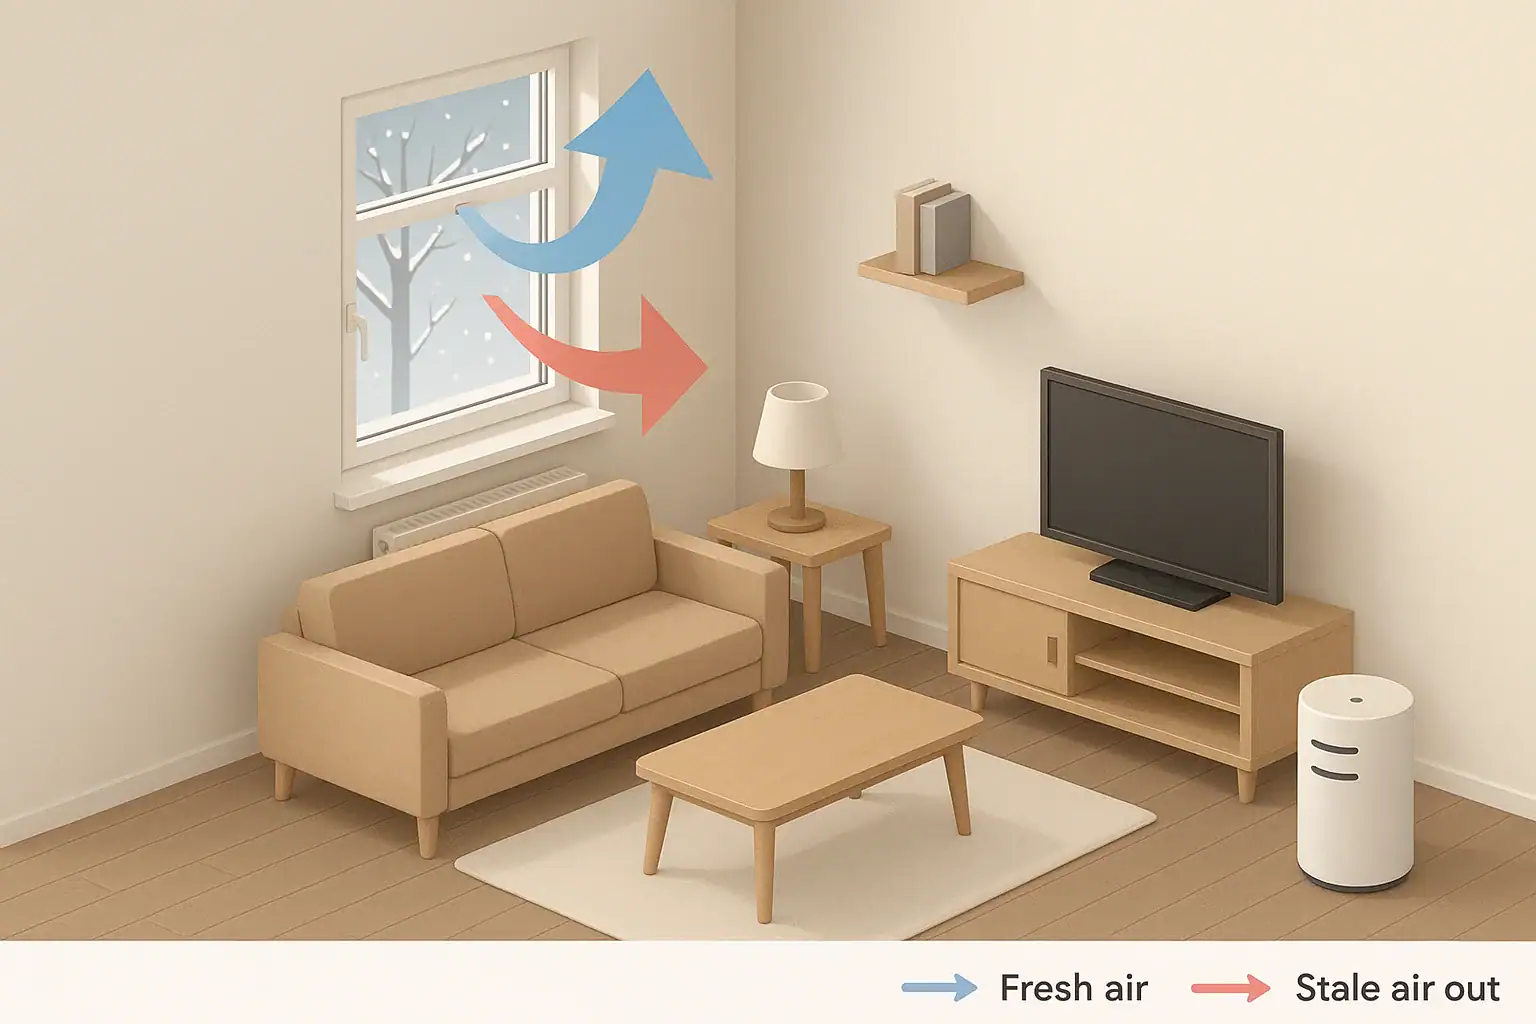
Isometric winter room with window ventilation and air purifier

You can ventilate in winter without freezing by using short, controlled airing, balancing fresh air with heat retention, and supporting it with filtration where needed.

In cold weather, completely sealing a home keeps heat in but also traps indoor pollutants and moisture. With a few simple strategies, you can bring in enough fresh air for comfort and indoor air quality while keeping heat loss, drafts, and energy waste to a minimum.

Quick answer
  • Aim for brief window openings (3–10 minutes) several times a day instead of leaving a window cracked all day.
  • Target around 0.3–0.5 air changes per hour (ACH) as a general minimum for most homes, higher for crowded or stuffy rooms.
  • Use cross-ventilation (two openings) when possible so air exchanges quickly and you can close windows sooner.
  • Run kitchen and bathroom exhaust fans during and shortly after cooking or showering to remove moisture and pollutants.
  • Use air purifiers and range hoods to reduce particles and some gases so you can ventilate a bit less aggressively in extreme cold.
  • Keep indoor temperature and humidity in a comfortable range (about 68–72°F, 30–50% RH) to avoid condensation and chills.

Why winter ventilation matters for indoor air quality

In winter, people often close windows for weeks at a time to stay warm and save on heating costs. While this reduces drafts, it also allows indoor pollutants to build up. Everyday activities like cooking, showering, cleaning, burning candles, and simply breathing all add moisture and contaminants to indoor air.

Without some form of ventilation, you may see:

  • Stuffy, stale-feeling rooms
  • Rising carbon dioxide (CO2) levels from people indoors
  • Excess humidity, leading to condensation on windows and potential mold growth on cold surfaces
  • Lingering odors from cooking or household products
  • Accumulation of fine particles (for example, from cooking or smoke) and volatile organic compounds (VOCs)

Good winter ventilation does not mean leaving windows wide open all day. Instead, the goal is controlled air exchange: bringing in enough fresh air to dilute pollutants and moisture, while limiting unnecessary heat loss and discomfort.

Key concepts: air exchange, ACH, and balanced strategies

To ventilate intelligently in cold weather, it helps to understand a few basic concepts. You do not need precise measurements in most homes, but rough targets can guide your choices.

Air changes per hour (ACH)

Air changes per hour (ACH) is a way to describe how often the air in a space is replaced with outdoor air in one hour. For example, 0.5 ACH means that half of the air volume is replaced every hour, on average.

In practice, most existing homes end up somewhere around 0.3 to 0.7 ACH from natural leakage plus intermittent window opening and fans. Very tight homes may be lower, and older, draftier homes may be higher even without deliberate ventilation.

As rough guidance:

  • Below ~0.3 ACH: Air may feel increasingly stale, especially with several occupants.
  • Around 0.3–0.5 ACH: Often acceptable for many households if pollutant sources are moderate and localized exhaust is used.
  • Above ~0.5 ACH in winter: Fresher air but potentially more heat loss unless managed with short bursts or heat recovery.

Ventilation versus filtration

Ventilation exchanges indoor air with outdoor air, diluting pollutants and moisture. Filtration, such as using a HEPA air purifier, removes particles from indoor air but does not lower CO2 or humidity. A balanced winter strategy often combines the two.

  • Use ventilation (windows, vents, exhaust fans) to manage CO2, moisture, and gases.
  • Use filtration to reduce fine particles (dust, PM2.5, smoke) when opening windows is impractical or outdoor air is poor.

Short, intense airing vs. constant small leaks

Opening windows wide for a short period can exchange air quickly, then you can close them and let the heating system recover. This often wastes less energy than leaving a window slightly open for hours, which creates a continuous stream of cold air and cools surrounding surfaces.

Figure 1. Winter ventilation choices: when to ventilate, filter, or dehumidify. Example values for illustration.
Home situation Main issue noticed Primary action type Why this is a good first step
Tight home, windows rarely opened Stuffy air, grogginess, rising CO2 on monitor Increase ventilation (windows or mechanical) Fresh outdoor air directly reduces CO2 and stale feeling.
Cooking daily with gas or high-heat methods Odors and fine particles lingering Use exhaust hood and/or air purifier Local exhaust and filtration reduce particles and smells.
Small bathroom, frequent showers Foggy mirror, condensation on walls Run exhaust fan; brief window opening Removes humid air at the source, limiting moisture spread.
Bedroom with closed door all night Stale smell in morning, mild headache Short airing cycles; possible purifier Window airing resets air; purifier helps with particles.
Cool exterior walls and windows Condensation or mold spots Control humidity; targeted ventilation Lowering indoor humidity reduces condensation risk.
Outdoor air occasionally smoky or dusty Concern about bringing in particles Time ventilation; rely more on filtration Ventilate when outdoor air is cleaner; filter when not.
Basement or lower level Damp smell, higher humidity Dehumidification plus limited ventilation Moisture removal and modest fresh air manage dampness.

Common winter ventilation mistakes and what to watch for

Trying to stay warm often leads to patterns that quietly worsen indoor air quality. Recognizing these can help you adjust your approach without large renovations.

Leaving a window slightly open all day

A constant small gap can cause continuous cold drafts and cool adjacent walls, which may lead to condensation. You pay to heat a steady stream of incoming cold air. Short, deliberate openings usually exchange air more efficiently.

Blocking or ignoring exhaust fans

Kitchen and bathroom exhaust fans are valuable tools in winter. Common issues include:

  • Not using the hood when cooking due to noise or habit.
  • Shutting off the bathroom fan immediately after a shower instead of letting it run 15–20 minutes.
  • Dirty fan covers or weak fans that do not move much air.

These fans primarily remove humid, polluted air directly at the source with limited impact on overall heat loss when used for short periods.

Over-humidifying closed spaces

Humidifiers can make dry winter air more comfortable, but in sealed rooms they can quickly raise humidity beyond the recommended range. This increases condensation on cold windows and walls. If you use a humidifier, monitor humidity with a basic hygrometer and adjust runtime and ventilation accordingly.

Relying only on filtration and never airing out

HEPA filtration can significantly reduce particles, but it does not remove CO2, water vapor, or all gases. Even in very cold conditions, some level of outdoor air exchange is beneficial. Filtration is a complement, not a complete replacement for ventilation.

Ignoring warning signs in specific rooms

Winter problems often show up first in certain spaces. Signs that a room needs better ventilation or humidity control include:

  • Persistent condensation on windows, especially at the bottom edges
  • Musty odors or visible mold spots on exterior walls or ceilings
  • Strong cooking or chemical odors that linger for many hours
  • People regularly complaining that a room feels stuffy or air feels “heavy”

Practical strategies: how to ventilate in winter without freezing

Combining short airing cycles, exhaust use, and filtration lets you manage air quality while keeping your home comfortable. Adjust frequency and duration to your climate, insulation level, and household size.

1. Use short, scheduled window airing

Instead of leaving windows cracked for long periods, try controlled airing:

  • How long: Open windows wide for about 3–10 minutes, depending on outdoor temperature and wind.
  • How often: Typically 2–4 times per day in frequently occupied rooms (morning, midday, evening, and after specific activities like cooking).
  • Cross-ventilation: If safe and possible, open two windows or a window and a door on opposite sides of the space to create a quick airflow path.

During airing, you can lower thermostats slightly to keep the heating system from overshooting, then return to your normal setting afterward.

2. Target high-pollution activities

Some activities briefly create much higher pollution than typical background levels. Ventilate most around these events:

  • Cooking: Use the range hood on a setting that vents outdoors, and run it for several minutes after cooking. If you do not have a hood that vents outside, open a nearby window in short bursts and consider using a portable air purifier near the cooking area.
  • Showering: Run the bathroom fan during and at least 15–20 minutes after showering. If the bathroom has a window, a short opening after the shower can clear moist air faster.
  • Cleaning or painting: Many products release VOCs. Increase ventilation while using them and for a while afterward, especially if odors are noticeable.

3. Rotate ventilation between rooms

In colder climates, you may not want many windows open at once. A practical approach is to ventilate rooms in sequence:

  • Open bedroom windows wide for 3–5 minutes while you are not in the room, then close them.
  • Later, air out the living room for another 3–5 minutes.
  • Use closed interior doors to limit drafts into occupied spaces during these short cycles.

This pattern keeps overall heat loss modest while giving each room a periodic fresh air reset.

4. Combine ventilation with air purifiers

When outdoor air is very cold or has temporary issues (such as nearby traffic or smoke), you can lean more on filtration to control particles and use shorter ventilation bursts.

  • Run a suitable HEPA air purifier sized for the room, placed so that it can circulate air effectively without obstructing airflow.
  • Ventilate when outdoor air is relatively cleaner (for example, away from rush hour or local events that generate smoke).
  • Use purifiers to maintain lower particle levels between ventilation events.

This combination allows reasonable indoor air quality while reducing how long windows must stay open in harsh weather.

5. Manage humidity alongside ventilation

In winter, indoor humidity often drops, but in well-sealed homes it can sometimes become too high in certain rooms. Aim for roughly 30–50% relative humidity. To help stay in this range:

  • Ventilate and exhaust moisture at the source in kitchens and bathrooms.
  • Avoid drying large amounts of laundry indoors without extra ventilation.
  • Use humidifiers carefully, with a hygrometer, and reduce output or add airing when humidity climbs above about 50–55% for extended periods.

Realistic home scenarios and example strategies

Every home is different, but some common situations illustrate how winter ventilation strategies can be adapted without major changes to the building.

Small apartment with sealed windows and central heat

If your windows are tight and you cannot open them widely, use what you can access:

  • Open available windows for brief periods on milder winter days.
  • Run kitchen and bathroom exhaust fans during and after use.
  • Place an air purifier in the main living area or bedroom to reduce particulate buildup.
  • If allowed and safe, use the building’s ventilation features (trickle vents, dedicated vents) so they remain unblocked.

Detached house in a cold climate

Homes in colder regions may experience bigger temperature swings when windows open. You can still ventilate efficiently by:

  • Performing 3–5 minute cross-ventilation in the morning and evening.
  • Limiting airing to one or two rooms at a time, closing doors to unused rooms.
  • Using local exhaust (kitchen, bath) more often, as these are targeted and relatively brief.
  • Insulating and weather-stripping to reduce uncontrolled drafts, then using controlled window openings instead.

Bedroom used heavily at night

Bedrooms often have elevated CO2 by morning because doors and windows stay closed for hours. For these rooms:

  • Air out the bedroom for several minutes shortly before bed and again in the morning.
  • Where safe, keep the door slightly open at night to allow central air circulation.
  • Consider a small air purifier to reduce particles from bedding, dust, and nearby activities.
  • Watch for condensed moisture on windows; increase ventilation or reduce humidifier settings if it appears routinely.

Some ventilation and air-cleaning devices include additional features beyond simple fans and filters. It is helpful to understand what they do and how they fit into a winter strategy.

Ozone-generating devices

Ozone can react with indoor air components in ways that may produce byproducts and is generally not desired in occupied spaces. For home use, many people prefer devices that are described as not producing intentional ozone, especially in winter when windows are closed more often.

Ionizers and electrostatic devices

Some air cleaners use ionization or electrostatic methods to remove particles. While they can reduce certain particles, they can sometimes generate small amounts of ozone as a byproduct, depending on design. If you use such devices in winter, consider:

  • Reading manufacturer information on ozone output and usage recommendations.
  • Avoiding running them continuously in tightly closed rooms if you are unsure of their byproducts.
  • Supplementing with regular ventilation to dilute any byproducts.

UV-C features

Some systems incorporate UV-C light to address microorganisms within ducts or inside the device. These features do not replace ventilation. If a device uses UV-C:

  • Ensure the light source is enclosed so occupants are not directly exposed.
  • Follow manufacturer guidance for placement, maintenance, and lamp replacement.
  • Continue to use regular ventilation and filtration practices alongside UV-C features.

Using monitors to guide winter ventilation

Basic consumer air quality monitors can show trends for CO2, PM2.5, and sometimes total VOCs. While readings can be imprecise, trends can help you understand when spaces benefit most from ventilation. In winter, you might:

  • Note how quickly CO2 rises in bedrooms at night and adjust airing or door positions.
  • See how long cooking particles or odors linger and adjust hood use or window-opening time.
  • Watch humidity readings and increase dehumidification or ventilation if they stay elevated near cold surfaces.

Maintenance and ongoing upkeep in winter

Good winter ventilation depends not only on when you open windows, but on how well your systems and components are maintained. A few small tasks can make a noticeable difference.

Keep exhaust fans effective

Over time, lint, dust, and grease can reduce fan performance.

  • Clean range hood filters as recommended so they can move air efficiently.
  • Vacuum or wipe bathroom fan grilles periodically to remove dust.
  • Listen for changes in noise or airflow that might indicate a failing fan.

Maintain air purifier performance

Filters clog gradually, reducing airflow and effectiveness.

  • Replace HEPA and carbon filters on the schedule suggested by the manufacturer or sooner if heavily used.
  • Vacuum pre-filters if they are designed to be cleaned.
  • Place purifiers where their airflow is not blocked by furniture, curtains, or walls.

Check windows and seals

Well-sealed windows allow you to control when and how you ventilate, instead of losing heat through random leaks.

  • Use weather-stripping or caulk to fix obvious drafts.
  • Ensure windows can still open and close easily for short airing cycles.
  • Consider using interior curtains or blinds at night to reduce radiant heat loss, opening them during airing periods.

Frequently asked questions about winter ventilation

How often should I ventilate my home in winter?

A common pattern is two to four brief airing sessions per day in main living areas and bedrooms, plus targeted ventilation during activities like cooking and showering. The exact frequency depends on how many people are present, the tightness of the building, and your climate.

Is it better to keep a window slightly open all night?

This may be comfortable for some people, but from an energy standpoint it usually leads to continuous heat loss and can cool nearby surfaces. A mix of pre-bed airing, door position adjustments, and occasional night-time window opening may be more efficient while still supporting comfort.

Can I rely on my kitchen range hood alone for winter ventilation?

A vented range hood is excellent for removing cooking-related pollutants, but it mainly affects the kitchen area and times when you cook. You still benefit from broader whole-room airing from time to time, especially in bedrooms and living areas.

What if outdoor air quality is sometimes poor?

You can time ventilation for periods when outdoor air is relatively better and use filtration more heavily when outdoor conditions are worse. Short, targeted airing even during less-than-ideal outdoor conditions may still be useful if you quickly follow it with filtration to capture incoming particles.

How cold is too cold to open windows?

There is no strict temperature cutoff. In very cold conditions, you can shorten airing times to just a few minutes with strong cross-ventilation, use interior doors to shield occupied areas, and rely more on exhaust fans. The goal is to exchange air quickly and then close up again.

Figure 2. Example winter humidity and mold risk quick plan. Example values for illustration.
Humidity goal Simple actions Tools that can help Notes
Around 30–40% RH in very cold weather Limit humidifier output; ventilate after moisture-heavy activities. Hygrometer; bathroom and kitchen exhaust fans. Lower humidity reduces condensation on cold windows and walls.
Around 40–50% RH in mild winter Use moderate humidification if air feels dry; open windows briefly. Humidifier with adjustable output; window airing. Balance comfort with avoiding persistent window condensation.
Humidity often above ~55% Increase exhaust use; avoid drying laundry indoors without extra ventilation. Dehumidifier (if needed); fans to move air off cold surfaces. Prolonged high humidity increases risk of mold growth in cool corners.
Condensation on windows most mornings Air out bedrooms after waking; reduce overnight humidifier use. Timed exhaust fans; short cross-ventilation. Focus on moisture sources near bedrooms first.
Localized mold spots on exterior walls Improve airflow to that area; manage humidity; consider moisture-resistant finishes. Fans; furniture spacing from walls. Keep furniture a few inches from cold walls to allow air circulation.
Basement or crawlspace feels damp Use dehumidification; seal obvious water entry; ventilate moderately. Dehumidifier; sump or drainage improvements (if applicable). Too much cold outdoor air can cool surfaces, so balance ventilation and drying.

Related guides: Ventilation vs Air Purifier: When You Need One, the Other, or BothHow to Stop Condensation on Windows (And Why It Matters for Mold)CO2 Monitors for Homes: What Good Numbers Look Like and Why They Matter

Key takeaways for ventilating in winter without freezing

Ventilating in winter is about timing and focus, not leaving windows open all day. Short, intentional airing and targeted exhaust during high-pollution activities can maintain fresher air with limited heat loss. Filtration helps manage particles when it is too cold or inconvenient to rely solely on open windows.

Watching for signs like condensation, lingering odors, and persistent stuffiness gives you feedback about whether your current approach is working. With modest adjustments—using fans effectively, caring for filters, and scheduling quick window openings—you can balance comfort, energy use, and indoor air quality through the winter season.

Frequently asked questions

How long should I open windows during a winter airing session?

Open windows wide for roughly 3–10 minutes depending on outdoor temperature and wind; in very cold weather aim for the shorter end (around 3 minutes) with cross-ventilation if possible. The goal is a quick exchange of indoor air to dilute CO2 and moisture while minimizing heat loss to surfaces.

Can I rely solely on HEPA air purifiers instead of opening windows in winter?

HEPA air purifiers effectively remove particles like dust and smoke but do not reduce CO2, humidity, or many gases. Purifiers are a useful complement, but periodic outdoor air exchange is still advisable to manage CO2 and moisture.

What is the best way to ventilate after cooking in winter without losing too much heat?

Use a vented range hood that exhausts outdoors when available and run it for several minutes after cooking. If you lack an exhaust hood, open a nearby window briefly and consider running a portable air purifier to reduce lingering particles while keeping the airing time short.

How should I manage indoor humidity to avoid condensation and mold in winter?

Aim for roughly 30–50% relative humidity (lower in very cold weather), exhaust moisture at source when showering or cooking, and monitor levels with a hygrometer. Reduce humidifier output or add brief ventilation if humidity regularly exceeds about 50–55% to limit condensation on cold surfaces.

What if outdoor air is smoky or polluted—how can I still ventilate in winter?

Time ventilation for periods when outdoor air is cleaner and rely more on filtration (HEPA and activated carbon) when outdoor conditions are poor. Short, targeted airing followed by running air cleaners can help balance reducing particles while maintaining acceptable indoor air quality.

CO2 in Bedrooms: What Levels Mean and What to Do

Isometric illustration of a bedroom with window ventilation

In bedrooms, carbon dioxide (CO2) levels below about 800–1000 ppm are generally considered good for comfort, while higher values suggest limited air exchange and a buildup of exhaled air.

Bedroom CO2 is mainly a sign of how well fresh air is replacing stale air while people sleep. It does not tell you everything about air quality, but it is a useful marker of ventilation and can help you decide when to open windows, adjust HVAC settings, or add simple ventilation strategies. Understanding typical ranges and how room size, occupancy, and doors/windows affect CO2 can make your bedroom more comfortable and easier to ventilate.

Quick answer
  • Aim for bedroom CO2 roughly below 800–1000 ppm for typical comfort.
  • Over ~1200–1500 ppm usually indicates not enough fresh air exchange.
  • High CO2 in bedrooms is common when doors/windows are closed and vents are weak.
  • Improve air exchange with window airing, HVAC fan use, and under-door gaps.
  • Air purifiers do not remove CO2; you need ventilation or fresh air supply.
  • Use a CO2 monitor as a ventilation guide, not a medical device.

What Bedroom CO2 Means and Why It Matters

CO2 in a bedroom mostly comes from people breathing. When you close doors and windows at night, the same air is recirculated, and CO2 gradually rises. The higher it climbs, the clearer the signal that fresh outdoor air is not entering fast enough.

CO2 is measured in parts per million (ppm). Outdoor air in most locations typically sits around 400 ppm, sometimes higher in cities. Indoor levels are usually higher than outdoor because of human activity and limited ventilation.

In bedrooms, elevated CO2 is mainly a comfort and ventilation issue. People often notice stuffy or stale air, mild headaches, or grogginess when air is poorly exchanged, but reactions vary widely. CO2 is helpful because it gives you a simple number to work with when you want to improve air movement, even though it does not directly track dust, particles, or volatile organic compounds (VOCs).

Key Concepts: CO2 Ranges, Air Changes, and Room Factors

To use CO2 readings effectively in a bedroom, it helps to understand a few basic concepts: typical ranges, air changes per hour (ACH), and how room characteristics affect buildup.

Typical CO2 Ranges in Bedrooms

These ranges are general comfort-oriented guidelines, not strict health limits:

  • Outdoor air: around 400 ppm (varies by location).
  • Well-ventilated indoor space: commonly 500–800 ppm.
  • Typical bedroom with door closed: 800–1500+ ppm overnight, depending on size and leaks.
  • Very poorly ventilated bedroom: 2000+ ppm by early morning is possible with multiple people and tight construction.

The exact numbers depend on how many people are in the room, how long they stay, and how easily air can move in and out.

Air Changes Per Hour (ACH) in Simple Terms

ACH describes how many times the air in a room is effectively replaced in one hour. Higher ACH means better ventilation and slower CO2 buildup. For bedrooms focused on comfort, an air change rate on the order of a few changes per hour is often used as a planning idea, but actual rates vary widely between homes.

CO2 level trends can act as a rough indicator of ventilation:

  • If CO2 rises quickly and remains high, ACH is likely low (little fresh air).
  • If CO2 rises slowly and levels off at a moderate value, ACH is higher.
  • If CO2 drops rapidly when you open a window, you are briefly reaching very high effective ACH.

Room Size, Occupancy, and Door/Window Position

Several practical factors strongly influence bedroom CO2:

  • Room volume: Larger rooms with higher ceilings dilute CO2 more, so levels rise more slowly.
  • Number of people: Each person exhales CO2, so two adults in a small room will drive levels up faster than one person in a large room.
  • Door position: A fully closed, well-sealed door can significantly limit airflow, especially in tight homes without dedicated supply and return vents in the bedroom.
  • Windows: Open windows, even slightly, can dramatically lower CO2 by boosting natural ventilation when outdoor conditions allow.
  • Mechanical supply/return: Bedrooms with active supply and return ducts connected to central HVAC often maintain lower CO2 than isolated rooms without good ducting.
Table 1. Bedroom CO2 troubleshooting checklist – common issues, why they matter, and simple notes. Example values for illustration.
Observation Why it matters Practical note
CO2 over ~1500 ppm by morning Signals limited fresh air exchange overnight Check door gaps, vents, and window options
CO2 stays near outdoor level Indicates strong ventilation or large leaks Air exchange already high; focus on filtration if needed
CO2 drops quickly when window opens Window airing is very effective in that room Use short airing periods before bed or in early morning
CO2 high only when door fully closed Door is restricting airflow to rest of home Consider under-cut door or small transfer grille (if feasible)
CO2 high despite HVAC running Bedroom may lack return path or supply air Discuss balancing or duct adjustments with a professional
CO2 lower on mild days Natural ventilation improves when windows are comfortable to open Use these times to flush the room fully

Common CO2 and Ventilation Mistakes in Bedrooms

Many bedrooms have elevated CO2 simply because of everyday habits and building quirks. Recognizing frequent issues makes it easier to choose realistic improvements.

Relying on Air Purifiers for CO2 Removal

Mechanical air purifiers with HEPA or activated carbon filters are designed to remove particles and some gases, but typical home units do not remove CO2 in a meaningful way. They recirculate indoor air within the room. As a result, CO2 will still rise if there is no source of outdoor air, even if the air purifier is running on high.

Closing Doors and Windows Completely All Night

Sleeping with both door and windows closed is common for privacy, temperature control, or noise reduction. In tight, modern homes, this can leave the bedroom almost isolated from the rest of the house, especially if there is no return duct. CO2 may rise from a few hundred ppm to well over 1500 ppm overnight.

Blocking Supply or Return Vents

Furniture, curtains, and rugs can partially block wall, floor, or ceiling registers. When supply air cannot enter or leave the room freely, both temperature control and air exchange suffer. Even if the central system is capable of good ventilation, the bedroom may not receive the full benefit.

Ignoring Under-Door Gaps

Some bedrooms have thick carpets or tight-fitting doors that nearly seal the gap at the bottom. Without enough space under the door, air cannot move easily when the HVAC fan runs, reducing effective air changes. A small visible gap can make a noticeable difference in CO2 trends.

Misreading CO2 Monitors

CO2 monitors vary in sensor type and accuracy. Many consumer units estimate CO2 (“eCO2”) indirectly from VOC readings. These can be useful for general trends but may not match absolute values precisely. Treat them as directional tools rather than instruments that must match a specific numerical target.

Practical Ways to Improve Bedroom Air Exchange

You do not need complex systems to improve CO2 in many bedrooms. A few simple changes to air pathways and timing can have a large effect on overnight levels.

Use Window Ventilation Strategically

When outdoor air quality and weather are acceptable, windows are one of the most powerful tools for reducing CO2:

  • Short, intensive airing: Open windows wide for 5–15 minutes before bedtime or first thing in the morning. This can quickly bring CO2 close to outdoor levels.
  • Cracked windows overnight: A small opening can meaningfully increase air changes, especially if the door is also slightly open to allow crossflow.
  • Opposite-side openings: If possible, open windows or vents on opposite sides of the home or at different heights to create a mild cross-breeze.

Always consider outdoor temperature, humidity, pollen, and pollution when deciding how much to open windows.

Leverage Central HVAC for Ventilation Support

If your home has a central HVAC system:

  • Fan “on” or circulation mode: Running the system fan continuously or on a schedule (not just during heating/cooling) can increase mixing and help distribute whatever outdoor air your system introduces.
  • Keep vents unblocked: Ensure supply and return registers in and near the bedroom are not hidden by furniture or heavy drapes.
  • Check return paths: If the bedroom has only a supply vent and no obvious return, air must escape under the door or through transfer paths. Keeping the door slightly open or ensuring a gap under the door supports this.

Not all residential systems bring in dedicated outdoor air; many mostly recirculate indoor air. In those cases, HVAC still helps with distribution, but CO2 ultimately declines only when outdoor air is admitted via cracks, windows, or dedicated ventilation inlets.

Improve Door and Transfer Airflow

If you prefer to sleep with the door mostly closed, consider:

  • Under-cut doors: A modest gap under the door allows air to move between the bedroom and hallway when the HVAC fan runs or when windows are open elsewhere.
  • Door position: Even opening the door a few inches can reduce peak CO2 overnight compared to a fully closed door.
  • Passive transfer grilles: In some homes, small wall or door grilles are used to allow air to pass between rooms while maintaining privacy; adding these should be planned and installed by someone familiar with building codes and sound/privacy expectations.

Use Fans to Support, Not Replace, Ventilation

Portable fans and ceiling fans help mix air within the room and can move indoor air toward open doors or windows, but they do not create fresh air on their own. Combine them with a source of outdoor air (like a cracked window), or use them to help pull air to and from the hallway where other vents are located.

Combine CO2 Monitoring With Other Air Quality Tools

Because CO2 does not track particles or many gases, you may also want to manage other aspects of bedroom air:

  • Air purifiers: Useful for dust, smoke, and other particles, especially when outdoor air is not ideal for open windows.
  • Humidity control: Keeping indoor relative humidity in a moderate range (often discussed in the ~30–50% area as a general comfort example) can help with comfort and mold prevention; humidifiers or dehumidifiers can support this when used carefully.
  • Source control: Limiting candles, incense, and strong chemical products in the bedroom can reduce pollutants that are not reflected in CO2 readings.

Example Bedroom Scenarios and CO2 Patterns

Looking at typical setups can help you interpret what your own readings might mean and which changes are likely to help.

Small Apartment Bedroom, One Person, Door Closed

In a compact room with a tight-fitting door and no window use, CO2 might start near 600–800 ppm in the evening and climb to 1500–2000 ppm by morning. Opening the door slightly or running the HVAC fan continuously can often bring peak levels down significantly.

Medium Bedroom, Two People, Window Cracked

With two people sleeping and a window open slightly, CO2 may rise from outdoor levels to somewhere in the 700–1100 ppm range overnight, depending on wind and temperature differences. Short, regular airing plus partial window opening can maintain moderate values with minimal effort.

Large Bedroom With Good Supply and Return Vents

In a large, well-ducted bedroom where the HVAC system runs regularly, CO2 may remain between roughly 600 and 900 ppm, even with the door closed. Here, the main focus might be filters and humidity, since air exchange is already relatively strong.

Safety, Devices, and Technology Considerations

When working on bedroom CO2 and air exchange, it is important to think about safety and the limitations of various devices.

CO2 vs CO: Different Gases, Different Devices

Carbon dioxide (CO2) and carbon monoxide (CO) are different. CO is a safety hazard at relatively low concentrations and requires dedicated CO alarms that meet local codes. CO2 monitors do not replace CO detectors or smoke alarms.

Choosing and Using CO2 Monitors Carefully

Consumer CO2 monitors vary widely. Some points to keep in mind:

  • Sensor type: Non-dispersive infrared (NDIR) sensors are typically used for more direct CO2 readings. Some low-cost devices instead estimate “equivalent CO2” based on VOCs.
  • Placement: Place monitors away from open windows, vents, and direct exhaled breath to get more representative readings of room air.
  • Calibration: Many devices benefit from regular exposure to outdoor air to maintain reasonable baseline readings (following the manufacturer’s instructions).
  • Use trends, not single numbers: Watching how CO2 changes overnight, and how it responds to opening a window or door, is often more useful than focusing on a precise value at one moment.

Neutral View on Ionizers and UV-C Devices

Some air cleaners use ionization or UV-C lamps to address particles or microorganisms. These technologies can have trade-offs and should be used with care. For CO2, they do not provide a benefit, because they work on particles or microbes, not on the main gas composition. If considering such devices, check for independent testing, potential byproducts, and how they fit with existing filters and ventilation.

Maintenance, Filters, and Long-Term Bedroom Air Quality

Keeping CO2 at comfortable levels is part of overall bedroom air quality. Ongoing maintenance helps keep ventilation and filtration working as intended.

HVAC Filters and Airflow

A clogged central HVAC filter can reduce airflow through the system, which may indirectly affect bedroom air exchange. Replacing filters on a reasonable schedule (following equipment guidance) helps maintain designed airflows. Filters with higher particle efficiency can capture smaller particles but may require correct sizing and fan capacity to avoid airflow issues.

Window and Door Seals

Weatherstripping and tight construction improve energy efficiency but also reduce natural air leakage. If your home is very tight, planned ventilation methods (such as controlled window airing or dedicated outdoor air systems) become more important to manage CO2 and other indoor pollutants.

Purifier Filters and Bedroom Particles

While purifiers do not reduce CO2, they can keep particle levels lower in a bedroom with limited ability to open windows (for example, during wildfire smoke events or high-pollen seasons). Replacing HEPA and carbon filters according to recommended intervals helps maintain clean airflow and avoid reduced performance from clogged or saturated media.

Table 2. Bedroom air monitor metrics quick guide – what common readings indicate and simple action ideas. Example values for illustration.
Metric What it indicates Common pitfall Simple action idea
CO2 (ppm) Ventilation and buildup of exhaled air Treating purifier use as a CO2 fix Open windows or improve airflow when levels rise
PM2.5 (µg/m³) Fine particles from dust, smoke, and outdoor air Ignoring outdoor sources like traffic or wildfires Use filtration and close windows during high outdoor pollution
TVOC (ppb or index) Mixed volatile organic compounds Assuming it directly measures all chemical risks Increase ventilation and reduce strong chemical products
Temperature (°F) Thermal comfort and HVAC performance Not linking temperature swings to HVAC cycling Adjust thermostat and fan settings for steadier sleep comfort
Relative humidity (%) Moisture level affecting comfort and mold risk Letting humidity stay very high or very low for long periods Use humidifiers or dehumidifiers to stay in a moderate range
Indoor/outdoor comparison How much indoor air differs from outside Not checking outdoor air before airing out Plan window opening when outdoor air is relatively clean

Related guides: CO2 Ventilation Calculator: Fresh-Air Needs for BedroomsBedroom Air Change Targets: How Many ACH for Sleep?Air Purifier vs Ventilation: Which Fixes Stuffy Bedrooms Better?

Key Takeaways on Bedroom CO2 and Air Exchange

CO2 in bedrooms is a practical indicator of how well fresh air is replacing exhaled air overnight. Values below about 800–1000 ppm are often associated with good ventilation for comfort, while higher levels suggest it may be time to adjust windows, doors, or HVAC settings.

Because CO2 does not capture particles or many gases, it should be viewed as one part of an overall indoor air quality picture. Combining simple CO2 monitoring with window airing, appropriate HVAC use, unobstructed vents, and, when needed, separate filtration and humidity control gives you a balanced approach to making bedroom air fresher and more comfortable over the long term.

Frequently asked questions

What CO2 concentration in a bedroom typically indicates inadequate air exchange?

As a practical rule for comfort, sustained bedroom CO2 above about 1200–1500 ppm usually indicates limited fresh-air exchange overnight. Levels between roughly 800 and 1000 ppm are commonly associated with comfortable ventilation; anything much higher suggests you should consider opening windows, running the HVAC fan, or improving door/transfer airflow.

How can I reduce CO2 overnight without making the room too cold or noisy?

Try short, intensive airing before bed (5–15 minutes) and then leaving a window cracked slightly, or run the central HVAC fan continuously to increase mixing. If you prefer the door mostly closed, a small under-door gap or opening the door a few inches helps; pair these steps with a fan to support airflow while minimizing temperature and noise impacts.

Will running an air purifier lower CO2 levels in my bedroom?

No. Typical HEPA or activated-carbon air purifiers remove particles and some gases but do not remove CO2; they mainly recirculate indoor air. To reduce CO2 you need ventilation or an engineered outdoor-air supply rather than a standard room purifier.

Where is the best place to put a CO2 monitor in a bedroom for reliable readings?

Place the monitor away from open windows, supply vents, and direct exhalation zones (avoid putting it right next to the bed’s head). A representative location is near the breathing zone height (about 1–1.5 m above the floor) and roughly in the room’s center or on a nightstand a little way from the occupant to capture typical room air rather than short-term spikes.

How often should I check or recalibrate a consumer CO2 monitor?

Follow the manufacturer’s guidance, but in practice it’s helpful to expose the device to outdoor air occasionally to reset its baseline and to check long-term trends rather than isolated values. Many consumer units benefit from periodic outdoor-air exposure and occasional calibration checks; if readings seem inconsistent, consult the device documentation or consider a sensor with NDIR technology for greater accuracy.

Dehumidifier for Laundry Rooms: Dry Clothes Without Musty Odor

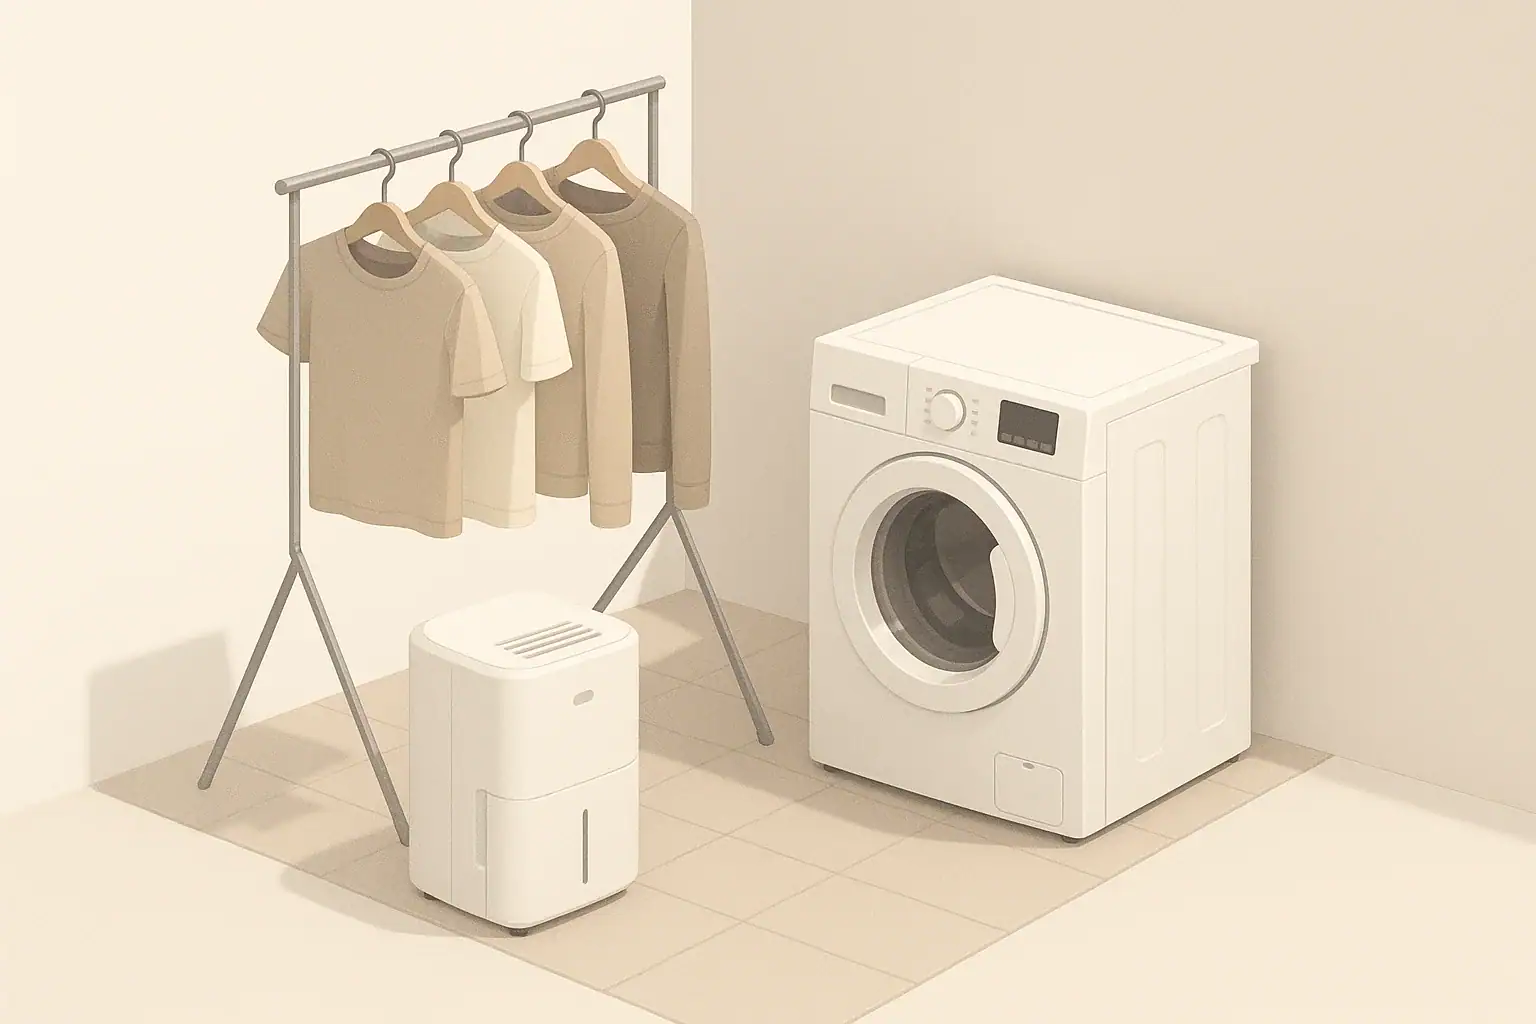
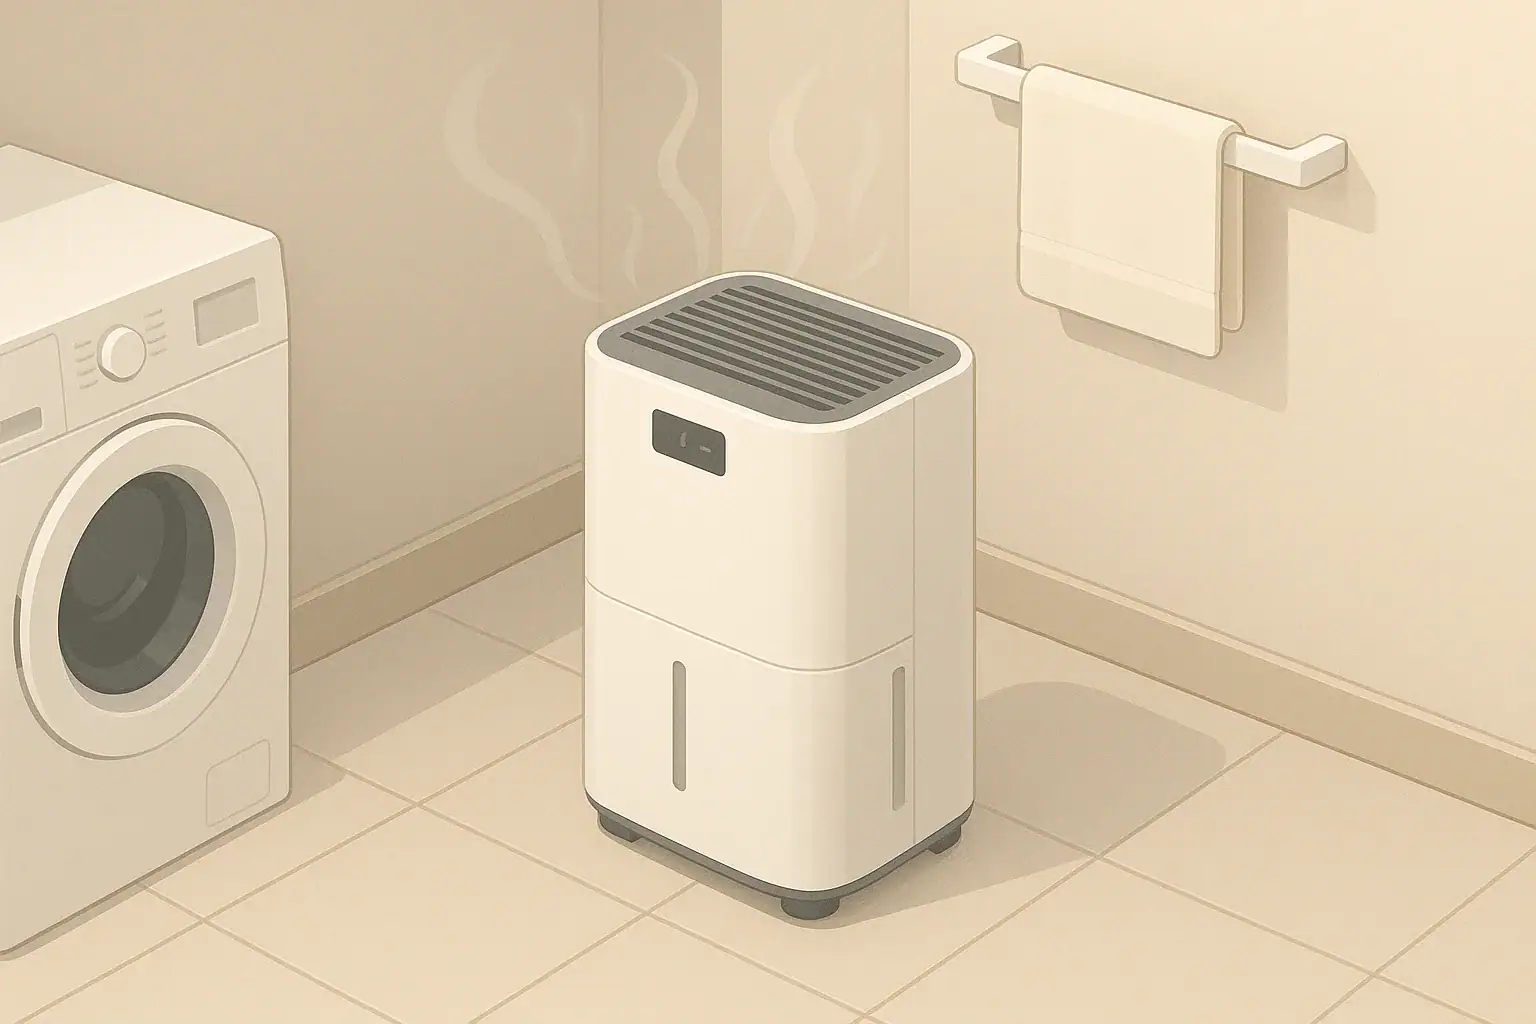
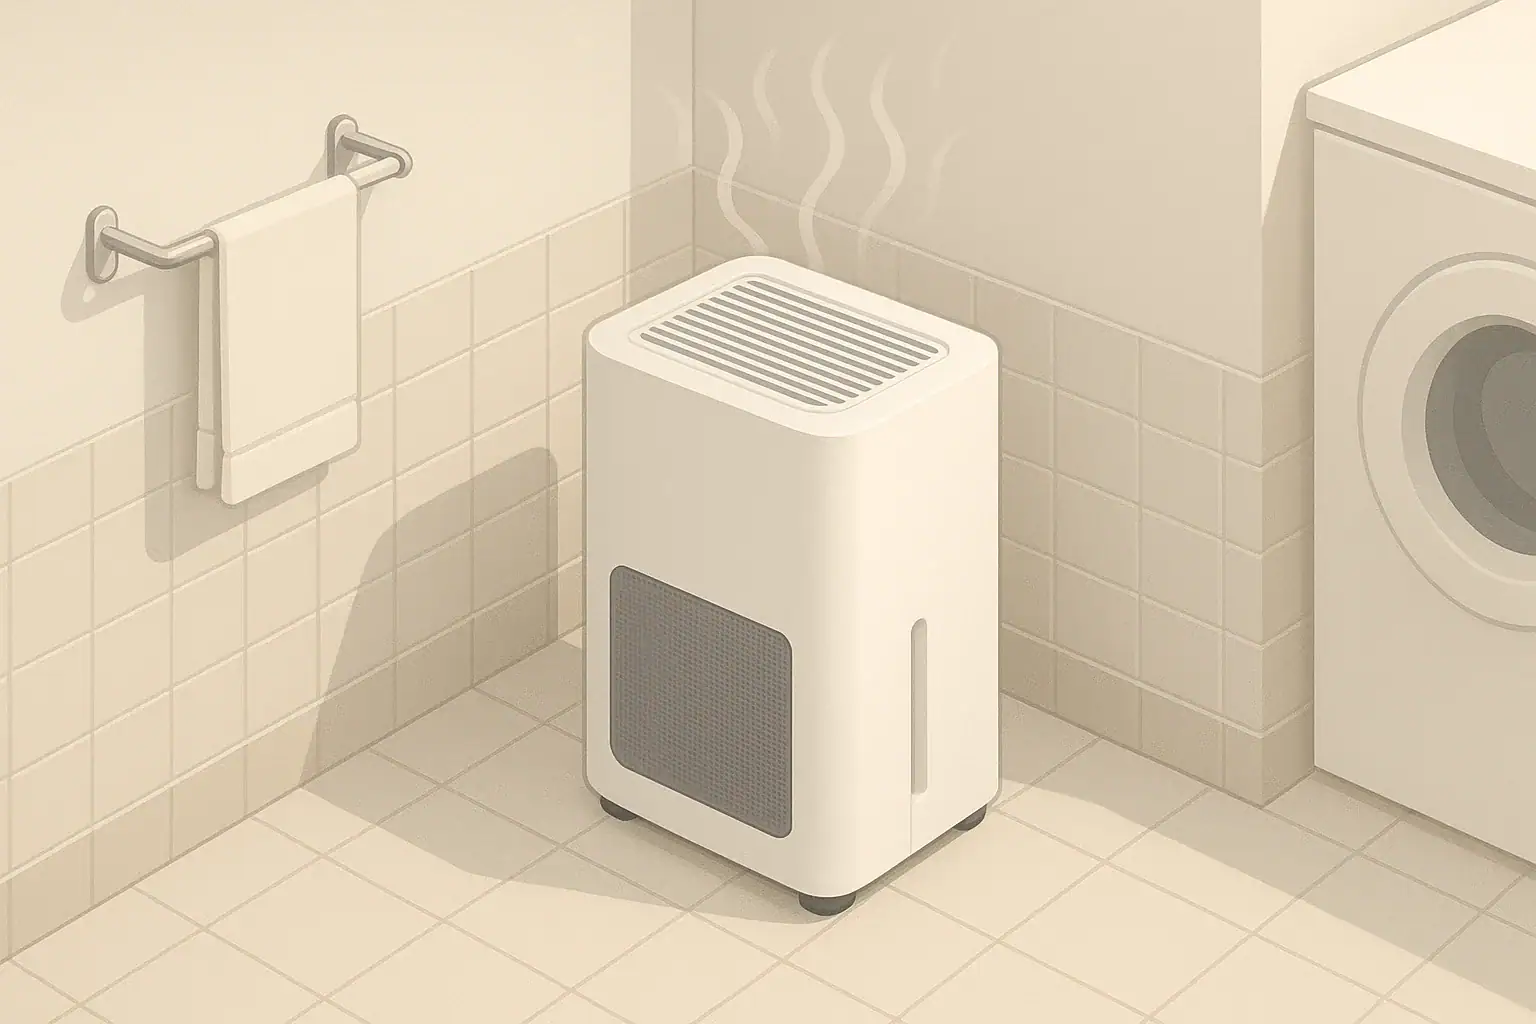
Isometric laundry room with dehumidifier and drying rack

Using a dehumidifier in a laundry room helps clothes dry faster and reduces the musty mold smell by keeping humidity in a controlled range while air circulates around wet laundry.

Indoor drying adds a lot of moisture to the air, and laundry rooms are often small, enclosed, and already humid from washers and nearby bathrooms. A correctly sized and well-placed dehumidifier can keep relative humidity in a more comfortable range, limit mold growth on walls and fabrics, and shorten drying time for hanging clothes or items coming out of a dryer slightly damp.

Quick answer
  • Aim to keep laundry room humidity roughly between 40–55% RH while drying.
  • For a small laundry room (around 50–120 sq ft), a compact residential dehumidifier is usually sufficient.
  • Run the dehumidifier during and 1–2 hours after drying cycles or hanging wet clothes.
  • Place it where air can flow freely, away from walls and right under dripping laundry.
  • Use exhaust fans or slightly open doors with the dehumidifier for better moisture removal.
  • Empty the tank and clean filters and coils regularly to maintain performance.

Why Laundry Rooms Get Musty and How Dehumidifiers Help

Laundry rooms are one of the most moisture-loaded spaces in a home. Washers add humidity, dryers can leak warm moist air if vents are leaky or clogged, and hanging wet clothes turns the room into a small drying chamber. When moisture lingers, materials like drywall, wood trim, and fabrics can harbor mold and mildew, which often cause the classic musty laundry smell.

A dehumidifier removes some of that moisture from the air. As humid air passes over cold coils inside the unit, water condenses and drips into a tank or drain hose. Drier air leaving the dehumidifier can then pick up more moisture from your clothes and room surfaces, helping them dry faster and reducing conditions that favor mold growth.

Used together with basic ventilation—like an exhaust fan, open door, or nearby window—a dehumidifier can be an effective tool for keeping laundry areas more comfortable and less musty without needing any major renovations.

Key Concepts: Humidity Targets, Room Size, and Dehumidifier Capacity

A few simple concepts will help you choose and use a dehumidifier effectively in a laundry room: humidity range, room size, and capacity (how much moisture the unit can remove in a day under standard test conditions).

Comfortable and practical humidity ranges

  • General indoor target: Many sources recommend keeping homes in roughly the 30–50% relative humidity (RH) range for comfort and mold prevention.
  • For laundry rooms while drying: It is practical to aim to stay below about 55–60% RH most of the time, and avoid extended periods above roughly 60%.
  • Too low? Constantly running a dehumidifier to push humidity much below about 30–35% RH indoors is usually unnecessary and can feel dry to some people and materials.

Estimating laundry room size

To get a rough sense of what size dehumidifier you need, first estimate room volume:

  • Measure or estimate length × width × height in feet.
  • Example: A 7 ft × 9 ft laundry room with an 8 ft ceiling is about 504 cubic feet.
  • Smaller, closed-off rooms tend to build up humidity faster than open-plan spaces.

Dehumidifier capacity basics

Residential dehumidifiers are often described by how many pints or liters of water they can remove per day under standardized lab conditions. In a real laundry room the exact amount will differ, but capacity ranges still help with planning:

  • Small units: Often used for small rooms or mild humidity loads.
  • Medium units: Useful for typical laundry rooms with regular use and some hanging clothes.
  • Larger units: More appropriate if the laundry shares space with a basement or if there are persistent dampness issues.

In many homes, a small to medium residential dehumidifier is adequate for a stand-alone laundry room, especially when combined with basic ventilation.

Laundry room dehumidifier sizing checklist – Example values for illustration.
Checklist item Why it matters Notes (example-based)
Room area (sq ft) Helps choose a general capacity range Small laundry rooms are often about 40–120 sq ft
Ceiling height Affects total air volume Higher ceilings increase moisture load per cycle
Drying style Changes moisture added to air Hanging clothes adds more moisture than fully vented dryers
Ventilation quality Determines how quickly moist air is replaced Strong exhaust fans can reduce dehumidifier runtime needed
Baseline humidity Shows how damp the space is to begin with Basement laundry rooms often start more humid than upstairs
Usage frequency Influences daily moisture load Multiple loads per day need more capacity than weekly use
Drain option Affects convenience and tank emptying Gravity drain or pump can help for heavy or frequent use

Example values for illustration.

Common Problems: Musty Smell, Slow Drying, and Condensation

Many laundry rooms show similar warning signs before mold or odor becomes obvious. Recognizing them early makes it easier to use a dehumidifier and ventilation more effectively.

Signs that humidity is too high

  • Persistent musty or “wet towel” odor that lingers even after laundry is done.
  • Condensation on windows, metal dryer vents, or cold walls and pipes.
  • Clothes that feel slightly damp or cool even after a full drying cycle or a day on the rack.
  • Spots or streaks of discoloration on walls, ceilings, or caulk lines, which can indicate mold or mildew.

Missteps that reduce dehumidifier effectiveness

  • Placing the dehumidifier in a corner with intake or exhaust pressed close to walls or appliances, restricting airflow.
  • Running it with doors tightly sealed and no exhaust or makeup air in a very wet space, which can slow the overall drying process.
  • Letting the water tank overfill so the unit shuts off frequently and does not run long enough during laundry cycles.
  • Ignoring lint and dust buildup on air filters and coils, which lowers air movement and moisture removal.

When to consider more than just a dehumidifier

A dehumidifier is only one tool. If you see recurring problems such as visible mold growth on walls, frequent standing water, or a dryer vent that is clearly leaking moist air back into the room, you may also need to address ventilation or moisture sources:

  • Check that dryer ducts are connected and not blocked.
  • Use or install a bathroom-style exhaust fan if the laundry shares space with a bathroom.
  • Reduce moisture at the source by spinning clothes on a high-speed washer cycle before drying or hanging.

Practical Setup: Where to Place the Dehumidifier and How to Use It

Placement and runtime can make as much difference as the device size itself. The goal is to move humid air from around the clothes and appliances through the dehumidifier and then out of the room when possible.

Placement tips for laundry rooms

  • Allow space around the unit. Keep at least several inches of clearance on all sides so intake and exhaust are not blocked.
  • Avoid direct drips. Do not place the dehumidifier directly under dripping clothes or near splashing sinks to protect the device and reduce safety risks.
  • Consider airflow paths. If possible, place the dehumidifier where its airflow can pass across hanging clothes or between the washer/dryer and drying rack.
  • Keep off thick rugs. A flat, stable surface helps air intake and drainage.

When and how long to run it

  • During drying: Turn the dehumidifier on shortly before starting a wash/dry cycle or hanging wet clothes.
  • After drying: Keep it running for 1–2 hours after you finish laundry, or until humidity readings drop back into your target range if you use a basic humidity monitor.
  • Intermittent use: In drier seasons, you may only need it on laundry days; in humid climates or basements, you may run it more regularly.

Using ventilation with a dehumidifier

A dehumidifier recirculates room air; it does not bring in outdoor air. Ventilation helps carry moisture out of the home entirely.

  • Use exhaust fans while the washer or dryer is running and while the dehumidifier is on.
  • If possible, crack the laundry room door to allow drier air from other parts of the home to replace the moist air being exhausted.
  • In mild weather, a slightly open window can also help move moisture out, especially in combination with a fan.

Real-World Scenarios: Matching Dehumidifier Use to Your Laundry Room

Every home is different, but some typical setups appear again and again. Here are a few simplified examples of how dehumidifier use might look in practice.

Small upstairs laundry closet

A stacked washer/dryer is tucked into a closet off a hallway. Clothes are usually dried in the dryer, with no hanging racks. Humidity spikes mainly while the washer and dryer are running.

  • A small dehumidifier in the hallway outside the closet may be enough, especially if the dryer vent is well sealed.
  • Keep the closet door open slightly during use to let humid air out to the dehumidifier.
  • Run an exhaust fan nearby if the hallway connects to a bathroom with a fan.

Dedicated laundry room with drying rack

A mid-size room with side-by-side washer and dryer plus a wall-mounted drying rack. Clothes are hung to dry year-round, and the room sometimes smells musty.

  • Use a small or medium dehumidifier placed so its airflow reaches the drying rack.
  • Aim to keep humidity around 40–55% RH during typical drying days.
  • Run the dehumidifier throughout drying and for at least an hour after.
  • Check for any leaks or condensation around washer hoses and dryer vent.

Basement laundry with persistent dampness

The laundry is in an unfinished or partially finished basement that already tends to be humid. Clotheslines or racks are used often to avoid overusing the dryer.

  • A medium to larger dehumidifier for the broader basement area may be appropriate, not just the laundry corner, depending on overall dampness.
  • Consider running the dehumidifier more continuously in humid seasons, not only on laundry days.
  • Use fans to move air across hanging clothes and toward the dehumidifier.
  • Address other moisture sources like water seepage or uninsulated cold pipes that collect condensation.

Safety and Indoor Air Quality Considerations

Most home dehumidifiers are straightforward to use, but it is useful to keep basic safety and air quality points in mind, especially in tight laundry rooms.

Electrical and water safety

  • Keep cords and outlets dry. Place the dehumidifier away from direct water sources and spills.
  • Use grounded outlets. Follow the manufacturer’s instructions regarding power requirements and extension cords.
  • Secure the drain hose if you use continuous drainage so it does not become a tripping hazard.

Heat and airflow

  • Dehumidifiers release warm air as they operate. In a very small laundry room this can increase the temperature slightly, which may be noticeable but often helps drying.
  • Ensure that dryer vents are sealed and exhausted outdoors rather than into the laundry room. A dehumidifier is not a substitute for proper venting.

Devices with additional air features

Some air treatment devices combine dehumidification with filtration or other technologies, such as ionizers or UV-C lamps. For laundry rooms, the core function you need is moisture control; anything else is optional.

  • Filtration: A simple washable filter that catches dust and lint is often sufficient near laundry equipment.
  • Ozone and strong oxidizers: If a device can intentionally generate ozone or similar oxidizing gases, it is generally advisable not to use those features in occupied spaces.
  • UV-C lamps: If present, use them according to safety instructions and avoid staring into any UV light source.

Maintenance: Keeping Your Dehumidifier Effective and Odor-Free

Without regular care, a dehumidifier can itself develop unpleasant odors or lose effectiveness. Most maintenance tasks are simple and take only a few minutes.

Routine tasks

  • Empty the tank as often as needed so the unit does not shut off in the middle of laundry cycles.
  • Rinse the tank regularly with mild soap and water to minimize biofilm or slime buildup.
  • Clean or replace air filters on the schedule recommended by the manufacturer, or more often in lint-heavy laundry areas.
  • Visually inspect coils and intake grills for dust and lint, and gently clean them when accessible according to instructions.

Monitoring performance

  • If you have a basic humidity meter (hygrometer), note how quickly humidity drops when the dehumidifier is on.
  • If it takes much longer than it used to to reach the same humidity, check filters, coils, and airflow.
  • Unusual noises, smells, or heat from the unit can be a cue to power it down and consult the manual or a professional.

FAQs: Everyday Decisions About Laundry Room Dehumidifiers

Do I need a separate dehumidifier if my dryer is vented?

A well-vented dryer removes a lot of moisture directly outdoors, but humidity can still spike from the washer, damp clothes, and any leaks or partial loads air-dried indoors. In many homes, a dehumidifier is useful if you notice musty odors, condensation, or slow-drying laundry, even when the dryer is vented.

Is it better to close or open the laundry room door?

If you are using only a dehumidifier, keeping the door mostly closed can help focus moisture removal in that room. However, if you have a good exhaust fan or want to share conditioned air with the rest of the home, leaving the door slightly open can help balance humidity. Observation works well: choose the position that leads to less condensation and faster-drying clothes.

Can a dehumidifier replace a bathroom-style exhaust fan?

No. A dehumidifier recirculates indoor air and removes moisture into a tank or drain, while an exhaust fan moves humid air outdoors and draws in replacement air from elsewhere. In a laundry room that doubles as a bathroom or has a shower nearby, an exhaust fan is still very helpful even if you use a dehumidifier.

Will a dehumidifier remove laundry odors from clothes?

A dehumidifier can reduce the damp, musty smell that comes from high humidity and slow drying, but it does not wash or deodorize fabrics. Proper washing, drying, and occasionally re-washing items that have already developed strong odors are still important.

Humidity and mold quick plan for laundry rooms – Example values for illustration.
Goal Simple actions Tools Note
Limit musty smell Dry clothes promptly and avoid leaving wet loads in washer Washer spin cycle, dryer, drying rack Shortens time fabrics stay damp
Keep humidity near 40–55% RH Run dehumidifier during and after laundry Residential dehumidifier, basic hygrometer Helps reduce mold-friendly conditions
Remove moisture from home Use exhaust fans or open windows when practical Bathroom-style fan, operable window, small fan Moves moist air outdoors
Reduce condensation Improve airflow around cold surfaces and insulate pipes if needed Fan, basic pipe insulation Less dripping on walls and floors
Prevent recurring damp spots Check for leaks and repair or seal as needed Visual inspection, basic tools or professional help Stops constant moisture sources
Maintain dehumidifier performance Clean filters, empty tank, check drainage Manufacturer instructions, mild cleaning supplies Keeps airflow and moisture removal more consistent

Example values for illustration.


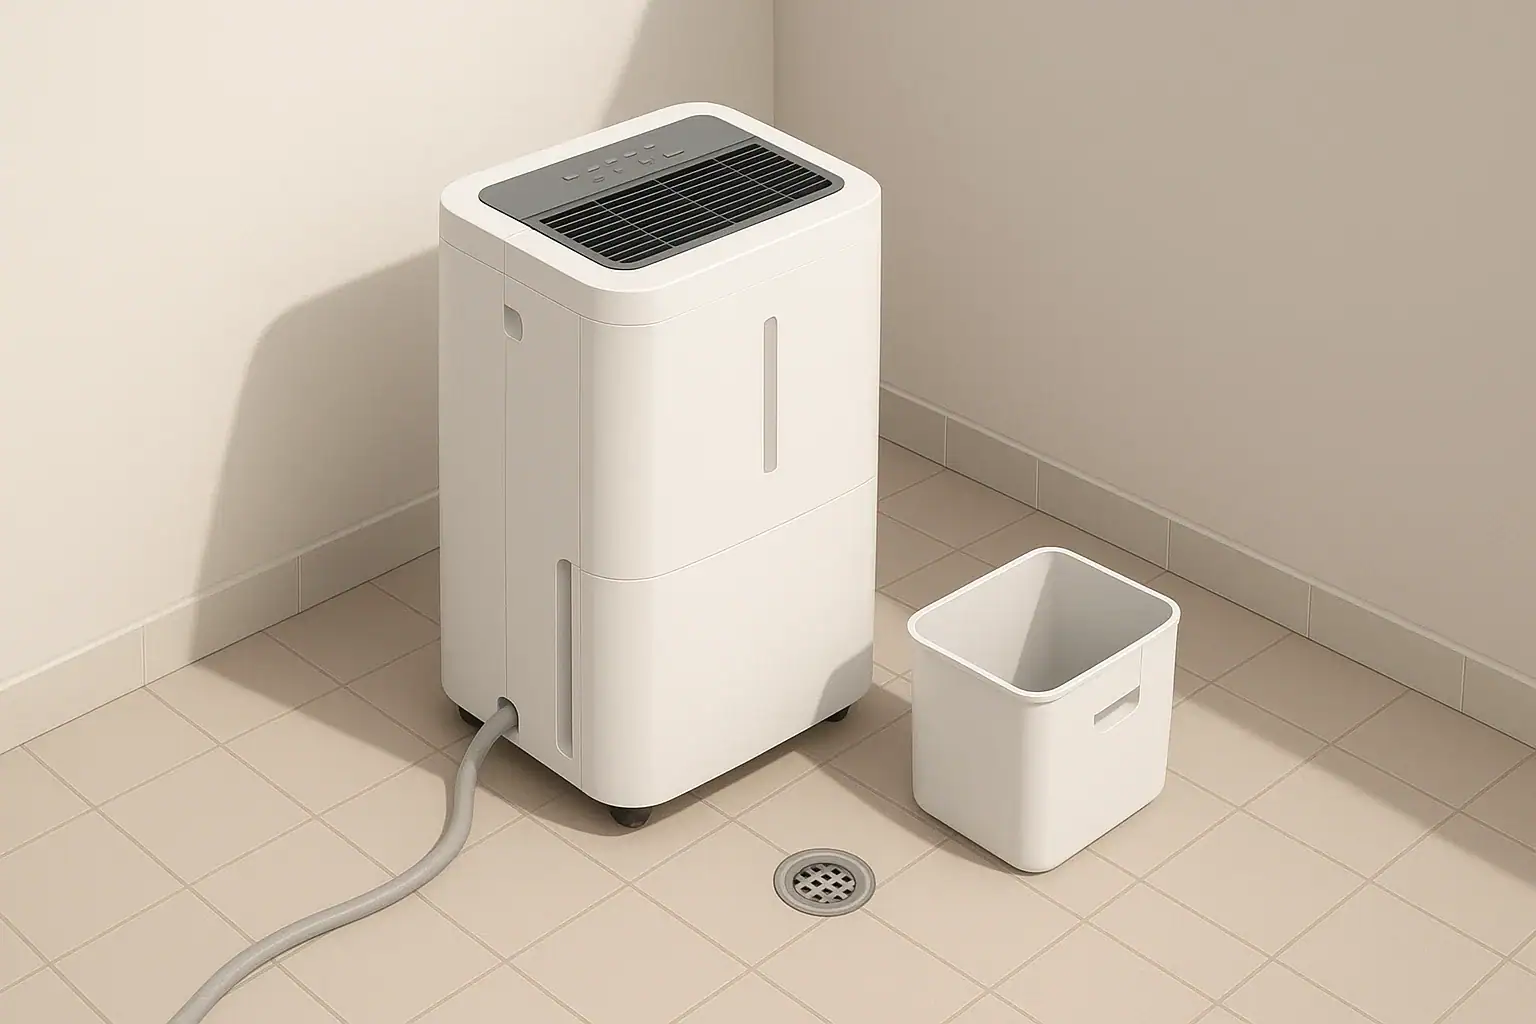
Related guides: Dehumidifier Running Cost: How Much Electricity Will It Use?Drain Hose vs Bucket: Which Dehumidifier Setup Is Best?Dehumidifier Sizing: Liters/Day, Room Type, and Dampness Levels

Key Takeaways: Using a Dehumidifier for Fresher Laundry Rooms

In a laundry room, the basic goal is to manage the moisture that naturally comes from washing and drying clothes. A reasonably sized dehumidifier, used during and shortly after laundry tasks, can help keep humidity in a moderate range, shorten drying times for hanging clothes, and reduce the musty smell often linked with damp, enclosed spaces.

Combining dehumidification with simple ventilation, correct dryer venting, and regular cleaning of both laundry equipment and the dehumidifier itself provides a practical, low-stress way to maintain more comfortable air in this busy part of the home.

Frequently asked questions

What humidity level should I target in a laundry room to prevent mold smell?

Aim for about 40–55% relative humidity while drying laundry; staying below roughly 60% RH reduces the likelihood of mold growth and the musty odor it produces. Use a hygrometer to monitor the room and run the dehumidifier during and for an hour or two after drying until readings return to the target range.

Can a dehumidifier remove existing mold smell from clothes and fabrics?

A dehumidifier helps by speeding drying and preventing further odor development, but it does not clean fabrics or remove odors already embedded in fibers. Items with strong, established smells often need rewashing, drying in warm air, or professional cleaning, and any mold on surfaces should be treated to stop recontamination.

Where is the best place to put a dehumidifier in a laundry room to reduce mold smell?

Place the dehumidifier with several inches of clearance so intake and exhaust are unobstructed and aim its airflow across hanging clothes or toward an exhaust path. Avoid putting it directly under dripping items or on thick rugs; if possible locate it between the drying rack and a door or vent to help move moist air out of the room.

How large a dehumidifier do I need for a basement laundry area prone to mold smell?

Basement laundry areas often need a medium to larger-capacity dehumidifier because baseline humidity and room volume are higher. Estimate the room size and moisture load (frequent hanging, leaks, or seepage increase demand) and choose a unit with a higher daily removal rate plus a continuous drain or pump for convenience.

Will running a dehumidifier while my dryer is vented outside cause any issues?

Generally it is safe and can be beneficial: the dryer removes most moisture outdoors, and the dehumidifier handles residual humidity from the washer and any indoor drying. Make sure the dryer vent is properly sealed and exhausting outdoors; if you suspect vent leaks into the room, address that first because the dehumidifier won’t replace proper venting.

Dehumidifier in Winter: What Works in Cold Basements

Dehumidifier operating in a cool basement corner in winter

A dehumidifier can work in a winter basement, but its performance drops sharply as the room temperature falls near or below about 60°F.

Cold air holds less moisture than warm air, so winter basements often feel damp without actually having very high relative humidity. Dehumidifiers also have minimum operating temperatures, and below these they may ice up, shut down, or simply remove very little water. Whether it is worth running one in a cold basement depends on the actual humidity level, the temperature, and how the space is used.

Quick answer
  • Most standard dehumidifiers work best around 65–80°F; below ~60°F they become less effective.
  • Target indoor basement humidity is generally about 40–50% RH in winter, if practical.
  • If your winter basement stays below ~55°F and under ~50% RH, a dehumidifier may add cost without much benefit.
  • Use a simple hygrometer: run the dehumidifier only when RH is consistently above ~55–60%.
  • Address bulk moisture first (leaks, groundwater, condensation) before relying on a dehumidifier.

Why dehumidifiers in winter basements are different

Basements behave differently from above-grade rooms in winter. Soil insulates them somewhat, but they are still cooler, often darker, and can trap moisture from the ground, plumbing, and household activities. This combination can lead to musty odors, visible condensation, or mold on cool surfaces, even when the air’s relative humidity (RH) is not extremely high.

In winter, outdoor air is usually cold and dry. When that air enters your home and warms up, its relative humidity drops. This is why upper floors often feel dry in winter. Basements, however, may stay cooler, so the same air can reach higher RH in the basement than upstairs. At the same time, refrigeration-style dehumidifiers themselves need relatively warm air to work properly. Understanding this balance is key to deciding whether running a dehumidifier in a cold basement is useful or mostly wasted energy.

Key concepts: temperature, humidity, and dehumidifier limits

To judge if a dehumidifier will work in your winter basement, it helps to understand three linked ideas: how cold air holds moisture, what RH really means, and how common dehumidifiers are built to operate.

Cold air and moisture capacity

Relative humidity is a percentage that describes how full of moisture the air is compared with the maximum it can hold at that temperature. Cold air has a much lower moisture capacity than warm air. This means:

  • At 75°F, air can hold much more water before reaching 60% RH.
  • At 55°F, that same amount of water may drive RH near or above 70%.

This is why a cool basement can reach high RH and see condensation on cold surfaces, even if the total amount of moisture is not especially large.

Typical winter humidity targets

General indoor comfort and moisture guidelines in winter often suggest:

  • About 30–50% RH in living spaces.
  • Basements often run a bit higher; staying roughly in the 40–50% range is commonly considered helpful for limiting mold growth while avoiding overly dry air.

These are broad ranges, not strict rules. The right target depends on your climate, the age of your home, and how vulnerable your basement is to condensation and leaks.

How common dehumidifiers behave in the cold

Most home dehumidifiers are refrigeration-based: they pull air over cold coils, where moisture condenses and drips into a tank or drain. This design has temperature limits.

  • Optimal range: Many residential units are designed for air temperatures roughly in the mid-60s to mid-80s °F.
  • Reduced performance: As room temperature drops below about 60°F, the cold coils can start to freeze, and moisture removal slows.
  • Auto-defrost or shutoff: Some units will stop or cycle frequently to thaw ice, which means more runtime with less water removed.

There are also desiccant-style dehumidifiers that handle cooler temperatures better, but these use a different technology and can have different energy characteristics. Whatever the type, you should check the stated operating temperature range in the documentation that came with your appliance.

Table 1. Basement winter moisture: what usually helps most – Example values for illustration.

This table summarizes common basement moisture situations and which action is typically most effective.

Situation (winter) Main issue Most helpful first step Role of dehumidifier
Visible water seepage on walls or floor Bulk water entry from soil or drainage Fix grading, gutters, drainage, and sealing Secondary; manages residual dampness only
Cold basement, RH under ~50% Cool surfaces, but not much moisture Improve air circulation and insulation where practical Often unnecessary or low impact
Cool basement, RH ~55–65% Marginally high moisture risking musty odor Use hygrometer, reduce sources (drying clothes, leaks) Periodic use can trim RH toward ~45–50%
Cool basement, RH consistently above ~65–70% High moisture plus cold surfaces Check for hidden leaks, improve ventilation Useful tool if temp stays near or above low 60s°F
Finished basement used as living space Comfort, odors, potential surface condensation Seal air leaks, manage humidity sources, monitor RH Regular use during damp periods may be justified
Unfinished storage-only basement Protecting stored items from dampness Elevate items, use plastic bins, control leaks Targeted use when RH is high around storage areas

Common winter basement dehumidifier mistakes

Many homeowners plug in a dehumidifier in the basement and let it run all winter without checking whether it is doing much. Several typical mistakes reduce effectiveness or waste energy.

Running at very low temperatures

If your basement sits in the low 50s°F or colder for long stretches, a standard dehumidifier may spend more time defrosting than removing moisture. Signs of this include:

  • Coils icing over frequently.
  • Compressor cycling on and off quickly.
  • Very little water in the bucket despite long runtime.

In these conditions, you may get more benefit by slightly warming the space, improving air mixing with the rest of the house, or addressing moisture entry directly.

Ignoring actual humidity readings

Relying on how “damp” a room feels can be misleading, especially in a cold basement. Concrete floors and walls feel clammy at low temperatures even if RH is not especially high. Using a basic hygrometer (standalone or built into some devices) gives more reliable feedback.

  • If RH rarely rises above about 50–55%, constant dehumidifier operation is usually not necessary.
  • If RH often sits around 60–70%, targeted dehumidification or ventilation changes might be worthwhile.

Blocking airflow and poor placement

Dehumidifiers need a clear flow of air across their coils. In tight corners or behind storage, the machine may mostly reprocess already-dried air or recirculate cold pockets.

  • Placing the unit too close to walls or large objects can reduce air circulation.
  • Positioning under low-hanging shelves can trap warm, moist air away from the intake.

Using dehumidification instead of fixing leaks

Dehumidifiers are designed to handle moisture in the air, not to compensate for ongoing leaks or standing water. If you see active water intrusion, staining, or repeated puddles, those issues need to be addressed at the source. A dehumidifier alone will not resolve structural moisture problems and may simply run continuously with modest impact.

Practical steps: deciding if a dehumidifier makes sense in your winter basement

Instead of guessing, you can use a simple process to decide how and when to use a dehumidifier in winter.

Step 1: Measure temperature and humidity

  • Place a basic hygrometer-thermometer combo in the basement away from exterior walls and drafts.
  • Record temperature and RH at a few times during the day, over several days.
  • Note the lowest temperature you commonly see and the typical RH range.

If winter temperatures are usually below the mid-50s°F and RH remains under roughly 50–55%, a standard dehumidifier is often not doing much for you.

Step 2: Check for visible moisture and odors

  • Look for condensation on windows, metal pipes, or uninsulated ducts.
  • Inspect lower walls, corners, and behind stored items for damp spots or surface mold.
  • Notice any persistent musty odor, especially after wet weather or laundry days.

These observations help you separate comfort concerns (slightly musty smell) from more serious moisture issues (staining, peeling paint, repeated condensation).

Step 3: Address moisture sources

Before relying on a dehumidifier, make simple fixes where possible:

  • Improve exterior drainage with clear gutters and downspouts aimed away from the foundation.
  • Seal obvious gaps or cracks that allow liquid water to enter, where appropriate for your structure.
  • Vent clothes dryers outdoors and avoid line-drying indoors in the basement when RH is already high.
  • Insulate cold water pipes that sweat, and consider insulating bare foundation walls where suitable.

Step 4: Use the dehumidifier selectively

Once you have a baseline:

  • Set the dehumidifier to a target RH around 45–50% rather than a constant “on” mode.
  • Run it most when RH readings rise above roughly 55–60%, such as during thaws or rainy stretches.
  • Monitor whether the bucket fills regularly; if it stays nearly empty, it may not be worth the energy use.

If your basement has multiple rooms, consider whether doors should be open to allow better circulation, or whether you should focus on the dampest area only.

Real-world basement scenarios in winter

Here are some common patterns homeowners see and how a dehumidifier typically fits into each situation.

Unfinished, cool storage basement

Temperature might hover around 50–55°F, with RH readings between 45–55%. The space feels chilly and slightly clammy, but there is no obvious water, and cardboard boxes and stored items look fine.

  • A dehumidifier here may run but extract very little water.
  • Simple steps like elevating boxes off the floor, using plastic storage bins, and improving airflow may be sufficient.
  • Consider using the dehumidifier only during shoulder seasons when the basement is warmer and RH creeps up.

Partly finished basement office or playroom

This space may be conditioned somewhat by the main HVAC system, staying closer to 60–65°F. People spend time here, electronics are present, and the space has soft furnishings or carpet.

  • If RH readings are often around 55–65%, modest dehumidifier use can help protect materials and improve comfort.
  • Placing the unit centrally with good clearance and continuous drainage can make seasonal operation easier.
  • In very cold snaps, if room temperature drops, watch for icing and consider reducing runtime.

Basement laundry area with intermittent moisture

Laundry spaces can spike humidity during washing and drying cycles, especially if the dryer is not well vented or if clothes are air-dried indoors.

  • You might see RH peak above 60–70% for several hours, then drop back down.
  • A dehumidifier can help smooth these peaks, especially in winter when windows are closed.
  • Improving ventilation (for example, short, controlled periods of outdoor air exchange) often works well alongside dehumidification.

Older home with known seepage issues

In some basements, moisture from the ground continues to enter through walls or floor cracks even in winter. RH may sit in the 65–80% range, and there may be a noticeable musty smell.

  • A dehumidifier can reduce RH, but it is not a replacement for structural drainage or sealing work.
  • Operating temperatures still matter; if it is too cold, performance will be limited.
  • Monitoring RH before and after running the unit helps you see how much improvement you are actually getting.

Safety, efficiency, and equipment considerations

Using a dehumidifier in a cold basement involves more than just comfort; safety, energy use, and equipment limits all play a role.

Electrical and placement safety

  • Place the unit on a stable, level surface away from standing water or floor drains where it could tip.
  • Avoid using long, undersized extension cords that can overheat; plug directly into a properly grounded outlet where possible.
  • Maintain clearance around air inlets and outlets, typically at least a few inches on all sides.

Drainage and overflow

In winter, you may be less inclined to empty a bucket daily. If you use continuous drain:

  • Route the hose to a floor drain or sump where freezing will not occur.
  • Ensure the hose slopes downward all the way to avoid standing water and backups.

Technology types and low-temperature performance

Refrigeration-based units dominate the residential market, but they have limitations in cold spaces. Some devices include features like auto-defrost cycles designed to protect the coils. Desiccant-based units, which use moisture-absorbing materials, can handle lower temperatures better but usually have different power use patterns and capacities.

Whatever the technology, respecting the stated temperature operating range in the product documentation helps avoid damage and inefficient operation.

Maintenance and winter operation tips

Proper maintenance keeps a dehumidifier working as efficiently as possible, which becomes especially important when the temperature already limits performance.

Filter and intake care

  • Clean or replace the air filter as recommended; dust buildup reduces airflow and can cause icing.
  • Vacuum intake and exhaust grilles gently to keep them clear.

Coil inspection and defrost cycles

  • Periodically inspect the coils (when the unit is off and unplugged) for dust accumulation.
  • If you notice frequent icing, check that room temperature is within the acceptable range and that airflow is not obstructed.

Energy planning

A dehumidifier can be a significant electrical load if it runs constantly. To avoid unnecessary energy use in winter:

  • Use the built-in humidistat or an external reading to limit runtime to periods of higher RH.
  • Consider whether slightly improving basement heating or air circulation would reduce humidity without as much dehumidifier use.
  • Shut the unit off if RH is consistently at or below your target level.

FAQs: dehumidifiers, winter, and cold basements

Is a dehumidifier necessary in winter if the air feels dry upstairs?

Not necessarily. Upper floors and basements often experience different humidity levels. Measure RH in the basement separately before deciding.

Can a dehumidifier prevent all mold in a basement?

No. Keeping RH in a moderate range can make conditions less favorable for mold growth, but it does not replace fixing leaks, condensation, or building issues. It is one tool in a broader moisture-control strategy.

What RH should I set my basement-dehumidifier-to-in-winter”>What RH should I set my basement dehumidifier to in winter?

Many homeowners aim for around 45–50% RH when practical. If achieving that target requires excessive runtime or causes other issues (like upstairs air becoming too dry), you may choose a slightly higher range and address localized problem spots directly.

Should I run a dehumidifier in an unheated, very cold basement?

In basements that regularly drop below the mid-50s°F, standard dehumidifiers are often inefficient or ineffective. In these cases, controlling liquid water entry, improving drainage, and managing ventilation and insulation usually matter more than running a dehumidifier continuously.

Table 2. Winter humidity and mold risk quick plan – Example values for illustration.

This table outlines simple action ideas for common winter basement humidity goals.

Humidity / moisture goal Simple actions Tools that help Note
Keep RH roughly 40–50% Monitor RH, limit indoor clothes drying, seal obvious leaks Hygrometer, occasional dehumidifier use Good general comfort and moisture balance in many homes
Reduce musty basement odor Improve airflow, declutter corners, clean dusty surfaces Fan for circulation, dehumidifier at ~45–50% setpoint Odors often lessen as RH and surface dust decrease
Limit surface condensation on windows and pipes Insulate cold surfaces, avoid drying laundry nearby Pipe insulation, hygrometer, dehumidifier if RH high Even moderate RH can condense on very cold surfaces
Protect stored items from dampness Use sealed bins, elevate items, avoid exterior walls Hygrometer near storage, spot dehumidification Local protection can matter more than room-wide RH
Handle seasonal wet spells or thaws Check sump and drainage, watch RH during thaws Dehumidifier during temporary RH spikes Short-term use may be more efficient than year-round
Manage persistent high RH in a finished basement Seal air leaks, consider ventilation adjustments Continuous-drain dehumidifier, RH tracking Combine moisture control with general HVAC planning

Related guides: How to Size a Dehumidifier (Sq Ft, Pints/Day, and Real-World Tips)Basement Dehumidifier Guide: Targets, Drainage, and Energy UseDehumidifier Running Cost: How Much Electricity Will It Use?

Key takeaways about dehumidifiers in cold winter basements

Dehumidifiers can help manage winter basement moisture, but only when conditions are within their effective operating range and when humidity is truly high enough to justify running them. Cold basements often feel damp even when RH is not excessive, and standard dehumidifiers lose efficiency as temperatures drop toward the low 60s°F and below.

Using a simple hygrometer, observing temperature, and addressing obvious moisture sources first will guide whether a dehumidifier is worthwhile. In many homes, selective use during damp periods, combined with better drainage, insulation, and airflow, offers a practical balance between comfort, protection of belongings, and energy use.

Frequently asked questions

Can I run a standard refrigeration dehumidifier in a basement that stays below 55°F?

Most refrigeration-type dehumidifiers become much less effective below about 60°F and may ice up or spend excessive time in defrost cycles if used under ~55°F. For consistently cold basements, either slightly warming the space, improving air circulation, or considering a desiccant-style unit (which handles low temps better) is advisable. Always check the unit’s specified operating temperature range before extended use.

How should I decide when to run a dehumidifier in winter versus leaving it off?

Use a hygrometer to track basement RH; run the dehumidifier when RH consistently exceeds roughly 55–60% or during identifiable humidity spikes like laundry or thaws. If RH stays near or below your target (about 45–50%) most of the time and the unit collects little water, it’s usually energy-wasteful to run it continuously.

Will running a dehumidifier stop mold growth on basement walls and stored items?

Lowering ambient RH reduces the likelihood of mold, but a dehumidifier cannot fix liquid water entry, condensation on cold surfaces, or hidden leaks. For persistent mold risk, combine humidity control with repairs (drainage, sealing, insulation) and dry or replace affected materials as needed.

Are desiccant dehumidifiers a better choice for cold basements?

Desiccant dehumidifiers generally perform better at lower temperatures than refrigeration models because they do not rely on cold coils to condense moisture. However, they can have different energy use profiles and capacities, so weigh expected moisture load, operating cost, and maintenance when choosing a unit.

What is the safest way to set up continuous drainage for winter use?

Route the drain hose to an interior floor drain, sump, or laundry drain where it will not be exposed to freezing temperatures, and maintain a continuous downward slope to prevent standing water. If you must route to a higher point, use a condensate pump rated for cold conditions and inspect connections periodically to avoid clogs and backups.

Drain Hose vs Bucket: What Works Better for Dehumidifiers

Isometric dehumidifier with drain hose and bucket options

A drain hose is usually better for continuous dehumidifier use, while a bucket is better for flexible, portable use or when no suitable drain is available.

Both setups can keep indoor humidity in a comfortable range if used correctly. The best choice depends on how damp the space is, how often the unit runs, whether you have safe access to a drain, and how often you want to empty a tank. Understanding the tradeoffs helps you avoid leaks, overflows, and unnecessary hassle.

Quick answer
  • Use a drain hose for very damp areas or 24/7 operation where a floor drain or nearby sink is available.
  • Use the bucket when the dehumidifier moves between rooms or no safe gravity drain is nearby.
  • Aim to keep indoor humidity roughly in the 40–60% range for general comfort and mold prevention.
  • Expect to empty a bucket anywhere from once every couple of days to multiple times a day in very damp spaces.
  • Always keep hoses pitched downward with no kinks, and check for leaks or clogs regularly.

Why the Dehumidifier Drain Setup Matters

Dehumidifiers remove moisture from indoor air and collect it as liquid water (condensate). How that water leaves the machine affects convenience, safety, and performance. If the tank overflows or the drain clogs, the unit may shut off early or spill water onto floors, drywall, or stored items.

In many U.S. homes, a portable dehumidifier handles damp basements, laundry rooms, or bathrooms. Some people only run theirs on humid summer days, while others rely on it nearly all year. With that much variation, there is no single “best” setup: a drain hose or a bucket can both work well when matched to the space and usage.

This comparison focuses on portable residential units, not whole‑home systems tied into HVAC drains. The same basic ideas still apply: water must move away from your living space safely and reliably.

How Drain Hoses and Buckets Work

Before choosing between a drain hose or using the built‑in bucket, it helps to understand how each option operates and its basic requirements.

Bucket (Collection Tank) Basics

Most portable dehumidifiers include an internal tank or bucket that slides out from the front or side. Condensate drips into this container until it reaches a certain level. A float or sensor detects when the tank is full and shuts off the compressor or the whole unit to prevent spilling.

Key points about buckets:

  • Capacity: Often ranges from around 0.5 to 2 gallons (roughly 2–8 liters), depending on the size of the dehumidifier.
  • Shutoff feature: Automatic shutoff when full prevents overflow but also stops dehumidifying until you empty and reseat the bucket.
  • Portability: The unit can run anywhere there is an outlet, with no need to reach a drain.
  • Maintenance: The bucket needs periodic cleaning to limit biofilm, slime, and musty odors.

Drain Hose (Continuous) Basics

A drain hose uses gravity (or sometimes a pump) to move water from the dehumidifier to a floor drain, utility sink, condensate pump, or other safe outlet. Many units have a threaded outlet on the back where you attach a short hose or a longer compatible tube.

Key points about drain hoses:

  • Gravity dependence: For a passive drain, the hose outlet must be higher than the drain termination so water flows downhill.
  • Continuous operation: The tank usually stays empty, so the unit does not stop for bucket emptying and can run as long as needed.
  • Placement limits: The dehumidifier’s location is partly dictated by where a drain is available and the necessary downward slope.
  • Leak risk: Poor connections, kinks, or clogs can cause water to back up and leak around the machine.
Table 1. Drain hose vs bucket comparison for home dehumidifiers — Example values for illustration.
Comparison of bucket and drain hose setups
Aspect Bucket (Tank) Drain Hose (Continuous)
Best use case Occasional or seasonal use, moving between rooms Very damp areas, long daily runtimes
Water removal limit Limited by tank size; may fill in a few hours in wet spaces Limited mainly by dehumidifier capacity and drain availability
User effort Regular lifting and emptying Initial setup work, then low effort if drain stays clear
Placement flexibility High; only needs a power outlet Medium; needs access to a drain with downward slope
Risk if neglected Unit stops dehumidifying when full; minimal spill risk Potential for leaks or unnoticed clogs if not checked
Cost and accessories No extra parts usually needed May need hose, clamps, or a condensate pump
Cleaning needs Bucket needs periodic scrubbing Hose interior can build slime; occasional flushing helps

Example values for illustration.

Common Issues With Each Setup

Both buckets and drain hoses can cause frustration if something goes wrong. Being aware of typical problems helps you spot them early.

  • Frequent shutdowns: In a very damp basement, a small bucket may fill quickly, forcing you to empty it multiple times per day. If you forget, humidity creeps up again.
  • Spills when carrying: If the bucket is awkward to grip or very full, water can slosh out on the way to the sink or drain.
  • Musty smell or slime: Standing water, dust, and biofilm create odors over time. This does not necessarily mean mold in the air, but it can make the area smell unpleasant.
  • Improper reseating: If the bucket is not fully pushed in, the unit may not run, or it may leak around the edges.
  • Backflow from poor slope: If the hose loops upward or lies flat, water can stagnate or back up into the unit.
  • Kinks and crushing: Hoses running under doors or furniture can pinch closed, causing leaks at the connection point.
  • Clogs from debris: Dust, lint from laundry areas, or scale can slowly narrow the hose, eventually blocking flow.
  • Leaking connections: Loose threads or an ill‑fitting hose can drip slowly, sometimes unnoticed behind the unit.
  • Improper drain choice: Draining into sinks or tubs that are used frequently can be knocked loose or cause standing water if the sink drain is partially blocked.

How to Choose: Drain Hose vs Bucket

To decide which option fits your situation, consider humidity levels, runtime, room layout, and how often you can attend to the dehumidifier.

1. How Damp Is the Space?

  • Lightly damp: Slight musty smell after rain, humidity occasionally above about 60%. A bucket may only fill every few days, making manual emptying reasonable.
  • Moderately damp: Humidity often above 60%, noticeable condensation on windows or pipes. Buckets may fill once or more per day, which can be manageable or annoying depending on your schedule.
  • Very damp: Visible moisture on walls or floors, frequent musty odor, or humidity often above about 70%. Continuous drains are usually more practical so the unit can run steadily.

2. How Often Will the Dehumidifier Run?

  • Occasional use: For short humid spells or specific tasks (like drying laundry indoors), a bucket is often sufficient.
  • Daily seasonal use: In many climates, basements need dehumidifying most summer days. If you are emptying the tank more than once a day, a drain hose may be worth the effort.
  • Near‑continuous use: In persistently damp spaces, a hose to a reliable drain or pump is usually the most practical choice.

3. What Drains Are Actually Available?

Good candidates for a drain hose connection include:

  • Floor drains in basements or utility rooms
  • Utility sinks or laundry tubs
  • Condensate pumps that discharge to a higher drain line or outdoors, set up according to local codes

Avoid draining directly onto soil near the foundation, into yard drains that can back up toward the house, or into areas where children or pets are likely to disturb the hose.

4. How Much Maintenance Are You Willing to Do?

  • Bucket users: Plan to empty and rinse the tank as often as needed to prevent the unit from shutting off and to keep odors down.
  • Hose users: Plan occasional checks for clogs, leaks, or accidental disconnections, especially after moving the unit or cleaning the area.

Practical Setup Tips for Buckets and Drain Hoses

Once you decide on a setup, a few practical habits help avoid messes and maintain effective dehumidification.

Better Bucket Use

  • Monitor how fast it fills: For the first few days, note how many hours it takes to fill the bucket. This gives you a realistic emptying schedule.
  • Do not overfill on purpose: Avoid trying to “stretch” time between empties. Let the automatic shutoff work as intended, then empty promptly.
  • Rinse regularly: A quick swish with clean water once or twice a week, plus occasional mild detergent cleaning, helps reduce biofilm buildup.
  • Dry before storage: If you put the dehumidifier away for a season, empty and dry the bucket thoroughly so it does not sit with stagnant water.

Better Drain Hose Use

  • Maintain a steady downhill slope: Route the hose so every point is lower than the outlet, with no loops that trap water.
  • Secure the connection: Use the correct fitting and ensure it is hand‑tightened; avoid cross‑threading.
  • Protect the hose: Keep it away from areas where it might be stepped on, pinched by doors, or chewed by pets.
  • Check for flow: After setup, run the unit and confirm water is steadily reaching the drain point.
  • Flush occasionally: If practical, detach and rinse the hose with clean water to clear sediment or slime.

Real‑World Scenarios: Which Setup Fits?

Scenario 1: Finished Basement Family Room

A mostly finished basement used as a family room is slightly damp in late spring and summer. Humidity is often around 60–65%, and there is a floor drain in an adjacent unfinished storage area.

Good fit: A drain hose routed gently downhill to the floor drain. This allows the dehumidifier to run as needed without constant tank checks, important for a space people use daily.

Scenario 2: Small Apartment Bedroom

A renter in a small apartment notices seasonal humidity and a slight musty smell near an exterior wall. There is no nearby floor drain, and only one shared bathroom sink is available down the hall.

Good fit: Bucket use. The dehumidifier can move between bedroom and living area if needed, and the occupant can empty the tank in the bathroom sink once a day or as required.

Scenario 3: Laundry Room With Frequent Drying

A laundry room in a house has a utility sink and is frequently used for drying clothes indoors on racks. Humidity spikes whenever laundry is drying and takes hours to drop.

Good fit: Drain hose into the utility sink or into a properly installed condensate pump. Continuous drainage keeps up with the frequent moisture load without constant bucket trips.

Scenario 4: Seasonal Cabin

A seasonal cabin is shut for part of the year and used heavily in summer. The owner visits on weekends and wants to limit dampness but cannot check equipment daily.

Possible approaches:

  • If there is a reliable floor drain and power is left on, a drain hose may allow the dehumidifier to maintain humidity without manual emptying.
  • If no drain is available, the owner may choose to run the unit only when present and use the bucket, accepting that humidity may rise between visits.

Safety and Building Considerations

Moving water around indoors always carries some risk. A few precautions can reduce the chance of damage.

  • Use appropriate drains: Ideally, discharge into drains intended for continuous or intermittent water, such as floor drains or utility sinks. Avoid sending water into electrical conduits, wall cavities, or other non‑plumbing openings.
  • Mind electrical safety: Keep cords, plugs, and power strips away from any potential leak path, whether from a bucket spill or hose issue.
  • Check local rules: In some areas, discharging condensate into certain drains may be restricted or require specific connections. If in doubt, consult local building or plumbing guidance.
  • Avoid trip hazards: Route hoses where people are unlikely to trip, especially in hallways or near stairwells.
  • Consider surfaces: On wood or laminate floors, even small leaks can cause warping over time. A tray or mat under the unit may help contain minor drips.

Ongoing Maintenance, Cleaning, and Costs

Whichever setup you use, regular maintenance helps keep the dehumidifier effective and limits unwanted odors or leaks.

Shared Maintenance Tasks

  • Clean the air filter: Most dehumidifiers have a washable filter to catch dust. Check and clean it according to the manual—often every few weeks during heavy use—to maintain airflow.
  • Wipe the exterior: Dust buildup can make vents less effective. A soft cloth or vacuum brush keeps intake and exhaust grills clear.
  • Inspect the area: Periodically check nearby walls, floors, and stored items for any signs of dampness or staining that might indicate leaks or insufficient dehumidification.

Bucket‑Specific Maintenance

  • Regular cleaning: Use mild detergent and warm water to clean the bucket interior every few weeks, especially in warm weather.
  • Check the float mechanism: Ensure any float or sensor is moving freely and not coated with residue that might affect shutoff.

Drain Hose‑Specific Maintenance

  • Visual hose inspection: Look for discoloration, bulging, or obvious kinks along the length of the hose.
  • Drain outlet check: Confirm that the floor drain or sink remains clear and that water is not pooling or backing up.
  • Occasional disconnection: Detach and run clean water through the hose to flush out interior buildup if you notice slow draining.

Humidity Planning and Simple Action Guide

Beyond choosing a drain method, it helps to think about your humidity goals and the steps that support them. Most households find a relative humidity range around 40–60% generally comfortable and less favorable to mold growth than persistently higher levels.

If you use a simple hygrometer or a home air quality monitor with humidity readings, you can adjust how often and how long the dehumidifier runs. Pay attention to how quickly the room returns to that approximate range after showers, laundry, or heavy rain.

Table 2. Humidity goals and simple action ideas — Example values for illustration.
Example humidity and mold quick‑plan actions
Goal Simple actions Tools Notes
Keep general indoor humidity around 40–60% Run dehumidifier during humid weather; use exhaust fans when cooking or showering Dehumidifier, bathroom and kitchen fans Range is for general comfort and mold prevention tendencies, not a medical target
Reduce dampness in basements Seal obvious water entry points; use continuous drain if space is very damp Dehumidifier, drain hose or bucket Address standing water or leaks separately from humidity control
Limit bathroom moisture after showers Run exhaust fan during and after showers; open door when steam clears Fan, simple humidity gauge if desired Dehumidifiers can help but do not replace adequate ventilation
Manage moisture from indoor laundry drying Run dehumidifier nearby; improve airflow with a fan Dehumidifier, small fan Continuous drain is often more convenient for frequent drying
Check if your strategy is working Monitor humidity before and after running the dehumidifier Basic hygrometer or air quality monitor Look for patterns over days rather than single readings
Prepare for seasonal changes Adjust runtime as outdoor humidity changes with the seasons Same tools, plus simple notes or reminders Humid months may need more frequent or continuous drainage

Example values for illustration.


Related guides: Basement Dehumidifier Guide: Targets, Drainage, and Energy UseHow to Size a Dehumidifier (Sq Ft, Pints/Day, and Real-World Tips)Dehumidifier Running Cost: How Much Electricity Will It Use?

Summary: Picking the Setup That Fits Your Space

A bucket setup works well when you need portability, have no convenient drain, or only run the dehumidifier occasionally. You exchange manual effort—emptying and cleaning the bucket—for flexibility in where you place the unit.

A drain hose setup makes more sense in consistently damp spaces or when you expect long daily runtimes and have a reliable drain with a proper downward slope. You invest a bit more effort in initial routing and periodic checks, but you avoid frequent trips to empty the tank.

In many homes, the most practical approach is to start with the bucket, observe how fast it fills, and switch to a drain hose if emptying becomes a daily chore. Matching the method to your room, schedule, and available drains is usually more important than the specific equipment, as long as you keep humidity roughly in a comfortable range and watch for leaks or clogs.

Frequently asked questions

Should I use a drain hose or a bucket for a basement dehumidifier?

For basements, if the space is very damp or the unit will run near‑continuously and a floor drain or utility sink is available, a drain hose is usually better because it allows continuous operation without frequent emptying. Use the bucket if you need portability, no suitable drain exists, or you can empty the tank regularly.

How should I route a drain hose to avoid backflow and leaks?

Route the hose with a continuous downhill slope from the dehumidifier to the drain with no upward loops, secure the connection with the correct fitting, and protect it from kinks or damage. If the drain point is higher than the unit, use a condensate pump or raise the unit following manufacturer guidance.

How often will I need to empty a dehumidifier bucket?

Emptying frequency depends on tank size, room humidity, and run time; in lightly damp rooms a tank may last several days, while in very damp spaces it might fill multiple times per day. Monitor the first few days to establish a realistic emptying schedule.

Is it safe to leave a dehumidifier running unattended with a bucket attached?

Leaving a dehumidifier unattended with a bucket is acceptable for short periods, but not ideal for long absences because the tank can fill and the unit will shut off, and spills can occur during transport. For extended unattended operation, a properly routed drain hose or condensate pump is safer.

How do I prevent musty smells and slime in buckets and hoses?

Rinse and clean the bucket every few weeks with warm water and mild detergent, dry it before storage, and occasionally flush the hose with clean water to remove sediment and biofilm. Keep the air filter clean and run the unit often enough to avoid stagnant water sitting in the system.

Dehumidifier Noise Explained and How to Reduce It

Isometric illustration of a dehumidifier in a quiet laundry room

Most home dehumidifiers make a steady fan and compressor hum in the 40–60 dB range, similar to quiet conversation or background TV, and there are several practical ways to reduce how loud they sound in your space.

Dehumidifier noise matters because these units often run for many hours in bedrooms, basements, and living areas. Understanding what causes the sound, what is typical, and how placement and settings affect noise can help you get the moisture control you need without constant distraction. This article explains what to expect and offers realistic ways to make your dehumidifier seem quieter.

Quick answer
  • Many portable dehumidifiers operate around 40–60 dB at low–medium fan speeds (example range).
  • Noise mainly comes from the fan and compressor; higher fan speed and heavy moisture loads are usually louder.
  • Placing the unit on a stable, level, vibration-damping surface often cuts rattles and hum.
  • Keeping at least a few feet of open space around the intake and exhaust can reduce turbulent airflow noise.
  • Using lower fan modes or timers at night helps limit disturbance in bedrooms and living spaces.

What dehumidifier noise is and why it matters

Dehumidifiers pull humid air across cold coils to condense water, then blow the drier air back into the room. This process relies on a compressor and a fan, both of which generate sound. The goal is not silence but a stable noise level that fades into the background of daily life.

The overall noise you perceive is a mix of:

  • Fan noise – the sound of air moving through grilles and ductwork inside the unit.
  • Compressor noise – a mechanical hum or buzz while the refrigeration system is running.
  • Vibration and rattles – from loose panels, wheels, or the unit touching hollow floors or furniture.
  • Room acoustics – hard surfaces, corners, and small rooms can reflect and amplify sound.

This matters for comfort and usability. A slightly louder unit may be perfectly acceptable in a basement but distracting in a bedroom. Understanding what is normal helps you decide if you are hearing typical operating noise, avoidable vibration, or a sign of a problem.

Key concepts: noise levels, distance, and operating modes

Noise is usually measured in decibels (dB). Because the dB scale is logarithmic, small number changes can feel significant. For everyday reference, quiet conversation is often around 50–60 dB, and a typical kitchen refrigerator hum is often in the 40 dB range (example comparisons).

Dehumidifier noise depends on several practical factors:

Distance from the unit

Noise levels fall as you move away from the source. Sound measurements are often taken at a set point, such as around 3 feet in front of the unit. A dehumidifier that sounds noticeable at close range may blend into background noise a room away.

Fan speed and operating mode

  • High fan or turbo modes move more air, remove moisture faster, and usually sound louder.
  • Low or sleep modes reduce airflow and noise at the cost of slower dehumidification.
  • Compressor cycling may cause the sound to rise and fall as humidity reaches and drops below the target.

Moisture load and duty cycle

In very damp spaces, the compressor may stay on for longer periods (a higher duty cycle), so you hear the louder operating sound more of the time. As humidity drops closer to your setpoint, the unit may cycle off more often, lowering average noise over the day.

Type and size of dehumidifier

  • Portable refrigerant dehumidifiers (common in homes) typically have a noticeable but steady hum.
  • Desiccant dehumidifiers can have different noise profiles, sometimes more fan-dominated.
  • Larger-capacity units often have bigger fans and compressors, which can be louder but may run less often if correctly sized.

Noise expectations should match room use. A basement or garage may tolerate more sound than a nursery or home office where people value quiet.

Table 1. Common dehumidifier noise factors and simple mitigation ideas – Example values for illustration.
Noise factor What happens What you can try
High fan speed More airflow whoosh, higher overall sound level Use medium/low speed once humidity is under control
Hard floor contact Vibration transferred to floor, possible droning sound Add a thin rubber mat or anti-vibration pads
Corner placement Sound reflects off walls, can seem amplified Pull unit slightly away from walls and corners
Clogged air filter Restricted airflow can cause turbulence and higher fan effort Clean or replace intake filter per manual
Loose panels or bucket Rattling, intermittent buzzing or clicking Ensure bucket and panels are seated; adjust or pad contact points
Room acoustics Hard, bare rooms reflect and sharpen noise Add soft furnishings or relocate unit if possible

Example values for illustration.

Common dehumidifier noise issues and troubleshooting

Most dehumidifiers will produce a consistent hum plus fan noise, but some sounds suggest maintenance needs or setup problems. Here are frequent complaints and what they often indicate.

Rattling or vibrating sounds

Rattles usually come from loose parts or resonance with the floor.

  • Check the surface: Uneven or hollow floors can amplify vibration.
  • Inspect wheels and feet: Ensure casters fully touch the floor and are not stuck in one direction.
  • Confirm bucket fit: A slightly loose water bucket can chatter against its housing.

If a light press on the unit changes or stops the rattle, it is often surface- or panel-related rather than an internal failure.

Buzzing, clicking, or metal-on-metal sounds

Short, sharp sounds may point to contact between parts or expansion and contraction of metal components as the unit cycles.

  • Look for loose grilles or panels that can be gently tightened per the manual.
  • Check that cords, hoses, or nearby objects are not touching the unit and vibrating.

Persistent harsh or grinding noises can be a sign of a failing fan motor or other internal issues, which usually requires professional servicing or replacement rather than a do-it-yourself fix.

Gurgling or water sounds

Some gurgling or trickling is normal as condensate drains into the bucket or through a hose. Sudden changes in these sounds could indicate a partially blocked drain hose or an incorrectly sloped hose causing water to pool. Ensuring the hose has a gentle downward path and is not kinked can help.

Noise spikes when the compressor starts

A brief increase in sound when the compressor starts or stops is common. However, repeated loud bangs, clanks, or electrical noises are not typical and may be a reason to stop using the unit and consider inspection or replacement for safety reasons.

Practical ways to make your dehumidifier quieter

You cannot remove all sound from a dehumidifier, but you can often reduce the loudness and how noticeable it feels.

Optimize placement

  • Use a stable, level surface: This reduces vibration and rattling. A simple test is to gently rock the unit; it should not wobble.
  • Add soft isolation: Thin rubber pads or a dense foam mat under the feet can absorb vibration energy that would otherwise travel into the floor.
  • Avoid tight corners: Pulling the unit 6–12 inches away from walls and corners can reduce reflected sound and allow smoother airflow.
  • Aim airflow away from listening areas: Direct exhaust air away from beds, desks, and seating areas where the noise might feel more intrusive.

Adjust settings and schedule

  • Lower fan speed once humidity is under control, especially at night.
  • Use timers so the unit runs more in the daytime and less during sleep or quiet hours, if your moisture situation allows.
  • Choose a realistic humidity setpoint: Aiming for a moderate level (often around 45–50% relative humidity in many homes, as a general comfort-oriented example) can reduce how often the compressor runs compared to trying to keep it much lower.

Separate the unit from sleeping and working areas

If possible, locate the dehumidifier in an adjacent hallway, closet with louvered doors, or nearby room where it can still treat much of the air without being right next to sleeping or working spaces. Leave doors open or partially open to allow airflow, and ensure there is enough clearance around the unit as specified in the manual.

Real-world noise scenarios in different rooms

How loud a dehumidifier feels depends as much on the room as on the device itself. These example situations illustrate how to balance noise and moisture control.

Basement or crawlspace

Basements typically tolerate more noise, and sound often stays isolated from living areas. In these spaces, a higher-capacity unit on a moderate or high setting can be acceptable, especially if it keeps upstairs areas drier and more comfortable.

Practical ideas:

  • Place the unit on a rubber mat to control vibration on concrete.
  • Keep it away from stairs that open directly to quiet living areas, if possible.
  • Use a continuous drain with a hose, if the layout allows, to avoid frequent bucket emptying noise.

Bedroom or nursery

For sleeping spaces, consistent, low-level fan noise can act as a form of neutral background sound, but sudden changes or higher pitched tones are more disturbing.

  • Prioritize low fan or sleep modes with a modest humidity target.
  • Place the unit several feet away from the bed and ideally not directly facing it.
  • Consider running the dehumidifier more intensely during the day, then scaling back at night if your climate and building conditions allow.

Living room or open-plan area

In larger, open rooms, sound spreads out and is often less concentrated. However, reflective surfaces like bare floors and large windows can keep the noise noticeable.

  • Position the unit near a supporting wall but not tightly wedged into a corner.
  • Use area rugs, curtains, and upholstered furniture to absorb sound.
  • Experiment with different locations within the same room; moving a few feet can make a surprising difference.

Noise, safety, and indoor air quality considerations

Noise is only one aspect of using a dehumidifier safely and effectively. When adjusting for quieter operation, it is important not to compromise basic safety or indoor air quality goals.

  • Do not cover the unit or block vents in an attempt to muffle sound; this can cause overheating or reduced performance.
  • Keep clearances as recommended by the manufacturer so air can move freely.
  • Use grounded outlets and avoid overloading extension cords; electrical safety is more important than small noise gains.
  • Manage humidity within a reasonable range to help discourage mold growth and damp odors, instead of turning the unit off completely due to noise if moisture is significant.

Some air cleaning devices use ionizers or ozone-generating technologies that can have their own acoustic and air quality considerations. Standard home dehumidifiers generally rely on refrigeration or desiccant processes rather than ozone, and for indoor air quality, it is usually preferable to avoid adding ozone intentionally to occupied spaces.

Maintenance steps that can reduce noise over time

Regular maintenance keeps a dehumidifier working efficiently and can also prevent new noises from developing as parts wear or get dirty.

Clean or replace intake filters

Many portable dehumidifiers have a washable or replaceable intake filter that captures dust and lint. When this filter clogs:

  • The fan may work harder, which can increase noise.
  • Airflow becomes more turbulent, sometimes causing whistling or whooshing sounds.

Cleaning or replacing the filter on the schedule suggested in the manual (or more often in dusty areas) helps both sound and performance.

Empty and seat the water bucket correctly

Removing and replacing the water bucket multiple times a week can gradually wear or shift alignment points. Make sure the bucket:

  • Slides fully into place and engages any float switches correctly.
  • Does not wobble front-to-back or side-to-side when the unit is moved gently.

If you use a drain hose, ensure connections are snug but not overtightened, and that the hose routing does not press or pull on the unit, which can create extra vibration.

Dust and coil cleanliness

Over time, dust buildup on grills and coils can affect airflow paths. With the unit unplugged, lightly vacuuming accessible grills and wiping exterior surfaces can help air move more smoothly, sometimes reducing noise associated with uneven airflow. Internal coil cleaning beyond what the manual allows for users is generally a job for a qualified technician.

Monitor for changes over time

A gradual increase in noise over months or years may reflect:

  • Wear in fan bearings.
  • Extra vibration as parts loosen.
  • Reduced efficiency due to internal dust or aging components.

At some point, a significantly louder or harsher-sounding unit may be nearing the end of its practical life span, especially if performance has also declined.

Frequently asked questions about dehumidifier noise

Is it normal for a dehumidifier to run constantly and make noise all day?

In very humid conditions or in a space with ongoing moisture sources, a dehumidifier may run for long periods, especially at first. As humidity approaches your setpoint, it should cycle off or drop into lower fan modes. If it never seems to shut off and remains loud, you may need to reassess sizing, humidity targets, or underlying moisture issues.

Can a dehumidifier be used as white noise?

Some people find the steady hum of a dehumidifier similar to white noise and even helpful for sleep. Others are sensitive to compressor cycling or particular tones. If used as background sound, choose a stable setting and location that keeps the noise consistent, and ensure the unit is safe to operate unattended in that space.

Are quieter units always better for indoor air quality?

Quieter does not automatically mean better moisture control. The key is matching capacity and noise tolerance to the room. A slightly louder, correctly sized unit that runs efficiently can often maintain a healthier humidity range more reliably than a very quiet device that is too small for the space.

Should I put my dehumidifier in a closet to muffle the noise?

Placing a dehumidifier in an enclosed closet can restrict airflow, trap heat, and reduce effectiveness unless the closet is specifically designed with ventilation. A better approach is usually to move it to a nearby open area, adjust placement, and use soft furnishings to absorb sound while keeping clearances and ventilation adequate.

Table 2. Example noise and sleep planning ideas for dehumidifier use – Example values for illustration.
Situation Noise consideration Placement tip Note
Light sleeper in bedroom Prefer steady, low noise Place across room, low fan, away from bed Run more aggressively in daytime if possible
Basement moisture control Higher noise usually acceptable Central placement on rubber mat Keep doors open to upper levels as needed
Home office nearby Fan noise may interfere with calls Place in adjacent hall or room, door ajar Use medium fan during work hours
Open-plan living area Sound spreads but can reflect off hard surfaces Near wall, not in corner, away from seating Rugs and curtains help soften acoustics
Nighttime cooling and drying Combined HVAC and dehumidifier noise Coordinate with HVAC fan settings Balance comfort, humidity, and sound
Children’s room Sudden noise changes may disturb sleep Use steady mode, slightly outside doorway Check cord and trip safety around kids

Example values for illustration.


Related guides: How to Size a Dehumidifier (Sq Ft, Pints/Day, and Real-World Tips)Dehumidifier Running Cost: How Much Electricity Will It Use?Dehumidifier Capacity Estimator: Room Dampness to Liters/Day

Summary: what to expect and what you can do

Typical home dehumidifiers produce a constant mix of fan and compressor noise that many people describe as similar to a refrigerator or quiet conversation at close range. This sound level is usually normal, especially when the unit is working hard to pull moisture out of the air.

You can often make a dehumidifier seem quieter by focusing on placement, vibration control, realistic humidity targets, and regular maintenance rather than relying on settings alone. Paying attention to sudden changes in noise helps distinguish ordinary operation from signs of wear or potential problems. With a practical approach, it is usually possible to keep indoor humidity in a comfortable range while limiting how much the dehumidifier disrupts daily life.

Frequently asked questions

What decibel level should I expect from a home dehumidifier at typical distances?

Most portable home dehumidifiers produce roughly 40–60 dB when measured a few feet away, similar to a quiet conversation or background television. Measured levels drop with distance, so a unit that is noticeable at 3 feet may be much quieter across a room.

Why does my dehumidifier get louder when the compressor starts?

A brief increase in volume when the compressor starts is normal because the motor and refrigerant flow create transient mechanical and airflow sounds. Repeated loud bangs, clanks, or electrical noises are not typical and should prompt you to stop use and have the unit inspected.

How far should I place a dehumidifier from walls and furniture to reduce noise?

Pull the unit about 6–12 inches (15–30 cm) from walls and corners to reduce reflections and allow smoother airflow; increasing that distance further reduces perceived noise. Also avoid direct contact with hollow floors and consider placing a rubber or foam mat under the feet to cut vibration transfer.

Can I run a dehumidifier in sleep or low fan mode overnight without compromising moisture control?

Using low or sleep modes overnight is common and will reduce noise, but dehumidification will be slower and the unit may run longer to reach the same setpoint. If persistent high humidity is a concern, run the unit more aggressively during the day and scale back at night if conditions allow.

What noises mean I should perform maintenance or seek repairs?

Persistent rattling, grinding, harsh metallic noises, or a steady increase in volume over time often indicate loose panels, worn bearings, or other mechanical problems that need attention. Normal sounds include steady hums and occasional gurgling from condensate drainage; irregular water noises, electrical pops, or very loud mechanical sounds warrant inspection.

Dehumidifier Energy Cost: Practical Monthly Estimates

Isometric illustration of a home dehumidifier in a laundry corner

A typical home dehumidifier adds roughly $5–$30 per month to your electric bill, depending mainly on its wattage, runtime, and your local electricity rate.

Dehumidifiers can be helpful for comfort and moisture control, but they do use noticeable electricity if they run many hours a day. Understanding their power draw and how long they operate makes it easier to forecast costs, compare options, and decide when running one is worth it for your space and climate.

Quick answer
  • Most portable dehumidifiers draw about 300–700 watts when running.
  • At $0.15/kWh, 8 hours of daily use might cost around $5–$15 per month.
  • Heavy use (24/7) can push monthly costs toward $20–$40 for a larger unit.
  • Higher efficiency (higher pints per kWh) and humidistat controls reduce energy use.
  • Lowering humidity only to about 45–50% instead of very dry levels can cut runtime.
  • Good room sealing and airflow help your dehumidifier cycle off more often.

Why Dehumidifier Energy Cost Matters

Dehumidifiers remove moisture by running air over cold coils, which takes electrical power similar to a small air conditioner. While a single device rarely dominates a home’s electricity use, it can become a steady, background load—especially in humid climates or damp basements where it may run for many hours a day.

Energy cost matters for several reasons:

  • Monthly budget: Knowing approximate costs helps you decide when to run, upgrade, or downsize a unit.
  • Humidity targets: You can balance comfort and moisture control against electricity use.
  • Equipment choices: Comparing efficiency and capacity helps avoid over- or under-sizing, both of which can waste energy.
  • Whole-home strategy: Dehumidifiers are one part of moisture management alongside ventilation, insulation, and drainage.

Key Concepts: Watts, kWh, and Runtime

Estimating dehumidifier energy cost uses the same basic math as any electrical appliance. Three ideas matter most: wattage, run hours, and your electricity rate.

Wattage: How Much Power It Draws

Most portable residential dehumidifiers fall into these broad ranges:

  • Small (under ~20 pints/day): about 200–400 watts
  • Medium (~20–40 pints/day): about 300–600 watts
  • Large (~40–70 pints/day): about 500–800+ watts

The exact number is printed on the unit label as watts (W) or amperes (A). If you see amperes, you can estimate watts by multiplying amps by voltage (in the U.S., usually about 120 V). For example, 4 A × 120 V ≈ 480 W.

kWh: How Utilities Bill for Energy

Electric bills use kilowatt-hours (kWh). One kWh is using 1000 watts for 1 hour. For a dehumidifier:

  • Convert watts to kilowatts: 500 W → 0.5 kW.
  • Multiply by hours of operation: 0.5 kW × 8 hours/day = 4 kWh/day.
  • Multiply by your electricity rate: 4 kWh/day × $0.15/kWh = $0.60/day.
  • Multiply by days per month: $0.60 × 30 ≈ $18/month.

This simple formula—kW × hours × rate—is the core of any cost estimate.

Runtime: How Many Hours It Actually Runs

Runtime is not the same as how many hours per day the dehumidifier is plugged in. Most units have a humidistat that turns the compressor on and off to maintain a set humidity level. In practice:

  • Light duty: A unit might run only 2–4 hours/day in mild conditions.
  • Moderate duty: 4–10 hours/day is common in a typical basement in humid weather.
  • Heavy duty: In very damp spaces, it may run nearly continuously (16–24 hours/day).

The real energy cost is based on compressor-on hours, not clock time. A plug-in energy meter can show actual kWh if you want precise data for your device and conditions.

Table 1. Dehumidifier cost planning checklist – Example values for illustration.
Step What to check Why it matters
1 Rated watts or amps on the label Base number for all cost estimates
2 Approximate daily runtime (hours) Turns power draw into kWh used
3 Local electricity rate ($/kWh) Connects energy use to real dollars
4 Humidity setting on the humidistat Lower settings increase runtime and cost
5 Room size and leakage (doors, cracks) Leaky or oversized areas require more work
6 Filter and coil cleanliness Dirt reduces efficiency and raises energy use
7 Drain setup (tank vs hose) Overflow shutoffs can cause unexpected cycling

Example values for illustration.

Common Cost Ranges and Typical Mistakes

While actual bills vary, some patterns are common across U.S. homes. Understanding these helps you avoid overestimating or underestimating what your dehumidifier adds to your monthly bill.

Typical Monthly Cost Ranges

Assuming an electricity rate around $0.15/kWh, here are rough example ranges:

  • Small unit, light use (300 W, 3 hours/day): about 0.9 kWh/day → around $4/month.
  • Medium unit, moderate use (500 W, 8 hours/day): about 4 kWh/day → around $18/month.
  • Large unit, heavy use (700 W, 16 hours/day): about 11.2 kWh/day → around $50/month.

These are examples only. Your home’s humidity, temperature, insulation, and setpoint can change runtime dramatically.

Costly Oversights Homeowners Often Make

  • Running too dry: Trying to reach very low humidity (for example, below about 40%) makes the compressor work much longer than needed for typical comfort and moisture control.
  • Oversizing without a plan: A large-capacity unit in a small room may short-cycle inefficiently, depending on controls and airflow, without major benefit.
  • Ignoring air leaks: Open windows, unsealed gaps, or a door constantly left open can force the unit to treat essentially outdoor air.
  • Poor placement: Tucking the unit into a tight corner can restrict airflow and reduce performance, increasing runtime.
  • Dirty filters and coils: Dust buildup means the fan and compressor must work harder for the same moisture removal.

Misunderstanding Duty Cycle

Another common mistake is assuming that a dehumidifier uses its rated wattage 24/7. In reality, many units spend part of the time with the compressor off but fan on, or fully off once the set humidity is reached. This lowers average power use compared with a constant full-power assumption. However, in very damp conditions, duty cycle can approach continuous operation.

How to Estimate Your Dehumidifier’s Monthly Cost

You can get a useful cost estimate with a few minutes of observation and simple math. This helps you plan ahead or compare different humidity settings.

Step 1: Find the Power Draw

  • Look at the back or side label for W (watts) or A (amps).
  • If you see amps only, multiply by 120 to estimate watts (for a typical U.S. circuit).
  • Divide watts by 1000 to get kilowatts. Example: 480 W → 0.48 kW.

Step 2: Estimate Daily Runtime

Over a few days of typical use, note roughly how often the compressor is actually running:

  • Listen for the change in sound when the compressor starts and stops.
  • Check how often the water tank fills (for tanked units) under steady conditions.
  • Consider seasonality: peak summer humidity may double or triple runtime compared with drier seasons.

Use a reasonable average (for example, 4, 8, 12, or more hours per day) for your calculation. A plug-in energy monitor gives the most accurate number if you want to measure directly.

Step 3: Use Your Actual Electricity Rate

Your utility bill lists your energy charge per kWh. In many U.S. regions, this falls somewhere between about $0.10 and $0.30/kWh, though it can be outside this range. Use the full rate including delivery or distribution charges if they’re billed per kWh.

Step 4: Do the Math

Use the formula:

  • Monthly cost ≈ kW × hours/day × days/month × $/kWh

Example: 0.5 kW unit, 6 hours/day, 30 days, at $0.15/kWh:

  • 0.5 kW × 6 hours/day = 3 kWh/day
  • 3 kWh/day × 30 days = 90 kWh/month
  • 90 kWh × $0.15 = $13.50/month

Step 5: Compare Settings and Options

Once you have a baseline estimate, you can see how changes affect cost:

  • Raising the humidity setpoint (for example, from 40% to 50%) may reduce runtime.
  • Improving room sealing and drainage can reduce how long the unit must run.
  • Upgrading to a more efficient unit (more moisture removed per kWh) can lower energy use for the same dryness level.

Real-World Usage Scenarios

Every home is different, but some typical situations show how costs add up in practice. These examples use $0.15/kWh as a reference rate and assume average conditions.

Example 1: Mildly Damp Basement

A medium dehumidifier (about 500 W) runs around 4 hours/day to keep a basement at about 50% relative humidity during spring and fall.

  • 0.5 kW × 4 hours = 2 kWh/day.
  • 2 kWh × 30 days = 60 kWh/month.
  • 60 × $0.15 = $9/month (approximate).

For many homeowners, this level of cost is acceptable for added comfort and protection from dampness.

Example 2: Very Humid Summer in an Older Home

A larger unit (around 700 W) serves a partly finished basement in a humid climate. Poor insulation and air leaks mean it runs close to 12 hours/day during peak summer.

  • 0.7 kW × 12 hours = 8.4 kWh/day.
  • 8.4 × 30 = 252 kWh/month.
  • 252 × $0.15 ≈ $38/month.

Improving air sealing, fixing gutters or drainage, or using targeted ventilation may reduce moisture load and runtime in this scenario.

Example 3: Seasonal Use in a Vacation Home

A small unit (about 350 W) runs 8 hours/day only during a particularly damp month.

  • 0.35 kW × 8 = 2.8 kWh/day.
  • 2.8 × 30 = 84 kWh/month.
  • 84 × $0.15 ≈ $13/month.

This highlights how seasonal patterns can concentrate dehumidifier costs into a few months of the year.

Energy-Smart Operation and Moisture Control

Reducing dehumidifier energy cost is not only about the device itself; it also depends on how well your home manages moisture overall. A few habit and setup changes can significantly reduce runtime.

Set Realistic Humidity Targets

In many homes, keeping indoor relative humidity roughly in the 40–50% range is a reasonable balance between comfort, moisture control, and energy use. Trying to reach much lower humidity often leads to long compressor runs without clear added comfort.

Improve Room Tightness and Drainage

  • Seal gaps: Weatherstrip doors, caulk cracks, and close unneeded vents around the area being dehumidified.
  • Address water sources: Fix plumbing leaks, improve exterior drainage, and check gutters to reduce incoming moisture.
  • Use exhaust fans: Bathroom and kitchen fans can remove moisture at the source, especially when showering or cooking.

Optimize Placement and Airflow

  • Place the unit centrally in the area you want to treat, not wedged tightly against walls or furniture.
  • Keep intake and exhaust grilles unobstructed for good circulation.
  • Consider internal doors: slightly open ones can help circulate air around a basement or large room.

Consider Integration with Cooling

In some climates, central air conditioning already removes a significant amount of moisture while cooling. In those cases, running the thermostat fan setting correctly and maintaining the AC system can reduce the dehumidifier’s workload. However, in cooler but humid conditions (for example, a cool basement), standalone dehumidifiers often remain more practical.

Safety, Standards, and When to Rethink Use

Although dehumidifiers are common household appliances, they still require basic safety and code awareness, especially when they run many hours a day.

Electrical and Placement Considerations

  • Plug directly into a properly grounded wall outlet; avoid long, undersized extension cords that can overheat.
  • Keep clear of flammable materials and provide space around vents for airflow.
  • In damp areas like basements, follow local electrical code recommendations for outlet type and placement.
  • Ensure the power cord is routed to avoid tripping hazards or standing water.

Moisture and Drainage Safety

  • Regularly empty the collection tank to prevent spills; standing water can encourage biological growth.
  • If using a continuous drain hose, route it with a proper slope to a suitable drain and check for leaks.
  • Avoid draining near foundation walls where water might seep back into the structure.

Signs You May Need a Different Approach

Some situations suggest that a dehumidifier alone may not be the most efficient or appropriate long-term solution:

  • Unit runs nearly 24/7 for long periods and still struggles to maintain reasonable humidity.
  • Visible moisture issues persist (such as recurring damp spots) despite continuous operation.
  • Energy costs for dehumidification become a large share of your bill during certain seasons.

In these cases, broader building moisture strategies—like improving drainage, insulation, controlled ventilation, or other building-envelope work—may be worth exploring with appropriate professionals.

Maintenance, Lifespan, and Long-Term Cost Planning

Regular maintenance helps keep energy consumption closer to the original rating and can extend the useful life of the unit, limiting replacement costs over time.

Routine Tasks That Affect Energy Use

  • Clean or replace the air filter: Many units have a washable filter at the air intake. Keeping it clean maintains airflow and efficiency.
  • Vacuum dust around intake and exhaust grilles: Surface dust can restrict air movement.
  • Check coils periodically: If the evaporator or condenser coils accumulate dirt, professional cleaning may restore performance.
  • Inspect the drain system: A clogged hose or float switch can cause frequent cycling and inefficient operation.

Planning for Replacement

Dehumidifiers do not last indefinitely. Over time, refrigerant leaks, wear on the compressor, or control failures can reduce efficiency. Signs that energy use may be rising relative to performance include:

  • Notably longer runtimes to achieve the same humidity level under similar weather conditions.
  • Frequent icing of coils despite appropriate operating temperatures and airflow.
  • Unusual noises or heat from the unit during operation.

When an older device begins to show these signs, comparing its measured kWh use (with an energy monitor) against a new, appropriately sized model can clarify whether replacement would reduce long-term operating cost.

Quick FAQ: Dehumidifiers and Energy Bills

These brief answers address common questions homeowners have when they first notice the impact of a dehumidifier on their energy bill.

Does a dehumidifier use more electricity than an air conditioner?

Many portable dehumidifiers use less power than central air conditioners but more than some window or portable AC units, depending on size. However, they are used for different purposes—dehumidifiers focus on moisture removal rather than temperature control—so direct comparisons can be misleading. The key is to look at each device’s wattage, runtime, and kWh use.

Is it cheaper to run a dehumidifier or just cool the space?

In hot, humid weather, air conditioning can remove moisture while cooling, which may reduce or eliminate the need for a separate dehumidifier in some spaces. In cooler but humid conditions (for example, a cool basement), running air conditioning may not be practical, and a dehumidifier is often more suitable despite its energy use.

Can a more efficient dehumidifier significantly cut my bill?

Higher-efficiency models remove more moisture per kWh. If your unit runs many hours per day for several months a year, improving efficiency and right-sizing the capacity can noticeably reduce electricity use over time. For light or occasional use, the difference in operating cost may be smaller.

Table 2. Humidity and mold risk quick planning examples – Example values for illustration.
Goal Simple actions Tools Note
Keep living areas around 40–50% RH Use dehumidifier as needed; avoid overly low settings Portable dehumidifier, humidity gauge Moderate setpoints reduce runtime and energy cost
Limit basement dampness Seal leaks, improve drainage, run dehumidifier Weatherstripping, gutter maintenance, dehumidifier Address water entry before relying solely on drying
Manage moisture after showers Run exhaust fan during and after use Bathroom exhaust fan, timer Removes moisture at the source, reducing load
Reduce laundry-related humidity Vent dryer outdoors, avoid indoor line-drying in small spaces Proper dryer venting Prevents large moisture spikes that drive runtime
Check for hidden moisture sources Inspect plumbing, foundation, and window frames Basic tools, visual checks Fix leaks to cut long-term dehumidification needs
Track seasonal humidity changes Log humidity readings by month Simple hygrometer Helps plan when dehumidifier use is most necessary

Example values for illustration.


Related guides: Dehumidifier Running Cost: How Much Electricity Will It Use?Desiccant vs Compressor Dehumidifiers: Which Is Better for Cold Rooms?Humidifier vs Dehumidifier: Which One You Need (And How to Tell)

Summary: What a Dehumidifier Adds to Your Bill

In most U.S. homes, a typical portable dehumidifier adds somewhere between about $5 and $30 per month to the electric bill, with higher costs in very damp spaces or during peak humidity seasons. The main drivers are the unit’s wattage, the number of hours it actually runs each day, and your local electricity rate.

By checking the nameplate rating, estimating runtime, and applying simple kWh math, you can forecast your own costs with reasonable accuracy. Adjusting humidity setpoints to moderate levels, improving building moisture control, and maintaining the unit all help reduce energy use without giving up the comfort and protection that controlled humidity can provide.

Frequently asked questions

How much does a typical portable dehumidifier add to my monthly electricity bill?

A typical portable dehumidifier usually adds about $5–$30 per month, depending on the unit’s wattage, daily compressor-on hours, and your local electricity rate. Very damp conditions, longer runtimes, or higher utility rates can push that figure higher.

How can I calculate my dehumidifier’s monthly energy cost?

Use the formula: kW × hours/day × days/month × $/kWh. Convert the unit’s rated watts to kilowatts, estimate compressor-on hours per day (not just plugged-in hours), then multiply by days in the month and your utility rate; a plug-in energy monitor gives the most accurate measurement.

Will lowering the humidistat significantly increase my dehumidifier energy cost monthly bill?

Yes. Lowering the set humidity requires the compressor to run longer to remove more moisture, which increases monthly energy use. Small setpoint changes can materially lengthen the duty cycle, so balance comfort and energy savings by choosing moderate targets like 40–50% RH.

Is it more energy-efficient to run a dehumidifier continuously or only when humidity rises?

Running the unit only as needed via its humidistat is generally more energy-efficient than continuous operation. Continuous running raises energy use and wear without added benefit if humidity is already at an acceptable level; improving sealing and source control usually reduces required runtime more effectively.

Can replacing an old dehumidifier with a higher-efficiency model noticeably lower my monthly bill?

Possibly—if your dehumidifier runs many hours per day for extended periods, a newer, more efficient model (higher pints removed per kWh) can reduce operating costs enough to justify the purchase. Measure current kWh use and estimate annual savings to compare against replacement and installation costs; for light seasonal use, payback is typically longer.

Basement Dehumidifier Setup: Placement, Drains, RH Targets

Isometric illustration of a dehumidifier in a tidy basement corner

A basement dehumidifier should be set up on a level surface near a drain or collection point, with at least a few inches of clearance for airflow and a humidity target around 40–50% relative humidity (RH) in most climates.

Getting the basics right—placement, drainage, and realistic humidity targets—matters more than picking a specific model. A correctly set up dehumidifier can help keep a basement more comfortable, discourage mold growth, and protect stored items from excess dampness, without needing constant attention. The steps below focus on simple, practical choices you can adapt to your own basement layout.

Quick answer
  • Target around 40–50% RH in finished basements; up to 55–60% is often acceptable in unfinished spaces.
  • Place the dehumidifier on a stable, level surface with 6–12 inches of clearance around air inlets and outlets.
  • Use gravity drain (hose to floor drain or sump), condensate pump, or regularly empty the bucket.
  • Keep doors open within the basement level so air can circulate between rooms or storage areas.
  • Run the unit continuously or on a humidistat setting during damp seasons; adjust if air feels too dry.

Why Basement Dehumidifier Setup Matters

Basements tend to be cooler and more humid than the rest of the house because they are partly or fully below grade. Ground moisture, small leaks, and limited sunlight make them prone to condensation and damp materials. A dehumidifier can help manage this moisture, but only if it can move air freely and get rid of the collected water reliably.

Poor setup can lead to short cycling, overflowing buckets, or areas of the basement that stay damp even while the dehumidifier runs. Over-drying can also be a problem, especially in cold weather, making the space uncomfortable and potentially stressing wood and other materials.

Good setup focuses on three questions:

  • Where should the dehumidifier sit so air can circulate across as much space as possible?
  • How will the water drain without constant manual emptying, if possible?
  • What RH target is realistic for your basement and local climate?

Key Concepts: RH Targets, Sizing, and Airflow

Before moving the dehumidifier around, it helps to understand how humidity and capacity interact in a basement environment.

Practical RH targets for basements

Relative humidity is the amount of moisture in the air compared to the maximum the air can hold at that temperature. In basements, practical ranges are:

  • Finished basements used regularly: aim for roughly 40–50% RH.
  • Unfinished storage basements: up to about 55–60% RH is often acceptable if surfaces stay dry and materials aren’t musty.
  • Colder seasons: slightly higher RH may be acceptable because cold air holds less moisture; focus on avoiding visible condensation.

Lower is not always better. RH much below about 35–40% for long periods can feel dry and may not provide additional benefit for most materials in a basement.

Sizing basics for basement dehumidifiers

Dehumidifier capacity is typically given as pints of water removed per day under standard test conditions. Actual performance will be lower in cooler basements, but capacity guidelines are still useful. When thinking about sizing, consider:

Airflow and room layout

Dehumidifiers need to move basement air across their coils. For that to happen:

  • Keep at least 6–12 inches clearance around air intake and exhaust areas.
  • Face the exhaust toward open space, not directly into a wall or large object.
  • Open doors between rooms on the same level so air can circulate.
  • Consider a small fan to help move air into dead corners or behind shelving if needed.

The more evenly air circulates, the closer your whole basement will be to the same RH level.

Table 1. Basement dehumidifier setup checklist. Example values for illustration.
Task Why it matters Notes
Measure basement area Aligns roughly with dehumidifier capacity Include all rooms that share air with the unit
Check for visible water issues Identifies problems that dehumidifiers alone cannot fix Look for leaks, standing water, or seepage first
Choose a central location Improves air mixing across the basement Avoid tight corners if possible
Confirm a drainage path Prevents bucket overflows and interruptions Plan hose routing before permanent placement
Set initial RH target Prevents over-drying or under-dehumidifying Start around 45–50% RH and adjust
Test for a few days Shows how the setup performs in real conditions Use a separate hygrometer in a few spots
Adjust doors and fans Reduces humid pockets and uneven results Reposition if some areas stay noticeably damp

Example values for illustration.

Common Basement Dehumidifier Mistakes

Certain patterns show up frequently in damp basements, even when a dehumidifier is running. Recognizing these makes troubleshooting easier.

Poor placement and blocked airflow

Placing a dehumidifier directly against a wall, behind large furniture, or in a tight closet can starve it of air. This can lead to:

  • Reduced moisture removal, even if the unit runs constantly.
  • Higher noise and wear because the fan is working harder.
  • Localized dry spots near the unit and damp areas farther away.

Aim for an open area, such as a central section of the basement or a spot near the stairwell where air naturally circulates.

Inadequate drainage planning

Another common issue is relying on the internal bucket in a very damp basement, then forgetting to empty it. When the bucket fills up, most units shut off until it is drained. Problems include:

  • Humidity creeping up again when the unit stops.
  • Risk of spillage if the bucket is overfilled or jostled.
  • Extra work carrying water up stairs or across the basement.

Where possible, continuous drainage or a condensate pump helps the dehumidifier run steadily.

Unrealistic RH targets

Trying to drive a basement to very low RH, especially in a humid climate, can lead to constant operation with little gain. Signs your target may be too aggressive include:

  • The unit running nearly nonstop but RH readings changing slowly.
  • Noticeably dry air and static in other parts of the home when air mixes.
  • Higher energy costs without additional practical benefit.

Adjusting to a moderate RH target often balances comfort, protection of belongings, and energy use.

Ignoring building moisture problems

Dehumidifiers manage airborne moisture. They do not fix structural water entry, such as foundation cracks, failed gutters, or plumbing leaks. If walls are visibly wet or there is standing water, addressing those issues first usually makes dehumidification more effective and reliable.

Practical Setup: Placement, Drainage, and RH Settings

Once you understand the basics, you can focus on step-by-step setup in your specific basement.

Choosing the location

Good placements in basements often include:

  • Near the center of the open area: encourages even air mixing.
  • Close to a floor drain or sump pit: simplifies hose routing for drainage.
  • On a slightly raised, stable surface: such as a low platform or sturdy stand to keep the unit above minor spills.

Avoid locations where water could drip onto electrical connections or where dust and lint are very heavy, such as directly under woodworking tools or near a dryer vent that leaks lint into the room.

Setting up drainage options

There are three common drainage approaches in basements:

  • Bucket only: simplest but requires regular manual emptying. Suitable for moderately damp basements where you are often present.
  • Gravity drain hose: connect a hose to the unit’s drain port and run it downhill to a floor drain, sloped floor, or sump. The outlet must be lower than the dehumidifier’s drain point.
  • Condensate pump: a small pump that lifts water from the unit to a higher drain point, like a utility sink or standpipe.

When routing hoses, keep them as straight as possible, avoid kinks, and make sure the end is secure in the drain to prevent splashing.

Leveling and clearance

Use a level or visual check to make sure the unit is not leaning. A slight tilt toward the drain side is sometimes recommended by manufacturers, but extreme tilts can cause noise or internal issues. Leave enough clearance—often at least 6–12 inches from walls, shelving, or stored boxes—around both intake and exhaust sides. This encourages smooth airflow and more uniform drying.

Setting the humidistat

Many basement dehumidifiers include a built-in humidistat. If so:

  • Start with a target around 45–50% RH in a finished basement.
  • In an unfinished storage basement, 50–55% can be a reasonable starting point.
  • Allow a few days of operation and check readings with a separate hygrometer placed away from the unit.

If the built-in display and your separate hygrometer differ, use the external readings primarily for decisions, as they better reflect conditions in the rest of the space.

Real-World Basement Scenarios

Each basement has its own combination of materials, leaks, and airflow paths. Here are some typical patterns and how setup might differ.

Unfinished utility basement with floor drain

In a large, open, unfinished basement with a floor drain near the furnace or water heater:

  • Place the dehumidifier a few feet from the drain, on a stable platform.
  • Run a short gravity drain hose into the floor drain.
  • Set RH to around 50–55% and monitor stored items such as cardboard boxes for signs of dampness.
  • Open any interior doors on that level to include adjacent rooms if desired.

Finished basement family room and bedroom

In a finished basement with separate rooms:

  • Place the dehumidifier in a hallway or open family room where air can spread to both the bedroom and other spaces.
  • Keep doors open during the day so humidity can equalize, closing them only when needed for privacy.
  • Consider a small fan to help pull air from the farthest room toward the dehumidifier.
  • Aim for around 40–50% RH for comfort, adjusting slightly based on how the space feels.

Basement with known seepage or heavy dampness

If there is visible water entry during rainstorms or consistent damp patches on walls:

  • Address drainage, gutters, grading, or interior waterproofing strategies where possible.
  • Locate the dehumidifier away from direct water paths to reduce the risk of splashing onto the unit.
  • Expect to run the unit more frequently and possibly at a higher RH target to balance comfort and energy use.

In such spaces, a single dehumidifier may not solve all moisture problems, but it can still help control airborne humidity and protect items that are kept off the floor.

Safety, Electrical Considerations, and Add-On Features

While dehumidifiers are common household appliances, basements present specific safety considerations.

Electrical safety in damp areas

Because basements can be damp:

  • Plug the dehumidifier directly into a properly grounded outlet; avoid long extension cords whenever possible.
  • Keep the cord path away from standing water areas and where it won’t be tripped over.
  • Follow any local requirements for ground-fault circuit interrupter (GFCI) outlets in unfinished or damp locations.

Temperature limits

Most standard residential dehumidifiers are designed for moderate temperatures. In very cool basements, coils can frost. Many newer units have defrost cycles, but performance still decreases at lower temperatures. If your basement stays quite cold for long stretches, expect slower moisture removal and monitor for frost buildup.

Air cleaning and extra features

Some dehumidifiers include basic air filters primarily meant to protect the coils from dust. These are usually not high-efficiency particle filters. Other technologies such as ionization or UV-C may be offered in certain air-treatment devices; these should be evaluated on their own merits, taking into account energy use, maintenance needs, and any manufacturer safety guidance. For most basements, the main priorities remain moisture control, safe operation, and clean airflow through the unit.

Maintenance, Filters, and Energy Use

Routine care keeps a basement dehumidifier working efficiently and reduces the chance of odors or performance loss.

Regular cleaning tasks

  • Dust the intake and grille: wipe or vacuum periodically to maintain airflow.
  • Clean or replace the pre-filter: rinse or change according to the manual; a clean filter reduces strain on the fan and coil.
  • Check the bucket and drain hose: rinse the bucket occasionally, and inspect the hose for kinks, algae, or mineral buildup.
  • Inspect the coil area: if accessible, gently remove lint and dust buildup, taking care not to bend fins.

Monitoring performance over time

Simple cues that your setup may need attention include:

  • Unit runs more often than it used to for the same RH readings.
  • Noticeable musty smells returning despite the unit operating.
  • Condensation on windows or cool surfaces even when the unit is running.

These signs may mean filters or coils are dirty, drainage is partially blocked, or moisture entering the basement has increased.

Energy considerations

Dehumidifiers can be one of the larger contributors to basement electricity use, especially in humid months. To manage this:

  • Use a moderate RH target rather than the lowest possible setting.
  • Seal obvious air leaks and improve drainage so the unit doesn’t have to work against constant new moisture.
  • Close basement windows on humid days; outside air can quickly raise moisture levels.

Basement Humidity FAQs

Homeowners often have similar questions when they start managing basement humidity.

Should a basement dehumidifier run all the time?

During very humid seasons, it is common for a dehumidifier to cycle frequently or even run nearly continuously when set to a low RH target. Using the built-in humidistat or an external controller allows the unit to shut off once the target is reached. In drier months, it may run only occasionally.

Where should the RH sensor be located?

If you use a separate hygrometer, place it at roughly breathing height in a representative location away from direct airflow from the dehumidifier, windows, or vents. For finished basements, measuring in the main living area and in at least one corner or storage area offers a clearer picture of how even the RH is.

Is it better to dehumidify the whole house or just the basement?

This depends on your home layout and moisture sources. If dampness is mainly in the basement, a dedicated basement dehumidifier is usually sufficient. If humidity is high throughout the house, whole-house strategies like improved ventilation, moisture control in other rooms, or additional dehumidification on upper floors may be helpful.

Table 2. Basement humidity quick-plan examples. Example values for illustration.
Goal Simple actions Tools Note
Keep finished basement comfortable Set RH around 45–50%, run unit in humid months Dehumidifier with humidistat, hygrometer Adjust a bit higher in colder weather
Protect stored items from dampness Raise items off floor, use moderate RH target Shelving, pallets, dehumidifier Aim near 50–55% RH if space is unfinished
Reduce musty odor after rain Check for leaks, run unit continuously for several days Dehumidifier, fan, hygrometer Address water entry points in addition to drying air
Smooth humidity between rooms Open doors, add small fan to move air Box fan, dehumidifier Helps avoid humid pockets in closed-off rooms
Limit energy use Use moderate RH setpoint, seal leaks, close windows Weatherstripping, caulk, dehumidifier Reducing moisture sources lowers runtime
Prepare for very humid season Clean filter, test drain, confirm RH reading Dehumidifier, hygrometer Do a short test run before peak humidity

Example values for illustration.


Related guides: Basement Dehumidifier Guide: Targets, Drainage, and Energy UseBasement Dampness 101: RH Targets, Dehumidifiers, and VentilationDehumidifier Capacity Estimator: Room Dampness to Liters/Day

Key Takeaways for Basement Dehumidifier Setup

Effective basement dehumidification depends on a few fundamentals: stable placement with good airflow, reliable drainage, and realistic RH targets tailored to how you use the space. Finished basements generally benefit from RH around 40–50%, while unfinished areas can often be kept slightly higher as long as surfaces remain dry and odors are controlled.

Checking conditions with a separate hygrometer, inspecting for water entry, and doing simple maintenance on filters and drains help your dehumidifier work steadily over time. With these basics in place, most homeowners can keep basement dampness in check without constant adjustments.

Frequently asked questions

Where exactly in a basement should I place a dehumidifier for the most even RH control?

Place the unit in a central, open area such as a hallway or near the stairwell so air can circulate to adjoining rooms. Keep at least 6–12 inches of clearance around intake and exhaust and avoid corners or enclosed closets that create dead spots.

What is the best drainage option if my floor drain is higher than the dehumidifier’s outlet?

Use a condensate pump to lift the water to a higher drain point or route the hose to a lower sump pit if available; gravity drains require the outlet to be lower than the unit’s drain. Make sure hoses are straight, secure, and checked periodically for algae or kinks.

What RH target should I set for a finished versus an unfinished basement?

For a finished basement used as living space, aim for about 40–50% RH for comfort and mold prevention. In unfinished storage areas, 50–55% (up to ~60% in some cases) is often acceptable as long as surfaces remain dry and there’s no musty odor.

Should a basement dehumidifier run constantly, or can I rely on the humidistat?

During very humid periods the unit may need to run frequently, but a properly set humidistat will cycle the unit off once the target RH is reached. Running continuously is reasonable if the space has persistent moisture, but using a moderate RH setpoint saves energy while protecting belongings.

How can I avoid humid pockets so the dehumidifier treats the whole basement?

Keep interior doors open when practical, position the unit centrally, and use small fans to move air from far corners toward the dehumidifier. Also place separate hygrometers in different areas to verify even humidity and relocate or add fans if some spots stay noticeably damp.

Dehumidifier Sizing: Liters Per Day Without Guessing

Isometric illustration of a home dehumidifier in a laundry corner

Dehumidifier sizing in liters per day depends mainly on room size, room type, and how damp the space is to begin with.

Getting the capacity right helps keep indoor humidity in a comfortable range, reduce musty odors, and protect materials, without wasting energy on an oversized unit. This article explains how to estimate the right liters-per-day rating using simple steps and example ranges you can adapt to your home.

Quick answer
  • For a small bedroom (up to ~150 sq ft) mildly damp, many people find around 8–12 L/day often sufficient.
  • For a medium living room (~150–300 sq ft) that feels damp, example needs are around 12–20 L/day.
  • For a large basement or open area (>400 sq ft) with clear moisture issues, example ranges are 20–30+ L/day.
  • Use higher capacity if you have visible condensation, musty odor, or laundry drying indoors.
  • Use lower capacity if the room is only slightly humid and already has some ventilation.
  • These are general examples only; actual needs depend on climate, insulation, and moisture sources.

Why Dehumidifier Sizing Matters for Indoor Comfort

Dehumidifiers remove moisture from indoor air and are rated by how many liters of water they can remove in 24 hours under standardized test conditions. If the unit is too small, humidity may stay high, leading to clammy air, musty smells, and more condensation on cool surfaces. If it is too large, you may pay more than necessary and cycle the unit on and off more often.

In most U.S. homes, a relative humidity (RH) target around 40–50% is commonly used for comfort and to help limit excess moisture. Sizing to keep humidity roughly in this range is usually more important than hitting an exact number. Room type (bedroom vs basement), typical moisture sources (showers, cooking, laundry), and local climate all influence how much moisture a dehumidifier needs to handle.

Key Sizing Concepts: Liters/Day, Room Type, and Dampness

Dehumidifier sizing uses three main ideas: capacity (liters per day), the space you are treating, and how damp that space is. Thinking through each of these helps you choose an approximate size without complicated calculations.

1. Capacity in liters per day

Manufacturers usually express dehumidifier capacity in liters per day (L/day) or pints per day (pt/day). The bigger this number, the more moisture the unit can remove under test conditions. Actual performance at home depends on temperature, humidity level, and how the room is used, so capacity is best treated as a rough planning number, not a guarantee.

As a very general orientation:

  • Small units: roughly 5–10 L/day – suited to small bedrooms, offices, or closets with mild dampness.
  • Medium units: roughly 10–20 L/day – often used for typical living rooms, small basements, or laundry areas.
  • Larger units: roughly 20–30+ L/day – often chosen for basements, large open spaces, or more severe dampness.

These ranges are examples only; always adjust up or down based on your specific conditions.

2. Room size and layout

Room area, ceiling height, and layout strongly affect dehumidifier sizing. A small enclosed bedroom retains moisture differently than a large open-plan living room. When you estimate the size of your space, note:

  • Floor area: Measure approximate length × width in feet (or meters) to understand the size category of your room.
  • Ceiling height: Higher ceilings mean more air volume, which may justify a slightly higher capacity.
  • Open-plan or connected rooms: Air flows between connected spaces, so a single unit may effectively serve more than one room if doorways are large and air circulation is good.

3. Dampness level (how wet is the space?)

How the space feels and looks is just as important as its size. You can categorize dampness with simple observations:

  • Slightly humid: Air feels a bit clammy in warm weather; perhaps minor odor after rain; little or no visible condensation.
  • Damp: Frequent musty smell, light condensation on windows or cool surfaces, fabrics may feel slightly damp.
  • Very damp: Noticeable moisture on walls or floors, frequent condensation, stored items feel damp, possible visible mold growth in some areas.

The more severe these signs, the larger the capacity you should consider for the same room size.

Figure 1. Dehumidifier sizing checklist by room and dampness. Example values for illustration.
Practical checklist: what to note before choosing capacity
Checklist item Why it matters Notes when sizing
Room type (bedroom, basement, bath, laundry) Different rooms have different moisture sources Basements and laundry rooms usually need higher capacity
Approximate floor area Larger rooms contain more humid air volume Up-size capacity as room area increases
Ceiling height Higher ceilings increase air volume Consider moving up one size for very tall rooms
Dampness level (slight, damp, very damp) More moisture load requires more removal per day Choose higher L/day in very damp spaces
Moisture sources (showers, cooking, leaks) Internal sources can overwhelm small units Address leaks and standing water before sizing
Ventilation and air leakage Outdoor air can add or remove moisture Poorly ventilated rooms often need more capacity
Desired humidity range Lower targets require more moisture removal Targets near 40% usually need higher capacity than near 50%

Example values for illustration.

Common Sizing Mistakes and How to Spot Them

Many sizing problems show up as lingering dampness or inefficient operation. Recognizing these patterns can help you adjust capacity or usage.

Undersized dehumidifier symptoms

  • Humidity readings stay above your target (for example, consistently above about 55–60% RH) even with long run times.
  • li>Musty odors persist after several days of operation.
  • Condensation still appears on windows or cool surfaces in the treated area.
  • The water bucket fills quickly, but the room still feels damp.

If these occur, you may need either a higher-capacity unit, additional units, or changes to moisture sources or ventilation.

Oversized dehumidifier trade-offs

  • Unit reaches target humidity quickly and cycles on and off frequently.
  • Noise may be more noticeable than needed for a given room.
  • Initial cost and potential energy use may be higher than warranted for the space.

While having somewhat more capacity than you strictly need is usually fine, sizing far beyond your requirements can be inefficient and less comfortable in quiet spaces like bedrooms.

Ignoring room type and moisture sources

Using a small bedroom-sized dehumidifier to dry a basement with frequent bulk water intrusion, or a busy laundry room with hanging clothes, often leads to poor results. Address obvious moisture sources (such as leaks, poor drainage, or unvented dryers) as part of the overall plan. Dehumidifiers are most effective when they are dealing with airborne moisture rather than liquid water problems.

Step-by-Step: How to Estimate Dehumidifier Size

You can match dehumidifier capacity to your space using a simple four-step process. This approach uses liters per day as a practical planning number and applies regardless of brand.

Step 1: Identify room type and use

Start by categorizing the room:

  • Sleeping areas: bedrooms, nurseries, guest rooms – typically smaller, lower moisture load.
  • Living spaces: living rooms, family rooms, home offices – moderate size, occasional higher occupancy.
  • Moisture-heavy rooms: bathrooms without strong exhaust, laundry rooms, indoor drying areas, basements.

Moisture-heavy rooms usually need higher capacity than sleeping or living rooms of the same size.

Step 2: Estimate size category

Next, group your space into a rough size category (using square feet as an example):

  • Small room: Up to about 150 sq ft.
  • Medium room: About 150–300 sq ft.
  • Large room: About 300–500 sq ft.
  • Very large or open area: More than about 500 sq ft or multiple connected rooms.

Adjust upward for high ceilings or very open layouts, since those increase air volume.

Step 3: Decide how damp the room is

Use your observations to rate the space:

  • Mildly humid: Slightly sticky or heavy air at times; no clear visible moisture problems.
  • Damp: Frequent mild musty odor, light condensation, or damp feeling on fabrics or walls.
  • Very damp: Regular condensation, damp materials, or clearly visible mold patches in some areas.

The more severe the dampness, the more liters per day you will generally want.

Step 4: Match to example capacity ranges

Combine room type, size, and dampness to land on a realistic example range. The numbers below are planning examples, not strict rules:

  • Small bedroom (~100–150 sq ft), mildly humid: often about 8–12 L/day.
  • Medium living room (~200–300 sq ft), damp: often about 12–20 L/day.
  • Large or partially finished basement (~400–700 sq ft), very damp: often about 20–30+ L/day.

You can also adjust for climate. In humid regions, lean toward the higher end of each range. In dry climates, closer to the lower end may be sufficient.

Example Scenarios: From Bedroom to Basement

Walking through a few real-world style scenarios can help illustrate how these principles play out in everyday homes. These are generalized examples meant to help you think through your own situation.

Scenario 1: Small upstairs bedroom

A 120 sq ft bedroom in a reasonably well-insulated house feels a bit stuffy in summer. There is no visible condensation or musty smell, but a humidity monitor often reads above 55–60% RH when the weather is humid.

This room is small, used mainly for sleeping, and only mildly humid. Many people in this situation would consider something in the lower range, around 8–12 L/day, combined with occasional window ventilation when outdoor conditions allow.

Scenario 2: Open-plan living/dining area

A 350 sq ft open-plan living and dining space with average ceiling height hosts family activities and occasional indoor plants. After rainy days, windows sometimes show a bit of fog, and there is a faint musty odor near an exterior wall.

This is a medium-to-large, moderately damp living area. A medium-sized unit in the neighborhood of 12–20 L/day can be reasonable, placed centrally with good airflow around it. Improving insulation or sealing drafts at the problem wall can further reduce moisture load.

Scenario 3: Partially finished basement

A 600 sq ft basement with concrete floors feels cool and clammy most of the year. Cardboard boxes feel damp to the touch, and there is regular condensation on metal surfaces. Laundry is sometimes dried on racks down there.

This basement is clearly very damp, with additional moisture introduced by drying clothes. In this case, many homeowners would lean toward larger capacities in the range of 20–30+ L/day and might also use more than one unit if the layout is segmented. Addressing any water seepage, improving drainage, and venting laundry appliances are also important.

Safety, Standards, and Interaction With Other Air Equipment

Most residential dehumidifiers simply condense water from the air and do not intentionally produce ozone or other reactive gases. However, some devices marketed for air treatment may include additional functions such as ionization or UV-C lights. Neutral, cautious use is appropriate.

  • Ozone-producing devices: For typical homes, it is generally advisable to avoid intentional ozone generation. Standard condensing dehumidifiers do not rely on ozone.
  • Ionizers and UV-C: If included in a combined device, they should be used according to manufacturer guidance. They are not required for dehumidification and can usually be disabled if you prefer simple moisture control.
  • Electrical safety: Place dehumidifiers on stable surfaces, keep cords away from standing water, and use appropriate outlets. Avoid modifying internal components or bypassing safety features.
  • Drainage and overflow: If using a continuous drain hose, ensure it slopes correctly and discharges where it will not cause water damage.

When operating a dehumidifier in the same space as an air purifier, there is usually no conflict. The dehumidifier controls moisture, while the purifier focuses on particles and sometimes gases. Both may improve comfort in different ways, but they serve different functions.

Maintenance and Operating Tips That Affect Sizing

Maintenance and how you run the dehumidifier can greatly influence real-world performance. A well-maintained, correctly used medium unit can sometimes outperform a neglected larger unit.

Keep filters and air pathways clear

  • Clean the air filter regularly according to the manual. A clogged filter reduces airflow and water removal.
  • Ensure clear space around the unit (often a foot or more on each side is suggested by many manufacturers) so air can circulate freely.

Use humidity settings wisely

  • Set a realistic target, often in the 40–50% RH range for general comfort. Very low targets can increase run time with little additional benefit in many homes.
  • Allow continuous operation during wet weather or in consistently damp areas such as basements.

Drainage, placement, and energy

  • Empty the bucket promptly or use a drain hose if available so the unit does not shut off early.
  • Place the unit away from walls or furniture that would block air intake or exhaust.
  • Consider energy impact when choosing capacity. Larger units may remove moisture faster, but they can also draw more power; finding a reasonable match to your needs is usually most efficient.

Humidity and Mold Risk: Quick Planning Table

While dehumidifiers are not a stand-alone solution for all moisture issues, they can play a key role in keeping humidity in a range that makes mold growth less likely on many indoor surfaces. The table below provides a simple planning overview.

Figure 2. Humidity and mold risk quick-plan. Example values for illustration.
Planning actions around indoor humidity and mold risk
Goal range (RH example) Simple actions Tools to consider Notes
Around 30–40% in cold weather Limit indoor drying, vent bathrooms and cooking, reduce indoor water use where practical Dehumidifier in basements, exhaust fans in baths and kitchens Avoid going too low to prevent overly dry air for comfort
Around 40–50% in mild weather Use cross-ventilation when outdoor air is not too humid, run dehumidifier as needed Room dehumidifier sized to room type and dampness Common comfort range in many homes
Below about 55–60% in humid seasons Close windows during very humid periods, control indoor moisture sources Basement or whole-floor dehumidifiers Helps limit conditions where mold more easily thrives
Reducing high peaks after events Run dehumidifier longer after showers, cooking, or indoor laundry Timer or continuous mode on dehumidifier Helps prevent prolonged dampness after moisture spikes
Addressing chronic damp spots Check for leaks, improve drainage, seal cracks or gaps Dehumidifier plus basic home repairs Fixing moisture sources usually improves dehumidifier effectiveness
Monitoring over time Track seasonal RH changes in key rooms Simple hygrometer or indoor air quality monitor Helps refine dehumidifier size and run-time decisions

Example values for illustration.


Related guides: How to Size a Dehumidifier (Sq Ft, Pints/Day, and Real-World Tips)Dehumidifier Running Cost: How Much Electricity Will It Use?Desiccant vs Compressor Dehumidifiers: Which Is Better for Cold Rooms?

Summary: Matching Dehumidifier Size to Your Space

Dehumidifier sizing in liters per day is mainly about three factors: room type, room size, and how damp the area is. Small, mildly humid bedrooms often need only modest capacity, while larger, very damp basements usually benefit from stronger units or multiple units.

By observing your space, categorizing its dampness, and comparing it with the example ranges in this article, you can narrow down a practical capacity without relying on guesswork. Combined with basic moisture control and ventilation practices, a reasonably sized dehumidifier can help keep indoor humidity in a comfortable and manageable range.

Frequently asked questions

How do I estimate the liters-per-day capacity I need for a specific room?

Measure the floor area and note ceiling height, then categorize the room by use (bedroom, living area, basement) and dampness (mild, damp, very damp). Match those observations to the example capacity ranges in the article—upsize for higher dampness, high ceilings, or poor ventilation.

Should I increase liters per day for high ceilings or open-plan layouts?

Yes. Higher ceilings increase the air volume to treat, and open-plan or connected rooms allow moisture to move across a larger area, so choose a higher-capacity unit or multiple units to ensure adequate moisture removal.

Can a single dehumidifier serve multiple connected rooms effectively?

Sometimes a single unit can work for multiple connected rooms if doorways are wide and airflow is good, but effectiveness drops with closed doors, segmented layouts, or different moisture sources. In larger or compartmentalized spaces, multiple units or a higher-capacity central solution may be needed.

How do I convert liters per day to pints per day?

To convert liters per day to pints per day (using U.S. pints), multiply liters by about 2.11. This gives a quick approximate conversion when comparing specifications that use different units.

Will a dehumidifier fix problems caused by leaks or standing water?

No. Dehumidifiers remove airborne moisture but are not a substitute for repairing leaks, improving drainage, or removing standing water. Fixing bulk water problems is a necessary first step; dehumidification helps control residual airborne humidity after those issues are addressed.