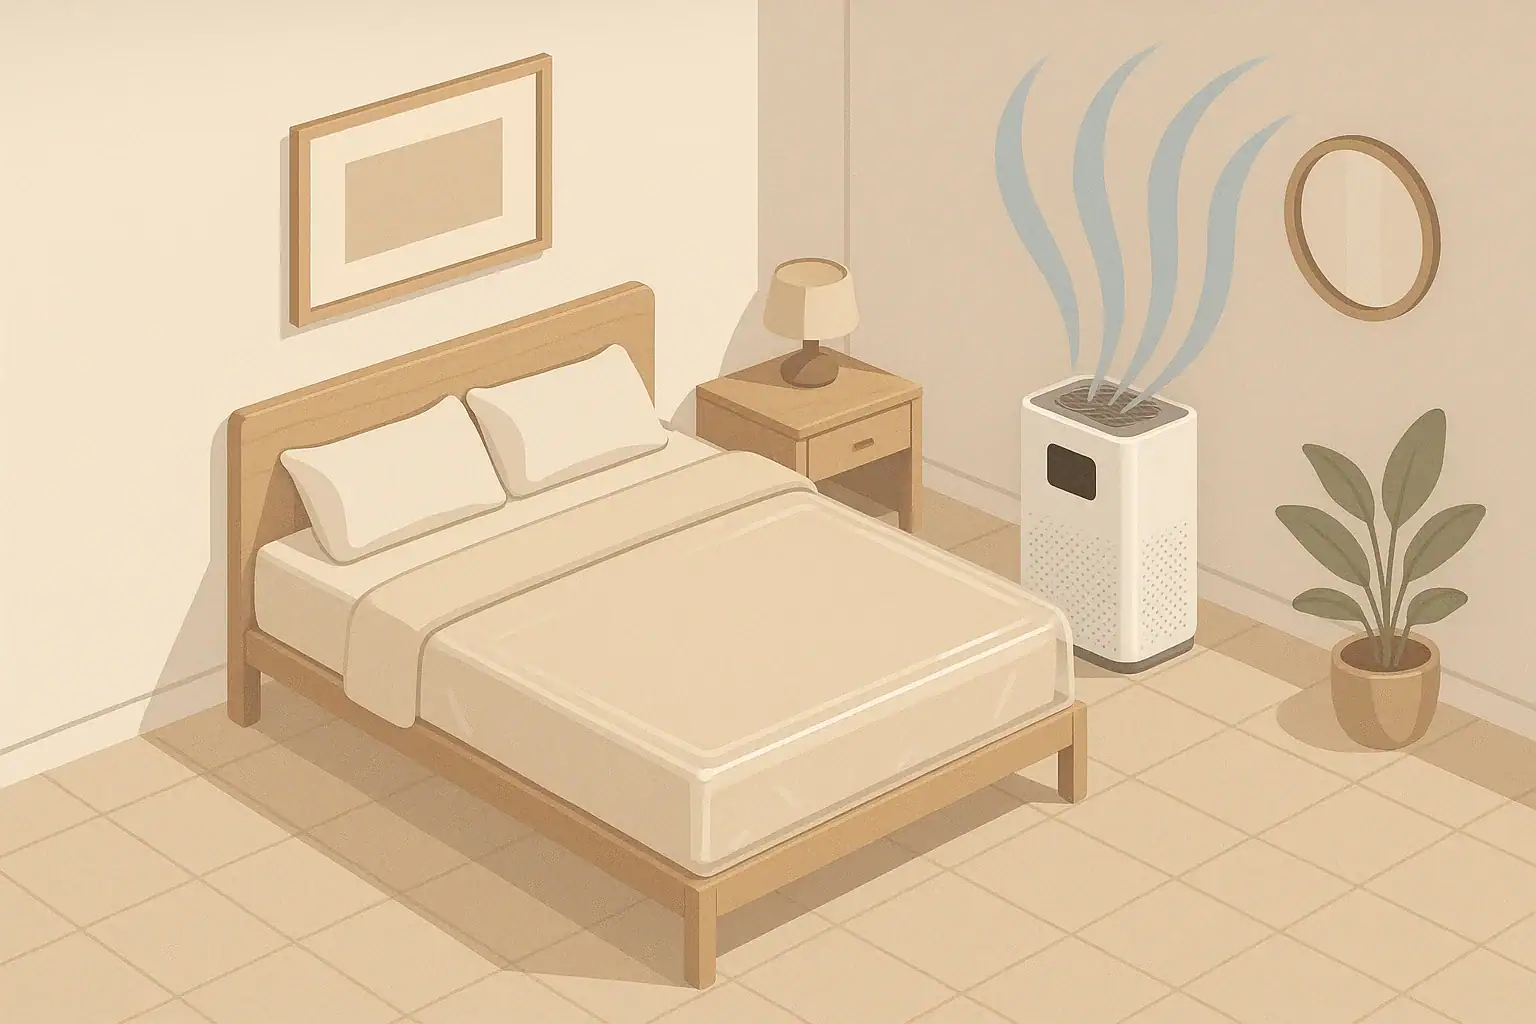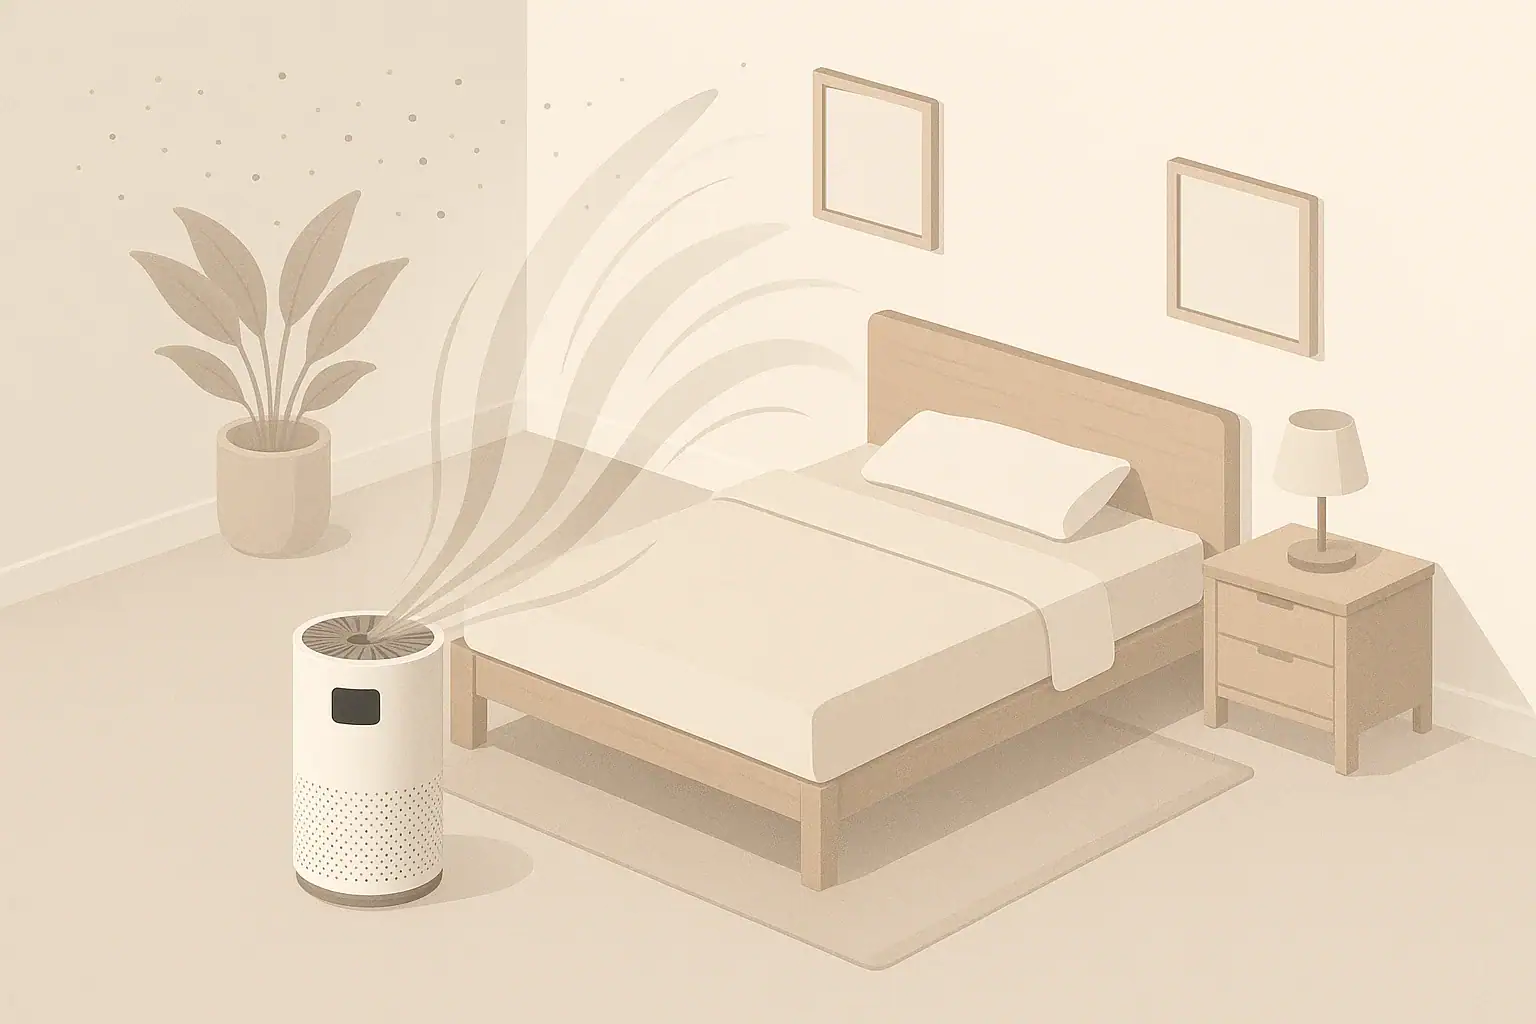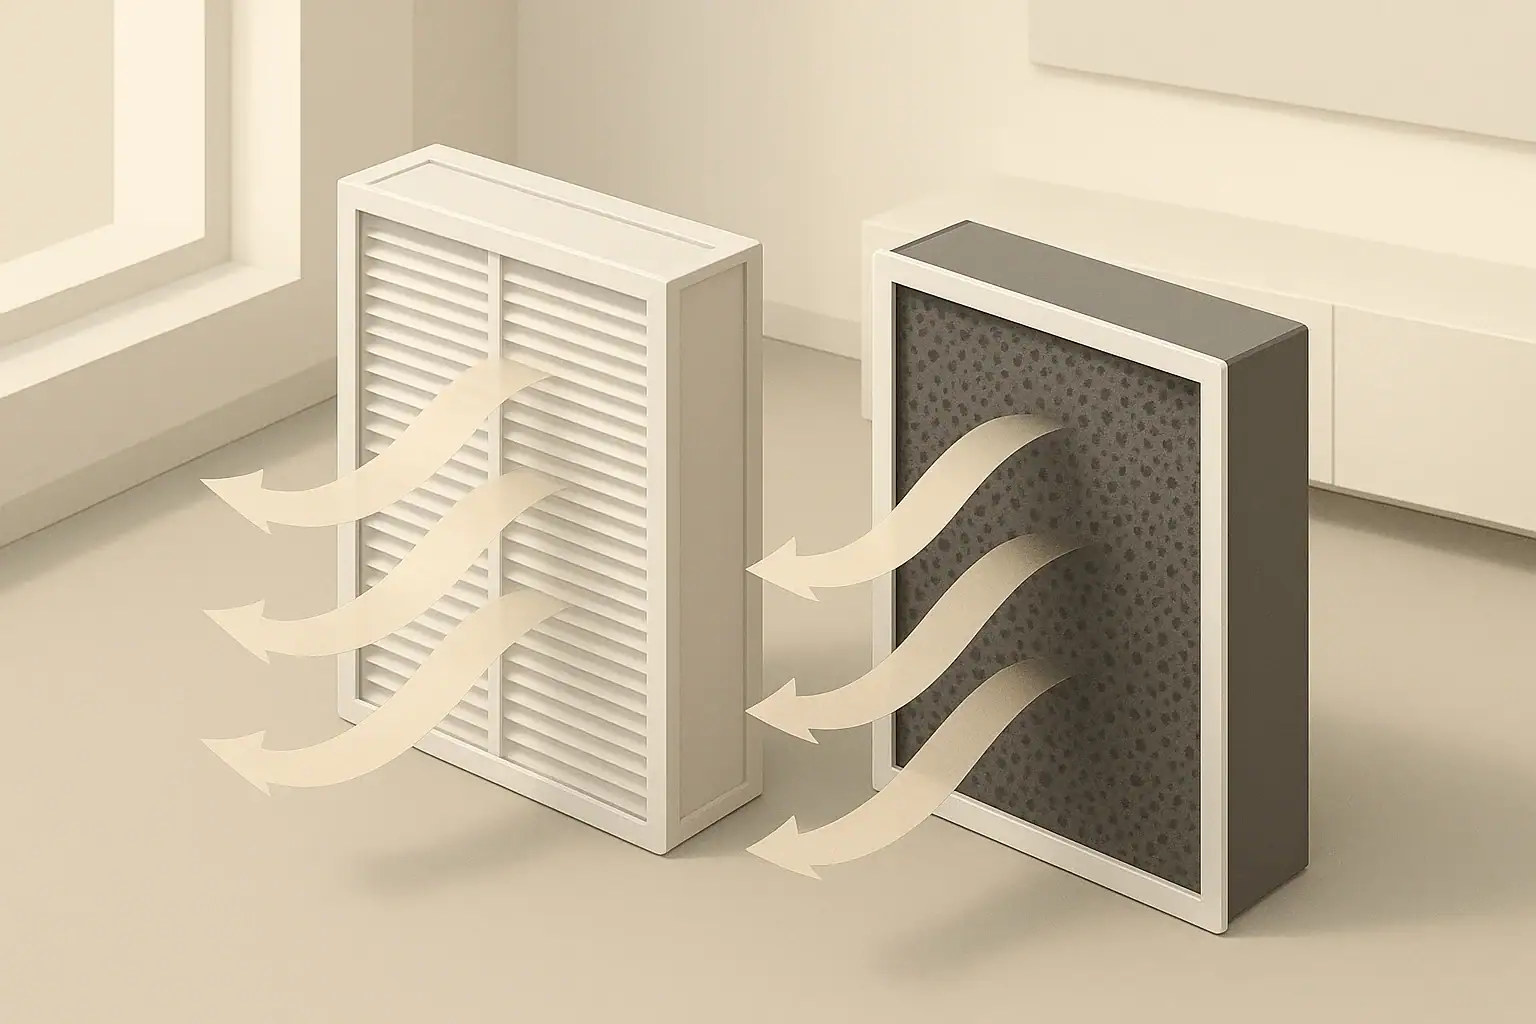
How to Reduce Dust in Your Home (Without Constant Cleaning)

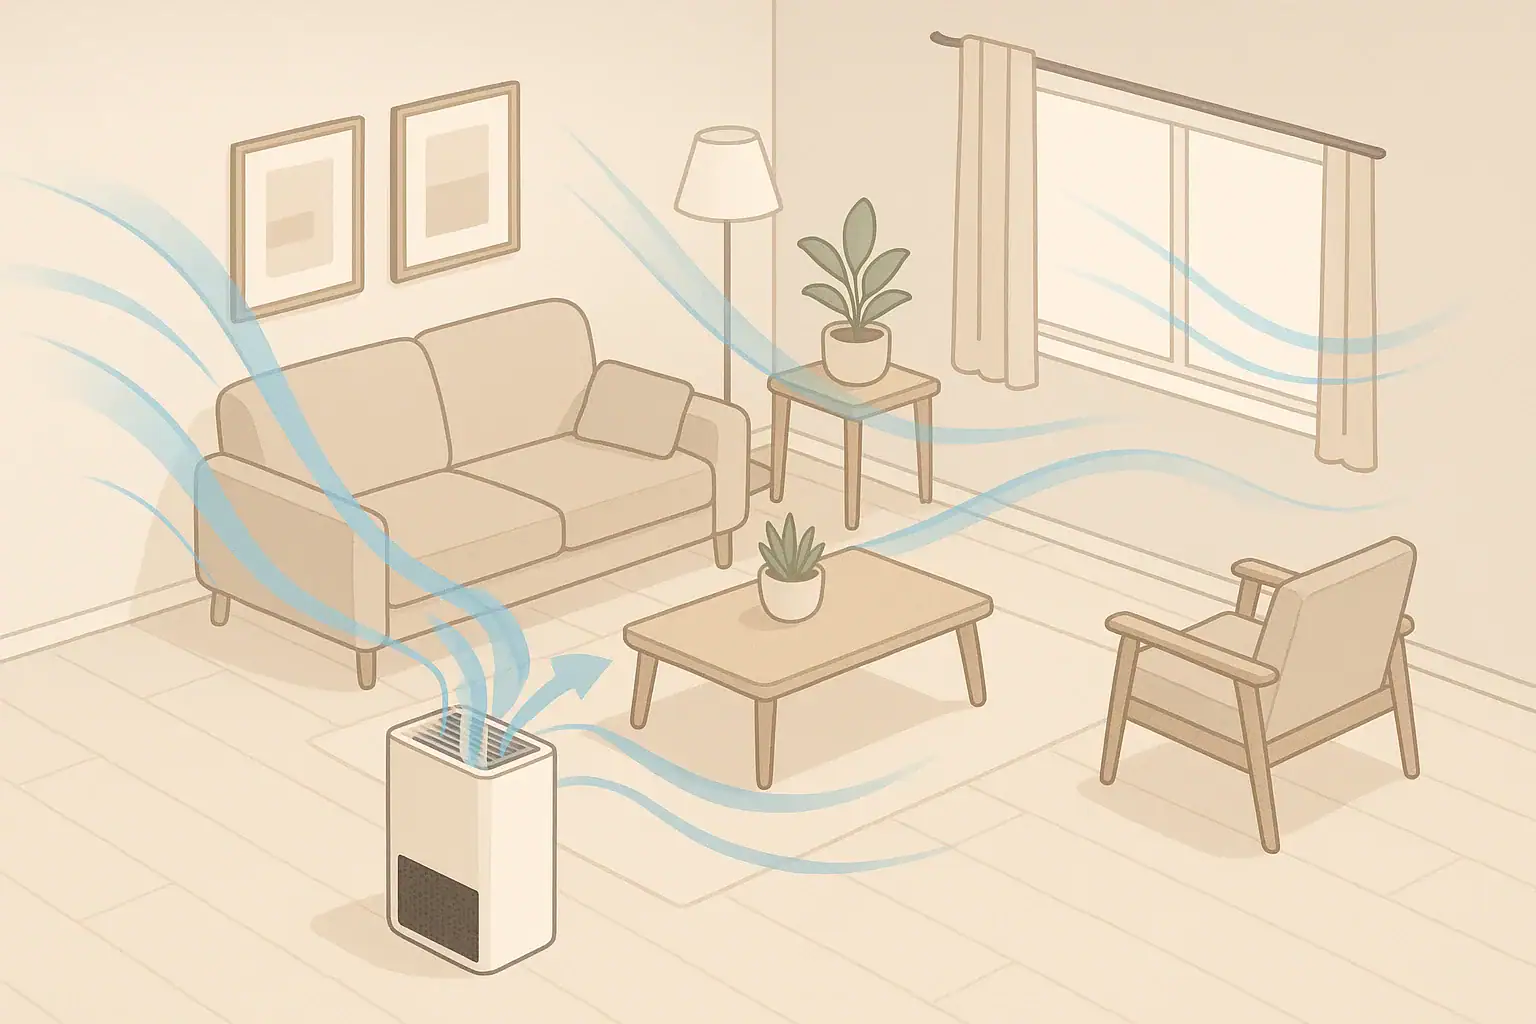
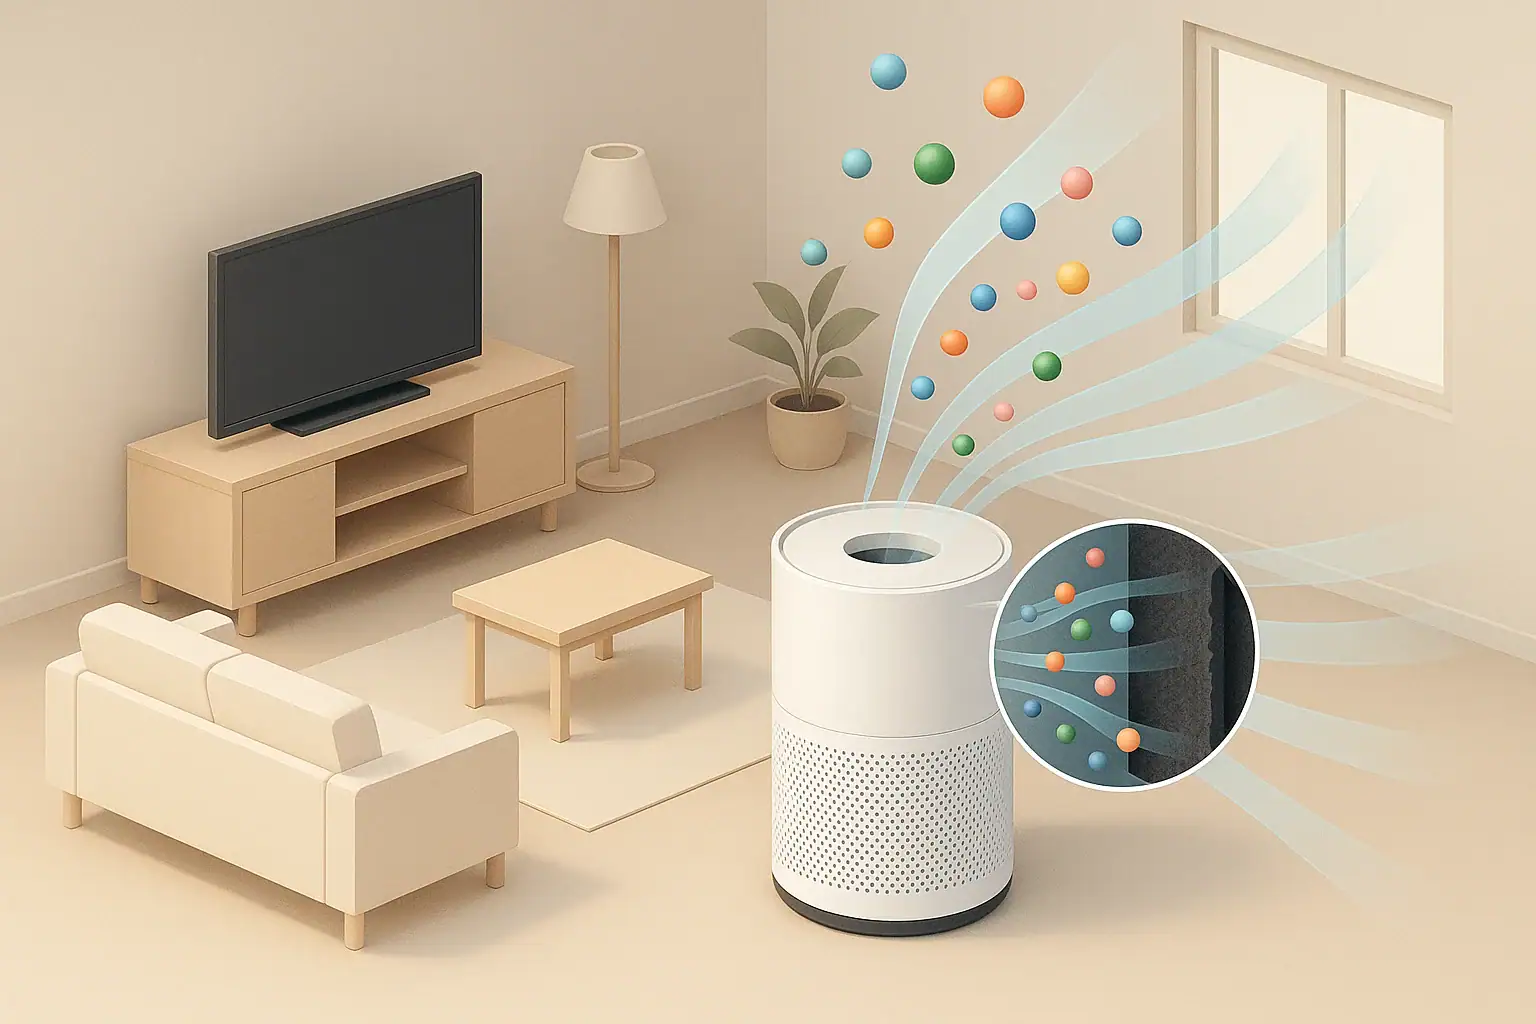
Isometric living room with airflow showing reduced dust

The most effective way to reduce dust in your home without constant cleaning is to block dusty air and dirt at the doors, improve air filtration, and focus on a few high-impact habits instead of endless dusting. When you control where dust comes from and how it moves, surfaces stay cleaner for longer.

This guide explains what household dust actually is, why some homes get dusty so fast, and how to cut down on dust buildup with practical, low-effort steps. You will see how entry control, filters, humidity, and textiles all work together, plus what to avoid so you are not accidentally making dust problems worse.

Whether you are dealing with dust on furniture, floating particles in sunlight, or allergy symptoms, you can use these strategies to reduce dust levels, improve indoor air quality, and stretch the time between full cleaning sessions.

What Household Dust Really Is and Why It Matters

Household dust is a mix of tiny solid particles that settle on surfaces and float in the air. It usually contains a combination of indoor and outdoor materials:

  • Fibers from clothing, bedding, carpets, and upholstery
  • Skin flakes and hair from people and pets
  • Soil, sand, and pollen tracked in on shoes and paws
  • Combustion particles from cooking, fireplaces, and candles
  • Fine particles that leak in from outdoor air

Even in a clean home, these sources are active every day. Dust matters for more than appearance:

  • Air quality and health: Fine particles can irritate eyes, nose, and lungs, especially for people with asthma or allergies.
  • Comfort: Dusty fabrics and surfaces can feel gritty and stale.
  • Equipment performance: Dust buildup in filters, fans, and electronics can reduce efficiency and shorten lifespan.

Understanding what dust is and where it comes from is the first step to reducing it without turning cleaning into a full-time job.

Key Ways Dust Gets In, Spreads, and Gets Removed

Dust levels in a home are the result of three main processes happening at the same time: entry, generation, and removal. When you know how each one works, you can target the highest-impact changes.

1. Entry: Dust coming in from outside

  • Foot traffic: Shoes grind outdoor dirt into carpets and floors, where it later becomes airborne.
  • Air leaks: Gaps around doors, windows, and utility penetrations allow dusty outdoor air to bypass filters.
  • Open windows: Natural ventilation can be helpful, but it also brings in pollen and fine particles.

2. Indoor generation: Dust created inside the home

  • Textiles: Fuzzy blankets, shedding rugs, and worn upholstery release fibers.
  • People and pets: Skin flakes, hair, and pet dander add to the dust load.
  • Combustion: High-heat cooking, candles, and fireplaces generate very fine particles.

3. Removal and capture: How dust leaves the air

  • Filtration: Central HVAC filters and room air cleaners capture particles as air moves through them.
  • Settling: Heavier particles fall onto surfaces, where they can be removed by vacuuming and dusting.
  • Ventilation: Exhaust fans and controlled fresh air can remove particles to the outdoors.

To reduce dust without constant cleaning, you want to:

  • Block as much outdoor dust as practical at entry points
  • Choose materials and habits that create less indoor dust
  • Use filtration and airflow so more dust ends up in filters, not on furniture
Dust pathway Typical sources High-impact controls
Entry from outdoors Shoes, open doors and windows, air leaks Entry mats, shoes-off habit, weatherstripping, targeted window use
Indoor generation Textiles, pets, cooking, candles Low-shedding fabrics, pet grooming, exhaust fans, limiting candles
Removal and capture HVAC system, room air cleaners, cleaning tools Higher-efficiency filters, strategic fan use, good vacuum and dusting tools
Overview of how dust moves through a home and where you can intervene. Example values for illustration.

Real-World Ways to Cut Dust with Less Effort

Instead of trying to clean every surface all the time, focus on a few practical zones and habits that give the biggest dust reduction for the time you spend.

Entry control: Keep dirt and grit out

Stopping outdoor dust at the door is one of the fastest ways to see less dust indoors.

  • Use two-stage entry mats: Place a coarse mat outside to scrape off grit and a softer mat inside to catch finer soil. Aim for mats long enough for at least two full steps.
  • Adopt a shoes-off habit: Keep a small bench or chair and a shoe tray near the door so removing shoes is easy. In cooler months, keep washable indoor slippers by the entry.
  • Maintain the mats: Shake or vacuum mats several times a week so they do not become dust sources themselves.

Air filtration and airflow that actually help

If you have central heating or cooling, your system already moves large volumes of air. Using that airflow wisely can noticeably reduce dust on surfaces.

  • Upgrade the central filter within system limits: Choose a filter with higher particle capture that is still compatible with your equipment and does not overly restrict airflow.
  • Change filters on a schedule: In many homes, every 1–3 months works well. Homes with pets, more occupants, or visible dust may need more frequent changes.
  • Use the fan strategically: Run the fan during dusty activities (such as vacuuming or high-pollen days) to pull more particles through the filter.
  • Add room air filtration where needed: Use portable air cleaners in bedrooms and main living areas to capture fine particles that would otherwise settle on surfaces.

Humidity management so dust behaves better

Humidity does not create dust, but it affects how dust moves and feels.

  • Avoid very dry air: Extremely low humidity can make dust more likely to become airborne and cause static cling.
  • Avoid very damp air: High humidity can combine with oils and cooking residues to create sticky films that grab dust.
  • Use simple tools: A small hygrometer can show whether your home tends to be very dry or very humid so you can adjust with humidifiers, dehumidifiers, or ventilation.

Bedrooms and fabrics: Quiet dust hotspots

Bedrooms often have the most textiles and are where you spend many hours breathing close to fabrics.

  • Wash bedding regularly: Launder sheets and pillowcases weekly when possible, and wash blankets and duvet covers on a repeating schedule.
  • Reduce dust-collecting items: Limit extra throw pillows, stuffed toys, and open shelving in sleeping areas.
  • Vacuum mattresses and under beds: Use upholstery and crevice tools to remove dust that would otherwise be stirred up at night.
Area or habit Simple change Typical dust impact
Main entry Add indoor/outdoor mats and a shoes-off policy Less grit in carpets and on hard floors
Living room Use low-shedding throws and vacuum upholstery weekly Fewer fibers on tables and electronics
Bedroom Wash bedding weekly and clear clutter under the bed Less dust stirred up while sleeping
Kitchen Run exhaust fan when cooking and wipe greasy films Reduced sticky dust on cabinets and nearby surfaces
Everyday examples of small changes that can noticeably reduce dust buildup. Example values for illustration.

Common Dust-Control Mistakes and How to Troubleshoot Them

Some well-meant habits can actually keep dust levels higher. Recognizing these patterns helps you fix the problem instead of working harder.

Using tools that spread dust instead of capturing it

  • Dry feather dusters: These often lift dust into the air instead of holding it.
  • Old cotton rags: Smooth fabrics may just push dust around.
  • Vacuum without good filtration: A vacuum that leaks fine particles can leave the room dustier than before.

Better approach: Use lightly damp microfiber cloths, electrostatic dusters, and vacuums with effective filtration. Rinse or wash dusting tools after use so they do not become dust sources.

Ignoring high-yield dust zones

Certain spots quietly collect thick layers of dust that are released whenever air moves.

  • Ceiling fan blades and light fixtures
  • Top edges of doors, window frames, and tall cabinets
  • Return air grilles and nearby walls
  • Under beds, sofas, and large furniture

Troubleshooting cue: If you see dusty streaks on walls near vents, or a visible film on fan blades, add these spots to a monthly or seasonal quick-clean list.

Overlooking air leaks and pressure paths

Dust streaks on carpets along baseboards or around outlets can signal that air is moving through gaps and dragging dust with it.

  • Check for drafts around windows and doors.
  • Look for gaps where pipes, cables, or ducts pass through walls.
  • Inspect attic hatches and pull-down stairs for visible gaps.

Better approach: Use appropriate weatherstripping and sealants to reduce unfiltered air movement, then rely on planned ventilation and filtration instead.

Running humidifiers or dehumidifiers without monitoring

Trying to “fix” comfort by guessing at humidity can backfire.

  • Very dry air can increase static and airborne dust.
  • Very humid air can make dust sticky and encourage musty odors.

Better approach: Use a simple hygrometer and aim for a comfortable mid-range humidity. Adjust settings seasonally and in response to actual readings, not just how the air feels.

Expecting filtration to replace all cleaning

Even strong filtration will not remove every particle before it lands on surfaces.

  • If surfaces look dusty within a day, filtration or entry control likely needs improvement.
  • If surfaces stay mostly clean for a week or more, your current balance is probably working well.

Better approach: Use filtration to slow dust buildup, then rely on focused, periodic cleaning to remove what does settle.

Basic Safety When Reducing Dust and Using Equipment

Most dust-control steps are low risk, but a few safety basics can protect both your health and your home systems.

Protect your lungs and skin during heavy cleaning

  • Use a simple mask when disturbing heavy dust: For attic work, moving old furniture, or cleaning thick buildup, a basic mask can reduce inhaled dust.
  • Ventilate while cleaning: Open a window or run exhaust fans when vacuuming or dusting large areas so stirred-up particles have a path out.
  • Wear gloves for dirty or damp areas: This helps avoid skin irritation when wiping dusty, greasy, or previously damp surfaces.

Use HVAC and air cleaning equipment correctly

  • Follow system limits: Only use filter types and efficiencies that your heating or cooling equipment can handle without excessive airflow restriction.
  • Turn off power before opening panels: When changing central filters or cleaning return grilles, switch off the system according to manufacturer instructions.
  • Keep vents and returns clear: Do not block supply or return vents with furniture, curtains, or bedding; blocked vents can affect system performance and comfort.

Handle moisture and humidity tools with care

  • Empty and clean water containers: For humidifiers and dehumidifiers, empty tanks as directed and clean them regularly to avoid stagnant water and residue.
  • Avoid over-humidifying: Prolonged high humidity can encourage mold growth on dusty surfaces and in building materials.

Be cautious with combustion sources

  • Use exhaust fans when cooking: Especially with high-heat frying or broiling, which produces fine particles and greasy vapors.
  • Limit candles and incense: Use them sparingly, and in well-ventilated spaces, to avoid unnecessary particle generation.
  • Maintain fireplaces and fuel-burning appliances: Proper venting and maintenance help keep combustion byproducts from entering living spaces.

Long-Term Habits and Maintenance That Keep Dust Down

Once you have basic dust controls in place, consistent, low-effort maintenance keeps them working. The goal is not perfection; it is a steady routine that prevents heavy buildup.

Simple weekly and monthly routines

  • Weekly: Vacuum high-traffic floors and rugs slowly, wipe key surfaces with a microfiber cloth, and check entry mats.
  • Monthly: Clean return air grilles, ceiling fan blades, and tops of tall furniture where dust quietly accumulates.
  • Seasonally: Check HVAC filters, wash or change curtains, and review humidity levels as weather changes.

Keep filters and tools in good condition

  • Central and room filters: Replace or wash filters on the schedule recommended for your conditions or sooner if visibly dirty.
  • Vacuum maintenance: Empty bins or replace bags before they are packed full, and clear hair from brush rolls and tools.
  • Microfiber cloths and mop pads: Wash them separately from lint-producing laundry so they keep their ability to grab dust.

Monitor clues that your dust plan needs adjustment

  • Fast dust return on surfaces: May indicate weak filtration, clogged filters, or heavy entry of outdoor dust.
  • Dust lines on carpet edges: Suggest air leakage under baseboards or pressure imbalances between rooms.
  • Seasonal spikes in dust: Can point to open windows during high-pollen periods or changes in humidity.

Store supplies where you will actually use them

  • Keep a small caddy with a microfiber cloth and duster in the main living area.
  • Store a flat mop and vacuum where they are easy to reach, not buried in a distant closet.
  • Place extra HVAC filters near the system so replacements are convenient.

Putting It All Together: Practical Steps and Specs to Look For

Reducing dust in your home without constant cleaning comes down to a few coordinated moves: stop as much dust as possible at the door, create fewer particles indoors, and capture more of what remains with filtration and smart cleaning tools.

For most homes, a realistic starting plan looks like this:

  • Add well-sized entry mats and a shoes-off habit at main doors.
  • Upgrade to an appropriate higher-efficiency central filter and change it on a schedule.
  • Use a room air cleaner in at least one bedroom or main living area.
  • Switch to microfiber-based dusting and mopping tools.
  • Wash bedding regularly and simplify bedroom clutter.
  • Check humidity with a hygrometer and adjust if it is consistently very dry or very humid.

Specs to look for when choosing dust-control equipment

When you are selecting tools to support these habits, look for features that make dust capture more effective and easier to maintain over time.

  • Central HVAC filters
    • Designed to fit your system size and type
    • Higher particle capture rating that is still approved for your equipment
    • Clear replacement interval guidance (for example, 1–3 months under typical use)
  • Room air cleaners
    • Mechanical filtration capable of capturing fine particles, not just coarse dust
    • Clean air delivery suitable for the room size you plan to use it in
    • Multiple fan speeds, including a quieter setting for bedrooms
    • Easy-to-access filters with clear replacement indicators or schedules
  • Vacuums
    • Effective filtration so fine dust is not blown back into the room
    • Tools for carpets, hard floors, upholstery, and crevices
    • Sealed or well-designed air paths to prevent leaks around the bin or bag
  • Dusting and floor tools
    • Microfiber cloths and mop pads that can be washed and reused
    • Flat mops that reach under furniture where dust collects
    • Electrostatic dusters for blinds, electronics, and delicate surfaces
  • Humidity tools
    • Simple hygrometer for monitoring typical humidity levels
    • Humidifiers or dehumidifiers with easy-to-clean water tanks (if needed)
    • Clear capacity information so the device matches room or area size

By combining the right equipment specs with practical habits, you can noticeably reduce dust in your home and keep surfaces cleaner between full cleaning days, without turning dust control into a constant chore.

Frequently asked questions

How quickly will entry mats and a shoes-off policy reduce indoor dust?

You can notice less tracked-in grit within days and reduced visible dust on floors and lower textiles within one to two weeks as fewer large particles enter. Combined with regular mat maintenance and consistent shoe removal, these measures cut the overall dust load so filters and surfaces accumulate more slowly.

Which features matter most when buying filters, vacuums, or room air cleaners to reduce dust?

Look for mechanical filtration rated to capture fine particles (appropriate MERV levels for HVAC systems or HEPA-level capture for portable cleaners) while ensuring compatibility with your equipment. For vacuums, sealed airflow and high-efficiency filters reduce re-suspension of fine dust. For portable cleaners, choose a unit sized to the room with clear clean-air performance guidance and accessible, replaceable filters.

Are microfiber cloths really better than feather dusters for controlling dust?

Yes. Microfiber traps and holds dust when used slightly damp or dry, whereas dry feather dusters often lift particles into the air. Microfiber and electrostatic tools reduce re-suspension and are washable, making them more effective for repeated use.

How can I protect my health when cleaning very dusty areas?

Wear a particulate mask when disturbing heavy dust and ventilate the area by opening windows or running exhaust fans so stirred particles can exit. Prefer vacuuming with good filtration or damp wiping over dry sweeping to limit airborne dust, and take breaks if you experience respiratory irritation.

Will running my HVAC fan constantly reduce dust on surfaces?

Running the system fan increases circulation through the central filter and can reduce airborne particles and slow dust settling on surfaces. Its effectiveness depends on filter efficiency and system condition—if the filter is low-grade or clogged, constant fan use may offer limited benefit and could strain the system.

How often should I change filters and clean dust-prone zones to see a difference?

Check central filters every one to three months and replace them sooner in homes with pets, many occupants, or heavy outdoor dust. Wipe high-yield dust zones monthly and do quick weekly spot cleaning in high-traffic areas; adjust frequency based on visible dust and indoor air quality.
PM2.5 Explained: What the Numbers Mean and What’s a Safe Level Indoors

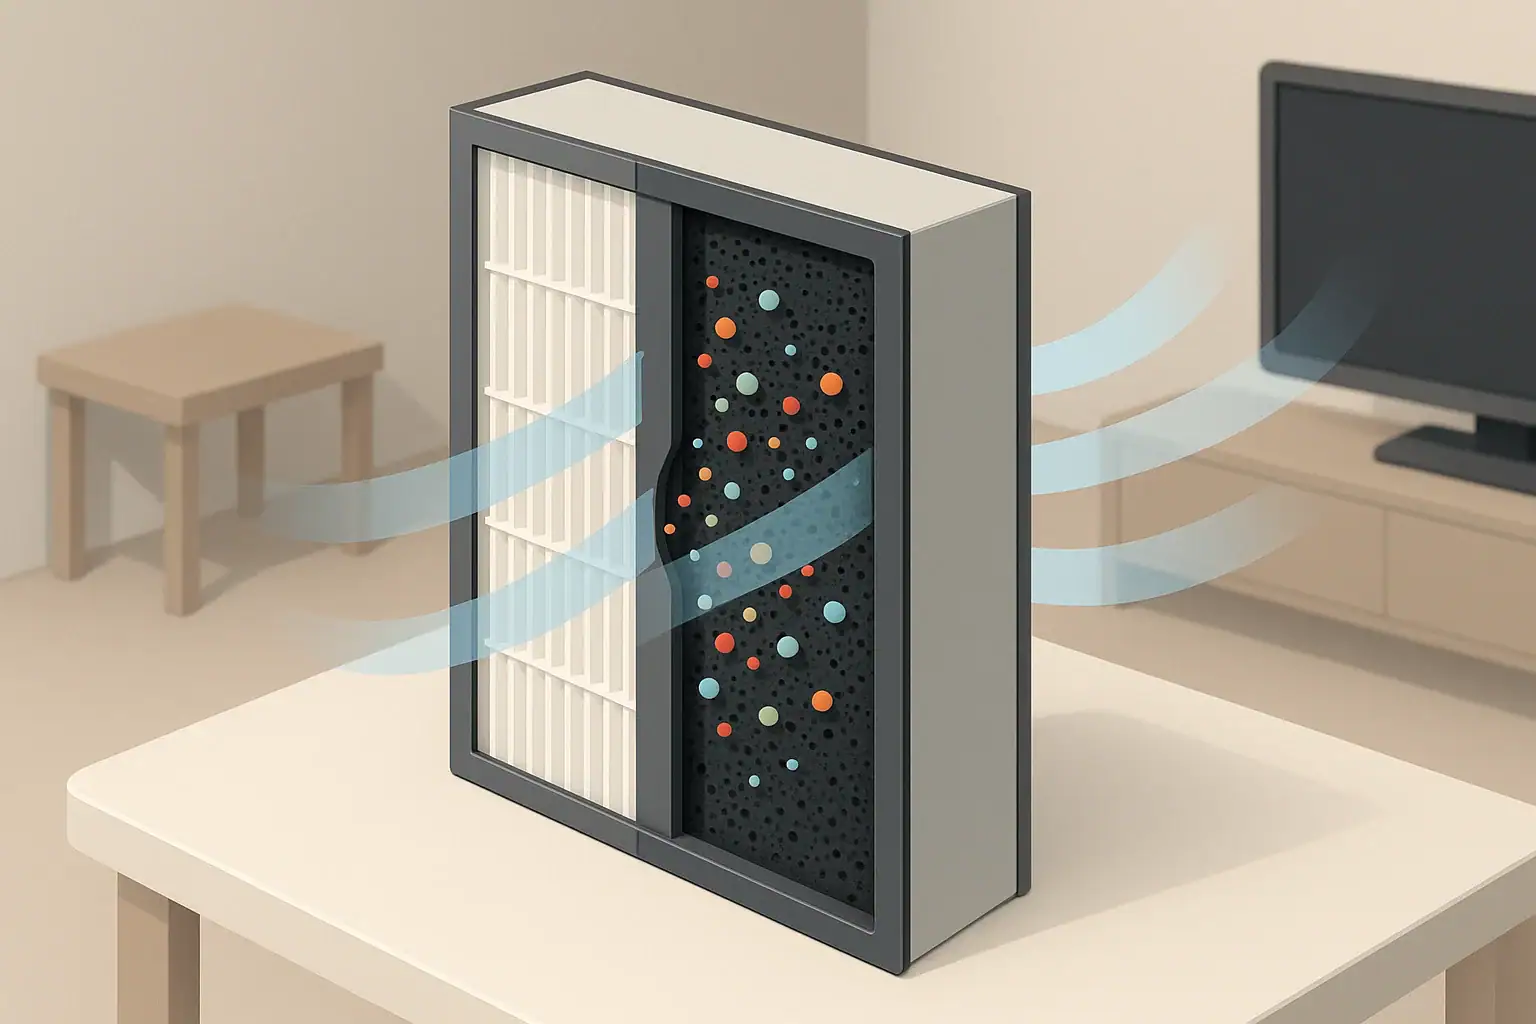
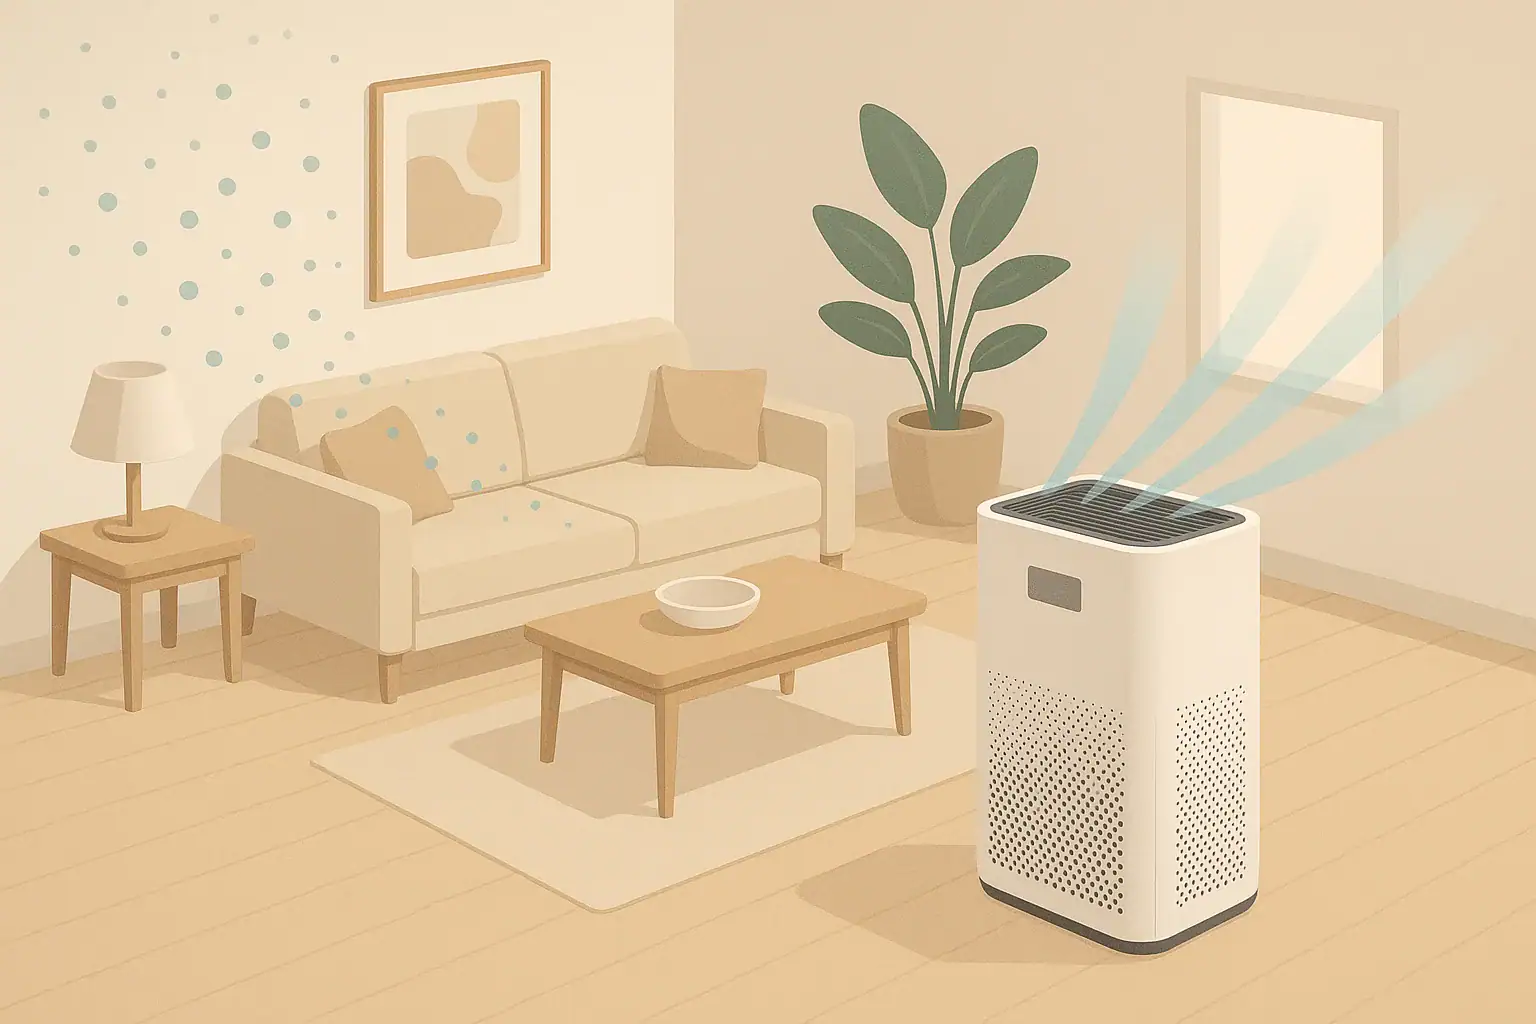
isometric living room with air purifier reducing fine particles

A practical target for a safe PM2.5 level indoors is to keep everyday background levels in the single digits to low teens in µg/m³ and to limit how high and how long short-term spikes last. Lower is generally better, especially for children, older adults, and anyone with asthma or heart or lung disease.

Indoor PM2.5 (fine particulate matter) is one of the most important indicators of air quality at home. These tiny particles come from cooking, smoke, outdoor pollution, and everyday activities, and they are small enough to reach deep into the lungs. Understanding what the numbers on your air quality monitor mean helps you decide when to ventilate, when to filter, and when to change habits.

This guide explains PM2.5 in plain language, shows typical indoor ranges, and walks through real-world examples from cooking, wildfire smoke, and cleaning. You will also see common mistakes that keep indoor particle levels higher than they need to be, basic safety considerations, and a simple checklist of specs to look for when you buy monitors, filters, or other gear in the future.

What PM2.5 Means Indoors and Why It Matters

PM2.5 stands for particulate matter with a diameter of 2.5 micrometers or smaller. For comparison, a human hair is roughly 70 micrometers thick, so these particles are about 30 times smaller than a hair and invisible to the naked eye.

Because they are so small, PM2.5 particles can stay suspended in the air for long periods. When you breathe, they can travel deep into the lungs and, for the smallest particles, even enter the bloodstream. This is why PM2.5 is often used as a shorthand for “fine particle pollution” or “fine dust” in indoor air quality discussions.

Health agencies link both short-term and long-term exposure to elevated PM2.5 with a range of problems, including irritation of the eyes and throat, worsening asthma, increased respiratory infections, and added strain on the heart and circulatory system. The risk is higher for sensitive groups such as children, older adults, pregnant individuals, and people with existing heart or lung disease.

Indoors, PM2.5 is especially important because you spend many hours each day at home, and many common activities—like frying food or burning candles—can temporarily push levels much higher than your background baseline. Knowing this helps you focus on what you can control: sources, ventilation, and filtration.

Key Concepts: How PM2.5 Is Measured and Interpreted

Most home air quality monitors use a small optical sensor. Air is drawn through a chamber and a laser or LED shines light across the airflow. The sensor estimates the amount of fine particulate matter by measuring how much light bounces off the particles.

There are two main ways these readings are shown:

  • Micrograms per cubic meter (µg/m³) – how many micrograms of PM2.5 are present in one cubic meter of air. This is the most straightforward unit for indoor use.
  • Index or color scale (often based on an Air Quality Index) – a simplified number and color band (green, yellow, orange, red, purple) that groups ranges of PM2.5 into categories from “good” to “unhealthy.”

Most home devices show near real-time values, sometimes averaged over a short internal period (for example, 10–60 seconds). Health guidelines, however, often refer to averages over 24 hours or longer. This is why a quick spike while you sear food in a hot pan may look dramatic on your monitor but is less concerning if it drops quickly and your daily average stays low.

To make sense of the numbers, it helps to distinguish between background levels (what your home settles to when nothing obvious is happening) and activity-related spikes (short bursts from cooking, cleaning, or smoke).

PM2.5 level (µg/m³) Typical indoor situation General interpretation for most homes
1–5 Well-sealed home with good filtration and clean outdoor air Very low background; desirable for sensitive groups if sustainable
5–12 Typical home with occasional cooking and basic filtration Generally good; reasonable target for everyday indoor air
12–35 Frequent cooking, nearby traffic, or mild outdoor pollution Elevated; aim to reduce duration and frequency of these levels
35–55 Heavy frying, indoor smoke, or nearby wood burning High; minimize exposure time, especially for sensitive people
>55 Wildfire smoke intrusion or strong indoor combustion sources Very high; take active steps to lower levels as quickly as possible
Typical indoor PM2.5 ranges and how to interpret them at home. Example values for illustration.

These bands are not strict safety cutoffs. They are practical guideposts to help you decide when to open windows, turn on filtration, or change habits. For long-term health, keeping your usual background in the lower bands and shortening higher spikes is a sensible strategy.

Real-World PM2.5 Examples at Home

Seeing how PM2.5 behaves in everyday situations makes the numbers on a monitor much easier to understand. Below are common household scenarios and how particle levels often respond.

Cooking and kitchen activities

Cooking is usually the largest controllable indoor source of PM2.5 in non-smoking homes. High-heat methods such as frying, broiling, or searing can cause rapid spikes that sometimes exceed 100 µg/m³ near the stove, especially if there is no effective exhaust.

  • Boiling or steaming: small, brief increases; often remains under 15–20 µg/m³ if ventilation is reasonable.
  • Oven baking at moderate temperatures: modest rises, especially when opening the oven door.
  • Pan frying or stir-frying: sharp spikes; readings may jump from 8 µg/m³ background to 60 µg/m³ or more in minutes.
  • Toasting bread: noticeable but short-lived spikes, especially if crumbs are burning.

With good ventilation (such as an effective exhaust hood vented outdoors or open windows when outdoor air is clean), these spikes usually fall back toward background within 30–60 minutes.

Wildfire smoke and outdoor pollution

During wildfire events or periods of heavy outdoor pollution, indoor PM2.5 can climb even if you do nothing differently indoors. Leaky windows, frequently opened doors, and running fans that pull air from outside can all raise indoor levels.

  • Closed windows, no filtration: indoor PM2.5 often tracks at roughly half to three-quarters of outdoor levels, depending on how tight the building is.
  • Closed windows, active filtration: indoor levels can be much lower than outdoors, sometimes by a factor of three or more.
  • Open windows during smoky periods: indoor readings may quickly approach outdoor levels.

In these situations, a monitor helps you confirm whether your mitigation steps—closing gaps, running filters, limiting outdoor air intake—are working.

Cleaning, dusting, and hobbies

Many dust-generating activities produce PM2.5 even if you do not see visible dust clouds.

  • Dry sweeping or vigorous dusting: can create short-lived spikes as dust is stirred up and then resettles.
  • Vacuuming with a low-efficiency or leaking vacuum: may increase PM2.5, especially in smaller rooms.
  • Hobbies such as sanding, soldering, or 3D printing: can produce fine particles that linger without good local exhaust or filtration.

Switching to damp cleaning methods, using vacuums with better filtration, and isolating hobby areas can noticeably lower the peaks you see on your monitor.

Activity Typical PM2.5 pattern Simple adjustment to reduce levels
Pan frying dinner Background 8 µg/m³, spike to 70 µg/m³ for 15–30 minutes Start exhaust before cooking, use lids, run filtration on high during and after
Weekend house cleaning Repeated bumps from 5 to 25–35 µg/m³ while sweeping and vacuuming Use damp mopping, higher-efficiency vacuum, and ventilate during cleaning
Wildfire smoke day Outdoor 150 µg/m³, indoor drifting from 15 to 60 µg/m³ without action Seal windows, close vents drawing outdoor air, and run room filtration continuously
Burning scented candles Slow rise from 6 to 30–40 µg/m³ over an evening Limit use, choose fewer open flames, and ventilate after extinguishing
Common indoor scenarios, how PM2.5 behaves, and simple ways to reduce exposure. Example values for illustration.

Common Mistakes and Troubleshooting High PM2.5 Readings

When you first start using a PM2.5 monitor, it is easy to misinterpret the numbers or overlook simple fixes. Recognizing common mistakes helps you troubleshoot quickly.

Mistake 1: Reacting to every short spike

Brief spikes during cooking or cleaning are normal in most homes. The more important question is how long levels stay elevated after the activity stops.

  • Sign of a problem: PM2.5 remains above about 25–35 µg/m³ for hours after cooking or cleaning ends.
  • What to check: Are you using kitchen exhaust or opening windows during and after cooking when outdoor air is clean? Is there any smoldering source, such as a candle or incense, left burning?

Mistake 2: Ignoring background levels

Some people focus only on peak readings and overlook their everyday baseline. A background that never drops below the mid-teens or higher suggests ongoing sources or poor filtration.

  • Sign of a problem: Lowest readings during quiet times stay above roughly 12–15 µg/m³ even on days with clean outdoor air.
  • What to check: Indoor smoking, frequent candle use, nearby busy roads, leaky windows, or clogged filters.

Mistake 3: Placing the monitor in misleading locations

Monitor placement can easily skew your understanding of indoor PM2.5.

  • Avoid: placing the device directly above a stove, next to a window crack, on the floor, or in direct sunlight.
  • Better: position it at breathing height (about 3–5 feet from the floor), away from walls and direct drafts, in a room where you spend a lot of time.

Mistake 4: Forgetting about humidity and sensor limits

Low-cost optical sensors can be influenced by high humidity and the type of particles in the air. On very humid days, some monitors may overestimate PM2.5.

  • Sign of a problem: Numbers jump when humidity rises sharply, even without a clear particle source.
  • What to check: Compare readings before and after using dehumidification or ventilation. Focus on trends and averages, not single readings.

Mistake 5: Overlooking hidden sources

Sometimes elevated PM2.5 is caused by less obvious sources.

  • Unvented gas appliances or space heaters.
  • Attached garages where vehicle exhaust or hobby activities leak into the home.
  • Regular burning of incense or scented products.

If PM2.5 stays elevated and you cannot see an obvious cause, walk through your home while watching the monitor, moving it room to room. Sudden jumps in one area can help you pinpoint hidden sources.

PM2.5 Safety Basics Indoors

There is no single PM2.5 number that guarantees safety for every person, but there are widely used guideline ranges and practical targets that help reduce risk. The general principle is straightforward: the lower your long-term average and the shorter your high spikes, the better.

Everyday targets for most households

  • Background level: Aim for single-digit to low-teens µg/m³ when no obvious sources are active.
  • Short-term peaks: Expect spikes during cooking or cleaning, but try to keep them as low as reasonably possible and bring levels back down within about an hour.
  • Long-term exposure: Pay attention to the patterns you see over weeks, not just one busy evening in the kitchen.

Extra caution for sensitive groups

Some people feel symptoms—such as coughing, tightness in the chest, wheezing, or headaches—at levels that others tolerate without noticing. Extra caution is sensible if your household includes:

  • People with asthma or other chronic lung conditions.
  • Individuals with heart disease or circulation problems.
  • Older adults.
  • Infants, young children, or pregnant individuals.

In these homes, it can be helpful to aim for especially low PM2.5 in bedrooms and main living areas. That may mean running filtration more often, using gentler cooking methods, and avoiding routine indoor smoke from any source.

When to take immediate action

While exact thresholds vary by guideline, the following situations usually call for prompt steps to reduce PM2.5:

  • Readings above roughly 35–55 µg/m³ that last more than an hour or two indoors.
  • Any time sensitive individuals are experiencing breathing difficulty, chest pain, or unusual fatigue in conjunction with elevated readings.
  • Periods when outdoor air is visibly smoky or hazy and indoor levels are climbing.

In these cases, focus on stopping the source (for example, turning off a smoky appliance), improving filtration, and using cleaner outdoor air if and when it is available.

Long-Term Management, Habits, and Monitoring

Keeping PM2.5 low indoors is not a one-time project. It is an ongoing balance of habits, building characteristics, and equipment. The goal is to build routines that naturally keep your long-term averages low without constant effort.

Daily and weekly habits

  • Cooking: Use lids when practical, pre-start kitchen exhaust, and avoid charring or burning food.
  • Cleaning: Favor damp dusting and mopping over dry sweeping; use vacuums with effective filtration.
  • Open flames: Limit candles and incense to occasional use, and ventilate afterward.
  • Smoking: Avoid smoking indoors; even occasional indoor smoking can dominate your PM2.5 profile.

Ventilation and filtration routines

Ventilation and filtration work together, but the balance shifts depending on outdoor air quality.

  • When outdoor air is clean: Open windows periodically to dilute indoor sources, especially after cooking or cleaning.
  • When outdoor air is polluted or smoky: Keep windows closed as much as practical and rely more on filtration and sealing leaks.
  • Whole-home systems: If your heating or cooling system uses replaceable filters, change them on schedule and consider higher-efficiency options compatible with your equipment.

Using a monitor over months and seasons

Over the long term, a PM2.5 monitor is most useful for spotting patterns and confirming that your strategies are working.

  • Note your typical background in different seasons; it may rise in winter if windows stay closed or during local pollen or dust seasons.
  • Watch how quickly levels fall after cooking or smoky events; if it takes longer over time, filters may be clogged or ventilation paths may be blocked.
  • Use logs or simple notes to connect activities (such as a new hobby or a change in cleaning products) with changes in your PM2.5 patterns.

Storage and care of monitors and filters

  • Monitors: Keep vents and inlets free of dust; avoid storing devices in very humid areas or where they can collect grease (such as directly above a stove).
  • Filters: Store spare filters in dry locations, sealed in their packaging, and label them with the date you plan to install them.
  • Seasonal homes: If you leave a home unoccupied for long periods, consider how you will ventilate and filter the air before regular use resumes.

Practical Takeaways and Specs to Look For

Bringing all of this together, managing PM2.5 at home comes down to three main actions: limit what you generate, dilute or remove what you cannot avoid, and use your monitor as a guide rather than a source of anxiety.

  • Use the monitor to learn how cooking, cleaning, and outdoor conditions affect your PM2.5, then adjust habits accordingly.
  • Aim for low background levels and shorter, lower peaks rather than chasing a perfect zero reading.
  • Give extra protection to sensitive individuals by keeping bedrooms and main living areas especially clean and well-filtered.

Specs to look for when choosing PM2.5 gear

If you plan to improve your setup over time—whether by upgrading your monitor, filtration, or ventilation—these specifications and features are worth paying attention to:

  • For PM2.5 monitors:
    • Clear display of PM2.5 in µg/m³ (not only a color or generic index).
    • Ability to show short-term trends or graphs over at least several hours.
    • Documented operating humidity and temperature range.
    • Option to log data or view historical averages (daily or weekly) if you like to track patterns.
  • For filtration devices:
    • Filters rated to capture fine particles in the PM2.5 size range.
    • Clean air delivery rate (CADR) or similar performance information appropriate for the room size.
    • Multiple fan speeds so you can run quietly at low speed most of the time and higher during spikes.
    • Filter replacement indicators or clear guidance on replacement intervals.
  • For whole-home systems:
    • Filters with efficiency ratings suitable for fine particle removal while still compatible with your equipment.
    • Fan settings that allow extended or continuous circulation when needed.
    • Access for regular inspection and replacement of filters without tools or with minimal effort.

By combining a basic understanding of PM2.5 numbers with thoughtful equipment choices and everyday habits, you can create a home environment with cleaner air, fewer particle spikes, and better comfort for everyone who lives there.

Frequently asked questions

Which monitor and filter features most affect how well indoor PM2.5 is measured and reduced?

For monitors, look for a clear numeric PM2.5 readout in µg/m³, the ability to view short-term trends or logged data, and documented operating ranges for humidity and temperature. For filters, important features include a rating that captures fine particles (PM2.5), an appropriate clean air delivery rate (CADR) for the room size, and multiple fan speeds to balance noise and performance.

How can I tell if a PM2.5 spike is a short event or a persistent problem?

Watch how long elevated readings remain after the source stops—short cooking spikes typically fall within 30–60 minutes with good ventilation, while persistent problems keep background levels in the mid-teens or higher for long periods. Use trend or average views on your monitor and compare quiet-period baselines across days to identify ongoing sources.

At what indoor PM2.5 levels should I take immediate safety measures?

There is no single absolute cutoff for everyone, but readings sustained above roughly 35–55 µg/m³ indoors generally warrant prompt action to reduce exposure, especially if sensitive people are present. Any time occupants experience breathing difficulty, chest pain, or other concerning symptoms in combination with elevated levels, stop the source and improve filtration or ventilation immediately.

How quickly can ventilation and filtration bring PM2.5 down after cooking or a smoky event?

Reduction speed depends on room size, airflow, and filtration capacity; with a good exhaust hood or a high-CADR air cleaner running on high, levels often return near background within 30–60 minutes. In poorly ventilated spaces or without adequate filtration, elevated levels can linger for hours.

Should I open windows or run filters when outdoor air looks smoky?

If outdoor air is visibly smoky, keep windows and doors closed and rely on filtration and sealing leaks to limit indoor infiltration. When outdoor air is clean, periodic window opening can help dilute indoor sources, but rely on your monitor to confirm whether outdoor air is beneficial at a given time.

Where should I place a PM2.5 monitor to get readings that represent typical exposure?

Position a monitor at breathing height (about 3–5 feet above the floor) in a frequently used room, away from direct drafts, windows, the stove, and floors to avoid misleading readings. For larger homes, consider additional monitors in bedrooms and main living areas to capture typical exposure patterns.

Asthma Triggers Indoors: Room‑by‑Room Checklist to Improve Air Quality

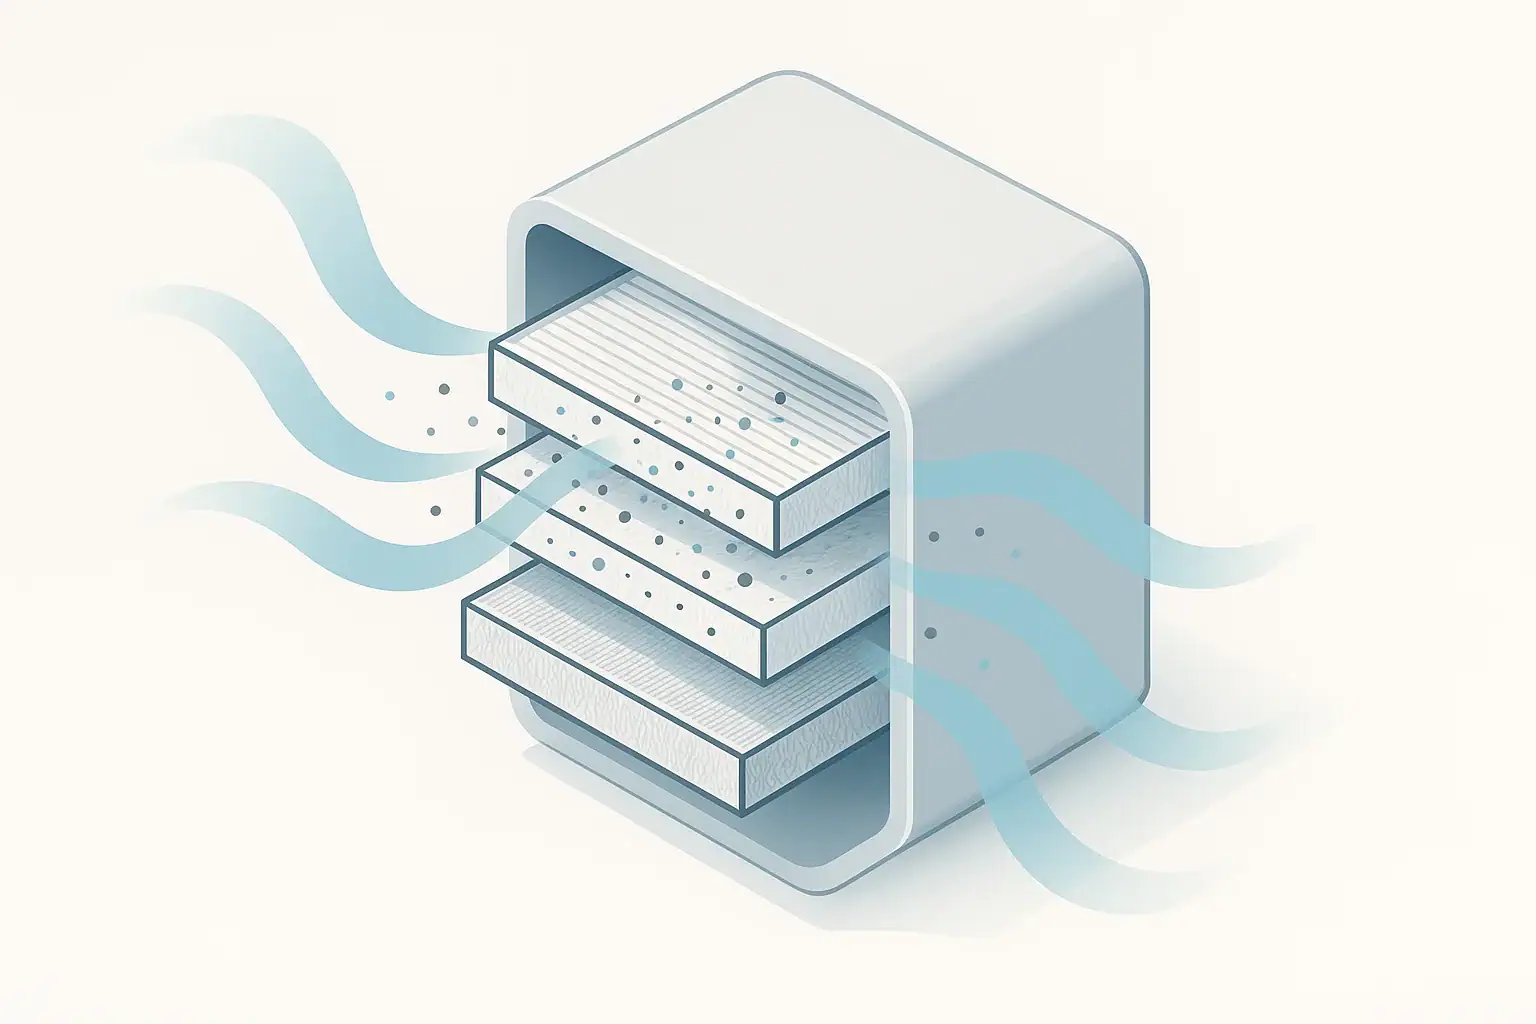
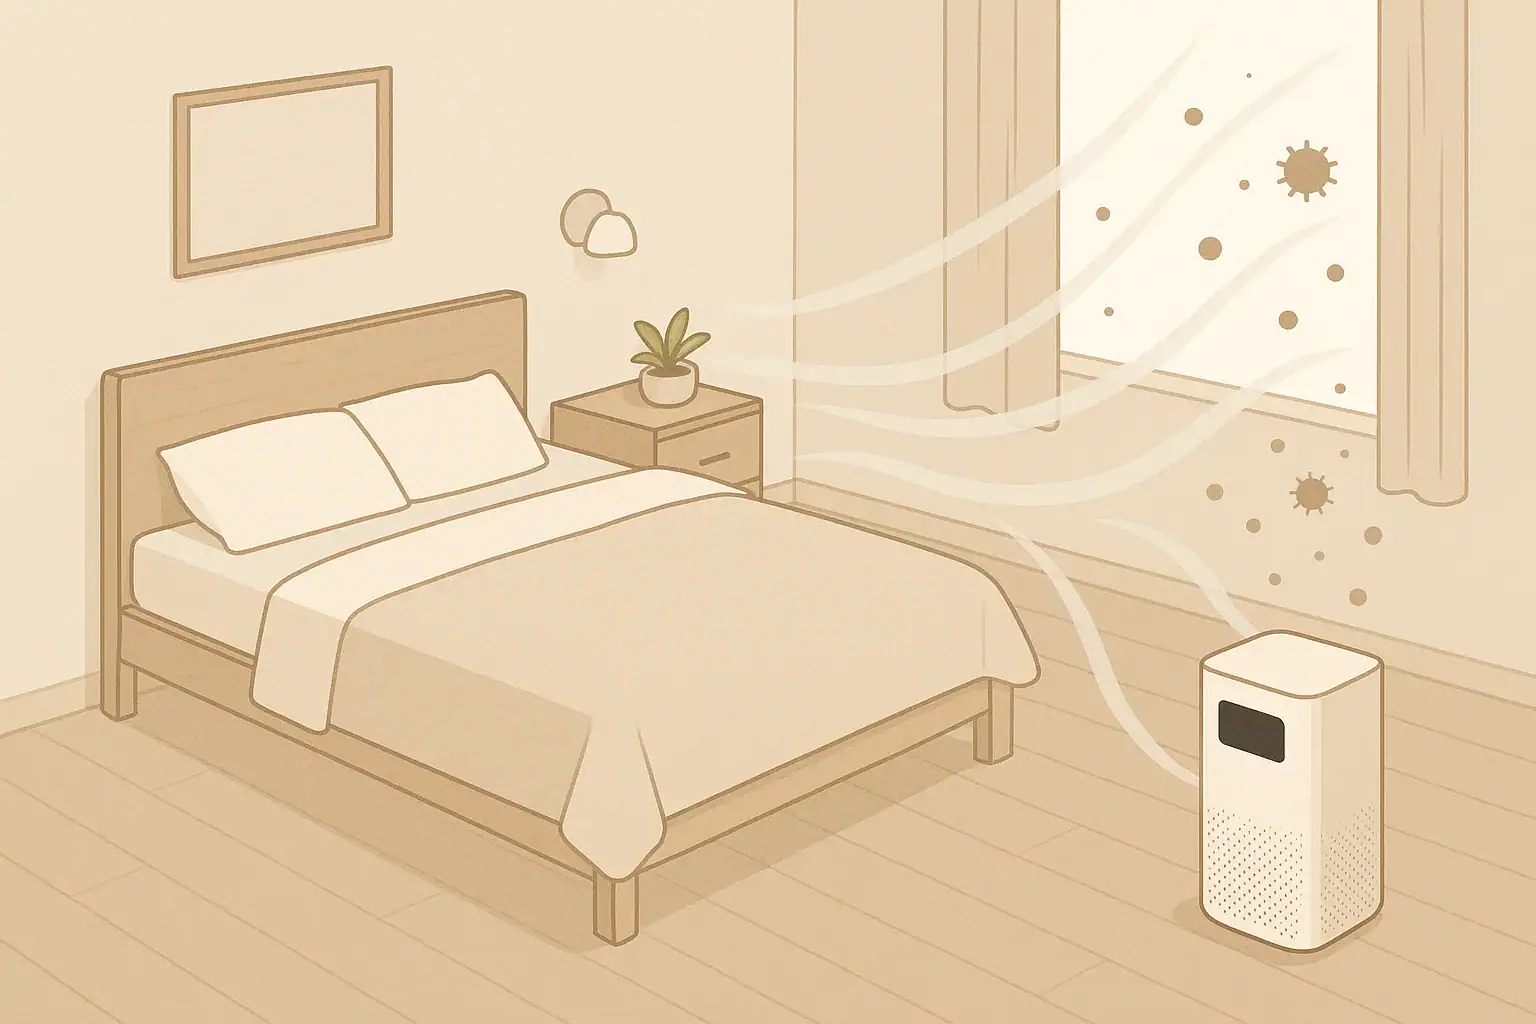
Isometric bedroom with air purifier capturing indoor particles

Indoor asthma triggers are anything inside your home that can irritate or inflame the airways and make breathing harder. For many people, managing these triggers indoors is just as important as using prescribed asthma medications. Because we spend so much time inside, even small improvements in home air quality can noticeably reduce coughing, wheezing, and nighttime symptoms.

This guide walks through what asthma triggers indoors typically look like, why they matter, and how to find and fix them room by room. You will see concrete examples, simple checks you can do in a few minutes, and practical changes that do not require a full renovation. Use it as a living checklist you update over time as seasons, activities, and household members change.

What Indoor Asthma Triggers Are and Why They Matter

Indoor asthma triggers are particles, gases, and conditions inside a building that can set off or worsen asthma symptoms. Common examples include dust mites in bedding, mold in damp bathrooms, smoke from cooking, and strong odors from cleaning products. The goal is not to create a perfectly sterile home, but to lower the level of irritants enough that your lungs are less likely to react.

Several factors make indoor triggers especially important:

  • Time spent indoors: Many people spend 80–90% of their day inside, so even moderate triggers can add up.
  • Limited air exchange: Tightly sealed homes hold in heat and cool air, but they also trap pollutants.
  • Layered exposures: Dust, pet dander, moisture, and chemical irritants often overlap in the same rooms.

Reducing exposure to asthma triggers indoors does not replace medical care, but it can help lower the frequency and intensity of flare-ups. It may also reduce the need for emergency visits and improve sleep quality for both adults and children.

Key Indoor Asthma Triggers and How They Build Up

Most indoor asthma triggers fall into a few categories. Understanding how each one behaves helps you decide what to tackle first.

Dust, Dust Mites, and Fine Particles

Household dust is a mix of fabric fibers, soil, skin flakes, and debris. The main concern for asthma is what lives in or attaches to that dust:

  • Dust mites: Microscopic insects that thrive in warm, humid fabric surfaces like mattresses and pillows.
  • Fine particles: Tiny particles from cooking, candles, and heaters that can reach deep into the lungs.
  • Tracked-in particles: Pollen, soot, and soil that come in on shoes and clothing.

Fine particles are often too small to see, so a room can look “clean” and still contain irritants that affect sensitive lungs.

Allergens from Pets, Pollen, and Pests

Allergens can cause airway inflammation even when you cannot see them.

  • Pet dander: Skin flakes and saliva proteins from furry animals that cling to fabrics and dust.
  • Pollen: Outdoor pollen that sticks to hair, clothing, and window screens, then settles indoors.
  • Pests: Cockroach fragments and rodent droppings that break down into fine particles.

Even if you do not see pests, droppings and fragments can remain in cracks, cabinets, and behind appliances.

Mold, Dampness, and Humidity Extremes

Mold grows where materials stay damp. Mold spores and fragments can become airborne when disturbed, and damp surfaces also support dust mites and bacteria. Common sources include leaky plumbing, poorly ventilated bathrooms, and basements with moisture problems.

Humidity itself can be a trigger when it is very high or very low:

  • High humidity: Encourages mold and dust mites and can make the air feel heavy.
  • Low humidity: Dries the airways, making them more sensitive to particles and gases.

Smoke, Combustion Byproducts, and Chemical Irritants

Smoke and certain gases are strong airway irritants, even at levels that may not bother people without asthma.

  • Smoke: From tobacco, vaping, wood stoves, fireplaces, candles, and over-heated cooking oil.
  • Combustion gases: From gas stoves, furnaces, and space heaters if they are not vented or maintained.
  • Volatile organic compounds (VOCs): From paints, new furnishings, strong cleaners, air fresheners, and hobby supplies.

These pollutants can linger in fabrics, dust, and on surfaces long after the smell has faded.

Real-World Room-by-Room Examples

Walking through your home with asthma triggers in mind can make problems easier to spot. The examples below show typical issues and practical fixes in each area.

Bedrooms: High-Exposure Spaces

Because people spend many hours sleeping, bedrooms are a priority for reducing asthma triggers indoors.

  • Bedding and mattresses: Use tightly woven, washable covers on pillows and mattresses. Wash sheets and pillowcases in hot water at least weekly.
  • Soft surfaces: Limit decorative pillows, stuffed animals, and heavy drapes that collect dust. Choose a few washable items instead of many small ones.
  • Flooring: If you have carpet, vacuum slowly and thoroughly with effective filtration. If you have hard floors, damp-mop instead of dry sweeping.
  • Pets: Keep pets out of the bedroom if pet dander is a known trigger. Use a closed door or gate to maintain a pet-free sleep zone.

Living Room and Family Areas

These shared spaces usually combine soft furnishings, electronics, and higher foot traffic.

  • Upholstery: Vacuum sofas, chairs, and curtains on a schedule. Wash removable covers regularly.
  • Dust control: Dust shelves and electronics with a damp or microfiber cloth so particles stick instead of becoming airborne.
  • Shoes and entryways: Use mats at doors and remove shoes when practical to reduce tracked-in pollen and soil.
  • Scented products: Limit candles, incense, and strong room sprays, especially in smaller or tightly closed rooms.

Kitchen: Smoke, Grease, and Moisture

Cooking is one of the largest sources of indoor particles and gases.

  • Ventilation: Use a range hood that vents outdoors if available, especially when frying or searing. Run it during cooking and for a short time afterward.
  • Cooking method: Favor boiling, steaming, and baking over high-heat frying. Cover pans to reduce smoke and splatter.
  • Moisture: Wipe up spills quickly, fix leaks under sinks, and allow dishwashers and drying racks to air out between uses.

Bathrooms: Dampness and Mold Hotspots

Bathrooms are often the first place mold appears.

  • Showering habits: Run an exhaust fan during showers and for at least 15–20 minutes afterward. If there is no fan, open a window when weather allows.
  • Surfaces: Wipe condensation from mirrors and windows. Clean tile, grout, and caulking regularly to remove early mold growth.
  • Textiles: Wash or replace shower curtains and bathmats on a schedule, especially if they stay damp.

Basements, Laundry Rooms, and Storage Areas

These areas are often cooler and more humid, which favors mold and dust mites.

  • Moisture checks: Look for damp spots on walls and floors, musty odors, or visible mold. Address drainage or leaks promptly.
  • Dehumidification: In persistently damp spaces, use mechanical dehumidification to bring humidity into a moderate range.
  • Storage: Keep items off concrete floors and away from exterior walls to allow air circulation.
  • Dryers: Ensure clothes dryers vent outdoors where required and clean lint paths so moisture does not build up indoors.
Room Typical Main Trigger Simple First Fix
Bedroom Dust mites in bedding and soft surfaces Wash sheets weekly in hot water and add mattress/pillow covers
Living room Dust on upholstery and carpets Vacuum seating and rugs on a set schedule using effective filtration
Kitchen Cooking smoke and grease particles Use exhaust fan during high-heat cooking and cover pans
Bathroom Mold from frequent moisture Run exhaust fan after showers and dry damp surfaces
Basement Dampness and mold on surfaces Check for leaks and use dehumidification if humidity stays high
Quick starting points for reducing common indoor asthma triggers by room. Example values for illustration.

Common Mistakes and Troubleshooting Indoor Asthma Triggers

Even well-intentioned efforts to improve indoor air can backfire. Recognizing common mistakes helps you troubleshoot when symptoms do not improve as expected.

Cleaning Habits That Stir Up Triggers

  • Dry dusting: Using a feather duster or dry cloth often launches dust into the air. Switch to damp or microfiber cloths so particles stick instead.
  • Fast vacuuming: Rushing over carpets can leave deeper dust behind. Vacuum slowly, with overlapping passes, and empty the container outdoors when possible.
  • Strong fragrances to “cover” odors: Heavy use of air fresheners or scented candles can add chemical irritants instead of removing the source of the smell.

Ventilation Missteps

  • Running fans without removing pollutants: A ceiling fan alone just mixes air. Pair fans with open windows or exhaust to move pollutants out.
  • Blocking vents: Furniture or curtains in front of supply or return vents can reduce air circulation and leave certain rooms stuffy and dusty.
  • Ignoring outdoor conditions: Opening windows during high outdoor pollen or smoke events can worsen indoor air for some people with asthma.

Moisture and Mold Troubleshooting

  • Only treating visible mold: Wiping off visible spots without drying the underlying material often leads to regrowth.
  • Using humidifiers without monitoring: Running a humidifier continuously can push humidity too high, encouraging mold and dust mites.
  • Drying clothes indoors without ventilation: This can raise humidity significantly in small spaces.
Issue You Notice Likely Underlying Trigger Targeted Adjustment
Symptoms worse at night or on waking Dust mites or pet dander in bedding Wash bedding hot weekly, add covers, keep pets out of bedroom
Coughing after cooking Fine particles and cooking fumes Use exhaust fan, lower cooking temperatures, cover pans
Musty smell in one room Hidden dampness or mold Check for leaks, condensation, or damp materials and dry thoroughly
Symptoms flare after cleaning Fragrances or stirred-up dust Switch to fragrance-free products and damp dusting
Scratchy throat in winter Very dry indoor air Monitor humidity and add careful humidification if needed
Linking asthma symptom patterns to likely indoor triggers and adjustments. Example values for illustration.

Safety Basics When Changing Your Indoor Environment

Improving indoor air quality for asthma should not introduce new risks. A few safety basics help keep changes balanced and practical.

When Dealing with Mold and Moisture

  • Wear basic protection such as gloves and, if disturbing dusty or moldy materials, a suitable mask.
  • Avoid dry-scrubbing moldy areas; gently clean and dry them so fewer spores become airborne.
  • Do not ignore signs of structural damage, large areas of mold, or chronic leaks. Those situations may need professional evaluation.

Using Cleaning Products and Chemicals

  • Follow label directions, especially for ventilation and contact time.
  • Avoid mixing products that are not meant to be combined.
  • Store chemicals in tightly closed containers, away from living and sleeping areas when possible.

Combustion Appliances and Heat Sources

  • Have heating equipment and any fuel-burning appliances inspected and maintained on a schedule.
  • Do not use unvented combustion devices in small or poorly ventilated rooms.
  • Avoid idling vehicles in attached garages, as exhaust can enter living spaces.

Personal Health Considerations

  • Plan heavier cleaning or home projects for times when someone with asthma can be out of the area.
  • Keep prescribed rescue medications accessible when doing activities that might temporarily increase exposure, such as moving old boxes or cleaning dusty closets.
  • Discuss major home changes related to asthma management with a healthcare professional, especially if symptoms are frequent or severe.

Long-Term Habits, Monitoring, and Maintenance

Indoor asthma triggers change with seasons, activities, and renovations. Long-term habits help you keep up with those changes instead of reacting only when symptoms flare.

Simple Observation and Symptom Tracking

  • Note where you were and what you were doing just before symptoms started or worsened.
  • Pay attention to recent changes such as new furniture, a new pet, or a different cleaning product.
  • Watch for environmental clues: musty odors, condensation on windows, or visible dust on surfaces.

Humidity, Temperature, and Airflow Over Time

  • Use a basic humidity indicator to understand your typical indoor levels during different seasons.
  • Aim for a moderate humidity range, avoiding extremes that feel very dry or very damp.
  • Reduce drafts and large temperature swings between rooms, which can make symptoms more noticeable.
  • Use exhaust fans in kitchens and bathrooms routinely, not only during visible steam or smoke.

Regular Cleaning and Filter Schedules

  • Set a routine for vacuuming, dusting, and washing bedding, focusing first on bedrooms and living areas.
  • Change or clean HVAC and appliance filters according to guidance, or sooner if they look visibly dirty.
  • Periodically clean fan covers, vents, and accessible duct grilles where dust tends to collect.

Adjusting Based on Results

  • Make one or two changes at a time so you can see what actually helps.
  • If a change does not seem to improve symptoms after a reasonable trial, reconsider whether you are targeting the right trigger or room.
  • Revisit your checklist when seasons change, during renovations, or when someone new moves into the home.

Putting It All Together: Practical Takeaways and Specs to Look For

Most homes have multiple asthma triggers indoors, but you do not need to fix everything at once. Focus first on the spaces and activities where symptoms are most noticeable, then build out your plan from there.

  • Start with the bedroom, where exposure time is longest.
  • Address obvious moisture problems and musty odors promptly.
  • Reduce smoke and strong odors from cooking, cleaning, or hobbies.
  • Fine-tune humidity, temperature, and ventilation gradually, watching how symptoms respond.

Specs to Look For When Choosing Indoor Air Tools

If you decide to use equipment such as dehumidifiers, humidifiers, or air cleaners to manage asthma triggers indoors, a few basic specifications can guide your choices:

  • Room size match: Check that the device’s rated coverage area is at least as large as the room where it will be used.
  • Filtration level: For air cleaning, look for filters designed to capture fine particles such as dust, smoke, and dander.
  • Noise level: For bedrooms and study areas, select equipment quiet enough to run during sleep or work without being turned off.
  • Energy use: Consider power consumption if the device will run many hours per day.
  • Maintenance access: Choose designs with filters, tanks, or trays that are easy to access, clean, and replace.
  • Controls and indicators: Simple controls, clear on/off indicators, and, if available, basic humidity or filter status indicators can make regular use more consistent.

By combining the right tools with steady habits—regular cleaning, moisture control, and smart ventilation—you can create an indoor environment that better supports comfortable breathing and long-term asthma management.

Frequently asked questions

What specs and features matter when choosing air cleaners or humidity-control devices to reduce asthma triggers indoors?

Pick devices sized for the room so they can adequately clean or condition the air; for cleaners, prioritize high-efficiency particle filtration that captures fine particles and dander. For humidifiers and dehumidifiers, choose units with accurate control and easy-to-clean reservoirs or removable filters. Low noise and simple maintenance access (clear filter indicators, easy replacement) help ensure regular use.

How can I tell if my home has hidden asthma triggers indoors?

Watch for symptom patterns tied to specific rooms or activities, musty or persistent odors, visible dust buildup, and condensation or damp spots. Keeping a simple log of when symptoms occur and inspecting bedding, vents, and damp-prone areas can reveal hidden sources.

Will scented candles or air fresheners help or worsen asthma triggers indoors?

Scented products can worsen asthma for sensitive people because fragrances and some air fresheners emit volatile organic compounds (VOCs) that irritate the airways. Addressing the odor source, increasing ventilation, and using fragrance-free, low-VOC cleaning products are safer first steps.

What safety precautions should I take when removing mold or cleaning dusty areas?

Wear gloves and a well-fitting mask when disturbing moldy or dusty materials, avoid dry-scrubbing moldy surfaces, and ventilate the area during cleanup. Large or recurring mold problems and suspected structural leaks should be evaluated by professionals rather than handled casually.

Which areas of the home should I prioritize to reduce asthma triggers indoors?

Begin with the bedroom because exposure time is longest during sleep, then address the kitchen and bathroom where smoke and moisture are common. Focus first on the rooms most closely linked to your symptoms and work outward from there.

How often should I change filters and wash bedding to control indoor asthma triggers?

Wash sheets and pillowcases weekly in hot water when possible, and follow guidance for HVAC and appliance filters—many need attention every 1–3 months, though heavily used or dirty filters may require more frequent changes. Inspect filters and bedding routinely and adjust schedules for pets, smokers, or renovation work.

Dust Mite Allergy: Humidity Targets, Bedding Strategies, and Filtration That Actually Help

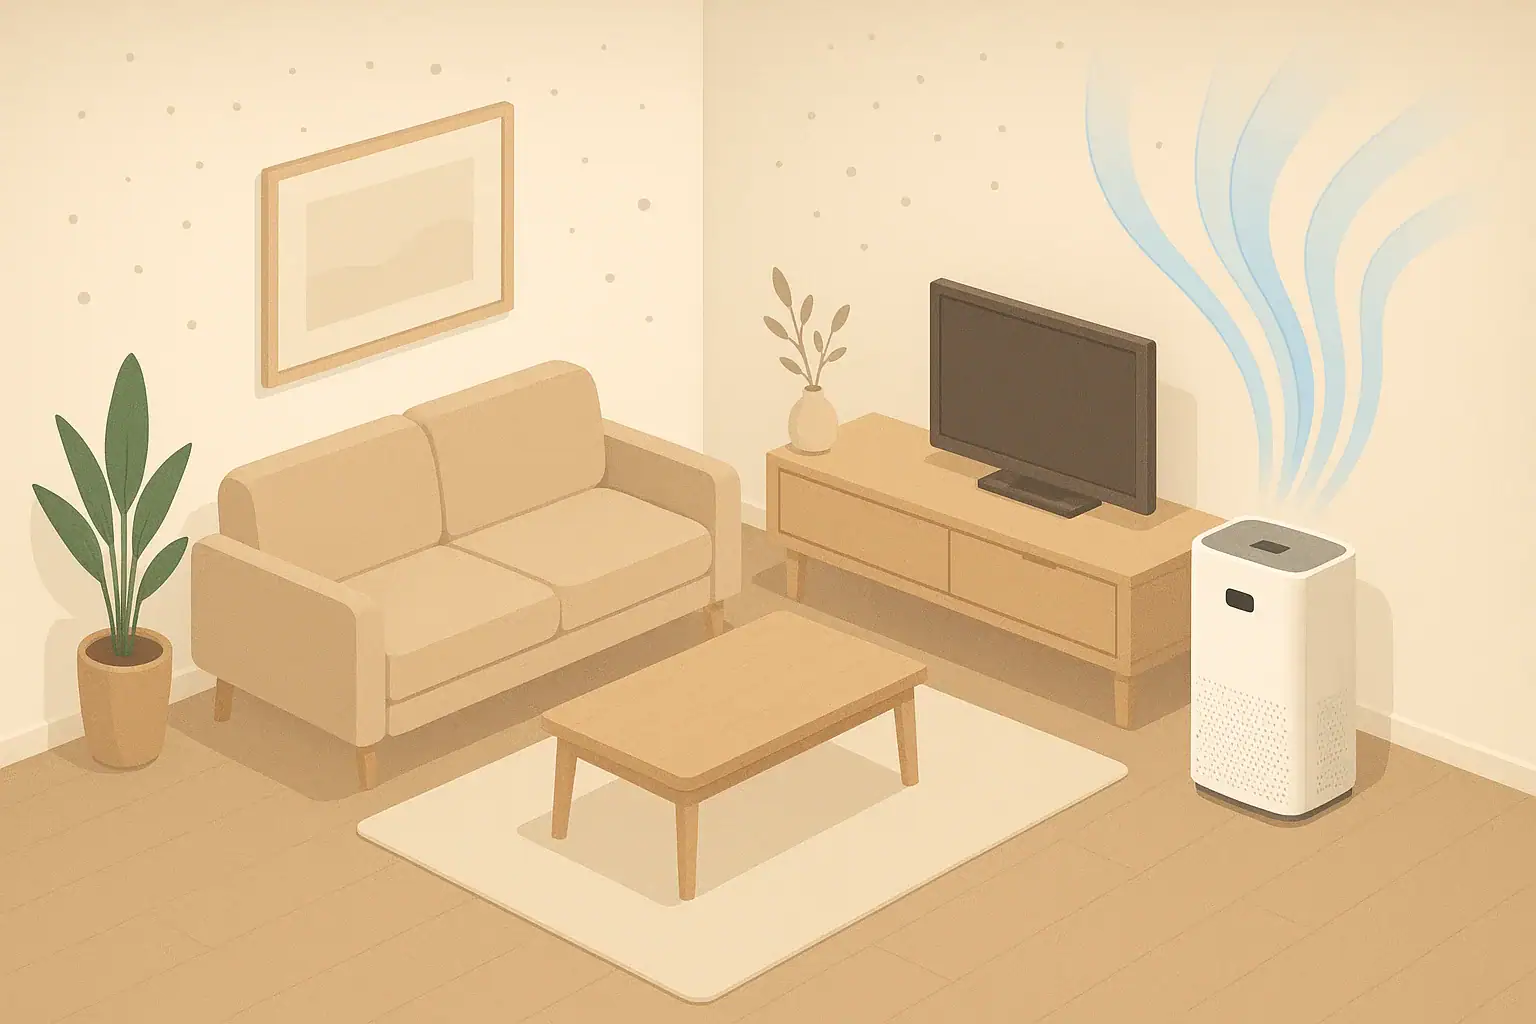
Isometric bedroom with air purifier and allergen proof bedding

The most effective humidity target for dust mite allergy is generally 40–50% relative humidity, combined with allergen-proof bedding and good air filtration. Keeping indoor air in this range over weeks, not just days, helps limit dust mite growth while staying comfortable for people. When you pair that with washable bedding, mattress encasements, and a well-sized air cleaner, you can noticeably reduce allergy symptoms at night.

This guide explains how dust mites respond to moisture, what humidity levels to aim for, and how to set up your bedroom, bedding, and filtration so the whole system works together. You will also see concrete examples, simple comparison tables, and common mistakes to avoid, so you can focus on changes that actually matter in everyday life.

Whether you are dealing with dust mite allergy, perennial allergic rhinitis, or asthma that worsens in bed, these steps will help you turn a high-risk bedroom into a lower-allergen zone you can maintain long term.

What Dust Mite Allergy Is and Why Indoor Conditions Matter

Dust mite allergy is an immune reaction to proteins in the bodies and droppings of microscopic mites that live in fabric and dust. The mites themselves stay hidden in mattresses, pillows, carpets, and upholstery, but their allergen becomes airborne whenever these surfaces are disturbed.

Typical symptoms include year-round sneezing, congestion, itchy or watery eyes, and worsening nasal or chest symptoms in bed or right after waking. For people with asthma, dust mite exposure can also trigger wheezing and shortness of breath.

Dust mites thrive where three conditions come together:

  • Moderate warmth (typical bedroom temperatures)
  • Enough humidity in the air and in fabrics
  • A steady supply of shed human skin cells

Because of this, managing the bedroom environment is usually more impactful than focusing on the rest of the home first. Humidity targets, bedding choices, and filtration all influence how much allergen you actually breathe while sleeping.

Instead of looking for a single “magic” device, it is more realistic to stack several moderate improvements: control moisture, block contact with mite reservoirs, remove settled dust, and filter the air you breathe most often.

Key Humidity and Allergen Concepts: How Control Actually Works

Dust mites do not drink water; they absorb moisture from the air and from the fabrics they live in. That makes relative humidity (RH) a key lever you can control.

Target Humidity Range for Dust Mite Control

For most homes, a practical target range is:

  • 40–50% RH in bedrooms and main living spaces

This range is low enough to stress dust mites and slow population growth, but usually high enough to avoid very dry-air problems like nosebleeds or cracked skin. People with severe dust mite allergy may aim closer to 40% if the climate and building allow it without causing other issues.

Short dips below 40% or brief spikes above 55% matter less than the average over weeks. Mites are protected deep in fabric, so consistent conditions over time are what gradually reduce populations.

How Humidifiers and Dehumidifiers Fit In

Which device you need depends on your climate and your home:

  • Dry-climate or winter homes: Humidifiers can raise very low RH into the 40–50% comfort band. The risk is overshooting and accidentally creating a better environment for mites if RH regularly climbs above about 50%.
  • Humid-climate or damp homes: Dehumidifiers help pull moisture out of the air when RH tends to sit above 55–60%. Bedrooms above damp basements, or homes with poor insulation, often benefit from dedicated dehumidification.

A standalone hygrometer or a monitor with a humidity readout keeps you from guessing and lets you see how weather, showers, cooking, and laundry affect indoor RH.

Humidity, Bedding, and Filtration Working Together

Humidity control makes the environment less friendly to mites, but it does not remove the allergen already in your bed and carpets. That is where encasements, hot-water washing, and air filtration come in:

  • Bedding encasements create a physical barrier between you and mite reservoirs in mattresses and pillows.
  • Regular hot-water washing of sheets and blankets removes mites and allergen from the top layers you touch.
  • Air filtration captures airborne allergen fragments when you move in bed, vacuum, or walk on carpets.

Think of humidity control as slowing new mite growth, while bedding and filtration reduce what you breathe tonight.

Humidity Targets Compared to Comfort and Mold Risk

The table below compares typical humidity ranges and what they mean for dust mites and general indoor comfort.

Average indoor RH Dust mite conditions Comfort and other risks Typical actions
Below 30% Mites stressed; population tends to shrink over time Dry skin, nose, and throat; static shocks more common Consider modest humidification if symptoms of dryness are bothersome
30–40% Less favorable for mites; good for allergy control in many homes Comfortable for many people, slightly dry for some Often ideal in cold climates if not causing dryness issues
40–50% Balanced: acceptable for most households, still limiting mite growth Comfortable range for most; helps avoid very dry air problems Common target range for dust mite and general indoor air quality
50–60% Supports dust mite survival; populations can grow Air feels more humid; risk of condensation in cool spots Use dehumidification and ventilation to bring RH down
Above 60% Very favorable for mites; allergen levels tend to be higher Increases risk of mold and musty odors Address moisture sources and consider a dehumidifier
How different humidity ranges affect dust mites, comfort, and moisture problems. Example values for illustration.

Real-World Setups and Routines That Reduce Dust Mite Exposure

Turning theory into practice is easier if you think in terms of specific rooms and routines rather than the whole house at once. Bedrooms, especially for the person with allergy or asthma, are the priority.

Example Bedroom Setup: Humid Climate

Consider a ground-floor bedroom in a humid region where indoor RH often sits around 60–65% in summer:

  • Install a dehumidifier in or near the bedroom and set it to maintain about 45–50% RH.
  • Run the bathroom exhaust fan during showers and for at least 20 minutes afterward.
  • Use tightly woven encasements on the mattress, pillows, and box spring.
  • Wash sheets and pillowcases weekly in the hottest water safe for the fabric, then dry completely.
  • Place a portable air cleaner near the side of the bed where the allergic person sleeps, and run it on a quiet but continuous setting at night.
  • Vacuum carpets and upholstered furniture in the bedroom at least once per week with a vacuum that has effective particle filtration.

Within several weeks, many people notice less morning congestion and fewer nighttime flare-ups.

Example Bedroom Setup: Dry Winter Climate

Now imagine a home in a cold, dry climate where indoor RH in winter falls to 20–25%:

  • Use a room humidifier with a built-in control or external hygrometer and aim for 35–40% RH during the coldest months.
  • Keep the humidifier output moderate to avoid visible condensation on windows or walls.
  • Still use mattress and pillow encasements, because existing mite allergen remains even when the air is dry.
  • Wash bedding weekly; consider lighter, washable blankets instead of heavy, rarely washed comforters.
  • Run a portable air cleaner in the bedroom if symptoms remain bothersome, especially during vacuuming or bed making.

In this situation, the main goal is to avoid overshooting humidity with the humidifier while keeping bedding and filtration optimized.

Practical Bedding and Laundry Routine

A realistic weekly routine for a dust-mite-sensitive person might look like this:

  • Weekly: Wash sheets and pillowcases in hot water and dry on a hot setting; vacuum bedroom floor and rugs; wipe bedside surfaces with a slightly damp or microfiber cloth.
  • Every 1–2 months: Wash blankets and duvet covers if washable; vacuum the mattress surface (through or before opening the encasement if designed for that); wash washable stuffed animals or rotate them out of the bed.
  • Yearly or as needed: Replace older pillows that cannot be washed; reassess whether carpets or heavy curtains near the bed can be replaced with easier-to-clean options.

How Filtration Fits into Daily Life

For dust mite allergy, air filtration is most useful when it is running:

  • During sleep, when exposure to airborne allergen near your face matters most.
  • For at least 30–60 minutes before bedtime, to reduce particles stirred up by evening activity.
  • While vacuuming or dusting, to help capture particles that are temporarily kicked into the air.

Position a portable air cleaner so that it draws air from the room and returns cleaner air toward the breathing zone, without blowing directly on your face if that feels uncomfortable or drying.

Common Mistakes and Troubleshooting Dust Mite Control

Many people invest in devices or special bedding but still feel stuck with symptoms. Often the problem is not effort, but a few key gaps or conflicting habits.

Frequent Pitfalls That Undermine Humidity and Allergen Control

The table below summarizes common mistakes, what you might notice, and simple fixes.

Common mistake What you may notice Simple adjustment
Running a humidifier without checking RH Windows fogging, musty smell, worsening congestion over time Use a hygrometer; reduce output or runtime to keep RH near 40–50%
Buying encasements but not covering all main bedding pieces Some improvement, but persistent symptoms when using the bed Encasements for mattress, main pillows, and box spring if fabric-covered
Rarely washing heavy comforters or decorative pillows Nighttime symptoms despite clean sheets Switch to washable layers or wash/replace bulky items more often
Using an air cleaner on the lowest setting for short periods Little change in symptoms or dust levels Run it longer at a speed that still allows sleep; size it to the room
Vacuuming with poor filtration or a leaking vacuum Symptoms flare during or right after cleaning Use a vacuum with effective particle filtration and good seals; empty carefully
Ignoring hidden moisture sources (leaks, damp basements) Humidity stays high despite a dehumidifier; recurring musty odors Fix leaks, improve drainage or ventilation, and close off very damp areas if possible
Typical dust mite control mistakes and how to correct them. Example values for illustration.

Quick Troubleshooting Checklist

If you have already made changes but symptoms are still strong, consider these questions:

  • Is bedroom RH actually staying below about 50% most of the time? Check with a hygrometer in both humid and dry seasons.
  • Are all main sleep surfaces encased? Mattress, pillows, and box spring or foundation if it has fabric.
  • Is bedding washed frequently enough? Weekly for sheets and pillowcases; monthly or as allowed for blankets and covers.
  • Is there wall-to-wall carpet in the bedroom? If so, are you vacuuming regularly with good filtration, or can flooring be simplified over time?
  • Is the air cleaner sized for the room and run long enough? Check the recommended coverage and adjust speed and runtime accordingly.

Improving even one or two weak areas can make the rest of your efforts more effective.

Safety Basics for Humidity Devices, Cleaning, and Filtration

Dust mite control strategies are generally low risk, but a few safety basics help you avoid trading one problem for another.

Safe Use of Humidifiers and Dehumidifiers

  • Avoid standing water: Empty and dry humidifier and dehumidifier tanks regularly to prevent bacterial or mold growth inside the unit.
  • Follow cleaning schedules: Use the cleaning methods recommended for your device to keep mineral buildup and biofilm under control.
  • Watch for condensation: If you see persistent moisture on windows, cold walls, or around vents, reduce humidifier output or adjust airflow.
  • Electrical safety: Place plug-in devices on stable surfaces, away from bathtubs, sinks, or places where water can be spilled onto cords or outlets.

Safe Cleaning and Laundry Practices

  • Hot water caution: When washing bedding in hot water, avoid overloading the machine and use care when handling hot, wet laundry.
  • Avoid harsh fumes in small spaces: If you use strong cleaners for mold or heavy soil, ventilate the area and avoid mixing products such as bleach and ammonia.
  • Vacuuming and asthma: People with asthma or severe allergy may want to stay out of the room during vacuuming and for a short period afterward.

Filter and Dust Safety

  • Mask use for heavy dust: When changing very dirty filters or cleaning long-neglected areas, a simple particle mask can reduce inhalation of dust.
  • Dispose of filters carefully: Place used filters directly into a trash bag, seal it, and remove it from the living space to avoid releasing captured dust.
  • Check for overheating: If a fan, air cleaner, or dehumidifier feels unusually hot, smells like burning, or trips a breaker, unplug it and have it inspected or replaced.

Long-Term Maintenance and Seasonal Adjustments

Dust mite reduction is not a one-time project; it is an ongoing set of habits that become easier once they are built into your routine.

Seasonal Humidity Adjustments

  • Spring and fall: Track how outdoor humidity changes and how your home responds. You may need less dehumidification or humidification during these transitional seasons.
  • Summer in humid climates: Expect to rely more on dehumidifiers and air conditioning to keep RH in the target range.
  • Winter in cold climates: Balance humidifier use with condensation risk on cold windows and walls. If condensation is frequent, lower your humidity target slightly.

Filter and Device Maintenance Over Time

  • Air cleaner filters: Replace or clean them on the schedule recommended for your usage level. Homes with pets, smokers, or heavy dust may need more frequent changes.
  • HVAC filters: Change central system filters regularly, especially during heating and cooling seasons when the system runs more often.
  • Humidifier and dehumidifier care: Clean reservoirs, coils, and intake grilles as recommended so the devices remain effective and hygienic.

Bedding and Soft Furnishing Refresh Cycle

  • Pillows: Wash washable pillows according to care instructions or replace non-washable pillows every few years, sooner if heavily used.
  • Mattress: Vacuum the mattress periodically and check encasements for tears or worn zippers; repair or replace them if they no longer seal well.
  • Soft clutter: Periodically review stuffed animals, extra cushions, and heavy throws in the bedroom. Keep only what you can realistically clean on a regular schedule.

Putting It All Together: Practical Takeaways and Specs to Look For

Effective dust mite allergy control comes from combining humidity management, bedding barriers, regular cleaning, and air filtration in the rooms where you spend the most time, especially the bedroom. Aim for steady humidity near 40–50%, use encasements on mattresses and pillows, wash bedding weekly in hot water, and run a properly sized air cleaner consistently in sleeping areas.

Rather than striving for a perfectly dust-free home, focus on reducing allergen exposure where it matters most and on habits you can maintain year-round. Track how your symptoms respond over several weeks as you adjust humidity, bedding, and cleaning routines.

Specs to Look For When Choosing Devices and Materials

When you are ready to upgrade equipment or bedding, these features help support dust mite and humidity control without locking you into specific brands:

  • Humidifiers: Built-in humidistat or compatible with an external hygrometer; adjustable output; easy-to-clean tank and surfaces; automatic shutoff when water is low.
  • Dehumidifiers: Clear humidity setpoint control (ideally in percentage RH); continuous drain option if used in very damp spaces; accessible filter or intake screen for cleaning.
  • Air cleaners: High-efficiency particle filtration; airflow capacity appropriate for the bedroom size; multiple fan speeds including a quiet night mode; sealed housing to reduce air bypass around the filter.
  • Vacuum cleaners: Effective particle filtration and well-sealed body; tools for mattresses and upholstery; easy-to-empty bag or bin without creating a dust cloud.
  • Bedding encasements: Tightly woven, breathable fabric designed to block fine particles; fully zippered with seams and closures that do not gap; smooth surface that is comfortable to sleep on.
  • Sheets and blankets: Machine washable in hot water; durable enough for frequent laundering; lighter, layered bedding instead of one very bulky, rarely washed item.

By matching these specs to your room size, climate, and cleaning habits, you create a practical setup that manages dust mite allergen exposure over the long term without constant trial and error.

Frequently asked questions

How low should indoor humidity be to reduce dust mites without causing dry-air problems?

A practical target for dust mite control is about 40–50% relative humidity. This range stresses mites over time while avoiding many dry-air symptoms; people with sensitive skin or severe allergy may aim closer to 40% if the home can maintain it without condensation issues.

What device features and specs matter most when choosing humidifiers, dehumidifiers, or air cleaners?

Look for built-in or compatible humidistats and clear RH setpoint control, adjustable output, easy-to-clean tanks or filters, and airflow appropriate for the bedroom size. For air cleaners, high-efficiency particle filtration, sealed housing to prevent bypass, and a quiet night mode are useful for continuous overnight use.

What common mistakes cause humidity or allergen control efforts to fail?

Common issues include not measuring RH, incomplete use of encasements, infrequent washing of bedding, running air cleaners too briefly or at too-low speeds, and ignoring hidden moisture sources like leaks. Addressing even one of these gaps often improves the overall program significantly.

Are humidifiers and dehumidifiers safe to use around people with asthma or severe allergies?

Yes—when properly maintained. Empty and clean tanks regularly, avoid visible condensation that can promote mold, and monitor indoor RH to stay within recommended ranges; poor maintenance or persistent condensation can worsen allergen or mold exposure.

How often should bedding and air cleaner filters be cleaned to reduce dust mite exposure?

Wash sheets and pillowcases weekly in the hottest water safe for the fabric; wash blankets and duvet covers every 1–2 months or per care instructions. Check air cleaner filters monthly for heavy use and replace or clean them on the manufacturer-recommended schedule or more often if you have pets or high dust levels.

Can a portable air cleaner alone control dust mite allergen in a bedroom?

No—air cleaners help capture airborne allergen fragments but do not remove reservoirs in mattresses, pillows, and fabrics. Combine filtration with humidity control, encasements, and regular laundering to reduce both airborne and settled allergen effectively.

Pet Dander Allergy: Best Air Cleaner Setup and Habits That Actually Help

Bedroom with air purifier reducing pet dander particles

The most effective way to reduce pet dander allergy symptoms is to combine a properly sized HEPA air cleaner with strict bedroom control, surface cleaning, and smart pet habits. Air filtration alone rarely fixes symptoms unless it is part of a full-home routine that targets where dander is produced, where it settles, and where you spend the most time.

If you live with cats, dogs, or other furry pets and react to pet dander, you are dealing with tiny allergen particles that float in the air, cling to dust, and embed in fabrics. A good pet allergy air cleaner setup focuses on capturing those particles before you breathe them in and before they build up on soft surfaces.

This guide explains how pet dander behaves in your home, how to configure air cleaners for real-world rooms, habits that make or break results, and what specifications to look for when you buy or upgrade equipment.

What Pet Dander Allergies Mean for Your Indoor Air

Pet dander allergies are reactions to proteins found in tiny flakes of skin, dried saliva, and urine that your pet constantly sheds into the home. These allergens are much smaller than visible fur, and they easily become part of your indoor dust and air.

Why this matters for air cleaning:

  • Particle size: Many pet allergens are in the fine particle range that can stay suspended in the air for long periods.
  • Distribution: Dander spreads from pet zones into bedrooms, offices, and even homes without pets via clothing and fabrics.
  • Persistence: Once dander settles into carpets, upholstery, and bedding, it can be re-released into the air every time you walk, sit, or vacuum.

For people with allergies or asthma, this continuous circulation of pet allergens can mean morning congestion, itchy eyes, coughing, or chest tightness, even if the pet is not in the same room. That is why a pet dander allergy air cleaner strategy focuses on both the air you breathe and the surfaces around you.

In practical terms, your goals are to lower the background level of airborne pet allergens, slow down how quickly they build up on surfaces, and create at least one lower-exposure room where your body can recover overnight.

How Pet Dander Moves, Settles, and Gets Captured

Understanding how pet dander behaves indoors helps you decide where to place an air cleaner, how powerful it needs to be, and which filters matter most.

Sources and movement of pet allergens

  • Continuous shedding: Pets shed microscopic skin flakes all day, not just when they visibly shed fur.
  • Grooming and saliva: When pets lick their fur, saliva dries on the hair and skin, adding allergen proteins that later break off into the air.
  • Litter and bedding: Litter boxes, cages, and bedding can release dust that carries allergen proteins, especially when disturbed.

Once released, these particles behave in two main ways:

  • Airborne phase: Fine particles float and follow air currents from HVAC vents, fans, and people walking through a room.
  • Settled phase: Over time, they land on floors, shelves, bedding, and upholstery, then get kicked back into the air when disturbed.

Why filtration type and airflow matter

Air cleaners work by pulling room air through filters that trap particles. For pet dander, two aspects matter most:

  • Filtration quality: A true HEPA filter captures a high percentage of small particles, including many pet allergen sizes. Basic or “HEPA-type” filters are less reliable for the finest particles.
  • Airflow and room coverage: The device must move enough air for the size and layout of the room. Otherwise, much of the dander never reaches the filter.

Odor control is a separate but related issue. Activated carbon or similar media can help with pet, litter box, or cage smells, but they do not replace HEPA filtration for allergen capture.

Room type Approximate size (sq ft) Suggested air cleaner capacity Priority for pet dander control
Small bedroom 100–150 Unit rated for at least this size on a medium setting Very high (overnight exposure)
Medium living room 200–300 Unit sized for full area, or two smaller units in open layouts High (pet rest and family activity zone)
Home office 80–150 Compact unit close to the desk area Moderate to high (hours of close-range breathing)
Hallway near litter box or cage 50–100 Small unit focused on odor and dust capture Targeted (odor and localized allergen)
Typical room types and how to think about air cleaner capacity for pet dander control. Example values for illustration.

In many homes, starting with the bedroom and the main pet hangout area gives the most noticeable improvement in symptoms.

Real-World Pet Dander Control Setups and Habits

Combining air cleaners with targeted habits is what usually makes the difference between slight improvement and clear allergy relief. Here are practical examples of how to set up your home.

Example 1: Allergic person with a bedroom cat

  • Bedroom strategy: Move toward a pet-reduced or no-pet bedroom. Keep the door closed at night to limit new dander entering.
  • Air cleaner placement: Place a HEPA air cleaner 3–6 feet from the bed, with the outlet pointed toward the center of the room, not directly at your face.
  • Run pattern: Run on a quiet setting 24/7, using a higher speed for 30–60 minutes before bedtime.
  • Surface control: Wash bedding weekly in warm water and choose smooth, easy-to-clean nightstands instead of heavy fabric decor.

Example 2: Dog that sheds heavily in the living room

  • Pet zone focus: Place the dog bed on a washable mat and keep it a short distance from the main seating area.
  • Air cleaner placement: Position a unit between the dog’s main resting spot and the seating area, but not so close that fur blocks the intake.
  • Floor and fabric habits: Vacuum carpets and sofas with a machine that has a good filter and sealed body, then run the air cleaner on a higher setting for an hour afterward.
  • Grooming: Brush the dog outdoors or in a well-ventilated area to keep loose hair from loading the indoor filters too quickly.

Example 3: Small pets with litter or cage dust

  • Location: Keep cages or litter boxes in a room with hard flooring, away from bedrooms if possible.
  • Air cleaner: Use a unit with both HEPA and odor media nearby, but leave enough space so litter dust does not immediately clog the intake.
  • Cleaning routine: Scoop or change litter slowly to minimize dust clouds, and run the air cleaner on a higher speed for 30–60 minutes afterward.
  • Ventilation: When outdoor air is acceptable, briefly open a window in that room during cleaning to dilute odors and airborne particles.

Using humidity and ventilation alongside filtration

  • Humidity: Aim for moderate indoor humidity. Very dry air can irritate nasal passages, while very humid air may encourage other allergens such as mold.
  • Ventilation: Use bathroom and kitchen exhaust fans and, when outdoor air is good, short periods of window opening to dilute indoor allergens.

These combined steps help your air cleaner work on a lower, more manageable allergen load instead of fighting a constant flood of new particles.

Common Mistakes and Troubleshooting Pet Dander Air Cleaning

Many people buy a good air cleaner but see little improvement because of a few avoidable missteps. Recognizing these patterns makes it easier to troubleshoot.

Frequent setup and usage mistakes

  • Undersized unit: Using a small air cleaner in a large, open-plan space where it cannot turn over enough air.
  • Wrong location: Hiding the unit behind furniture, next to thick curtains, or in a corner with poor airflow.
  • Intermittent use: Running the air cleaner only when symptoms feel bad, instead of continuously in key rooms.
  • Neglected filters: Letting pre-filters or HEPA filters clog with hair and dust, which drastically cuts airflow and performance.
  • Ignoring surfaces: Expecting the air cleaner to handle dander embedded in carpets, sofas, and bedding without regular cleaning.

Troubleshooting cues by symptom

Problem you notice Likely cause Practical adjustment
Still wake up congested in the morning Bedroom not well controlled; pet in bed; air cleaner undersized or off at night Make bedroom pet-reduced, run unit all night, verify size and placement near sleeping area
Visible dust and hair on vents or grilles Clogged pre-filter or blocked intake Clean or replace pre-filter, move objects away from intake and outlet
Strong pet or litter odor despite filtration Spent odor media or infrequent cleaning of litter/cage Replace odor filter, increase cleaning frequency in pet areas
Little change in symptoms anywhere in the home Relying on a single unit in a large home; surfaces not cleaned Prioritize bedroom and main pet zone, add regular vacuuming and fabric washing
Air cleaner seems loud and is often turned off Unit only effective on high speed; noise not tolerated Reassess sizing so a larger or more efficient unit can run quietly on a lower setting
Common pet dander air cleaning issues and simple adjustments to improve results. Example values for illustration.

When to reconsider your overall approach

If you have followed basic sizing, placement, and maintenance steps but still have strong symptoms, consider:

  • Creating a stricter no-pet or low-pet bedroom boundary.
  • Reducing heavy fabric items such as thick curtains, multiple throw pillows, or deep shag rugs.
  • Checking for other indoor triggers such as dust mites or mold that may be adding to your symptoms.

Air cleaners are powerful tools, but they cannot fully overcome constant, heavy allergen sources and neglected surfaces.

Safety Basics for Air Cleaners in Pet Allergy Homes

Most filtration-based air cleaners are straightforward to use, but a few safety points are worth keeping in mind, especially in homes with pets and children.

Ozone and reactive technologies

  • Avoid intentional ozone generators: Devices that deliberately produce ozone or rely mainly on reactive gases can irritate airways, especially in people with allergies or asthma.
  • Prefer mechanical filtration: HEPA and carbon-based systems generally focus on physical filtration rather than chemical reactions in the air.

Electrical and placement safety

  • Stable placement: Place units on flat, stable surfaces where pets are unlikely to knock them over.
  • Cord management: Route cords where they will not be chewed by pets or create tripping hazards.
  • Vent clearance: Keep the intake and outlet free of blankets, toys, or pet beds to prevent overheating and poor airflow.

Filter handling and cleaning safety

  • Avoid shaking dusty filters indoors: Shaking or banging filters can release trapped dander back into the room.
  • Use gentle handling: When changing filters, handle them slowly and consider placing used filters directly into a trash bag.
  • Follow manufacturer guidance: Only wash or vacuum filters that are designed for it; wetting non-washable filters can damage them and reduce effectiveness.

For sensitive individuals, it can help to have someone else handle filter changes or to leave the room while the task is done, then let the air cleaner run for a while before spending extended time there.

Keeping Your Pet Dander Air Cleaner Effective Over Time

Pet homes load filters faster than homes without animals, so long-term performance depends on a simple but consistent maintenance routine.

Filter checks and replacement rhythm

  • Pre-filters: Inspect monthly or more often in heavy-shedding seasons. Vacuum or wash if allowed when you see visible hair and dust buildup.
  • HEPA filters: Check on the schedule recommended by the manufacturer, but be prepared to replace sooner if you notice reduced airflow or persistent dust.
  • Odor media: Replace odor-control layers when pet or litter smells return even after cleaning the source areas.

Many people find it helpful to mark filter change dates on a calendar or in a simple note on the device itself.

Room and device housekeeping

  • Dust the unit exterior: Wipe grills and surfaces with a slightly damp cloth to prevent dust from being pulled back into the intake.
  • Maintain clear airflow paths: Periodically check that furniture rearrangements, new pet beds, or storage items have not blocked the air cleaner.
  • Coordinate with cleaning: Run the air cleaner on a higher setting for a while after vacuuming or changing bedding, when more dander is temporarily in the air.

Seasonal adjustments and storage

  • All-year use: For most pet owners with allergies, year-round operation in key rooms is helpful because pets shed and groom continuously.
  • If you ever pause use: Store the unit in a dry place, remove heavily used filters, and cover the intake and outlet to keep dust out.
  • Restarting after storage: Inspect filters for dust, odor, or damage and replace as needed before returning the unit to daily use.

Putting It All Together: Practical Takeaways and Specs to Look For

Managing pet dander allergies at home means reducing the amount of allergen in the air you breathe and on the surfaces you touch most. The most consistent results come from pairing a well-chosen air cleaner with realistic bedroom rules, targeted cleaning, and thoughtful pet care.

In summary, focus first on the rooms where you spend the most hours, especially the bedroom and main living area. Keep pets and heavy fabrics out of at least one room if possible, and use your air cleaner continuously rather than occasionally.

Checklist: Specs to look for in a pet dander allergy air cleaner

  • Filtration type: True HEPA or equivalent fine particle filter for allergen capture.
  • Pre-filter: Washable or replaceable layer to catch hair and large dust before it reaches the main filter.
  • Odor control (optional but useful): Activated carbon or similar media if pet or litter odors are a concern.
  • Room coverage: Rated to handle the size of your bedroom or main living area on a medium or quiet setting.
  • Noise level: A low-speed mode quiet enough for overnight use in the bedroom.
  • Energy use: Reasonable power draw for continuous operation, especially if running 24/7.
  • Filter access: Easy-to-open panels and clearly labeled filters to simplify maintenance.
  • Ozone-free design: Filtration-focused operation without intentional ozone production.
  • Physical size and placement: Compact enough to fit near your bed or seating area with several inches of clearance on all sides.

Using this checklist, you can match an air cleaner to your rooms, your pets, and your daily routines. When combined with consistent grooming, cleaning, and bedroom control, it becomes a powerful tool for making pet dander allergies more manageable while keeping your animals at home with you.

Frequently asked questions

Which air cleaner specifications or features most affect removal of pet dander?

Filtration efficiency for fine particles (true HEPA-level capture), adequate airflow for the room size, and a washable or replaceable pre-filter for hair all matter most. Optional activated carbon helps with odors but does not replace particle filtration. Together these features determine how effectively the unit reduces airborne pet allergens.

Why might an air cleaner not reduce my allergy symptoms?

Common reasons include an undersized unit for the space, poor placement or blocked airflow, intermittent use, or heavy allergen loads on surfaces that keep reintroducing dander. Neglected filters can also dramatically reduce performance. Addressing sizing, continuous operation in key rooms, and surface cleaning usually improves results.

Are ozone-generating or ionizing air cleaners safe for people with pet allergies?

Devices that deliberately produce ozone or rely primarily on reactive chemistry can irritate the airways and are generally not recommended for people with allergies or asthma. Mechanical filtration (HEPA) and carbon-based odor control avoid intentional ozone generation and are safer choices. Always choose units that specify they do not emit harmful levels of ozone.

How long does it usually take to notice symptom improvement after improving air cleaner setup and habits?

Some people notice reduced symptoms within a few days when bedroom exposure and main pet zones are controlled and air cleaners run continuously. More complete improvements, especially where dander is embedded in fabrics, can take several weeks of combined filtration and surface cleaning. Consistent maintenance speeds meaningful change.

How often should I check or replace filters in a home with shedding pets?

Inspect washable pre-filters monthly and clean them as needed during heavy-shedding periods; HEPA and odor filters should be checked on the manufacturer’s recommended schedule but may need earlier replacement if airflow drops or dust buildup is visible. Marking change dates and watching performance cues helps prevent reduced efficiency. Faster replacement is common in pet homes.

Can grooming and cleaning replace the need for an air cleaner?

Grooming pets and regular cleaning significantly reduce dander but rarely eliminate airborne allergens on their own, especially in shared living spaces. Air cleaners help capture fine particles before you breathe them and reduce background levels between cleanings. Best results come from combining grooming, surface cleaning, bedroom rules, and targeted air filtration.

Formaldehyde in Homes: Sources, Health Risks, and Practical Ways to Reduce It

Isometric living room with air purifier reducing indoor gases

Formaldehyde in homes comes mainly from building materials, furniture, household products, and combustion sources, and you reduce it by controlling sources, improving ventilation, managing humidity, and using the right type of air cleaning. Indoor formaldehyde is a common volatile organic compound (VOC) that can irritate the eyes and airways and may contribute to long-term health risks, especially for sensitive people.

If your home is newer, recently renovated, tightly sealed, or full of pressed-wood furniture, you are more likely to have elevated formaldehyde levels. You cannot see it, but you can often connect it to patterns: irritation that feels worse indoors, strong chemical odors in certain rooms, or symptoms that flare when the home is warm and humid.

This guide explains where formaldehyde comes from, what typical exposure looks like in real homes, and how to make practical, step-by-step improvements without rebuilding your house. You will see concrete examples, comparison tables, and simple checklists you can use when choosing materials, operating ventilation, or shopping for air-cleaning equipment.

What Formaldehyde Is and Why It Matters Indoors

Formaldehyde is a colorless gas with a sharp, chemical odor. Indoors, it is one of the most important VOCs because it is released by many common materials and can build up in closed spaces. Even at relatively low concentrations, it can irritate the eyes, nose, and throat and trigger symptoms in people with asthma or other breathing problems.

Manufacturers use formaldehyde-based resins and binders in products such as composite wood panels, some textiles, and certain coatings and adhesives. These materials slowly release small amounts of gas into the air, a process called off-gassing. Off-gassing is strongest when products are new and when the air is warm and humid.

Formaldehyde matters in home air quality for several reasons:

  • It is widespread. Most homes contain at least a few formaldehyde-emitting materials or products.
  • It accumulates indoors. Tighter, energy-efficient construction can trap gases if ventilation is limited.
  • It affects sensitive groups. Children, older adults, and people with asthma or chronic respiratory conditions can react at lower concentrations.
  • It has long-term health implications. Long-term exposure to elevated levels is associated with chronic irritation and increased cancer risk in some exposure scenarios.

Understanding what formaldehyde is and how it behaves indoors is the first step toward deciding which actions make the biggest difference in your specific home.

Key Sources, Exposure Patterns, and How Formaldehyde Behaves

Formaldehyde in homes rarely comes from a single source. Instead, many small sources combine to create the total indoor level. Knowing where it comes from and how it behaves helps you prioritize changes that matter most.

Major Indoor Sources of Formaldehyde

  • Building materials and finishes
    • Composite wood products such as particleboard, MDF, and some plywood
    • Cabinets, shelving, and built-ins made from engineered panels
    • Engineered wood or laminate flooring and some underlayments
    • Certain insulation products, especially older ones with formaldehyde-based binders
    • Wall panels, trim, and decorative elements using strong adhesives
  • Furnishings and textiles
    • Pressed-wood furniture, desks, and bookcases
    • Upholstered furniture and mattresses with certain treatments
    • Wrinkle-resistant or “easy-care” fabrics, curtains, and bedding
    • Carpets and carpet pads with specific backings or adhesives
  • Household and personal products
    • Some cleaning agents and disinfectants
    • Glues, craft adhesives, paints, and varnishes
    • Certain cosmetics and nail products that release small amounts of formaldehyde
  • Combustion sources
    • Cigarette, cigar, and other tobacco smoke
    • Unvented or poorly vented gas stoves, ovens, and space heaters
    • Fireplaces and wood stoves, especially when burning inefficiently
    • Candles and incense used in small, poorly ventilated rooms

How Formaldehyde Levels Typically Vary

Formaldehyde levels are influenced by product age, ventilation, temperature, and humidity. Newer materials and higher heat and moisture generally mean more off-gassing.

Home situation Relative formaldehyde risk What usually drives levels
New construction or full remodel (0–12 months) Higher Large areas of new composite wood, flooring, and finishes off-gassing at once
Older home with limited recent changes Lower to moderate Residual emissions from older materials plus everyday product use
Tightly sealed, energy-efficient home Moderate to higher Reduced air exchange, especially if windows rarely open
Home with heavy indoor smoking or frequent unvented gas use Higher during use Combustion byproducts and poor exhaust ventilation
Humid, warm climate with limited dehumidification Moderate to higher Increased off-gassing from materials at higher temperature and humidity
Typical home situations and how they influence formaldehyde levels. Example values for illustration.

Short-Term vs. Long-Term Health Effects

Health effects depend on both concentration and exposure time:

  • Short-term (acute) effects
    • Burning or watery eyes
    • Runny nose, nasal congestion, or scratchy throat
    • Coughing, chest tightness, or headaches
    • Skin redness or irritation after contact with certain products
  • Long-term (chronic) concerns
    • Persistent eye and airway irritation
    • Worsening of asthma or other respiratory diseases
    • Increased sensitivity to other indoor pollutants over time
    • Elevated cancer risk at sufficiently high and prolonged exposures

People who are most at risk include infants and young children, older adults, those with asthma or chronic lung disease, and anyone who spends many hours per day inside a single home, such as remote workers or people with limited mobility.

Real-World Home Scenarios and Practical Reduction Strategies

Turning general guidance into room-by-room action makes it easier to lower formaldehyde in a realistic way. The goal is not perfection but steady reduction of avoidable sources and better control of the indoor environment.

Scenario 1: Newly Renovated or Newly Built Home

Typical situation: New cabinets, flooring, trim, and furniture were installed within the last year. There is a noticeable “new house” or “new furniture” smell.

  • Ventilate aggressively for the first several months by opening windows when weather and outdoor air quality allow.
  • Run kitchen and bathroom exhaust fans longer than usual, even outside of cooking and showering.
  • Use your central HVAC fan setting to circulate air through filters more often, if available.
  • Consider a room air cleaner with gas-phase media in bedrooms and main living areas where people spend the most time.
  • Keep indoor temperatures and humidity at moderate levels to slow off-gassing.

Scenario 2: Older Home with New Bedroom Furniture

Typical situation: A new pressed-wood bed frame, dresser, and nightstands were installed within a few weeks of each other. One person wakes up with irritated eyes and stuffy nose that improve later in the day.

  • Open windows in that bedroom daily for short airing periods, especially in the first few months.
  • Run a portable air cleaner with gas-phase media on a higher setting for several hours before bedtime.
  • Pull furniture slightly away from walls to improve airflow around surfaces.
  • Wash new bedding and curtains to remove surface residues.
  • If symptoms remain strong, consider moving the most odorous piece (for example, a nightstand) to a better-ventilated area temporarily.

Scenario 3: Home with Gas Cooking and Limited Ventilation

Typical situation: The kitchen has a gas range and oven, but the range hood is weak or recirculating only. The home is often closed up due to weather or noise.

  • Always use the range hood on its highest effective setting while cooking.
  • Crack a nearby window during high-heat cooking to improve dilution.
  • Avoid using the oven to heat the home for long periods.
  • Schedule basic appliance maintenance to ensure proper combustion.
  • Place an air cleaner with gas-phase media near the kitchen or adjacent living area if cooking is frequent.

Scenario 4: Humid Basement or Lower Level

Typical situation: The basement has older paneling, stored paints and adhesives, and noticeable musty or chemical odors, especially in summer.

  • Use a dehumidifier to keep relative humidity in a moderate range.
  • Seal and store paints, adhesives, and solvents in tightly closed containers; move them to a detached or better-ventilated area if possible.
  • Improve air movement with fans so that stagnant corners do not trap pollutants.
  • Ventilate during hobbies like woodworking, painting, or crafting that use strong products.
  • If the basement is directly connected to living spaces, consider air sealing gaps between levels to limit pollutant transfer.

Room-by-Room Quick Wins

  • Living room and bedrooms
    • Limit the number of new pressed-wood items brought in at the same time.
    • Place air cleaners with gas-phase media where people sit or sleep.
    • Open windows periodically when outdoor conditions allow.
  • Kitchen
    • Use and maintain exhaust fans during every cooking session.
    • Store strong cleaners in sealed containers away from living areas.
  • Bathrooms and laundry
    • Run bath fans during and after showers to control humidity.
    • Ventilate when using strong cleaners or products with noticeable odors.
  • Basement, garage, and storage
    • Keep VOC-heavy products contained and away from sleeping areas.
    • Use dehumidification where dampness is persistent.

Common Mistakes and Troubleshooting Signs

Even when people are trying to improve indoor air quality, a few common missteps can limit progress. Recognizing these patterns helps you troubleshoot whether formaldehyde is still a problem in your home.

Common Mistakes That Keep Formaldehyde Levels Higher

Mistake What it looks like in real life Better approach
Relying on particle-only filters Using a HEPA air cleaner and assuming it removes gases like formaldehyde Choose units that include gas-phase media in addition to particle filtration
Bringing in many new items at once Filling a room with new cabinets, furniture, and flooring in a short time Phase in purchases when possible and ventilate aggressively after large projects
Ignoring humidity and temperature Allowing the home to stay hot and humid for long periods Use air conditioning or dehumidifiers to keep conditions moderate
Running exhaust fans for only a minute or two Turning off kitchen or bath fans as soon as cooking or showering ends Run fans for at least 15–20 minutes after activities that generate pollutants
Storing VOC-heavy products in living spaces Keeping paints, solvents, and strong adhesives in closets or under beds Move them to detached or better-ventilated areas and keep containers sealed
Frequent mistakes that limit formaldehyde reduction and how to correct them. Example values for illustration.

Clues That Formaldehyde May Still Be an Issue

  • Symptom patterns
    • Eye, nose, or throat irritation that is clearly worse at home and improves when you are away for several hours.
    • Symptoms that are strongest in specific rooms, such as a newly furnished bedroom or finished basement.
    • Asthma or breathing symptoms that flare in warm, humid conditions indoors.
  • Odor patterns
    • Persistent sharp or antiseptic-like odors near new cabinets, flooring, or furniture.
    • Smells that intensify when the home is closed up for several days.
  • Home history
    • Recent renovation with large amounts of new composite wood, flooring, or paneling.
    • Frequent use of unvented gas heaters or indoor smoking.

If these clues match your situation, it may be worth prioritizing ventilation, source reduction, and, if needed, targeted testing to better understand actual concentrations.

Safety Basics for Managing Formaldehyde in Homes

While most homes do not reach the very high concentrations seen in some industrial settings, it is sensible to treat formaldehyde as a pollutant to minimize, especially for sensitive occupants. A few basic safety principles can guide decisions about materials, activities, and equipment.

Reduce Exposure for Sensitive People

  • Locate bedrooms and main living spaces away from garages, storage rooms, or hobby areas that use strong products when possible.
  • Ventilate thoroughly after painting, floor refinishing, or installation of new cabinetry, and avoid having children or people with asthma in those areas until odors clearly diminish.
  • Do not smoke indoors, and avoid heavy use of candles or incense in small, enclosed rooms.
  • If someone in the home has asthma or chronic lung disease, consider using gas-phase air cleaning in that person’s bedroom and main living area.

Use Combustion Appliances Safely

  • Have gas stoves, ovens, and space heaters inspected and serviced as recommended to ensure proper combustion.
  • Always use kitchen exhaust fans while cooking on gas burners, and run them long enough to clear the air.
  • Make sure fireplaces and wood stoves are vented correctly and that chimneys or flues are maintained.
  • Never use outdoor grills, generators, or gasoline-powered tools inside the home or attached garage.

Handle VOC-Heavy Products with Care

  • Read labels and follow ventilation instructions when using paints, adhesives, and coatings.
  • Limit the amount of strong cleaners or solvents used at one time; choose milder options when they are adequate for the task.
  • Keep containers tightly closed when not in use, and avoid long-term storage in closets that open directly into bedrooms or living rooms.

Long-Term Management, Testing, and Ongoing Maintenance

Managing formaldehyde is not a one-time project. Materials continue to age, new products enter the home, and ventilation patterns change with seasons. A long-term approach keeps levels from creeping back up.

When and How to Test

  • Short-term test kits can give a snapshot over several hours or days and are useful after major renovations or when symptoms suddenly appear.
  • Longer-term samplers that stay in place for a week or more provide a better picture of typical exposure in frequently used rooms.
  • Professional assessments can combine targeted measurements with a walkthrough to identify likely sources and ventilation gaps.
  • General VOC monitors are helpful for tracking overall VOC trends but usually do not report formaldehyde specifically; they are better for spotting changes than for exact numbers.

Maintenance for HVAC and Air Cleaning Equipment

  • Replace central HVAC filters on a regular schedule so they continue to capture particles that can interact with gases and impact overall air quality.
  • For air cleaners with gas-phase media, follow the recommended replacement interval; saturated media becomes less effective over time.
  • Keep vents, returns, and air cleaner intakes free of obstructions so that airflow is not restricted.
  • Check that exhaust fans actually move air to the outdoors rather than simply recirculating it, and clean fan grilles as needed.

Material and Product Decisions Over Time

  • When replacing flooring, cabinets, or furniture, favor simpler designs and materials with fewer glued layers.
  • Spread out major purchases so that not everything is new at once, especially in small or poorly ventilated rooms.
  • Wash new textiles such as bedding, curtains, and washable slipcovers before use, especially if they have a strong chemical odor.
  • Revisit storage areas annually to remove or relocate old paints, solvents, and adhesives that are no longer needed.

Practical Takeaways and Specs to Look For

Reducing formaldehyde in homes is about stacking small, practical steps rather than searching for a single perfect fix. Focus first on major sources, then on ventilation and environmental control, and finally on targeted filtration where it offers clear benefits.

In most homes, the biggest improvements come from limiting high-emitting materials, using exhaust ventilation consistently, keeping humidity moderate, and choosing air-cleaning solutions that are actually designed to remove gases rather than just particles.

Quick Takeaways You Can Act on This Month

  • Identify rooms with the strongest chemical odors or symptom patterns and prioritize them for ventilation and air cleaning.
  • Use kitchen and bathroom exhaust fans longer and more consistently, especially during and after cooking or cleaning.
  • Keep indoor humidity in a moderate range with dehumidifiers or air conditioning as needed.
  • Store paints, adhesives, and strong cleaners outside main living areas whenever possible.
  • When buying new furniture or doing renovations, phase in changes and allow new items to air out before heavy use.

Specs to Look For When Choosing Air-Cleaning and Ventilation Solutions

When you are ready to invest in equipment or upgrades that can help with formaldehyde and other VOCs, use this checklist to compare options.

  • For room air cleaners
    • Includes a dedicated gas-phase filtration stage (such as activated carbon or other sorbent media), not just a particle filter.
    • Provides clear information on the amount of gas-phase media and recommended replacement intervals.
    • Has a clean air delivery rate (CADR) or airflow rating appropriate for the size of the room.
    • Offers multiple fan speeds so you can run it quietly at night and higher during the day.
  • For central HVAC upgrades
    • Filter options that combine adequate particle filtration with optional gas-phase media modules.
    • Fan settings that allow continuous or extended circulation when extra filtration is desired.
    • Professional evaluation of ductwork and return placement to ensure even air distribution.
  • For ventilation improvements
    • Kitchen and bathroom fans rated for sufficient airflow for the size of the room.
    • Fans that exhaust directly outdoors rather than recirculating air.
    • In tight homes, consideration of balanced mechanical ventilation with heat or energy recovery to maintain comfort and manage energy use.

By combining thoughtful material choices, consistent ventilation, humidity control, and appropriately specified air-cleaning equipment, you can steadily reduce formaldehyde in your home and create a more comfortable, healthier indoor environment over time.

Frequently asked questions

Which air cleaner features matter most for reducing formaldehyde in a home?

Look for a dedicated gas-phase filtration stage (for example, activated carbon or another sorbent) with enough media to provide meaningful contact time, clear replacement intervals, and an airflow rating appropriate for the room size. Particle-only technologies such as HEPA do not remove gases effectively, so gas-phase media and sufficient airflow are key.

Is using a HEPA air purifier enough to remove formaldehyde?

No. HEPA filters are excellent at removing particles but do not capture gaseous pollutants like formaldehyde. To reduce formaldehyde you need air cleaning that includes gas-phase sorbents; combining ventilation and humidity control also helps.

What precautions should I take to protect children and people with asthma from formaldehyde?

Prioritize source reduction (avoid or limit high-emitting materials), maintain good ventilation especially after renovations, and control temperature and humidity to reduce off-gassing. Consider placing gas-phase air cleaning in bedrooms or main living areas for sensitive occupants and avoid indoor smoking or unvented combustion appliances.

How can I tell if formaldehyde may be a problem in my home without specialized testing?

Watch for symptom patterns (eye, nose, or throat irritation that improves away from home), persistent sharp chemical odors near new furniture or finishes, and recent renovations involving composite wood. These clues suggest testing or targeted interventions may be warranted, since symptoms and odors are only indirect indicators.

How long does off-gassing from new composite wood furniture usually last?

Off-gassing is typically strongest in the first weeks to months after installation, with emissions declining over time, but low-level release can continue for a year or more depending on the material, temperature, and humidity. Keeping items well-ventilated and maintaining moderate indoor humidity speeds up the reduction in emissions.

Will dehumidifiers, air conditioning, or HVAC filters reduce formaldehyde levels?

Controlling temperature and humidity with air conditioning or dehumidifiers reduces the rate of off-gassing from materials, which lowers indoor concentrations indirectly. Standard HVAC particle filters do not remove gases unless they include specific gas-phase media; for direct removal, use dedicated sorbent media or add room air cleaners with gas-phase stages along with good ventilation.

Carbon Filter vs HEPA: What Each One Removes (And What It Doesn’t)

Isometric comparison of HEPA and carbon air filters

The short answer is that HEPA filters remove particles (dust, pollen, smoke, spores), while activated carbon filters remove many gases and odors, and neither one can do the other’s job well. To clean indoor air effectively, you need to match your filter to the specific pollutants in your home.

People often search for “carbon filter vs HEPA” hoping to find which one is better. In reality, they handle different parts of indoor air pollution: HEPA for particulate matter and allergens, carbon for smells and some chemicals. Choosing the wrong type leads to disappointment, even if the device itself is high quality.

This guide explains how each filter works, what it removes and misses, where each one shines in real rooms (bedrooms, kitchens, basements), and how to avoid common mistakes. You will also see safety basics, maintenance tips, and a practical checklist of specs to look for when you compare air purifiers, furnace filters, or standalone filtration units.

Carbon Filter vs HEPA: What They Are and Why It Matters

From a home air quality standpoint, HEPA and activated carbon filters are complementary tools, not competitors. Understanding the difference helps you avoid buying a “great” filter that does nothing for your actual problem.

  • HEPA (High Efficiency Particulate Air) filters target solid and liquid particles suspended in air.
  • Activated carbon filters target many gases and odors that glide straight through HEPA media.

In practical terms:

  • If you see or feel the problem (dust on furniture, visible smoke haze, itchy eyes from pollen), a particle filter like HEPA is essential.
  • If you mostly smell the problem (cooking smells that linger, musty basement odor, traffic fumes, paint or cleaner smells), an activated carbon filter becomes critical.

Most homes have both particles and gases, so many air purifiers and HVAC filter upgrades combine HEPA or HEPA-like media with a carbon layer. The goal is not to pick a winner in “carbon filter vs HEPA,” but to use each where it is strongest.

How HEPA and Carbon Filters Work (and What They Miss)

Although both are called “filters,” they rely on very different physical processes.

How HEPA Filters Work

HEPA filters are dense mats of fibers arranged so that air can pass but fine particles cannot easily escape. As air moves through the filter, particles are captured by several mechanisms:

  • Interception – a particle follows the airstream but brushes against a fiber and sticks.
  • Impaction – a heavier or faster-moving particle cannot follow the air’s curve and slams into a fiber.
  • Diffusion – very tiny particles move randomly (Brownian motion) and eventually collide with fibers.

Certified HEPA media is designed to capture a very high percentage of particles around 0.3 microns in size, which is a “worst case” size. In normal use, HEPA usually performs as well or better on both smaller and larger particles.

HEPA is good at removing:

  • Household dust and dust mite debris
  • Pollen from trees, grasses, and weeds
  • Pet dander and hair fragments
  • Fine smoke particles from wildfires, cigarettes, candles, and cooking
  • Airborne mold spores (once they are in the air)
  • Many bacteria attached to droplets or dust
  • General fine particulate matter (PM2.5)

HEPA is poor at removing:

  • Individual gas molecules and vapors
  • Odors from cooking, pets, or musty spaces
  • Most volatile organic compounds (VOCs) from cleaners, paints, and new materials
  • Carbon monoxide, radon, and other small gases

How Activated Carbon Filters Work

Activated carbon (also called activated charcoal) is carbon that has been processed to create a maze of microscopic pores. This structure gives it an enormous internal surface area, where gas molecules can stick in a process called adsorption (not absorption).

In air cleaners and HVAC add-ons, activated carbon is usually used as:

  • Loose granules or pellets in a cassette or tray
  • Carbon-impregnated foam or nonwoven sheets

The performance of a carbon filter depends heavily on:

  • Carbon mass – more grams of carbon generally mean more capacity for gases.
  • Contact time – slower airflow through the carbon usually improves adsorption.
  • Gas type – some VOCs stick readily; others barely adsorb at all.
  • Humidity – high humidity can compete with gases for adsorption sites.

Activated carbon is good at reducing:

  • Everyday household odors (cooking, mild pet smells, garbage)
  • Many smoke odors and some smoke-related gases
  • Some VOCs from paints, cleaners, new furniture, and flooring
  • Some traffic-related gases that infiltrate indoors

Activated carbon is poor at reducing:

  • Dust, pollen, pet dander, and spores (these are particles, not gases)
  • Very small or weakly adsorbing gases such as carbon monoxide
  • Heavy or continuous VOC loads when only a thin carbon pad is used
  • Odors once the carbon media is saturated (even if it still looks clean)

Side by Side: What Each Filter Type Handles

Use the comparison below to quickly map your main concern to the right filter type.

Indoor Air Pollutant HEPA Filter Performance Activated Carbon Performance
Dust and dust mite debris Very effective (captures airborne dust and fine debris) Not designed for particles
Pollen (seasonal allergies) Very effective, primary solution No direct effect
Pet dander and hair fragments Effective at reducing airborne dander Helps only with related pet odors
Airborne mold spores Effective at capturing spores in the air Helps with musty odor compounds only
Wildfire or cigarette smoke particles Effective for haze and PM2.5 Effective for many smoke odors and some gases
Cooking particles (grease, fine aerosols) Helps reduce fine cooking particles Limited for particles, better for cooking smells
General household odors Minimal impact Often noticeably reduces odors
VOCs from paint, cleaners, new furniture No meaningful removal Sometimes helpful, depends on VOC type and carbon mass
Traffic-related gases No effect Some components may be reduced
Carbon monoxide, radon No effect Not reliably removed, not a safety solution
Comparison of what HEPA and activated carbon filters typically handle in homes. Example values for illustration.

Real ‐World Scenarios: When You Need HEPA, Carbon, or Both

Most people do not buy a filter for “PM2.5” or “VOCs”; they buy one because something in their home is bothering them. The examples below translate technical filter behavior into everyday situations.

Scenario 1: Seasonal Allergies and Dust

Main complaints: Sneezing, itchy eyes, congestion, visible dust on surfaces.

Typical pollutants: Pollen, dust mites, fine dust, pet dander if you have animals.

  • Primary need: HEPA filtration to lower airborne allergen particles.
  • Carbon filter: Optional, mainly if you also notice pet or household odors.

In a bedroom, a HEPA-equipped air purifier running continuously can reduce nighttime exposure to pollen and dust, especially when combined with regular vacuuming and washing bedding in hot water.

Scenario 2: Asthma Sensitive to Irritants

Main complaints: Tight chest, coughing, or wheezing triggered by smoke, fragrance, or strong smells.

Typical pollutants: Fine particles plus irritating gases and VOCs.

  • Primary need: HEPA filtration to reduce fine particles that can inflame airways.
  • Secondary need: Activated carbon to reduce some odor and irritant gases.

In a living room where candles, fireplaces, or scented products are used, a combined HEPA + carbon unit is often more comfortable than HEPA alone. It will not replace medical care, but it can reduce triggers in the environment.

Scenario 3: Wildfire Smoke or Indoor Smoking

Main complaints: Smoky smell that lingers, visible haze, irritated eyes and throat.

Typical pollutants: Very fine smoke particles plus a complex mixture of gases.

  • Primary need: HEPA for smoke particles and visible haze.
  • Secondary need: Substantial activated carbon for odor and some gases.

For wildfire events, closing windows, sealing gaps, and running a HEPA + carbon purifier on a higher speed in the main occupied room can significantly cut indoor smoke levels. For indoor smoking, filtration helps, but source control (not smoking indoors) is still the most effective step.

Scenario 4: Cooking Odors and Grease

Main complaints: Frying or grilling smells that drift into bedrooms, sticky film on surfaces near the kitchen.

Typical pollutants: Grease droplets, fine cooking particles, and odorous gases.

  • Primary need: Ventilation (range hood vented outdoors if possible).
  • Helpful add ‐on: HEPA to reduce cooking particles and carbon to reduce lingering odors.

In small apartments where kitchen exhaust is weak, a HEPA + carbon unit placed near the cooking area and run before, during, and after cooking can noticeably reduce both haze and smell, although it cannot replace proper exhaust.

Scenario 5: New Furniture, Flooring, or Paint

Main complaints: “New” chemical smell, headaches, or irritation after renovations or new purchases.

Typical pollutants: VOCs off ‐gassing from adhesives, finishes, and materials.

  • Primary need: Ventilation and time for off ‐gassing.
  • Helpful add ‐on: Carbon filtration with a meaningful amount of carbon media.

A HEPA filter alone will not help much here, because VOCs are gases. A carbon filter can reduce some of the smell, but you should not rely on it as your only strategy. Bringing in outdoor air and limiting new VOC sources are more important.

Scenario 6: Moldy or Musty Basement

Main complaints: Musty odor, concern about mold spores, feeling “stuffy” downstairs.

Typical pollutants: Mold spores, microbial VOCs, and high humidity.

  • Primary need: Moisture control and mold remediation.
  • Helpful add ‐on: HEPA to reduce airborne spores and carbon to reduce musty odors.

A HEPA + carbon unit can make a basement smell and feel better to be in, but it will not dry out damp walls or remove mold inside framing or carpet. Dehumidification and fixing water entry are non ‐negotiable.

Common Mistakes and Troubleshooting Cues

Many complaints about “air purifiers not working” come down to mismatched expectations, poor sizing, or incorrect setup. The table below summarizes frequent issues and what they usually mean.

What You Notice Likely Cause What to Check or Change
Air still smells bad, but dust is reduced HEPA only; no or minimal carbon media Add or upgrade activated carbon; confirm odor source is not ongoing and heavy
Air smells better, but dust settles quickly Carbon only; weak or no particle filtration Add HEPA or high efficiency particle filter; increase airflow or runtime
Odors were reduced at first, then slowly returned Carbon filter saturated with gases Replace carbon filter; consider a model with more carbon mass or lower fan speed for longer contact time
Filter looks clean, but allergy symptoms persist HEPA media loaded with fine particles you cannot see, or unit undersized Replace HEPA filter on schedule; verify clean air delivery rate (CADR) is suitable for room size
Good filters installed, but little improvement Bypass leaks or poor placement Check that filters are sealed correctly; move unit away from corners and obstructions; keep doors open for better circulation
Musty smell returns quickly after running purifier Ongoing moisture and active mold source Investigate humidity, condensation, or water leaks; address moisture and mold directly, then use filters as support
Typical troubleshooting cues for HEPA and carbon filter performance in homes. Example values for illustration.

Other Common Missteps

  • Relying on “HEPA ‑like” or “HEPA ‑style” claims without checking performance ratings. These may not capture fine particles as effectively as true HEPA media.
  • Using a tiny tabletop unit for a large open floor plan. Even with good filters, airflow may be far too low to make a noticeable difference.
  • Running the purifier only occasionally. For ongoing sources like pets, nearby traffic, or recurring smoke, continuous or long ‑duty operation is usually needed.
  • Ignoring humidity and ventilation. No filter can fix stale, under ventilated air or chronic dampness on its own.

Safety Basics: What Filters Can and Cannot Protect You From

HEPA and carbon filters improve comfort and reduce many exposures, but they are not full safety systems.

Limits With Serious Gas Hazards

  • Carbon monoxide (CO): Neither HEPA nor standard activated carbon filters can be trusted to remove CO at dangerous concentrations. Dedicated CO alarms and proper combustion venting are essential.
  • Radon: Radon gas is not reliably removed by consumer carbon filters. Radon requires specific testing and mitigation systems.
  • High ‑level chemical spills: Spills or releases of strong chemicals (for example, concentrated solvents) call for ventilation, evacuation, and appropriate protective equipment, not household filters.

Limits With Biological Contaminants

  • Mold growth: HEPA removes spores from the air, but mold on or inside building materials continues to grow and release spores until moisture is controlled and materials are cleaned or removed.
  • Bacteria and viruses: HEPA can capture many particles that carry microbes, but it does not sterilize air or replace hygiene, ventilation, or medical guidance.

Electrical and Placement Safety

  • Keep air purifiers on stable, level surfaces and away from water sources such as sinks or bathtubs.
  • Avoid blocking air inlets or outlets with curtains, furniture, or walls; this can overheat the motor and reduce performance.
  • Follow the manufacturer’s instructions for power strips and extension cords; high ‑speed operation can draw significant current.

Maintenance and Long Term Use

Even the best HEPA or carbon filter becomes ineffective if it is clogged, saturated, or installed incorrectly. Long ‑term performance depends on both replacement schedules and day‑to‑day habits.

HEPA Filter Care

  • Replacement interval: Often every 6–12 months of regular use, but heavy smoke or dust can shorten this. Follow the device’s guidance.
  • Visual checks: A HEPA filter may look only slightly gray yet still be highly loaded with fine particles. Do not rely solely on appearance.
  • Pre‑filter cleaning: Many systems include a washable pre‑filter for hair and large dust. Keeping this clean extends HEPA life and maintains airflow.

Activated Carbon Filter Care

  • Replacement interval: Often shorter than HEPA, because adsorption sites fill with gases. Odors returning is a common sign that replacement is due.
  • Storage: If you buy spare carbon filters, keep them sealed in airtight packaging until use so they do not adsorb background odors while sitting on a shelf.
  • Humidity control: Very high humidity can reduce effectiveness; maintaining moderate indoor humidity helps carbon work more predictably.

Whole ‑Home vs Room ‑By ‑Room Strategies

  • Portable room units are flexible and can focus on bedrooms, nurseries, or main living spaces where you spend the most time.
  • HVAC filters with higher efficiency can improve baseline particle levels throughout the home, but may not include meaningful carbon media for odors and VOCs.
  • In many cases, a combination works best: an upgraded central filter for general particle reduction plus targeted room units with HEPA + carbon where specific problems are worst.

Practical Takeaways and Specs to Look For

Choosing between a carbon filter vs HEPA filter (or a combination) becomes easier once you match them to your actual pollutants and room conditions.

Key Takeaways

  • Use HEPA when the problem is visible or measurable particles: dust, pollen, pet dander, smoke haze, and spores.
  • Use activated carbon when the main complaint is odor or chemical smell: cooking, pets, musty basements, traffic fumes, or new materials.
  • Use both together when you have a mix of particles and odors, such as wildfire smoke, indoor smoking, or asthma triggered by both particles and smells.
  • Remember that filters treat air that passes through them; they do not replace ventilation, humidity control, or direct source removal.

Specs and Features to Look For

When you compare air purifiers or HVAC filter upgrades, use this checklist to align specs with your needs:

  • Filter type clearly stated: Look for true HEPA or equivalent performance data for particles, and explicit mention of activated carbon (not just “odor filter”).
  • Clean Air Delivery Rate (CADR): For room units, CADR values for smoke, dust, and pollen should be appropriate for your room size; higher CADR means more cleaned air per minute.
  • Carbon mass or thickness: For odor and VOC control, a thicker or heavier carbon section generally offers better capacity than a thin, lightweight pad.
  • Fan speeds and noise levels: You need a speed you can tolerate long‑term; quiet enough for sleeping, powerful enough for daytime cleanup.
  • Filter access and cost: Check how easy it is to replace filters and what replacement HEPA and carbon elements are likely to cost over several years.
  • Sealing and construction: Gaskets or tight frames around filters help prevent unfiltered air from bypassing the media.
  • Energy use: If you plan to run the unit continuously, consider power consumption at the speed you will actually use.

By focusing on these specifications—and by being clear about whether your main concern is particles, gases, or both—you can choose HEPA, carbon, or a combined system that actually improves the air you breathe, rather than just moving it around.

Frequently asked questions

What specifications and features should I prioritize when comparing carbon filter vs HEPA air purifiers?

Prioritize verified true HEPA performance and a CADR rating that matches your room size, plus a substantial carbon section (mass or thickness) for odors and VOCs. Also look for good sealing, easy filter access and replacement costs, and fan/noise levels you can run long‑term.

How do I know if I’m using the wrong type of filter for my problem?

If odors persist while dust is reduced, you likely need more carbon; if visible dust, pollen, or smoke haze remains, you need HEPA or more airflow/CADR. Check unit sizing, placement, runtime, and whether the device actually includes the media it claims.

Are carbon and HEPA filters safe to use for everyday indoor air quality, or do they miss hazards I should worry about?

They are safe and effective for many particles and common odors, but they do not replace safety systems: neither reliably removes carbon monoxide or radon, nor do they substitute for professional mitigation after chemical spills. Use alarms and specialist services where appropriate.

Can a single purifier with both HEPA and carbon replace ventilation or dehumidification?

No. A combined purifier reduces airborne particles and many odors but does not remove moisture, supply fresh outdoor air, or eliminate pollution sources. Ventilation, source control, and humidity management remain necessary for lasting indoor air quality.

How often should I replace HEPA and carbon filters to maintain effectiveness?

HEPA filters commonly need replacement every 6–12 months with regular use, while carbon filters often require replacement more frequently depending on odor and VOC exposure. Heavy smoke, continuous odors, or high runtime will shorten intervals; returning smells or reduced CADR are good cues to change filters.

Will running an air purifier nonstop use too much electricity or wear filters out faster?

Continuous operation increases energy use but most modern purifiers are relatively efficient; running at lower speeds when possible saves power. Higher fan speeds will load filters faster, so balance fan setting, CADR needs, and room coverage to optimize both energy use and filter life.

How Much Activated Carbon You Really Need to Remove Odors

Isometric living room with cutaway activated carbon air filter

You typically need a deep, reasonably heavy bed of activated carbon for meaningful odor and VOC removal, not just a thin black coating on a filter. The exact amount depends on room size, odor strength, and how long you want the filter to last before it fills up.

For light, occasional odors in a small bedroom, a modest granular carbon stage can be enough. For regular cooking smells, pet odors, smoke, or chemical fumes in larger rooms, you need a thicker carbon bed with noticeably more media and longer contact time. Instead of chasing a perfect gram number, it is more practical to match the carbon mass and filter design to how much odor your space actually produces.

This guide explains how activated carbon works, how to estimate your needs for odor and VOC control, what common mistakes to avoid, and which safety and performance specs to look for when choosing filters or air cleaners.

What Activated Carbon Is and Why the Amount Matters

Activated carbon is a highly porous form of carbon used to capture odors and gases such as volatile organic compounds (VOCs). It works by adsorbing gas molecules onto its internal surfaces rather than absorbing them like a sponge. Because the internal surface area is enormous, a relatively small mass of activated carbon can hold a large quantity of odor molecules—up to a limit.

The amount of carbon in a filter matters for two main reasons:

  • How much odor it can hold before it is saturated.
  • How long it works before odors begin to break through again.

If there is too little carbon, a filter may seem effective for a short time and then quickly lose its ability to control smells. A deeper carbon bed with more mass can handle higher odor loads and remain effective for longer, especially in rooms with ongoing sources such as cooking, pets, or smoke.

There is no universal grams-per-square-foot formula. Instead, you match carbon capacity to your room size, odor intensity, and runtime. The heavier and deeper the carbon stage (relative to airflow and odor load), the more robust your odor and VOC control will be.

Key Concepts: How Activated Carbon Removes Odors

Understanding a few basic concepts makes it easier to estimate how much activated carbon you need and why some filters work better than others.

Adsorption, Breakthrough, and Saturation

Activated carbon removes odors by adsorption—gas molecules stick to internal surfaces inside the carbon pores. Over time, those pores fill up:

  • Saturation: Most adsorption sites are occupied, so the carbon cannot hold much more.
  • Breakthrough: Odor molecules pass through the filter without being captured, and smells return.

The more suitable carbon you have (both in mass and pore structure), the longer it takes to reach saturation and breakthrough at a given odor load.

Carbon Bed Depth vs. Thin Coatings

Carbon filters are commonly built in two ways:

  • Thin carbon-coated sheets: A light dusting of carbon on foam or fiber. These help with mild, short-lived odors but saturate quickly with stronger gases.
  • Deep-bed granular or pellet carbon: A thick layer of loose or packed carbon particles. These hold substantially more odor and VOC mass and usually last longer.

When you are serious about odor removal, depth and mass matter more than simply having a black-colored layer.

Contact Time (Dwell Time)

Even with plenty of carbon, air must remain in contact with the media long enough for gas molecules to stick. This is called contact time or dwell time. It depends on:

  • Bed thickness: Deeper beds force air to travel farther through carbon.
  • Air velocity: Slower air gives odor molecules more time to adsorb.
  • Filter design: Pleats, canisters, and baffles can increase the path length without overly restricting airflow.

A thin coating of carbon in a high-speed airflow can have very little contact time, so odors pass through before they can be captured.

Room Size, Air Changes, and Odor Load

How much odor a filter must handle depends on:

  • Room volume (floor area and ceiling height).
  • Air changes per hour (ACH) through the filter or device.
  • Source strength (light, moderate, or heavy odors).

Larger rooms or open-plan spaces with frequent air circulation deliver more total odor mass to the carbon over time. That means you either need more carbon mass, more frequent replacement, or both.

Room / Use Scenario Approx. Room Size Odor Level Typical Carbon Need (Relative)
Small bedroom, light odors 100–200 sq ft Occasional cooking drift, mild pet odor Low to moderate (thin granular layer may suffice)
Living room with daily cooking and pets 200–400 sq ft Regular odors, multiple sources Moderate to high (deep-bed granular carbon preferred)
Room used for smoking or solvents 150–300 sq ft Heavy, continuous odors High (large carbon mass and frequent replacement)
Typical relative carbon needs by room type and odor strength. Example values for illustration.

Real-World Examples: Matching Carbon Amount to Odor Problems

Instead of focusing on an exact gram number, it is more useful to think in terms of scenarios. These examples can help you gauge whether you are using enough activated carbon for your situation.

Example 1: Small Bedroom with Mild Odors

Scenario: A 150 sq ft bedroom with one cat and occasional cooking smells drifting in from the kitchen.

  • Odor type: Light pet dander odor, cooking aromas a few times a day.
  • Carbon need: A modest granular carbon stage or a thicker carbon pre-filter can noticeably reduce smells.
  • Expected behavior: Odors should fade within 30–60 minutes when the filter runs on a medium setting.
  • Replacement pattern: Carbon may last several months before you notice reduced performance.

In this case, you do not need a very heavy carbon bed, but you still want more than a purely decorative thin coating.

Example 2: Open-Plan Living Area with Daily Cooking

Scenario: A 350 sq ft combined kitchen and living area with daily frying and baking, plus one dog.

  • Odor type: Regular cooking odors, occasional lingering grease smells, pet odor on soft furnishings.
  • Carbon need: A deeper, heavier carbon cartridge or canister designed specifically for gases and odors.
  • Expected behavior: Cooking smells should noticeably drop within an hour after cooking, not linger all evening.
  • Replacement pattern: Carbon may need replacement every few months, depending on how often and what you cook.

If a filter in this scenario uses only a thin carbon sheet, it will likely saturate quickly and stop controlling odors long before the rest of the filter looks dirty.

Example 3: Room with Indoor Smoking or Strong VOCs

Scenario: A 200 sq ft den where someone smokes or uses solvent-based paints and adhesives regularly.

  • Odor type: Tobacco smoke, solvent fumes, and persistent chemical odors.
  • Carbon need: A large mass of granular or pellet carbon with substantial depth and strong airflow through the media.
  • Expected behavior: Noticeable reduction in smoke odor soon after smoking stops, though complete removal may require ventilation as well.
  • Replacement pattern: Carbon can saturate quickly; expect shorter replacement intervals than in lighter-use rooms.

Here, the amount of activated carbon becomes critical. Thin coatings generally cannot keep up with the odor and VOC load, even if the device claims to have a carbon layer.

Scenario Visible Filter Clues Likely Outcome
Bedroom, light odors Moderately thick carbon pad; some granular feel Good comfort improvement; several months of useful life
Living area, daily cooking Deep cartridge or canister filled with carbon pellets Strong odor reduction; replacement every few months
Smoking room Thin black sheet only, no visible granules Brief improvement, then rapid odor breakthrough
How physical filter design hints at whether there is enough carbon for your odor problem. Example values for illustration.

Common Mistakes and Troubleshooting When Odors Won’t Go Away

Even with activated carbon in place, many people still struggle with persistent smells. Often the problem is not the technology itself but how it is being used or sized.

Mistake 1: Relying on a Thin Carbon Sheet for Heavy Odors

A very common mistake is assuming that any filter labeled “carbon” or “charcoal” is enough for smoke, strong cooking odors, or chemical fumes. Thin, flexible black sheets usually contain only a small amount of carbon.

Signs this is happening:

  • Odors improve for a day or two after installing a new filter, then quickly return.
  • The device is noisy and moves a lot of air, but smells remain noticeable.

What to do: Look for a design with a visibly thicker carbon section, more media volume, and, if possible, a separate gas stage rather than a single thin combination layer.

Mistake 2: Underestimating Odor Sources

Another mistake is assuming your odor load is “light” when it is actually moderate or heavy. Daily frying, multiple pets, scented cleaning products, and indoor smoking add up quickly.

Signs this is happening:

  • Odors seem to disappear while the device is on high, but return quickly when it is turned down or off.
  • You notice strong smells in fabrics, carpets, and upholstery even with filtration running.

What to do: Reduce sources where possible, increase ventilation, and choose a filter with more carbon mass and longer contact time.

Mistake 3: Ignoring Airflow and Placement

Even a well-designed carbon filter will struggle if air does not reach it effectively.

Signs this is happening:

  • Odors are strong on one side of the room but weaker near the device.
  • The device is blocked by furniture or placed in a corner with poor circulation.

What to do:

  • Place the device where air can circulate freely around it.
  • Run it long enough and at an appropriate fan speed to process room air multiple times per hour.

Troubleshooting Checklist When Odors Persist

  • Check filter age: Has the carbon been in use longer than recommended for your odor level?
  • Inspect the carbon stage: Is it a deep bed or just a thin sheet?
  • Look for dust buildup: Is a clogged pre-filter reducing airflow to the carbon?
  • Reassess sources: Have new odor sources (paint, new furniture, smoking, pets) been added?
  • Evaluate runtime: Is the device running long enough each day to keep up with odors?

Safety Basics When Using Activated Carbon for Odor Removal

Activated carbon is generally safe for home use, but there are some basic safety points to keep in mind when using it for odor and VOC control.

Do Not Over-Rely on Carbon for Hazardous Gases

Activated carbon is helpful for everyday indoor odors and many VOCs, but it is not a substitute for proper ventilation or professional controls when dealing with potentially hazardous gases or very strong chemical exposures.

  • Use carbon filters as one layer of protection, not the only one.
  • For strong fumes from paints, solvents, or fuel, increase ventilation and follow product safety instructions.

Avoid DIY Reactivation Attempts

Some people try to “reactivate” or “recharge” carbon at home by heating it in an oven or exposing it to high heat. This is not recommended.

  • Household ovens cannot reproduce the controlled high-temperature conditions used in industrial reactivation.
  • Heating filters may damage plastic components or release trapped contaminants.

For home use, the safe and reliable approach is to replace saturated carbon with new media.

Handle Used Carbon Filters Carefully

Used carbon has adsorbed a variety of gases and odors. While it is not usually hazardous waste, it should be handled sensibly:

  • Follow local guidance for disposing of used filters.
  • Avoid cutting or tearing filters open, which can release dust and trapped material.
  • Wash hands after handling used filters, especially if you are sensitive to chemicals or allergens.

Consider Sensitive Occupants

For people with asthma, chemical sensitivities, or respiratory issues, odor and VOC control is only part of the picture.

  • Use carbon together with good particle filtration for dust, smoke particles, and allergens.
  • Ensure adequate ventilation so that carbon is not the only strategy for managing indoor air quality.

Maintenance and Long-Term Use of Activated Carbon Filters

Even a large amount of activated carbon has a finite life. How you maintain and operate your system strongly affects how much odor it can remove and for how long.

Replacing Carbon Before Strong Odors Return

Waiting until odors are overwhelming before changing filters usually means you have been living with reduced performance for some time.

  • Monitor how long it takes for everyday smells (like cooking) to fade compared with when the filter was new.
  • Shorter odor-clear times usually mean the carbon is still effective; longer times suggest saturation.
  • In heavier odor environments, plan for more frequent replacement than in light-use rooms.

Protecting Carbon with Pre-Filtration

Dust and particles can clog the pores and pathways in a carbon bed, reducing airflow and contact between gases and the media.

  • Use a pre-filter to catch larger particles like dust, hair, and lint before they reach the carbon.
  • Clean or replace the pre-filter as recommended so that airflow stays strong.

Good pre-filtration helps ensure the carbon is used primarily for gas adsorption rather than becoming a dust trap.

Storing Spare Carbon Filters

If you buy replacement carbon filters in advance, how you store them affects their future performance.

  • Keep unopened filters in their original packaging until needed.
  • Store in a cool, dry place away from strong odors or chemicals, which could slowly load the carbon.
  • Avoid humid storage areas, as moisture can occupy adsorption sites.

Using Carbon with Other Odor-Reduction Strategies

Activated carbon works best as part of a broader odor-control plan:

  • Source control: Use low-odor or low-VOC products when possible and limit indoor smoking.
  • Ventilation: Use exhaust fans when cooking or showering and open windows when outdoor air quality allows.
  • Cleaning: Regularly clean soft surfaces that can hold odors, such as carpets and upholstery.

Reducing the overall odor load means the carbon you have can last longer and perform more consistently.

Practical Takeaways and Specs to Look For

When you put all of these pieces together, choosing the right amount of activated carbon becomes much more straightforward.

Key takeaways about how much activated carbon you need:

  • Match carbon capacity to odor intensity and room size rather than aiming for a single gram target.
  • For light, occasional odors, a moderate granular carbon layer can be enough if it is replaced on schedule.
  • For daily cooking, pets, smoke, or strong VOCs, look for a deep-bed carbon design with visibly more media.
  • Expect that heavier odor loads will require more carbon and more frequent replacement.
  • Combine carbon with ventilation and source control for the best long-term results.

Specs and Features to Look For in Carbon Filters

When you compare filters or air cleaners for odor and VOC control, pay attention to these practical details:

  • Carbon type and form: Granular or pellet carbon usually indicates more media mass than a thin coated sheet.
  • Carbon bed thickness: Deeper cartridges or canisters typically provide better capacity and contact time.
  • Overall filter weight: For similar-sized filters, heavier models often contain more media (though frame materials also contribute).
  • Dedicated gas stage: Separate stages for particles and gases often allow more room for carbon.
  • Airflow and fan settings: Multiple speeds help balance contact time and room air changes per hour.
  • Recommended replacement interval: Short intervals in heavy-use environments are normal; very long intervals with minimal carbon may indicate limited capacity.
  • Pre-filter presence: A washable or replaceable pre-filter helps protect the carbon from dust and extend its life.
  • Room size rating: Make sure the device is rated for at least the volume of the space where you need odor control.

By focusing on carbon depth, media mass, and how well the device matches your room and odor sources, you can choose a setup that uses enough activated carbon to make a clear, lasting difference in your indoor air.

Frequently asked questions

Which filter specifications are most important when choosing activated carbon for odor removal?

Look for carbon form (granular or pellet vs. thin coating), bed thickness, and total media mass because those determine how much odor the filter can hold. Also check whether the device has a dedicated gas stage, suitable airflow settings, and a room-size rating so the filter matches your space and odor load.

Why does my carbon filter stop removing odors quickly even when it’s new?

Common causes include a thin carbon coating that has low capacity, insufficient contact time from high air velocity, poor device placement, or a clogged pre-filter reducing airflow. Verify the physical carbon depth and ensure the unit is running at an appropriate speed and location for your room.

Is activated carbon safe to use for indoor odor and VOC control?

Activated carbon is generally safe for routine indoor odor and many VOC reduction tasks, but it is not a replacement for ventilation or professional controls for hazardous gases. Handle used filters carefully, follow disposal guidance, and combine carbon with ventilation and particle filtration for sensitive occupants.

How often should I replace activated carbon filters?

Replacement frequency depends on odor intensity, room size, and runtime: light-use areas may last several months, while heavy-use environments (smoking, frequent cooking, solvents) can need replacement every few months or sooner. Monitor odor breakthrough and follow manufacturer intervals as a baseline.

Can I reactivate or recharge used activated carbon at home?

No—home reactivation is not recommended because household ovens and simple heating cannot reproduce the controlled industrial conditions needed and can release trapped contaminants or damage filter components. Replace saturated carbon with fresh media for safety and reliability.

Will increasing fan speed always improve odor removal?

Not necessarily: higher fan speeds increase the volume of air processed but reduce contact time, which can lower adsorption efficiency unless the carbon bed is deep enough. Using a deeper carbon stage or running at moderate speeds for longer periods often yields better odor control.

Activated Carbon Filters Explained: VOCs, Odors, and Their Real Limits

Isometric illustration of activated carbon filter capturing gas molecules

Activated carbon filters remove many household odors and a portion of VOCs, but they do not catch dust, pollen, or every gas in your indoor air. They are best used alongside particle filters like HEPA plus good ventilation and source control, not as a stand‑alone solution. Understanding what these carbon filters can and cannot do helps you avoid disappointment, wasted money, and a false sense of safety.

This guide explains how activated charcoal filters work, which odors and chemical fumes they are good at capturing, where they fall short, and how to choose and maintain them for real-world home use. You will see concrete examples, common mistakes to avoid, and simple specs to check before you buy or replace a filter so you can match your air cleaning strategy to your actual indoor air quality problems.

What Activated Carbon Filters Are and Why They Matter

Activated carbon filters (also called activated charcoal filters or gas-phase filters) use highly porous carbon to capture gas molecules and odor compounds from the air. Instead of trapping particles like dust or pollen, they target chemicals in the gas phase, especially many volatile organic compounds (VOCs) and nuisance smells.

In homes, activated carbon is commonly added to portable air purifiers, whole-house filtration cabinets, and some ventilation or recirculation systems. People usually turn to carbon when they notice:

  • Persistent cooking or pet odors that linger even after cleaning.
  • New paint, flooring, or furniture smells from renovation or remodeling.
  • Smoke odors from wildfires, neighbors, or past smoking indoors.
  • Musty smells that remain after fixing a moisture problem.

These filters matter because many VOCs are too small and too light to be captured efficiently by particle filters, even very good ones. Without a gas-phase medium like activated carbon, an air cleaner can remove visible haze while leaving much of the odor and some chemical exposure behind.

At the same time, carbon filters are often oversold. Very thin, lightweight carbon pads may only offer modest odor reduction, and no amount of carbon will fix an active source like a gas leak, ongoing mold growth, or heavy smoking indoors. The goal is to use carbon where it is effective and pair it with other measures where it is not.

Key Concepts: How Activated Carbon Filters Work

Activated carbon works by providing a huge internal surface area where gas molecules can stick. Several key ideas explain how and why this happens.

What “Activated” Carbon Means

Regular carbon materials (such as charcoal) are processed at high temperatures and with specific treatments to create millions of microscopic pores. This activation step turns a relatively dense material into a sponge-like network of internal tunnels and cavities.

Because of this structure, a small amount of activated carbon can have the internal surface area of a large house. That surface is where gas molecules are held when air passes through the filter.

Adsorption vs. Absorption

Activated carbon filters rely on adsorption, not absorption:

  • Adsorption means molecules cling to the surface of the carbon due to physical forces and sometimes chemical interactions.
  • Absorption means a substance is drawn into the bulk of a material, like water soaking into a sponge.

In a carbon filter, air flows across or through the carbon bed. As the air moves, some odor and VOC molecules stick to the carbon surface and are removed from the airstream. The more contact time and surface area available, the more can be captured on each pass.

Why Surface Area, Depth, and Airflow Matter

Three design factors largely determine how well a carbon filter performs:

  • Carbon mass: More grams of carbon usually mean more total capacity to hold VOCs and odors.
  • Bed depth: A deeper carbon layer gives air more time in contact with the media.
  • Airflow speed: Slower airflow through the carbon bed increases contact time per pass, improving removal efficiency, but reduces total air volume treated per minute.

There is always a tradeoff between airflow and gas removal per pass. Very thin carbon sheets in a high-speed purifier may move a lot of air but remove only a small fraction of VOCs with each pass, while a deep, dense carbon bed at moderate airflow can remove a higher fraction of gas pollutants but may move less air overall.

Typical roles of different filter types in home air cleaning. Example values for illustration.
Filter type Main target Examples of what it removes well What it does not handle
Pre-filter Large particles Hair, lint, large dust Fine particles, gases, VOCs
HEPA or high-efficiency particle filter Fine particles Pollen, dust, smoke particles, spores Gases, most odors
Activated carbon filter Gases and odors Many VOCs, cooking smells, pet odors, some smoke odors Dust, pollen, most microbes

In practice, the most effective home systems combine these media so each type of pollutant is handled by the filter that is best suited to it.

Real-World Examples: What Carbon Filters Can and Cannot Remove

Seeing how activated carbon behaves in everyday situations makes its strengths and limits clearer.

Common VOC and Odor Sources in Homes

Indoor air often contains a mix of VOCs and odor-causing compounds from sources such as:

  • Building and renovation materials: Fresh paint, varnish, sealants, flooring adhesives, new cabinets and furniture.
  • Daily activities: Cooking, cleaning sprays, air fresheners, candles, personal care products.
  • Combustion: Gas stoves, fireplaces, candles, and tobacco or other smoke.
  • Stored products: Solvents, glues, fuels, and hobby chemicals kept in living areas.

Many of these emit organic vapors that are reasonably well-suited to removal by a substantial activated carbon filter, especially when the source is intermittent rather than constant.

Situations Where Activated Carbon Helps

Examples where a well-designed carbon filter can make a noticeable difference include:

  • Post-renovation bedroom: After repainting and installing new flooring, a carbon-equipped purifier can help reduce the paint and adhesive smell while the room continues to off-gas.
  • Open-plan kitchen: For frequent pan-frying or strongly seasoned cooking, carbon can reduce lingering food odors that drift into nearby living spaces.
  • Pet area: In a room where litter boxes or pet bedding are already kept clean, carbon helps trim down residual pet smells.
  • Smoke-affected room: After addressing the source, carbon can lessen remaining smoke odors from wildfires or occasional indoor smoke exposure.
  • Craft or hobby room: When glues, resins, or solvents are used occasionally, a carbon filter can reduce the short-term VOC peaks in the room air.

In these cases, performance is best when the carbon filter has enough mass, the room is reasonably well sealed from new sources, and ventilation and source control are also used.

What Activated Carbon Filters Cannot Do

There are clear limits to what activated carbon can handle:

  • Particles: Carbon does not reliably remove dust, pollen, pet dander, mold spores, or fine smoke particles. A separate particle filter is needed.
  • Very small or reactive gases: Some gases, including certain acidic or very small polar molecules, are poorly captured by standard carbon and may require specialized media.
  • Strong, continuous sources: Heavy indoor smoking, an unvented gas appliance problem, or an active mold growth area will quickly overwhelm carbon and may saturate it in a short time.
  • Underlying building issues: Carbon cannot fix moisture intrusion, structural mold, or ventilation design problems. It can only reduce some of the odors that result.

Recognizing these boundaries prevents over-reliance on carbon filters when other interventions are more appropriate or urgent.

Common Mistakes and Troubleshooting Carbon Filter Performance

When people say their activated carbon filter “does nothing,” it is often due to avoidable setup or expectation issues rather than a completely ineffective product. Watching for these patterns can help you troubleshoot.

Frequent User Mistakes

  • Choosing a filter with too little carbon: Thin, feather-light carbon pads may have very limited capacity, especially in rooms with strong or frequent odor sources.
  • Running at the lowest fan speed only: Very low airflow may be quiet but can treat too little room air to make a noticeable difference, even if per-pass removal is decent.
  • Placing the unit poorly: Hiding a purifier behind furniture or in a corner with blocked intake or exhaust reduces how much room air actually passes through the carbon.
  • Ignoring saturation: Carbon that has been in place for many months in a high-VOC environment may be effectively full, even if it looks clean.
  • Expecting particle removal from carbon alone: Using carbon to solve dust or pollen problems leads to disappointment because it is the wrong tool for that job.

Simple Troubleshooting Cues

If your carbon filter does not seem to be working well, consider these quick checks:

  • Confirm the unit is actually pulling air (feel for airflow at the outlet).
  • Check that the carbon filter is installed in the right orientation and fully seated.
  • Try a higher fan speed for several hours to increase the volume of air treated.
  • Move the unit closer to the odor source or more central in the room.
  • Review how long the same carbon filter has been in use and whether odor problems have intensified recently.
Typical symptoms of carbon filter problems and likely causes. Example values for illustration.
Observed issue Likely cause Practical next step
Odors never improve, even when new Filter has very little carbon or source is too strong Reduce source, improve ventilation, or use a unit with more carbon mass
Odors improved at first, then returned Carbon saturated over time Replace the carbon filter and shorten future replacement intervals
Smell near the purifier is musty or stale Old carbon holding a mix of captured vapors Replace filter; check for moisture or mold issues nearby
Dust and allergies remain bad No effective particle filter in the system Add or upgrade a HEPA or similar particle filter
Unit is loud but room still smells Poor placement or air short-circuiting around the unit Reposition so intake and outlet are unobstructed and away from walls

When to Suspect a Source Problem Instead of a Filter Problem

Sometimes the issue is not the filter at all but an unresolved source. Warning signs include:

  • Odor intensity that spikes when a particular appliance or activity starts.
  • Musty smell that increases after rain or when humidity rises.
  • Chemical or fuel odors strongest in a specific closet, basement area, or attached garage.

In these cases, tracking down and addressing the source, and improving ventilation, will usually have a much larger impact than changing filter models or running more carbon.

Safety Basics When Using Activated Carbon Filters

Activated carbon filters are generally safe for home use, but there are some safety-related points to keep in mind so they support, rather than replace, critical protections.

Do Not Use Carbon as a Substitute for Hazard Detection

Carbon filters should never be relied on to manage or hide serious hazards. Specifically, they do not replace:

  • Smoke alarms or carbon monoxide detectors.
  • Proper venting and servicing of fuel-burning appliances.
  • Professional remediation for significant mold growth or chemical spills.

If you suspect a gas leak, combustion problem, or major chemical release, the correct response is to leave the area safely and contact appropriate help, not to run an air purifier harder.

Ventilation and Combustion Safety

When using combustion devices indoors, such as gas stoves or fireplaces, ventilation is the primary safety control. Activated carbon may reduce some odors from these sources but does not remove all harmful gases. Ensuring exhaust hoods, flues, and make-up air are working properly is more important than any filter for safety.

Handling and Disposal of Used Carbon Filters

Over time, used carbon filters can hold a mixture of adsorbed chemicals. For typical home use, basic precautions are usually enough:

  • Turn off the unit and allow it to sit briefly before opening, so dust settles.
  • Handle the filter by its frame where possible, and avoid crushing or cutting it.
  • Place the spent filter in a bag before discarding to help contain odors and dust.
  • Wash your hands after handling used filters, especially from smoke- or solvent-heavy environments.

Local rules may differ for disposal in specialized settings, but for ordinary household exposures, used filters are typically discarded with regular trash.

Maintenance, Replacement, and Long-Term Use

Because activated carbon works by filling up its available sites with gas molecules, it has a finite life. Good maintenance habits keep performance closer to what you expect.

How Long Carbon Filters Tend to Last

Filter life depends on several factors:

  • The amount of carbon in the filter (heavier, deeper filters usually last longer).
  • How many hours per day the system runs and at what fan speed.
  • The strength and frequency of VOC and odor sources in the space.
  • Humidity levels, which can compete with VOCs for adsorption sites.

In a typical home with moderate odor levels and a reasonable amount of carbon, replacement intervals are often on the order of a few months of regular use. In spaces with frequent smoke, strong cooking odors, or regular solvent use, saturation can occur much faster, and shorter replacement intervals are appropriate.

Signs Your Activated Carbon Filter Is Spent

Because carbon does not usually change appearance, you have to infer its condition from performance:

  • Odors that used to clear within an hour now linger for several hours or more.
  • A faint stale or musty smell near the purifier even when the room air seems otherwise clean.
  • Noticeable improvement right after installing a new filter, compared to the old one.

Tracking approximate installation dates and household conditions (for example, a period of wildfire smoke or recent remodeling) can help you anticipate when capacity is likely to be used up.

Why “Recharging” Carbon at Home Does Not Work Well

Once VOCs and odor molecules are adsorbed into the pores of activated carbon, they are held tightly. Industrial regeneration processes use high temperatures, controlled atmospheres, or chemical treatments to drive those molecules off and restore capacity. These processes are not practical or safe in a home setting.

Common home ideas such as washing the filter, leaving it in the sun, or heating it in an oven usually fail to restore meaningful capacity and can instead:

  • Damage the filter structure or supporting materials.
  • Release captured pollutants back into indoor air in an uncontrolled way.
  • Increase fire risk if heating is involved.

For typical consumer products, activated carbon filters are designed as consumables: once saturated, they should be replaced rather than regenerated at home.

Practical Takeaways and Specs to Look For

Putting all of this together, activated carbon filters are best seen as one tool in a broader indoor air quality plan. They are very useful for trimming down many household odors and some VOCs, but they cannot do everything and they eventually fill up.

Key Takeaways for Using Activated Carbon Filters

  • Use carbon alongside a good particle filter when you care about both odors/VOCs and dust, pollen, or smoke particles.
  • Address sources first: ventilate well during painting or cooking, store chemicals outside main living areas, and fix moisture issues promptly.
  • Expect to replace carbon regularly, especially after heavy odor events or in high-use rooms like kitchens.
  • Do not rely on carbon for safety-critical hazards such as gas leaks, carbon monoxide, or structural mold problems.

Specs and Features to Look For

When comparing air cleaners or replacement filters that use activated carbon, pay attention to:

  • Carbon mass or weight: More grams of carbon generally mean more capacity and longer life. Filters that feel substantially heavier for the same size often contain more carbon.
  • Bed depth: A visibly thicker carbon layer usually provides better gas contact than a thin coating or sprayed-on layer.
  • Airflow and room size rating: The system should be capable of circulating the air in your room several times per hour at a fan speed you can tolerate for noise.
  • Separate particle filtration: Look for a clearly defined particle filter stage (such as HEPA or another high-efficiency media) in addition to carbon if you also need dust and allergen control.
  • Replacement filter availability and cost: Check how often the manufacturer expects the carbon to be replaced and what that will cost over a year of typical use.
  • Operating environment: Consider humidity and temperature in the room; very damp areas may shorten effective carbon life.
  • Access and installation: Filters that are easy to access, orient correctly, and seal well inside the unit are more likely to perform as intended.

By focusing on these practical details and pairing activated carbon with source control, ventilation, and particle filtration, you can set realistic expectations and get the most value from gas and odor filtration in your home.

Frequently asked questions

What specifications should I check when choosing an activated carbon filter?

Look for the carbon mass or weight and the apparent bed depth first: heavier and thicker beds generally offer more capacity and better per-pass removal. Also check the unit’s airflow/room size rating and whether a separate particle filter (such as HEPA) is included, plus replacement frequency and cost.

Why won’t my activated carbon filter remove dust and allergens?

Activated carbon targets gases and odors, not particles; it does not capture dust, pollen, or pet dander effectively. If you need particle removal, use a purifier or system that includes a HEPA or equivalent particle filter in addition to carbon.

Can activated carbon filters protect against dangerous gases like carbon monoxide?

No. Carbon filters are not a substitute for hazard detection and do not reliably remove or neutralize life‑threatening gases such as carbon monoxide. Always use proper detectors and follow evacuation and service procedures for suspected leaks.

How long does an activated carbon filter typically last in a home?

Lifetime varies widely: in a moderate-use home a carbon filter may last a few months, while heavy odor or smoke exposure can saturate it much faster. Track install dates and performance (odor reduction) and replace sooner if effectiveness declines.

Is it effective to try to “recharge” or wash a spent carbon filter at home?

No. Industrial regeneration requires high heat or chemical treatment; common home methods like washing, sunning, or oven heating generally won’t restore capacity and may release trapped pollutants or damage the filter. For safety and performance, replace spent carbon filters.

Where should I place a purifier with an activated carbon filter for best odor removal?

Place the unit centrally or nearer the odor source (for short-term events) with intake and outlet unobstructed, and avoid hiding it behind furniture or in corners. Increasing fan speed during strong odor events also helps treat more room air quickly.

Do HEPA Filters Remove Viruses, Bacteria, and Allergens? What They Can and Can’t Do

Isometric illustration of air passing through HEPA filter layers

Yes, true HEPA filters can remove many virus-carrying particles, bacteria, and common indoor allergens from the air, but they do not sterilize a room or replace cleaning and ventilation. In real homes, HEPA filtration is best viewed as one powerful layer in an overall strategy for healthier indoor air.

If you are wondering whether a HEPA air purifier can help with airborne viruses, germs, pollen, pet dander, mold spores, or fine dust, it helps to understand what HEPA actually means, how these filters capture particles, and where their limits are. This guide walks through how HEPA filters work, what they can realistically do for infection risk and allergy control, and how to size, use, and maintain them so you get the most benefit.

Along the way you will see practical examples, simple comparisons, and common mistakes to avoid, so you can decide when HEPA filtration makes sense in your home and how to use it effectively.

What HEPA Filtration Means and Why It Matters

HEPA stands for High Efficiency Particulate Air. A true HEPA filter is a dense mat of randomly arranged fibers (often glass or synthetic) that forces air to weave through a maze of tiny passages. As air moves through, particles are trapped in the fibers while the cleaned air exits the filter.

The defining feature of a true residential HEPA filter is its tested efficiency: at least 99.97% removal of particles that are 0.3 microns in diameter under standardized test conditions. This 0.3-micron size is often called the most penetrating particle size because it is typically the hardest size for the filter to capture. Larger and smaller particles are usually captured as well or better.

This matters for viruses, bacteria, and allergens because most of the particles that actually float around your home do not exist as bare single microbes. They are attached to droplets, dust, or other debris that fall squarely in the size range where HEPA filters perform best.

In everyday language, you can think of a HEPA filter as a very efficient particle trap for airborne contaminants such as:

  • Fine dust and smoke (including much of PM2.5)
  • Pollen, pet dander, and dust mite debris
  • Mold spores and fragments
  • Many bacteria and virus-carrying droplets or aerosols

At the same time, HEPA filters are not magic. They do not remove gases or most odors, they do not clean surfaces, and they do not solve moisture problems that allow mold and bacteria to grow.

How HEPA Filters Capture Viruses, Bacteria, and Allergens

Despite looking like a simple pad, a HEPA filter relies on several physical mechanisms working together. Understanding these helps explain why HEPA can capture particles smaller than the visible gaps between fibers, including many microbe-containing aerosols.

Main Filtration Mechanisms

  • Inertial impaction – Larger, heavier particles (for example, coarse dust or clumps of pollen) cannot follow the air as it bends around fibers. Their inertia carries them straight into a fiber, where they stick.
  • Interception – Mid-sized particles follow the airflow but pass close enough to a fiber that they brush against it and adhere, like a car grazing a guardrail.
  • Diffusion – Very small particles, including many ultrafine aerosols, move in random zigzag paths due to Brownian motion. This random movement makes them wander into fibers more often than their size alone would suggest.
  • Sieve effect – For particles larger than the spaces between fibers, the filter acts like a screen and simply blocks passage.

These mechanisms overlap across particle sizes. The result is a U-shaped efficiency curve: very small and very large particles are often captured more easily than those near the 0.3-micron “most penetrating” size.

Particle Sizes vs. HEPA Capability

Viruses, bacteria, and allergens span a wide size range. The key question is not just how big the microbe is, but how it actually travels in indoor air.

Particle or contaminant Typical airborne size range How it usually appears in indoor air HEPA capture outlook
Individual viruses ~0.02–0.3 microns Embedded in droplets, droplet nuclei, or attached to dust Indirect: HEPA targets the larger carrier particles
Virus-containing aerosols ~0.5–10 microns Respiratory droplets from breathing, talking, coughing Generally high capture when air passes through filter
Airborne bacteria ~0.3–10 microns Single cells, clumps, or attached to dust Often captured efficiently by true HEPA
Pollen ~10–100 microns Whole grains or fragments Very easy for HEPA and even pre-filters
Dust mite allergens ~1–20 microns Proteins carried on dust particles Well within HEPA capture range
Mold spores ~2–20 microns Spores and broken fragments Generally captured effectively
PM2.5 (fine particles) ≤2.5 microns Smoke, combustion byproducts, fine dust Core target range for HEPA filtration
Typical airborne size ranges and how they relate to HEPA filtration. Example values for illustration.

Because HEPA filters are tested at 0.3 microns and usually perform better at sizes above and below that point, they can significantly reduce airborne concentrations of many particles that carry microbes and allergens when enough air is processed through the filter.

What HEPA Filters Do Not Handle Well

HEPA filters are designed for particles, not gases. They are not the right tool for:

  • Volatile organic compounds from paints, cleaning products, or new furnishings
  • Most odors from cooking, smoke, or pets
  • Carbon monoxide, carbon dioxide, or other gases

Other media, such as activated carbon or specialized sorbents, are typically used alongside HEPA when gas or odor control is needed.

Real-World Examples: Viruses, Bacteria, Allergens, and PM2.5

The real question behind “do HEPA filters remove viruses” is how much they can reduce the particles that matter in everyday situations. Here are practical examples of how HEPA filtration can help in typical homes.

Example 1: Respiratory Virus Season in a Living Room

In a family room where people gather, virus-containing aerosols are released whenever someone breathes, talks, coughs, or sneezes. A properly sized HEPA purifier running on an appropriate fan speed can:

  • Continuously pull room air through the HEPA filter
  • Capture many of the droplets and droplet nuclei that carry viruses
  • Lower the average concentration of these particles over time

This does not guarantee that no one will get sick, but it can reduce one pathway of exposure, especially when combined with ventilation and other recommended health measures.

Example 2: Allergies in a Bedroom

For someone with dust mite or pet allergies, a bedroom is often the most important space to control. Running a HEPA purifier continuously in the bedroom can:

  • Reduce airborne dust mite debris that is stirred up when changing bedding or moving around
  • Capture pet dander that drifts in from other rooms or clothing
  • Help lower nighttime exposure to pollen that enters when windows are open

When combined with encased bedding, regular vacuuming with a good filter, and limiting pet access, HEPA filtration can noticeably reduce airborne allergen levels in this key room.

Example 3: Mold Concerns After Humid Weather

After a damp season, someone may notice musty smells and worry about mold spores. A HEPA purifier can help by:

  • Capturing many airborne mold spores released from contaminated materials
  • Reducing the spread of spores to other rooms through the air

However, HEPA filtration does not remove visible mold from walls, carpets, or furnishings, and it does not fix the underlying moisture that allowed growth. Those issues require moisture control and, if needed, professional remediation.

Example 4: Cooking, Smoke, and PM2.5

Cooking, candles, and outdoor smoke can all raise indoor PM2.5 levels. In these cases, a HEPA purifier can:

  • Capture a large portion of fine smoke and combustion particles
  • Help bring PM2.5 levels down more quickly after the source stops

Because HEPA does not remove gases, some odor may remain even after particles are reduced. That is why filtration is often combined with ventilation (such as kitchen exhaust) to improve overall air quality.

Common Mistakes and Troubleshooting HEPA Performance

Many people buy a HEPA air purifier and are disappointed with the results, not because the technology fails, but because of how it is used. Avoiding a few common mistakes can make a big difference in how well a HEPA filter reduces viruses, bacteria, and allergens in your home.

Common Setup and Usage Mistakes

  • Undersized purifier for the room – If the clean air delivery rate (CADR) or airflow is too low for the room size, the device may barely change particle levels.
  • Running only on the lowest fan speed – Quiet settings often move less air, reducing the number of air changes per hour and slowing cleanup after particle spikes.
  • Poor placement – Tucking a purifier into a corner behind furniture can block airflow and limit how much of the room air actually passes through the filter.
  • Infrequent operation – Running the purifier only occasionally allows particle levels to rise again between uses.
  • Ignoring filter replacement – A heavily loaded HEPA filter can restrict airflow so much that overall performance drops, even if efficiency per pass remains high.

Quick Sizing and ACH Check

A practical way to estimate whether a purifier is appropriate for a room is to compare its airflow (in cubic feet per minute, or CFM) with the room volume and your target air changes per hour (ACH). The higher the ACH, the faster particle levels can be reduced.

Room example Approx. room size (ft) Room volume (cubic feet) Target ACH Approx. airflow needed (CFM)
Small bedroom 10 × 12 × 8 960 5 ACH ~80 CFM
Medium bedroom 12 × 14 × 8 1,344 5 ACH ~112 CFM
Living room 15 × 20 × 8 2,400 5 ACH ~200 CFM
Open-concept area 20 × 25 × 9 4,500 5 ACH ~375 CFM
Example airflow needs for different room volumes at 5 air changes per hour. Example values for illustration.

If a purifier’s rated airflow is far below what your room volume requires for your target ACH, you may need a higher-capacity unit or more than one device to achieve meaningful reductions.

Troubleshooting Cues

Signs that your HEPA setup is not working as intended include:

  • Visible dust still settling quickly on surfaces despite continuous operation
  • Allergy symptoms that do not improve at all after several weeks of consistent use and other controls
  • Strong drafts at the outlet but almost no airflow felt at the intake (possible filter blockage or incorrect installation)
  • Unusual noises or whistling sounds that suggest air is bypassing the filter through gaps

In these cases, check room sizing, fan speed, placement, and filter condition before assuming the technology itself is ineffective.

Safety Basics When Using HEPA Filters

HEPA filtration is generally safe for home use, but there are a few safety and hygiene points to keep in mind, especially when dealing with microbes and allergens.

Air and Electrical Safety

  • Avoid blocking airflow – Keep the intake and outlet clear of curtains, walls, and furniture to prevent overheating and ensure proper circulation.
  • Stable placement – Place the purifier on a flat, stable surface where it is unlikely to be tipped by children or pets.
  • Follow electrical guidelines – Use properly grounded outlets, avoid overloading power strips, and keep cords out of walkways.

Handling Used Filters

Because HEPA filters accumulate particles, including potentially viable microbes, treat used filters as dusty waste that should be handled carefully:

  • Turn the purifier off and let it sit briefly before opening, so particles settle.
  • Avoid tapping or shaking the filter, which can release trapped dust and allergens.
  • If you are sensitive or concerned about microbes, consider wearing a simple mask and disposable gloves while changing filters.
  • Place used filters directly into a bag, seal it, and dispose of it according to local guidelines.

Ozone and Add-On Technologies

A mechanical HEPA filter by itself does not produce ozone. However, some devices combine HEPA with additional technologies that may generate ozone or other byproducts. If ozone or reactive gases are a concern, focus on units that rely on mechanical filtration and clearly state that they do not intentionally produce ozone.

Maintenance and Long-Term Use

To keep a HEPA filter working effectively against viruses, bacteria, allergens, and fine particles, consistent maintenance is essential. A neglected filter can restrict airflow and reduce the real-world benefits of the purifier.

Filter Replacement and Pre-Filter Care

  • Pre-filters – Many purifiers include a washable or replaceable pre-filter to capture larger dust and hair. Cleaning or replacing this on schedule helps protect the HEPA media and maintain airflow.
  • HEPA filter life – Follow the manufacturer’s recommended replacement interval, but also pay attention to visible buildup, reduced airflow, or indicator lights.
  • Environment matters – Homes with heavy dust, pets, or smoke may load filters more quickly than average estimates suggest.

Simple Maintenance Schedule Example

Task Typical frequency What to look for
Wipe exterior surfaces Every 1–2 weeks Dust buildup around intake and outlet grilles
Clean or replace pre-filter Every 1–3 months Visible lint, hair, and dust coating the mesh
Check HEPA filter condition Every 3–6 months Dark discoloration, musty odor, or reduced airflow
Replace HEPA filter Every 6–24 months (varies) Manufacturer interval reached or clear signs of loading
Inspect room placement and airflow Every 6–12 months New furniture or layout changes that may block circulation
Example maintenance intervals and what to monitor for long-term HEPA performance. Example values for illustration.

Seasonal and Storage Considerations

  • Seasonal peaks – During allergy seasons or smoke events, you may need higher fan speeds or continuous operation to keep up with particle loads.
  • Temporary storage – If you store a purifier for a season, remove heavily used filters, keep the unit in a dry area, and cover it to prevent dust accumulation.
  • Odors from older filters – A musty smell when the purifier starts can indicate that the HEPA filter or pre-filter is overdue for replacement or cleaning.

Practical Takeaways and Specs to Look For

When you put all of this together, HEPA filtration is a strong tool for reducing airborne particles that carry viruses, bacteria, and allergens, but it works best as part of a broader indoor air quality plan that also includes cleaning, moisture control, and ventilation.

Key practical takeaways include:

  • True HEPA filters can capture many virus-containing aerosols, bacteria, and common allergens, especially when sized correctly and run long enough.
  • They do not sterilize air, kill all microbes, or address gases, odors, or surface contamination.
  • Real-world effectiveness depends heavily on room size, airflow (ACH), placement, and maintenance.

Specs to Look For in a HEPA Air Purifier

To choose a unit that can realistically help with viruses, bacteria, and allergens in your home, pay attention to these specifications and features:

  • True HEPA rating – Look for clear language indicating at least 99.97% efficiency at 0.3 microns, rather than vague “HEPA-like” or “HEPA-type” claims.
  • Clean air delivery rate (CADR) or airflow (CFM) – Match these numbers to your room volume and target air changes per hour; larger rooms need higher airflow.
  • Room size guidance – Prefer conservative room size recommendations and consider higher ACH targets for bedrooms, allergy control, or higher-risk situations.
  • Fan speed options – Multiple speeds allow you to balance noise and performance, using higher speeds during particle spikes and lower speeds for background operation.
  • Filter replacement indicators – Timers or sensors that remind you to check or replace filters help maintain long-term performance.
  • Pre-filter design – A washable or easily replaceable pre-filter can extend HEPA life and keep operating costs more predictable.
  • Noise levels – Check sound ratings at different fan speeds, especially for bedrooms or workspaces where continuous operation is important.
  • Byproduct information – If additional technologies are included, look for clear statements about ozone and other byproducts so you can choose what aligns with your comfort level.

By focusing on true HEPA performance, adequate airflow, thoughtful placement, and regular maintenance, you can use HEPA filtration to meaningfully reduce airborne particles that carry viruses, bacteria, and allergens, supporting a cleaner and more comfortable indoor environment.

Frequently asked questions

Can HEPA filters remove viruses from indoor air?

True HEPA filters can remove many virus-containing aerosols and droplets because they capture particles in the size ranges that typically carry viruses. They reduce airborne concentrations but do not sterilize a room or guarantee prevention of transmission; combine filtration with ventilation and hygiene for better protection.

What specifications and features matter when choosing a HEPA air purifier?

Important specs include a true HEPA rating (at least 99.97% at 0.3 microns), adequate airflow or CADR matched to your room size, and useful features like multiple fan speeds and filter replacement indicators. A washable pre-filter and clear information about ozone or byproducts are also helpful for long-term performance and safety.

Why might my HEPA purifier not seem to reduce dust, smoke, or allergy symptoms?

Common causes are an undersized unit for the room, running on too-low fan speeds, poor placement that blocks airflow, or clogged pre-filters/HEPA elements. Checking sizing, operating the purifier at appropriate speeds, and following maintenance schedules usually restores expected performance.

How often should I change filters and perform maintenance for best performance?

Clean or replace pre-filters roughly every 1–3 months and inspect HEPA filters every 3–6 months, with full HEPA replacement typically recommended on a 6–24 month schedule depending on use. Regular exterior cleaning and watching for reduced airflow or odors will help maintain effectiveness.

Are HEPA filters safe to use around children, pets, and people with respiratory conditions?

Mechanical HEPA filtration is generally safe and does not produce ozone when it uses only filters and fans; ensure the unit is placed stably and intakes/outlets remain clear. Avoid devices that intentionally generate ozone or other reactive byproducts if household members are sensitive or have respiratory issues.

Will a HEPA purifier remove cooking smells or volatile organic compounds (VOCs)?

HEPA media capture particles but do not remove most gases or VOCs, so cooking odors and chemical fumes often persist after particle reduction. For odors and gases, choose a unit that pairs HEPA with activated carbon or other sorbents and use ventilation to remove the source.