
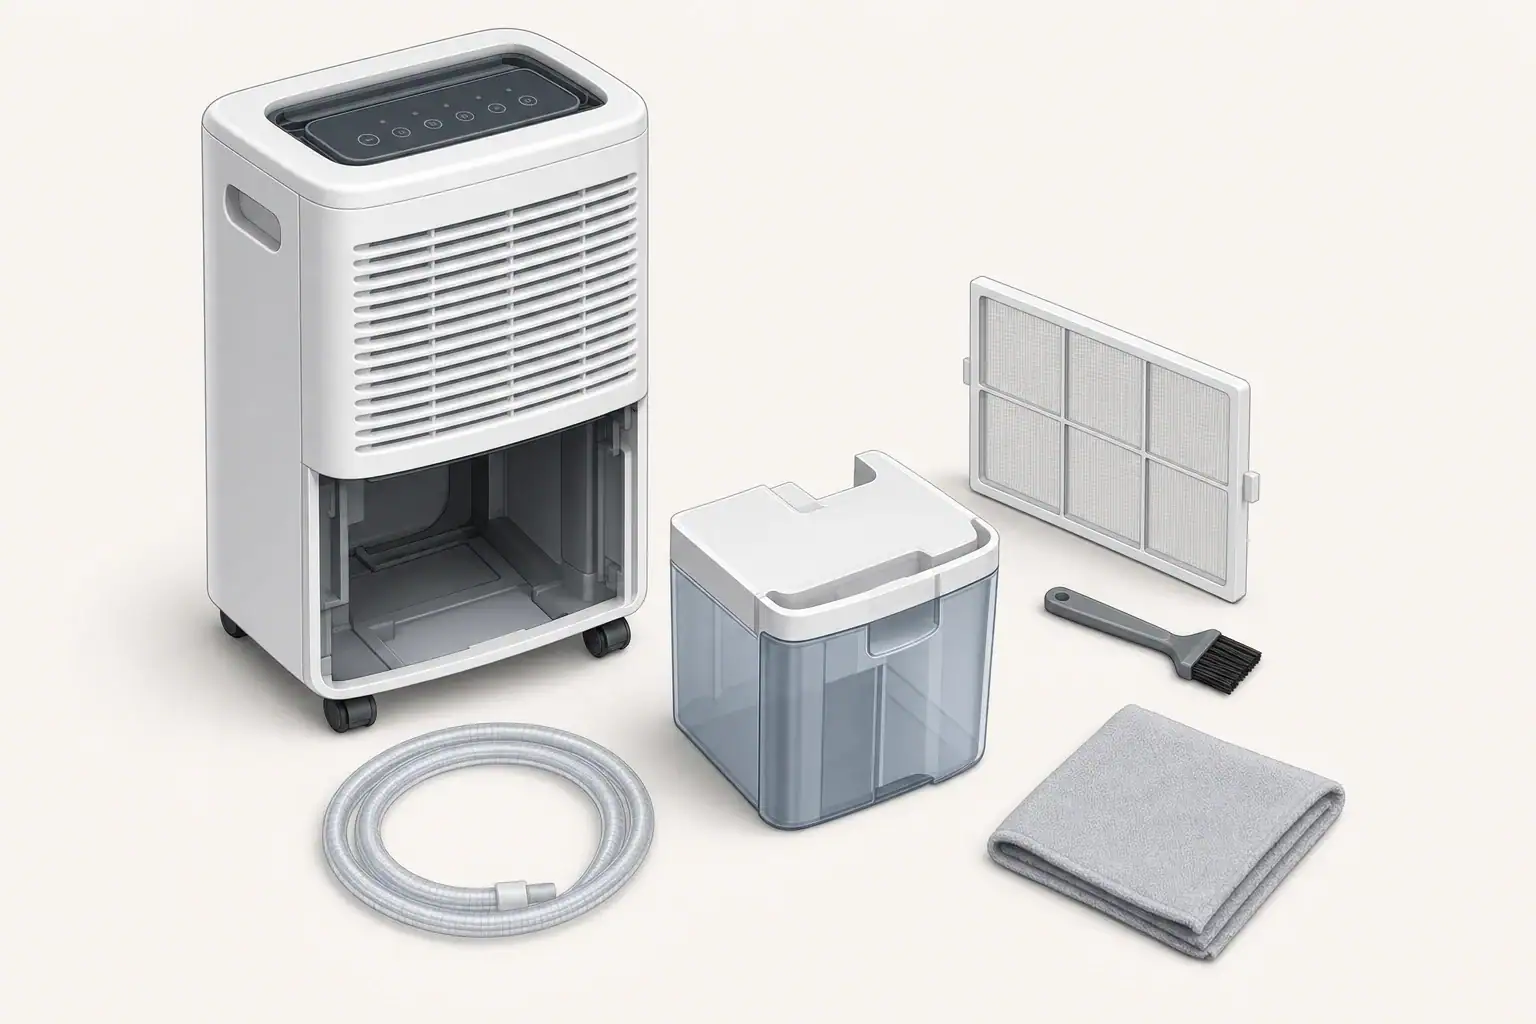
A practical cleaning sequence
To clean a dehumidifier, switch it off and unplug it, then wash the water tank, clean the filter as its manual allows, remove dust from accessible coils and grilles, and flush the drain hose. Let washable parts dry before reassembly, and keep liquids away from controls, wiring, and other electrical components.
The owner’s manual takes priority because access, washable parts, and drain designs vary. Do not remove the cabinet or refrigerant-system components unless the manufacturer specifically describes that work as routine user maintenance.
Supplies
- Soft cloths or nonabrasive sponges
- Warm water
- A small amount of mild dish soap
- Soft brush or old toothbrush
- Vacuum with a soft brush attachment
- Shallow pan or towel for water from the drain connection
1. Shut down and empty the unit
- Turn off the dehumidifier and unplug it.
- Move it to a surface where small spills are easy to manage.
- Remove and empty the collection tank.
- If the coils are frosted, leave the unit off and allow the frost to melt naturally. Do not scrape the coils or apply direct heat.
2. Wash the collection tank
- Rinse out loose residue.
- Wash the tank with warm water, mild dish soap, and a soft cloth or brush.
- Clean seams, corners, the handle area, and the channel around the float without forcing the float mechanism.
- Rinse away soap residue and let the tank drain and dry.
A narrow brush can help with recessed areas, but avoid abrasive pads that may scratch the tank. If the manual permits a particular cleaner, follow its dilution and rinsing directions rather than combining products.
3. Clean the air filter
Find the filter behind the intake grille and check whether it is washable. Filter construction differs among dehumidifiers.
- Washable filter: Remove loose dust with a vacuum or gentle rinsing, then wash it as directed in the manual. Let it dry completely before reinstalling it.
- Nonwashable filter: Vacuum it gently if the instructions allow, or replace it with the specified type when needed.
- Damaged filter: Replace a filter that is torn, warped, crumbling, or no longer fits securely.
Do not reinstall a damp filter or operate the unit without its required filter.
4. Remove dust from grilles and accessible coils
- Vacuum the intake and exhaust grilles with a soft brush attachment.
- If a coil is visible after removing the normal user-access filter or grille, lift dust from its surface with a soft brush or low-suction vacuum attachment.
- Work lightly in the direction of the fins. Thin metal fins bend easily.
- Wipe nearby plastic surfaces with a barely damp cloth.
Do not spray cleaner or water into the cabinet unless the manufacturer provides a specific procedure. Heavy buildup behind a fixed cabinet, damaged fins, refrigerant-system damage, or contamination that cannot be reached through normal access points calls for qualified service rather than further disassembly.
5. Flush the drain hose and port
For a gravity-drain setup, place a towel or shallow pan beneath the connection before removing the hose.
- Disconnect the hose according to the manual.
- Flush the hose with warm water until water moves through it freely.
- Use a flexible, nonabrasive brush if the hose diameter and design allow it.
- Rinse the drain port carefully without directing water into the cabinet.
- Inspect the hose for cracks, flattened sections, sharp bends, or trapped debris.
- Reconnect it firmly and restore the required downhill route for a gravity drain.
If the unit has an internal pump, follow its pump-cleaning instructions. A pump chamber, check valve, or tubing arrangement may require a model-specific procedure.
6. Reassemble and check operation
- Confirm that the filter and tank are dry and seated correctly.
- Make sure the float moves normally and the drain connection is secure.
- Wipe the exterior with a soft, slightly damp cloth, then dry it.
- Return the unit upright to its operating location and reconnect power.
- During the next operating cycle, check that the tank or drain receives water without leaking.
When each part needs attention
| Part | Check or clean when |
|---|---|
| Tank | A film, residue, or odor appears, or during regular emptying |
| Filter | Dust is visible, airflow seems restricted, or the manual’s maintenance indicator activates |
| Grilles and accessible coils | Dust collects on the intake, exhaust, or visible fin surfaces |
| Drain hose | Flow slows, water backs up into the tank, or the hose has been stored |
Room dust, operating hours, and drainage method affect the maintenance interval, so use inspection and the manufacturer’s schedule rather than relying on one universal cleaning frequency.
Related guides: Dehumidifier Ice Build-Up: Why Coils Freeze and What to Do • Drain Hose vs Bucket: Which Dehumidifier Setup Is Best? • Storing Humidifiers and Dehumidifiers Off-Season: Avoiding Mold
Frequently asked questions
Can I use vinegar to clean a dehumidifier?
Use only cleaners the owner’s manual permits. Mild dish soap and warm water are suitable for the removable tank in many units, while vinegar or other cleaners may not be appropriate for every material or component.
Why is my dehumidifier not draining through the hose?
Check for a loose connection, a kinked or flattened hose, trapped debris, or a gravity-drain hose that does not maintain a downhill route. Flush the hose with warm water and consult the manual if the unit uses an internal pump.
What should I do if the coils are dirty but not easily reachable?
Do not remove fixed cabinet panels or refrigerant-system parts unless the manufacturer identifies that work as user maintenance. Arrange qualified service if buildup cannot be removed through normal access points or if the fins are damaged.
Summary
Clean the tank with mild soap and water, service the filter according to its instructions, vacuum accessible coils and grilles gently, and flush the drain path. Keep liquids out of the cabinet, avoid bending coil fins, and use qualified service when contamination or damage is beyond normal user-access areas.
- Clear sizing logic (room size → CADR/ACH)
- HEPA vs carbon explained for real use-cases
- Humidity + ventilation basics to reduce mold risk