
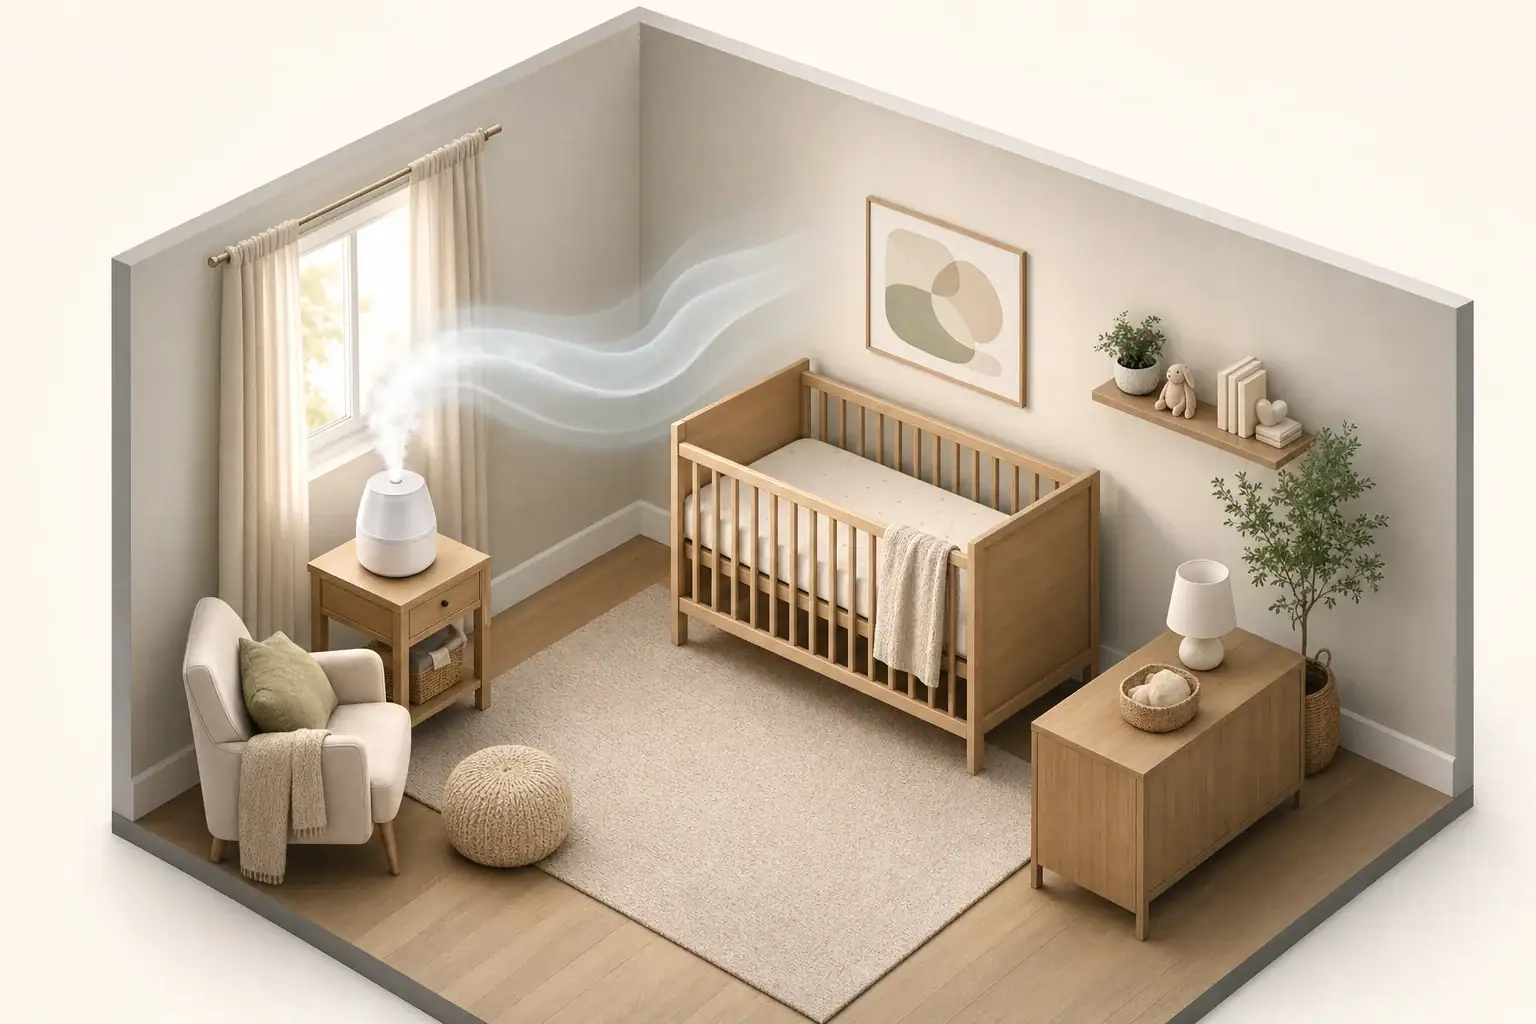
Place a baby-room humidifier on a stable, moisture-resistant surface several feet from the crib, aim for 30% to 50% relative humidity, and clean the unit according to its instructions. A distance of about 3 feet from the crib is a practical starting point, but the mist must not dampen bedding, walls, or furniture. Keep the device and cord out of a child’s reach and use a separate humidity gauge to prevent over-humidifying the room.
Quick answer
- Aim for about 30% to 50% relative humidity as general indoor guidance.
- Start with the humidifier at least 3 feet from the crib and adjust if nearby surfaces become damp.
- Use a firm, level, moisture-resistant surface where the unit cannot be pulled down.
- Keep mist away from the crib, walls, curtains, electronics, and the humidity monitor.
- Empty and dry the tank regularly, and clean the humidifier on the manufacturer’s schedule.
Why humidifier placement matters in a baby room
A humidifier adds water vapor or fine water droplets to indoor air. Placement affects how evenly that moisture spreads and whether it settles on nearby materials before mixing into the room.
If the unit is too close to a crib, cool mist can dampen the mattress, sheets, sleepwear, or nearby wall. Persistent dampness can support unwanted microbial growth and may damage finishes or furniture. If the humidifier is hidden behind furniture or placed in a corner with little airflow, humidity may also become uneven.
The goal is not to direct mist toward the baby. Instead, position the unit so moisture can disperse into the room’s air while the sleeping area remains dry. The humidifier’s manual should take priority because outlet direction, required clearances, and approved surfaces vary by design.
How far a humidifier should be from the crib
There is no universal official distance that works for every room and humidifier. As a practical starting point, place the unit at least 3 feet from the crib. More distance may be necessary for a high-output ultrasonic unit, a small room, or a model that produces a visible plume.
Choose a stable surface that cannot tip or wobble. It should be high enough to discourage access as a child becomes mobile, but not positioned where the humidifier could fall into the crib. Route the cord directly to an appropriate outlet without creating a loop, trip hazard, or reachable section near the crib.
Keep the outlet clear of curtains, shelving, toys, and furniture. Do not place the unit under a shelf or directly against a wall unless the instructions specifically permit that arrangement. Check the wall, floor, furniture, and bedding after the humidifier has operated for an hour or two. Any cool, clammy, or visibly wet surface indicates that the unit should be moved, redirected, or turned down.
| Placement factor | Practical starting point | What to check |
|---|---|---|
| Crib distance | At least 3 feet | Bedding remains completely dry |
| Wall clearance | Follow the unit manual | No condensation or damp finish |
| Surface | Firm, level, and moisture-resistant | No wobbling or blocked air intake |
| Mist direction | Toward open room air | No plume aimed at the crib |
| Cord location | Outside the child’s reach | No loops or trip hazards |
| Humidity monitor | Away from the mist plume | Reading represents the wider room |
What humidity level to target
A relative humidity range of 30% to 50% is widely used as general indoor guidance. The appropriate point within that range depends on outdoor weather, room temperature, building construction, and whether condensation appears on cold surfaces.
Relative humidity changes with temperature. A room can show a higher percentage as it cools overnight even when the actual amount of moisture in the air has not increased. For that reason, check readings at different times rather than relying on one measurement.
How to measure room humidity
Use a separate digital hygrometer when possible. Place it near the general occupied area, but not beside the humidifier, over a heating vent, against an exterior wall, or in direct sunlight. A monitor in the mist plume may report an artificially high reading that does not represent the rest of the room.
Consumer humidity sensors can differ by several percentage points. Small variations are less important than the overall trend and physical signs in the room. If windows collect condensation or surfaces feel damp, reduce output even if the displayed reading appears to be within the intended range.
When to turn the humidifier down
- Relative humidity stays above 50%.
- Condensation forms on windows, walls, or other cool surfaces.
- Bedding, curtains, carpeting, or furniture feels damp.
- A musty odor develops or existing damp areas worsen.
- The room feels noticeably clammy.
During very cold weather, a home may need to stay below 40% humidity to avoid window or wall condensation. The room’s physical conditions are more useful than treating one percentage as a rigid target.
Common placement mistakes and troubleshooting cues
Putting the humidifier next to the crib
Close placement does not necessarily provide better room humidity. It mainly increases the chance that mist will settle on bedding or that the device and cord will become reachable. Move the unit farther away and direct its outlet into unobstructed room air.
Placing it directly on carpet or soft fabric
A soft surface can make the unit unstable and may block an air intake. It can also conceal small spills. Use a firm surface approved by the manufacturer, and avoid towels or pads that obstruct the base or vents.
Running the unit continuously without measuring
Humidity can build gradually, particularly with the bedroom door closed. Use a hygrometer and lower the output or operating time as needed. An automatic humidistat can be helpful, but its sensor may not match conditions across the entire room.
Using hard tap water in a mist-producing unit
Some ultrasonic humidifiers can disperse minerals from tap water as fine white dust. Demineralized or distilled water may reduce mineral residue when the manual permits it. It does not eliminate the need for cleaning, and water handling recommendations can vary by humidifier type.
Ignoring hidden damp areas
Check behind the crib, under the humidifier stand, near exterior walls, and around windows. These cooler or poorly ventilated locations may show moisture before the center of the room does.
Practical setup examples for different baby rooms
Small nursery with a closed door
In a compact room, humidity can rise quickly. Start at the lowest useful output, keep the humidifier several feet from the crib, and measure humidity after the door has been closed for part of the normal sleep period. Avoid placing the unit between the crib and a wall where mist can become trapped.
Bedroom shared with an adult
Place the humidifier where its mist can mix into open room air without crossing either sleeping area at close range. A dresser or stable table may work if it is moisture-resistant, inaccessible to the child, and able to meet the manufacturer’s clearance requirements.
Room with forced-air heating
Do not place the humidifier directly beside or over a supply register. Moving air may distort the humidity reading, carry mist onto unexpected surfaces, or cause moisture to distribute unevenly. Position the hygrometer away from both the vent and humidifier.
Room with cold windows or exterior walls
Cold surfaces may develop condensation even when the center of the room has moderate humidity. Keep the humidifier away from the window, monitor the glass and frame, and use a lower target when outdoor temperatures fall.
Safety considerations for humidifier use
Cool-mist humidifiers avoid the hot water and steam associated with warm-mist units, making them a common choice around children. Regardless of type, keep the entire appliance, water reservoir, and power cord out of reach. Do not place the unit where it could fall into the crib or onto a person.
Plug the humidifier in according to its instructions. Avoid extension cords unless the manufacturer explicitly allows them, and keep plugs and outlets dry. Unplug the unit before filling, draining, moving, or cleaning it.
Do not add essential oils, fragrances, medications, disinfectants, or other substances to the tank unless the humidifier is specifically designed for that substance and its instructions allow it. Additives can damage some units or become dispersed into room air.
Ionizers and ozone-generating functions are not needed for humidity control. If a combined air-treatment device includes optional ionization, review its documentation and relevant safety certification information before use. UV-C components, where enclosed inside an appliance, do not replace routine tank and surface cleaning.
A humidifier also does not replace ventilation or correction of leaks and damp building materials. If a room has persistent moisture, visible water damage, or recurring musty odors, identify and correct the moisture source rather than adding more humidity.
Cleaning and maintaining a baby-room humidifier
Standing water and mineral deposits can create residue inside a humidifier. Regular emptying, drying, and cleaning limit buildup and help the unit operate as intended. Follow the model’s instructions because tanks, seals, wicks, and electronic bases require different handling.
Daily or each-use care
- Unplug the unit before handling it.
- Empty leftover water rather than repeatedly topping off the tank.
- Rinse removable water-contact parts when the instructions permit.
- Allow the tank and removable parts to air-dry before storage or refilling.
- Wipe up spills and check the surface beneath the humidifier.
Routine cleaning
Many general public-health recommendations suggest cleaning portable humidifiers about every three days during regular use, while some manufacturers specify a different interval. Use the schedule and cleaning agents listed in the manual. Mineral scale may require a separate descaling process from disinfection.
Never mix cleaning chemicals. Use adequate ventilation, keep the child away from the cleaning area, and rinse treated surfaces thoroughly when instructed. Do not immerse the powered base unless the manual says that it is washable.
Filters, wicks, and storage
Replace disposable wicks, cartridges, or filters when they become hardened, discolored, damaged, or overdue under the manufacturer’s schedule. Before seasonal storage, clean and dry the unit completely. Store it without water so moisture is not trapped in the tank or base.
| Goal or cue | Simple action | Tool or check |
|---|---|---|
| Maintain comfortable humidity | Aim for 30% to 50% | Separate hygrometer |
| Prevent wet bedding | Increase distance or lower output | Touch-check nearby materials |
| Limit window condensation | Reduce the humidity target | Inspect glass and frames |
| Reduce mineral dust | Use suitable low-mineral water | Check the unit instructions |
| Control tank residue | Empty, dry, and clean routinely | Inspect water-contact surfaces |
| Prepare for storage | Clean and dry all approved parts | Store the tank empty |
Related guides: Humidifier for Baby’s Room: Safe Settings and Placement Tips • Humidifier Placement: Near Bed, Near Vent, or Center of Room? • How to Clean a Humidifier Properly (And How Often) • How to Stop Condensation on Windows (And Why It Matters for Mold) • Best Humidity Level for Winter: Comfort vs Health vs Mold Risk
Baby-room humidifier placement summary
Start with the humidifier at least 3 feet from the crib on a stable, moisture-resistant surface, while keeping the unit and cord inaccessible to the child. Direct mist into open room air rather than toward bedding, walls, curtains, windows, or electronics.
Use a hygrometer away from the mist plume and generally aim for 30% to 50% relative humidity. Reduce output whenever condensation, damp materials, or humidity above the intended range appears. Empty and dry the reservoir regularly, clean the unit on its recommended schedule, and inspect the surrounding room for moisture as part of normal upkeep.
Frequently asked questions
Can I put a humidifier on a dresser in a baby’s room?
A dresser can be an appropriate location if its top is firm, level, moisture-resistant, and stable enough to support the humidifier. The unit must remain out of the child’s reach, meet the clearance requirements in its manual, and be positioned so it cannot fall into or toward the crib. Check the dresser surface and nearby wall for moisture after use.
Should a humidifier run all night in a baby’s room?
A humidifier may run overnight if the room humidity stays in an appropriate range and nearby materials remain dry. Use a separate hygrometer and reduce the output, use a timer, or turn the unit off if humidity rises above the target range or condensation develops. A closed nursery door can allow humidity to build more quickly.
Where should the hygrometer go in relation to a baby-room humidifier?
Place the hygrometer in the general occupied area of the room, away from the humidifier’s mist plume. Keep it away from heating vents, direct sunlight, exterior walls, and windows, which can skew its reading. This helps the monitor reflect broader room conditions rather than the moisture immediately around the unit.
What should I do if the humidifier makes the nursery window wet?
Window condensation is a sign that the room air or nearby surface is too moist for current conditions. Lower the humidifier output or run time, move the unit away from the window, and reassess the humidity target, especially during cold weather. Also inspect nearby walls, furnishings, and bedding for dampness.
Is visible mist in a baby’s room a sign that the humidifier is too close?
Visible mist alone does not always mean the humidifier is incorrectly placed, but the plume should not be aimed at the crib, bedding, walls, or furniture. If mist settles on surfaces or leaves them cool and clammy, move the unit farther away, redirect the outlet, or reduce the output. Follow the humidifier manufacturer’s placement and clearance instructions.
Recommended next:
- Best Humidity Level for Winter: Comfort vs Health vs Mold Risk
- Ultrasonic vs Evaporative Humidifiers: Pros, Cons, and Which to Buy
- Humidifier White Dust: Causes, Health Concerns, and Fixes
- How to Clean a Humidifier Properly (And How Often)
- Ideal Indoor Humidity in Winter: Comfort vs Mold Risk
- Humidifier Cleaning Routine: How to Prevent Slime and Odors
- Clear sizing logic (room size → CADR/ACH)
- HEPA vs carbon explained for real use-cases
- Humidity + ventilation basics to reduce mold risk