
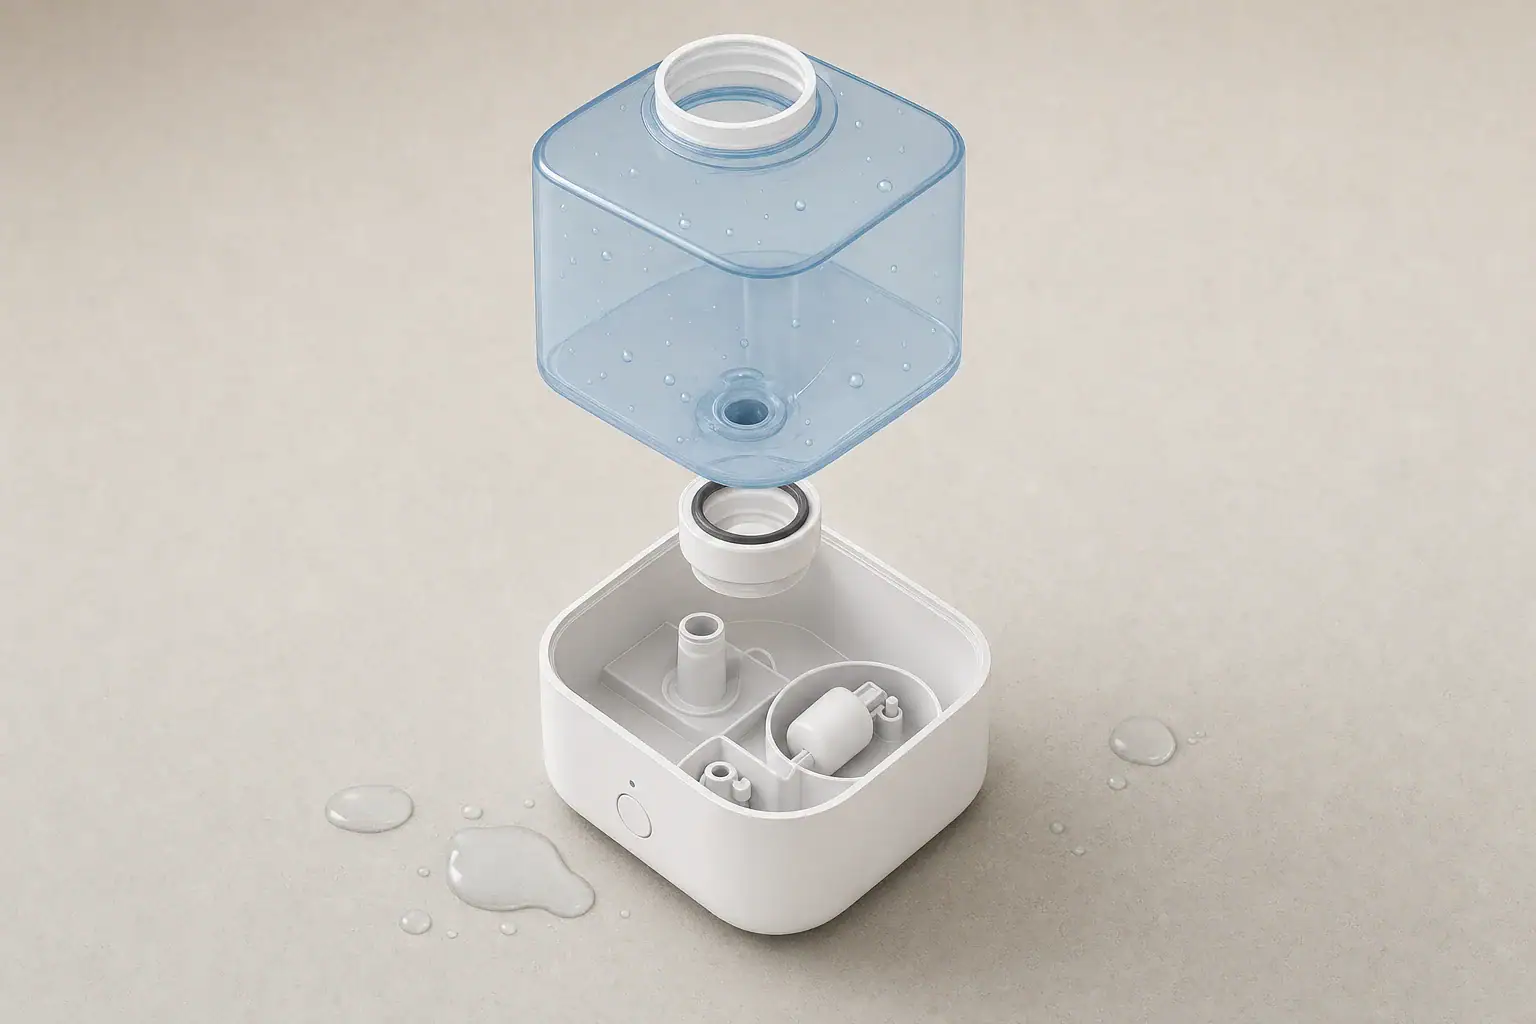
Find the source before replacing parts
Water around a portable humidifier’s base most often comes from a misaligned or damaged tank seal, a tank that is not fully seated, a sticking float or valve, overfilling, or an uneven setup. Unplug the unit, dry it completely, and check each area in order so residual water is not mistaken for a new leak.
Start with a dry inspection
- Turn off and unplug the humidifier.
- Remove the tank over a sink or other water-resistant area.
- Empty the tank and base according to the manufacturer’s directions.
- Dry the tank, cap, reservoir, base, cord, and surrounding surface.
- Look for cracks, warped plastic, loose parts, mineral deposits, or water inside control areas.
If water has reached the plug, cord connection, outlet, or electronic controls, do not reconnect the unit for testing. Follow the manufacturer’s service guidance or replace the humidifier if the affected parts are not intended to be serviced.
Check the tank cap and seal
On humidifiers with removable tanks, the cap commonly contains a gasket, O-ring, or flat rubber seal. A missing, twisted, hardened, or mineral-coated seal can let water escape when the tank is installed.
- Remove the cap and confirm that the seal is present and seated evenly in its groove.
- Rinse away loose residue using the cleaning method allowed in the manual.
- Inspect the gasket for splits, flattening, swelling, or loss of flexibility.
- Reinstall the cap straight and tighten it only as directed. Overtightening can distort some seals or caps.
- Use only a replacement seal or cap specified for the model.
Do not use glue, plumbing tape, petroleum jelly, or an improvised gasket unless the manufacturer specifically permits it. These materials may interfere with the valve or damage seal materials.
Test the removable tank separately
After closing the cap, place the tank upright on a dry, water-resistant surface where any drip will be easy to see. A tank designed to hold water outside the base should remain dry around its cap, seams, and valve until the valve is pressed by the humidifier.
If the tank leaks while separate from the base, inspect the cap seal, spring-loaded valve, tank seams, and plastic around the handle. A cracked or deformed tank generally needs an exact replacement rather than a patch.
Inspect the float and water valve
Some models use a float to monitor the reservoir level, while others rely on a tank valve that opens when the tank is seated. With the unit unplugged, locate only the user-accessible parts identified in the manual.
- Check whether the float moves freely through its normal range.
- Remove accessible mineral flakes or debris using the approved cleaning procedure.
- Confirm that the float is installed in the correct orientation if it was removed for cleaning.
- Check that the tank valve is not stuck open and that its seal is intact.
Do not bend, bypass, weight down, or permanently hold a float or valve. If the mechanism remains stuck or a non-user-serviceable component is damaged, stop using the unit and follow the manufacturer’s repair or replacement instructions.
Verify tank seating and setup
- Use a level surface: A tilted base can make reservoir water reach an unintended opening.
- Seat the tank fully: Align guides, tabs, and the cap valve without forcing them.
- Respect the fill line: Do not add water above the marked maximum or pour water into openings not intended for filling.
- Keep vents unobstructed: Do not operate the unit on a towel, deep tray, carpet, or other surface that blocks air openings.
- Avoid moving it while full: Water can slosh into air passages or collect between the tank and base.
For a top-fill model without a removable tank, inspect the fill opening, maximum-level mark, drain plug if present, and user-accessible reservoir seals described in the manual.
Rule out condensation and spilled water
Water beside the base is not always coming through the housing. Spills during refilling, droplets from lifting the tank, or mist settling near the unit can resemble a leak. After drying everything, refill without exceeding the maximum line and wipe the tank exterior before installation.
Run the humidifier briefly on a dry, level, water-resistant surface while remaining nearby. Watch where the first moisture appears. Do not place absorbent material under an operating unit if it could block vents.
When to stop troubleshooting
Discontinue use if the tank or base is cracked, water repeatedly enters controls or electrical connections, the reservoir continuously overflows, or an accessible seal and correct setup do not resolve the leak. Plumbed whole-house humidifiers have additional supply-line, drain, and solenoid components; close the water supply as directed by the system manual and use qualified service when those parts are not user-serviceable.
Related guides: How to Clean a Humidifier Properly (And How Often) • Humidifier Water Choices: Tap vs Filtered vs Distilled • Humidifier Safety: Bacteria Risk, Cleaning, and Safe Humidity Limits
Frequently asked questions
Why does my humidifier leak only after I put the tank back on the base?
A tank that stays dry when tested separately but leaks after installation may not be seated correctly, or its valve may not be opening and closing properly. Check the alignment guides, tank cap, and valve area with the unit unplugged, and make sure the base is level.
Can mineral buildup cause a humidifier to leak around the base?
Yes. Mineral deposits can keep a gasket from sealing evenly or prevent a user-accessible float or valve from moving normally. Clean only the parts and methods identified in the manufacturer’s instructions, then dry and retest the unit.
Should I replace a humidifier tank with a small crack?
Yes, a cracked tank should generally be replaced with the exact compatible part. Patches and adhesives may fail when the tank is full or interfere with proper seating and valve operation.
Summary
Dry the humidifier first, then check the tank cap seal, tank valve, float movement, tank seating, fill level, and placement. A leak that follows the tank usually points to its cap, valve, seam, or gasket; recurring overflow from the base more often indicates a seating, float, valve, or setup problem. Replace cracked or incompatible parts rather than improvising a repair.
- Clear sizing logic (room size → CADR/ACH)
- HEPA vs carbon explained for real use-cases
- Humidity + ventilation basics to reduce mold risk