
Stop the leak, then trace the water
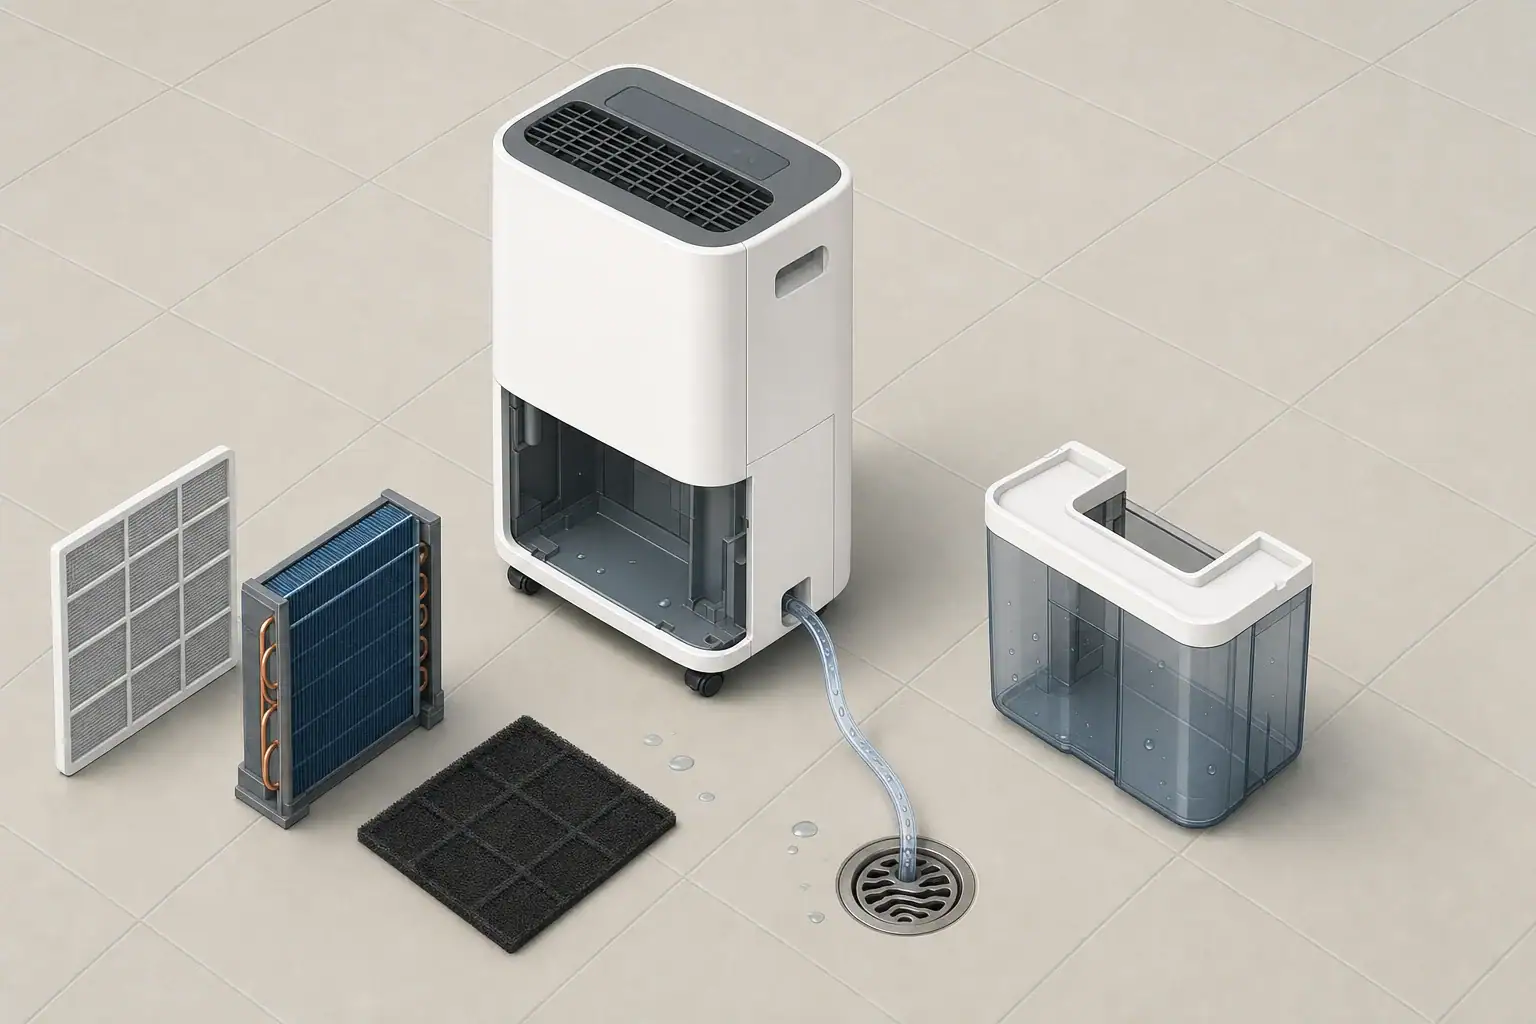
A dehumidifier usually leaks onto the floor because its tank is full, cracked, or incorrectly seated; a drain hose is loose or blocked; or ice is melting around the coils. Turn the unit off, unplug it, empty the tank, and dry the surrounding floor before checking each possible source.
If the plug or outlet is wet, do not handle it while the circuit is energized. Shut off that circuit from a dry location or contact a qualified electrician if you cannot do so safely.
Use the leak location as a clue
| Where water appears | Likely area to check |
|---|---|
| Under or around the tank | Tank seating, cracks, float, or drain-port cap |
| Near the hose connection | Loose fitting, missing seal, blockage, or poor hose routing |
| Below the front or rear grille | Frozen coils, restricted airflow, or an internal drain problem |
| From inside the cabinet | Internal drain pan, tubing, or pump fault requiring service |
Check the collection tank
- Empty and clean the tank. Remove any debris that could keep the tank or float from sitting correctly.
- Inspect for damage. Look closely at the bottom, corners, seams, handle mounts, and drain fittings. To check a suspected crack, test the removed tank over a sink rather than while it is inside the appliance.
- Check the float. If the tank has a shutoff float, confirm that it moves freely and is not stuck by residue. Do not tape down, bypass, or remove the float.
- Reinstall the tank fully. Align it with its guides and push it in without forcing it. A tank that is slightly out of position may not collect water from the internal drain channel.
- Inspect unused drain openings. If continuous drainage is not being used, verify that the drain-port cap, plug, and any specified seal are installed as described in the manual.
Replace a tank that is cracked or distorted. Adhesive repairs may not remain watertight and can interfere with proper seating.
Inspect the drain hose
For gravity drainage, water must be able to travel downhill from the appliance to the drain. A rise, kink, compressed section, or submerged hose end can cause water to back up into the tank or cabinet.
- Confirm that the hose is attached to the correct outlet and that its connector is straight and secure.
- Check for a missing or displaced washer if the connection uses one.
- Route the hose in a continuous downward path without loops or high spots.
- Keep the outlet end above standing water and positioned where it cannot slip out of the drain.
- Disconnect the hose while the appliance is unplugged, then flush the hose separately with clean water to remove sediment or buildup.
- Remove only visible debris from the external drain opening. Do not insert wire or tools deep into the cabinet.
If the dehumidifier uses a built-in pump, follow its manual for hose routing and maximum lift. A pump reservoir, sensor, or pump that no longer moves water may require qualified service.
Look for frost or ice on the coils
Restricted airflow or operation outside the model’s specified temperature range can allow frost to form on the coils. When that ice melts, water may overwhelm or miss the intended collection path. Learn more about dehumidifier ice build-up and the conditions that can cause it.
- Unplug the unit and let any ice thaw completely.
- Remove and clean the filter according to the manufacturer’s instructions. Let it dry before reinstalling it if the manual requires a dry filter.
- Use a vacuum with a soft brush to remove accessible surface dust, if permitted by the manual. Avoid bending the coil fins.
- Confirm that curtains, furniture, and walls are not blocking the intake or exhaust.
- Check the manual’s allowable operating-temperature range before restarting the appliance.
Do not chip ice from the coils or use a hair dryer, heat gun, or other external heater to accelerate thawing.
Check placement and perform a controlled restart
Place the dehumidifier upright on a dry, level, stable, water-resistant floor. An uneven surface can prevent condensate from reaching the tank or drain outlet correctly.
After reinstalling the tank or hose, restore power and remain nearby during the initial operating cycle. Observe the tank area and hose connection without reaching into the appliance. Stop the unit immediately if water again emerges from the cabinet.
When to stop troubleshooting
Leave the dehumidifier unplugged and arrange service if it continues leaking after the tank, hose, filter, placement, and operating conditions have been checked. Service is also appropriate for a failed pump, damaged power cord, recurring ice under permitted conditions, or water coming from an inaccessible internal pan or tube. Do not remove the cabinet unless the manufacturer’s instructions specifically provide a user-serviceable procedure.
Related guides: Basement Dehumidifier Drain Hose Setup: Gravity, Pumps, and Common Mistakes • Drain Hose vs Bucket: Which Dehumidifier Setup Is Best?
Frequently asked questions
Why is my dehumidifier leaking even though the tank is not full?
A tank that is not fully seated, a stuck float, a cracked tank, or an improperly sealed unused drain port can let water escape before the tank fills. Remove the tank, inspect it over a sink, clean the float area, and reinstall it along its guides.
Can a drain hose cause water to leak from the dehumidifier cabinet?
Yes. With gravity drainage, a kink, blockage, loose connector, upward loop, or submerged hose end can cause condensate to back up. Confirm that the hose is secure and follows a continuous downward route to the drain.
Should I run a dehumidifier again after finding ice on its coils?
Let the unit thaw completely while unplugged before restarting it. Clean the filter, clear airflow obstructions, and verify that the room temperature is within the operating range stated in the manual; recurring ice may require service.
Summary
Start with the tank because incorrect seating, a stuck float, or a crack is easy to identify. Next, verify that the drain hose is secure, clear, and continuously downhill. If water appears near the grille, thaw any ice and correct filter or airflow restrictions. Persistent internal leaks generally require repair rather than continued operation.
- Clear sizing logic (room size → CADR/ACH)
- HEPA vs carbon explained for real use-cases
- Humidity + ventilation basics to reduce mold risk