Square Feet to CADR Cheat Sheet: Simple Sizing Table for Any Room

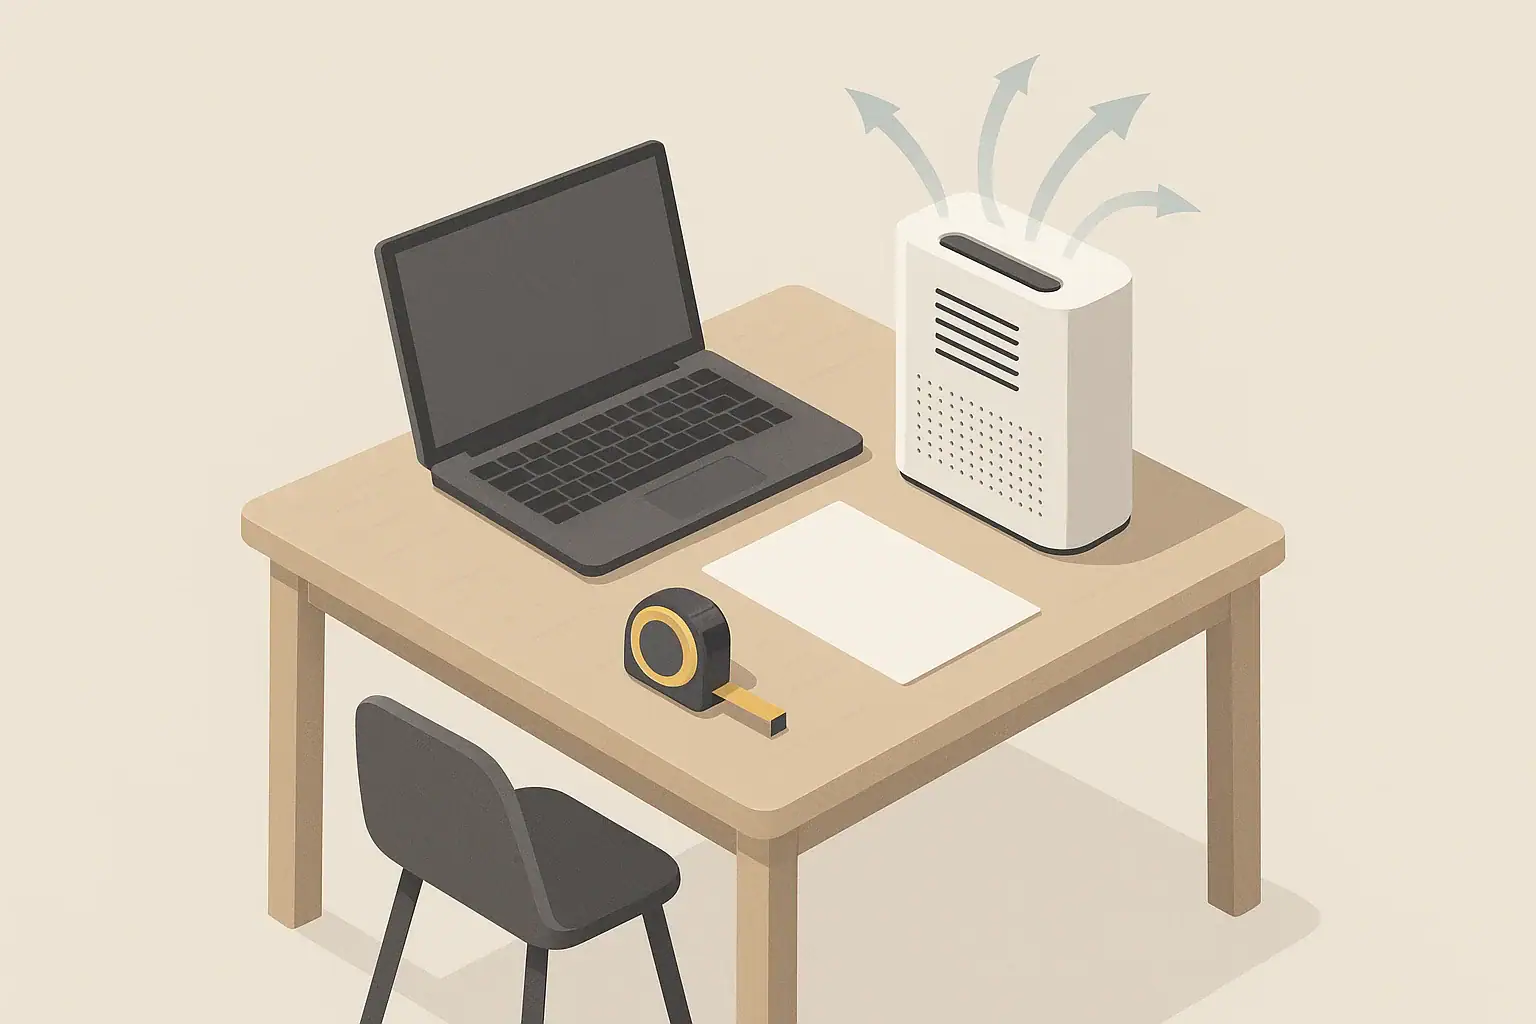
Isometric illustration of desk, tape measure and air purifier

The fastest way to convert square feet to CADR is to multiply your room size by about 0.1–0.12 for an 8 ft ceiling, which gives a reasonable clean air delivery rate in CFM for many homes. That simple rule of thumb turns floor area into a practical CADR target so you can choose an air purifier that is not too small or excessively large.

This guide explains how square footage, ceiling height, and air changes per hour (ACH) work together, then gives you an easy CADR sizing table you can use in seconds. You will see how to size an air cleaner for a bedroom, living room, or open-plan area, and how to adjust for taller ceilings or higher filtration needs.

Along the way, you will find real-world examples, common sizing mistakes to avoid, safety basics, and a checklist of purifier specs to look for. The goal is simple: help you turn square feet into a realistic CADR target you can use confidently when planning indoor air cleaning.

What CADR Means and Why Room Size Matters

Clean Air Delivery Rate (CADR) is a measure of how much filtered air an air purifier can deliver each minute, usually in cubic feet per minute (CFM). When you compare square feet to CADR, you are checking whether the purifier can cycle through the air in your room often enough to noticeably reduce particles like dust, smoke, pollen, and general indoor pollution.

Thinking only in terms of “small room” or “large room” is not enough. Two 200 ft² rooms can need very different CADR if one has an 8 ft ceiling and the other has a 10 ft or vaulted ceiling. The taller room simply contains more air volume, so the same CADR will produce fewer air changes per hour.

CADR sizing matters because it affects:

  • How quickly particles are reduced after cooking, cleaning, or outdoor smoke drifts inside.
  • How noisy the purifier must run to keep up with the space, especially at night in bedrooms.
  • How many units you need in open-plan or connected spaces where air mixes between rooms.

By matching CADR to your room’s square footage and ceiling height, you get a realistic expectation of how much filtration a space actually needs, instead of relying on vague “room coverage” claims.

Key Concepts: From Square Feet to CADR and ACH

To turn square feet into a CADR target you can use, it helps to understand four connected ideas: floor area, room volume, CADR, and air changes per hour (ACH).

Square footage (ft²)

  • Measure the room length and width in feet, then multiply them.
  • Example: 12 ft × 15 ft = 180 ft².
  • Round to the nearest whole foot; extreme precision is not necessary for planning.

Room volume (cubic feet)

  • Room volume = floor area × ceiling height.
  • Example: 180 ft² × 8 ft = 1,440 cubic feet.
  • Taller ceilings increase the volume of air that needs to be cleaned.

CADR (Clean Air Delivery Rate)

  • CADR is measured in cubic feet per minute (CFM).
  • Higher CADR means more filtered air per minute and faster dilution of indoor pollutants.
  • Real performance depends on filter condition, placement, and how well the room air mixes.

ACH (Air Changes per Hour)

  • ACH tells you how many times per hour the purifier can theoretically filter a room-sized volume of air.
  • Formula: ACH = (CADR × 60) ÷ room volume.
  • Higher ACH means more frequent passes through the filters and generally faster cleanup of particles.

For many homes, a planning range of about 4–5 ACH is a practical starting point for general air cleaning. Some people aim higher (5–8 ACH or more) in spaces with more particles, such as near busy roads, in homes with indoor smoking, or during wildfire smoke events. These are planning targets, not strict standards.

To size quickly without doing the full ACH formula every time, you can use a simple multiplier based on square feet and typical ceiling heights.

Rule of thumb: CADR per square foot

  • For an 8 ft ceiling and around 4–5 ACH, use:
    CADR (CFM) ≈ square feet × 0.1–0.12.
  • For a 9 ft ceiling, use roughly square feet × 0.12–0.14.
  • For a 10 ft ceiling, use roughly square feet × 0.13–0.15.

Choosing the higher end of the range gives you more headroom to run the purifier on a quieter fan speed while still maintaining similar ACH.

Real-World CADR Examples and Quick Sizing Table

The table below shows example CADR planning ranges for common room sizes, assuming an 8 ft ceiling and a target of roughly 4–5 ACH. These are not strict requirements, but they provide a quick reference when you compare room square feet to CADR ratings on product boxes or spec sheets.

Square feet to CADR cheat sheet for common room sizes – Example values for illustration.
Room size (ft²) Approximate use Example CADR range (CFM) Approximate ACH at mid-range
80 ft² Small office, nursery 80–110 CFM About 4–5 ACH
120 ft² Typical small bedroom 120–150 CFM About 4–5 ACH
180 ft² Mid-size bedroom 180–220 CFM About 4–5 ACH
220 ft² Small living room 220–270 CFM About 4–5 ACH
300 ft² Large bedroom or studio 300–360 CFM About 4–5 ACH
400 ft² Large living room 400–500 CFM About 4–5 ACH
500 ft² Open-plan zone 500–650 CFM About 4–5 ACH (if air mixes well)

Here are a few step-by-step examples that show how to use the rule of thumb and, if you want more precision, the full ACH formula.

Example 1: Small bedroom

  • Room size: 10 ft × 12 ft = 120 ft².
  • Ceiling height: 8 ft → volume = 960 ft³.
  • Target: about 5 ACH.
  • Formula: CADR ≈ (960 × 5) ÷ 60 = 80 CFM.
  • Rule of thumb: 120 ft² × 0.1–0.12 = 12–14.4 → about 120–145 CFM.

The rule-of-thumb range is higher than the strict formula because it builds in extra capacity for quieter operation and real-world mixing losses. Many people prefer to size closer to the rule-of-thumb range.

Example 2: Medium living room

  • Room size: 15 ft × 18 ft = 270 ft².
  • Ceiling height: 9 ft → volume = 2,430 ft³.
  • Target: about 5 ACH.
  • Formula: CADR ≈ (2,430 × 5) ÷ 60 ≈ 203 CFM.
  • Rule of thumb for 9 ft: 270 × 0.12–0.14 ≈ 32–38 → about 320–380 CFM.

Again, the rule-of-thumb CADR is higher than the minimum formula result. That helps compensate for open doorways, furniture, and the fact that many purifiers only reach their rated CADR on the highest (loudest) fan speed.

Example 3: Open-plan area

  • Space: 20 ft × 25 ft = 500 ft², 8 ft ceiling → volume = 4,000 ft³.
  • Target: around 4–5 ACH.
  • Formula at 5 ACH: CADR ≈ (4,000 × 5) ÷ 60 ≈ 333 CFM.
  • Rule of thumb: 500 ft² × 0.1–0.12 = 50–60 → about 500–600 CFM.

In a large, open space, many people prefer to use two smaller purifiers whose CADR adds up to the target rather than one very large and potentially noisy unit. For example, two purifiers around 250–300 CFM each can be placed in different zones of the space.

Common Sizing Mistakes and Troubleshooting Cues

Even with a square feet to CADR cheat sheet, it is easy to misjudge what a space really needs. The issues below show up repeatedly in homes and small offices.

Frequent mistakes when converting square feet to CADR

  • Ignoring ceiling height: Sizing only by floor area and assuming all rooms are the same height can leave tall rooms under-filtered.
  • Using the “marketing room size” only: Some products list a large maximum room size that assumes low ACH; check the CADR number instead.
  • Forgetting open doors and adjacent spaces: If doors stay open most of the time, air mixes and the effective space is larger.
  • Assuming rated CADR at every fan speed: CADR is usually measured at a high or maximum fan setting; lower speeds deliver less clean air per minute.
  • Placing the purifier in a blocked corner: Poor placement reduces mixing and makes the effective ACH lower than the calculation suggests.

The table below pairs common problems with simple cues you can watch for and adjustments you can make.

Common CADR sizing and use problems with practical cues – Example values for illustration.
Observed issue Likely cause Simple adjustment
Air still feels dusty even with purifier on CADR too low for room volume or fan speed too low Recalculate CADR from square feet and ceiling height; increase fan speed or add a second unit
Smoke or cooking odors linger for hours ACH is low or purifier is far from source Move purifier closer to source zone and aim for higher ACH by increasing CADR or fan setting
Noise is bothersome at effective speeds Unit sized too small, forced to run on high Plan a higher CADR than the minimum so you can use medium or low speeds for the same ACH
One side of room seems cleaner than the other Blocked airflow or poor mixing Move unit away from corners, keep intake and outlet clear, and avoid hiding it behind furniture
Filter clogs quickly High particle load or very dusty space Check pre-filters more often, vacuum if allowed, and consider slightly higher CADR to avoid strain

Quick troubleshooting checklist

  • Re-measure your room and confirm square footage.
  • Check actual ceiling height, especially in basements or vaulted rooms.
  • Estimate whether doors are usually open (space effectively larger) or closed (space closer to a single room).
  • Compare your purifier’s CADR to the cheat sheet; if it is far below, expect slower results.
  • Test different placements and fan speeds for a few days and note how quickly air feels clearer after common activities.

Safety Basics When Increasing CADR and ACH

Using CADR and ACH planning to improve indoor air quality is generally straightforward, but a few safety basics help keep your setup comfortable and reliable over time.

Electrical and placement safety

  • Plug air purifiers directly into a wall outlet rated for their power draw; avoid overloaded power strips.
  • Keep cords out of walkways to reduce tripping hazards, especially in tight bedrooms or hallways.
  • Maintain clear space around air inlets and outlets so they cannot overheat or pull in fabric, paper, or curtains.
  • Avoid placing purifiers right next to heat sources or in damp areas where electrical components could be exposed to moisture.

Filter and air quality considerations

  • Follow manufacturer guidance when handling and replacing filters; some filters can release dust if shaken vigorously.
  • Do not run a purifier without the proper filters installed, as it can recirculate unfiltered air and stress the motor.
  • If you are sensitive to dust, consider changing filters outdoors or wearing basic protection while handling them.

Interaction with ventilation and combustion appliances

  • Remember that filtration does not replace ventilation. Exhaust fans, range hoods, and bathroom fans still play a key role in removing moisture and combustion byproducts.
  • Do not block vents, returns, or combustion air inlets with purifiers or furniture when rearranging rooms to fit your CADR plan.
  • If you use fuel-burning appliances, continue to rely on appropriate detectors and safety devices; CADR sizing does not address combustion safety.

These basics do not change how you calculate CADR from square feet, but they help ensure that higher ACH targets are reached safely and comfortably.

Long-Term Use: Maintaining Performance Over Time

Once you have matched CADR to your room size, keeping that performance over months and years depends on filter care, placement discipline, and periodic re-checks as your home changes.

Filter maintenance and CADR

  • Filters gradually load with particles, which reduces airflow and effective CADR.
  • Clogged filters can turn a purifier that was correctly sized on paper into an underperforming unit in practice.
  • Pre-filters, if present, often capture larger dust and hair; cleaning or replacing them on schedule helps protect the main filter.

Room changes that affect CADR needs

  • Converting a spare room into a home office with more electronics and paper can increase dust levels.
  • Adding soft furnishings, rugs, and curtains can slightly change airflow and where particles settle.
  • Opening a doorway to another room more often effectively increases the air volume that needs to be filtered.

It is useful to revisit your square feet to CADR assumptions when you renovate, move furniture, or change how you use a room.

Simple seasonal routine

  • At the start of heating or cooling seasons, re-check room measurements if layouts changed.
  • Inspect filters for visible dust loading and follow replacement guidance.
  • Confirm that the purifier still has clear intake and exhaust paths after any furniture moves.
  • Consider slightly higher CADR or longer run times during seasons with more pollen, wildfire smoke, or closed windows.

Thinking of CADR as a long-term planning number rather than a one-time calculation helps keep your air cleaning close to your original target ACH as your home evolves.

Practical Takeaways and Specs to Look For

Converting square feet to CADR does not need to be complicated. The key is to pick a realistic ACH target, account for ceiling height, and leave some margin so you can run the purifier at comfortable noise levels.

  • For an 8 ft ceiling and general home use, multiplying square feet by 0.1–0.12 gives a practical CADR range.
  • Taller ceilings and open-plan spaces need proportionally higher CADR or multiple units.
  • Real-world performance depends on clean filters, smart placement, and consistent use.

Specs to look for when matching CADR to your room

  • Published CADR values: Look for clear CADR numbers in CFM for particles. Compare these directly to your calculated target from square feet and ceiling height.
  • Recommended room size: Use this as a rough guide only; confirm that the CADR aligns with your desired ACH, not just the marketing room size.
  • Fan speed options: Multiple fan settings let you reach rated CADR when needed and then drop to quieter speeds while still staying near your target ACH.
  • Noise levels by speed: If available, compare noise ratings at the speeds you will actually use; oversizing CADR slightly can let you run on lower, quieter settings.
  • Filter type and surface area: Larger filters often support higher CADR and longer life; check how often filters are expected to be replaced.
  • Energy use at typical speeds: Continuous operation at moderate CADR is often more effective than short bursts at very high speed.
  • Air intake and outlet design: Side or top exhaust can help with room mixing; make sure you can place the unit so air moves through your occupied area.
  • Indicator lights or controls: Simple status lights or controls can remind you when to change filters and help you keep CADR closer to the planned level.

With these specs in mind and the square feet to CADR cheat sheet as a guide, you can match an air purifier’s clean air delivery rate to your rooms more confidently, support better indoor air quality, and maintain comfortable noise and energy levels over the long term.

Frequently asked questions

Which purifier specs and features should I prioritize when matching CADR to my room?

Prioritize a clear published CADR value for particles (in CFM), multiple fan speeds with noise ratings at the speeds you plan to use, and the filter type and surface area. Also look for energy use, filter-life indicators, and an intake/outlet design that fits your room layout. These combined specs determine whether a unit can reliably deliver the ACH you planned while remaining reasonably quiet and easy to maintain.

How can I tell if my air purifier is undersized for the space?

Common signs include dust or odors lingering despite the purifier running, the need to operate at the highest fan speed to see results, and inconsistent cleanliness across the room. Measure your room and compare the unit’s CADR to the cheat sheet or calculate ACH; if the CADR is far below the target, the unit is likely undersized.

Are there safety concerns when running air purifiers at high speeds continuously?

Running a purifier continuously at high speeds increases electrical load and filter loading, which can shorten component life and raise noise. To stay safe, plug units into properly rated outlets (avoid overloaded strips), keep intake and exhaust clear, and follow manufacturer guidance for placement and maintenance. Filtration does not replace ventilation or combustion-safety devices.

Is it better to use one large purifier or multiple smaller units for open-plan areas?

Multiple smaller units can improve air mixing, let you place cleaners near pollution sources, and often run quieter by sharing the load. A single large unit may work for a uniformly open area but can be noisy and less effective for zoned spaces; choose based on room layout and noise preferences.

How should I adjust CADR needs for taller ceilings or connected rooms?

Increase your CADR target to account for greater room volume — for example, use higher multipliers for 9 ft or 10 ft ceilings as noted in the guide — or calculate CADR from the ACH formula using actual cubic feet. For connected rooms with open doors, treat the combined floor area (and volume) when sizing or add additional units for different zones.

How often should I check or replace filters to maintain rated CADR?

Check pre-filters monthly and inspect main filters regularly; replacement intervals vary but commonly fall in the 6–12 month range depending on usage and particle load. In dusty environments or during smoke events, inspect and replace filters sooner because clogged filters reduce airflow and effective CADR.
ACH to CADR Conversion: Simple Formula, Real Examples, and Sizing Tips

Isometric illustration of room sizing tools and air purifier

ACH to CADR conversion uses a simple formula: CADR (CFM) = (ACH × room volume in cubic feet) ÷ 60. Once you know your room size and your target air changes per hour, you can estimate how much clean air delivery rate you need from an air purifier. This turns confusing marketing claims into a clear, room-based sizing decision.

This guide explains what ACH (air changes per hour) and CADR (clean air delivery rate) really mean, how they work together, and how to apply the formula step by step. You will see practical room examples, planning tables, and common mistakes people make when sizing purifiers for bedrooms, living rooms, and open spaces.

By the end, you will be able to look at a purifier’s airflow specs, compare them with your room volume, and decide whether the unit can realistically keep up with your indoor air quality goals, noise preferences, and long-term use.

ACH and CADR: What They Mean and Why They Matter

ACH and CADR describe the same basic idea from two different angles: how quickly air is cleaned.

ACH (Air Changes per Hour) tells you how many times per hour the full volume of air in a room is filtered or replaced. It is a room-focused metric. For example, 5 ACH in a bedroom means the purifier processes a volume of air equal to that room’s volume five times every hour.

CADR (Clean Air Delivery Rate) tells you how much clean air a device delivers, usually in cubic feet per minute (CFM). It is a device-focused metric. A purifier with a CADR of 150 CFM is delivering 150 cubic feet of filtered air every minute under test conditions.

In practice:

  • Use ACH when you start with a specific room and comfort goal (for example, “I want about 4–6 air changes per hour in my bedroom”).
  • Use CADR when you compare purifiers or fan speeds (for example, “This model delivers more clean air at the same noise level”).

Converting between ACH and CADR lets you answer important sizing questions:

  • Is this purifier strong enough for my room size and ceiling height?
  • How many air changes will I actually get at a quieter fan speed?
  • Do I need one large purifier or two smaller ones to cover an open-plan area?

How ACH to CADR Conversion Works

The ACH to CADR relationship is based on basic volume and airflow. The key is to keep units consistent and follow the steps in order.

Step 1: Calculate Room Volume

First, estimate your room volume in cubic feet. For most homes in the U.S.:

Room volume (cubic feet) = length (ft) × width (ft) × ceiling height (ft)

Example room:

  • Length: 12 ft
  • Width: 10 ft
  • Ceiling height: 8 ft

Room volume = 12 × 10 × 8 = 960 cubic feet.

Step 2: Use the ACH to CADR Formula

ACH describes how many room volumes are cleaned per hour. CADR describes airflow per minute. Since there are 60 minutes in an hour:

ACH = (CADR × 60) ÷ room volume

Rearranging to solve for CADR gives the formula most people use when sizing a purifier:

CADR (CFM) = (ACH × room volume) ÷ 60

This assumes the purifier runs steadily at one fan speed and that air in the room mixes reasonably well. Real rooms are not perfect boxes, but this formula gives a solid planning estimate.

Step 3: Choose a Target ACH Range

There is no single “correct” ACH for every home. Instead, people usually pick a target range based on use, sensitivity, and noise tolerance. Common planning examples include:

  • 2–3 ACH: Light background cleaning in low-use rooms or offices.
  • 4–5 ACH: Often used for bedrooms and living rooms when air quality is a priority.
  • 6+ ACH: Sometimes chosen for faster particle reduction in a specific room.

Higher ACH generally means faster reduction of airborne particles, but also higher airflow and often more noise. The goal is to choose a range you can realistically live with day and night.

ACH to CADR Planning Steps
Example values for illustration.
Step What to do Key question Practical tip
1 Measure room length and width How big is the floor area? Round to the nearest half-foot; note odd alcoves separately.
2 Measure ceiling height How tall is the room? Do not assume 8 ft; many rooms are 9–10 ft or vaulted.
3 Calculate room volume (L × W × H) How much air is there to clean? Keep everything in feet so volume is in cubic feet.
4 Pick a target ACH range How aggressively do you want to clean? Plan a low and high value, such as 3 and 5 ACH.
5 Apply CADR = (ACH × volume) ÷ 60 What CADR do you need? Calculate once for each ACH target in your range.
6 Compare with purifier specs Does the device keep up? Remember published CADR is often at higher fan speeds.
7 Adjust for real room conditions Will mixing and doors change results? Open doors and tall ceilings usually mean you need more CADR.

Real-World ACH to CADR Examples

Working through real room examples makes the ACH to CADR conversion feel less abstract. The same formula applies to small bedrooms, medium living rooms, and open-plan areas; only the room volume changes.

Example 1: Typical Bedroom (12 × 10 ft, 8 ft Ceiling)

Room measurements:

  • Length: 12 ft
  • Width: 10 ft
  • Ceiling height: 8 ft

Room volume: 12 × 10 × 8 = 960 cubic feet.

Now compare several ACH targets using the formula CADR = (ACH × volume) ÷ 60:

  • 3 ACH: CADR = (3 × 960) ÷ 60 = 2,880 ÷ 60 ≈ 48 CFM
  • 4 ACH: CADR = (4 × 960) ÷ 60 = 3,840 ÷ 60 ≈ 64 CFM
  • 5 ACH: CADR = (5 × 960) ÷ 60 = 4,800 ÷ 60 ≈ 80 CFM
  • 6 ACH: CADR = (6 × 960) ÷ 60 = 5,760 ÷ 60 ≈ 96 CFM

In this bedroom, a purifier delivering around 80–96 CFM of clean air could reach roughly 5–6 ACH, assuming the door is mostly closed and the air mixes well around furniture.

Example 2: Medium Living Room (20 × 18 ft, 9 ft Ceiling)

Room measurements:

  • Length: 20 ft
  • Width: 18 ft
  • Ceiling height: 9 ft

Room volume: 20 × 18 × 9 = 3,240 cubic feet.

Now compare 3 ACH and 5 ACH:

  • 3 ACH: CADR = (3 × 3,240) ÷ 60 = 9,720 ÷ 60 ≈ 162 CFM
  • 5 ACH: CADR = (5 × 3,240) ÷ 60 = 16,200 ÷ 60 ≈ 270 CFM

This shows why a purifier that feels strong in a small bedroom can seem underpowered in a large living room: the room volume is more than three times larger, so you need several times more CADR to reach the same ACH.

Example 3: Higher Ceilings, Same Floor Area

Ceiling height changes room volume and required CADR even when the floor area stays the same.

Base floor area: 12 × 12 = 144 square feet.

  • 8 ft ceiling: Volume = 144 × 8 = 1,152 cubic feet
  • 10 ft ceiling: Volume = 144 × 10 = 1,440 cubic feet

At 5 ACH:

  • 8 ft ceiling: CADR = (5 × 1,152) ÷ 60 ≈ 96 CFM
  • 10 ft ceiling: CADR = (5 × 1,440) ÷ 60 ≈ 120 CFM

The taller room needs about 25% more CADR to reach the same air changes per hour.

Example 4: Multiple Purifiers in One Space

CADR is roughly additive when multiple purifiers operate in the same well-mixed space. For the 3,240 cubic foot living room above, 5 ACH requires about 270 CFM. You might reach that with:

  • One purifier at about 270 CFM, or
  • Two purifiers at about 135 CFM each, or
  • Three purifiers at about 90 CFM each

Splitting CADR across multiple units can help with layout and noise, as long as the devices are not blocked by furniture and air can circulate between zones.

Sample CADR Targets for Common Room Types
Example values for illustration.
Room type Approx. size and height Volume (cubic feet) CADR for ~4 ACH CADR for ~6 ACH
Small office 10 × 10 ft, 8 ft 800 ≈ 53 CFM ≈ 80 CFM
Typical bedroom 12 × 10 ft, 8 ft 960 ≈ 64 CFM ≈ 96 CFM
Large bedroom 15 × 12 ft, 9 ft 1,620 ≈ 108 CFM ≈ 162 CFM
Medium living room 20 × 18 ft, 9 ft 3,240 ≈ 216 CFM ≈ 324 CFM
Open-plan area 25 × 20 ft, 9 ft 4,500 ≈ 300 CFM ≈ 450 CFM

Common ACH to CADR Mistakes and Troubleshooting

Even with the right formula, it is easy to misjudge how a purifier will perform in a real room. These are some of the most common issues and how to spot them.

Mistake 1: Forgetting Ceiling Height

Many people size purifiers based only on floor area, ignoring ceiling height. This can lead to undersized units in rooms with 9–10 ft or vaulted ceilings. If your purifier seems weak in a tall room but fine in a smaller, lower-ceiling room, re-check your volume calculation.

Mistake 2: Treating Connected Rooms as One Box

ACH math assumes a mostly closed room. Open doors, stairwells, and connected hallways effectively increase the volume the purifier is trying to treat. Signs this is happening include clean air near the purifier but stale or dusty air in distant corners or adjacent rooms.

Mistake 3: Using Published CADR at a Much Lower Fan Speed

Published CADR ratings are typically measured at a higher fan setting. If you only use a very quiet, low speed, the effective CADR may be significantly lower than the rating used in your calculations. If the unit cleans well on high but not on your usual setting, this is a likely cause.

Mistake 4: Ignoring Filter Condition

Loaded filters increase resistance to airflow. Over time, this can reduce actual CADR even if the fan speed setting stays the same. If your purifier used to perform well at a certain speed but seems less effective now, check whether pre-filters are clogged or fine filters are overdue for replacement.

Mistake 5: Poor Placement and Blocked Airflow

Placing a purifier directly behind furniture, in a tight corner, or under a desk can limit intake and outlet airflow. This reduces effective mixing and lowers the real ACH in the room. If you see dust settling quickly on surfaces far from the unit, or feel little air movement, placement might be the issue.

ACH Troubleshooting Cues
Example values for illustration.
Symptom Likely cause What to check or adjust
Air feels clean only near the purifier Insufficient CADR for total volume or blocked airflow Recalculate volume including open areas; move unit away from obstacles.
Unit cleans well on high, poorly on low Actual CADR on low is below target ACH Recalculate using a lower estimated CADR; consider a stronger unit.
Performance dropped over months Dirty filters reducing airflow Inspect and clean pre-filters; replace main filters as recommended.
Dust builds up in distant corners Poor room mixing or complex layout Relocate purifier, add a second unit, or run ceiling/box fans to improve mixing.
Purifier feels undersized in a tall room Ceiling height not included in sizing Recalculate volume with actual height; adjust CADR target upward.

Safety Basics When Increasing ACH with Purifiers

Air purifiers used to reach a target ACH are generally straightforward to operate, but there are a few safety points to keep in mind while you work toward higher air changes per hour.

Electrical and Placement Safety

  • Plug purifiers directly into wall outlets, not into overloaded power strips or extension cords.
  • Keep the unit on a stable, level surface where it cannot be easily knocked over.
  • Leave several inches of clearance around air inlets and outlets to prevent overheating and airflow restriction.

Ozone and Byproduct Concerns

Some devices marketed as air cleaners rely on ionization or other technologies that can produce ozone or other byproducts. When you are focused on ACH and CADR, make sure the device is designed primarily around mechanical filtration (such as particle filters and optional gas/odor media) and not around ozone-generating methods.

Noise, Sleep, and Long-Term Comfort

Running a purifier at very high speed to chase a high ACH target may lead to sleep disruption or stress from constant noise. In practice, it is safer and more sustainable to choose a device that can reach your target ACH at a moderate, tolerable fan speed, then use higher speeds only when needed.

Interaction with Other Equipment

  • Do not block HVAC returns or supply vents with purifiers.
  • Avoid placing purifiers where they blow directly into open flames or combustion appliances.
  • Keep cords routed so they do not create tripping hazards, especially in dark bedrooms or hallways.

Long-Term Use, Filter Care, and Seasonal Adjustments

ACH and CADR calculations are most useful when your purifier continues to perform close to its rated airflow over time. That depends on filter care, seasonal changes, and how you operate the unit day to day.

Filter Maintenance and CADR Over Time

As filters load with dust and other particles, resistance to airflow increases and effective CADR can drop. To keep actual ACH closer to your calculations:

  • Clean pre-filters on the schedule in your manual, or more often in dusty homes or homes with pets.
  • Replace main filters based on time-in-use, not just calendar months, especially if the purifier runs 24/7.
  • Watch for airflow changes by feeling the outlet; a noticeable drop in airflow at the same fan speed is a cue to check filters.

Seasonal Use and Room Changes

Room volume and ACH needs do not change with the seasons, but how you use the space often does:

  • In colder months, doors and windows are usually closed, so your ACH calculations based on a single room are more accurate.
  • In warmer months, open windows and fans can dilute indoor pollutants but also connect multiple rooms into a larger “volume,” effectively lowering ACH from a single purifier.
  • Rearranging furniture or adding large items (such as wardrobes or bookcases) can affect air mixing; after big layout changes, reassess purifier placement.

Storage and Intermittent Use

If you only use a purifier during certain seasons or events (such as wildfire smoke or renovation work):

  • Store the unit in a dry, clean area to prevent dust buildup on filters while idle.
  • Seal spare filters in their packaging until needed so media does not age unnecessarily.
  • When bringing a stored unit back into service, check filters and run the purifier on a higher speed initially to quickly re-establish your target ACH.

Putting It All Together: Practical Takeaways and Specs to Look For

ACH to CADR conversion is mainly about matching your room’s air volume with a realistic clean air delivery rate. Once you understand the formula, most of the work is practical: measuring accurately, choosing a sensible ACH range, and selecting a purifier that can reach that target at a fan speed you will actually use.

Quick Summary of the Conversion

  • Measure length, width, and height of the room to find volume in cubic feet.
  • Pick a target ACH range (for many living spaces, 4–6 ACH is a common planning range).
  • Use CADR (CFM) = (ACH × volume) ÷ 60 to estimate how much clean air delivery you need.
  • Compare that CADR with the purifier’s airflow specs, keeping in mind that ratings usually assume higher fan speeds.

Specs to Look For When Sizing a Purifier

When you are ready to compare models, these are the key specifications and details to focus on:

  • CADR values in CFM: Look for clearly listed clean air delivery rates and compare them directly with your calculated target.
  • Airflow at different fan speeds: If available, note how airflow or CADR changes between low, medium, and high settings.
  • Recommended room size and ceiling assumptions: Check whether the manufacturer’s room-size claims assume 8 ft ceilings and a specific ACH.
  • Filter type and surface area: Confirm that the unit uses mechanical particle filtration, with optional gas or odor media if needed.
  • Noise levels (dB) by speed: Compare noise ratings at the speed you expect to use most often, not just at the quietest setting.
  • Energy use (watts) at typical speeds: Higher ACH targets usually mean higher power draw; consider long-term operating cost.
  • Filter replacement intervals and cost: Short intervals or expensive filters can add up, especially if you run the unit continuously.
  • Intake and outlet design: Wide, unobstructed grilles usually support better mixing and more even room coverage.

If you keep these points in mind and apply the ACH to CADR formula before you buy, you will be much less likely to undersize a purifier or rely on unrealistic room-size claims. Even a quick, back-of-the-envelope calculation is enough to bring your air cleaning plans closer to how the purifier will perform in your actual home.

Frequently asked questions

Which purifier specifications and features matter most when converting ACH to CADR?

Prioritize the purifier’s CADR (in CFM) and published airflow at different fan speeds, since those directly determine ACH. Also check filter type (mechanical particle filtration), noise levels at usable speeds, recommended room-size assumptions, and filter replacement intervals and costs for realistic long-term performance.

How can I tell if placement or room layout is causing poor performance rather than low CADR?

If the air feels clean near the unit but dusty in corners or other zones, poor mixing or blocked airflow is likely. Try moving the unit away from walls or furniture, ensure clear intake/outlet space, and consider adding a second unit or improving circulation with fans to confirm whether placement is the issue.

Are there safety concerns I should know about when increasing ACH by running purifiers faster?

Yes. Increasing fan speed raises noise and power draw and can overload outlets if multiple devices share the same circuit. Avoid purifiers that produce ozone or other byproducts, keep clearances around inlets and outlets, and place units on stable surfaces away from combustion appliances.

Can I reach my ACH target by combining multiple smaller purifiers?

Yes—CADR is roughly additive in a well-mixed space, so multiple units can achieve the same total CFM as a single larger unit. Ensure units are positioned to promote even circulation and not blocked by furniture, and be aware that poor mixing can reduce the effective benefit of additional devices.

How often should filters be replaced to keep CADR close to the rated value?

Filter replacement depends on run time and local conditions, but follow the manufacturer’s guidance and replace main filters sooner in heavy-use, dusty, or pet-owning homes. Check and clean pre-filters regularly and watch for a noticeable drop in outlet airflow as an indicator that replacements are needed.

CADR Calculator: How to Match Room Size, Ceiling Height, and ACH

Isometric illustration of room and purifier sizing setup

A CADR calculator tells you how much Clean Air Delivery Rate (CADR), in cubic feet per minute, you need for a specific room by combining room size, ceiling height, and your target air changes per hour (ACH). In practice, you measure the room, pick an ACH goal, and then use a simple formula to estimate the minimum CADR for an air purifier.

This approach is more reliable than marketing claims about “maximum room size” because it is based on room volume and how often you want that air filtered. It helps you compare different purifiers, decide whether one unit is enough, and estimate how well an existing unit is performing.

Below you will find the key CADR formulas, worked examples for common room sizes, typical ACH planning ranges, and practical tips for avoiding sizing mistakes. The goal is to give you a repeatable method you can use any time you are planning or checking air purifier capacity in your home.

What CADR Means and Why It Matters

Clean Air Delivery Rate (CADR) is a measure of how quickly an air cleaner reduces airborne particles in a room. It combines filter efficiency and airflow into a single number, expressed in cubic feet per minute (CFM). A higher CADR means more cleaned air each minute.

CADR is usually reported separately for smoke, dust, and pollen. Smoke CADR is often used for planning because smoke particles are closer in size to fine particulate matter (PM2.5). Many people use the lowest of the listed CADR ratings as a conservative planning value.

CADR matters for room sizing because it ties directly to how many times per hour the purifier can cycle the room’s air through its filters. This is called air changes per hour (ACH). When you know the room volume and your ACH target, you can calculate the CADR needed instead of guessing.

Thinking in terms of CADR, room volume, and ACH helps you:

  • Size a new purifier for a bedroom, living room, or office.
  • Estimate how well an existing purifier is likely to perform in a given space.
  • Plan for special conditions such as seasonal smoke or allergy seasons.

Key Concepts: Room Volume, ACH, and CADR Formulas

A CADR calculator is just applying a few basic relationships. Once you understand them, you can do the math yourself or double-check any automated tool.

Room area and volume

First, convert floor measurements into air volume:

Area (sq ft) = length (ft) × width (ft)
Volume (cubic ft) = area (sq ft) × ceiling height (ft)

Example:

  • Length = 12 ft, width = 15 ft → area = 180 sq ft
  • Ceiling height = 8 ft → volume = 180 × 8 = 1,440 cubic ft

Air changes per hour (ACH)

ACH describes how many times per hour the purifier can theoretically move the room’s total air volume through its filters. It is a planning tool, not a guarantee of specific outcomes.

Common planning ranges many households use:

  • 2–3 ACH for gentle background improvement in larger or open rooms.
  • 4–6 ACH for bedrooms and main living spaces where you want more consistent particle reduction.
  • 6–8+ ACH as a temporary target during smoke events or heavy outdoor pollution.

How CADR, room volume, and ACH fit together

Once you know room volume and ACH, you can convert between CADR and ACH using two core formulas:

  • Required CADR (CFM) = (room volume × ACH) ÷ 60
  • ACH = (CADR × 60) ÷ room volume

The division by 60 converts between “per hour” and “per minute.” These formulas assume the CADR you use is the effective clean airflow at the fan speed you actually run, not just the maximum rating.

CADR Planning Steps and Example Targets Example values for illustration.
Step What to calculate or choose Example value How it affects CADR
1 Measure length × width 12 ft × 15 ft = 180 sq ft Sets the basic floor area to treat
2 Note ceiling height 8 ft Converts area into room volume
3 Compute room volume 180 × 8 = 1,440 cubic ft Larger volume requires more CADR
4 Pick ACH target 5 ACH for a bedroom Higher ACH target increases CADR need
5 Compute required CADR (1,440 × 5) ÷ 60 = 120 CFM Minimum smoke CADR to plan around
6 Adjust for real fan speed Size up by 20–30% Helps medium speed still meet your target

Real-World CADR Calculator Examples

These examples show how to apply the formulas in typical home situations. Numbers are rounded for clarity.

Example 1: Small bedroom with standard ceiling

  • Room size: 10 ft × 12 ft → 120 sq ft
  • Ceiling height: 8 ft → volume = 120 × 8 = 960 cubic ft

Plan for 5 ACH in this bedroom:

  • Required CADR = (960 × 5) ÷ 60 = 4,800 ÷ 60 = 80 CFM

In practice, you might look for a purifier with a smoke CADR somewhat above 80 CFM so that a medium or quiet setting can still deliver close to this airflow.

Example 2: Larger living room with higher ceiling

  • Room size: 15 ft × 20 ft → 300 sq ft
  • Ceiling height: 10 ft → volume = 300 × 10 = 3,000 cubic ft

Plan for 4 ACH in this living room:

  • Required CADR = (3,000 × 4) ÷ 60 = 12,000 ÷ 60 = 200 CFM

If this room is open to a hallway or dining area, the effective volume may be closer to 3,500–4,000 cubic ft. That would increase the required CADR for 4 ACH to around 230–270 CFM, or may suggest using two smaller units placed in different parts of the space.

Example 3: Estimating ACH for an existing purifier

Suppose you already own a purifier with a listed smoke CADR of 150 CFM and want to know how it performs in a 180 sq ft room with a 9 ft ceiling.

  • Room volume = 180 × 9 = 1,620 cubic ft
  • ACH = (150 × 60) ÷ 1,620 = 9,000 ÷ 1,620 ≈ 5.6 ACH

If you usually run the purifier on medium instead of maximum, the effective CADR might be closer to 60–70% of the rated value. That would reduce the actual ACH, which can help you decide whether to increase the fan speed at certain times or move the unit to a smaller room.

Example 4: High ceiling room vs. standard ceiling

Consider two rooms with the same floor area but different ceiling heights:

  • Room A: 200 sq ft with 8 ft ceiling → volume = 1,600 cubic ft
  • Room B: 200 sq ft with 12 ft ceiling → volume = 2,400 cubic ft

Planning for 5 ACH:

  • Room A CADR = (1,600 × 5) ÷ 60 ≈ 133 CFM
  • Room B CADR = (2,400 × 5) ÷ 60 = 200 CFM

The taller room needs about 50% more CADR to reach the same ACH, which is easy to miss if you only look at square footage.

Illustrative CADR Needs by Room Type and ACH Target Example values for illustration.
Room description Approx. area and height Volume (cubic ft) Example ACH target Approx. CADR needed
Small office or nursery 100 sq ft, 8 ft 800 4 ACH (800 × 4) ÷ 60 ≈ 55 CFM
Typical bedroom 150 sq ft, 8–9 ft 1,200–1,350 5 ACH ≈ 100–115 CFM
Large living room 300 sq ft, 9 ft 2,700 4 ACH (2,700 × 4) ÷ 60 = 180 CFM
Open-plan area 400 sq ft, 9 ft 3,600 3–4 ACH ≈ 180–240 CFM
High-ceiling loft 250 sq ft, 12 ft 3,000 5 ACH (3,000 × 5) ÷ 60 = 250 CFM

Common CADR Calculator Mistakes and How to Fix Them

Even when the math is simple, a few recurring issues can lead to underperforming air cleaning. These troubleshooting cues can help you spot and correct problems.

Mistake 1: Ignoring ceiling height and total volume

Relying only on square footage can significantly underestimate CADR needs in rooms with tall or vaulted ceilings. If the air feels stale or particle readings stay high despite using a purifier, re-check your calculations using actual ceiling height.

Mistake 2: Using maximum CADR but running on low speed

CADR ratings are often measured at the highest fan speed. If you rarely use that setting, the effective CADR is lower than the number on the box. Signs this might be an issue include visible dust settling quickly, slow recovery after cooking, or persistent smoke odors during outdoor smoke events.

Mistake 3: Treating open layouts as separate rooms

When a living room, dining area, and hallway share large openings without doors, air mixes freely. Sizing a purifier only for the main room can leave the combined space under-served. If you notice that particle levels drop near the purifier but stay higher in distant areas, consider recalculating CADR using the combined area.

Mistake 4: Forgetting about filter loading

As filters capture particles, airflow gradually decreases. If you sized the purifier exactly to the minimum CADR needed, performance may drift below your target between filter changes. A sudden increase in fan noise, reduced airflow at the outlet, or a slower drop in measured particle levels can all signal that filters are restricting flow.

Mistake 5: Poor placement and blocked airflow

Even with adequate CADR, placing the purifier in a tight corner, behind furniture, or directly under a shelf can limit how well it mixes air. If one side of the room feels noticeably dustier, or a particle monitor near the purifier shows much lower readings than one across the room, placement may be the issue.

Common CADR Planning Problems and Simple Corrections Example values for illustration.
Symptom you notice Likely CADR-related cause Practical adjustment to try
Air feels stuffy in a tall room Ceiling height not included in volume Recalculate using actual height; consider higher CADR or a second unit
Good results only on loud “turbo” mode Unit sized to minimum CADR at max speed Size up so medium speed meets your ACH target
Clean near the purifier, dusty across the room Blocked airflow or oversized open area Move unit to a more central, open spot or add a second unit
Performance drops after a few months Filters loaded and reducing airflow Inspect and replace or clean pre-filters as recommended
Smoke or cooking haze clears very slowly ACH target too low for the source strength Temporarily aim for higher ACH by increasing fan speed or CADR

Safety Basics When Using High-CADR Air Purification

CADR calculations are primarily about performance, but there are a few safety-related points to keep in mind when you operate air cleaners at higher airflow levels or for extended periods.

Avoiding unintended ozone or byproducts

CADR ratings focus on particle removal, not on chemical byproducts. When selecting an air cleaner, many households prefer technologies that do not intentionally generate ozone or reactive gases. Always follow the manufacturer’s instructions for safe operation and avoid modifying the device or using it in ways not described in the manual.

Electrical and placement safety

Higher airflow usually means a more powerful fan motor. Use a properly grounded outlet, avoid overloading power strips, and keep cords out of walkways. Place the purifier on a stable, level surface where it is unlikely to be knocked over, especially in homes with children or pets.

Ventilation and indoor air quality balance

A CADR calculator helps with particle filtration, but it does not replace the need for adequate ventilation. In tightly sealed rooms, especially where combustion appliances are present, make sure that basic ventilation and safety detectors are in place. Air purifiers do not remove carbon monoxide or maintain oxygen levels.

Noise exposure and comfort

Running a purifier at its highest speed for long periods may create unwanted noise. Prolonged exposure to high sound levels can be uncomfortable, particularly in bedrooms. Use CADR planning to size the purifier so that a moderate speed can meet your ACH target while keeping sound levels reasonable.

Long-Term CADR Performance: Maintenance and Monitoring

Once you have sized and placed a purifier using CADR calculations, ongoing care helps keep its effective CADR closer to the original plan.

Filter replacement and pre-filter care

Filters gradually load with particles and, in the case of activated carbon, with gases and odors. This can reduce airflow and effective CADR over time.

  • Follow the manufacturer’s recommended replacement intervals as a baseline.
  • Inspect filters periodically for visible dust or discoloration, especially pre-filters.
  • If the unit includes a washable pre-filter, clean it as directed to help maintain airflow.

Seasonal adjustments and storage

Many people change how they use purifiers across the year:

  • During wildfire season or heavy outdoor pollution, you might target higher ACH and run higher fan speeds.
  • During milder seasons, you may accept lower ACH and quieter operation.
  • If you store a purifier for part of the year, keep it in a dry area and check filters for dust or odors before using it again.

Using simple monitors to validate CADR planning

Basic indoor particle monitors can help you see whether your CADR-based plan is working as expected. While consumer devices are not laboratory instruments, they can still reveal patterns:

  • How quickly readings drop after turning the purifier on at a given fan speed.
  • Whether particle levels stay lower in a room where you have calculated a higher ACH.
  • When performance starts to drift, suggesting that filters or placement need attention.

Combining CADR calculations with simple observations gives you a more complete picture of long-term performance.

Practical Takeaways and Specs to Look For

A CADR calculator is most useful when it leads to clear decisions about room coverage, fan speed, and purifier selection. The following points summarize how to put the numbers to work.

  • Always start with accurate room measurements, including ceiling height.
  • Pick an ACH planning range that fits how you use the room and your noise tolerance.
  • Calculate the minimum CADR, then add a margin so medium-speed operation can still meet your target.
  • Revisit your calculations when you move the purifier to a new room or change your floor plan.

Specs to look for when comparing purifiers

When you are ready to compare specific models against your CADR calculation, it helps to have a short checklist:

  • Particle CADR values: Look for clearly stated CADR for smoke, dust, and pollen. Use the smoke or lowest value for planning.
  • Recommended room size vs. your own math: Compare marketing room-size claims with your calculated CADR to see if they align.
  • Fan speed vs. CADR: If possible, note how CADR or airflow changes between low, medium, and high speeds.
  • Filter type and efficiency: Confirm that the unit uses a high-efficiency particulate filter suitable for fine particles.
  • Noise levels at each speed: Check whether the speed that meets your CADR target has an acceptable sound rating for the room.
  • Physical size and airflow path: Make sure you have space to place the unit where air can circulate freely.
  • Filter maintenance indicators: A simple reminder or indicator can help you maintain CADR over time.
  • Energy use: For continuous operation, consider power consumption at the speed that matches your ACH goal.

Using CADR calculations together with this spec checklist gives you a structured way to match an air purifier to your room, your comfort preferences, and your long-term air quality goals.

Frequently asked questions

Which air purifier specifications and features matter most for meeting a CADR target?

Focus on the particle (smoke) CADR value at the fan speed you plan to run, because that directly relates to ACH. Also check filter type and efficiency (e.g., true high-efficiency particulate filters), airflow path/placement flexibility, noise levels at the operating speed, and maintenance features like filter-change indicators.

Why is relying only on square footage a common sizing mistake?

Square footage ignores ceiling height and any open connections to other spaces, both of which affect room volume and required CADR. Always calculate volume (area × height) and account for adjacent open areas to avoid under-sizing.

Are there safety concerns when running air purifiers at high fan speeds?

Running at higher speeds is generally safe, but be mindful of electrical load, stable placement, and noise exposure. Also avoid devices that intentionally generate ozone or reactive byproducts and follow the manufacturer’s safety instructions.

When should I temporarily raise my ACH target, and by how much?

Increase ACH during events that raise indoor particle concentrations, such as wildfires, heavy outdoor pollution, or indoor smoke from cooking. Temporary targets of 6–8+ ACH are commonly used for smoke events; monitor particle levels and run higher speeds while the source persists.

Is it better to use one larger purifier or multiple smaller units to reach a CADR goal?

Multiple units can improve distribution and mixing in large or open-plan spaces because total CADR is additive and placement can reduce dead zones. A single larger unit may be simpler and quieter for a single enclosed room; choose based on room layout, noise, and placement options.

How can I tell when a purifier’s effective CADR is dropping?

Signs include slower reductions in particle readings after turning the unit on, increased fan noise, or visible dust buildup on filters and pre-filters. Use a particle monitor if available and inspect/replace or clean filters per the device guidance when performance drifts.

Air Purifier in a Humid Room: How Much Does High Humidity Really Matter?

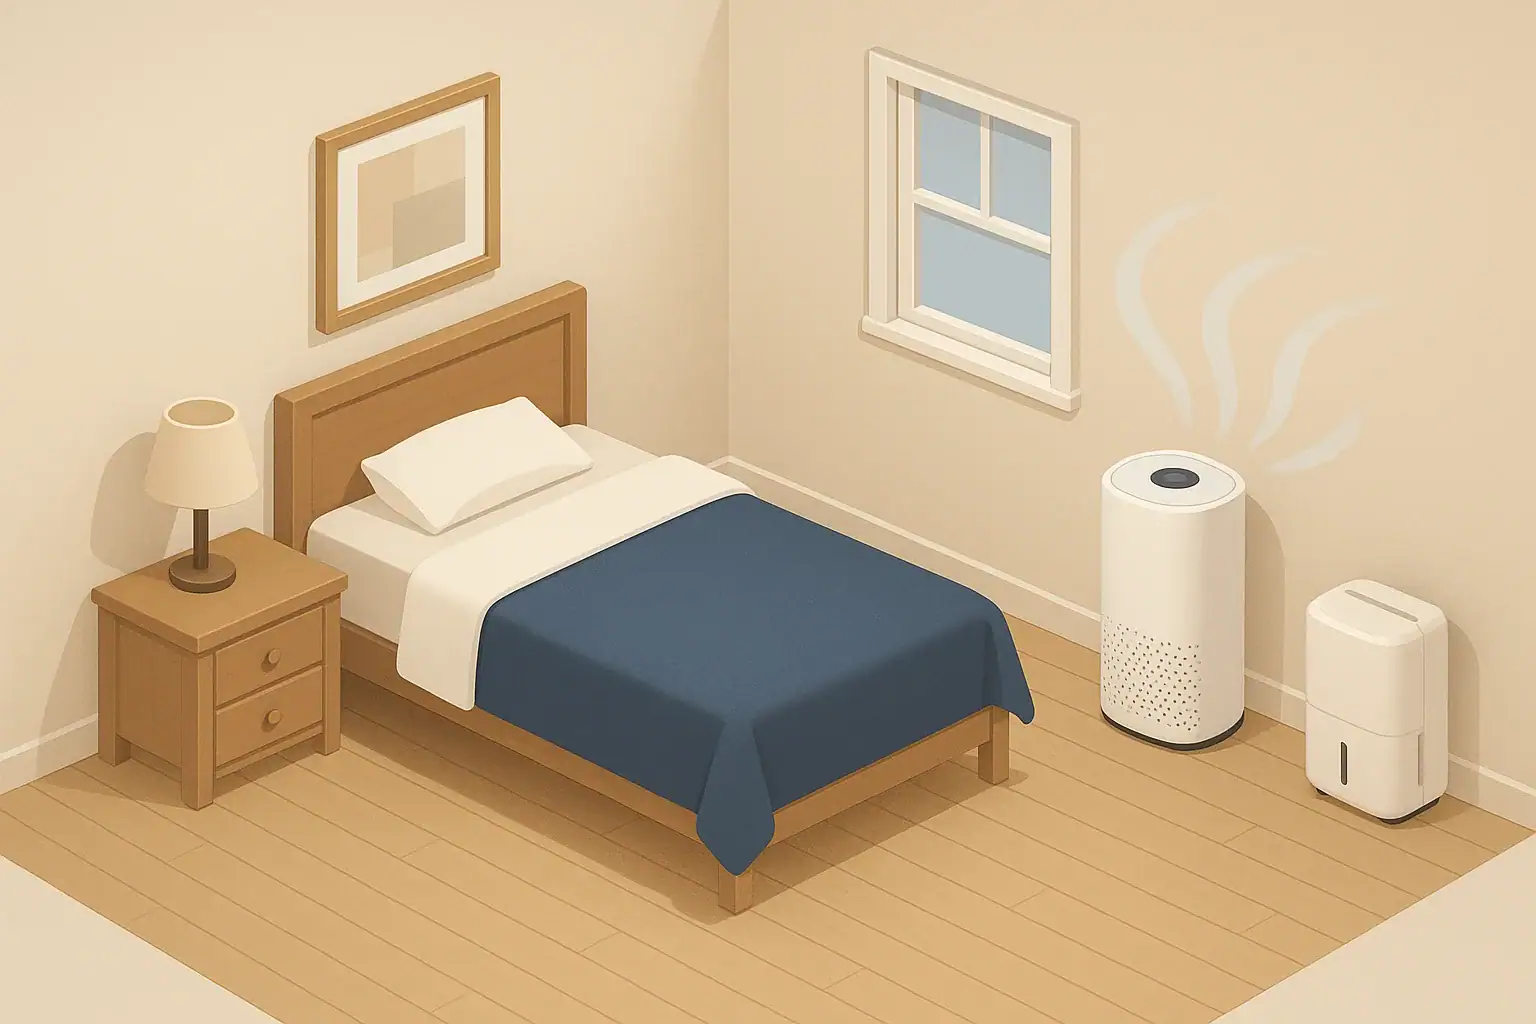
Air purifier operating in a tidy bedroom with balanced humidity

Using an air purifier in a humid room is usually fine, but high humidity can shorten filter life, reduce odor control, and increase mold risk if you ignore moisture. An air purifier cleans particles and some gases, while humidity describes how much water vapor is in the air. In damp bedrooms, basements, and bathrooms, these two factors interact in ways that affect performance, comfort, and long-term reliability.

This guide explains what actually happens when you run an air cleaner in muggy conditions, how relative humidity levels change filter behavior, and when you should prioritize dehumidification or ventilation instead of more filtration. You will see concrete room examples, a comparison table to help decide which device to use first, and a troubleshooting section for common humidity-related issues like musty smells or clogged filters. By the end, you will know how to place, maintain, and select an air purifier so it keeps working effectively even when your home feels warm and damp.

What It Means to Use an Air Purifier in a Humid Room (and Why It Matters)

When people talk about an air purifier in a humid room, they are usually describing a space that feels clammy, smells slightly musty, or shows signs of condensation while a purifier runs in the background. The key point is that an air purifier does not remove humidity. It moves air through filters; it does not remove water vapor the way a dehumidifier does.

Humidity is typically measured as relative humidity (RH). In many homes, a practical target is roughly 30–50% RH. Above that range, rooms can feel sticky, dust can clump, and surfaces may stay damp long enough to support mold growth. Below that range, air can feel very dry and irritating, especially in winter.

This matters for air purifiers because filters and internal parts are designed around normal indoor conditions. In a consistently humid room, you may see:

  • Faster filter loading and reduced airflow
  • Weaker odor and gas removal from activated carbon
  • Higher chance of musty smells from dirty, damp filters
  • More stress on electronics and metal components over time

Understanding this relationship helps you decide when an air purifier is enough on its own and when you also need moisture control to protect both your indoor air quality and your equipment.

How Humidity Affects Air Purifier Components and Performance

An air purifier in a humid room still moves air and captures particles, but moisture changes how efficiently different components work. Most home units include three main stages: a pre-filter, a fine particle filter (often HEPA or similar), and an activated carbon stage for odors and gases.

Pre-filters and coarse dust

The pre-filter catches large debris such as hair, lint, and coarse dust. In high humidity, these particles can clump and form a thicker mat on the pre-filter surface. That can:

  • Increase resistance to airflow sooner than expected
  • Push the fan to work harder for the same air movement
  • Send more fine particles toward the HEPA filter once the pre-filter is overloaded

Regular cleaning of the pre-filter is especially important in muggy rooms with a lot of textiles, pet hair, or laundry activity.

HEPA and fine particle filters

Fine particle filters are made from dense fiber mats. In moderate humidity, they perform very well. Problems are more likely when humidity is:

  • Frequently above about 60–70% RH, or
  • Combined with visible dampness, condensation, or leaks

Under those conditions, you may notice:

  • Faster clogging because moist air carries sticky particles that pack into the fibers
  • Warping or softening of the filter frame or media if it absorbs moisture
  • Musty odors from organic material trapped in a filter that stays damp

The purifier will still run, but the clean air delivery rate can drop while noise and energy use stay the same or increase.

Activated carbon and odor control

Activated carbon works by adsorbing gases and odors onto its large internal surface area. In very humid air, water molecules compete for those same adsorption sites. This can:

  • Temporarily reduce how well the purifier removes smells and volatile organic compounds
  • Shorten the useful life of the carbon filter if it repeatedly cycles between very humid and dry conditions while loaded with pollutants

In practice, that often shows up as cooking, pet, or musty odors returning sooner than the manufacturer’s nominal replacement schedule would suggest.

Airflow, electronics, and housing

Fans and electronics in modern purifiers are generally designed for typical indoor humidity. However, in damp basements or bathrooms where you see condensation on metal or glass, long-term exposure can lead to:

  • Dust and lint sticking to fan blades and grills
  • Corrosion on exposed screws or metal screens
  • Intermittent noises or reduced airflow as moving parts encounter more resistance

These effects develop gradually. Regular inspection and basic cleaning usually keep them from becoming serious problems.

Table 1. Choosing Between an Air Purifier, Dehumidifier, or Ventilation in Humid Rooms – Example values for illustration.
Room situation Typical humidity pattern Main problem Device to prioritize first
Finished basement feels damp, slight musty odor, no visible leaks Often 60–70% RH for many hours Chronic moisture and mold risk Dehumidifier, then add air purifier for particles and odor
Bedroom near a busy road, windows closed, air feels a bit stuffy Around 40–55% RH most of the time Fine particles and stale air Air purifier, plus occasional window or fan use
Bathroom without exhaust fan, mirror fogs for a long time after showers Short spikes near 90% RH, then slow drop Moisture buildup on surfaces Ventilation (fan or window); purifier only for residual odors
Open-plan living room in humid climate, light cooking odors linger 50–65% RH, higher on rainy days Odors and light dampness Air purifier with carbon, plus targeted dehumidification if RH stays high
Home office over crawl space, floor feels cool and clammy 55–70% RH, especially in summer Moisture from below and comfort issues Dehumidifier or building fixes first; purifier for dust and allergens

Real-World Examples of Air Purifiers in Humid Rooms

Seeing how humidity and air purifiers interact in specific rooms makes it easier to plan your setup. The following scenarios are common in many homes.

Humid bedroom with allergies

Imagine a small bedroom that feels slightly sticky in summer. Relative humidity hovers around 60–65% at night. You run an air purifier for allergies and wake up with less congestion, but the room still smells a bit stale.

In this case, the purifier is helping with pollen and dust, but humidity is high enough to keep bedding and carpets from fully drying between uses. Over time, the HEPA filter may load faster, and the carbon stage may struggle to completely remove body and fabric odors. Adding a small dehumidifier or improving whole-home air conditioning settings often brings humidity back into a more comfortable range, making the purifier’s work more noticeable.

Finished basement media room

A finished basement with carpet and furniture frequently sits at 65–70% RH in spring and summer. You run an air purifier to handle pet dander and musty smells, but the odor comes back within a day after changing the carbon filter.

Here, the main issue is chronic moisture. The purifier can remove airborne particles stirred up by walking or vacuuming, yet the musty smell is mostly from damp surfaces, wall cavities, or subfloor materials. Without lowering humidity, odor molecules keep entering the air, and the carbon filter saturates quickly. A dehumidifier and moisture source control are needed before the purifier can make a lasting difference.

Bathroom and laundry area

In a combined bathroom and laundry space, humidity spikes during showers and washing cycles. Mirrors fog, and towels dry slowly. You place a small air purifier inside the room to deal with fabric lint and detergent smells.

The purifier can help with lint and some odors once humidity drops, but it should not sit directly in the steam path or next to the shower. It is more effective in an adjacent hallway or open doorway, running continuously on a low setting. The primary moisture control tools should still be an exhaust fan, open window, or door gap to let steam escape quickly after use.

Kitchen and open living area

In an open-plan kitchen and living room, cooking adds both moisture and odors. On humid days, windows stay closed, and indoor humidity creeps above 60% RH during dinner time. An air purifier with a carbon stage can reduce cooking smells, but performance drops when the air is very damp.

Here, a combination of strategies works best: use the range hood or window to vent moisture and fumes while cooking, then let the purifier run afterward to polish the air. If the home is in a very humid climate, a whole-house or room dehumidifier may be needed so humidity does not stay elevated all evening.

Table 2. Humidity-Related Symptoms and Practical Fixes Around Air Purifiers – Example values for illustration.
What you notice Likely humidity link Quick checks Practical next steps
Musty smell near the purifier, even with a new filter Dirty filter stored or used in a damp room Inspect filter for discoloration or soft spots Replace filter, lower room humidity, and run purifier regularly
Weaker airflow on the same fan setting Pre-filter and HEPA loaded faster in moist air Check pre-filter for lint mat; feel outlet airflow Clean pre-filter, consider earlier HEPA replacement, reduce moisture sources
Odors return quickly after cooking or laundry Carbon filter competing with high moisture and heavy odor load Note RH level during and after activities Vent during source activities; replace carbon more often if RH stays high
Condensation on walls or windows near purifier Room humidity above safe range Measure RH with a simple meter Move purifier away from cold surfaces; use dehumidifier or better ventilation
New rattling or humming sounds over time Dust and moisture buildup on fan components Unplug and look for dust mats on grills Clean exterior, check filters, and improve room dryness

Common Mistakes and Troubleshooting in Humid Rooms

Many problems blamed on a “bad” air purifier are actually humidity or placement issues. Avoiding a few common mistakes can preserve performance and extend filter life.

Mistake 1: Expecting the purifier to dehumidify the room

An air purifier can make air feel fresher, but it cannot lower humidity. If your main complaints are sticky walls, condensation, or slow-drying towels, a dehumidifier or better ventilation should be your first step. Use the purifier for particles and odors once humidity is under better control.

Mistake 2: Placing the purifier in direct steam or splash zones

Putting an air purifier next to a shower, sink, or leaky window exposes the filters and electronics to liquid water, not just humid air. That can quickly warp filters, cause musty smells, and in extreme cases damage the unit.

Troubleshooting cue: If you can see droplets or condensation on the purifier housing, it is too close to a moisture source. Move it farther away and elevate it off very cold or damp floors.

Mistake 3: Ignoring early signs of filter stress

In humid rooms, filters may darken, sag, or smell musty before they reach their advertised service life. Waiting for a reminder light alone can leave you running with poor filtration.

Troubleshooting cue: If surfaces seem dustier or odors linger even with the purifier on, open the unit (unplugged) and examine the filters. Replace any that look warped, smell musty, or show heavy loading.

Mistake 4: Turning the purifier off for long periods in a damp space

In a humid room, turning the purifier completely off for days allows trapped particles and moisture in the filter to sit without airflow. That stagnant environment is more favorable for microbial growth on dirty media.

Troubleshooting cue: If a purifier smells musty when you first turn it back on after a long break in a damp room, consider replacing the filter and running the unit more consistently on a low setting.

Mistake 5: Storing spare filters in damp areas

Even unused filters can absorb moisture and odors if they are stored in basements, garages, or laundry rooms. When installed later, they may already be compromised.

Troubleshooting cue: If a brand-new filter has a musty or damp smell out of the package, it may have been stored in poor conditions. Store spare filters in a dry, conditioned space instead.

Safety Basics for Air Purifiers in Humid Conditions

Most air purifiers are safe to use in normal indoor humidity, but damp rooms introduce additional safety considerations. Paying attention to moisture, power, and placement reduces risks.

Keep electricity away from liquid water

Humid air alone is not usually a shock hazard, but standing water is. Do not place an air purifier where it can sit in puddles from leaks, plumbing issues, or minor flooding. Keep cords and power strips off the floor in basements that occasionally get wet.

Avoid blocking vents and intakes

In an attempt to hide a purifier or protect it from moisture, some people push it tightly against walls or behind furniture. That can overheat the motor and reduce filtration.

  • Leave several inches of clearance around both intake and outlet grills.
  • Do not drape damp towels, clothing, or curtains over the purifier.

Be cautious with ozone or ion-producing technologies

Some air cleaning technologies can produce byproducts such as ozone. In humid rooms with poor ventilation, these byproducts can accumulate more than in well-ventilated spaces. Always follow manufacturer guidance about safe operation, especially in small, closed rooms.

Use appropriate extension cords and outlets

If you must use an extension cord in a basement or laundry area, choose one rated for the purifier’s power draw and keep it out of traffic paths and away from wet areas. Never run cords under rugs where moisture can accumulate unseen.

Know when to shut the unit down

If you notice unusual smells like burning plastic, see visible corrosion around the plug, or find that the unit has been splashed or partially submerged, unplug it immediately. Allow it to dry completely and have it inspected or replaced before using it again.

Maintenance and Long-Term Use in Humid Rooms

Humidity mainly shows up as a maintenance issue. With a few adjusted habits, you can keep an air purifier working reliably even in climates or rooms that run on the damp side.

Filter inspection schedule in humid environments

In a typical home with moderate humidity, many users inspect filters every few months. In a humid room, it is wise to:

  • Check pre-filters monthly for lint mats and sticky dust.
  • Inspect HEPA or fine filters every 3–4 months for discoloration, warping, or odor.
  • Assess carbon filters whenever odors return, even if that is earlier than the nominal replacement interval.

Cleaning practices around moisture

When cleaning the purifier:

  • Unplug the unit before wiping grills or surfaces.
  • Use a dry or slightly damp cloth; avoid soaking any part of the housing.
  • Do not wash non-washable HEPA or carbon filters with water unless the manufacturer explicitly states they are washable.

After cleaning, let the exterior dry fully before plugging the unit back in, especially in already humid rooms.

Storing purifiers and filters between seasons

If you store an air purifier seasonally, humidity matters:

  • Store the unit in a dry, conditioned area rather than a damp basement or garage.
  • Remove and discard heavily used filters before long-term storage.
  • Keep new or lightly used filters sealed in their packaging in a dry closet.

When you bring the purifier back into service, inspect the interior for dust or any signs of moisture damage before running it.

Using humidifiers and dehumidifiers alongside purifiers

Many homes use a humidifier in winter and a dehumidifier in summer along with air purifiers. To avoid one device undermining another:

  • Do not aim humidifier mist directly at the purifier’s intake.
  • Place the dehumidifier closer to the moisture source and the purifier closer to where you sit or sleep.
  • Use a simple humidity meter to keep RH roughly in the 30–50% range where possible.

Key Takeaways and Specs to Look For in a Purifier for Humid Rooms

Using an air purifier in a humid room is generally safe and helpful for particles and some odors, but it is not a substitute for moisture control. High humidity can shorten filter life, weaken odor removal, and increase the risk of musty smells if you ignore underlying dampness.

In most homes, a balanced approach works best:

  • Use dehumidifiers and ventilation to control moisture.
  • Use air purifiers to handle particles, allergens, and some gases.
  • Place and maintain both with humidity in mind.

Specs to look for when choosing a purifier for humid spaces

When you are selecting an air purifier that will often run in a humid bedroom, basement, or living area, pay attention to these practical specifications and features:

  • Clean Air Delivery Rate (CADR): Choose a CADR appropriate for your room size so the purifier can cycle the air several times per hour even on a medium setting.
  • Filter design and availability: Look for clearly labeled pre-filters, fine particle filters, and optional carbon stages, with replacement filters that are easy to find.
  • Sealed or well-fitted filter housing: A good seal helps ensure that damp, particle-laden air passes through the filter media instead of around it.
  • Multiple fan speeds and a low continuous mode: A quiet low or sleep mode lets you run the purifier more consistently, which is useful in humid rooms where stopping and starting can leave filters damp.
  • Filter change indicators based on hours or pressure: Indicators that track actual use can be more reliable than fixed calendar reminders, especially when humidity accelerates filter loading.
  • Energy efficiency: Look for models with modest power draw at low and medium speeds, since long runtimes are common in damp climates.
  • Solid construction and corrosion-resistant parts: Units with sturdy housings and protected metal components tend to tolerate humid environments better over the long term.
  • Clear guidance on washable vs. non-washable filters: Knowing exactly which parts can be cleaned with water helps you avoid accidental damage in moisture-prone areas.

By combining the right purifier features with sensible humidity control, placement, and maintenance, you can keep indoor air cleaner and more comfortable even in rooms that naturally run warm and muggy.

Frequently asked questions

Which purifier specifications most affect performance in humid rooms?

CADR relative to room size, a well-sealed filter housing, and an effective pre-filter are the most important specs because they determine how much air is processed and how quickly filters load. Materials and corrosion-resistant construction also matter for long-term reliability in damp environments. Multiple fan speeds and accurate filter-life indicators help you run the unit continuously without overstressing the media.

Can an air purifier replace a dehumidifier in a damp room?

No. An air purifier removes particles and some gases but does not remove water vapor from the air. If you have condensation, persistent high RH, or mold risk, a dehumidifier or improved ventilation is the primary solution; the purifier can help with airborne allergens and residual odors once moisture is controlled.

Are there safety risks to using an air purifier in very humid rooms?

Yes — the main safety concerns are exposure to standing water or direct splashes, which can create electrical hazards and corrosion, and the potential buildup of byproducts if the unit uses ionizing or ozone-producing technologies in poorly ventilated spaces. Keep units away from splash zones, elevate cords and power strips off the floor, and unplug the device if it gets wet.

How frequently should I check or replace filters when indoor humidity is high?

Check pre-filters monthly and inspect HEPA or fine filters every 3–4 months as a starting point, adjusting based on visible dirt, odor, or reduced airflow. Carbon filters should be assessed whenever odors return, which may be earlier than the nominal schedule in humid conditions. Replace or clean filters sooner if they look warped, smell musty, or noticeably reduce airflow.

What common placement mistakes reduce purifier effectiveness in moist spaces?

Putting the purifier directly in a steam path, tight against walls, or under damp fabrics reduces effectiveness and increases moisture exposure. Also avoid placing it on very cold floors where condensation forms; instead, provide several inches of clearance on all sides and locate the unit where air circulates through the occupied space.

How can I prevent musty smells from developing in purifier filters?

Keep room RH in the recommended range (roughly 30–50%), run the purifier more consistently on a low setting to avoid long stagnant periods, and replace or clean filters promptly when they show signs of dampness or odor. Store spare filters in a dry area and prioritize ventilation or dehumidification to remove the underlying moisture source.

Air Purifier for Cat Litter Odor: How Carbon Filters Actually Help

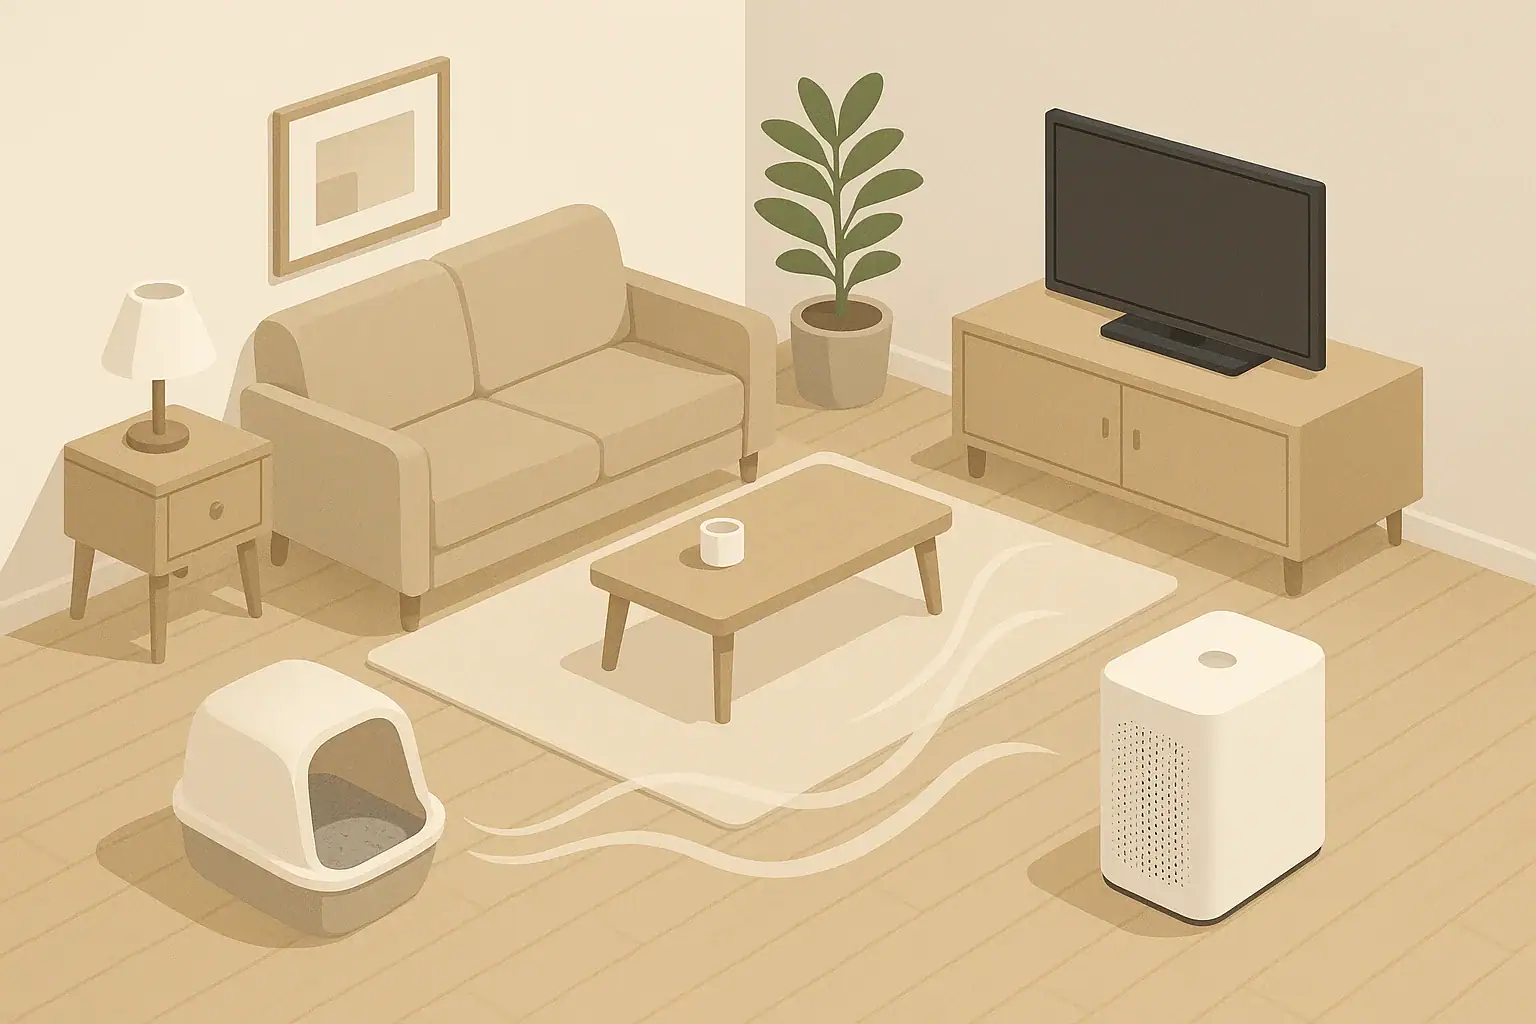
Isometric living room with air purifier near cat litter box

An air purifier for cat litter odor can noticeably reduce urine and feces smells, but only if it has an effective carbon filter, is sized correctly, and is placed well. Litter boxes constantly release odor gases and litter dust, so you are asking the purifier to handle a continuous source, not just the occasional whiff. When you combine a good carbon filter with basic litter box hygiene and some ventilation, you can usually keep the litter area from smelling up the rest of the home.

This guide explains how carbon filters work for cat litter smells, what to look for in an odor-focused air purifier, and how to use it day to day. You will see how factors like room size, airflow, humidity, and filter maintenance all change how well a purifier can control cat box odor. Whether your litter box is in a small bathroom, a laundry room, or a bedroom corner, the same principles apply.

What “Air Purifier for Cat Litter Odor” Really Means and Why It Matters

When people search for an air purifier for cat litter odor, they are usually dealing with a room that smells like urine or a musty litter box even when it looks clean. From an indoor air quality perspective, those smells are mostly gases and very fine particles, not just ordinary dust.

Cat litter smells are largely caused by:

  • Ammonia and other nitrogen compounds released as urine breaks down in the box
  • Sulfur-containing compounds and VOCs from feces and decomposing organic matter
  • Fine litter dust and cat dander stirred up when cats dig or when you pour new litter

Standard particle-only filtration cannot remove most odor molecules. That is why a purifier aimed at litter box odor must include a gas-adsorbing stage, typically an activated carbon filter, in addition to a particle filter such as HEPA.

This matters because it sets expectations. A small, HEPA-only unit might help with visible dust near the litter box but still leave the room smelling like a cat bathroom. To actually reduce odor, you need the right filter media, enough carbon to matter, and enough airflow to pass room air through that carbon many times per hour.

Key Concepts: How Carbon Filters and HEPA Work on Litter Odor

An air purifier for cat litter odor usually combines two main filter types: a particle filter (often HEPA or HEPA-style) and a gas filter (usually activated carbon). Each plays a different role.

HEPA or HEPA-style filters are designed to capture solid particles such as:

  • Litter dust kicked up during digging or pouring
  • Cat dander and hair fragments
  • General household dust circulating through the room

Activated carbon filters are porous materials that adsorb gases onto their internal surface area. For litter odor, they help by:

  • Reducing ammonia and related urine gases that cause sharp, eye-watering smells
  • Adsorbing sulfur compounds and VOCs from feces and decomposing waste
  • Tempering strong scents from scented litters or cleaning products used near the box

Not all carbon filters are equally effective. Thin, lightly coated sheets may provide only short-term improvement near a litter box before they saturate. Thicker beds of pellets or granules usually offer more odor-holding capacity, but they also increase resistance to airflow. The purifier’s fan has to be strong enough to move air through the carbon without losing too much flow.

Airflow concepts also matter:

  • Clean Air Delivery Rate (CADR) is a measure of how much filtered air a purifier can deliver. Higher CADR generally means more room air passes through the carbon each hour.
  • Air Changes per Hour (ACH) describes how many times per hour the purifier can theoretically filter a room’s entire volume. Litter rooms often benefit from higher ACH than general living spaces.
Table 1. Roles of HEPA vs carbon filters for cat litter odor control. Example values for illustration.
Feature HEPA-style filter Activated carbon filter
Main target Particles: litter dust, dander, hair, fine dust Gases and VOCs: ammonia, sulfur compounds, scents
Visible dust near litter box Highly effective at capturing fine dust Minimal impact on visible dust
Strong urine or feces odor Limited; most odor molecules pass through Effective when carbon amount and contact time are adequate
What happens when overloaded Clogs; airflow drops, noise may increase Saturates; odor starts passing straight through
Typical life in odor-heavy room (illustrative) 6–18 months depending on dust load 3–12 months depending on odor intensity and runtime
Best role in a litter-area purifier Core filter for dust and dander reduction Dedicated odor layer for gas and smell control

Understanding these roles helps you choose a purifier that does more than just blow air around the litter box. For odor, the carbon stage is non‑negotiable; for overall cleanliness and allergies, the HEPA stage is just as important.

Real-World Setups: How to Use a Purifier Around the Litter Box

How you set up the purifier matters almost as much as which model you buy. The same unit can perform very differently in a cramped bathroom versus an open-plan living room.

Matching purifier size to room and odor level

Think about the room where the litter box lives:

  • Small bathroom or closet (under about 60–80 square feet): A compact purifier with modest CADR can work if it runs most of the time and has a decent carbon layer.
  • Bedroom or office (around 100–200 square feet): You generally want a mid-size purifier with a stronger fan, since the odor can spread to sleeping or working areas.
  • Open living room or combined space: A single purifier right next to the litter box may improve the immediate area but will not completely control odor across the whole zone. In that case, treat the litter corner as a “local problem” and focus on that area first.

In most homes, people aim for several air changes per hour in the litter room. That usually means running the purifier continuously on a low or medium speed instead of only turning it on when the smell is noticeable.

Placement relative to the litter box

Placement can make the difference between a purifier that quietly works in the background and one that barely affects odor.

  • Keep the purifier a few feet from the litter box, close enough to intercept the odor plume but not so close that litter dust blows straight into the intake.
  • Leave several inches of clearance around the intake and outlet so air can move freely.
  • Avoid tucking the purifier behind furniture, under shelves, or in tight corners where airflow is blocked.
  • Do not aim a strong outlet stream directly at the litter box; gentle draw across the area is better than a blast of air that disturbs the litter.

Example scenarios

  • Litter box in a guest bathroom: Place a small purifier on the floor or a low shelf opposite the toilet, about 3–5 feet from the box. Run it on low all day and briefly on higher speed right after scooping.
  • Litter box in a bedroom corner: Put the purifier between the box and the bedroom door so air flows from the box toward the unit instead of toward the bed. Use a quiet or night mode overnight.
  • Litter box in a laundry room: Position the purifier so its intake faces the box, with the outlet pointed toward the door. If there is an exhaust fan, let the purifier help clean air before it mixes with the rest of the house.

In all setups, remember that the purifier supplements, but does not replace, basic litter box hygiene and periodic ventilation when outdoor air quality allows.

Common Mistakes and Troubleshooting Cat Litter Odor

If you bought an air cleaner for cat litter smell and the room still seems unpleasant, the problem is often how the purifier is chosen or used, not just the product itself. Recognizing common mistakes can help you troubleshoot.

Frequent mistakes that limit odor control

  • Using a HEPA-only purifier: It removes dust and dander but leaves most odor gases untouched.
  • Relying on a thin carbon sheet: Very light carbon coatings saturate quickly near a litter box, especially with multiple cats.
  • Undersizing the purifier: A small fan in a large or open room cannot move enough air through the carbon to keep up with odor production.
  • Placing the purifier too far away: If it sits across the room or in a different area entirely, odor can spread long before air reaches the filter.
  • Running it only when you smell something: By the time odor is strong, the room air is already saturated with gases; continuous operation works better.
  • Neglecting the litter box itself: Infrequent scooping and rare full litter changes can overwhelm even a well-sized purifier.

Simple troubleshooting cues

Use the symptoms you notice to narrow down what to adjust:

  • Odor is strong right at the box but fades a few feet away: Improve scooping frequency and consider a thicker carbon filter. The purifier may be helping the room but not keeping up at the source.
  • Odor fills adjacent rooms even with the purifier running: The unit may be undersized or poorly placed. Move it closer to the box and consider a higher CADR or an additional purifier for nearby living spaces.
  • Odor used to be controlled but has slowly returned: Carbon is likely saturated. Replace the odor filter stage, and clean pre-filters so airflow stays strong.
  • Room feels dusty even though odor is better: Check the HEPA filter and pre-filter for buildup. They may need cleaning or replacement to restore particle control.
Table 2. Common litter-odor problems and likely causes. Example values for illustration.
What you notice Likely cause Practical next step
Room smells the same with purifier on or off No carbon filter or carbon fully saturated Confirm there is a carbon stage; replace or upgrade to thicker carbon
Odor returns quickly after scooping Continuous odor source overwhelming small purifier Increase runtime and fan speed; consider higher-CADR unit for that room
Purifier exhaust smells like litter box Carbon bed is loaded with odor molecules Replace carbon filter; check for clogged pre-filter reducing airflow
Cat avoids using the box after purifier is added Noise or airflow disturbing the cat Move purifier a bit farther away; use lower fan speed or quiet mode
Dusty surfaces near litter box despite purifier HEPA or pre-filter clogged, or airflow blocked Clean or replace filters; ensure intake and outlet are unobstructed

Using these cues, you can usually decide whether you need a stronger purifier, better placement, more frequent filter changes, or simply improved litter box maintenance.

Safety Basics for Using Purifiers Near Litter Boxes

Most portable air purifiers are designed for continuous use in homes, but litter areas introduce extra considerations such as pet behavior, moisture, and cleaning habits.

Filtration technologies and byproducts

Many odor-focused devices advertise extra technologies beyond basic filters. Some of these can create byproducts or add complexity:

  • Ozone-generating modes: Ozone can irritate lungs and is not recommended as a primary tool for household odor control, especially in small, enclosed litter rooms.
  • Ionizers and similar add-ons: These can change how particles behave in the air. Some users prefer to leave these modes off and rely on mechanical filters and carbon alone.
  • UV or other internal lights: These are usually aimed at microorganisms, not odor gases. They do not replace the need for carbon.

When in doubt, treat add-on features as optional. For many homes, simple mechanical filtration plus carbon provides a predictable, low-complexity approach to litter odor.

Placement, cords, and tipping risks

Cats can be curious about new appliances, especially those that hum or move air.

  • Route power cords along walls or behind furniture so they are harder to snag during play or zoomies.
  • Choose a stable, flat surface for the purifier. Avoid wobbly stands or narrow shelves where a jumping cat could knock it over.
  • Keep vents free of litter bags, toys, and storage bins so air can move and the motor does not overheat.
  • Unplug the purifier before any internal cleaning or filter changes to avoid electrical hazards.

Interaction with humidity and cleaning products

Humidity and cleaning choices around the litter box can influence both odor and purifier performance.

  • Excess humidity can make air feel heavier and odors more noticeable. It can also affect how some carbon filters age over time.
  • Very dry air can increase dustiness and static, making litter dust more noticeable even if odor is reduced.
  • Strong cleaning chemicals or heavy fragrances near the box add VOCs that the carbon filter must also adsorb, using up capacity that could be spent on litter odor.

Moderate humidity and mild, cat-safe cleaners usually pair best with an odor-focused purifier.

Maintenance and Long-Term Use Around Cat Litter

Because a litter box is a constant odor source, filters near it usually wear out faster than in a typical bedroom or office. Planning for more frequent checks and replacements helps keep performance consistent.

Carbon filter care

Activated carbon has a finite capacity. Once its pores are filled with gases, it stops adsorbing and begins letting odors pass through again.

  • Expect shorter replacement intervals in a litter room than the generic schedule printed in the manual for normal use.
  • Use your nose as a guide. If odor returns quickly after scooping or you smell litter at the purifier’s exhaust, the carbon stage is likely saturated.
  • Whenever possible, replace the carbon component alone rather than discarding the entire filter stack, if the purifier is designed that way.

Pre-filter and HEPA maintenance

Pre-filters trap hair and large dust before it reaches the finer media. In a litter area, they collect cat hair, tracked litter, and general debris quickly.

  • Clean washable pre-filters on the schedule suggested by the manufacturer, or more often if visibly dusty.
  • Vacuum non-washable pre-filters gently using a brush attachment to remove built-up hair and dust.
  • Inspect HEPA filters during each carbon change. If they look heavily gray or clogged, replacement may be due even if the calendar interval is not up.

Keeping upstream filters clean protects the carbon stage by maintaining airflow. Poor airflow means fewer passes of room air through the carbon, which reduces odor control even if the carbon is not yet saturated.

Operating patterns for odor-heavy rooms

Because the litter box never really “turns off,” the purifier strategy should reflect that.

  • Run the purifier continuously on a low or medium speed in the litter room to maintain stable odor levels.
  • Temporarily increase fan speed right after scooping or when multiple cats have just used the box to handle short-term odor spikes.
  • Keep doors either mostly open or mostly closed on a consistent basis so you can better predict how much air the purifier is actually treating.

Over time, you can fine-tune runtime, fan speed, and filter replacement intervals based on how the room smells and how quickly filters load with dust.

Putting It All Together: Practical Takeaways and Specs to Look For

For most homes, the most effective approach to cat litter odor is layered: good litter box hygiene, some ventilation when possible, and a properly chosen air purifier with a meaningful carbon filter close to the box.

In summary, a purifier can:

  • Reduce how far and how strongly cat urine and feces odors spread from the litter room
  • Cut down on litter dust and dander in the surrounding area
  • Make bedrooms, offices, and living rooms with litter boxes more comfortable to spend time in

It cannot completely compensate for a rarely scooped or heavily soiled box, but it can significantly improve baseline air quality when used correctly.

Specs to look for in an air purifier for cat litter odor

When you are comparing options for a litter-area purifier, focus on these practical specifications and features:

  • Carbon filter type and amount: Look for a clearly defined odor or gas stage with a substantial layer of carbon (pellets, granules, or a thick block), not just a thin dusting.
  • Replaceable carbon stage: Check that the odor filter can be replaced regularly without discarding the entire unit.
  • HEPA or high-efficiency particle filter: Essential for capturing litter dust, dander, and general indoor particles.
  • Appropriate CADR for your room size: Choose a unit that can provide several air changes per hour in the specific room where the litter box sits.
  • Multiple fan speeds: Helpful for running quietly most of the time and boosting airflow after scooping or during heavy use.
  • Low to moderate noise levels on working speeds: Especially important if the litter box is in a bedroom or if your cat is noise-sensitive.
  • Good airflow design: Intakes and outlets should not be easy to block, and the unit should not require tight corners for placement.
  • Simple filter access: Filters should be easy to reach and change so you actually keep up with maintenance.
  • No reliance on ozone-generating modes for odor control: Mechanical filtration plus carbon is usually the safer, more predictable choice.

If you match these specs to your room size, number of cats, and litter box location, an air purifier with a solid carbon filter can become a reliable part of your long-term strategy for managing cat litter odor and improving indoor air quality.

Frequently asked questions

Which features make an air purifier effective against cat litter odor?

An effective unit couples a meaningful activated carbon stage (pellets, granules, or a thick block) with a true HEPA particle filter and enough CADR or airflow for the room size. Replaceable carbon stages, multiple fan speeds, and straightforward filter access help maintain long-term odor control.

Why doesn’t my HEPA-only purifier remove the litter box smell?

HEPA filters capture particles like dust and dander but do not remove most odor-causing gas molecules such as ammonia or sulfur compounds. For smells you need a carbon or other gas-adsorbing stage with sufficient capacity and contact time.

Is it safe to use ozone-generating or ionizer modes near a litter box?

Ozone-generating modes are not recommended for occupied indoor spaces because ozone can irritate the respiratory system; they are especially inappropriate in small, enclosed litter rooms. Many users prefer to rely on mechanical filtration and carbon rather than ionizers or ozone-producing features.

How often should carbon and HEPA filters be replaced when the purifier is near a litter box?

Replacement intervals are typically shorter than manufacturer estimates for normal use: carbon filters in odor-heavy areas may need replacing every few months, and pre-filters or HEPA elements should be inspected regularly and replaced when visibly loaded. Use smell and airflow (and the purifier’s indicators, if available) as practical cues.

Can an air purifier completely eliminate odor from a rarely cleaned litter box?

No. An air purifier can reduce how far and how strongly odors spread but cannot substitute for regular scooping and litter changes; a heavily soiled box will overwhelm any realistic purifier. Treat filtration as part of a layered strategy including hygiene and ventilation.

Air Purifiers for Cigarette Smoke: How Much Carbon You Really Need

Isometric illustration of room with air purifier and airflow

An air purifier for cigarette smoke can noticeably cut haze and reduce odors, but only if it has enough activated carbon, strong particle filtration, and is correctly sized for the room. It cannot make heavy indoor smoking disappear or turn a smoky room into a “never smoked here” space, but it can make the air more tolerable and cleaner to breathe.

This guide explains what cigarette smoke actually is, how HEPA and activated carbon filters work together, and where their limits are. You will see practical examples, sizing tips, and warning signs that your purifier is overloaded or poorly set up. The goal is to help you choose and run an air cleaner in a way that realistically improves air quality in a smoking environment, without overpromising what any filter can do.

What Cigarette Smoke Really Is and Why It Matters for Air Purifiers

To understand what an air purifier can do for cigarette smoke, it helps to know what you are asking it to remove. Smoke from cigarettes, cigars, or vaping is not just a smell; it is a mix of particles and gases that behave very differently in the air and in filters.

In a typical smoking room, the air contains:

  • Fine and ultrafine particles (part of PM2.5 and smaller) that stay suspended for long periods and create visible haze.
  • Gaseous pollutants and odors, often grouped as VOCs and semi-volatile compounds, which cause the characteristic smoke smell and irritation.
  • Sticky residues that eventually settle on walls, fabrics, and surfaces, sometimes called thirdhand smoke.

This mix matters because different parts of the smoke need different tools. Particle filters handle the fine particles. Gas-phase filters, usually activated carbon or other sorbents, deal with some of the odors and chemicals. No single filter stage can do everything.

It also matters how often and where smoking happens. An occasional cigarette on a balcony that drifts indoors is very different from daily smoking in a closed living room. The heavier and more frequent the smoke, the more quickly filters saturate and the more important room size, airflow, and ventilation become.

Key Filtration Concepts: How HEPA and Carbon Work on Cigarette Smoke

Most portable air purifiers for cigarette smoke combine two main types of filtration: a particle filter (often HEPA or similar) and a gas filter (usually activated carbon). Each has a specific job and specific limits.

How HEPA-Type Filters Handle Smoke Particles

HEPA or HEPA-type filters are dense mats of fibers that capture particles as air passes through. For cigarette smoke, they are especially useful for:

  • Capturing fine smoke particles that contribute to PM2.5 readings and visible haze.
  • Reducing deposition on surfaces by trapping particles that would otherwise settle as sticky residue.
  • Improving measured air quality on basic particle monitors, even if the room still smells smoky.

However, HEPA filters do not remove odors or gases. You can have low particle counts and clear-looking air that still smells strongly of smoke if there is no gas-phase filtration.

How Activated Carbon Works on Smoke Odors and Gases

Activated carbon is a highly porous form of carbon with a large internal surface area. Smoke gases and odor molecules can attach to this surface in a process called adsorption. In practice, a carbon stage in an air purifier:

  • Captures some VOCs and odors as air passes through the carbon bed.
  • Holds them until the carbon is saturated, at which point odor control drops off.
  • Works best with sufficient contact time, meaning a reasonable air speed and enough carbon depth or mass.

For cigarette smoke, the amount and type of carbon matters more than simply having a thin “deodorizing” layer. Thicker beds or heavier cartridges usually provide more noticeable and longer-lasting odor reduction than light carbon-coated meshes.

Carbon Quantity, Airflow, and Room Size

Two performance ideas are especially useful when planning smoke control:

  • Clean Air Delivery Rate (CADR) for smoke or fine particles, which indicates how much clean air the purifier can supply per minute.
  • Air Changes per Hour (ACH), which describes how many times per hour the purifier can theoretically filter the air volume of the room.

Higher CADR and higher ACH generally mean faster cleanup after a cigarette and better control while smoking is occurring, as long as the filters are not saturated. But increasing airflow through a very thin carbon sheet does not magically make it effective; it can simply push more smoke through a filter that has limited gas-adsorption capacity.

Table 1. Roles of HEPA and activated carbon in cigarette smoke control – Example values for illustration.
Filter feature Main target Helps with Key limitation for smoke
HEPA or similar particle filter Fine and ultrafine particles Reducing haze and particle exposure Does not address odors or gases
Thin carbon-coated sheet Light odor polishing Occasional mild smells Saturates quickly with regular smoking
Thicker carbon cartridge or bed Odors and some VOCs More durable odor reduction Still cannot remove all smoke chemicals
High CADR fan and housing Room air circulation Faster cleanup after smoking Effectiveness limited by filter capacity
No carbon stage Particles only Lower PM2.5 readings Odors and gases largely unchanged

In short, a realistic cigarette smoke setup usually means pairing a decent HEPA-type filter with a substantial carbon stage and enough airflow for the room size.

Real-World Smoke Scenarios: What to Expect from an Air Purifier

The same purifier can feel very effective in one home and disappointing in another because the smoke load and room conditions differ. These examples illustrate what to expect in common situations.

Occasional Smoking in a Small Living Room

Imagine a 150 square foot living room with an 8-foot ceiling, where someone smokes a cigarette indoors once or twice a week with a window cracked open. A mid-sized purifier with a HEPA filter and moderate carbon cartridge can often:

  • Clear visible haze within 30–60 minutes after smoking stops.
  • Reduce the odor intensity significantly, especially if run on a higher fan speed.
  • Maintain acceptable odor control for several months before the carbon needs replacement.

In this lighter-use case, even a modest carbon stage can feel helpful, especially when combined with ventilation and closing doors to contain the smoke to one room.

Daily Smoking in a Large Open-Plan Area

Now consider a 400 square foot open-plan living and dining area with a 9-foot ceiling, where several cigarettes are smoked indoors every evening and windows are usually closed. In this heavier-use setting:

  • A small purifier with a thin carbon sheet may barely touch the odor, even if the haze eventually clears.
  • A larger purifier with a thick carbon cartridge and high CADR can reduce haze and make odors less intense, but the room may still smell faintly smoky to sensitive noses.
  • Carbon filters may need replacement every few months instead of once a year, because they saturate more quickly under constant smoke exposure.

Here, planning for higher ACH (multiple full air cycles per hour), generous carbon capacity, and supplemental ventilation is important. Even then, the goal is improvement, not a smoke-free smell.

Trying to Clean Up a Long-Term Smoky Room

If a room has been smoked in for years, much of the problem is not airborne anymore. Tar and smoke residues are embedded in walls, carpets, curtains, and furniture. In this scenario, even a powerful purifier with heavy carbon will:

  • Help with new smoke particles and some ongoing odors.
  • Have little effect on existing stains and deep-set smells in soft furnishings.
  • Need support from thorough cleaning, repainting, or replacing porous materials to truly change how the room smells.

An air purifier is still useful, especially after cleaning, but it cannot remove residue that is already in surfaces.

Using a Purifier in a Smoking Bedroom

In a bedroom where someone smokes daily, expectations should be conservative. A reasonably sized purifier with HEPA and a robust carbon stage can:

  • Lower overnight particle exposure if run continuously at a moderate speed.
  • Reduce the strength of morning smoke odors compared with having no purifier.
  • Require more frequent filter changes than in a non-smoking bedroom of the same size.

However, the room will almost never smell like a non-smoking bedroom if smoking continues regularly inside with windows closed.

Common Mistakes and Troubleshooting When Using Purifiers for Smoke

Many disappointments with air purifiers for cigarette smoke come from a few predictable mistakes. Recognizing these issues can help you troubleshoot and improve performance before deciding a purifier “does not work.”

Typical Setup and Usage Mistakes

  • Relying on a purifier that is too small for the room – A compact unit designed for a small bedroom may struggle in a large living room, especially with regular smoking.
  • Running only on the quietest fan speed – Low speed can be fine for maintenance, but during and after smoking, a higher fan setting is usually needed to move enough air through the filters.
  • Placing the purifier in a corner or behind furniture – This restricts airflow and reduces how much smoke-laden air actually reaches the filters.
  • Expecting a thin carbon layer to handle heavy smoking – A light “deodorizing” sheet may help with mild odors but is quickly overwhelmed by daily cigarette smoke.
  • Ignoring filter replacement cues – Waiting only for a calendar reminder instead of noticing when odor control declines can mean running with ineffective carbon for months.

How to Tell When Carbon Is Saturated

Unlike a particle filter that visibly darkens, a carbon filter may look similar even when it is no longer effective. Practical signs of saturation include:

  • Smoke odors that used to fade in an hour now linger for several hours.
  • The room smells smoky again soon after smoking stops, despite the purifier running.
  • Turning the purifier to a higher fan speed no longer makes much difference to odor intensity.

When these patterns appear, the carbon stage is likely full, even if the unit’s general filter indicator has not yet triggered.

Particle vs Odor Performance: Reading the Clues

It is common to see mixed results, such as clear-looking air that still smells smoky. Interpreting these clues helps you decide what to change:

  • Haze is gone but smell remains: Particle filtration is working; gas filtration is under-sized or saturated.
  • Smell improves a bit but haze lingers: Carbon may be adequate, but overall airflow or HEPA filtration is insufficient for the room volume.
  • Little change in either haze or smell: The purifier is likely too small, poorly placed, run too slowly, or filters are clogged or incorrectly installed.
Table 2. Troubleshooting common purifier issues in smoky rooms – Example values for illustration.
Symptom Likely cause Practical next step
Strong odor even after hours of use Carbon saturated or too little carbon Replace carbon filter; consider thicker carbon stage next time
Visible haze lingers in the room Low CADR or clogged HEPA filter Increase fan speed, check and replace particle filter if needed
Purifier is loud but room still smells Undersized unit for room volume Use in a smaller space or add a second unit
One side of room smells more smoky Poor placement and airflow patterns Move purifier closer to smoking area with clear intake and outlet
Odor returns quickly after smoking No ventilation; smoke trapped indoors Add window opening or exhaust fan use during and after smoking

Working through these steps often reveals whether a different operating mode, a filter change, or a larger unit is the most logical next move.

Safety Basics: What an Air Purifier Can and Cannot Do for Smoke Exposure

Air purifiers can improve comfort and reduce some components of cigarette smoke, but they do not make indoor smoking safe. It is important to understand their role as a risk-reduction tool, not a complete solution.

Limits of Relying on Purifiers for Health Protection

  • Not all harmful components are removed – HEPA filters focus on particles, and carbon captures only some gases. Many smoke chemicals remain in the air or deposit on surfaces.
  • Secondhand and thirdhand smoke persist – Even with filtration, people in the home can still be exposed to smoke residues on clothing, furniture, and dust.
  • Purifiers do not replace medical advice – For people with asthma, COPD, heart conditions, or smoke sensitivity, source control and medical guidance are more important than any single device.

Safer Operating Practices in Smoking Environments

Within those limits, there are ways to use purifiers more safely and effectively:

  • Combine filtration with ventilation – Whenever possible, open windows or run exhaust fans during and after smoking to remove smoke-laden air from the home.
  • Keep intakes and outlets clear – Do not block the purifier with curtains, furniture, or bedding, which can restrict airflow and create overheating risks.
  • Use appropriate electrical safety – Plug the purifier directly into a wall outlet, avoid overloading power strips, and follow the manufacturer’s warnings about extension cords.
  • Do not modify filters – Avoid adding loose carbon, taping on improvised media, or washing non-washable filters, which can damage the unit or reduce performance.

Protecting Sensitive Occupants

For children, older adults, and people with respiratory or cardiovascular issues, extra precautions are often warranted:

  • Keep at least one non-smoking room in the home, ideally a bedroom, and prioritize a well-sized purifier there.
  • Encourage smoking outdoors or in well-ventilated areas away from sleeping spaces when possible.
  • Use the purifier continuously on a moderate setting in key rooms rather than cycling it on only after smoke becomes obvious.

These steps do not eliminate exposure but can reduce it compared with smoking unfiltered in enclosed spaces.

Maintenance and Long-Term Use in Smoky Homes

In homes with regular cigarette smoke, filters typically wear out faster than in non-smoking homes. Planning for this helps you budget and avoid long periods of poor performance.

How Smoke Changes Filter Lifespan

  • Particle filters load faster – Fine smoke particles and sticky residues can clog HEPA media, increasing resistance and reducing airflow.
  • Carbon saturates more quickly – Smoke-related VOCs and odors fill up the adsorption sites on activated carbon faster than light household smells.
  • Prefilters become dirtier – Mesh or foam prefilters can collect brownish films from smoke, requiring more frequent cleaning.

Because of this, generic replacement intervals (for example, “every 12 months”) are often optimistic in a smoking environment. Real-world replacement may need to be two to three times more frequent, depending on smoking intensity and room size.

Practical Maintenance Habits

  • Check prefilters monthly – Vacuum or wash them if they are visibly dusty or discolored. A clean prefilter helps protect the HEPA and carbon layers behind it.
  • Inspect HEPA filters every few months – Look for heavy darkening, visible tar-like spots, or signs of warping. Replace if airflow seems reduced or if the filter looks saturated.
  • Use your nose for carbon timing – When odor control drops off noticeably, treat that as a signal to change the carbon filter, even if the manufacturer’s schedule suggests more time remains.
  • Keep vents and sensors clean – Gently dust the purifier’s intake and outlet grilles and any exposed sensors so smoke residue does not interfere with operation.

Off-Season or Low-Use Storage

If smoking habits change or you store the purifier for a season:

  • Remove and discard heavily used carbon filters rather than storing them long term when saturated.
  • Store the unit in a dry, cool place to avoid moisture damage to remaining filters.
  • When restarting after storage, consider beginning with fresh filters if the old ones have been exposed to smoke for many months.

These steps help the purifier start from a strong baseline when you need it again.

Putting It All Together: Realistic Expectations and Specs to Look For

Activated carbon and HEPA filtration can substantially improve air quality in a smoking home, but they work best as part of a broader strategy. Source control, ventilation, and consistent maintenance all matter as much as the purifier itself.

In practical terms, a well-chosen air purifier for cigarette smoke should be expected to:

  • Reduce visible haze and fine particle levels when correctly sized and run at appropriate speeds.
  • Lower, but not fully erase, smoke odors when equipped with a substantial and regularly replaced carbon stage.
  • Perform better when combined with open windows, exhaust fans, or other ways to remove smoke-laden air from the home.

It should not be expected to make heavy indoor smoking harmless or to fully remove long-standing smoke residues from walls and fabrics.

Specs to Look For in an Air Purifier for Cigarette Smoke

When comparing models for use in smoky rooms, focus on these practical specifications and design details:

  • Room size rating and CADR – Choose a unit rated for at least the actual room size, and consider higher CADR if smoking is frequent or the space is open-plan.
  • HEPA or equivalent particle filter – Look for a dedicated fine-particle stage capable of capturing smoke-sized particles, not just a basic mesh filter.
  • Substantial activated carbon stage – Prefer thicker carbon cartridges or beds over very thin deodorizing sheets, especially for daily smoking.
  • Multiple fan speeds – Ensure there is a higher setting you can use during and after smoking sessions, plus quieter modes for background use.
  • Good internal seals – Filters should fit snugly so air is forced through both the HEPA and carbon stages rather than leaking around them.
  • Clear filter replacement access – Easy access encourages regular changes; complex or messy designs can lead to postponed maintenance.
  • Energy use and noise level – Consider how loud and power-hungry the unit is at the fan speed you will actually need for smoke control.

Choosing a purifier with these characteristics, then operating it with realistic expectations and good habits, gives you the best chance of making a smoky room meaningfully more comfortable and less polluted over time.

Frequently asked questions

Which features have the biggest impact on removing cigarette smoke?

The most important features are an effective particle stage (HEPA or equivalent), a substantial activated carbon bed for gas-phase adsorption, and a CADR/airflow rating that matches the room volume. Good seals and multiple fan speeds also matter so air actually passes through both the particle and carbon stages at an adequate rate.

Why does the room still smell even when particle levels drop?

Particle filters remove airborne particles but do not capture most gases and odors; if the carbon stage is too small or saturated, smoke smells will persist. Persistent odor despite low particle readings usually indicates under-sized or exhausted gas-phase filtration, poor placement, or ongoing emissions from surfaces.

Can an air purifier make indoor smoking safe?

No. Air purifiers can reduce some airborne particles and certain volatile compounds but cannot remove all harmful smoke chemicals or eliminate residues on surfaces. They reduce exposure but are not a substitute for source control, ventilation, or medical advice for vulnerable people.

How often should I replace HEPA and carbon filters in a smoking home?

Replacement intervals depend on smoking intensity; in smoker-occupied homes expect filters to require replacement more frequently—often two to three times sooner than in non-smoking homes. Use visual checks for particle filters and your sense of odor for carbon timing, replacing carbon when odor control noticeably declines.

Where is the best place to put an air purifier when people smoke indoors?

Place the purifier near the source of smoke with clear intake and outlet paths, avoid corners or blocked locations, and ensure the unit is sized for the overall room volume. In large or open-plan areas consider multiple units or a larger unit to increase air changes per hour and improve coverage.

What is a common setup mistake that reduces effectiveness?

Common mistakes include using a unit that is too small for the room, running only on the lowest fan speed, and relying on very thin carbon sheets instead of substantial carbon stages. Neglecting filter replacement or poor placement also often leads to disappointing odor control.

Can an Air Purifier Reduce Dust on Furniture? Expectations vs Reality

Isometric illustration of a living room with an air purifier

Yes, an air purifier can reduce how quickly dust builds up on furniture, but it will not stop dust from settling altogether. A properly sized unit with a good particle filter lowers the amount of airborne dust that would otherwise land on tables, shelves, and electronics, so you can usually go a bit longer between dusting sessions.

However, dust on furniture is created all the time by people, pets, fabrics, and outdoor air. An air purifier can only capture particles that pass through it while they are still floating. It cannot vacuum your couch, clean your bookshelves, or remove the dusty film that is already there. To see a real difference, you need the right purifier, the right setup, and consistent cleaning habits working together.

This guide explains how dust actually behaves, what an air purifier can realistically do for visible dust, and how to set up your room so your purifier supports cleaner-looking furniture instead of becoming an expensive fan.

What It Really Means for an Air Purifier to Reduce Dust on Furniture

When people ask whether an air purifier can reduce dust on furniture, they are usually hoping for two outcomes: less visible dust film and less frequent dusting. In indoor air quality terms, this means lowering the concentration of airborne particles that eventually settle on surfaces.

Household dust is a mix of many particle types, including:

  • Fibers from clothing, bedding, carpets, and upholstery
  • Skin flakes, tiny bits of hair, and pet dander
  • Soil and grit tracked in from outside
  • Particles from cooking, candles, and fireplaces
  • Pollen and other outdoor particles that leak or blow indoors

These particles constantly cycle between air and surfaces. Fine particles float for hours before settling, while heavier debris falls quickly to the floor or nearby furniture.

In practical terms, an air purifier that reduces dust on furniture is doing two things:

  • Lowering the average level of airborne dust in the room
  • Slowing the rate at which new dust lands on visible surfaces

This distinction matters. You may still see dust if you run your finger over a shelf after a week, but if the purifier is well set up, that layer is usually thinner and slower to appear than it would be without filtration. The goal is “less and slower,” not “none at all.”

How Air Purifiers Actually Change Dust Levels

To understand what an air purifier can and cannot do for your furniture, it helps to look at the basic dust cycle in a room. Three processes control how dusty your home feels:

  • Generation – People, pets, textiles, and outdoor air constantly add new particles.
  • Transport – HVAC airflow, ceiling fans, and movement keep particles suspended and moving.
  • Removal – Dusting, vacuuming, washing, ventilation, and filtration take particles out of circulation.

An air purifier only affects the removal side, and only for particles that pass through its intake. Its main tools are:

  • Airflow – The volume of air pulled through the unit each minute or hour.
  • Filter efficiency – How well the particle filter captures fine dust instead of letting it pass through.

For visible dust on furniture, four technical details matter most:

  • Room size vs purifier capacity – Undersized units move too little air to keep up with dust generation.
  • Air changes per hour (ACH) – More complete passes of room air through the filter per hour generally mean less dust settling.
  • Filter type – High-efficiency particle filters capture the fine fraction of dust that stays airborne long enough to be filtered.
  • Runtime and fan speed – Continuous operation at a moderate speed is usually needed for visible improvement.

It is also important to be clear about limitations:

  • A purifier does not remove dust already on furniture or floors. That requires cleaning.
  • Heavier grit and crumbs may never reach the purifier before settling.
  • The unit does not stop dust production from people, pets, or outdoor air leaks.

When all of these pieces line up, you are likely to notice that your home feels less dusty overall and that your furniture stays visually cleaner between dusting sessions.

Table 1. Matching purifier capacity to room size for dust control. Example values for illustration.
Room type Approx. floor area Ceiling height Suggested ACH range for dust control Result you can reasonably expect
Small bedroom 100–150 sq ft 8 ft 4–5 ACH Noticeably slower dust buildup on nightstands and dressers
Medium living room 200–300 sq ft 8–9 ft 4–6 ACH Less visible dust on TV stands, coffee tables, and shelves
Open-plan area 350–500+ sq ft 8–10 ft 5–8 ACH (often needs more than one unit) Localized improvement near the purifier; whole-space control is harder
Home office 100–180 sq ft 8–9 ft 4–6 ACH Less dust on electronics, monitors, and desk surfaces

Real-World Examples of Dust Reduction on Furniture

The impact of an air purifier on dust is easiest to understand through real-world scenarios. These examples assume a unit with a good particle filter, sized sensibly for the space and run most of the day.

Example 1: Small bedroom with light dust

A single person in a small bedroom with hard flooring and minimal clutter notices a visible dust film on the nightstand every 7–10 days. After adding a properly sized purifier and running it continuously on a medium setting:

  • The nightstand still gathers dust, but the layer is thinner.
  • Dusting every two weeks feels adequate instead of every week.
  • Sunlight through the window shows fewer floating particles.

In this lower-dust setting, the purifier makes a clear difference in how often furniture looks dusty.

Example 2: Living room with pets and carpet

A family with two shedding pets and wall-to-wall carpeting sees dust returning to the TV stand within two or three days. They add a purifier rated for the room size and run it 24/7:

  • The TV stand still needs weekly dusting, but the visible film is reduced.
  • Pet hair on surfaces is mostly unchanged, because hair settles quickly and must be removed by cleaning.
  • Allergy symptoms improve slightly due to lower airborne dander.

Here, the purifier helps, but heavy dust sources limit how far dusting intervals can realistically be stretched.

Example 3: Open-plan space with cooking and traffic

An open kitchen-living area with frequent cooking, open doors, and foot traffic has a persistent dusty feel. A single portable purifier is placed in the living room corner:

  • Dust reduction is noticeable on the coffee table closest to the purifier.
  • Shelves and surfaces farther away show less improvement.
  • Running the kitchen exhaust fan during cooking still matters as much as filtration.

In this kind of space, a purifier is most effective as part of a broader strategy: using exhaust fans, limiting open doors on dusty days, and reducing clutter on surfaces.

Example 4: Home office with sensitive electronics

A home office with multiple monitors and electronics tends to collect fine dust quickly, especially on black surfaces. After adding a purifier:

  • The visible gray film on monitors and speakers returns more slowly.
  • Cleaning microfiber cloths pick up less dust per wipe.
  • Keyboards and vents still need regular cleaning, but buildup is reduced.

In this case, the purifier’s main benefit is lowering fine airborne dust that would otherwise settle on sensitive equipment.

Table 2. Common dust problems, likely causes, and targeted fixes. Example values for illustration.
Visible dust problem Likely main cause How a purifier helps What else you should do
Dust film returns on furniture within 2–3 days High dust generation, undersized or underused purifier Reduces airborne dust if sized and run correctly Increase runtime and fan speed; review room size vs capacity
Heavy dust on books, decor, and open shelves Lots of surfaces and clutter trapping settled dust Slows new settling but cannot remove existing layers Declutter, dust with microfiber, and vacuum more thoroughly
Pet hair and fuzz on couches and rugs Shedding pets and fabric surfaces Helps with fine dander more than visible hair Use lint rollers, upholstery tools, and pet grooming routines
Sticky dust in damp or musty areas High humidity making dust cling and feel tacky Reduces airborne dust but not the sticky residue Control humidity, clean with damp cloths, and dry the area well

Common Mistakes and How to Troubleshoot Poor Dust Reduction

Many people plug in an air purifier, see little change on their furniture, and assume the device does not work. Often the problem is the setup, not the concept. These are common pitfalls and how to correct them.

Mistake 1: Undersizing the purifier for the room

Symptom: Surfaces look just as dusty as before, even after weeks of use.

Likely issue: The purifier’s airflow is too low for the room volume, so it cannot turn the air over often enough.

Fix:

  • Confirm your room’s approximate square footage and ceiling height.
  • Compare that to the unit’s stated coverage or airflow and target several air changes per hour.
  • Consider moving the unit to a smaller, more enclosed space if upgrading is not an option.

Mistake 2: Running only on the lowest fan speed

Symptom: The purifier is very quiet but dust reduction is minimal.

Likely issue: Low speed moves too little air to capture enough dust.

Fix:

  • Use medium or higher speed when you are out of the room.
  • At night, use the lowest acceptable speed that still provides reasonable airflow.
  • Expect some noise trade-off if you want faster dust removal.

Mistake 3: Poor placement and blocked airflow

Symptom: Dust seems reduced only in a very small area, or not at all.

Likely issue: The intake or outlet is blocked by furniture, curtains, or walls, limiting how much room air actually circulates through the filter.

Fix:

  • Place the purifier where air can flow freely around it, not in a tight corner.
  • Keep a clear zone around the intake and outlet so air is not immediately recirculated into a wall or piece of furniture.
  • Avoid placing it directly under shelves where falling dust can clog the intake quickly.

Mistake 4: Neglecting filter maintenance

Symptom: The purifier seems weaker over time, and dust levels slowly increase again.

Likely issue: Clogged pre-filters and main filters restrict airflow, so less air passes through the unit.

Fix:

  • Check pre-filters regularly for lint and hair buildup.
  • Follow the recommended replacement intervals for main filters, adjusting for dusty homes or shedding pets.
  • Do not wash filters that are not designed to be washed; this can damage them and reduce efficiency.

Mistake 5: Expecting the purifier to replace cleaning

Symptom: Surfaces are still visibly dusty even though the purifier runs continuously.

Likely issue: Existing dust on furniture and floors has not been removed, so the room starts from a dusty baseline.

Fix:

  • Do a thorough cleaning before judging the purifier’s impact: dust, vacuum, and mop where appropriate.
  • Use microfiber or slightly damp cloths to capture dust instead of just moving it around.
  • Then run the purifier continuously and see how quickly dust returns compared to before.

Safety Basics When Using an Air Purifier for Dust Control

Most mechanical air purifiers are straightforward to use, but there are still safety and health considerations when you run a unit for long periods to control dust on furniture.

Electrical and placement safety

  • Plug the purifier directly into a wall outlet rather than an overloaded power strip.
  • Keep cords out of walking paths to avoid tripping and accidental tipping.
  • Place the unit on a stable, level surface where it cannot easily be knocked over.
  • Maintain clear space around the intake and outlet to prevent overheating and ensure proper airflow.

Filter handling and dust exposure

  • When changing filters, handle them gently to avoid shaking loose accumulated dust.
  • Consider wearing a simple dust mask if you are sensitive to particles while replacing filters.
  • Place used filters directly into a trash bag, seal the bag, and remove it from the living space.

Ozone and additional technologies

  • For dust reduction, mechanical filtration is usually sufficient; extra features that generate ozone are not necessary and may be undesirable.
  • If your unit has optional ionizing or similar modes, follow manufacturer guidance and disable any feature that is not needed for particle removal.

Noise, comfort, and sleep

  • Higher fan speeds can be loud; if noise disturbs sleep, use a slightly lower setting overnight and higher speeds during the day.
  • Ensure that airflow is not blowing directly at your face or creating uncomfortable drafts in seating or sleeping areas.

Long-Term Use, Maintenance, and Dust Management Habits

To keep dust on furniture under control over months and years, you need both consistent purifier use and basic housekeeping habits that support it.

Filter and unit maintenance

  • Pre-filters: Check every few weeks and clean or replace as recommended to capture hair and lint before they reach the main filter.
  • Main particle filters: Replace on schedule, or sooner if you notice reduced airflow or a persistent dusty smell from the unit.
  • Exterior cleaning: Wipe the purifier’s housing and intake grilles with a dry or slightly damp cloth to prevent dust from forming a crust that restricts air.

Room habits that support dust reduction

  • Use entry mats and consider a no-shoes policy to reduce tracked-in grit and soil.
  • Vacuum carpets and rugs regularly with a machine that has effective filtration.
  • Wash bedding, throws, and frequently used blankets on a regular schedule to limit fiber and skin-flake buildup.
  • Control indoor humidity to a comfortable mid-range so dust does not become excessively sticky or statically charged.

Seasonal and storage considerations

  • If you pause purifier use for a season, store it in a dry, clean area so dust and moisture do not damage the filters.
  • Before restarting after storage, inspect filters for discoloration, odor, or visible damage and replace if needed.
  • Re-check room layout after furniture moves or renovations to ensure the purifier still has good access to room air.

Practical Takeaways and Specs to Look For

Putting everything together, an air purifier is a useful tool for reducing dust on furniture, as long as you treat it as part of an overall dust-management plan rather than a replacement for cleaning.

  • You can reasonably expect slower dust buildup and a less dusty feel in the air, not perfectly dust-free surfaces.
  • Results depend heavily on room size, purifier capacity, filter quality, and runtime.
  • Regular dusting, vacuuming, and humidity control are still required to keep furniture looking clean.

When you are choosing or evaluating a purifier specifically to help with dust on furniture, use this simple checklist.

  • Room coverage: Rated for at least the size of your room; larger or open-plan spaces may need more than one unit.
  • Air changes per hour: Capable of several air changes per hour in the target space for meaningful dust reduction.
  • Particle filter type: High-efficiency filter designed to capture fine particles, not just large lint.
  • Pre-filter: A washable or replaceable pre-filter to catch hair and larger dust, protecting the main filter.
  • Sealed airflow path: Air is forced through the filter rather than leaking around it.
  • Fan settings: Multiple speeds so you can balance noise and performance, with a setting strong enough for daytime cleaning.
  • Filter access: Easy-to-open housing and clear filter replacement guidance to encourage proper maintenance.
  • Energy use: Reasonable power draw for continuous or near-continuous operation.

If you start with a clean room, run a well-sized purifier consistently, and keep up with filter maintenance, you should see that dust takes longer to settle on your furniture and is easier to manage over time.

Frequently asked questions

Which specifications and features matter most when choosing an air purifier to reduce dust on furniture?

Look for a unit sized for your room that provides several air changes per hour, a high-efficiency particle filter to capture fine dust, a washable or replaceable pre-filter for hair and lint, and multiple fan speeds so you can balance noise and performance. A sealed airflow path and clear filter access also help the unit perform consistently over time.

Why isn’t my air purifier noticeably reducing dust on my furniture?

Common causes are an undersized unit, low fan speed, poor placement that blocks airflow, or clogged filters that reduce intake. Check room coverage and ACH, move the purifier to a more open location, increase runtime or fan speed, and inspect filters for maintenance needs.

Is it safe to run an air purifier continuously to control dust?

Most mechanical air purifiers are designed for continuous operation and are safe when used according to the manufacturer’s instructions; plug them into a suitable outlet and keep vents clear. Avoid technologies that intentionally generate ozone and follow guidance for filter handling and placement to minimize dust exposure when servicing.

How should I place an air purifier relative to furniture for the best dust reduction?

Place the purifier where it can draw air from across the room rather than tucked into a corner, and keep several feet of clear space around intakes and outlets so air isn’t immediately recirculated. For targeted improvement, position it near the most dust-sensitive furniture but not directly under shelves or inside enclosed cupboards.

Will an air purifier remove pet hair and visible fibers from sofas and carpets?

An air purifier helps reduce fine airborne dander and microscopic fibers, but larger pet hair and visible fibers usually settle rapidly and must be removed by vacuuming, lint rollers, or upholstery tools. Combining regular grooming, cleaning, and filtration gives the best results.

How often should I clean or replace filters to maintain dust reduction?

Check pre-filters every few weeks and clean or replace them as recommended; replace main particle filters on the schedule provided by the manufacturer or sooner in homes with pets or heavy dust. Clogged filters reduce airflow and performance, so timely maintenance is important for sustained dust control.

Do You Need a Pre-Filter? Extending HEPA Life and Reducing Filter Costs

Bedroom with air purifier showing subtle airflow illustration

Most homes benefit from a pre-filter if the air purifier runs a lot or the home has pets, visible dust, or pollen. A pre-filter catches larger particles before they hit the HEPA filter, so the HEPA lasts longer, clogs more slowly, and costs you less to replace over time.

If your air is already very clean and you only use a HEPA purifier occasionally, a pre-filter is less critical but still helpful for keeping the unit cleaner inside. Understanding how pre-filters work, when they matter most, and how to care for them will help you decide whether to prioritize this feature and how to manage long‑term filter costs.

This guide explains what a pre-filter does, how it affects HEPA life, energy use, and noise, and gives concrete examples, maintenance schedules, and specs to look for when you are comparing air purifiers or filter packs.

What a Pre-Filter Is and Why It Matters

A pre-filter is a separate, usually coarser filter layer placed in front of a HEPA filter. Its main job is to trap larger debris so it never reaches the fine HEPA media. Common examples include pet hair, visible dust, lint, carpet fibers, and larger pollen grains.

Because HEPA filters are designed to capture very small particles, they are dense and relatively expensive. When big debris hits the HEPA first, it covers the surface quickly, blocks airflow, and forces you to replace the HEPA sooner than necessary. A pre-filter acts like a “first shield” that takes the brunt of this load.

Pre-filters are typically made from coarse synthetic fibers, foam, or mesh. Some are simple washable screens, while others are thin disposable pads. A few incorporate a light layer of activated carbon for basic odor reduction, but their primary role is still mechanical filtration of larger particles.

For most households that care about indoor air quality and long‑term cost, a pre-filter matters because it:

  • Extends HEPA lifespan by slowing down clogging
  • Helps keep airflow and clean air delivery more stable over time
  • Shifts some of the maintenance to a cheaper, easier‑to‑clean part
  • Can reduce how often you need to open the purifier to change the main filter

How a Pre-Filter Works with HEPA Filtration

In a typical purifier airflow path, room air enters the unit, passes through the pre-filter first, then any optional carbon layer, and finally through the HEPA filter. Each stage is tuned to a different particle size range.

Think of the pre-filter as a coarse “strainer.” It removes large pieces that would otherwise pile up on the HEPA surface. The HEPA then focuses on fine particles such as smoke, fine dust, and many allergens.

Key concepts that explain how this affects performance and costs:

  • Particle size targeting: Pre-filters capture larger particles (hair, lint, visible dust). HEPA targets fine particles that are too small to see.
  • Pressure drop: Every filter layer adds resistance to airflow. A clean, low‑density pre-filter adds only a small pressure drop but prevents the much larger pressure increase that happens when the HEPA clogs with coarse debris.
  • Filter loading pattern: Without a pre-filter, the HEPA loads from both large and small particles. With a pre-filter, the HEPA mainly loads with fine particles, which usually spreads out more evenly across the filter media.
  • Cost distribution: The pre-filter is cheaper to clean or replace, so you move part of the “wear and tear” away from the expensive HEPA layer.

Different pre-filter designs behave differently:

  • Washable mesh or fabric: Lower cost over time, but needs regular cleaning; best for capturing hair, lint, and visible dust.
  • Disposable fiber pads: Slightly finer capture and no washing step, but add recurring cost.
  • Pre-filters with basic carbon: Offer limited odor reduction plus particle capture; carbon saturates faster and usually needs more frequent replacement.
Filter setup comparison: when a pre-filter is most useful
Example values for illustration.
Home situation Filter setup Likely HEPA replacement pattern Pre-filter value for cost control
Apartment, no pets, low dust, purifier on a few hours per day HEPA only HEPA often lasts toward the longer end of its rated life Modest benefit; convenience may matter more than savings
House with two shedding pets, carpeted floors, purifier on most of the day HEPA + washable pre-filter HEPA life can extend by several months with regular pre-filter cleaning High value; pre-filter can prevent rapid clogging from fur and hair
Urban home near traffic, light pet dander, mixed flooring HEPA + disposable pre-filter HEPA replaced on a moderate schedule; pre-filter changed more often Moderate value; balances convenience and cost
Home in dusty region, windows open often, purifier runs continuously HEPA + pre-filter (washable or disposable) Without pre-filter, HEPA clogs quickly; with pre-filter, intervals stabilize High value; helps keep airflow and noise more consistent
Home with strong central HVAC filtration already in place Central filter + portable HEPA, optional pre-filter Portable HEPA sees less large debris thanks to central filter Low to moderate value; depends on run time and room dust

Impact on airflow, noise, and energy use

When the pre-filter is clean, it has limited impact on total airflow. Over time, by keeping the HEPA from becoming heavily coated with large particles, it helps your purifier maintain a more stable clean air delivery rate.

If the pre-filter is neglected and becomes clogged, airflow drops. Some purifiers respond by running the fan at higher speeds, which can:

  • Increase noise, especially on higher fan settings
  • Raise energy use slightly over long periods
  • Reduce how much air is actually cleaned if the fan cannot fully compensate

This is why pre-filters are helpful only when they are part of a regular maintenance routine, not when they are left in place until heavily loaded.

Real-World Examples of When You Do and Do Not Need a Pre-Filter

Whether you personally need a pre-filter depends on how you live, your flooring, and how often your purifier runs. These scenarios can help you decide.

Homes where a pre-filter helps the most

  • Pet-heavy households: If you see fur on furniture or clumps in your vacuum after every cleaning, a pre-filter can intercept that material before it mats onto the HEPA. This often means more frequent pre-filter cleaning but fewer HEPA replacements.
  • Dusty or high‑traffic homes: Homes near busy roads, construction, or in dry, dusty climates tend to have more coarse dust. A pre-filter can catch that dust and keep airflow steadier between HEPA changes.
  • Carpeted spaces and fabric-heavy rooms: Bedrooms or living rooms with rugs, curtains, and upholstered furniture shed fibers and lint. A pre-filter is useful for capturing these fibers early.
  • Open-window seasons: If you like to open windows when pollen counts are high or during wildfire smoke events, a pre-filter can help manage the sudden increase in airborne particles.
  • Purifiers running 24/7: Continuous operation magnifies the difference between having and not having a pre-filter, because small efficiency gains accumulate over thousands of hours.

Homes where a pre-filter is less critical

  • Low‑dust, pet‑free homes: If you rarely see visible dust buildup and do not have pets, the HEPA may not clog quickly with large debris. A pre-filter is still helpful but not essential for cost control.
  • Short seasonal use: If you only run a purifier for a few weeks during a specific season, the HEPA may not reach the point where a pre-filter’s cost savings are significant.
  • Strong whole‑home filtration: If your HVAC system uses an efficient central filter and runs regularly, the air entering a portable purifier may already be stripped of much of the larger material.

Practical example: estimating cost impact

Suppose a HEPA filter is rated for 12 months in normal use. In a dusty, pet‑heavy home without a pre-filter, you might find that airflow and performance drop noticeably after 6–8 months, prompting earlier replacement. With a pre-filter that you clean every few weeks, the same HEPA might remain effective closer to the rated 12 months.

Over several years, that difference can reduce how often you buy HEPA filters, especially if you run multiple purifiers or have larger units with more expensive cartridges.

Maintenance patterns with and without a pre-filter
Example values for illustration.
Setup Typical user actions Common issues if neglected Approximate impact on HEPA life
HEPA only Replace HEPA on manufacturer schedule Dust matting on HEPA, faster airflow drop May need earlier replacement in dusty homes
HEPA + washable pre-filter Clean pre-filter every 2–4 weeks; replace HEPA less often Clogged pre-filter if cleaning is skipped, noisy fan Often extends HEPA life by several months in heavy‑use homes
HEPA + disposable pre-filter Replace pre-filter pad every 1–3 months Forgotten pre-filter changes, gradual performance loss Moderate extension of HEPA life with predictable schedule
HEPA + pre-filter + basic carbon layer Maintain both pre-filter and carbon; replace HEPA less often Odor breakthrough if carbon is not changed; higher resistance Good HEPA protection if all layers are maintained on time

Common Pre-Filter Mistakes and Troubleshooting Cues

Pre-filters are simple, but a few common mistakes can cancel out their benefits or even reduce purifier performance. Watching for specific cues can help you fix problems early.

Frequent mistakes

  • Letting the pre-filter cake over with dust: A thick gray layer of dust, hair, and lint on the surface is a sign the pre-filter is overdue for cleaning or replacement. At this point, it can restrict airflow more than it helps.
  • Washing a non‑washable pre-filter: Some disposable pads look similar to washable ones. Washing a pad that is not designed for it can cause tearing, shedding fibers, or warping that lets air leak around the filter frame.
  • Reinstalling the pre-filter while damp: Moist material can encourage mold growth inside the purifier and may increase odor. It can also deform the filter as it dries.
  • Installing the filter backwards or with gaps: If the pre-filter is not seated correctly, air may bypass it and deposit debris directly onto the HEPA or fan.
  • Ignoring odor layers: If your pre-filter also contains carbon, it may stop controlling odors long before the HEPA is due. Waiting too long to change it can give a false impression that the purifier is not working.

Troubleshooting cues to watch for

  • Sudden drop in outlet airflow: If the purifier feels weaker at the outlet than it did when new, check the pre-filter first. A clogged layer often explains the change.
  • Fan seems louder at the same setting: Many units increase fan speed automatically when filters load up. More noise at a familiar setting can be a clue that the pre-filter is restricting airflow.
  • Visible dust on the HEPA surface: If you see hair, lint, or coarse dust on the HEPA itself, the pre-filter may be missing, installed incorrectly, or overdue for replacement.
  • More dust settling in the room: If surfaces seem dustier even though the purifier is running, check both pre-filter and HEPA for loading or gaps.

When in doubt, a quick inspection of the pre-filter is a low‑effort way to diagnose many performance complaints before assuming the purifier is defective.

Safety Basics When Using and Cleaning Pre-Filters

Pre-filters are generally low‑risk components, but basic safety habits help you avoid damage to the purifier and reduce exposure to captured dust.

  • Turn off and unplug the purifier before opening it: This prevents the fan from turning while you are handling the filter and reduces the chance of pulling dust into the room as you remove panels.
  • Avoid shaking dusty filters indoors: Shaking or slapping a loaded pre-filter can release dust back into the air. If possible, handle heavily soiled filters over a trash bag or outdoors.
  • Use gentle rinsing, not high‑pressure sprays: Strong water pressure can damage mesh or fiber layers and create holes that allow bypass.
  • Allow full drying after rinsing: Lay washable pre-filters flat and let them dry completely before reinstalling. Trapped moisture can encourage mold or bacterial growth on the filter surface.
  • Wear basic protection if you are sensitive: If you have allergies or asthma, consider wearing a simple mask and gloves when cleaning a heavily loaded pre-filter so you are not breathing in the dislodged dust.
  • Do not modify the filter stack: Adding extra layers of random material in front of the HEPA can create too much resistance, stress the fan, and reduce clean air delivery.

Following these safety basics helps your purifier operate as designed and keeps the captured pollutants contained rather than re‑released during maintenance.

Maintenance for Long-Term Performance and Lower Costs

To get the full benefit of a pre-filter, you need a simple, repeatable maintenance routine. This keeps airflow strong, extends HEPA life, and makes costs more predictable from year to year.

How often to check and clean a pre-filter

There is no single schedule that fits every home, but these patterns are common:

  • Washable or vacuumable pre-filters: Inspect every 2–4 weeks. Clean whenever you see a visible layer of dust, hair, or lint instead of waiting for a fixed date.
  • Disposable pre-filter pads: Plan on replacement about every 1–3 months in typical homes, sooner if you see heavy loading or notice performance changes.
  • Carbonized pre-filters: Expect odor control to fade before the HEPA is due. If smells return even though the HEPA looks clean, the carbon layer may be saturated.

Simple cleaning steps for washable pre-filters

  • Remove the pre-filter carefully so you do not drop debris into the purifier housing.
  • Use a vacuum with a brush attachment to remove loose dust and hair.
  • If the pre-filter is rated as washable, rinse it gently with lukewarm water until the water runs mostly clear.
  • Allow it to air‑dry fully on a clean surface; do not use heat sources that could warp the material.
  • Reinstall it firmly, ensuring there are no gaps around the edges.

For disposable pre-filters, replacement is usually as simple as removing the old pad, disposing of it, and installing a new one in the same orientation.

Coordinating pre-filter care with HEPA changes

A practical approach is to tie pre-filter checks to other household routines, such as vacuuming days or monthly cleaning tasks. Each time, you can quickly:

  • Look at the pre-filter surface for buildup
  • Glance at the HEPA through any access panel or during pre-filter removal
  • Note any change in purifier noise or airflow

When the HEPA is finally due, replacing it while the pre-filter is freshly cleaned or new gives the entire filter stack a “reset,” making it easier to track performance changes over the next cycle.

Key Takeaways and Specs to Look For

Pre-filters are most valuable when your air purifier runs many hours per day, your home has pets, or you see frequent dust buildup. In these situations, they can meaningfully extend HEPA life, stabilize airflow, and reduce long‑term filter costs, as long as you are willing to clean or replace the pre-filter on a regular schedule.

If your home is already low in dust and you run a purifier only occasionally, a pre-filter is still helpful but less critical. In that case, ease of maintenance and clear filter schedules may matter more than squeezing out maximum HEPA life.

Specs to look for when choosing a pre-filter setup

  • Clearly defined pre-filter stage: Look for a purifier or filter set that lists a dedicated pre-filter layer rather than combining everything into a single cartridge without explanation.
  • Washable vs. disposable design: Decide if you prefer lower long‑term cost with washing and vacuuming, or the convenience of swapping disposable pads on a schedule.
  • Access and replacement method: Check how easy it is to reach the pre-filter. Tool‑free access encourages more consistent maintenance.
  • Recommended maintenance interval: A clear suggested schedule (for example, “clean every 2–4 weeks”) makes planning easier and helps you budget for replacements.
  • Filter area and thickness: Larger pre-filter surface area generally loads more slowly and may need less frequent cleaning than a very small strip.
  • Presence of carbon in the pre-filter: If odor control matters, note whether the pre-filter includes carbon and be prepared for more frequent changes as the carbon saturates.
  • Compatibility with HEPA rating: Ensure the pre-filter is designed to work with a true HEPA or high‑efficiency filter so that coarse and fine filtration stages complement each other.
  • Availability and price of replacements: Check that replacement pre-filters and HEPA filters are easy to obtain and that their combined annual cost fits your budget.

By focusing on these specs and matching them to how dusty your home is and how often you run your purifier, you can decide whether you personally need a pre-filter and how to use it to extend HEPA life and manage filter costs over the long term.

Frequently asked questions

Which pre-filter features most influence performance and long-term cost?

Look for a clearly defined pre-filter stage, the option for washable versus disposable materials, accessible tool-free access, and larger surface area. These factors determine how often you must clean or replace the pre-filter and therefore how much it extends HEPA life and controls annual filter costs.

What is a common mistake that cancels out a pre-filter’s benefits?

Failing to clean or replace the pre-filter regularly until it is heavily clogged is common; a caked pre-filter can restrict airflow more than it helps and force the fan to work harder. Regular inspection and timely maintenance preserve the pre-filter’s protective role for the HEPA.

What basic safety steps should I follow when handling dirty pre-filters?

Turn the unit off and unplug it before opening, avoid shaking dusty filters indoors, and handle heavily soiled filters over a trash bag or outdoors. If you are sensitive to dust, wear a simple mask and gloves and ensure washable filters are fully dry before reinstalling.

How do I decide between a washable pre-filter and disposable pads?

Choose washable pre-filters for lower long-term cost and routine cleaning; disposable pads suit users who prefer predictable swap schedules and less hands-on maintenance. Also factor in replacement availability and whether the pre-filter contains carbon, which usually needs more frequent changes.

Will adding a pre-filter change my purifier’s energy use or noise?

A clean low-density pre-filter adds minimal resistance and typically does not noticeably change energy use or noise, but a neglected clogged pre-filter can reduce airflow and cause the fan to run louder or harder. Keeping the pre-filter maintained minimizes any energy or noise impact.

Do I still need a pre-filter if my home has good central HVAC filtration?

A strong central filter can reduce coarse debris reaching a portable purifier, which lowers the pre-filter’s value, but a pre-filter can still be helpful in high-traffic rooms or for purifiers that run many hours. Consider room-specific dust sources and run time when deciding.

HEPA Air Purifier vs Washable Filter: What Really Matters for Clean Air

Isometric illustration of a living room with a generic air purifier

A HEPA air purifier is usually much better than a washable filter at removing fine particles like smoke, pollen fragments, and pet dander, while washable filters mainly catch larger dust and hair. The challenge is that marketing often blurs this difference, so it is easy to think a “permanent” or “no replacement filters” unit can replace a true HEPA purifier when it often cannot.

This guide explains what HEPA really means, what most washable filters actually do, and how to tell if a product can handle your real indoor air problems. You will see concrete examples, side-by-side comparisons, and simple cues you can use in a store or online listing.

Whether you are dealing with wildfire smoke, allergies, or just visible dust, understanding HEPA vs washable filter performance, maintenance, and safety will help you choose equipment that fits your home, budget, and effort level.

HEPA vs Washable Filters: What They Mean and Why It Matters

When you compare a HEPA air purifier vs a washable filter system, you are really comparing two different goals. HEPA filtration focuses on fine particles (often called PM2.5), while most washable filters focus on coarse dust and hair. Both can be useful, but they solve different problems.

Key points to understand:

  • HEPA (High-Efficiency Particulate Air) filters are dense mats of fine fibers designed to capture a very high percentage of tiny airborne particles in a single pass.
  • Washable filters in consumer products are usually coarse screens, foam pads, or reusable panels that target larger debris and protect fans or finer filters.
  • “Permanent” or “no replacement filter” claims usually mean you save on replacement filters but must do more hands-on cleaning, and you may get less fine-particle performance.

This distinction matters most if you are sensitive to smoke, traffic pollution, or allergens, or if you live in an area with seasonal wildfire smoke. In those situations, relying only on a washable filter can leave most of the problematic fine particles in the air.

How HEPA and Washable Filters Actually Work

Understanding the basic mechanics of each filter type makes it easier to see why their performance is so different in real rooms.

How HEPA filtration works

  • Dense fiber mat: HEPA media contains tightly packed fibers. Particles are captured by interception, impaction, and diffusion as air weaves through the filter.
  • Designed for fine particles: Certified HEPA filters are tested to capture a very high fraction of particles around the most penetrating particle size, which is typically in the fine range.
  • Airflow trade-off: Because the media is dense, the fan must be strong enough and well designed to move air through it without too much noise or pressure drop.
  • Not usually washable: Water and scrubbing can damage the fiber structure or any electrostatic charge the media relies on, reducing performance.

How typical washable filters work

  • Screen or mesh prefilters: These are like a reusable lint screen, catching hair, pet fur, and larger dust before air reaches finer stages.
  • Foam or fabric pads: Slightly finer than a bare screen, they can grab more dust but still are not designed for HEPA-level fine particle capture.
  • Reusable electrostatic panels (passive): Plastic or metal fibers can hold dust using an electrostatic effect. They are washed to remove buildup but typically do not match the efficiency of a sealed HEPA filter.
  • Collector plates in electronic air cleaners: In some systems, powered electrodes charge particles, which then stick to metal plates. These plates are washable, but they require careful cleaning to maintain performance.

In many air purifiers, a washable filter is intended as a first stage only. The real fine particle work is done by a non-washable HEPA filter and, if present, a separate gas or odor stage.

Table 1. HEPA vs washable filter roles in home air cleaning – Example values for illustration.
Filter type Main job Fine particle performance Washable? Best suited for
Certified HEPA filter High-efficiency fine particle removal Very high when properly sealed No (typically) Smoke, wildfire haze, allergies, urban pollution
“HEPA-type” pleated filter General dust reduction Moderate to high, varies by design Usually no Everyday dust control where exact specs are less critical
Washable prefilter screen Capture hair, lint, large dust Low for fine particles Yes Protecting HEPA filters, basic dust and pet hair control
Washable foam or fabric pad First-stage dust capture Low to moderate for coarse dust Yes Entry-level dust reduction, prefiltering in multi-stage units
Reusable electrostatic panel (passive) Reusable whole-house or room dust filter Variable; usually below HEPA Yes HVAC returns, homes prioritizing low filter waste
Electronic collector plates Capture charged particles on metal plates Can be high if clean and well designed Collector parts washable Built-in systems where regular cleaning is acceptable

Real-World Scenarios: When HEPA vs Washable Filters Make Sense

Looking at everyday situations can make the HEPA vs washable filter choice much clearer. Here are examples that match common indoor air quality problems.

Scenario 1: Wildfire smoke or heavy outdoor pollution

  • Goal: Reduce indoor haze and fine smoke particles that stay suspended for hours.
  • Better fit: A HEPA-based air purifier sized for the room, ideally with a separate odor or gas stage.
  • Why: Smoke particles are mostly in the fine and ultrafine range. A washable screen alone will leave most of them in the air, even at high fan speeds.

Scenario 2: Pet hair and visible dust in a living room

  • Goal: Cut down on tumbleweeds of fur, reduce how often you dust surfaces, keep the room looking cleaner.
  • Better fit: A unit with a washable prefilter plus a mid- to high-efficiency main filter. In some cases, a good washable filter in the HVAC return can also help.
  • Why: Hair and large dander are easy for washable filters to catch. A HEPA stage is still helpful if anyone has allergies, but the washable prefilter does a lot of the visible work.

Scenario 3: Bedroom for someone with allergies or asthma

  • Goal: Reduce exposure to fine allergens such as smaller pet dander, dust mite debris, and fragments of pollen or mold spores.
  • Better fit: A sealed HEPA purifier that can deliver several air changes per hour in that room.
  • Why: Fine allergen particles can stay airborne for long periods. A washable-only system may improve visible dust but not reduce the smaller particles that drive symptoms.

Scenario 4: Workshop, garage, or hobby room

  • Goal: Capture sawdust, fibers, and other large particles generated by projects.
  • Better fit: A strong fan with a washable or easily cleaned coarse filter, possibly paired with a finer disposable filter if you also care about fine dust.
  • Why: Large particles load filters quickly. Washable filters can be rinsed often without ongoing replacement costs.

Scenario 5: Whole-house HVAC filtration

  • Goal: Provide background dust and allergen control for the entire home through the central system.
  • Better fit: A correctly sized disposable filter or reusable panel in the return grille, potentially combined with room HEPA units in the most sensitive spaces.
  • Why: HVAC systems can move a lot of air, but filter resistance affects energy use and comfort. Many homeowners use a moderate-efficiency HVAC filter plus separate HEPA purifiers where needed.
Table 2. Matching filter approach to common home situations – Example values for illustration.
Situation Main concern Filter approach that usually works best Watch out for
Wildfire smoke season Fine smoke particles, haze Room-sized HEPA purifier with strong airflow Washable-only units that lack fine particle specs
Home with multiple pets Hair, large dander, odor Washable prefilter plus HEPA and odor stage Clogged prefilters that reduce airflow and noise comfort
Dusty hobby room or garage Large dust, debris High-flow unit with washable coarse filter Letting dust cake onto filters until airflow collapses
Bedroom for allergy sufferer Fine allergens, nighttime comfort Quiet HEPA purifier sized for several air changes per hour Relying on a washable HVAC filter alone
General whole-home dust control Visible dust, routine cleaning Moderate-efficiency HVAC filter or reusable panel, plus spot HEPA units if needed Filters so restrictive that the HVAC system struggles

Common Mistakes and Troubleshooting HEPA vs Washable Filter Performance

Many people buy a purifier or filter upgrade and then feel disappointed with the results. Often the problem is not the technology itself but how it is used or maintained.

Frequent mistakes with washable filters

  • Treating a washable prefilter as the only filter: If the unit was designed for multi-stage filtration, running it without the HEPA or main filter dramatically reduces fine-particle removal.
  • Infrequent cleaning: A washable filter that looks gray or fuzzy is already restricting airflow. The fan may get louder while actual cleaning performance drops.
  • Reinstalling while damp: Moist filters can promote odor or microbial growth inside the housing and may shed particles when they dry unevenly.

Frequent mistakes with HEPA filters

  • Washing non-washable HEPA media: This can permanently reduce efficiency, even if the filter looks cleaner afterward.
  • Ignoring air leaks: If the HEPA filter is not seated correctly or the door is not latched fully, air can bypass the media and reduce overall performance.
  • Undersizing the purifier: A small HEPA unit in a very large, open floor plan may never deliver enough clean air to noticeably change particle levels.

Troubleshooting cues to watch for

  • Air still looks hazy during smoke events: Check that the HEPA filter is installed, the fan is on a higher speed, and doors/windows are closed as much as practical.
  • Visible dust builds up quickly on surfaces: Verify that washable filters are clean, that the purifier runs long enough each day, and that the unit is not blocked by furniture.
  • Odors persist even with a purifier running: Remember that particle filters (HEPA or washable) do not remove gases by themselves. A separate odor or gas stage is usually required.

Safety Basics When Using HEPA and Washable Filter Systems

Most air purifiers and HVAC filters are straightforward to use, but a few safety basics can prevent problems with electrical components, moisture, and indoor air quality.

Safe cleaning and handling of washable filters

  • Power off before removal: Always switch off and unplug the unit or shut down the HVAC system before removing filters.
  • Avoid harsh sprays: High-pressure water jets or aggressive scrubbing can damage meshes, seals, or electronic parts around the filter frame.
  • Dry completely: Allow washable filters to air dry fully before reinstallation to avoid moisture accumulation inside the appliance.

Safe handling of HEPA and dust buildup

  • Minimize dust release: When replacing a heavily loaded HEPA filter, handle it gently to avoid shaking dust back into the room.
  • Do not cut or modify filters: Trimming or bending media can create bypass gaps and compromise both performance and safety.
  • Follow disposal guidance: Place used filters in a bag before discarding, especially after heavy smoke or renovation dust exposure.

Electrical and electronic considerations

  • Keep electronics dry: For devices with electronic collection plates or powered stages, never spray or immerse electrical parts unless instructions clearly allow it.
  • Check for damage: Cracked housings, loose doors, or broken latches can lead to bypass leaks or expose internal wiring.
  • Ventilation and placement: Avoid blocking air intakes and outlets; restricted airflow can overheat motors and reduce lifespan.

Maintenance and Long-Term Use: Getting the Most from Your Filters

Over time, any filter system will change as dust accumulates and components wear. Planning for maintenance from the start helps you avoid surprise costs and poor performance.

Typical maintenance rhythms

  • Washable screens and pads: Rinse or wash every few weeks to months, depending on pets, outdoor dust, and how often the fan runs.
  • HEPA filters: Replace on the schedule suggested in the manual, often every 6 to 18 months, with shorter intervals in smoky or dusty environments.
  • Odor or gas stages: Expect more frequent replacement if you cook heavily, live near traffic, or notice odors returning quickly.

Signs your filter setup needs attention

  • Fan is louder than usual: Often a sign of clogged washable filters or a HEPA filter reaching the end of its life.
  • Airflow feels weak at the outlet: Check for clogged filters, blocked intakes, or doors not closing properly around the filter frame.
  • More dust on surfaces despite regular use: Confirm that all filter stages are installed, clean or fresh, and that the unit runs long enough each day.

Storage and seasonal use

  • Seasonal purifiers: If you mainly use a HEPA purifier during wildfire or pollen season, store it with clean filters in a dry area and cover it to keep dust out.
  • Washable filters in storage: Make sure they are completely dry before storing to avoid odors or damage.
  • After renovation or heavy dust events: Inspect all filters early; you may need to clean or replace them sooner than the usual schedule.

Putting It All Together: Choosing the Right Setup and Specs to Look For

For most homes, the most effective approach is not choosing HEPA versus washable filters, but combining them intelligently. Washable filters handle large debris and help control costs, while HEPA or other high-efficiency media tackle the fine particles that affect comfort and health.

A simple way to think about it:

  • Use HEPA-based purifiers in rooms where you care most about fine particles, such as bedrooms and main living spaces.
  • Use washable filters as prefilters or in high-dust areas where large particles dominate.
  • Support both with good housekeeping, reasonable ventilation, and attention to humidity and moisture control.

Specs and checklist to compare HEPA vs washable filter products

When you read product descriptions or packaging, use this checklist to see through vague claims:

  • Filter type clearly stated: Does it specify HEPA, HEPA-type, or only washable mesh or foam? Is the washable part a prefilter or the only filter?
  • Fine particle performance: Look for any stated efficiency for small particles or mention of performance at fine particle sizes. Absence of this information often means performance is unknown or modest.
  • Airflow and room size: Check that the stated room size or airflow is appropriate for your space. Larger, open areas need more capacity.
  • Multi-stage design: For serious air cleaning, a washable prefilter plus a main fine-particle stage (and optional odor stage) is usually more effective than a single washable filter.
  • Sealing and construction: Look for designs where filters press firmly into a frame, with gaskets or tight-fitting doors to minimize bypass.
  • Maintenance instructions: Are cleaning and replacement intervals clearly described, with realistic steps you are willing to follow?
  • Noise at higher speeds: If you need strong airflow for smoke or pollen season, consider whether you can tolerate the noise level at those settings.
  • Operating cost over time: Estimate how often you will replace HEPA and odor stages and how often you will wash prefilters, then choose a setup that fits your budget and effort level.

By focusing on these concrete specs instead of marketing phrases alone, you can choose a combination of HEPA and washable filters that delivers the level of air cleaning you actually need, without overspending on features that do not match your priorities.

Frequently asked questions

What specifications and features should I check when comparing HEPA air purifiers and washable filters?

Check for a clear statement of HEPA certification or measured efficiency at fine particle sizes, the unit’s CADR or recommended room size, and whether the design is multi-stage (washable prefilter plus a fine-particle stage and optional odor stage). Also look for good sealing, maintenance instructions, and realistic noise and operating-cost information.

Can I rely on a washable filter alone during wildfire smoke events?

No. Washable filters mostly capture larger particles and will usually miss most smoke (PM2.5 and smaller). During smoke events, a sealed HEPA purifier sized for the room is the better choice; washable filters can still serve as a helpful prefilter.

Is it safe to wash filters or clean HEPA filters at home?

Washable prefilters and collector plates can be cleaned safely if the device is powered off and parts are fully dried before reinstalling. Most HEPA media are not washable—washing can damage the fibers or any electrostatic charge and reduce efficiency—so follow manufacturer guidance and replace HEPA cartridges unless they are explicitly described as washable.

Do washable filters remove odors and gases, or do I need something else?

Particle filters, whether washable or HEPA, do not remove gases or odors effectively. To address odors and volatile compounds you need an appropriate gas/odor stage such as activated carbon or another sorbent designed for adsorption.

Will a washable prefilter extend the life of a HEPA filter?

Yes. A washable prefilter captures large debris, hair, and coarse dust, which reduces the loading rate on the HEPA stage and can extend its service life. Keep the prefilter clean on a regular schedule to prevent reduced airflow and maintain system performance.

How do I determine the right size or airflow for a HEPA air purifier in my room?

Use the purifier’s CADR or stated room-size rating and aim for multiple air changes per hour—commonly 4–5 ACH for allergy or smoke protection. If CADR isn’t provided, choose a unit rated for a larger room than yours or look for specific CADR values for smoke, dust, and pollen to match your needs.

Air Purifier for Open-Plan Living Rooms: Coverage, Circulation, and Doors

Air purifier in an open-plan living room showing airflow

An air purifier can work well in an open-plan living room if you size it for the main zones, place it where air actually moves, and manage doors and ventilation. Instead of trying to clean the entire floor of your home evenly, you focus on the seating, dining, and kitchen areas where people spend time and where pollutants are created.

This guide explains how to choose and use an air cleaner in a large, open-concept space. You will see how coverage, CADR, and air changes per hour (ACH) apply to open layouts, how doors and staircases affect performance, and how to handle open kitchens, smoke, and odors. Real-world examples, common mistakes, and simple routines will help you get better air without unnecessary noise or cost.

What Makes Open-Plan Living Rooms Different (and Why It Matters)

Open-plan living rooms combine living, dining, and often kitchen areas into one large volume of air. That feels spacious, but it makes air cleaning harder than in a small, enclosed bedroom.

In a simple room with a door, air recirculates through the purifier many times per hour. In a big open-plan space, air can wander into hallways, up stairs, and around partial walls. At the same time, you may have several pollution sources in one zone: cooking, candles, pets, and tracked-in dust.

When you use an air purifier for an open-plan living room, three ideas matter most:

  • Coverage: Matching the purifier’s clean air delivery to the volume of the space you actually care about.
  • Circulation: Making sure clean air reaches sofas, dining tables, and play areas instead of looping in a corner.
  • Connections: Understanding how open doors, hallways, and stairs spread both clean and dirty air.

Thinking in these terms helps you decide whether one purifier is enough, when you may need two, and how to position them so your open-concept living area actually feels fresher.

Key Concepts: Coverage, Zones, CADR, and Airflow

To make sense of air purifiers in open-plan spaces, it helps to translate marketing numbers into simple planning steps.

Coverage by Volume, Not Just Floor Area

Most boxes list coverage in square feet, but air purifiers work on air volume (length × width × height). High ceilings and open stairwells increase the volume that needs to be cleaned.

In an open-plan living room, treat the space in zones instead of one huge box:

  • Primary seating zone: Sofas, TV area, reading chair.
  • Dining zone: Table and chairs, often adjacent to seating.
  • Kitchen zone: Stove, oven, and food prep surfaces.

You rarely need to size a single purifier for the entire combined floor area plus hallways. Instead, size it for the main occupied zone (or two main zones) and accept that air will be cleaner where you actually sit.

ACH and CADR in Open-Plan Rooms

Two basic sizing terms show how strong a purifier really is:

  • CADR (Clean Air Delivery Rate): How much clean air the unit delivers, usually listed for smoke, dust, or pollen.
  • ACH (Air Changes per Hour): How many times per hour the purifier can process an amount of air equal to the room’s volume.

For general comfort in living spaces, people often aim for around 3–5 ACH in the main seating area. In very large open-plan rooms, achieving that level across the entire volume can require more CADR than is practical or quiet, so you prioritize the zones where people spend time.

Table 1. Example sizing ideas for open-plan zones – Example values for illustration.
Zone type Approx. floor area Ceiling height Approx. volume CADR planning idea (for comfort)
Small seating nook 120–180 sq ft 8 ft 960–1,440 cu ft Moderate CADR, run on low–medium most of the time
Typical living zone 220–320 sq ft 8–9 ft 1,760–2,880 cu ft Medium–high CADR or a strong unit on medium speed
Living + dining combined 350–450 sq ft 8–9 ft 2,800–4,050 cu ft One larger purifier near the overlap, or two smaller units
Open-plan with kitchen focus 450–600 sq ft 8–10 ft 3,600–6,000+ cu ft At least one purifier near seating plus strong kitchen ventilation
Very large, high-ceiling great room 600+ sq ft 10–16 ft 6,000–9,600+ cu ft Multiple units in separate zones; whole-room 5 ACH is rarely practical

Airflow and Layout

Even with enough CADR, performance depends on how air moves:

  • Intake: Where the unit pulls dirty air in (often sides or bottom).
  • Outlet: Where clean air exits (often top or front).
  • Obstacles: Sofas, islands, bookcases, and half-walls that block or deflect airflow.

A good rule is to place the purifier so its outlet can “sweep” across the main seating or dining area without blowing directly into a wall or the back of a couch.

Real-World Open-Plan Examples and Layout Ideas

Translating theory into your own home is easier if you compare it to a few common open-plan layouts.

Example 1: Living–Dining Combo, Separate Kitchen

Imagine a 300 sq ft combined living–dining area with an 8 ft ceiling, plus a mostly separate kitchen with a wide doorway.

  • Place one purifier roughly between the sofa and dining table, with at least a few inches of space from walls.
  • Angle the outlet so clean air flows across both sitting and eating areas.
  • Use the kitchen’s range hood and window ventilation during cooking; let the purifier handle lingering odors that drift through the doorway.
  • Keep doors to unused rooms partly closed during the day so the purifier’s capacity stays focused on the shared space.

Example 2: L-Shaped Living Room with Open Kitchen

Now consider an L-shaped layout: one leg is the living area, the other is the dining area, and the kitchen is open to the dining side.

  • One purifier at the junction of the “L” mostly helps the central region, leaving the far ends weaker.
  • Two smaller units often work better: one near the sofa leg, one closer to the dining–kitchen leg.
  • Use a gentle ceiling fan or small floor fan to move air around the corner of the L without creating a draft.
  • During heavy cooking, increase the speed of the purifier nearest the kitchen while using the range hood.

Example 3: Great Room with Stairs and Loft

In a tall great room with an open staircase and loft, air naturally drifts upward as it warms.

  • Place the main purifier on the lower level near the seating cluster, not near the stairs, to keep more capacity in the area where people gather.
  • Expect some clean air to move upstairs; that is helpful, but it also means pollutants from upstairs can drift down.
  • If the loft is used often (office, playroom), consider a second purifier upstairs sized for that smaller zone.
  • Use low-speed ceiling fans to gently mix air vertically when the room feels stuffy or stratified.

Example 4: Open Kitchen Dominating the Space

In some homes, the kitchen island and cooking area sit right in the middle of the open-plan space.

  • Use strong local ventilation (range hood, exhaust fan) as your first line of defense against smoke, grease, and moisture.
  • Place a purifier a few feet away from the stove, ideally between the kitchen and main seating area.
  • Run the purifier on higher speed during and shortly after cooking, then return to a quiet setting.
  • Accept that very intense cooking (frying, broiling) may still leave some short-term odors, even with filtration.

Common Mistakes and Troubleshooting in Open-Plan Spaces

Many people buy a capable air purifier but see little benefit because of avoidable mistakes. Recognizing these patterns makes troubleshooting easier.

Table 2. Common open-plan purifier problems and quick fixes – Example values for illustration.
Symptom Likely cause What to try
Cooking smells linger for an hour or more Purifier too small for zone or too far from kitchen; weak ventilation Move purifier closer to kitchen–living boundary, increase fan speed during and after cooking, and use exhaust fans
Dust quickly reappears on coffee table Low ACH in seating zone; unit blocked by furniture Reposition so outlet faces seating, clear 6–12 inches around intakes, and run on medium continuously when occupied
Bedroom still smells like dinner Doors left open so kitchen odors spread freely Close bedroom doors before cooking, or add a small purifier in the bedroom if doors must stay open
Purifier feels loud but air still seems stale Trying to clean entire open floor with one unit on high Resize expectations: focus on main zones, consider a second unit, and use medium speeds for steady background cleaning
Visible haze or smoke near ceiling High ceilings and poor mixing; purifier only affects lower level Use low-speed ceiling fan to mix air, avoid placing purifier in a tight corner, and increase run time during events
Airflow feels weak from purifier outlet Clogged pre-filter or overdue HEPA/carbon replacement Clean or replace filters, then compare airflow and noise before and after

Placement Errors to Avoid

  • Behind furniture: Hiding a purifier behind a tall sofa or cabinet traps clean air in a small loop.
  • In a corner alcove: Tucking the unit into a recessed niche limits how far clean air spreads.
  • Right next to a door or stairwell: Much of the clean air may escape into other areas before benefiting the seating zone.

Door and Stair Mismanagement

  • Leaving every interior door open can dilute the purifier’s effect in the main room.
  • Closing all doors and turning off exhaust fans during cooking traps pollutants in the open-plan area.
  • Ignoring open staircases means underestimating how much air (and pollutants) move between levels.

If you notice persistent odors or stuffiness, start by checking doors, stairwells, and fans before assuming you need a bigger purifier.

Safety Basics for Air Purifiers in Open-Plan Homes

Air purifiers are generally low-risk appliances, but open-plan layouts introduce a few specific safety and comfort considerations.

Electrical and Placement Safety

  • Plug the purifier directly into a wall outlet rather than a long extension cord running across walkways.
  • Keep the unit stable and upright, away from areas where children or pets are likely to knock it over.
  • Maintain clearance around the intake and outlet to prevent overheating and poor airflow.

Features and Ozone Concerns

Some purifiers include ionizers or other electronic features. In a large, shared space:

  • Use mechanical filtration (particle and carbon filters) as your primary air cleaning method.
  • Turn off optional features if anyone in the household reports irritation, headaches, or throat discomfort when they are enabled.
  • Avoid using any device that is designed to intentionally generate ozone indoors.

Combining Purifiers with Other Equipment

  • Do not block or cover heating vents, baseboard heaters, or radiators with the purifier.
  • Keep the unit away from open flames such as fireplaces, candles, or gas burners.
  • Ensure that dehumidifiers, humidifiers, and fans are positioned so cords and water reservoirs do not interfere with safe purifier operation.

Ventilation and Indoor Air Quality

Remember that a purifier does not add oxygen or remove carbon dioxide. In an open-plan home:

  • Use kitchen and bathroom exhaust fans to remove moisture and odors at the source.
  • When outdoor air quality is good, brief window openings or cross-ventilation can refresh the space more quickly than filtration alone.
  • During outdoor smoke or pollution events, close windows, seal obvious gaps, and rely more on filtration and any available mechanical ventilation.

Long-Term Use, Maintenance, and Seasonal Adjustments

Open-plan living rooms benefit from steady, moderate filtration rather than short, intense bursts. Maintenance and seasonal changes affect how well that works.

Daily and Weekly Habits

  • Run the purifier on low or medium whenever the main living area is in use.
  • Increase to a higher speed during known pollution events: cooking, cleaning with sprays, or when outdoor smoke seeps indoors.
  • Dust and vacuum regularly so the purifier is not the only line of defense against settled particles.

Filter Care in Busy Open-Plan Homes

  • Inspect the pre-filter every few weeks and clean it according to the manual if it is visibly dusty.
  • Replace particle and carbon filters on schedule, or sooner if airflow drops, the unit becomes noisier, or odors linger.
  • Mark filter change dates on a calendar or reminder app so they do not get forgotten in a busy living space.

Seasonal Adjustments

  • Cold seasons: Windows stay closed longer, so you may rely more on filtration and exhaust fans. Consider running the purifier continuously when people are home.
  • Warm seasons: When windows are open and outdoor air is good, the purifier mainly helps with indoor dust and pollen that drift inside.
  • High-humidity periods: Use exhaust fans and, if needed, a dehumidifier to keep humidity in a comfortable range that discourages mold growth on soft furnishings.

Storage and Moving the Unit

  • If you store the purifier seasonally, remove or seal filters to protect them from damp basements or dusty garages.
  • When rearranging furniture, revisit purifier placement to be sure airflow is not blocked by new layouts.
  • In multi-level homes, consider moving the purifier to the level with the most activity if your routine changes (for example, more time in a loft office).

Practical Takeaways and Specs to Look For

Bringing everything together, the goal is not perfect air in every corner, but noticeably cleaner air where your household actually lives, eats, and relaxes.

  • Think in zones: size purifiers for the seating, dining, and kitchen-adjacent areas, not the entire open floor.
  • Place units where their clean air can reach people, not just where they are easiest to hide.
  • Use doors, stairs, and fans to guide where clean air goes instead of letting it wander randomly.
  • Combine filtration with good ventilation and humidity control for the best overall comfort.

Specs to Look For in an Air Purifier for Open-Plan Living Rooms

  • Particle filtration: High-efficiency particulate filter (HEPA-type or similar) as the main defense against dust, dander, and smoke.
  • Gas and odor control: A meaningful activated carbon or other sorbent filter if your open-plan space includes a busy kitchen or strong odors.
  • CADR appropriate for your main zone: Enough clean air delivery that, at a comfortable fan speed, you can achieve several air changes per hour in the seating and dining areas.
  • Multiple fan speeds: Quiet low or medium settings for everyday use, plus higher speeds for short-term events.
  • Clear airflow design: Intakes and outlets that are easy to keep unblocked by furniture, with a strong, smooth outlet stream.
  • Filter access and cost: Simple filter replacement and reasonably priced filters, since open-plan use often means long daily run times.
  • Optional features that can be disabled: Ability to turn off ionizers or other extras if anyone is sensitive.
  • Energy use: Efficient operation at low–medium speeds, since the unit may run many hours per day.
  • Noise levels: Published sound levels that fit your tolerance for conversation, TV watching, and quiet evenings.

If you match these specs to your layout and habits, an air purifier can be a practical, low-effort way to improve comfort and air quality in an open-plan living room.

Frequently asked questions

What specifications and features should I prioritize when choosing an air purifier for an open-plan living room?

Prioritize a high-efficiency particle filter (HEPA-type) and a substantial activated carbon stage for odors, along with a CADR suited to the volume of your main seating or dining zone. Also look for multiple fan speeds, a clear intake/outlet design that won’t be blocked by furniture, low published noise at typical settings, and reasonable filter replacement costs.

Why does my air purifier seem loud but the room still feels stale?

That often means the unit is trying to clean too large a volume or is poorly positioned so clean air loops in an empty corner. Focus capacity on the occupied zone, reposition the outlet toward seating or dining areas, unblock intakes, or add a second unit instead of running one unit at maximum continuously.

How should I position an air purifier so it actually cleans air where people sit?

Place the purifier so its outlet can sweep across sofas and tables, keep several inches of clearance from walls and furniture, and avoid tight corners or hiding it behind a couch. For divided or L-shaped spaces, position near the junction of zones or use two smaller units plus gentle fans to move air around corners.

Are air purifiers safe to run all day in an open-plan home?

Yes; mechanical HEPA and carbon-filter purifiers are designed for continuous use and are generally low-risk when used per the manufacturer’s instructions. Avoid devices that intentionally produce ozone, maintain clearance and filter care, and plug units into appropriate grounded outlets to minimize electrical hazards.

Will one purifier be enough for an L-shaped room or a great room with a loft?

It depends on size and layout: one unit can cover a central seating/dining zone, but L-shaped rooms, very large great rooms, or spaces with lofts often need two units to cover separate legs and vertical air stratification. Size each unit for the occupied zone and coordinate placement to promote balanced circulation.

How often should I check or replace filters in a busy open-plan living area?

Inspect pre-filters every few weeks and clean them as recommended; replace particle and carbon filters on the schedule in the manual or sooner if airflow drops, the unit becomes noisier, or odors persist. Homes with heavy cooking, pets, or high occupancy may require more frequent filter attention.