Humidifier Placement: Near Bed, Vent, or Center Explained

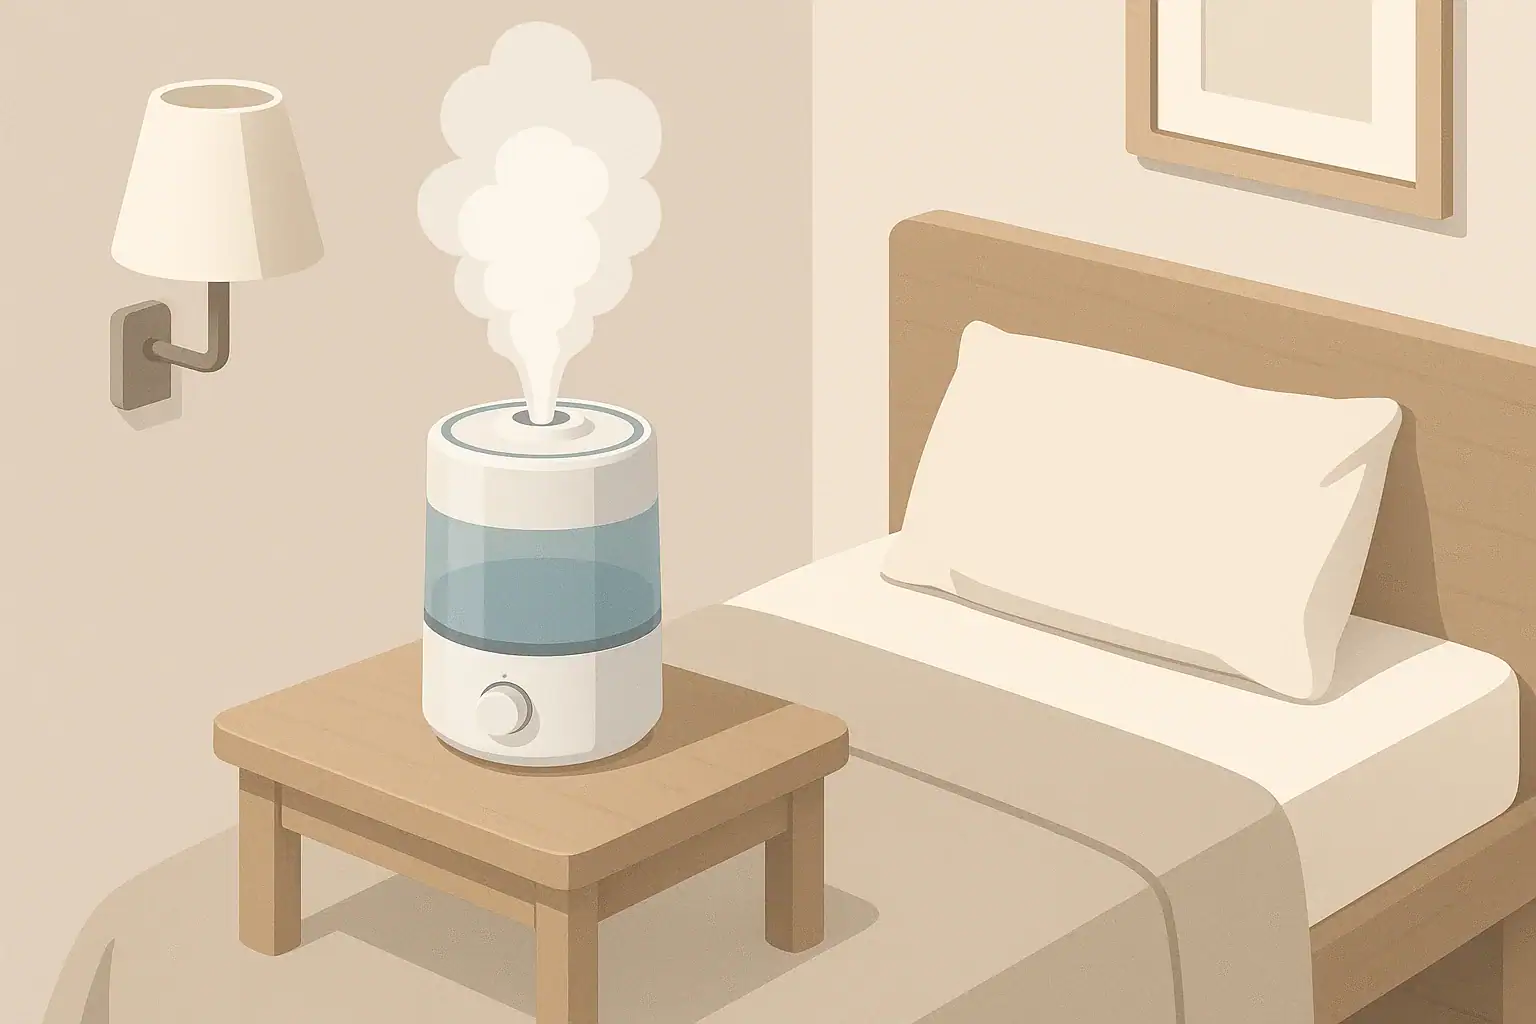
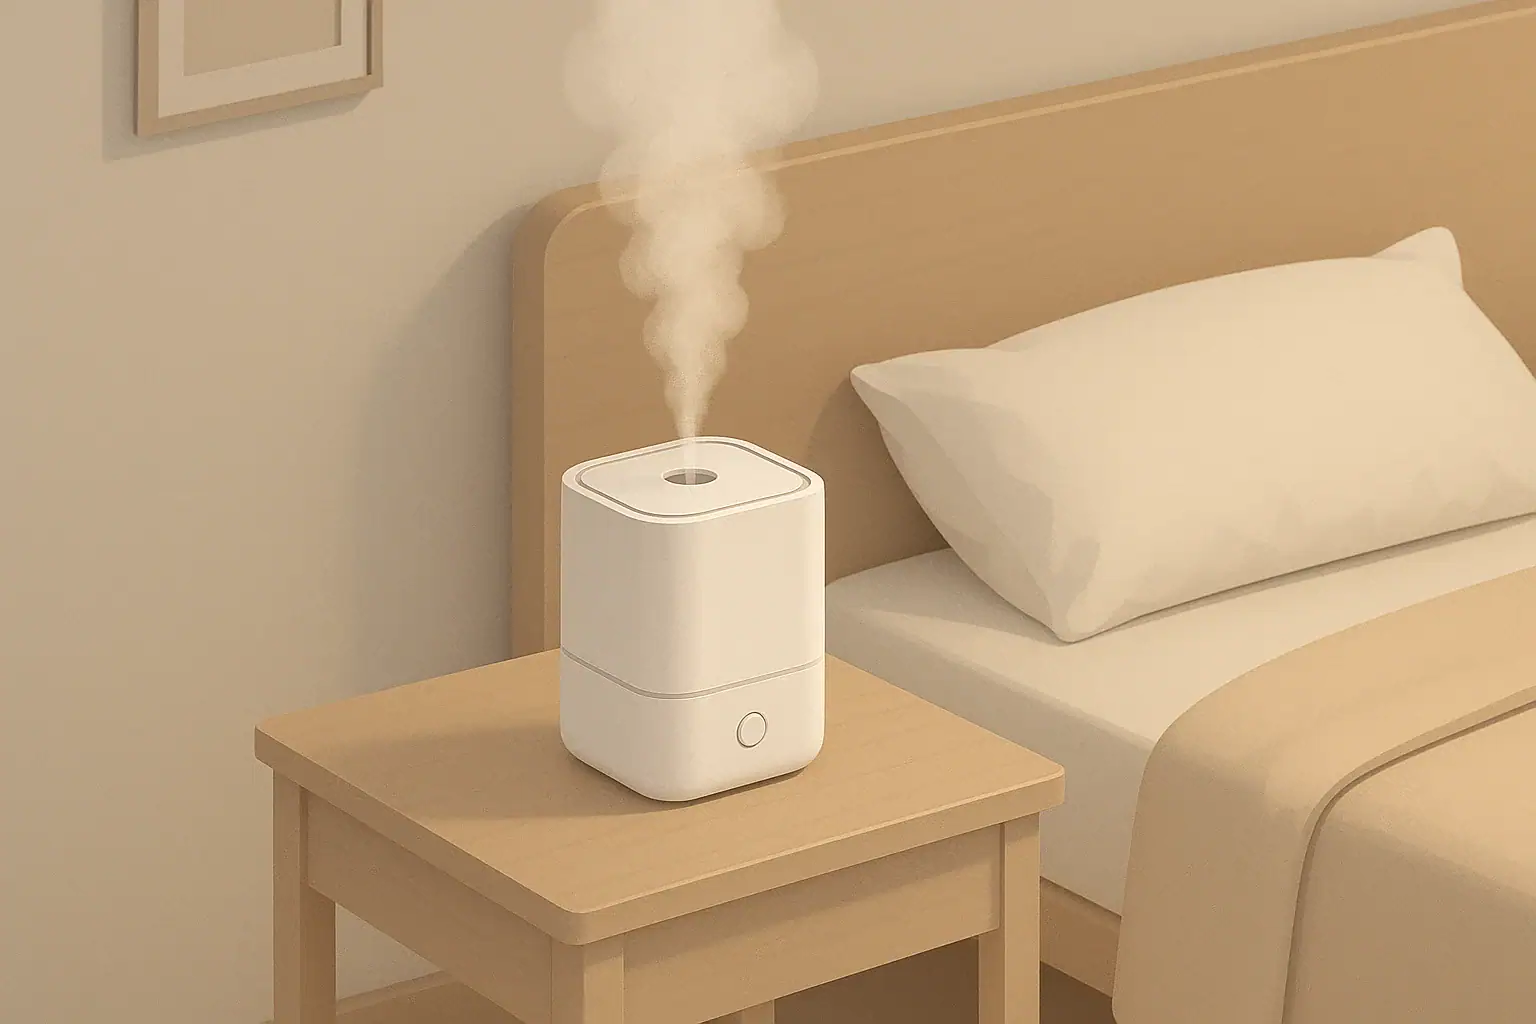
Bedroom scene showing safe humidifier placement on table

The best place for a humidifier is usually a few feet from the bed, away from supply vents, and toward the center or open side of the room for even moisture.

Good placement helps you reach a comfortable humidity range without wet surfaces, noisy drafts, or mist blowing straight into your face all night. The ideal spot depends on room layout, type of humidifier, and furniture, but a few simple rules cover most bedrooms and living spaces.

Quick answer
  • Aim for 30–50% relative humidity indoors as general comfort guidance.
  • Place the humidifier 3–6 feet from the bed, not right next to your head.
  • Keep it off the floor if possible, on a stable, water-safe surface 2–4 feet high.
  • Avoid placing it directly under or in front of a supply vent or fan.
  • Leave 12–18 inches of clearance around it for airflow and easy refilling.
  • Keep mist away from walls, electronics, and windows to prevent condensation.

Why humidifier placement matters for comfort and air quality

Humidifiers add moisture to indoor air, which can improve comfort in dry climates or during heating season. Where you place the unit changes how that moisture spreads, how evenly the room feels, and how likely you are to create damp spots.

Poor placement can lead to localized high humidity, condensation on cold surfaces, and mineral dust from ultrasonic models settling on nearby furniture. Good placement spreads moisture more evenly, reduces noise and drafts while you sleep, and makes regular maintenance and refilling easier.

Because humidifiers interact with room airflow, vents, and nearby surfaces, thinking about placement is as important as choosing the right size and type of unit.

Key concepts: distance, height, and airflow

Three basic ideas guide humidifier placement in most rooms: how far it is from you, how high it sits, and how air moves around it.

Distance from the bed or seating area

  • 3–6 feet away from the bed is a common, practical range. This keeps mist from blowing directly onto your face but still benefits the area where you sleep.
  • Placing a humidifier right on a nightstand next to your head can feel too damp, noisy, or drafty, especially with cool mist or higher output settings.
  • In a living room, placing it a few feet from the main seating area provides comfort without dampening upholstery.

Height: floor vs table vs shelf

  • Off the floor is usually better. A table, dresser, or sturdy stand 2–4 feet high lets the mist mix with room air before settling.
  • On the floor can be acceptable for larger units, but avoid carpeting if leaks or spills would be hard to clean.
  • High shelves are risky: carrying water up high, potential spills, and moisture rising into the ceiling or upper walls.
  • Use a water-resistant mat or tray under the unit if the surface could be damaged by drips.

Airflow: vents, fans, and room layout

  • Avoid direct airflow from supply vents, fans, or strong drafts pointing at the humidifier. This can blow mist unevenly or dry it out too quickly in one direction.
  • Do not place a humidifier directly under a supply vent; rising mist can condense in ductwork areas or push moisture against a particular wall.
  • Some gentle air movement in the room is helpful, but the unit should not be in the path of a strong airflow stream.
  • In very large or open-plan rooms, placing the humidifier closer to the center of the occupied zone improves coverage compared with pushing it into a corner.
Humidifier placement checklist by location

Example values for illustration.

Key placement checks for common room setups
Room area Placement focus Why it matters Example note
Bedroom 3–6 ft from pillow, off floor Comfort without damp bedding Side table across from bed works well
Nursery Away from crib, stable surface Limits direct mist and tip-over risk Low dresser across room, cord out of reach
Living room Near seating zone, not in walkway Even comfort and fewer trip hazards End table near sofa, away from TV
Home office Not next to electronics Reduces condensation on devices On a stand behind or beside desk
Small studio Central, with open space Helps one unit serve multiple zones Mid-room on a cart or shelf unit
Hallway or corner Avoid confined pockets Prevents damp, under-humidified areas Only use if air circulates through

Near bed, near vent, or center of room: pros and cons

The common placement choices each have trade-offs. Instead of a single “right” answer, it helps to think through what you want most in that space: sleep comfort, even coverage, or convenience.

Placing a humidifier near the bed

Advantages:

  • Noticeable comfort where you sleep, especially in dry climates or heated homes.
  • Easy access for refilling if the unit is on a nightstand or nearby table.
  • Helps if the rest of the room is large but you mainly care about the bed area.

Watch out for:

  • Mist blowing directly onto bedding or pillows if the outlet points toward you.
  • Condensation on nearby surfaces, especially windows right above a headboard.
  • Noise or gurgling close to your head if the unit is not very quiet.

A practical compromise is to place the humidifier on a side table or dresser across from the bed, angled so mist moves into the general sleeping area without hitting you directly.

Placing a humidifier near a vent

Sometimes people put humidifiers close to HVAC vents hoping the system will distribute moisture throughout the home. In practice, this is usually not ideal for a portable room humidifier.

Concerns with near-vent placement:

  • Supply air can blow mist toward one wall, causing localized dampness.
  • The moving air may disrupt the unit’s built-in humidity sensing (if present).
  • Return vents might draw moist air quickly out of the room, limiting benefit.

If you must place a humidifier in a room with limited options near vents, aim to keep it at least a couple of feet away and slightly off to the side of the airflow path rather than directly under or in front of the vent.

Center of the room or central zone

Putting a humidifier closer to the center of the occupied area often provides the most even coverage, especially in medium-sized rooms.

  • Helps moisture disperse more evenly with natural convection currents.
  • Reduces hot or cold spots of humidity near walls and windows.
  • Can be combined with a gentle ceiling fan on low to improve distribution.

The downside is that true center-of-room placement may create trip hazards with cords or take up usable floor space. A common workaround is to place it along a wall but closer to the middle of that wall, not jammed into a corner.

Common humidifier placement mistakes and warning signs

Certain placements cause recurring problems, even if humidity readings (if you use a hygrometer) look acceptable. Watching for warning signs helps you adjust before damage occurs.

Typical placement mistakes

  • Right against a wall or in a tight corner. Mist hits the wall, causing damp patches or paint issues, while the rest of the room stays relatively dry.
  • On wooden furniture without protection. Long-term drips or condensation can damage finishes or cause swelling.
  • Beside or above electronics and power strips. Moisture and mineral residue can build up on sensitive surfaces.
  • Under shelves or low-hanging items. Rising mist can dampen books, artwork, or fabric.
  • Too close to windows. Cold glass encourages condensation when warm, moist air hits it.

Warning signs that placement is not ideal

  • Visible condensation on windows, nearby walls, or the surface under the humidifier.
  • Musty smells or damp patches around the unit or behind nearby furniture.
  • White dust settling heavily on surfaces near an ultrasonic humidifier (suggests mineral output and possibly too-close placement to delicate items).
  • Large humidity swings on a hygrometer depending on where it sits in the room.

If you notice these, try moving the humidifier a foot or two at a time away from affected surfaces, lowering output, or running it for shorter intervals while watching humidity levels.

Practical placement checklist for bedrooms and living rooms

You can treat placement like a quick checklist rather than guesswork. Adjust step by step until the room feels comfortable and readings are in a reasonable range.

Step 1: Choose the general zone

  • Decide whether your priority is sleeping area comfort (near the bed), overall room coverage (central wall or middle of room), or convenience (near a sink or outlet you use often).
  • Avoid corners and closets unless airflow is clearly moving through those spots.

Step 2: Pick height and surface

  • Use a stable, level surface such as a nightstand, dresser, or small table.
  • Place a water-resistant tray, silicone mat, or towel underneath if the surface is sensitive.
  • Confirm that the unit is not directly under a shelf, curtain, or wall hanging.

Step 3: Check clearances

  • Leave about 12–18 inches of open space on all sides if possible.
  • Ensure cords do not cross pathways where people walk.
  • Make sure you can easily reach the tank for refilling and cleaning without moving the whole unit often.

Step 4: Use a hygrometer if available

  • Place a basic humidity meter somewhere away from the humidifier’s direct mist stream.
  • Check that the room is staying near 30–50% relative humidity for general comfort.
  • If readings near one wall are much higher than elsewhere, reposition the unit slightly toward the center.

Placement examples in real-world rooms

These simple scenarios show how the same basic rules apply in different layouts.

Small bedroom with one window and central bed

  • Bed is in the middle of the room with a window on one wall and a door on the opposite wall.
  • Place the humidifier on a dresser along a side wall, about 3–6 feet from the bed, with the mist aimed roughly toward the center of the room.
  • Avoid putting it on the window sill to prevent condensation on cold glass.

Large master bedroom with seating area

  • The bed is at one end; a chair and small sofa are at the other.
  • If you mainly care about sleep, place the humidifier on a table across from the bed, not wedged into a corner.
  • If the whole room feels dry, consider a more central location between bed and seating area, checking cords for safety.

Living room with HVAC vent above the sofa

  • Supply vent is in the ceiling above the main seating area.
  • Place the humidifier on an end table a few feet away from the direct airflow path, still reasonably close to where people sit.
  • Avoid putting it directly under the vent or next to electronics such as a TV or media console.

Open-plan studio apartment

  • Sleeping, dining, and living areas share one open space.
  • Place the humidifier on a small cart or shelf unit in the central zone of the room, where airflow can reach both bed and seating area.
  • Check humidity in more than one spot, such as near the bed and near the door, and adjust position if one zone remains very dry.

Safety, materials, and special features to consider

Placement also ties into safety and how different humidifier types behave in a room.

Surface and materials safety

  • Protect unfinished wood, delicate finishes, and paper products from long-term moisture exposure.
  • For ultrasonic units that may leave white mineral dust, keep them away from dark or glossy surfaces where residue is more noticeable.
  • Never block the unit’s air intake or exhaust areas with fabrics or objects.

Children, pets, and tip-over risks

  • Keep cords out of reach and avoid placing the humidifier where it could be pulled down by children or pets.
  • For warm-mist devices, place them where hot surfaces or steam cannot be easily touched.
  • Use lower, sturdy surfaces in nurseries, but still away from cribs and play areas.

Built-in humidistats and sensors

  • If your humidifier has a built-in humidity sensor, avoid placing it where it sits in its own mist plume.
  • Keep the front or top of the unit unobstructed so sensing reflects the room’s overall air, not just the immediate output.
  • In tricky rooms, a separate hygrometer placed at breathing height away from the unit gives a more balanced reading.

Maintenance, cleaning, and long-term placement

Even ideal placement will not help if the humidifier is not maintained. Placement can make cleaning either simple or inconvenient.

Placement for easy maintenance

  • Choose a spot with easy access to pick up and carry the tank to a sink.
  • Avoid positions that require stretching over furniture or ladders to reach the unit.
  • Plan for regular cleaning according to the manufacturer’s instructions to limit mineral buildup and microbial growth.

Watching humidity over the season

  • Humidity needs can change as outdoor conditions and heating or cooling patterns vary.
  • Consider moving the humidifier slightly away from windows when outdoor temperatures drop and glass surfaces cool.
  • If you change furniture layouts, revisit your placement to keep the unit in an open, well-ventilated part of the room.
Humidity and mold prevention quick-plan

Example values for illustration.

Planning targets to keep humidity comfortable without excess dampness
Goal Simple actions Tools Note
Avoid over-humidifying Keep indoor RH roughly 30–50% Basic hygrometer Turn down or off if readings stay high
Protect windows Keep humidifier away from cold glass Visual check for condensation Reduce output if water beads on panes
Dry damp corners Avoid placing unit in cold corners Room thermometer Cool spots can collect moisture first
Limit mineral dust Use low-mineral water where practical Humidifier manual Helps reduce white residue nearby
Keep surfaces dry Wipe surrounding area regularly Cloth or towel Spot early signs of over-humidifying
Balance whole-home moisture Open doors between rooms when needed Existing vents and fans Helps spread moisture more evenly

Related guides: Humidifier White Dust: Causes, Health Concerns, and FixesHumidifier Water Choices: Tap vs Filtered vs DistilledHumidifier Output Calculator: mL/hour Needed for Your RoomHumidifier for Baby’s Room: Safe Settings and Placement Tips

Summary: simple rules for better humidifier placement

Humidifier placement does not have to be complicated. Keeping the unit a few feet from the bed, off the floor on a stable surface, and away from direct vent airflow usually gives comfortable, even moisture with fewer side effects.

Watch nearby surfaces for condensation, use a basic hygrometer if you have one, and be willing to shift the unit slightly as seasons and room layouts change. With small adjustments and periodic checks, you can maintain comfortable indoor humidity without damp corners, wet windows, or unnecessary guesswork about where your humidifier should go.

Frequently asked questions

How close should I place a humidifier to my bed to improve sleep without causing dampness?

Place a humidifier about 3–6 feet from the bed and on a stable surface 2–4 feet high so mist has room to mix with room air before reaching you. Avoid aiming the outlet directly at pillows or bedding and check for condensation on nearby surfaces after a few hours of use.

Is it effective to put a portable humidifier near a supply vent to distribute moisture through the house?

Generally not; supply air can push mist toward a single wall and may cause localized dampness, while return vents can pull moist air out of the room before it spreads. If you have no better option, keep the unit a couple of feet away and slightly off to the side of the vent airflow path rather than directly under it.

Can placing a humidifier too close to windows or walls increase the risk of condensation or mold?

Yes. Cold glass and exterior walls can collect condensation from warm, moist air and create damp patches or musty smells; keep the humidifier away from windows and exterior walls and monitor humidity to stay in the 30–50% range. Move the unit if you notice visible moisture on nearby surfaces.

What height and surface are safest for a humidifier in a bedroom with children or pets?

Use a stable, level surface about 2–4 feet high that children and pets cannot easily reach, secure cords out of reach, and avoid placing the unit on unstable or high shelves. For warm-mist devices, ensure hot surfaces and steam paths are not accessible to small hands or animals.

How should I use a hygrometer to check if my humidifier placement is working well?

Put a hygrometer at breathing height away from the humidifier’s direct mist stream and check multiple spots in the room if possible. Aim for 30–50% relative humidity and reposition the humidifier toward the center of the occupied zone if readings vary widely between locations.

Humidifier for Dry Skin and Sinuses: What Works

Isometric illustration of a bedside humidifier gently adding mist

Using a humidifier can ease dryness in skin and sinuses by raising low indoor humidity into a more comfortable range, but it cannot fix every cause of irritation and can create problems if overused or poorly cleaned.

In dry climates or heated homes, indoor air often falls well below comfort humidity levels, which can make your skin feel tight and your nose or throat feel scratchy. Humidifiers are one tool to nudge the air back toward a moderate range, but their benefits depend on type, placement, maintenance, and realistic expectations.

Quick answer
  • Aim for indoor relative humidity around 30–50% for general comfort.
  • Below ~30% RH, a humidifier may help dry skin, lips, and nasal passages feel less irritated.
  • Avoid going much above ~50–55% RH to reduce mold and dust mite concerns.
  • Cool-mist (evaporative or ultrasonic) units are common for bedrooms; warm-mist adds heat but not extra moisture benefit.
  • Use distilled or low-mineral water when possible and clean tanks and surfaces at least weekly.
  • If symptoms are severe, persistent, or unexplained, consult a health professional rather than relying on a humidifier alone.

Why Dry Air Affects Skin and Sinuses

Dry indoor air means there is less water vapor in the space around you. When relative humidity (RH) is low, moisture more readily evaporates from your skin and the lining of your nose and throat. Many people notice this in winter, when heating systems run constantly and outdoor air is already dry.

For skin, lower humidity can contribute to a tight or flaky feeling and may make existing dryness more noticeable. For your upper airways, very dry air can make nasal passages feel stuffy or scratchy and may make it harder to feel comfortable when breathing through the nose.

A humidifier adds water vapor to the air, which can reduce how quickly moisture leaves your skin or mucous membranes. It does not treat underlying medical conditions, but it can change the environment to be less drying and more comfortable for many people.

Key Humidity and Humidifier Concepts

Before choosing or using a humidifier for dry skin and sinuses, it helps to understand a few basic terms and how they interact in a real room.

Relative humidity and comfort ranges

  • Relative humidity (RH) is the percentage of water vapor in the air compared with the maximum the air could hold at that temperature.
  • Many building and comfort guidelines point to roughly 30–50% RH as a generally comfortable range for most people.
  • Below about 30% RH, air often feels dry; above roughly 50–60% RH, the risk of condensation and mold growth on cool surfaces rises.

Humidifier types and what matters for comfort

  • Evaporative humidifiers pull air through a wet wick or filter. The air naturally picks up moisture until approaching a limit at that temperature, which can make over-humidification less likely.
  • Ultrasonic humidifiers use a vibrating plate to create a fine mist. They are often quiet and efficient, but can disperse minerals from tap water into the air, leaving white dust on surfaces.
  • Warm-mist or steam humidifiers boil water to create steam. The added moisture is similar to cool-mist, but the device is hotter and may require more energy.

For dry skin and sinuses, the key factor is the humidity level you achieve in the room, not whether the mist feels warm or cool by the time it reaches you. Temperature still matters for comfort, but both warm- and cool-mist units can help increase RH.

Room size and output

Humidifiers are rated for approximate room sizes, but these are rough estimates. High ceilings, open floor plans, drafts, and frequent door opening all make it harder to raise humidity. For dry skin and sinus comfort, you often do not need to humidify the whole home; focusing on a bedroom or main sitting area is common.

Monitoring with a basic hygrometer (humidity meter) helps you see whether your device can bring a specific room into the 30–50% window without overshooting.

Table 1. Humidifier choices and comfort-focused notes – Example values for illustration.
Option Helps with dry skin/sinuses? Key advantages Key trade-offs
Evaporative cool-mist Yes, when RH is low Self-limiting moisture; simple humidity boost Fan noise; wick/filter to replace
Ultrasonic cool-mist Yes, when RH is low Very quiet; compact Mineral “white dust” if not using low-mineral water
Warm-mist / steam Yes, similar moisture effect Warm output can feel cozy in winter Hot surfaces; higher energy use
Whole-house humidifier Potentially, when well controlled Even humidity through ductwork Installation cost; needs careful RH control
Bowl of water near heat source Mild effect only No power; very simple Slow, limited humidity increase
Essential oil diffuser (no added water) Not primarily for humidity Fragrance only Does not materially raise RH

Example values for illustration.

What Helps vs. What Does Not

Many people buy a humidifier hoping it will solve a variety of winter complaints. Some expectations are reasonable; others are less so.

What a humidifier can realistically help with

  • General dryness discomfort: When RH is low, raising it into the 30–45% range often makes air feel less harsh on skin and nasal passages.
  • Comfort during sleep: A moderate humidity level in the bedroom may feel more comfortable for breathing through the nose, especially when central heating runs overnight.
  • Static electricity and dry lips: Slightly higher humidity can reduce static shocks and the very dry feeling on lips or hands that some people notice in winter.

What a humidifier does not do

  • It does not diagnose or treat illness: It cannot determine the cause of nosebleeds, sinus infections, or skin conditions. These may need medical evaluation.
  • It does not filter allergens or pollutants: Most humidifiers do not remove dust, pet dander, or smoke. For that, an air purifier with appropriate filters is more relevant.
  • It does not replace ventilation: Adding moisture to stale air does not remove carbon dioxide, odors, or indoor pollutants. Fresh air exchange still matters.
  • It does not help if humidity is already high: If your RH is already near or above 50–55%, adding more moisture can work against comfort and indoor air quality.

When humidity is not the main issue

If your indoor humidity already sits around 35–45% and you still have significant skin or sinus problems, a humidifier alone is unlikely to make a big difference. In that case, it may be more useful to consider other factors such as personal skin care routines, indoor pollutants or fragrances, airflow and ventilation, or medical conditions.

Common Mistakes and Troubleshooting Signs

Even when a humidifier is the right tool, it is easy to use it in ways that reduce comfort or create new issues. Watching for a few practical signs can help you adjust.

Over-humidifying the room

It is possible to swing too far in the other direction. Signs that you might be over-humidifying include:

  • Persistent condensation on windows, especially in cold weather
  • Musty smells or damp corners on walls or ceilings
  • Clammy or stuffy-feeling air even at normal temperatures

If you notice these, reduce the humidifier output, run it for shorter periods, or improve ventilation until RH comes back under about 50%.

White dust on furniture

Ultrasonic humidifiers can aerosolize minerals in tap water. When the mist dries, the minerals settle as a light white powder on nearby surfaces. This can be reduced by using distilled or low-mineral water, or by using a unit that traps minerals before they become airborne.

Odors or slimy surfaces in the tank

Humidifier tanks and internal surfaces that stay wet can allow microbial growth if not cleaned regularly. A musty or unpleasant smell from the unit is a cue to stop using it until it is thoroughly cleaned according to the manual. Regular maintenance helps keep the added moisture as clean as practical.

No noticeable change in humidity

If your hygrometer reading hardly changes even when the humidifier runs, consider:

  • Room doors or windows left open, letting moisture escape
  • A device too small for the open floor area or tall ceilings
  • Very dry incoming outdoor air from continuous ventilation or exhaust fans

In such cases, try closing doors, moving the unit closer to where you sit or sleep, or using a slightly higher output (without overshooting the RH goals).

Practical Setup: How to Use a Humidifier for Comfort

For dry skin and sinus comfort, your goal is not maximum humidity, but a stable, moderate level in the spaces where you spend the most time.

Target ranges and simple monitoring

  • Use a basic digital hygrometer to see your current RH in bedrooms and living areas.
  • If readings sit below ~30% much of the day or night, a humidifier may improve comfort.
  • Adjust settings so typical readings land in the 30–45% range, rarely exceeding about 50% for long periods.

Placement for better results

  • Place the humidifier on a stable, water-resistant surface a few feet from the bed or seating area, not right up against walls.
  • Aim the mist into open space, not directly at walls, windows, or electronics.
  • Allow some clearance around the device so air can circulate.
  • Avoid placing it on the floor in corners where airflow is limited and surfaces can stay damp.

Water choices

  • Distilled or low-mineral water helps limit mineral buildup and white dust, especially in ultrasonic units.
  • If you use tap water, expect more frequent cleaning and possible mineral deposits over time.
  • Do not add oils, fragrances, or other substances to the tank unless the manufacturer explicitly states it is safe for that model.

Daily routine checklist

  • Check the water level and refill with fresh water, rather than continually topping off stale water.
  • Glance at your hygrometer when you turn the unit on or off to confirm you are staying near your target range.
  • Turn off or reduce output if windows fog or the room feels stuffy and damp.

Scenarios: When a Humidifier Makes Sense (and When It May Not)

Here are some common household situations and how a humidifier for dry skin and sinuses might fit in.

Winter bedroom with forced-air heating

In many colder climates, central heating can drop indoor RH well below 30%. If you wake up with a dry mouth or tight-feeling skin and your hygrometer shows low humidity, a small cool-mist humidifier running at night may help the room sit closer to 35–45% RH and feel more comfortable.

Apartment in a mild, already humid climate

In some regions, even winter air stays fairly moist. If your indoor RH is often 40–55% without a humidifier, adding more moisture is unlikely to improve comfort and may increase condensation or mold risk. In this case, focusing on ventilation, temperature control, and air purification may be more relevant than humidification.

Child’s room with frequent colds

If the room air is very dry, a carefully controlled humidifier can sometimes make the environment feel less harsh for breathing. However, since children may be more sensitive to hot surfaces and excess humidity, many caregivers prefer cool-mist units, place them out of reach, and monitor RH to avoid overuse. Medical questions about frequent illness are best directed to a pediatric professional rather than to the device.

Home office with static shocks and dry hands

Static buildup around electronics and dry-feeling skin in a home office often occur when RH is quite low. A modest bump in humidity via a small humidifier may make typing and sitting at the desk more comfortable, especially when paired with regular breaks and hand care.

Safety and Indoor Air Quality Considerations

Because a humidifier intentionally adds moisture to your air, it needs to be used with care to avoid creating new indoor air quality concerns.

Moisture and mold

Prolonged high humidity, especially in cooler corners or poorly ventilated areas, can favor mold growth. Keeping RH generally below about 50–55%, using exhaust fans in bathrooms and kitchens, and not directing mist at walls or fabrics helps reduce this risk.

Microbial growth inside the device

Standing water combined with warmth can support bacteria, algae, or biofilm inside tanks and tubing. Follow the manufacturer’s cleaning instructions, which often include emptying and drying the tank between uses, rinsing daily, and performing a more thorough cleaning with a gentle disinfecting step weekly or as directed.

Other home air devices

Some air cleaners and HVAC add-ons use technologies such as ionizers or UV-C lamps. These are separate from humidifiers. If you use such equipment, follow manufacturer guidance carefully and avoid any device that intentionally generates ozone indoors. For dry skin and sinus comfort, safely controlled humidity, adequate ventilation, and, when needed, particle filtration are usually higher priorities than advanced air treatment features.

Maintenance and Cost Planning

A humidifier is not a set-and-forget appliance. Staying ahead of maintenance keeps the moisture you add as clean and predictable as possible.

Regular cleaning tasks

  • Daily or every use: Empty the tank, rinse with clean water, and let it air-dry when not in use if practical.
  • Weekly (or as directed): Wipe internal surfaces to remove film or deposits and follow the manual for a mild disinfecting step.
  • Seasonally: Inspect seals, gaskets, and any removable parts for wear or buildup; deep clean before storing for the summer.

Filters, wicks, and other consumables

Many evaporative models use replaceable wicks or filters. Minerals in tap water can clog these over time, reducing output and potentially affecting cleanliness. Ultrasonic models may include optional demineralization cartridges. Plan for these recurring costs when comparing options.

Energy and water use

Portable humidifiers typically use modest electricity compared with large heating or cooling systems, especially cool-mist models. Steam-based units use more power to boil water. Water use is generally modest but varies with run time and output; you can adjust operation to reach your humidity target without running continuously at maximum.

Table 2. Humidity, mold, and comfort quick-plan – Example values for illustration.
Goal Simple actions Tools Note
Reduce dry air discomfort Run humidifier in main room or bedroom Portable humidifier, hygrometer Aim for roughly 30–45% RH
Avoid over-humidification Turn unit down/off if RH nears 50–55% Hygrometer Watch for window condensation
Limit mold-friendly conditions Ventilate, use exhaust fans, fix leaks Fans, dehumidifier if needed Keep damp rooms below ~50% RH
Keep added moisture cleaner Use fresh water, clean tank regularly Cleaning supplies, low-mineral water Follow manufacturer instructions
Balance comfort and energy Humidify occupied rooms, not whole house Room-sized units, timers Turn off when not needed
Plan for long-term use Track filter changes and seasonal storage Spare filters/wicks, calendar reminder Replace parts before performance drops

Example values for illustration.


Related guides: Humidifier Cleaning Routine: How to Prevent Slime and OdorsUltrasonic vs Evaporative Humidifiers: Pros, Cons, and Which to BuyHumidifier vs Dehumidifier: When to Add Moisture vs Remove It

Summary: Using Humidifiers Wisely for Dry Skin and Sinuses

A humidifier can be a useful tool when dry indoor air contributes to discomfort in your skin and sinuses. Its main value is moving a very dry room toward a moderate humidity range, usually around 30–45% RH, rather than providing direct medical treatment.

Choose a device suited to your room size, place it where air can circulate, use appropriate water, and clean it regularly. Pair humidification with sensible ventilation and, when needed, air filtration for particles. If humidity is already moderate or symptoms are significant despite good air conditions, consider other environmental factors and consult a health professional for personalized guidance.

Frequently asked questions

How humid should my bedroom be at night to improve dry skin and nasal comfort?

Aim for about 30–45% relative humidity in bedrooms; this range often reduces skin and mucous membrane dryness without greatly increasing mold risk. Use a digital hygrometer to monitor levels and adjust the humidifier so readings rarely exceed about 50% for extended periods.

Which humidifier type and water should I choose to minimize white dust and buildup?

Evaporative units are less likely to produce visible white dust, while ultrasonic models can aerosolize minerals from tap water. Using distilled or low-mineral water and following any demineralization cartridge guidance reduces deposits, and regular cleaning prevents buildup.

How often must I clean my humidifier to avoid bacterial or mold growth?

Emptying and rinsing the tank daily and performing a more thorough cleaning and mild disinfection weekly is a practical routine for most units. Always follow the manufacturer’s cleaning instructions and dry components between uses when possible to limit microbial growth.

Will a humidifier cure chronic sinus problems or frequent nosebleeds?

A humidifier can reduce symptoms caused by very dry air but does not diagnose or treat underlying medical conditions that cause chronic sinus issues or nosebleeds. If symptoms are severe, recurrent, or unexplained, seek evaluation from a healthcare professional for appropriate diagnosis and care.

Is it safe to run a humidifier all night or when I’m not home?

Running a humidifier overnight can be safe if you monitor RH and keep it in the recommended 30–45% range; using a hygrometer and timers helps avoid prolonged high humidity. Do not leave it unattended in a closed, poorly ventilated space if condensation is visible, and maintain regular cleaning to reduce risks.

Humidifier for Baby’s Room: Safe Settings Explained

Isometric baby room with a humidifier placed safely

A humidifier can be safely used in a baby’s room when indoor humidity stays around 40–50%, the unit is placed several feet from the crib, and it is cleaned regularly.

Parents often turn to humidifiers to keep a baby more comfortable in dry indoor air, especially during winter heating season. Used thoughtfully, a humidifier can help maintain a moderate humidity level that supports general comfort and helps avoid air that feels very dry. The key points are choosing appropriate settings, placing the unit in a sensible location, and keeping it clean so it does not add excess moisture or mineral residue to the room.

Quick answer
  • Aim for indoor humidity around 40–50% as a general comfort range.
  • Avoid staying above 60% for long periods to reduce mold and dampness risk.
  • Place the humidifier on a stable surface, about 3–6 feet from the crib.
  • Direct mist away from your baby and from walls, curtains, and furniture.
  • Use distilled or low-mineral water when possible to reduce white dust and buildup.
  • Empty, dry, and clean the tank and surfaces regularly, often daily or as the manual advises.

Why Humidity in a Baby’s Room Matters

Indoor air that is very dry or very damp can feel uncomfortable and can affect materials like wood furniture, flooring, and window frames. For babies, who spend many hours sleeping in one room, keeping humidity in a moderate range helps avoid air that feels overly dry while also preventing a heavy, damp environment.

In many U.S. homes, indoor air becomes quite dry in winter because heating systems lower relative humidity. A humidifier adds moisture back to the air and can make breathing feel more comfortable. At the same time, too much moisture can support mold growth and dust mites, especially in poorly ventilated spaces, so it is important to avoid over-humidifying a nursery.

Humidifiers are only one part of indoor air quality in a baby’s room. Ventilation, dust control, and, when appropriate, air filtration all work together. Thinking about humidity alongside these other factors can help you keep the nursery environment stable and easier to manage.

Key Concepts: Safe Humidity Levels and Basic Sizing

A few basic concepts make it easier to use a humidifier safely in a nursery without overthinking every setting.

Comfort-oriented humidity range

  • General comfort range: Around 40–50% relative humidity (RH) is widely used as a practical indoor target for many homes.
  • Upper boundary: Try to avoid keeping the room above about 60% RH for long stretches to limit mold and dampness risk.
  • Lower boundary: Air often feels very dry below ~30% RH, especially during winter; this is when many people consider using a humidifier.

A simple digital hygrometer (humidity meter) in the nursery can help you see whether your humidifier is pushing levels too low, too high, or comfortably in the middle.

Warm mist vs cool mist in a nursery

Many pediatric and safety organizations generally favor cool-mist units for baby rooms because they avoid hot water and hot surfaces. Warm-mist devices boil water and can pose a burn risk if a child can reach them or if they are knocked over. Regardless of type, any humidifier should be placed where a child cannot touch or pull it down.

Basic sizing ideas for a baby’s room

Humidifier packaging often lists an approximate room size. For a typical U.S. baby’s room of about 100–200 square feet with standard ceilings, most small to medium units are designed to be sufficient when run on a low to medium setting. Oversized units are more likely to over-humidify a small room if left on high continuously.

If you notice condensation on windows, damp patches on walls, or a persistently musty smell, the humidifier output is probably too high for the space or runtime and should be reduced.

Table 1. Basic nursery humidifier checklist – Example values for illustration.

Example values for illustration.

Nursery humidifier setup and why each step matters
Task Why it matters Simple notes
Check room size vs. device rating Prevents chronic over-humidifying Small nursery usually needs a small/medium unit
Place 3–6 ft from crib Avoids direct mist on baby or bedding Helps moisture disperse evenly in room air
Keep mist away from walls/curtains Reduces damp surfaces and mold risk Angle outlet toward open room area
Use distilled/low-mineral water Lowers white dust and scale buildup Tap water may be fine but needs more cleaning
Target 40–50% RH Helps keep air from feeling too dry or damp Use a simple humidity meter to spot-check
Empty and dry tank daily Limits standing water and slime buildup Wipe surfaces as recommended by the manual
Deep clean regularly Reduces mineral and film accumulation Follow manufacturer’s cleaning frequency and steps

Common Mistakes with Nursery Humidifiers

Many humidifier problems come from a few predictable habits. Being aware of them can help you adjust early.

Running the unit continuously on high

Leaving a powerful humidifier on a high setting all night in a small nursery can drive humidity above comfortable levels. Signs include:

  • Condensation or fogged windows in the morning.
  • Damp or clammy bedding or soft furnishings.
  • A musty or “wet cloth” smell in the room.

If you notice these, reduce the output setting, shorten runtime, or open the door more often to let moisture spread to the rest of the home.

Placing the humidifier too close to the crib

Setting a unit right next to the crib can direct a strong stream of moisture at your baby and the bedding, making that spot damp. It also increases the chance of a curious toddler touching or pulling at the humidifier later on. A distance of about 3–6 feet, with the mist directed into the open room, is usually more appropriate.

Not monitoring humidity levels

Without a humidity meter, it is hard to know whether the room is at 30% or 70% RH. A compact hygrometer can give you a simple number to guide your settings. You do not need constant monitoring, but checking at a few different times of day can reveal patterns, such as humidity spiking overnight.

Allowing water to sit in the tank for days

Humidifiers work by moving water into the air. If water sits in the tank and base for days without being emptied or refreshed, the interior can develop a film and buildup that is harder to remove later. Emptying leftover water and letting the tank air-dry between uses is a simple way to reduce this.

Practical Setup: Safe Placement and Settings in a Baby’s Room

Once you understand the basic humidity range and common pitfalls, the next step is setting up the humidifier in a way that works with your specific nursery layout.

Choosing a location in the nursery

  • Distance from crib: Place the humidifier several feet from the crib (often 3–6 feet is workable) so that mist has space to disperse.
  • Height and surface: Use a stable, level surface such as a dresser or side table that a child cannot easily reach or climb. Avoid carpeted floors if puddling is likely.
  • Clear airflow: Do not block the mist outlet with shelves, curtains, or furniture. Point the outlet toward the center of the room.
  • Away from electronics and books: Avoid placing the humidifier where moisture can drift directly onto outlets, power strips, or paper items that may warp.

Aligning runtime with your routine

Many families run a humidifier mostly during naps and nighttime sleep in dry seasons. Some possible patterns include:

  • Running on a low setting overnight and turning it off during the day.
  • Running on medium for a shorter time before bed, then switching to low or off once the room reaches a comfortable range.
  • Using a unit with a built-in humidistat (if available) set around 45–50% so the device cycles on and off automatically.

Whatever schedule you choose, occasionally check the humidity reading, windows, and walls to verify that the room is not staying excessively humid.

Coordinating with ventilation and heating

Nurseries are part of the whole-home air environment. Keeping the door slightly open at night can help even out humidity between rooms and prevent a small nursery from getting too damp. In winter, central heating tends to dry air, which may allow a bit more humidifier runtime without pushing humidity too high. In warmer, more humid climates or seasons, you may need the humidifier less or not at all.

Real-World Scenarios for Using a Humidifier in a Baby’s Room

Different homes and climates call for different approaches. These simplified examples illustrate how parents might adjust settings and placement.

Scenario 1: Small apartment nursery in a cold, dry climate

In a 120-square-foot room in a northern city during winter, the indoor humidity might fall below 25% RH once the heat is on. A small cool-mist humidifier on low, placed on a dresser 4 feet from the crib, might run each night. A hygrometer shows humidity rising to about 40–45% overnight without visible condensation on windows. In this case, the settings are likely appropriate, and the focus should be on regular cleaning and occasional humidity checks.

Scenario 2: Humid southern climate in a well-insulated home

In a warm, humid region, indoor humidity might already be 50–55% RH, especially in summer. In that situation, a humidifier may not be needed at all for much of the year. If a parent chooses to use one briefly during a spell of unusually dry air (for example, when air conditioning is running heavily), they would want to monitor closely and turn the unit off if humidity starts to approach 60% or if windows show condensation.

Scenario 3: Larger nursery with variable temperature

A 200-square-foot nursery over a garage may swing from cool to warm. A medium-size humidifier could be used with a built-in humidistat set around 45–50% RH, allowing the device to adapt automatically as room temperature and base humidity change. The unit would still need safe placement and consistent maintenance, with occasional confirmation that actual room humidity matches the settings reasonably well.

Safety Considerations and Device Features

Beyond humidity targets and placement, it is useful to be aware of safety and design details specific to humidifiers used around babies and young children.

Burn and tipping risks

  • Cool-mist preference: Choosing a cool-mist unit avoids hot water and steam that could cause burns if spilled or touched.
  • Stable placement: Set the humidifier where it cannot be bumped by adults walking past or pulled by cords. Avoid narrow shelves or high-traffic areas.
  • Cord management: Keep cords behind furniture when possible so children cannot tug on them as they get older.

Minerals, white dust, and filters

Many U.S. water supplies contain minerals that leave scale inside tanks and may create a light white dust on surfaces around ultrasonic humidifiers. To manage this:

  • Use distilled or low-mineral water when practical, especially in very hard-water areas.
  • If your device has a wick or demineralization cartridge, change it as recommended to keep performance consistent.
  • Wipe nearby furniture regularly to see whether visible white dust is accumulating, and adjust water source or cleaning frequency if needed.

Ozone, ionizers, and UV-C features

Some air-cleaning devices use ionization or ozone intentionally, but typical household humidifiers are not designed to produce ozone. When shopping, focus on products that do not market intentional ozone generation for a nursery setting. If a humidifier includes UV-C features for internal water treatment, treat that as a supplement, not a substitute, for cleaning and maintenance. You do not need UV or ionization to use a humidifier safely in a baby’s room; simple, well-cleaned designs are generally sufficient.

Cleaning, Maintenance, and Cost Planning

Good maintenance is central to using any humidifier in a nursery. Regular cleaning keeps mineral deposits and film from building up and helps the unit operate as intended.

Everyday care

  • Daily or frequent emptying: Empty the tank when turning the humidifier off for the day. Rinse and let it air-dry if possible.
  • Refill with fresh water: Use new water each time you start the humidifier rather than topping off old water repeatedly.
  • Quick wipe-down: Wipe the exterior and any easily accessible interior surfaces as the manufacturer recommends.

Deeper cleaning routines

Manufacturers usually provide instructions for more thorough cleaning at intervals such as weekly or every few days of use. Common elements include:

  • Removing scale deposits with a mild descaling step if needed.
  • Cleaning or replacing any internal filters or cartridges on schedule.
  • Inspecting seals, caps, and joints for cracks or wear that could lead to leaks.

If maintenance starts to feel unmanageable, it may mean the humidifier is oversized for your needs, or you may be running it more than necessary. Reducing runtime or changing water sources can sometimes reduce buildup.

Electricity and consumable costs

Most small nursery humidifiers use relatively little electricity compared with heating or cooling systems, especially on lower settings. Ongoing costs are more often related to:

  • Distilled or filtered water if you choose to use it.
  • Replacement wicks, filters, or cartridges, if your model uses them.
  • Basic cleaning supplies, such as soft cloths and mild cleaners recommended by the manufacturer.
Table 2. Humidity and mold quick-plan for nurseries – Example values for illustration.

Example values for illustration.

Illustrative actions based on general humidity goals
Goal Simple actions Tools Notes
Raise very dry air (<30% RH) Run humidifier on low, door slightly open Cool-mist humidifier, hygrometer Recheck humidity after 1–2 hours
Keep around 40–50% RH Adjust settings as seasons change Humidifier with simple controls Spot-check a few times per week
Avoid staying >60% RH Turn unit down or off, ventilate room Exhaust fan or open door Watch windows and walls for condensation
Limit mold and dampness risk Avoid damp surfaces, clean regularly Cloths, mild cleaners Address any leaks or water intrusion
Reduce mineral buildup Use lower-mineral water, descale as needed Distilled water, descaling method Check manufacturer’s recommendations
Plan off-season storage Fully dry, then store in a clean, dry place Storage box or shelf Clean again before next season’s use

Related guides: How to Clean a Humidifier Properly (And How Often)Humidifier Output Calculator: mL/hour Needed for Your RoomBest Indoor Humidity Level to Prevent Mold (With Seasonal Targets)

Summary: Calm, Simple Rules for a Nursery Humidifier

Using a humidifier in your baby’s room can be straightforward when you focus on a few steady principles. Aim for a moderate indoor humidity range around 40–50%, and avoid staying above about 60% for long periods. Place a cool-mist humidifier several feet from the crib, with mist flowing into the open room rather than onto your baby, walls, or curtains.

Check humidity with a simple meter, and adjust output or runtime if you see condensation or notice the room feeling damp. Empty and refresh the water regularly, clean the tank and internal parts as the manufacturer recommends, and keep the unit on a stable, child-inaccessible surface. With these habits, a humidifier can be one practical tool among many for managing the air environment in a baby’s room.

Frequently asked questions

What humidity should I set my humidifier for in a baby’s room?

Aim for about 40–50% relative humidity as a practical target for most nurseries. Avoid keeping the room consistently above 60% RH, since that increases the risk of condensation and mold growth; use a hygrometer to verify levels.

How far should a humidifier be placed from the crib and other surfaces?

Place the humidifier on a stable, child-inaccessible surface approximately 3–6 feet from the crib so mist disperses into the room instead of directly onto bedding. Also keep it away from walls, curtains, electronics, and books to prevent damp spots and mineral residue buildup.

Is a warm-mist or cool-mist humidifier safer for a nursery?

Cool-mist units are generally preferred for baby rooms because they avoid hot water and steam that could cause burns if spilled or touched. If you use a warm-mist unit, ensure it is inaccessible to the child and placed where tipping or contact is unlikely.

How often should I clean and empty a humidifier used in a baby’s room?

Empty and refill the tank daily or whenever you turn the unit off to prevent standing water and slime. Perform a deeper clean on a weekly schedule or as the manufacturer recommends, and replace wicks or filters on the device’s suggested timeline.

Can running a humidifier overnight cause mold or other problems?

Running a humidifier overnight is fine if the room stays in the recommended range (about 40–50% RH). Problems arise when humidity exceeds ~60%, which can lead to condensation, damp surfaces, and mold; monitor with a hygrometer and reduce runtime or output if you see signs of excess moisture.

Humidifier Water Choices: Tap vs Filtered vs Distilled

Isometric illustration of a humidifier with gentle mist on a bedside table

Distilled water is generally the most humidifier-friendly choice, with filtered water a practical middle ground and plain tap water the least ideal due to mineral buildup and residue.

Choosing water for your humidifier affects how often you clean it, how much mineral dust or film appears in your home, and how long the unit might last. While most humidifiers are technically designed to run on tap water, understanding the trade-offs between tap, filtered, and distilled water helps you match your water choice to your maintenance habits and local water quality.

Quick answer
  • For least scale and “white dust”: use distilled water when practical.
  • For a balance of cost and buildup: use filtered water (pitcher or under-sink) if your tap water is hard.
  • Tap water is usually safe for most units but often causes more mineral deposits and cleaning work.
  • Empty and dry the tank daily when in use, regardless of water type, to limit slime and film.
  • Deep-clean at least weekly during heavy use; more often if you see deposits, film, or odor.

Why humidifier water choice matters for indoor air

Humidifiers add moisture to the air, which can improve comfort in dry climates or during winter heating. But the water you put in the tank does not just vanish. Minerals and other dissolved solids in tap water can leave visible residue in the appliance and on nearby surfaces, especially with ultrasonic and cool-mist models.

Common effects of water choice include:

  • Mineral scale inside the humidifier that can clog parts and shorten its useful life.
  • “White dust” on furniture or floors near ultrasonic units when mineral-rich water is used.
  • More frequent cleaning needs when hard tap water dries into crusty deposits.
  • Water quality in the tank changing over time if the unit is not emptied and cleaned regularly.

Good humidity control is part of overall indoor air quality. Most homes are comfortable around 30–50% relative humidity, but the way you achieve that humidity can either simplify or complicate day-to-day upkeep.

Key differences: tap vs filtered vs distilled water

All three water types can physically work in a typical home humidifier, but they behave differently once they are turned into mist.

Tap water

  • What it is: Municipal or well water straight from the faucet, which usually contains dissolved minerals such as calcium and magnesium, and possibly trace metals.
  • Pros: Convenient, no extra cost or effort; widely available.
  • Cons: Can leave heavy mineral deposits and visible white dust with ultrasonic models; more scrubbing and descaling needed; effects are stronger in areas with hard water.

Filtered water

  • What it is: Tap water that has gone through a household filter (for example, a pitcher or under-sink cartridge) to reduce some contaminants and, in some cases, part of the mineral content.
  • Pros: Often lowers mineral content compared with straight tap water; may reduce white dust and scale; more convenient than buying distilled water.
  • Cons: Still usually contains some minerals; performance depends heavily on the type of filter; cartridges need replacement.

Distilled water

  • What it is: Water that has been boiled and condensed, leaving most minerals and many impurities behind; often similar to demineralized or purified water for this purpose.
  • Pros: Very low mineral content; minimizes scale and white dust; can reduce how often you must scrub mineral deposits.
  • Cons: Ongoing cost; requires purchase or a home distiller; may be less convenient for large daily volumes.

From a purely mineral and residue standpoint, distilled is generally the cleanest option, filtered is in the middle, and untreated tap water is the most likely to leave deposits and dust.

Table 1. Comparing humidifier water choices by common trade-offs. Example values for illustration.
Tap vs filtered vs distilled water in home humidifiers
Water type Mineral content (relative) White dust tendency Cleaning frequency impact Typical cost per gallon (example)
Tap High in hard-water areas High with ultrasonic models More scrubbing, frequent descaling Already paid through utility bill
Filtered Medium, depends on filter Medium, often reduced vs tap Moderate mineral buildup over time Low to moderate (filter cost spread out)
Distilled Very low Low to negligible Less mineral scrubbing, still needs sanitizing Low to higher depending on local prices

Example values for illustration.


How water type affects humidifier performance and issues

Water choice mostly influences maintenance, not the basic ability of a humidifier to raise humidity. However, the differences in buildup and residue can have secondary effects on performance and air cleanliness.

Mineral scale and clogging

Mineral deposits can collect on heating elements in warm-mist units and on internal surfaces and discs in ultrasonic or evaporative units. Over time, this can:

  • Reduce mist output or change spray pattern.
  • Make fans or moving parts noisier.
  • Require stronger descaling steps during cleaning.

Distilled water slows this buildup. Filtered water can help if it significantly lowers hardness. With tap water, especially if you notice white crust on faucets or kettles, expect more frequent descaling.

White dust on surfaces

Ultrasonic humidifiers create a fine mist of water droplets. When those droplets contain minerals and evaporate in the room, the minerals settle out as a light, powdery residue often called white dust. This is more noticeable when:

  • Local tap water is hard.
  • The humidifier runs for many hours each day.
  • The unit is close to dark furniture or electronics where dust stands out.

Using distilled water cuts the mineral supply and usually reduces this dust. Filtered water may lessen it if the filter reduces hardness, but results vary by filter type. Plain tap water tends to produce the most visible dust.

Tank cleanliness and biofilm

Regardless of water type, any standing water can gradually develop a slimy film if it is not emptied and cleaned. Distilled water does not prevent this on its own because the main driver is time, temperature, and organic material introduced from the environment, not just mineral content.

This means daily emptying and regular scrubbing are important whether you use tap, filtered, or distilled water.

Common mistakes when choosing water for humidifiers

A few frequent habits make humidifier upkeep harder than it needs to be.

  • Assuming filtered water always removes minerals. Many household filters focus on taste and odor, not hardness. Check whether your filter type is designed to reduce mineral content; otherwise, white dust may still appear.
  • Using softened water as a substitute for low-mineral water. Some water softeners swap calcium and magnesium for sodium or potassium. This changes the mineral mix but does not fully eliminate dissolved solids, so deposits and dust can still form.
  • Filling and leaving the same water for days. Even distilled water can become stale over time. Letting water sit between uses encourages film and odors.
  • Over-humidifying to compensate for dry air. Running a unit constantly with hard tap water not only risks condensation on windows and walls but also increases total mineral residue released into the room.
  • Ignoring visible buildup on the base, mist outlets, or sensors. Deposits can interfere with normal operation if not removed.

Practical guidance: how to choose the right water for your home

Your choice does not need to be all-or-nothing. You can match water type to your specific situation, budget, and tolerance for cleaning.

1. Check how hard your tap water is

Indicators of hard water include:

  • White or chalky deposits on faucets or showerheads.
  • Film or scale on kettles, coffee makers, or glass shower doors.
  • Local water reports mentioning hardness levels.

If you see clear signs of hardness, expect more humidifier scale and white dust with tap water.

2. Decide your comfort level with cleaning

  • Minimal scrubbing desired: Prioritize distilled water, especially for ultrasonic models.
  • Okay with weekly descaling: Filtered water may be enough if it lowers hardness.
  • Comfortable with frequent deep cleaning: Tap water may be practical, particularly if your water is not very hard.

3. Consider your humidifier type

  • Ultrasonic / cool-mist: Most sensitive to water minerals for visible white dust. Benefits the most from distilled or low-mineral water.
  • Evaporative: Often uses wicks or pads that can trap minerals. These may need more frequent replacement with hard tap water.
  • Warm-mist / steam: Heat can accelerate scale on heating elements; distilled water slows crust formation.

4. Balance cost, convenience, and results

Some households choose a hybrid approach, such as:

  • Using distilled water during the driest months when the humidifier runs most often.
  • Using filtered tap water when white dust is mild and easy to clean.
  • Reserving tap water for larger console units that are designed for easier descaling.

Real-world scenarios: matching water choices to typical homes

The right water option depends heavily on your living space, region, and usage pattern. Here are a few example situations.

Small apartment with one ultrasonic humidifier

In a compact living room or bedroom, white dust is more noticeable because it concentrates on just a few surfaces. If your tap water is hard and you use an ultrasonic unit overnight, distilled water can significantly reduce visible residue. Filtered water might be workable if the filter meaningfully reduces hardness; otherwise, some dust will still appear.

Single-family home with multiple rooms to humidify

Running several humidifiers on distilled water can become costly and logistically difficult. A common compromise is to use:

  • Distilled water for ultrasonic units in bedrooms or near electronics.
  • Filtered or tap water for larger evaporative units in main living areas, combined with regular upkeep.

Area with relatively soft tap water

If your taps and fixtures rarely show scale, tap water may not pose as much of a problem. In these cases, you may see only light deposits and minimal dust, so careful cleaning and monitoring humidity levels can be sufficient.

Occasional humidifier use in mild climates

If you use a humidifier only on especially dry days, tap or filtered water can be reasonable choices, provided you:

  • Empty the tank after each use.
  • Let the interior dry fully between uses.
  • Inspect for scale before the next season and descale if needed.

Safety and indoor air quality considerations

While water type mostly affects minerals and maintenance, the way you run and clean the humidifier plays a larger role in indoor air quality.

Humidity range for comfort and building materials

Most homes are generally comfortable in the 30–50% relative humidity range. Prolonged humidity far above this range can encourage moisture on windows and surfaces, which may contribute to dampness issues. Very low humidity can be uncomfortable and increase static electricity. Use a simple hygrometer or indoor humidity display to avoid guessing.

Use plain water only

Regardless of whether it is tap, filtered, or distilled, use only water in the tank unless your manufacturer explicitly states otherwise. Adding essential oils, fragrances, or cleaners directly to the tank can damage components or release unnecessary substances into the air.

Ventilation still matters

If you run a humidifier for many hours, especially in a small, tightly sealed room, consider occasional ventilation. Briefly opening a window or door or using exhaust fans can help prevent excess moisture from lingering on cool surfaces.

Maintenance and cost planning by water type

No water choice eliminates cleaning, but it can change what kind of maintenance you focus on most.

Daily basics (all water types)

  • Empty remaining water from the tank after use.
  • Rinse the tank and base with clean water.
  • Allow parts to air dry with the lid off if the humidifier will not run again soon.

Weekly or regular deep cleaning

Plan a thorough cleaning at least weekly during heavy use:

  • Use a mild cleaning method recommended by your manufacturer (commonly a gentle descaling solution or diluted household acid such as vinegar, if allowed).
  • Focus on areas where scale collects, such as the base, mist outlet, and heating element.
  • Rinse thoroughly so no cleaning solution remains in the tank or internal parts.

How water choice changes maintenance emphasis

  • Tap water: More frequent descaling and scrubbing of visible mineral deposits; watch for reduced output or noise changes.
  • Filtered water: Moderate descaling plus tracking the cost and schedule of filter replacements.
  • Distilled water: Less mineral removal but the same need for regular sanitizing of the tank and base.
Table 2. Humidity and dampness planning with different water choices. Example values for illustration.
Quick humidity and mold-awareness planner
Goal Simple actions Tools Note
Stay near 30–50% RH Run humidifier only as needed; adjust output Basic hygrometer Avoid running on maximum all day
Limit white dust Prefer distilled or low-mineral water Check local water hardness info Wipe surfaces regularly if dust appears
Reduce scale inside unit Use distilled or filtered water; descale monthly Manufacturer-recommended descaler Increase frequency if buildup is visible
Prevent damp corners Move humidifier away from walls and windows Visual checks for condensation Lower output if glass or walls stay wet
Keep tank fresh Empty and dry daily; clean weekly Soft brush or cloth Water type does not replace cleaning
Balance cost vs effort Use distilled where residue matters most Simple budget estimate Tap water is fine if you accept more scrubbing

Example values for illustration.


Related guides: How to Clean a Humidifier Properly (And How Often)Ultrasonic vs Evaporative Humidifiers: Pros, Cons, and Which to BuyHumidifier vs Dehumidifier: When to Add Moisture vs Remove It

Summary: choosing between tap, filtered, and distilled

For most home humidifiers, distilled water is the lowest-maintenance choice in terms of mineral deposits and white dust, especially with ultrasonic models. Filtered water can be a reasonable compromise if your filtration reduces hardness and you are comfortable with some visible residue and occasional descaling. Plain tap water usually works from an operational standpoint but tends to create the most scale and dust, particularly in hard-water regions.

Whichever option you pick, pay close attention to humidity levels, empty and dry the tank daily when in use, and perform regular cleanings. Good day-to-day care has at least as much impact on your indoor air and humidifier lifespan as the specific water you pour into the tank.

Frequently asked questions

Do all humidifier types benefit from distilled water?

Distilled water reduces mineral buildup for all humidifier types, but the benefit is most noticeable with ultrasonic and warm-mist units where minerals become airborne or form crusts on heating elements. Evaporative units may still trap minerals in wicks or pads, so they require maintenance regardless. Use distilled where residue or white dust is a frequent issue.

Will a household pitcher filter stop white dust from an ultrasonic humidifier?

Some pitcher and carbon filters improve taste and remove chlorine but do not significantly reduce hardness; they may only modestly reduce white dust. Filters that specifically reduce dissolved minerals or a reverse osmosis system are more effective at preventing dust. Check the filter specifications for hardness or mineral reduction before relying on it for dust control.

Is it safe to use water from a water softener in a humidifier?

Water from a softener replaces calcium and magnesium with sodium or potassium, so it still contains dissolved salts and can leave residues or increase corrosion risk in some components. It does not provide the same benefit as low-mineral or distilled water and is not generally recommended as a substitute for demineralized water in humidifiers. Follow manufacturer guidance if in doubt.

How often should I deep-clean my humidifier with different water types?

Regardless of water type, emptying and rinsing daily and sanitizing at least weekly during heavy use is a good rule. If you use hard tap water, you may need more frequent descaling (every few days to weekly) to remove mineral buildup. Distilled water reduces descaling frequency but does not remove the need for regular sanitizing to prevent biofilm.

Are there indoor air or health risks tied to using tap water instead of distilled?

Using tap water primarily affects aesthetics and maintenance by creating mineral dust and scale; it is not usually a direct health hazard. However, any humidifier that is not cleaned properly can harbor microbes, which may be aerosolized during operation. Maintaining cleaning routines and using plain water only (no additives) are the primary steps to reduce health risks.

Humidifier Cleaning Routine: What Really Prevents Slime

Tabletop humidifier with gentle mist in a tidy bedroom

A consistent humidifier cleaning routine using proper draining, rinsing, and disinfection is the most reliable way to prevent slime buildup and odors.

Humidifiers add moisture to dry indoor air, but standing water and warm conditions make their tanks ideal for slimy biofilm and musty smells. With a simple schedule and a few safe cleaning habits, you can keep your humidifier running without the slimy film, white crust, or sour odor that many people notice after just a few days.

  • Empty and air-dry the tank daily when in use.
  • Rinse with clean water every day; disinfect weekly in typical home use.
  • Use distilled or low-mineral water when possible to reduce scale and residue.
  • Replace wicks and filters on the schedule in the manual or when discolored/slimy.
  • Store the unit dry between seasons to avoid moldy or musty smells.

Why humidifiers get slimy and smelly

Humidifier “slime” is usually a mix of biofilm (microorganisms embedded in a slippery layer) and mineral deposits from water. Odors often come from that biofilm, stale water, or mineral buildup trapping organic material. This is common in US homes during heating season when humidifiers run daily.

Understanding what is happening inside the tank helps explain why regular cleaning is so important:

  • Standing water lets microbes multiply and form a film on surfaces.
  • Warm temperatures in heated homes speed up growth and odor formation.
  • Minerals in tap water form white crusts (scale) that are rough and hold moisture, which encourages more buildup.
  • Organic particles (dust, skin flakes) that settle in the tank can feed microbial growth.

This does not mean humidifiers are unsafe by definition, but it does mean they are not “set and forget” devices. They require similar attention to other appliances that hold water, such as coffee makers or ice machines.

Key concepts for a practical humidifier cleaning routine

A good humidifier cleaning routine follows a few simple concepts: remove standing water, break up biofilm, dissolve mineral scale, and keep parts dry when not in use. The exact steps vary by model, but the underlying logic is similar.

Daily vs weekly tasks

Think of humidifier care in two layers:

  • Daily: Empty, rinse, and air-dry to interrupt slime formation.
  • Weekly (or every few days for heavy use): Disinfect tank and base, and descale mineral buildup.

In drier climates or during peak winter use, you may need to shift “weekly” tasks to every 3–4 days if you notice a slippery feel or faint odor sooner.

Water type and slime formation

The type of water you use has a major effect on both white dust and internal buildup:

  • Tap water: Convenient but often high in minerals. Leads to white dust on surfaces (especially with ultrasonic units) and more scale inside the tank and base.
  • Distilled or demineralized water: Contains very few minerals, so it greatly reduces white dust and slows scale buildup. It does not eliminate the need for cleaning, but it can make it easier.
  • Filtered water (pitcher or faucet filter): May reduce some impurities but often leaves enough minerals to still create scale.

Even with distilled water, microbes from tap water residues, the environment, and the air can still colonize the tank, so disinfection is still necessary.

Understanding your humidifier type

Different designs have different cleaning needs, but all benefit from regular attention:

  • Ultrasonic: Uses a vibrating plate to create mist. Often compact and quiet, but can send minerals into the air as white dust. Tanks and mist outlets need frequent cleaning.
  • Evaporative (wick-type): Uses a fan blowing over a wet wick. Minerals tend to stay in the wick and base; wicks must be replaced and the base cleaned.
  • Warm mist/steam: Boils water before releasing steam. Heat can reduce some microbes in water but scale builds up quickly, and tanks and chambers still need descaling and disinfection.
Table 1. Humidifier cleaning checklist by task and purpose — Example values for illustration.
Task How often (typical home use) Why it matters Notes
Empty remaining water Daily, when in use Removes stagnant water that supports slime and odor Do not top off over old water
Rinse tank with clean water Daily Flushes out loose biofilm and particles Swish and drain thoroughly
Air-dry tank and base Daily, if possible Dry surfaces slow microbial growth Leave openings uncapped while drying
Disinfect tank and reservoir Weekly or every 3–7 days Breaks up settled biofilm Use a mild, manufacturer-approved disinfectant
Descale mineral buildup Weekly to monthly Removes rough surfaces that trap slime Use a mild acid such as household white vinegar
Replace wick or filter Every 1–3 months (example) Prevents hardened, odor-holding media Follow specific product instructions
Seasonal deep clean and dry storage At start and end of humidifier season Prevents musty smell next season Ensure all parts are fully dry before storing

Example values for illustration.

Common humidifier cleaning mistakes that cause slime and odors

Certain habits make slime and odor problems more likely, even if the humidifier looks clean from the outside.

1. Topping off instead of emptying

Adding fresh water on top of old water allows microbes to stay in place and keep growing. The water may look clear but the tank walls and base can still be coated with a thin biofilm.

2. Infrequent cleaning during heavy use

Running a humidifier continuously but only cleaning it every few weeks lets scale and biofilm accumulate. By the time a strong odor appears, buildup is usually significant and harder to remove.

3. Ignoring the base or internal reservoir

Many designs have a hidden pool of water in the base that is not obvious when you remove the tank. If this area is not emptied and disinfected, slime can grow there and spread into the tank or mist path.

4. Using harsh or unsuitable cleaners

Strong chemicals can damage plastics, seals, or coatings. Residues can also dry on surfaces and later mix with the water that becomes mist. Mild, manufacturer-approved options are generally preferred, and thorough rinsing is important.

5. Storing the unit wet between seasons

Putting a damp humidifier into a closet or box encourages mold and strong musty smells by the next winter. Even a thin film of water trapped under seals or in crevices can support growth.

Step-by-step daily and weekly cleaning to prevent slime

This section describes a general pattern. Always compare these steps with your manufacturer’s manual and follow any model-specific instructions or limits.

Daily routine when the humidifier is in use

  1. Turn off and unplug. Allow any hot parts in warm-mist units to cool fully.
  2. Remove the water tank. Set it on a stable surface near a sink.
  3. Empty all remaining water. Pour from both the tank and the base or reservoir.
  4. Rinse the tank. Add clean water, swish thoroughly, and empty again. Avoid abrasive brushes that could scratch plastic and create places for biofilm to cling.
  5. Rinse the base if allowed. Some bases can be swished with water; others should only be wiped with a damp cloth. Check the manual before submerging any part.
  6. Air-dry surfaces. Leave the tank uncapped and the base open so moisture can evaporate. Even 15–30 minutes of air-drying is helpful if you refill soon after.
  7. Refill with fresh water before use. Ideally use distilled or low-mineral water, especially in ultrasonic units.

Weekly (or every few days) disinfection and descaling

Frequency depends on how heavily you use the humidifier and your water quality. If you notice a slimy feel or odor sooner, shorten the interval.

  1. Prepare a mild cleaning solution.
    • For scale (white crust), many people use household white vinegar diluted with water as a mild acid cleaner.
    • For disinfection, use a cleaner recommended by the manufacturer. Some manuals allow a dilute unscented bleach solution; follow their ratios exactly and never mix bleach with vinegar or other cleaners.
  2. Descale mineral deposits.
    • Fill or soak the mineral-coated areas with diluted vinegar for 15–30 minutes (example duration).
    • Gently wipe or use a soft brush to loosen softened scale.
    • Rinse thoroughly with clean water until any vinegar smell is gone.
  3. Disinfect water-contact surfaces.
    • Apply the recommended disinfecting solution to the tank, cap, and any reservoir surfaces.
    • Let it sit for the recommended contact time in the manual.
    • Rinse several times with clean water to remove residual cleaner.
  4. Inspect and clean small parts.
    • Check mist nozzles, float assemblies, and caps for slime or deposits.
    • Rinse and gently brush them if allowed.
  5. Dry as much as practical.
    • Let the tank and base air-dry before refilling, especially after using disinfectants.

Real-world routines and scenarios

Different households will adjust their humidifier maintenance to fit their routines and environments. Here are some common scenarios and how cleaning patterns might adapt.

Bedroom humidifier running every night in winter

  • Use pattern: 8–10 hours each night, turned off during the day.
  • Daily: Empty and rinse each morning; leave tank uncapped to dry while at work or during the day.
  • Weekly: Descale and disinfect tank and base; check filters or wicks for discoloration.

Whole-day use in a dry climate

  • Use pattern: 16–24 hours of operation per day in a very dry home.
  • Daily: Empty and rinse when refilling, sometimes more than once a day.
  • Every 3–4 days: Perform a full disinfecting and descaling routine, since heavy use speeds up buildup.

Occasional use in a mild climate

  • Use pattern: A few nights per week during drier spells.
  • Each use: Fill with fresh water only when needed, and empty after the night’s use rather than leaving water standing.
  • Every 1–2 weeks: Disinfect and descale, even if the device was not used daily.

Transition to storage at end of season

  • Do a thorough descale and disinfection.
  • Dry all components completely, including wicks if they are to be reused, or discard wicks per instructions.
  • Store in a dry, breathable container or shelf rather than sealed plastic if moisture may be trapped.

Safety and standards considerations

Safe humidifier use is not just about cleanliness. It also involves humidity levels, cleaning agents, and appliance handling.

Safe humidity ranges

Indoor relative humidity that is too high can encourage mold and dust mites, while very low humidity can feel uncomfortable. Many sources suggest keeping indoor humidity in a moderate range (often around 30–50% as a general comfort guideline), but the ideal level can vary by home and season. A simple hygrometer can help you see when you are running much drier or more humid than you intend.

Choosing cleaning agents wisely

  • Follow the manufacturer’s recommendations on which cleaners are acceptable.
  • Avoid mixing cleaning products, especially bleach with vinegar or other acids.
  • Rinse until there is no noticeable odor from cleaners and let parts air-dry when possible.

Built-in features like UV or antimicrobial parts

Some humidifiers include UV lights or antimicrobial surfaces intended to reduce microbial growth. These can be part of the design, but they do not remove the need for regular physical cleaning and rinsing. Surfaces can still accumulate minerals and organic material that contribute to slime and odors.

General appliance safety

  • Always unplug before cleaning.
  • Do not immerse electrical components unless the manual explicitly allows it.
  • Avoid placing humidifiers where they can saturate nearby surfaces (windowsills, electronics, or floors).

Ongoing maintenance, filters, and cost planning

A humidifier’s long-term performance depends on more than tank cleaning. Wicks, filters, and other consumable parts slowly clog or degrade, which can contribute to odor and reduced output.

Wick and filter replacement

  • Evaporative wicks gradually harden with mineral deposits and may darken or develop an odor. They often need replacement every 1–3 months of regular use, depending on water hardness and runtime.
  • Other filters or cartridges (such as mineral-reduction inserts) have manufacturer-specified lifespans, which may range from weeks to months.
  • Replacing these parts on schedule helps maintain moisture output and reduces areas where slime and odor can develop.

Energy and water use

  • Energy: Ultrasonic and evaporative units usually use modest electricity; warm-mist units typically use more because they heat water.
  • Water: Daily water use depends on the unit’s capacity and settings. Being aware of daily output can help you plan refills and cleaning times.

Planning for seasonal operation

  • Estimate your humdifier season length (for example, a few winter months) and budget for replacement wicks or filters over that time.
  • Factor in distilled water costs if you choose to avoid tap water, or consider where water hardness sits in your area.
Table 2. Humidity and mold quick-plan for typical homes — Example values for illustration.
Goal Simple actions Tools Note
Avoid very dry air in winter Use a cleaned humidifier in key rooms; close doors at night Humidifier, basic hygrometer Check that humidity does not rise excessively
Reduce condensation on windows Lower humidifier setting; use exhaust fans in kitchens/baths Hygrometer, exhaust fans Condensation can signal local high humidity
Limit mold risk in damp areas Avoid adding humidity; consider dehumidification if needed Dehumidifier or ventilation Clean visible moisture and fix leaks promptly
Balance comfort and dryness from heating Run humidifier only as needed, based on readings Humidifier, hygrometer Adjust by room size and how the space feels
Monitor seasonal changes Spot-check humidity a few times a week Hygrometer Helps decide when to start or stop humidifier use
Prepare for storage Deep clean, dry, and store in a dry place Cleaning supplies, storage shelf Prevents musty smells next season

Example values for illustration.


Related guides: How to Clean a Humidifier Properly (And How Often)Humidifier White Dust: Causes, Health Concerns, and FixesBest Indoor Humidity Level to Prevent Mold (With Seasonal Targets)Ultrasonic vs Evaporative Humidifiers: Pros, Cons, and Which to Buy

Key takeaways: keeping humidifiers fresh and odor-free

Preventing slime and odors in a humidifier is mainly about consistency, not complexity. Emptying and rinsing daily, disinfecting and descaling on a regular schedule, and using water with fewer minerals all help keep internal surfaces smoother and cleaner. Replacing wicks and filters when they are spent, drying the unit before storage, and watching overall indoor humidity levels round out a practical routine. With these habits, a humidifier can support comfortable indoor air without the stagnant smell or slimy buildup that many people associate with neglected units.

Frequently asked questions

How often should I clean my humidifier to prevent slime?

A consistent daily routine of emptying, rinsing, and air-drying with a weekly (or every 3–7 days for heavy use) disinfection and descaling is recommended to prevent slime buildup. Adjust the disinfecting interval to every 3–4 days if you notice slime or odor sooner.

What disinfectants are safe to use in a humidifier tank?

Use the disinfectants recommended by your humidifier’s manufacturer; some manuals allow a dilute unscented bleach solution used at specified ratios, while vinegar is commonly used for descaling. Never mix bleach with acids (such as vinegar), follow contact-times in the manual, and rinse thoroughly until no cleaner odor remains.

Will using distilled water eliminate the need for cleaning?

Distilled or demineralized water greatly reduces mineral scale and white dust, making maintenance easier, but it does not prevent microbial colonization. Regular rinsing and periodic disinfection are still necessary to control biofilm and odors.

Is it acceptable to top off the tank instead of emptying daily?

No. Adding fresh water on top of old water allows microbes and biofilm to persist and continue growing, so you should empty and rinse the tank daily rather than topping off.

How should I store my humidifier between seasons to avoid mold and musty smells?

Perform a thorough descaling and disinfection, rinse and dry all components completely (or replace disposable wicks per the manual), and store the unit in a dry, well-ventilated space. Avoid sealing a damp unit in airtight containers, which can promote mold growth.

Ideal Indoor Humidity in Winter Explained

Isometric winter living room with humidifier balancing indoor humidity

The ideal indoor humidity in winter is generally around 30–40% relative humidity, which balances comfort with a low risk of mold growth in most homes.

Cold outdoor air holds little moisture, so indoor humidity often drops in winter when heating systems run. Raising humidity can ease dry-air discomfort, but pushing it too high increases condensation and mold risk, especially on cold windows and walls. The goal is a practical middle ground, not a single perfect number.

Quick answer
  • Aim for ~30–40% indoor relative humidity in typical winter conditions.
  • In very cold weather, staying closer to 30–35% helps reduce window condensation.
  • Above ~50–55% for extended periods indoors can raise mold and dust mite risk.
  • Use a small hygrometer to monitor humidity in several rooms.
  • Adjust with humidifiers, bathroom fans, kitchen exhaust, or dehumidifiers as needed.

Why Winter Humidity Matters for Comfort and Mold

Humidity describes how much water vapor is in the air compared with how much it could hold at that temperature, usually expressed as relative humidity (RH). In winter, outdoor air is often very dry, and once warmed indoors, its relative humidity drops even more.

Low humidity can lead to dry-feeling air, static shocks, and faster evaporation from skin and surfaces. Many people find air around 30–40% RH more comfortable than very dry air below 25%.

However, more moisture is not always better. When indoor humidity is too high for the surface temperatures in your home, water can condense on windows, exterior walls, and in hidden spaces. Persistently damp surfaces are a favorable environment for mold and mildew.

Finding the ideal indoor humidity in winter is therefore a balance between comfort and limiting moisture buildup where you cannot easily see it.

Key Concepts: Temperature, Humidity, and Condensation

To understand winter humidity, it helps to look at three linked factors: temperature, relative humidity, and surface temperature.

Relative humidity and temperature

Warm air can hold more water vapor than cold air. If you bring cold, humid outdoor air indoors and heat it up, its relative humidity drops even if no moisture is removed. This is why winter indoor air often feels dry.

For example, air at 30°F outside might be near 80–90% RH. Once that air is brought indoors and heated to 70°F without adding moisture, its relative humidity can drop below 20%.

Condensation and cold surfaces

Condensation happens when warm, moist indoor air contacts a surface that is cold enough that the air right next to it reaches 100% RH. Water then appears as droplets or fogging. Common spots include:

  • Single-pane or older double-pane windows
  • Uninsulated exterior walls and corners
  • Behind large furniture placed against exterior walls

In very cold climates, these surfaces can be much cooler than room air. That means even moderate indoor humidity can cause visible or hidden condensation, raising mold risk.

Why 30–40% is often a practical target

Research and building guidance often point to 30–50% RH as a general comfort range. In winter, many homes cannot safely maintain 45–50% without frequent condensation, especially when outdoor temperatures are well below freezing.

For many U.S. homes, staying near 30–40% in the main living areas is a realistic balance: enough moisture to reduce very dry air discomfort, but usually low enough to limit persistent condensation on reasonably insulated windows and walls.

Table 1. Winter humidity decision checklist for common home situations – Example values for illustration.
Choosing humidity actions based on simple household cues
Observed situation Likely humidity issue Suggested direction Notes
Hygrometer reads <25% RH, air feels very dry Humidity likely too low Add moisture Consider a humidifier and sealing obvious drafts.
Frequent static shocks on carpets and fabrics Often linked to low humidity Raise RH slightly Aim toward upper 30% range if condensation is minimal.
Regular window fogging or water on sills Local humidity near surfaces too high Reduce moisture Lower humidifier settings; increase ventilation.
Musty odor around closets or exterior corners Possible localized dampness Investigate and dry Improve airflow and check for leaks; avoid over-humidifying.
Bathroom mirrors stay foggy long after showers High humidity spikes Ventilate Use or upgrade exhaust fans; keep doors slightly open afterward.
Basement feels clammy while main floor feels dry Uneven humidity by level Zone control Consider a basement dehumidifier and targeted humidification upstairs.
No condensation, RH around 30–40% Generally balanced Maintain Monitor during cold snaps or large occupancy changes.

Example values for illustration.

Common Winter Humidity Mistakes and Warning Signs

Many humidity problems come from well-meant but unchecked adjustments. Knowing typical mistakes can help you avoid jumping from very dry to too damp.

Over-humidifying to chase comfort

It can be tempting to set a humidifier to reach 45–50% RH everywhere because it sounds more comfortable. In cold climates or in homes with older windows, that setting can quickly lead to:

  • Condensation at the bottom edges of windows
  • Peeling paint or swollen wood sills
  • Visible mold or dark spots on caulk or window frames

If you see these signs, the indoor humidity is too high for the building’s current conditions, even if a single room reading seems reasonable.

Ignoring room-to-room differences

One humidity reading in a hallway does not describe your entire home. Bathrooms, kitchens, basements, and bedrooms with closed doors can have very different humidity levels. Over-humidifying a central area to fix a dry bedroom may leave other zones damp.

Misreading short-term spikes

Short-lived spikes in humidity, such as during cooking or showering, are normal. The concern is humidity that stays elevated for long periods, particularly above about 50–55% in cool areas. A quick rise followed by a return to normal after ventilation is usually less of a problem than constant moderate dampness.

Overlooking building issues

Water leaks, poor insulation, and inadequate ventilation can create damp conditions even when your average RH is reasonable. If you see mold or persistent condensation in specific spots, do not assume the only answer is lowering humidity everywhere; localized building issues may need attention as well.

Practical Winter Humidity Targets and Simple Rules

Because homes and climates vary, there is no single perfect winter humidity number. Instead, use ranges and adjust based on observation.

General winter indoor targets

  • 30–40% RH: A practical target range for many U.S. homes in typical winter conditions.
  • 25–30% RH: More realistic in very cold climates during extreme cold snaps to limit condensation.
  • 40–45% RH: Often comfortable in milder winter climates or better-insulated homes with modern windows.

Watch your windows and cold corners. If they stay dry and your RH is in the 30–40% range, you are likely in a reasonable balance for comfort and mold risk in most situations.

Adapting to outdoor temperature

As outdoor temperature drops, it becomes harder to maintain higher indoor humidity without condensation. A simple idea:

  • When outdoor temperatures are just cool (for example, 40–50°F), 35–45% RH indoors may work well.
  • When temperatures are near or below freezing, 30–40% is often more appropriate.
  • During very cold spells (well below freezing), staying closer to 30% can reduce window and wall condensation.

These are example ranges; your home’s insulation, windows, and airflow may require slightly different targets.

How to Manage Winter Humidity: Step-by-Step

Managing ideal indoor humidity in winter is mostly about measurement, moderate adjustments, and paying attention to surfaces.

1. Measure humidity in more than one spot

  • Use a simple digital hygrometer.
  • Check several rooms: main living area, at least one bedroom, kitchen, and basement if applicable.
  • Take readings at different times of day, especially during very cold weather or periods of heavy cooking or showering.

2. Address very low humidity

If readings are consistently below about 25–30% and you notice dry-air discomfort, consider:

  • Portable humidifiers in main living spaces and bedrooms, set to modest target levels.
  • Reducing unnecessary ventilation when outdoor air is extremely dry, while still using exhaust fans during moisture-producing activities.
  • Improving air sealing around windows, doors, and obvious drafts so you are not constantly drying the air with outside infiltration.

3. Prevent overly high humidity and mold risk

If humidity readings are often above about 50% in winter, or you see condensation and musty smells, consider:

  • Lowering humidifier settings or turning units off when outdoor temperatures drop sharply.
  • Using exhaust fans in bathrooms and kitchens during and after moisture-generating activities.
  • Running a dehumidifier in basements or other consistently damp areas, especially if they are cooler than the rest of the home.
  • Moving furniture a few inches away from exterior walls to improve airflow.

4. Combine humidity management with air cleaning

Humidity control and air-cleaning devices are related but separate aspects of indoor air quality. For example:

  • Air purifiers with particle filters can reduce dust and some allergens but do not usually change humidity.
  • Balanced humidity (around 30–50% over the year) can help reduce dust resuspension and may influence how comfortable air feels.
  • For mold prevention, controlling moisture and cleaning visible mold growth are key; filters alone cannot stop growth on damp surfaces.

Real-World Winter Scenarios

These simplified scenarios show how humidity decisions can differ by home and climate.

Scenario 1: Cold climate, older windows

A home in a northern state with winter temperatures often below 20°F and older double-pane windows may see condensation as soon as RH creeps above the mid-30s. In this case:

  • Aim for around 30–35% RH during cold stretches.
  • Use portable humidifiers only in occupied rooms, not hallways.
  • Check window corners and sills daily for moisture; wipe dry as needed.

Scenario 2: Mild winter climate with good insulation

A newer, well-insulated home in a milder climate where winter temperatures often stay above freezing may tolerate slightly higher humidity without condensation problems. In such a home:

  • Targets around 35–45% RH may be comfortable and practical.
  • Condensation may be rare; still check around windows and south-facing walls during cold snaps.
  • Ventilation through kitchen and bathroom fans remains important.

Scenario 3: Dry upstairs, damp basement

A two-story home may have a dry upper floor (bedrooms) and a slightly damp basement due to cooler surfaces and limited sunlight.

  • Use a dehumidifier in the basement to maintain moderate RH there, often around 40–50% depending on conditions.
  • Use small humidifiers upstairs if RH is below about 30% and occupants feel uncomfortable.
  • Keep doors open when possible to help some mixing, but treat each level based on its own readings and condensation behavior.

Safety, Standards, and Device Considerations

Most home humidity management relies on standard appliances and exhaust fans used as intended. A few basic safety and standards-related points help keep things low-risk.

Humidifier safety basics

  • Follow manufacturer instructions for cleaning to limit mineral buildup and microbial growth inside the unit.
  • Use clean water; if you have very hard water, you may notice white dust from some types of humidifiers.
  • Do not aim mist directly at walls, windows, or electronics; disperse it into room air.
  • Avoid modifying humidifiers or adding unapproved additives.

Dehumidifiers and ventilation equipment

  • Place dehumidifiers so air can circulate freely around them.
  • Route collected water safely to a drain or empty the bucket regularly.
  • Ensure bathroom and kitchen exhaust fans vent to the outdoors where possible.

Air cleaners and add-on technologies

Some standalone or integrated air-cleaning devices may use technologies such as ionization or UV-C light. When evaluating these:

  • Look for information about ozone generation; many sources advise avoiding devices that intentionally produce ozone indoors.
  • Understand that air cleaners handle particles and certain gases, but do not fix underlying moisture problems that lead to mold growth.
  • Consider focusing first on basic measures: filtration, humidity control, and ventilation.

Ongoing Maintenance and Monitoring

Keeping winter humidity in a good range is not a one-time task. Conditions change as outdoor weather, occupancy, and home usage shift.

Routine checks

  • Glance at hygrometer readings daily during the coldest months.
  • Do a quick window check in the morning when surfaces are coolest.
  • Look occasionally behind furniture on exterior walls for signs of dampness or odor.

Appliance care

  • Clean humidifiers as instructed, often weekly during heavy use.
  • Rinse or replace any internal filters or cartridges on the schedule recommended by the manufacturer.
  • Clean dehumidifier filters and coils periodically to maintain performance.

Seasonal adjustments

  • As winter ends and outdoor humidity rises, reassess the need for humidifiers; many homes can turn them off in spring.
  • In humid summers, shift focus from adding moisture to removing it and ventilating.
  • Re-check humidity settings and habits at the start of each heating season.
Table 2. Winter humidity and mold quick-plan – Example values for illustration.
Simple actions to balance comfort and mold risk
Goal Simple actions Tools Notes
Reduce very dry air discomfort Add controlled moisture to main living areas. Portable humidifier, hygrometer. Target around 30–40% RH when practical.
Limit window condensation Lower humidity during cold nights and wipe sills. Hygrometer, towels, window coverings adjusted. Aim closer to 30–35% RH in cold snaps.
Keep bathrooms dry after showers Run exhaust fan during and after use. Bathroom fan, door slightly open afterward. Try to clear mirror fog within about 15–20 minutes.
Prevent basement dampness Remove moisture and improve airflow. Dehumidifier, fans. Check RH regularly; adjust for season and use.
Monitor for hidden mold risk Inspect corners, closets, and behind furniture. Flashlight, hygrometer. Look for spots, peeling paint, or musty odor.
Balance humidity with air cleaning Combine filters, humidity control, and ventilation. Air purifier, fans, humidifier or dehumidifier. Each tool addresses a different part of air quality.

Example values for illustration.


Related guides: Humidifier vs Dehumidifier: When to Add Moisture vs Remove ItHow to Size a Dehumidifier (Sq Ft, Pints/Day, and Real-World Tips)Basement Dehumidifier Guide: Targets, Drainage, and Energy Use

Summary: Balancing Comfort and Mold Risk in Winter

Ideal indoor humidity in winter is not a single fixed number, but for many homes, keeping relative humidity around 30–40% offers a practical balance between comfort and mold risk. In very cold weather or homes with less insulation and older windows, aiming toward the lower end of that range helps reduce condensation.

Use simple tools—a hygrometer, humidifiers or dehumidifiers where needed, and existing exhaust fans—to adjust gradually rather than making large changes all at once. Pay close attention to windows, cold corners, and any musty areas. When surfaces stay dry and your readings sit in a modest range, your indoor humidity is likely in a reasonable zone for both comfort and moisture control during the winter months.

Frequently asked questions

What relative humidity should I set a humidifier to for winter comfort without causing condensation?

For many homes, setting a humidifier to maintain around 30–40% RH is a practical balance between comfort and condensation risk. In very cold weather or in homes with older or poorly insulated windows, staying closer to 30–35% reduces the chance of window or wall condensation.

How can I prevent condensation on windows while using indoor humidification?

Lower indoor humidity during very cold nights, increase ventilation during and after moisture-producing activities, and improve window insulation or add storm windows if possible. Regularly checking and wiping window sills and monitoring multiple hygrometers helps spot local condensation early.

Where and how often should I place hygrometers to get an accurate picture of winter humidity?

Place hygrometers in several representative areas: a main living room, at least one bedroom, the kitchen, and the basement if you have one. Check readings daily during cold snaps and after activities that add moisture (like cooking or showering) to distinguish short-term spikes from persistent humidity.

Is it safe to run a humidifier overnight during winter?

Running a humidifier overnight is generally safe if you set it to modest targets (around 30–40% RH) and monitor levels to avoid sustained readings above about 50%. Keep the unit clean per instructions, avoid directing mist at walls or windows, and use a hygrometer to ensure humidity stays within your chosen range.

When is a dehumidifier appropriate during the winter months?

Use a dehumidifier in winter when specific areas—especially basements or ground-level rooms—consistently measure above about 50% RH, show condensation, or have musty odors. Targeted dehumidification combined with fixing leaks, improving drainage, or increasing airflow is more effective than lowering humidity throughout the whole house.

Mold vs Mildew: What the Difference Means at Home

Isometric illustration of dehumidifier in clean room for mold control

Mold and mildew are both types of fungi, but they differ in appearance, how deeply they grow, and how you should approach cleanup and prevention at home.

Understanding the difference between mold and mildew helps you decide when simple surface cleaning is enough and when you may need deeper moisture control, airflow changes, or professional help. Both are linked to dampness, but they signal slightly different stages and severity of a moisture problem. The goal is not panic, but calm, consistent moisture and air management so surfaces can stay dry and easy to clean.

Quick answer
  • Mildew is usually flat, powdery, and gray-white on surfaces; mold is often fuzzy or slimy with green, black, or other colors.
  • Small mildew spots on nonporous surfaces often wipe away; mold can grow deeper into walls, ceilings, and wood.
  • Keep indoor humidity generally around 30–50% to discourage mold and mildew growth.
  • Use bathroom fans 15–20 minutes after showers and fix leaks within 24–48 hours when possible.
  • Air purifiers can reduce airborne spores, but they do not fix moisture sources or remove growth on surfaces.
  • Large, persistent, or hidden mold growth usually calls for professional assessment, especially if building materials are involved.

Why Mold vs Mildew Matters for Everyday Home Care

Mold and mildew are both signs that dampness is present where it should not linger. From an indoor air quality perspective, they matter because they release spores and fragments that can become airborne, settle on surfaces, and recur if moisture is not controlled.

Mildew often shows up first as light, surface-level growth in places that get briefly damp, such as shower tiles or window frames. Mold, in contrast, is more likely to indicate longer or deeper moisture problems, such as chronic leaks, damp basements, or poorly ventilated spaces with high humidity.

Recognizing which you are dealing with helps you:

  • Estimate how deep the problem may go.
  • Decide whether cleaning alone is reasonable or if materials might need to be removed.
  • Choose tools: ventilation, dehumidifiers, air purifiers, or professional services.
  • Prioritize spaces that can most improve overall indoor air quality when addressed.

Key Differences: Appearance, Growth, and Where They Show Up

Although both are fungi, mildew and mold behave somewhat differently in homes.

Appearance and texture

  • Mildew tends to be:
    • Flat or slightly raised on the surface.
    • Powdery or dusty in texture.
    • White, gray, or light yellow at first; sometimes turns darker with time.
  • Mold is more often:
    • Fuzzy, patchy, or slimy.
    • Green, black, blue, or various mixed colors.
    • Uneven or spotty, with clusters or colonies.

Both can shift appearance as they grow or dry out, so use these as general patterns rather than strict rules.

How deeply they grow

  • Mildew generally stays on the surface of nonporous materials like tile, painted metal, or glass. It can usually be removed with cleaning products and scrubbing.
  • Mold often grows into porous or semi-porous materials such as drywall, wood, insulation, carpets, and ceiling tiles. In these cases, wiping the surface may not reach the growth inside the material.

Once growth penetrates fibers or pores, simply cleaning the exterior rarely fixes the underlying moisture or removes all fungal material.

Typical locations around the home

  • Common mildew spots:
    • Shower walls, grout, and curtains.
    • Window sills and frames with condensation.
    • Bathroom caulking and tile surfaces.
    • The surface of damp fabrics that dried slowly.
  • Common mold areas:
    • Basement walls, especially near foundation cracks or uninsulated surfaces.
    • Behind drywall after leaks or flooding.
    • Attics with roof leaks or poor ventilation.
    • Closets backed by exterior walls, especially in humid climates.
    • Under carpets or padding after spills that were not dried quickly.

In practice, both words are sometimes used loosely. For home decision-making, what matters most is the extent, moisture source, and depth of the growth.

Table 1. Mold vs. mildew comparison for home decisions

Example values for illustration.

Feature Mildew (surface fungi) Mold (deeper growth)
Typical look Flat, powdery, gray-white Fuzzy or slimy, green/black/other colors
Common locations Showers, tiles, window frames Drywall, wood, basements, attics
Depth of growth Mainly on surface Often into materials
Cleanup effort Usually scrub and dry area May need removal of materials
Moisture signal Short-term or light dampness Persistent or hidden moisture
Typical tools Cleaning products, exhaust fans Leak repair, dehumidifiers, possible professional work

Moisture, Humidity, and Airflow: The Conditions They Need

Mold and mildew need three main things: moisture, a food source, and time. You cannot practically remove all food sources (dust, drywall paper, wood, fabrics), but you can manage moisture and time.

Moisture sources to watch

  • Liquid water: leaks from plumbing, roofs, windows, appliances, or foundation seepage.
  • High humidity: indoor relative humidity above about 60% for extended periods encourages growth.
  • Condensation: warm moist air contacting cooler surfaces, such as windows or uninsulated walls.

Once surfaces stay damp for roughly 24–48 hours, conditions are more favorable for mold and mildew to start growing.

Humidity ranges and tools

  • A general comfort-oriented indoor range is around 30–50% relative humidity for many homes.
  • In humid climates, dehumidifiers help keep basements and closed rooms from staying damp.
  • In drier climates, watch localized humidity spikes (bathrooms, kitchens, laundry rooms) even when the overall home feels dry.
  • Simple hygrometers (humidity meters) can help you see which rooms regularly exceed about 55–60% humidity.

Ventilation and air exchange

Ventilation helps remove moist air and bring in drier air (or distribute air more evenly) so moisture does not collect on cold surfaces.

  • Use bathroom exhaust fans during showers and for about 15–20 minutes after.
  • Run kitchen exhaust when boiling water or cooking with lots of steam.
  • In mild weather, open windows on opposite sides of a room or home to create cross-ventilation when outdoor humidity allows.
  • Keep interior doors and supply/return air paths unblocked so HVAC systems can move air more effectively.

Common Mistakes When Dealing with Mold and Mildew

Many household mold and mildew problems persist not because they are impossible to solve, but because of a few predictable missteps.

Only treating the visible spots

Wiping away dark or powdery patches without addressing the underlying moisture is one of the most common issues. If a shower fan is weak, a basement stays humid, or a leak continues, growth often returns.

Relying solely on air purifiers

Air purifiers with particle filters can capture airborne spores and fragments, which may help keep surfaces cleaner and air fresher. However, they:

  • Do not dry wet walls or carpets.
  • Do not remove growth already in or on building materials.
  • Cannot replace fixing leaks or managing humidity.

Think of them as a supplement to moisture control, not a substitute.

Ignoring small leaks and condensation

Slow drips under sinks, slightly damp basement corners, or regular window condensation can seem minor but often add up to persistent moisture. Over time, these areas can progress from light mildew to more established mold in hidden spaces.

Covering affected areas without drying

Painting over stained or musty areas without drying and cleaning first can trap moisture and organic material behind the coating. Growth may continue out of sight and eventually reappear or affect nearby surfaces.

Practical Cleanup: When Simple Cleaning Is Enough vs. When to Escalate

How you respond depends on the size of the affected area, the type of surface, and whether moisture is ongoing.

Typical mildew cleanup on hard surfaces

For small areas of mildew on nonporous surfaces (tile, glass, metal, some sealed finishes):

  • Ensure the area is well ventilated while you clean.
  • Use an appropriate household cleaner or a product labeled for mildew on that surface.
  • Scrub with a non-scratch tool suited to the material (for example, a soft brush for grout).
  • Rinse or wipe residues away if needed.
  • Dry the area thoroughly with a towel or allow it to air dry quickly.

Then, focus on habits that keep the area dry, such as using exhaust fans or wiping down shower walls.

Mold on porous materials

When mold appears on porous or semi-porous materials such as drywall, ceiling tiles, insulation, or carpets, surface cleaning often cannot reach all growth. In many cases, those materials may need to be removed and discarded, and the source of moisture must be corrected.

Escalate your response if:

  • The affected area is large (for example, spans multiple wall sections or a large part of a basement wall).
  • The material is soft, crumbly, or clearly damaged by moisture.
  • You see evidence of repeated wetting, such as long-term staining or buckling.
  • You suspect mold behind walls, under flooring, or in insulation.

In such situations, many homeowners choose to consult with a qualified professional who can evaluate the extent of moisture damage and recommend safe removal approaches.

After cleanup: airing out and filtration

Once surfaces are cleaned and dried and moisture sources are addressed:

  • Ventilate the area to help remove any remaining moisture and odors.
  • Consider using an air purifier with a fine particle filter in frequently occupied rooms to capture airborne dust and spores.
  • Continue monitoring humidity and checking back on previously affected spots for a few weeks.

Real-World Scenarios: Is It Mold or Mildew, and What Do You Do?

These simplified examples illustrate how the mold vs mildew distinction guides cleanup and prevention steps.

Scenario 1: Discoloration in a shower

You notice grayish film on tiles and a few darker spots on grout.

  • Likely: Mildew and soap film on nonporous surfaces.
  • Action: Clean the area, then improve shower ventilation, keep the fan running after showers, and consider wiping walls after use.
  • Goal: Surfaces dry quickly between uses, so mildew does not have time to reestablish.

Scenario 2: Musty smell and spots on a basement wall

You see dark spots on lower drywall in a basement, and the air feels damp.

  • Likely: Mold growth associated with persistent moisture in or behind walls.
  • Action: Look for water entry (foundation cracks, drainage issues), use a hygrometer to check humidity, consider dehumidification, and assess whether materials are damaged.
  • Next step: If the affected area is significant or unclear in depth, consider professional evaluation before simply repainting.

Scenario 3: Spots on a window frame in winter

Condensation forms on windows on cold mornings, and you see small specks on the sill and caulking.

  • Likely: Mildew or early mold on surfaces repeatedly exposed to condensation.
  • Action: Clean the spots, reduce indoor humidity if high, and improve air circulation near windows (open blinds periodically, avoid blocking vents).
  • Longer term: Consider weatherstripping or insulating improvements to reduce cold surfaces that encourage condensation.

Safety, Indoor Air Quality, and When to Seek Help

From an indoor air quality standpoint, mold and mildew are part of a larger picture that includes ventilation, filtration, and moisture control. While visible growth gets attention, spores and fragments can also be present even when you do not see obvious patches.

Ventilation, filtration, and ozone-free operation

  • Ventilation helps dilute and remove moist, stale air and any airborne particles, including spores.
  • Filtration with a fine-particle filter (such as HEPA-type filters) can reduce airborne spores that move from room to room.
  • When choosing air-cleaning devices, many homeowners prefer options that do not intentionally produce ozone.
  • Some devices use ionization or UV-C; consider manufacturer guidance, independent information, and any safety certifications when evaluating these technologies.

Situations that may warrant professional input

Consider professional assessment if:

  • You suspect mold in structural cavities (behind walls, in attics, under floors).
  • There has been significant water damage (for example, flooding or long-term leaks).
  • The area of visible mold is large or growing quickly.
  • You are planning major renovations in an area with known or suspected moisture problems.

Professionals can help identify moisture entry points, measure humidity, and recommend safe removal and rebuilding approaches tailored to your home.

Ongoing Prevention: Habits, Maintenance, and Cost Planning

Long-term mold and mildew control is less about one-time cleaning and more about consistent moisture and air management.

Everyday habits that make a difference

  • Run bathroom and kitchen exhaust fans during and after moisture-producing activities.
  • Hang wet towels and clothes so they dry quickly, rather than leaving them in piles.
  • Promptly dry spills on carpets and floors, ideally within a few hours.
  • Keep furniture a small distance away from exterior walls in damp climates to allow air circulation.

Periodic checks and cleaning

  • Inspect areas near plumbing fixtures and under sinks for slow leaks every few months.
  • Look at basement corners, around sump pumps, and near foundation walls after heavy rain.
  • Clean and maintain HVAC filters and components according to instructions, so air movement is not restricted.
  • Wash or replace shower curtains and liners when they show recurring spots.

Budgeting for moisture control

Preventive investments can help avoid larger repair costs later. These may include:

  • Maintaining roof, gutters, and downspouts to move water away from the foundation.
  • Using dehumidifiers in known damp areas and planning for filter or bucket maintenance.
  • Occasional professional inspections in homes with a history of water issues.
Table 2. Humidity and mold prevention quick plan

Example values for illustration.

Goal Simple actions Tools Note
Keep living areas near 30–50% RH Use HVAC with proper settings, avoid over-humidifying Hygrometer, thermostat Check several rooms, not just one spot
Dry bathrooms quickly Run fan 15–20 minutes after showers, open door Exhaust fan, towel for wiping Helps limit mildew on grout and caulk
Limit basement dampness Seal obvious leaks, use dehumidifier if needed Dehumidifier, hygrometer Aim to stay below about 55–60% RH
Reduce window condensation Lower humidity, improve air circulation Fans, blinds management Wipe sills and frames when wet
Dry wet materials promptly Remove standing water, increase airflow Fans, towels, wet-dry vacuum Aim to dry within 24–48 hours
Limit airborne spores in main rooms Use air purifier as a supplement Air purifier with fine particle filter Does not replace fixing moisture sources

Related guides: Air Purifier for Mold Spores: What Works and What Doesn’tHow to Stop Condensation on Windows (And Why It Matters for Mold)Basement Dampness 101: RH Targets, Dehumidifiers, and Ventilation

Summary: Using the Mold vs Mildew Difference in Practice

Mildew usually signals shallow, surface-level dampness that responds well to cleaning and improved airflow. Mold more often indicates longer-lasting or deeper moisture problems that can involve building materials and may warrant more extensive work.

In both cases, the core steps are similar: dry wet materials quickly, keep humidity in a moderate range, maintain good ventilation, and use filtration as a supportive measure. By treating visible spots as moisture clues rather than just stains to cover, you can make steady, practical progress toward a drier, cleaner indoor environment.

Frequently asked questions

How can I tell whether a patch is mildew or mold?

Mildew typically appears as flat, powdery white to gray spots on nonporous surfaces and usually wipes away, while mold often looks fuzzy or slimy, can be green/black/multicolored, and may penetrate porous materials. If the spot stains, recurs after cleaning, or is embedded in drywall or wood, suspect mold rather than surface mildew. When the extent or health risk is unclear, consider a professional assessment.

How long after a leak should I be concerned about mold or mildew?

Surfaces that remain damp for roughly 24–48 hours are at increased risk for fungal growth, so prompt drying is important. Sustained indoor relative humidity above about 60% also raises the risk even without visible leaks. Use a hygrometer and drying methods (fans, dehumidifiers) to prevent establishment.

What cleaning method is safe and effective for mildew on bathroom tiles?

Ventilate the area and use a cleaner labeled for mildew on nonporous surfaces; diluted bleach solutions or household mildew cleaners are often effective when followed by thorough rinsing. Scrub grout and tile with a non-scratch brush, then dry the surface completely to prevent regrowth. Avoid using strong cleaners on unsealed or porous materials and test a small area first.

Can an air purifier prevent mold growth on surfaces?

An air purifier with a fine-particle filter can reduce airborne spores, which may help lower settling and secondary spread, but it does not remove moisture or kill growth on wet surfaces. Preventing surface mold and mildew requires fixing leaks, lowering humidity, and increasing ventilation. Treat air cleaning as supplemental to moisture control, not a replacement.

When should I call a professional for mold removal?

Seek professional help if visible mold covers a large area (commonly more than about 10 square feet), if mold is suspected in hidden cavities (behind walls, under floors, or in HVAC systems), after significant water damage, or when occupants have notable health reactions. Professionals can locate moisture sources, assess structural damage, and recommend safe removal and repairs. For small surface mildew on nonporous areas, DIY cleaning and moisture control are usually sufficient.

Musty Smell in Closets: Moisture Sources and Simple Fixes

Open closet with dehumidifier reducing moisture and musty odors

A musty smell in closets usually comes from excess moisture and poor air circulation allowing mold, mildew, or odors to build up on surfaces and fabrics.

Closet air often becomes stale because doors stay closed, airflow is limited, and walls are cooler than the rest of the room. When humidity runs high or items are stored while slightly damp, small enclosed spaces like closets become prime spots for musty odors. Understanding where that moisture comes from makes it easier to dry things out and keep the smell from coming back.

Quick answer
  • Keep indoor humidity around 30–50% as a general comfort range to discourage musty odors.
  • Check for hidden moisture sources: damp clothes, exterior walls, bathrooms nearby, or leaks.
  • Add airflow: crack the closet door, create gaps between items, and improve room ventilation.
  • Clean visible mold or mildew with a mild cleaning solution and dry surfaces thoroughly.
  • Use moisture control tools when needed, such as a small dehumidifier or passive desiccant tubs.
  • Store only dry items and avoid blocking supply/return vents with boxes or hanging clothes.

What a Musty Closet Smell Usually Means

A musty smell in a closet is typically a sign that moisture and organic material are sitting together long enough for microbes and odors to develop. It does not always mean there is a serious mold problem, but it usually means conditions are damp or stagnant enough that mold or mildew could grow.

Common odor sources in closets include:

  • Damp fabrics such as towels, workout clothes, or coats stored before they are fully dry.
  • Porous materials like cardboard boxes, shoes, leather items, or wood shelving that slowly absorb moisture.
  • Dust and skin flakes that settle into carpet, clothing, and shelves and can support microbial growth in damp air.
  • Hidden mold or mildew on walls, baseboards, behind stored items, or on the back of doors.

A light musty smell that comes and goes with weather changes often points to intermittent humidity issues, while a constant or worsening odor can indicate ongoing dampness, such as a leak or chronically high humidity in that part of the home.

Key Moisture Sources in and Around Closets

Most musty closets trace back to one or more moisture sources, combined with low airflow. Identifying the main source helps you choose the right remedy.

Indoor humidity and seasonal changes

In many homes, indoor humidity rises during rainy seasons, in humid climates, or when the home is tightly closed up. Moist air can condense on cooler surfaces such as closet walls, especially exterior or corner walls. Over time, this creates a slightly damp environment in an enclosed space.

As general comfort guidance, many households aim to keep indoor relative humidity roughly between 30% and 50%. Above this range for extended periods, materials may stay slightly damp, and musty odors are more likely to appear.

Adjacent bathrooms, laundry, and kitchens

Closets near moisture-producing rooms can be affected by steam and water use. For example:

  • A bedroom closet sharing a wall with a bathroom with frequent hot showers.
  • A hall closet next to a laundry room with a dryer vent that is partially blocked or leaking indoors.
  • A pantry or coat closet near a kitchen where cooking adds moisture to the air.

If these areas are not ventilated well, moisture can migrate into nearby closets and linger there because closet doors stay closed more of the time.

Exterior walls and cooler corners

Closets built along exterior walls or in corners of the house tend to be slightly cooler than the main living space. Warm, humid indoor air can contact these cooler surfaces and release moisture (condensation), especially in winter or during big temperature swings. Over time, this can make drywall, paint, or wallpaper slightly damp and prone to mustiness.

Leaks and building envelope issues

Less commonly, a closet odor may signal a leak or water intrusion. Examples include:

  • Roof leaks or ice dams wetting ceiling or upper walls behind shelves.
  • Plumbing lines running through closet walls or ceilings with slow drips.
  • Poor exterior sealing letting rain water seep behind siding and into wall cavities.
  • Basement or first-floor closets near foundation walls with occasional seepage or condensation.

These issues often show up as staining, bubbling paint, soft drywall, or visible mold patches, not just odor.

Table 1. Common closet moisture clues and simple next steps

Example values for illustration.

Clue you notice Likely moisture source Simple first action
Musty odor only after rainy days Seasonal high humidity, cooler walls Measure room humidity, increase ventilation on damp days
Smell strongest near floor or back wall Exterior wall condensation or slab moisture Pull items away from wall, inspect baseboards and corners
Odor near ceiling or upper shelves Possible roof or plumbing leak above Check for stains, bubbling paint, or damp drywall
Smell increases after hot showers Bathroom moisture migrating to closet Run bath fan longer, keep closet door cracked
Mustiness mostly from coats or shoes Items stored while still damp Dry items fully before storing, clean if needed
Visible spots on walls or baseboards Localized mold or mildew on surfaces Clean spots safely and dry area thoroughly
Carpet feels cool or slightly damp Floor moisture or high room humidity Improve airflow, consider dehumidification

Common Mistakes That Keep Closets Musty

Even when people try to fix a musty smell, certain habits can unintentionally keep the problem going.

Overstuffing and blocking airflow

Closets packed tightly with clothes and boxes trap still air. When nothing can breathe, any moisture in fabrics or on walls takes longer to evaporate. Overstuffing can also block supply vents, return grills, or undercut door gaps that help air cycle through the space.

Masking odors without removing moisture

Using strong fragrances, sprays, or scented products can temporarily hide a musty smell, but they do not dry out damp surfaces. In some cases, added fragrances cling to fabrics and combine with existing odors, making the space smell stale in a different way.

Ignoring small signs of water

Minor signs like slightly warped baseboards, minor discoloration, or a cooler, damp-feeling corner can be easy to overlook. Over time, these small hints can turn into more noticeable smell or surface damage if moisture is not addressed.

Storing items while damp

Putting away bath towels, boots, outdoor gear, or laundry that is not fully dry is one of the quickest ways to introduce musty odors. The enclosed environment slows drying, so microbes and odors have more time to develop.

Practical Checklist to Remove and Prevent Musty Closet Smells

Addressing a musty closet usually means removing existing odor sources, improving drying, and then keeping moisture under control.

Step 1: Empty and inspect the closet

  • Remove all clothing, shoes, and storage boxes.
  • Check walls, ceiling, baseboards, and shelves for discoloration, peeling paint, or visible mold or mildew.
  • Look behind and under large items and along corners where air circulation is weakest.
  • Feel for cool or damp spots on carpet, flooring, and lower walls.

Step 2: Clean surfaces and address visible mold

For light surface grime or mildew, many households use a mild detergent or general-purpose cleaner in accordance with product directions. Lightly scrub affected areas and then dry them thoroughly with clean towels and airflow.

For larger or persistent mold growth, or if structural materials are clearly damaged, many homeowners choose to consult local professionals or building specialists, since more extensive work may be needed. Avoid dry brushing, scraping, or sanding moldy areas without appropriate precautions, because that can spread spores and dust.

Step 3: Wash or air out contents

  • Launder washable fabrics like clothing, linens, and some curtains according to their care labels.
  • Air out items that cannot be washed easily, such as some shoes, suitcases, or certain fabrics, in a drier, well-ventilated room.
  • Discard items that are heavily damaged or strongly musty if they do not respond to cleaning.

Step 4: Improve airflow and drying

Once surfaces are clean, help them dry completely:

  • Leave the closet door open for several hours or days, if practical.
  • Use a fan in the adjacent room aimed toward the open closet to keep air moving.
  • If humidity is high, consider using a dehumidifier in the room to help dry the air.

Step 5: Adjust storage habits

  • Allow clothes and towels to dry fully before hanging them in the closet.
  • Avoid storing wet boots or umbrellas directly inside; let them dry in a better-ventilated area first.
  • Use breathable containers (for example, fabric bins) instead of completely airtight plastic bags for long-term textile storage.
  • Leave a small gap between items and walls to allow air to circulate behind them.

Step 6: Consider moisture control tools

Depending on how damp your home or region is, it may help to use:

  • Room dehumidifiers to keep overall humidity closer to a 30–50% comfort range.
  • Passive desiccant containers (moisture-absorbing tubs or pouches) placed on shelves to help in small, enclosed spaces.
  • Ventilation improvements such as using bathroom and kitchen exhaust fans more consistently or opening windows when weather allows.

Real-World Closet Scenarios and What Usually Helps

Different types of closets can develop musty odors in slightly different ways. Here are some common patterns and practical responses.

Bedroom closet with an exterior wall

In a typical bedroom closet on an exterior wall, the wall may be cooler, especially during colder months. If indoor humidity is high, this can promote condensation and mustiness in the back corners.

Helpful steps often include:

  • Pulling storage bins a few inches away from the exterior wall.
  • Limiting how tightly clothes are packed along that wall.
  • Monitoring indoor humidity during seasonal changes and using dehumidification if it stays high.

Closet next to a bathroom

A closet whose wall backs onto a frequently used bathroom may absorb steam and moisture through small gaps and temperature differences.

To reduce this effect:

  • Run the bathroom exhaust fan during showers and for about 15–20 minutes afterward as a general habit.
  • Keep bathroom doors slightly open after showers once privacy is no longer needed, if household routines allow.
  • Leave the adjacent closet door cracked open at times to equalize air and avoid long periods of stagnant, moist air.

Basement or first-floor hall closet

Basement-level closets or those near foundation walls can be affected by ground moisture and cooler surfaces. Even if you do not see water, the area can feel more humid.

Possible actions include:

  • Using a dehumidifier in the basement or lower level, especially in damp seasons.
  • Keeping closet doors open more often to share air with the larger room.
  • Storing moisture-sensitive items (like certain paper goods or fabrics) in upper-level closets instead.

Safety and Building Considerations

While many musty odors can be managed with simple housekeeping and moisture control, certain signs call for extra attention.

When a musty smell may indicate a larger issue

Consider seeking input from building, HVAC, or other local professionals if you notice any of the following:

  • Persistent strong musty odor that returns quickly after cleaning and drying.
  • Visible mold patches covering a large area or spreading over time.
  • Significant staining, sagging, or soft spots in walls, ceilings, or floors.
  • Evidence of active leaks from plumbing, roofs, or windows.

Addressing the underlying building or plumbing issue is important for long-term odor control and to protect materials in the home.

Devices and add-ons used with caution

Some air-cleaning or odor-control devices use technologies such as ionization or UV-C light. These can have specific operating instructions and safety considerations. Many homeowners prefer to choose systems described as not producing ozone, and to follow manufacturer guidance carefully when using any such devices, especially in small enclosed spaces like closets.

Whenever placing a powered device in or near a closet, maintain clearances recommended in the manual, keep cords away from hanging fabrics, and avoid blocking vents or intakes.

Ongoing Maintenance to Keep Closets Fresh

Once a musty smell is resolved, simple periodic habits help keep it from returning.

Regular inspection and light cleaning

  • Dust shelves, baseboards, and door frames on a routine schedule (for example, every 1–3 months).
  • Vacuum or clean closet floors, including edges and corners where dust tends to accumulate.
  • Check for new stains, peeling paint, or damp patches after heavy rain or seasonal changes.

Monitor indoor humidity and airflow

A simple humidity gauge can help you understand how often your home is above or below your target range. If humidity regularly runs high, more robust moisture control for the whole room or level may be more effective than treating closets one by one.

Keep closet doors at least slightly open when practical, especially in rooms without strong air circulation. Ensure supply and return vents in the room are not covered by furniture or storage.

Rotate and declutter stored items

  • Periodically sort through stored shoes, bags, and boxes to avoid long-forgotten damp items sitting in the back.
  • Consider donating or discarding rarely used items instead of packing the closet completely full.
  • Use shelving or raised platforms to keep items off potentially cooler or slightly damp floors, especially in basements.
Table 2. Humidity and mold risk quick-plan for closets

Example values for illustration.

Goal Simple actions Tools Note
Keep humidity in a comfort range Ventilate on humid days, run exhaust fans, limit indoor moisture Humidity gauge, bathroom/kitchen fans Aim roughly for 30–50% RH indoors when possible
Dry a musty closet after cleaning Open door, use a fan to move air from the room into the closet Portable fan, open interior doors Focus on steady airflow for hours to days
Reduce moisture in a damp basement closet Dehumidify the larger room, keep closet door ajar Room dehumidifier, hygrometer Treat the whole area, not just the closet
Protect stored fabrics and paper Use breathable containers, avoid floor contact, keep space less crowded Shelves, fabric bins, small desiccant tubs Allows air to circulate and limits damp spots
Handle seasonal humidity spikes Increase ventilation during mild weather, close windows and dehumidify in very humid weather Windows, fans, dehumidifier Adjust approach based on outdoor conditions
Check whether odor is returning Smell and inspect after rain, laundry days, and high-humidity stretches Flashlight, basic notes or reminders Catches issues early before they build up

Related guides: Air Purifier vs Dehumidifier: Which One Solves Musty Air?Air Purifier for Mold Spores: What Works and What Doesn’tDesiccant vs Compressor Dehumidifiers: Which Is Better for Cold Rooms?

Key Takeaways on Musty Closet Smells

A musty smell in closets usually points to extra moisture and limited airflow, not just age or dust. Finding where moisture enters the space—through humid indoor air, nearby bathrooms, cooler exterior walls, or occasional leaks—helps you choose the right combination of cleaning, drying, and ongoing moisture control.

Simple steps such as fully drying items before storage, decluttering to improve air circulation, keeping indoor humidity in a comfortable range, and periodically inspecting for early signs of dampness go a long way toward keeping closets fresher over time.

Frequently asked questions

What are the most likely moisture sources that cause a musty smell in closets?

The most common sources are high indoor humidity, damp fabrics stored before they dry, moisture migrating from adjacent bathrooms or laundry areas, condensation on cooler exterior walls, and occasional leaks in roofs or plumbing. Often a combination of these plus low airflow produces the persistent musty odor.

How can I tell if humidity, rather than a leak, is causing the closet smell?

Use a hygrometer to check relative humidity; sustained readings above 50% point to humidity issues. Also look for patterns — if the smell appears after rainy days or during humid seasons it’s likely humidity, while visible staining, bubbling paint, or localized wet spots suggest a leak.

Will air fresheners or scented sprays solve a musty closet smell?

No — masking agents only cover the odor temporarily and do not remove the underlying moisture or microbial growth. Effective solutions are cleaning affected surfaces, thoroughly drying the closet and contents, and addressing moisture sources or improving ventilation.

When should I call a professional about a musty closet smell?

Contact a building, HVAC, or water-remediation professional if the odor persists after cleaning and drying, if you see extensive or spreading mold, or if there are signs of active leaks, structural damage, or large stained areas. Professionals can identify hidden moisture paths and recommend repairs to prevent recurrence.

What moisture-control tools work best for small closets?

Small electric room dehumidifiers or compact desiccant tubs are practical for closets; portable fans to increase airflow and a hygrometer to monitor humidity are also helpful. For persistent whole-room humidity, treating the larger space (e.g., a bedroom or basement) with a properly sized dehumidifier is usually more effective than treating individual closets.

Bathroom Mold Prevention: Exhaust Fan Timing Explained

isometric bathroom with device reducing humidity and mold risk

Bathroom mold prevention typically means running the exhaust fan during showers and for about 20–30 minutes afterward while keeping indoor humidity around 40–50% when possible.

Mold grows most easily when warm, moist air lingers on surfaces, which makes bathrooms a common problem area. By combining proper exhaust fan use, basic humidity control, and simple daily habits, you can greatly reduce the chances of mold taking hold on walls, ceilings, grout, and caulking without complicated equipment.

Quick answer
  • Run the bathroom exhaust fan for the entire shower and about 20–30 minutes after.
  • Aim for indoor relative humidity around 40–50% most of the time; try to keep bathrooms under about 60%.
  • Keep the door slightly open after use (if privacy allows) to help moist air escape.
  • Use warm (not extremely hot) showers and limit length to reduce steam volume.
  • If moisture lingers on mirrors or walls for more than an hour, consider boosting ventilation or using a dehumidifier.

Why Bathroom Mold Forms and Why Timing Matters

Bathroom mold prevention starts with understanding what mold needs to grow. Mold spores are already present in most indoor spaces; what they need is persistent moisture, suitable temperature, and nutrient surfaces such as paint, drywall paper, grout, or caulk. Bathrooms often provide all three.

When you shower, steam raises the relative humidity in a small, enclosed room very quickly. If that moist air is not removed or diluted, it condenses on cooler surfaces like ceilings, windows, and exterior walls. Frequent wetting and slow drying create ideal conditions for mold colonies to establish and spread.

Exhaust fan timing is important because the highest humidity levels usually occur during and right after a shower. Running the fan only while you are in the room often stops the ventilation just as moist air is peaking. Keeping the fan on long enough after bathing allows humid air to be exhausted and surfaces to begin drying before mold can benefit from prolonged dampness.

Humidity control works alongside ventilation. Even with a fan, overall indoor humidity that stays high for long periods (around or above 60% much of the time) makes it harder for bathrooms to dry between uses. Combining fan use, reasonable shower habits, and sometimes dehumidification helps keep moisture in a range that is less favorable for mold growth.

Key Concepts: Exhaust Fan Performance and Humidity Levels

Two main ideas guide bathroom mold prevention: how effectively your exhaust fan exchanges air and what humidity levels you aim for in everyday use. Neither needs to be perfect; practical improvements often make a noticeable difference in moisture behavior.

Air changes and exhaust fan run time

Exhaust fans remove moist air and draw in drier air from the rest of the home. In simple terms, a fan that moves enough air for long enough helps moisture dissipate faster. Bathroom exhaust capacity is often discussed in cubic feet per minute (CFM), but without focusing on exact calculations, some general points are useful:

  • Smaller bathrooms usually need less airflow, but they also get steamy faster because the volume of air is small.
  • Larger bathrooms with tubs, separate showers, or high ceilings may require more airflow and/or longer fan run times.
  • Run time matters even with a reasonably sized fan; turning it off as soon as the shower ends often leaves a lot of moisture behind.

As general guidance, many households find that running the exhaust fan for the full duration of the shower plus about 20–30 minutes afterward helps visible condensation clear within a reasonable time. In a small or poorly ventilated room, longer run times may be helpful.

Indoor humidity targets and bathroom peaks

Relative humidity (RH) is the amount of water vapor in the air compared with how much it can hold at that temperature. Comfortable, general indoor ranges often fall around 40–50% RH, though seasonal and regional differences mean exact values vary from home to home.

For mold prevention in bathrooms:

  • Try to keep everyday indoor humidity around 40–50% when practical.
  • Short spikes above that during a shower are normal, but the room should trend back down soon after.
  • Prolonged periods around or above 60% RH in the bathroom or throughout the house often indicate a higher mold risk.

A simple humidity monitor can help you understand how quickly your bathroom humidity rises and how long it takes to fall back after running the fan. You do not need exact precision; look for patterns such as humidity staying elevated for hours or failing to drop when the fan is on.

Table 1. Bathroom moisture control checklist – Example values for illustration.

This checklist pairs common bathroom tasks with why they matter for mold prevention.

Task Why it matters Practical notes
Run exhaust fan during shower Removes steam as it forms Turn on a few minutes before hot water starts
Run fan 20–30 minutes after Continues drying air and surfaces Use a timer switch if you often forget
Open door after use Lets moist air mix with drier house air Even a small opening helps air exchange
Use moderate water temperature Reduces total steam volume Very hot showers create more condensation
Wipe down wet surfaces Removes standing water mold can use Focus on shower walls, glass, and window sills
Hang towels to dry fully Prevents constant dampness near walls Avoid piling towels in a corner or on the floor
Check for visible condensation Quick visual cue for excessive humidity Fogged mirrors and ceilings that stay wet are signals

Common Bathroom Mold Mistakes and Warning Signs

Even with a working exhaust fan, everyday habits can keep bathrooms damp longer than necessary. Recognizing common mistakes and early cues of moisture problems lets you adjust before significant mold growth appears.

Ventilation mistakes

  • Turning the fan off too soon: Stopping the fan as soon as you leave the bathroom often leaves humidity peaking after you are gone. A post-shower run time of 20–30 minutes is generally more effective.
  • Using a fan that vents into an attic or crawlspace: Some older installations may not exhaust outdoors, which can move moisture to another enclosed area instead of truly removing it.
  • Blocked or dirty fan grilles: Dust buildup reduces airflow, meaning less moisture removal even if the fan is on.
  • Closed doors with no make-up air: If the bathroom door is tightly sealed at the bottom, the fan may struggle to pull air through. A small gap under the door or slightly open door helps.

Humidity and surface cues

  • Condensation lasting more than an hour: Mirrors, tiles, or ceilings that remain wet long after a shower suggest that either humidity is too high overall or ventilation is insufficient.
  • Peeling paint or bubbling surfaces: These can indicate repeated moisture absorption into walls or ceilings.
  • Dark spots along grout or caulk: Early mold or mildew often appears along grout lines, in corners, or around fixtures where water tends to sit.
  • Musty odor: A persistent musty smell in or near the bathroom is a common sign of hidden or early mold growth.

Practical Fan Timing and Humidity Control Routines

Turning general guidelines into simple routines makes bathroom mold prevention easier to maintain. The goal is predictable moisture removal and steady drying rather than perfectly precise control.

Daily exhaust fan routine

  • Switch the exhaust fan on a few minutes before starting the shower to establish airflow.
  • Keep the fan running for the entire shower or bath.
  • Leave the fan on for about 20–30 minutes after finishing, especially if there is visible condensation.
  • If the bathroom is very small or does not dry quickly, extend run time or run the fan even when not showering after heavy use (such as multiple consecutive showers).

A timer switch can help maintain consistent fan use. If that is not available, using a phone alarm or household routine (for example, leaving the fan on until you finish another regular task) can provide a similar reminder.

Humidity-focused habits

  • Shorten or moderate showers where possible to reduce steam volume.
  • Use warm, not extremely hot, water to limit peak humidity and condensation.
  • Open the bathroom door after showering when privacy allows, so humid air can mix with drier house air.
  • Wipe down wet surfaces such as shower walls, glass doors, and window sills to remove standing water.
  • Hang towels and bathmats so air can circulate around them; consider drying them outside the bathroom in very humid homes.

If you use a whole-house humidifier in winter, check that it is not set so high that bathrooms and windows stay damp. Small adjustments to whole-home humidity can support bathroom mold prevention.

Real-World Scenarios: Matching Actions to Bathroom Types

Different bathrooms and households face different moisture challenges. The principles are similar, but practical steps vary based on room size, usage patterns, and climate.

Small interior bathroom with no window

A small bathroom located in the middle of a house or apartment usually has no direct outdoor window and relies entirely on a mechanical exhaust fan.

  • Fan run time is especially important; aim for full-shower-plus 20–30 minutes, and longer if condensation persists.
  • Try to keep the door slightly open after use so dry air can replace moist air more easily.
  • If humidity remains high, consider an additional moisture removal method nearby, such as a portable dehumidifier in an adjacent hallway (used according to manufacturer instructions).

Large bathroom with tub, shower, and high ceilings

Larger bathrooms can hold more moisture and often have areas the fan does not reach as well.

  • Multiple moisture sources (such as separate tub and shower) may require longer fan operation after use.
  • Ensure the fan is appropriately sized for the room and that air can flow in from under the door or adjacent rooms.
  • Ceiling fans (if rated for bathroom use) or strategic opening of doors can help reduce stagnant air pockets.
  • In very humid climates, using a dehumidifier in or near the bathroom between uses can assist with controlling overall humidity levels.

Shared hallway bath in a humid climate

In regions with long, humid seasons, outdoor air may already be quite moist. Even with a fan, it may be harder for the bathroom to dry quickly.

  • Focus on consistent fan use and daily habits like wiping surfaces dry and hanging towels elsewhere when possible.
  • Monitor indoor humidity in the hallway or nearby room; if readings stay high, whole-home or room dehumidification may be helpful.
  • Check that warm-weather cooling systems are functioning as expected since air conditioning often assists with dehumidification.

Safety, Standards, and Special Features

Bathroom ventilation involves both moisture control and safe operation of electrical and mechanical equipment. Simple checks can help ensure that moisture is actually being removed from the home and that devices are used appropriately.

Proper venting and electrical considerations

  • Outdoor venting: Bathroom fans should typically exhaust outdoors, not into attics, crawlspaces, or wall cavities, to avoid shifting moisture problems to another area.
  • Weather protection: Exterior vent hoods should be intact and allow air out while limiting backdrafts and pests.
  • Electrical safety: Bathroom fans and any dehumidifiers or other devices should be installed and used according to applicable electrical safety standards and instructions, especially in damp locations.

Humidity-sensing fans, heaters, and add-ons

Some bathroom fans include humidity sensors or timers intended to keep the fan running until humidity falls to a preset level. Others include auxiliary heaters to improve comfort. These features can be helpful when used correctly, but they do not replace the need to pay attention to visible condensation and drying times.

  • Humidity-sensing fans: May extend run time automatically, but sensor placement and sensitivity affect performance.
  • Heaters: Can warm surfaces, which sometimes reduces condensation, but do not remove moisture by themselves; they work best combined with adequate ventilation.
  • Air cleaners or UV-type products: Devices marketed to clean air or surfaces should be evaluated cautiously. For bathroom mold prevention, physical moisture control (ventilation, drying, humidity limits) is still the primary strategy.

It is generally advisable to avoid devices that intentionally produce ozone in occupied indoor spaces, as ozone is a respiratory irritant and is not necessary for everyday mold prevention.

Maintenance: Keeping Fans and Surfaces Mold-Resistant

Even good routines can be undermined if the exhaust fan is clogged or bathroom surfaces stay rough and absorbent. Regular, simple maintenance supports long-term moisture control.

Exhaust fan upkeep

  • Clean the grille: Dust and lint can collect on the fan cover. Gently vacuum or wipe it every few months.
  • Check airflow: With the fan on, hold a small tissue near the grille; it should be pulled toward the intake, indicating airflow.
  • Listen for changes: Loud, rattling, or weak-sounding fans may need inspection or replacement to restore effective ventilation.

Managing surfaces, grout, and caulk

  • Address leaks promptly: Dripping faucets, loose shower connections, or sweating pipes add to moisture load and can create localized damp spots.
  • Repair failing caulk or grout: Cracks or gaps can hold moisture longer and allow water behind surfaces; replacing damaged sections can reduce hidden dampness.
  • Clean routinely: Regular cleaning removes soap film and organic residues that can provide nutrients for mold.

Where visible mold appears, follow widely available cleaning and safety guidance suitable for the size and location of the growth. Large or recurring problems may call for professional assessment, particularly if building materials are affected.

Bathroom Mold and Humidity Quick-Plan Table

This table summarizes simple goals and typical tools used to keep bathroom humidity in a mold-resistant range.

Table 2. Bathroom humidity and mold quick plan – Example values for illustration.

Use these example goals and actions as starting points and adjust based on your bathroom and climate.

Goal Simple actions Helpful tools Notes
Limit everyday humidity to ~40–50% RH Adjust whole-home humidifiers or dehumidifiers as needed Basic humidity monitor Expect short-term spikes during showers
Clear condensation within about 30–60 minutes Run fan before, during, and 20–30 minutes after shower Bathroom exhaust fan Extend fan run time if surfaces stay wet longer
Prevent persistent damp corners Wipe down tiles, corners, and window sills after use Small squeegee or towel Focus on spots where water tends to collect
Reduce moisture from textiles Hang towels fully open, dry bathmats between uses Extra towel bars or hooks Consider drying in a better-ventilated room
Control humidity in very damp seasons Use dehumidification in nearby spaces Portable or whole-home dehumidifier Follow device instructions and drain guidelines
Catch issues early Inspect grout, caulk, and corners monthly Flashlight and cleaning supplies Look for dark spots, peeling, or musty odors

Related guides: Air Purifier for Mold Spores: What Works and What Doesn’tAir Purifier vs Dehumidifier: Which One Solves Musty Air?How to Stop Condensation on Windows (And Why It Matters for Mold)

Summary: Practical Steps to Reduce Bathroom Mold Risk

Effective bathroom mold prevention rests on simple moisture management: remove humid air, limit how wet surfaces stay, and keep overall humidity within a moderate range. Running the exhaust fan before, during, and for about 20–30 minutes after showers gives steam time to leave the room. Combining that with moderate shower temperatures, open doors when possible, thorough drying of towels and surfaces, and periodic maintenance of the fan and bathroom finishes helps keep moisture from lingering.

While every home and climate is different, watching how long condensation lasts and how often surfaces feel damp provides useful feedback. Small changes in fan timing and humidity habits can significantly reduce the conditions mold needs to grow, supporting cleaner, more durable bathroom surfaces over time.

Frequently asked questions

How long should I run my bathroom exhaust fan after a shower to reduce mold risk?

Run the exhaust fan for the entire shower and generally for about 20–30 minutes afterward to allow humid air to clear and surfaces to begin drying. In very small, poorly ventilated, or high-ceiling bathrooms, you may need longer run times until visible condensation is gone.

Can a humidity-sensing fan reliably replace manual timing for mold prevention?

Humidity-sensing fans can help by extending runtime automatically until RH falls to a preset level, but their effectiveness depends on sensor placement and sensitivity. It’s still wise to watch for visible condensation and perform basic maintenance like cleaning the grille to ensure the fan actually moves air.

Is it acceptable if my bathroom fan vents into an attic or crawlspace?

No, fans should ideally vent outdoors; routing moist air into an attic or crawlspace can create hidden moisture problems and increase mold risk in those spaces. If your fan currently vents indoors, have it redirected to the exterior or consult a professional for proper venting options.

What indoor humidity level should I aim for to help prevent bathroom mold?

Aim for everyday indoor relative humidity around 40–50% when practical and try to avoid prolonged periods at or above 60% RH. Short spikes during showers are normal if the room dries back down within an hour or so.

Do hotter or longer showers increase the chance of mold, and should I change my habits?

Very hot or long showers produce more steam, which raises peak humidity and lengthens drying time, increasing mold risk if ventilation is insufficient. Using warm (not extremely hot) water, shortening showers when possible, and running the fan before, during, and after bathing all help reduce that risk.

Condensation on Windows Explained: Causes and Fixes

Isometric illustration of dehumidifier near window with moisture

Condensation on windows happens when warm, moist indoor air contacts cooler glass surfaces and reaches its dew point, causing water to form on the glass.

Seeing water, fog, or even ice on your windows is common in many U.S. homes, especially in cooler months. A little moisture can be normal, but persistent or heavy condensation is a sign that indoor humidity, window temperatures, or air circulation need attention. Understanding dew point and a few simple fixes can greatly reduce the problem.

Quick answer
  • Aim for indoor humidity around 30–50% in most seasons to reduce window condensation.
  • Condensation increases when indoor air is humid and windows are cold, especially on winter mornings.
  • Use kitchen and bathroom exhaust fans and vent dryers outside to remove moisture at the source.
  • Improve air circulation: open interior doors, use ceiling or small fans on low, keep vents unblocked.
  • If humidity stays high (often above 55–60%), consider a dehumidifier or adjusting ventilation.
  • Persistent condensation inside double-pane windows can indicate a failed seal that may need professional attention.

What Window Condensation Means and Why It Matters

Condensation on windows is simply water vapor in the air changing into liquid water on a cooler surface. It often shows up as fog, droplets, or streaks on the glass. In cold weather, you may even see frost along the edges of the window.

Small amounts of condensation on very cold days can be normal, particularly on older or single-pane windows. However, when it is frequent, heavy, or persists for many hours, it can signal that:

  • Indoor humidity is higher than ideal for comfort and building materials.
  • Windows or frames are cold because of poor insulation or air leaks.
  • Air is not circulating well near the windows.

Over time, excessive condensation can contribute to staining, peeling paint, damage to window frames, and damp areas that make it easier for mold to grow on nearby surfaces. Managing moisture helps protect both indoor air quality and the building itself.

Dew Point, Humidity, and Why Glass Fogs Up

The key to understanding condensation is the dew point. Dew point is the temperature at which air becomes saturated with moisture and water begins to condense out of it. When the temperature of your window glass is at or below the dew point of the indoor air, condensation forms.

How relative humidity fits in

Relative humidity (RH) is the percentage of water vapor in the air compared with the maximum it could hold at that temperature. Warm air can hold more moisture than cold air, which is why the same amount of water vapor can give very different RH readings at different temperatures.

  • At a given moisture level, cooler indoor air has higher RH and a higher chance of condensation.
  • At the same temperature, adding moisture to the air (showers, cooking, drying clothes indoors) raises RH and increases condensation risk.

Typical indoor targets

For most U.S. homes, a commonly recommended indoor range for both comfort and building materials is roughly:

  • 30–50% RH in many seasons
  • On very cold days, some homes may need to be closer to 30–40% RH to limit window condensation, especially with older windows.

If your indoor humidity is much above these ranges for long periods, window condensation becomes more likely, especially on clear, cold nights when glass temperatures drop.

Table 1. Simple window condensation troubleshooting checklist – Example values for illustration.
Observation Likely issue Typical actions to consider
Condensation only on the coldest mornings and clears quickly Normal response to weather, borderline humidity Monitor humidity, run bath/kitchen fans, improve air circulation
Heavy water on lower glass edges most winter days High indoor humidity and cold window frames Reduce moisture sources, check weatherstripping, consider dehumidifier
Moisture between double-pane glass layers Seal failure allowing air and moisture between panes Consult window professional; replacement or repair may be needed
Condensation mainly on one window or wall Localized cold spot or poor airflow Check for drafts, improve insulation, move furniture slightly away
Condensation even in mild weather Very high indoor humidity or unvented moisture source Verify venting of dryers, use exhaust fans, investigate leaks
Black spots or musty smell around sill Prolonged dampness on building materials Dry area thoroughly, clean surfaces, adjust humidity and ventilation

Example values for illustration.

Common Causes of Condensation on Windows

Several everyday factors influence how much moisture ends up on your windows. Often, more than one is involved.

1. High indoor humidity

Indoor activities add moisture to the air. Major contributors include:

  • Hot showers and baths
  • Cooking and boiling water
  • Drying clothes indoors or unvented dryers
  • Large numbers of houseplants or aquariums in small rooms
  • Humidifiers set too high

Without enough ventilation or dehumidification, this moisture builds up and raises RH across the home.

2. Cold window surfaces

Condensation is more likely when the inner glass surface is cold relative to indoor air. Windows can be cooled by:

  • Outdoor cold temperatures, especially at night
  • Poorly insulated or single-pane windows
  • Metal frames without thermal breaks
  • Air leaks and drafts around window frames

Even in the same room, some windows may stay colder because of wind exposure or shading, so condensation may appear there first.

3. Poor air circulation near windows

When air is still, a layer of cool, moist air can sit directly against the glass and reach its dew point more easily. Factors that reduce airflow include:

  • Heavy curtains or blinds closed for long periods
  • Furniture or large objects pushed tightly against exterior walls
  • Blocked supply or return vents
  • Windows in corners or alcoves with limited airflow

4. Building and weather conditions

Sometimes the building or climate plays a major role:

  • New construction or recent renovations can trap extra moisture in materials for months.
  • Basements or crawlspaces with damp soil can continuously add moisture to indoor air.
  • Sudden cold snaps can make window glass much cooler than usual overnight.

Practical Ways to Reduce Window Condensation

reduce indoor humidity, warm up the interior glass surface, or improve air circulation. Often a combination works best.

1. Control indoor humidity

  • Use exhaust fans in bathrooms and kitchens whenever generating steam. Let them run for about 15–20 minutes after showers or cooking.
  • Vent dryers outdoors and avoid drying laundry on racks in small, enclosed spaces.
  • Adjust humidifiers to maintain roughly 30–50% RH, lower in very cold weather if needed to prevent heavy condensation.
  • Watch for hidden moisture sources such as plumbing leaks, damp basements, or uncovered aquariums in small rooms.
  • Use a dehumidifier in consistently damp areas (like basements or window-heavy rooms) if RH tends to stay above 55–60%.

2. Improve ventilation and air exchange

Fresh air helps dilute indoor moisture, especially when outdoor air is cooler and drier:

  • Open windows briefly when weather allows, creating cross-ventilation between opposite sides of the home.
  • Use mechanical ventilation if available (balanced systems or energy recovery ventilators) to exchange indoor and outdoor air more steadily.
  • In apartments, use available exhaust fans effectively and avoid blocking undercut doors, which help air move.

3. Increase air movement near windows

  • Keep blinds and curtains slightly open, especially at the bottom, to allow warm room air to reach the glass.
  • Pull furniture a few inches away from exterior walls to reduce cold pockets and improve circulation.
  • Use ceiling fans on low speed, set to gently push air downward during heating season.
  • Ensure supply vents are not blocked by rugs, furniture, or long curtains.

4. Reduce cold spots and drafts

Warming the inner glass surface, even slightly, can move it above the dew point and prevent condensation.

  • Seal obvious gaps around window frames with appropriate caulking or weatherstripping.
  • Use insulating window coverings or interior storm panels where appropriate, making sure they still allow some airflow and do not trap moisture directly on wood surfaces.
  • Check that heating registers are not blocked so warm air can reach windows.

5. Manage moisture seasonally

Condensation patterns change with the seasons, so your approach may need to adjust as well:

  • Winter: Focus on humidity reduction, draft sealing, and circulation near windows.
  • Shoulder seasons (spring/fall): Take advantage of outdoor air by opening windows when conditions are dry.
  • Humid summers: Air conditioning and dehumidifiers can reduce indoor moisture and help keep window surfaces warmer relative to outdoor dew point.

Real-World Scenarios and How to Respond

These simplified examples show how different homes might handle window condensation problems.

Scenario 1: Condensation only in the morning

A home with reasonably new double-pane windows sees fogged glass on the coldest winter mornings, especially after overnight cooking and dishwashing. The condensation usually disappears by midday.

Likely cause: Short periods of higher humidity combined with cold outdoor temperatures.

Helpful steps:

  • Run kitchen and bathroom fans during and after use in the evening.
  • Keep interior doors open at night to balance humidity.
  • Check that heating vents are open near windows.

Scenario 2: Persistent wet sills on older windows

An older home with single-pane windows has water collecting along the bottom edges of several windows through most of the winter. A hygrometer often shows 50–60% RH indoors.

Likely cause: High indoor humidity and cold glass surfaces.

Helpful steps:

  • Reduce indoor humidity to closer to 30–40% RH in the coldest months.
  • Use a dehumidifier if moisture sources cannot be fully controlled.
  • Add weatherstripping and consider interior storm windows or insulating panels.
  • Dry window sills regularly to avoid long-term dampness.

Scenario 3: Moisture between panes of glass

Double-pane windows show fog or droplets between the glass layers that do not wipe off from inside or outside.

Likely cause: A failed seal between the panes, allowing air and moisture into the space.

Helpful steps:

  • Monitor for drafts or temperature differences near the affected window.
  • Consult a window professional; options may include sash or full window replacement.
  • Address general humidity issues as well, but note that the failure is primarily a window seal issue.

Scenario 4: New home with widespread condensation

A recently built or renovated home shows condensation on many windows during the first winter, even at moderate indoor humidity readings.

Likely cause: Construction materials releasing residual moisture into the indoor air.

Helpful steps:

  • Use mechanical ventilation systems as designed and run exhaust fans regularly.
  • Open windows on dry, mild days to help flush moisture.
  • Use temporary dehumidification if RH remains high for extended periods.

Condensation, Indoor Air Quality, and Safety Considerations

While condensation itself is just water, it can affect indoor air quality indirectly by creating damp surfaces. Managing it fits into overall moisture and ventilation control in the home.

Mold and dampness concerns

Regularly wet window frames, sills, and nearby walls can stay damp long enough for mold to grow on paint, caulk, or wood. To reduce this risk:

  • Wipe up liquid water on sills and frames when you notice it.
  • Allow areas around windows to dry fully by opening blinds and improving airflow.
  • Address the underlying humidity and temperature issues, not just the visible water.

If you see recurring mold growth, cleaning and moisture control are both important. For large or persistent problems inside walls or building cavities, professional assessment may be helpful.

Ventilation and moisture devices

Many homes use a mix of equipment to manage moisture and air quality, such as bathroom fans, kitchen hoods, dehumidifiers, and whole-house ventilation systems. When choosing or operating such equipment:

  • Prefer exhaust and ventilation strategies that move moist air outdoors rather than into attics or crawlspaces.
  • Use devices as intended and follow manufacturer instructions; avoid modifying safety features.
  • Be cautious with devices marketed as air cleaners that intentionally generate ozone; excess ozone in occupied spaces is generally discouraged by public health and building organizations.

Maintenance, Monitoring, and Ongoing Checks

Keeping condensation under control is easier when you monitor basic conditions and maintain your home’s moisture-control features.

Monitor humidity and temperature

  • Use a simple indoor humidity meter to spot trends; check several rooms if possible.
  • Note when condensation appears (time of day, weather, activities) to connect it to specific causes.
  • Adjust humidifier settings, ventilation, or dehumidification based on these observations.

Maintain fans, windows, and seals

  • Clean bathroom and kitchen exhaust fan grilles so they can move air effectively.
  • Check that exterior vent flaps open freely and are not blocked.
  • Inspect window caulking and weatherstripping periodically and repair if cracked or missing.
  • Repaint or reseal window sills and trim if finishes are flaking due to past moisture.

Plan for gradual improvements

Some condensation is related to the basic design or age of the home. Over time, you may choose to:

  • Upgrade windows to more efficient models with better insulation value.
  • Improve insulation and air sealing in walls and around openings.
  • Add or refine mechanical ventilation for more consistent air exchange.

Frequently Asked Questions About Window Condensation

Is a little condensation normal?

Yes. Light fogging or a few droplets on very cold days, especially early in the morning, can be normal, particularly with older or less insulated windows. It becomes more of a concern when water is heavy, long-lasting, or causing damage to surrounding materials.

Can condensation damage my windows?

Over time, repeated wetting of sills, frames, and trim can contribute to peeling paint, staining, swelling of wood, or corrosion of metal parts. Managing humidity and drying surfaces promptly can limit this wear.

Will an air purifier stop window condensation?

Standard air purifiers are designed to remove particles and sometimes odors, not water vapor. They typically do not change humidity levels enough to affect condensation. Dehumidifiers, ventilation, and humidity control are more direct tools for this issue.

Why do some rooms have more window condensation than others?

Rooms with more moisture sources (bathrooms, kitchens), cooler exterior walls, or poorer airflow tend to show condensation first. Sun exposure, wind direction, and insulation levels can also make some windows colder than others.

Is condensation between window panes a humidity problem?

Indoor humidity may influence how much moisture collects, but fog or droplets trapped between double panes usually point to a failed window seal, not just high room humidity. Addressing the window itself is often necessary.

Table 2. Humidity and mold risk quick planning examples – Example values for illustration.
Goal Simple actions Tools Note
Keep winter humidity in a comfortable range Adjust humidifiers, use bath/kitchen fans, reduce indoor drying Hygrometer, exhaust fans Aim around 30–40% RH in very cold weather
Lower dampness in a basement Seal obvious leaks, run dehumidifier, improve drainage Dehumidifier, humidity meter Check RH regularly, especially in humid seasons
Reduce mold risk near windows Wipe condensation, increase airflow, manage humidity Fans, hygrometer Keep materials dry between condensation events
Handle short-term high humidity events Run fans during/after showers and cooking, open window briefly Bathroom and range fans Focus on quick moisture removal at the source
Monitor whole-home moisture Measure RH in several rooms at different times of day Multiple small humidity meters Look for consistently high readings (often above 55–60% RH)
Adjust ventilation seasonally Use more outdoor air when it is cool and dry Operable windows, mechanical ventilation Limit open windows during very humid outdoor conditions

Example values for illustration.


Related guides: How to Stop Condensation on Windows (And Why It Matters for Mold)Best Humidity Level for Winter: Comfort vs Health vs Mold RiskDehumidifier Capacity Estimator: Room Dampness to Liters/Day

Key Takeaways on Condensation, Dew Point, and Fixes

Condensation on windows is a visible sign of how indoor humidity, temperature, and airflow interact. When warm, moist air touches cooler glass at or below its dew point, water appears. Small amounts can be normal in cold weather, but persistent or heavy condensation is a cue to look at humidity control, ventilation, and window conditions.

By aiming for moderate indoor humidity, using exhaust fans and dehumidification where needed, improving air circulation near windows, and maintaining seals and insulation, most homes can significantly reduce window condensation. Regular observation and small adjustments over time usually make the biggest difference.

Frequently asked questions

How can I tell whether window condensation is caused by high indoor humidity or a failed window seal?

If the moisture wipes away from the glass or appears on the frame and sills, it’s usually due to high indoor humidity or poor ventilation. If fog or droplets are trapped between the panes and cannot be wiped off from inside or outside, that commonly indicates a failed seal and may require professional repair or replacement.

What indoor humidity level should I aim for to reduce condensation on windows in winter?

For most homes, aiming for about 30–50% relative humidity helps reduce condensation, with a target nearer 30–40% on very cold days to limit window fogging. Use a hygrometer to monitor levels and adjust humidifiers, ventilation, or dehumidifiers accordingly.

Will running a dehumidifier or an air purifier reduce window condensation?

A dehumidifier can help by removing excess moisture from the air and lowering relative humidity, which reduces condensation risk. Standard air purifiers remove particles and sometimes odors but do not remove water vapor, so they generally will not stop condensation.

What immediate steps should I take to dry wet sills and prevent mold growth?

Wipe up standing water promptly with an absorbent cloth, then allow the area to dry by improving airflow (open blinds, run fans) and reducing humidity with exhaust fans or a dehumidifier. If you see mold or persistent dampness, clean affected surfaces and address the underlying humidity or leak issues.

When is it time to call a professional about window condensation between panes?

Call a window professional if moisture between panes is persistent, worsening, or accompanied by noticeable temperature differences or drafts at the window. That pattern typically signals a seal failure, and a professional can assess whether repair, resealing, or replacement is the best option.