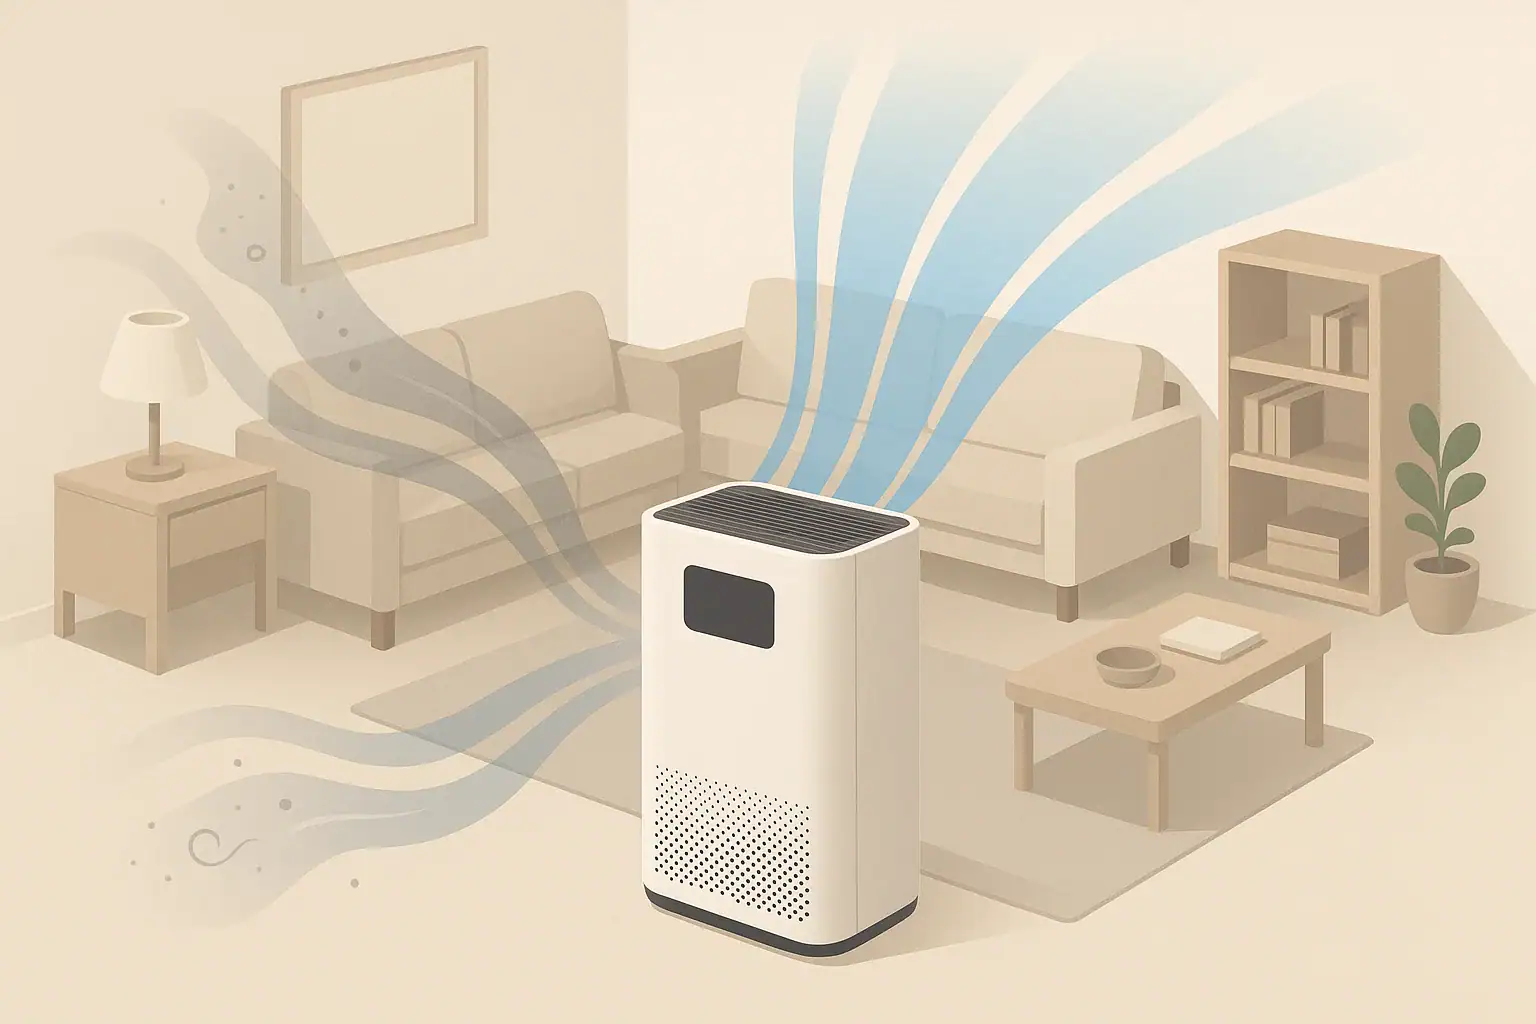
How Often Should You Replace a HEPA Filter? (Realistic Schedules and Signs)

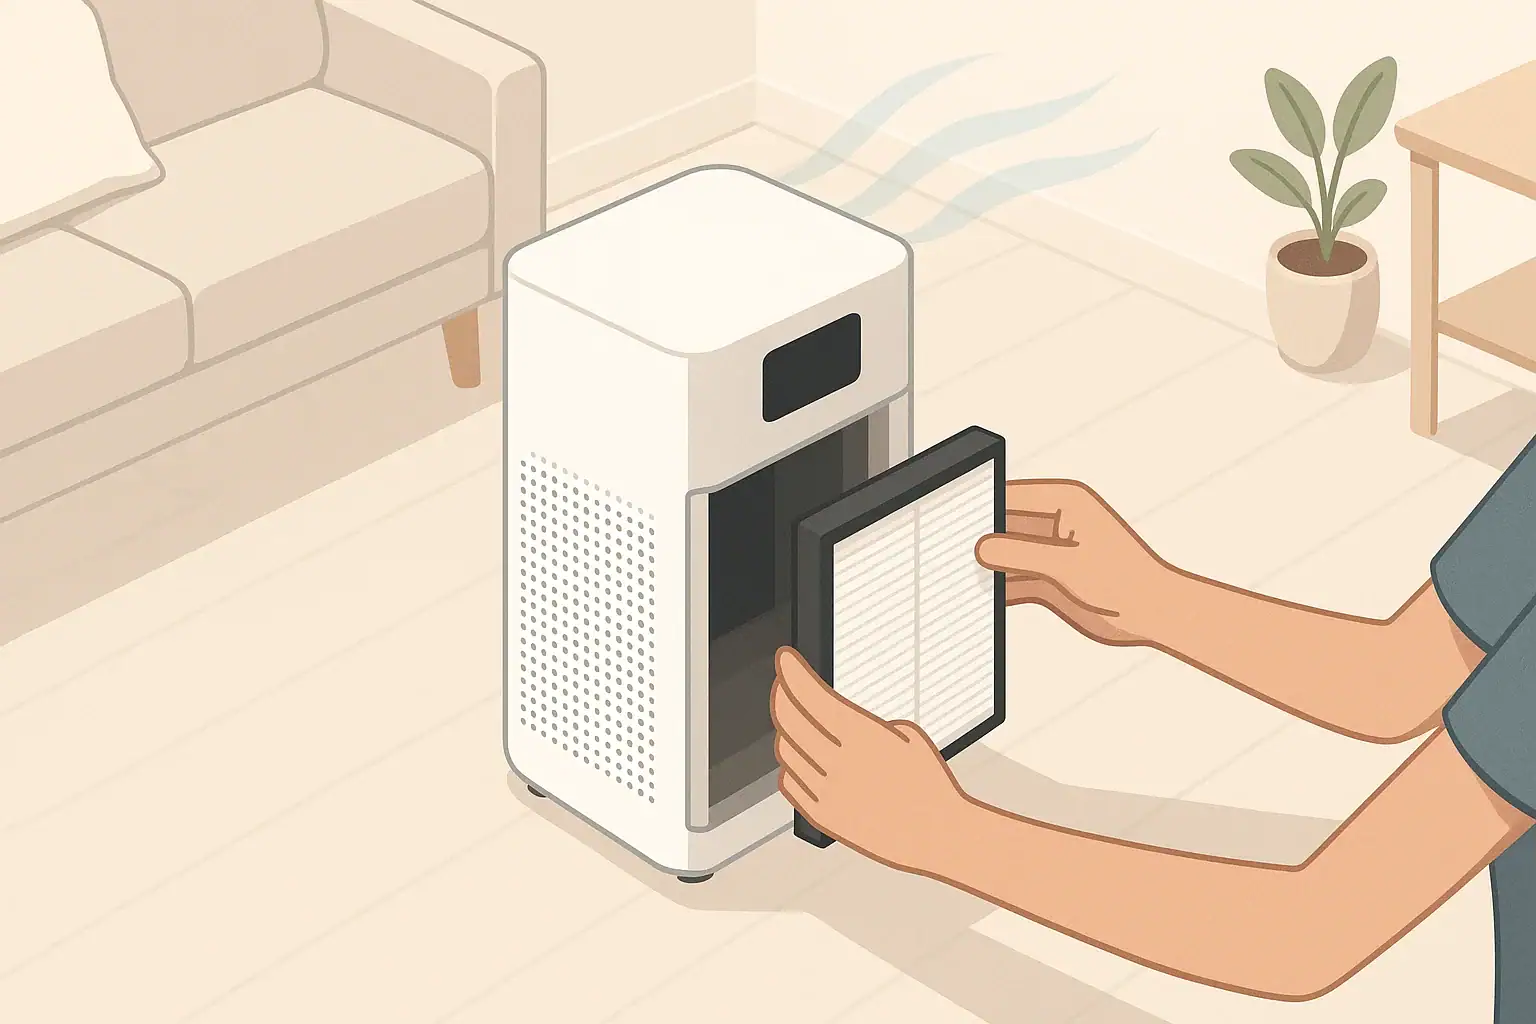
Person replacing a HEPA filter in a modern home purifier

Most homes should replace HEPA filters about every 6–12 months, but heavy use, pets, smoke, or allergies can shorten that to 3–6 months. The right schedule depends on the type of device, how long it runs, and how dirty your indoor and outdoor air are. Watching for reduced airflow, darker filter media, and worsening allergy symptoms is just as important as counting months on a calendar.

This guide explains how often to change HEPA filters in air purifiers, HVAC systems, vacuums, and vehicles, and how to adjust those timelines for your situation. You will see real-world examples, common mistakes, and safety basics so you can keep filtration strong without replacing filters more often than you need to.

Whether you are managing asthma, dealing with wildfire smoke, or simply trying to reduce dust, a practical HEPA filter replacement plan helps keep indoor air cleaner and your equipment working efficiently.

What a HEPA Filter Does and Why Replacement Matters

A HEPA (high-efficiency particulate air) filter is a dense mat of fibers designed to capture very small airborne particles as air passes through. When it is new and correctly installed, a HEPA filter can remove a high percentage of:

  • Fine dust and particulate (including many PM2.5 particles)
  • Pollen and plant debris
  • Pet dander and hair fragments
  • Dust mite debris
  • Some bacteria and other biological particles
  • Smoke particles from cooking, wood burning, or tobacco

As these particles accumulate, the filter slowly clogs. Air becomes harder to push through, and the device’s clean air delivery rate drops even if the filter is still technically capturing particles. Replacing the filter on time helps maintain:

  • Consistent filtration efficiency for allergens and fine particles
  • Steady airflow, so rooms clear more quickly
  • Lower fan noise and less strain on motors and blowers
  • Reasonable energy use for both portable purifiers and central HVAC systems

There is no single universal answer to how often a HEPA filter should be replaced. Instead, you combine general timelines, manufacturer guidance, and real-world signs from your own home. Thinking of the filter as a consumable part, similar to a car’s oil or cabin filter, makes it easier to budget and plan ahead.

Key Concepts: How HEPA Filter Life Really Works

HEPA filter life is mostly about how much air passes through the filter and how dirty that air is. Several concepts help explain why replacement intervals vary so much from home to home.

Typical Replacement Ranges by Device Type

Most HEPA filters fall into a few broad ranges:

Device type Typical use conditions Suggested replacement range When to use the shorter end
Portable room air purifier Runs many hours per day in average home Every 6–12 months Pets, smoke, or high outdoor pollution
Portable purifier in demanding conditions Near kitchens, smokers, or wildfire smoke Every 3–6 months Continuous high-speed operation
Central HVAC with HEPA or HEPA-level filter Heating/cooling used seasonally Every 6–12 months System runs almost nonstop or sensitive occupants
Vacuum cleaner HEPA exhaust filter Weekly or biweekly vacuuming Every 6–12 months Vacuuming large homes or very dusty areas
Vehicle cabin HEPA or high-efficiency filter Normal commuting and local driving About every 12 months Dusty roads, heavy traffic, or long daily drives
Typical HEPA filter replacement ranges by device type. Example values for illustration.

These are starting points, not strict rules. A purifier that runs a few hours per week in a clean home may go longer, while the same model in a smoky or dusty environment may need more frequent changes.

Factors That Shorten or Extend Filter Life

Several conditions have a big impact on how often you should replace a HEPA filter:

  • Particle load: Homes near busy roads, wildfire-prone areas, or construction zones send more pollution into filters.
  • Indoor sources: Frying food, burning candles or incense, using fireplaces, or indoor smoking all add fine particles.
  • Pets: Shedding fur, dander, and tracked-in dirt quickly load both pre-filters and HEPA media.
  • Run time: A purifier running 24/7 processes far more air than one used only during allergy season.
  • Fan speed: Higher speeds move more air and capture more pollutants, but fill the filter faster.
  • Filter size and design: Larger, deeply pleated filters have more surface area and typically last longer.
  • Pre-filters: Washable or replaceable pre-filters catch larger particles before they reach the HEPA layer, extending its life if maintained.

Calendar Time vs. Actual Use

Manufacturer guidance often lists a calendar interval such as “replace every 12 months.” In practice, two homes using the same purifier may need very different schedules. A more realistic way to think about it is:

  • Calendar time is a convenient reminder.
  • Actual run time and air quality determine how quickly the filter loads.
  • Physical signs (airflow, noise, color, and symptoms) confirm whether it is time.

Using both the calendar and real-world signals gives you a balanced replacement plan that avoids both overuse and unnecessary early changes.

Real-World Replacement Examples and Scenarios

Putting the concepts into real situations makes it easier to decide how often to replace your own HEPA filters. The examples below assume true HEPA or HEPA-level filters, with average-quality pre-filters when applicable.

Example 1: Small Apartment with One Purifier

Conditions:

  • One-bedroom apartment near a quiet residential street
  • No pets and no indoor smoking
  • Portable air purifier runs 8–10 hours most evenings on medium

Likely pattern:

  • Filter looks lightly gray after 6 months
  • Airflow feels similar to new, fan noise unchanged
  • Allergy symptoms under control

In this case, replacing the HEPA filter around 9–12 months is often reasonable, with a quick visual check at the 6-month mark.

Example 2: Family Home with Pets and Allergies

Conditions:

  • Three-bedroom house with two dogs that shed heavily
  • One family member with dust and pollen allergies
  • Two portable purifiers running 24/7 in living room and bedroom

Observed pattern:

  • Pre-filters visibly coated with hair and lint after 3–4 weeks
  • HEPA filters show clear darkening across most of the surface after 4–5 months
  • Allergy symptoms start to creep back if filters are left longer than 6 months

Here, a practical schedule is:

  • Clean or replace pre-filters every 2–4 weeks
  • Replace HEPA filters every 4–6 months, leaning toward 4 months during peak allergy seasons

Example 3: Wildfire Smoke Season

Conditions:

  • Home in a region with seasonal wildfire smoke lasting several weeks
  • Purifier runs on high speed continuously during smoke events
  • Windows mostly closed, but some odor still noticeable

Likely pattern:

  • Filter turns noticeably darker within a few weeks of heavy smoke
  • Airflow and odor reduction gradually worsen during the event
  • By the end of the season, the filter may be near the end of its useful life, even if only a few months old

In this situation, it often makes sense to:

  • Inspect filters before smoke season starts and replace if already partially loaded
  • Plan for an extra replacement shortly after a severe smoke period

Example 4: Central HVAC with HEPA Box Filter

Conditions:

  • Whole-house HEPA or HEPA-level filter installed in a dedicated box on the return side of the HVAC
  • System runs heavily during hot summers and cold winters
  • No indoor smoking, one cat, average dust levels

Realistic approach:

  • Inspect the filter at the start of heating season and at the start of cooling season
  • Replace roughly every 6–12 months, depending on how dirty it looks and whether airflow has dropped
  • Shorten the interval if anyone in the home has asthma or severe allergies

Example 5: Vacuum Cleaner HEPA Filter

Conditions:

  • Vacuum used weekly on carpeted floors and rugs
  • Bagless or bagged design with a HEPA exhaust filter
  • Some pet hair and tracked-in soil

Practical pattern:

  • Check the HEPA filter every 2–3 months when emptying the dust bin or changing bags
  • Lightly tap loose debris into a trash can only if allowed by the manufacturer
  • Plan to replace the HEPA filter about every 6–12 months, or sooner if suction and air quality drop noticeably
Scenario Key conditions Approximate HEPA replacement timing Adjustment trigger
Quiet apartment No pets, low outdoor pollution Every 9–12 months Airflow or odor change
Pet-heavy family home Multiple pets, 24/7 purifier use Every 4–6 months Allergy symptoms or darker filter
Wildfire season High smoke for several weeks Before and/or after smoke season Strong smoke odor or darkened media
Central HVAC with HEPA box Seasonal heating and cooling Every 6–12 months Reduced airflow at vents
Vacuum cleaner Weekly use, mixed flooring Every 6–12 months Loss of suction or more dust
Common HEPA filter replacement scenarios and rough timelines. Example values for illustration.

Common Mistakes and Troubleshooting Signs

Many people either stretch HEPA filters far beyond their effective life or replace them too early. Recognizing common mistakes and troubleshooting cues helps you avoid both extremes.

Mistake 1: Relying Only on the Calendar

Waiting exactly 12 months because the manual says so can be a problem if:

  • You live in a high-pollution or smoky area
  • You run the purifier on high speed most of the day
  • You have multiple pets or frequent visitors

Troubleshooting cue: If airflow feels weak, fan noise seems strained, or dust builds quickly on surfaces before the calendar date, inspect and likely replace the filter sooner.

Mistake 2: Ignoring Physical Signs

On the other hand, some people replace filters strictly on schedule even if they still look and perform well.

  • Filter surface is only lightly gray with no matted areas
  • Airflow feels strong at the usual fan setting
  • Allergy symptoms and odors are well controlled

Troubleshooting cue: If all performance signs are good, you may be able to safely extend the interval slightly, especially in cleaner environments.

Mistake 3: Washing Non-Washable HEPA Filters

Most consumer HEPA filters are not designed to be washed. Water and detergents can:

  • Damage the delicate fibers that trap fine particles
  • Change the structure of the filter media
  • Leave behind residues that affect airflow and performance

Troubleshooting cue: If a filter has been washed but air quality seems worse or airflow is uneven, replace it with a new, dry filter that matches the device specifications.

Mistake 4: Skipping Pre-Filter Maintenance

Many purifiers and HVAC housings include a pre-filter to catch hair, lint, and larger dust. If this stage is neglected:

  • The pre-filter clogs and restricts airflow before air reaches the HEPA media
  • The HEPA filter may load quickly with fine dust that could have been intercepted earlier

Troubleshooting cue: If your HEPA filters seem to darken very quickly, check whether the pre-filter is overdue for cleaning or replacement.

Mistake 5: Poor Filter Seating or Gaps

Even a new HEPA filter cannot perform well if air slips around it instead of passing through it. This can happen when:

  • The wrong size filter is used for the housing
  • Gaskets or seals are missing, damaged, or compressed
  • Access panels are not fully closed or latched

Troubleshooting cue: If dust accumulates near vents or purifier outlets despite recent filter changes, inspect for gaps around the filter frame and reseat or replace as needed.

Mistake 6: Ignoring Allergy or Asthma Feedback

For households with allergies or asthma, symptom changes can be an early warning that filters are past their prime.

  • More sneezing or congestion in rooms where purifiers run
  • Nighttime coughing or wheezing returning after a period of control
  • Itchy eyes or throat when spending time indoors

Troubleshooting cue: If symptoms worsen and other factors (such as pollen season) have not changed, check the HEPA filter, pre-filter, and device settings. A timely replacement can restore performance.

Safety Basics When Handling and Replacing HEPA Filters

HEPA filters are designed to trap contaminants, so it makes sense to handle them carefully when inspecting, replacing, or disposing of them.

Before You Open the Device

  • Turn off and unplug portable purifiers before opening panels.
  • Shut down central HVAC systems at the thermostat and, if recommended, switch off power at the service switch.
  • Let the device sit for a few minutes so particles settle inside the housing.
  • If you are sensitive to dust or smoke, consider wearing a simple mask and disposable gloves.

During Filter Removal

  • Open access panels slowly to avoid stirring up dust.
  • Lift the filter straight out without bending or squeezing it.
  • Avoid tapping, shaking, or brushing the filter, which can release trapped particles back into the room.

Bagging and Disposing of Used Filters

  • Place the used HEPA filter directly into a sturdy trash bag.
  • Seal the bag tightly before carrying it through living spaces.
  • Dispose of it with regular household trash unless local rules specify otherwise.

Because HEPA filters contain mixed materials and captured contaminants, they are rarely suitable for standard recycling streams.

Installing the New Filter Safely

  • Confirm that the replacement filter matches the size and type specified for your device.
  • Check for airflow arrows or orientation marks and align them correctly.
  • Press the filter gently into place so it sits flat and snug, with no visible gaps around the edges.
  • Close and latch access panels fully before turning the device back on.

After installation, listen for any unusual rattling or whistling sounds that might indicate air bypass or a loose panel.

Long-Term Maintenance, Storage, and Scheduling

Creating a simple, repeatable routine makes HEPA filter maintenance easier and more consistent over time.

Building a Practical Replacement Schedule

  1. Start with the manual: Note the recommended interval for each device (for example, 12 months for the HEPA filter, 3 months for the pre-filter).
  2. Adjust for your environment: Shorten the interval if you have pets, smoke exposure, or high outdoor pollution; extend slightly if your air is very clean and run time is low.
  3. Use seasonal checkpoints: Tie filter checks to early spring, mid-summer, early fall, and mid-winter so they are easy to remember.
  4. Record what you see: Note filter color, airflow, and any symptom changes at each check.

Over a year or two, these notes help you dial in a schedule that fits your home rather than relying only on generic timelines.

Maintaining Pre-Filters and Other Stages

Pre-filters and other stages can significantly affect how long the HEPA layer lasts.

  • Washable pre-filters: Rinse or vacuum every 2–4 weeks, then let them dry completely before reinstalling.
  • Disposable pre-filters: Replace more frequently than the main HEPA filter, especially in homes with pets.
  • Additional stages: Some systems include carbon layers or other media for odor control; these may have their own replacement schedule separate from the HEPA filter.

Keeping upstream stages in good shape protects the HEPA media and reduces how often you need to replace it.

Storing Spare HEPA Filters

If you like to keep spare filters on hand, proper storage helps them stay effective until you need them.

  • Leave filters sealed in their original packaging until installation.
  • Store them in a dry, clean area away from direct sunlight.
  • Avoid damp basements or garages where moisture could affect the media.
  • Keep them away from strong odors or chemicals that could be absorbed into the filter material.

Tracking Multiple Devices

Many homes have more than one HEPA-based device: a bedroom purifier, a living room purifier, a vacuum filter, and sometimes a central HVAC filter. To keep track:

  • Label each device with a small note indicating the next planned filter check date.
  • Use a digital calendar reminder for seasonal inspections.
  • Write installation dates on filter frames if recommended and safe.

This simple tracking prevents surprise clogs and last-minute filter purchases when air quality suddenly feels worse.

Practical Takeaways and Specs to Look For

By this point, you can see that the best answer to “how often should you replace a HEPA filter?” blends manufacturer guidance with your home’s real conditions. A short summary can help you act on that information.

  • For most portable purifiers, plan on changing HEPA filters every 6–12 months, or every 3–6 months in heavy-use or high-pollution situations.
  • For central HVAC HEPA filters, inspect at least twice a year and replace about every 6–12 months, sooner if airflow drops or sensitivities are high.
  • For vacuums and vehicle cabin filters, a 6–12 month interval is typical, adjusted for how often and where you use them.
  • Use physical signs—filter color, airflow, noise, odors, and symptoms—to fine-tune your schedule.

Specs to Look For When Choosing HEPA Filters and Systems

When you are evaluating HEPA filters or devices that use them, certain specifications and design details can make maintenance easier and replacement intervals more predictable:

  • Filter type and rating: Confirm that the filter is a true HEPA or HEPA-level filter, not just a generic “high-efficiency” label.
  • Filter size and surface area: Larger, more deeply pleated filters usually last longer between changes.
  • Clear replacement interval guidance: Look for straightforward recommendations (for example, “HEPA: up to 12 months, pre-filter: up to 3 months”).
  • Pre-filter design: Washable or easily replaceable pre-filters can significantly extend HEPA life.
  • Seal quality: Gaskets, foam edges, or other sealing features reduce air bypass and improve real-world performance.
  • Filter access: Tool-free panels and simple housings make it more likely you will actually check and replace filters on time.
  • Filter change indicators: Hour counters or sensor-based reminders are helpful prompts, even if you still verify with a visual check.
  • Availability of replacement filters: Make sure compatible filters are easy to obtain so you can stick to your schedule.

Combining these specs with a realistic replacement plan helps you maintain cleaner indoor air, protect your equipment, and avoid both overusing and overspending on HEPA filters.

Frequently asked questions

Which HEPA filter specifications and features should I prioritize when choosing a filter?

Prioritize a true HEPA rating (not just marketing terms), sufficient surface area or pleating for longer life, and good sealing features to prevent air bypass. Also consider whether the unit has a washable or replaceable pre-filter, easy access for changes, and clear replacement guidance so maintenance is practical.

Can I just follow the manufacturer's calendar interval for HEPA filter replacement?

The manufacturer's calendar interval is a useful baseline, but you should adjust it for actual use and indoor air conditions. Homes with pets, smoke exposure, or continuous operation often need more frequent changes; check physical signs like airflow, filter darkening, and symptom changes to fine-tune timing.

What precautions should I take when removing and disposing of a used HEPA filter?

Turn the device off and unplug it, open panels slowly to avoid stirring dust, and lift the filter out gently without shaking. Place the used filter in a sturdy trash bag, seal it before carrying through living spaces, and wash your hands after disposal.

How can I tell when a HEPA filter actually needs replacing?

Common signs include noticeably reduced airflow, a darker or matted filter surface, increased fan noise, persistent odors, or a return of allergy/asthma symptoms. Use these physical cues alongside calendar reminders to decide when to replace a filter.

Is it safe to wash a consumer HEPA filter to extend its life?

Most consumer HEPA filters are not washable; water and detergents can damage the delicate fibers and reduce effectiveness. Only wash a filter if the manufacturer explicitly states it is washable; otherwise replace it when performance declines.

Do pre-filters really help extend the life of a HEPA filter?

Yes. Washable or replaceable pre-filters capture larger particles like hair and lint, reducing the load on the HEPA media and often significantly extending its useful life when the pre-filter is maintained regularly.
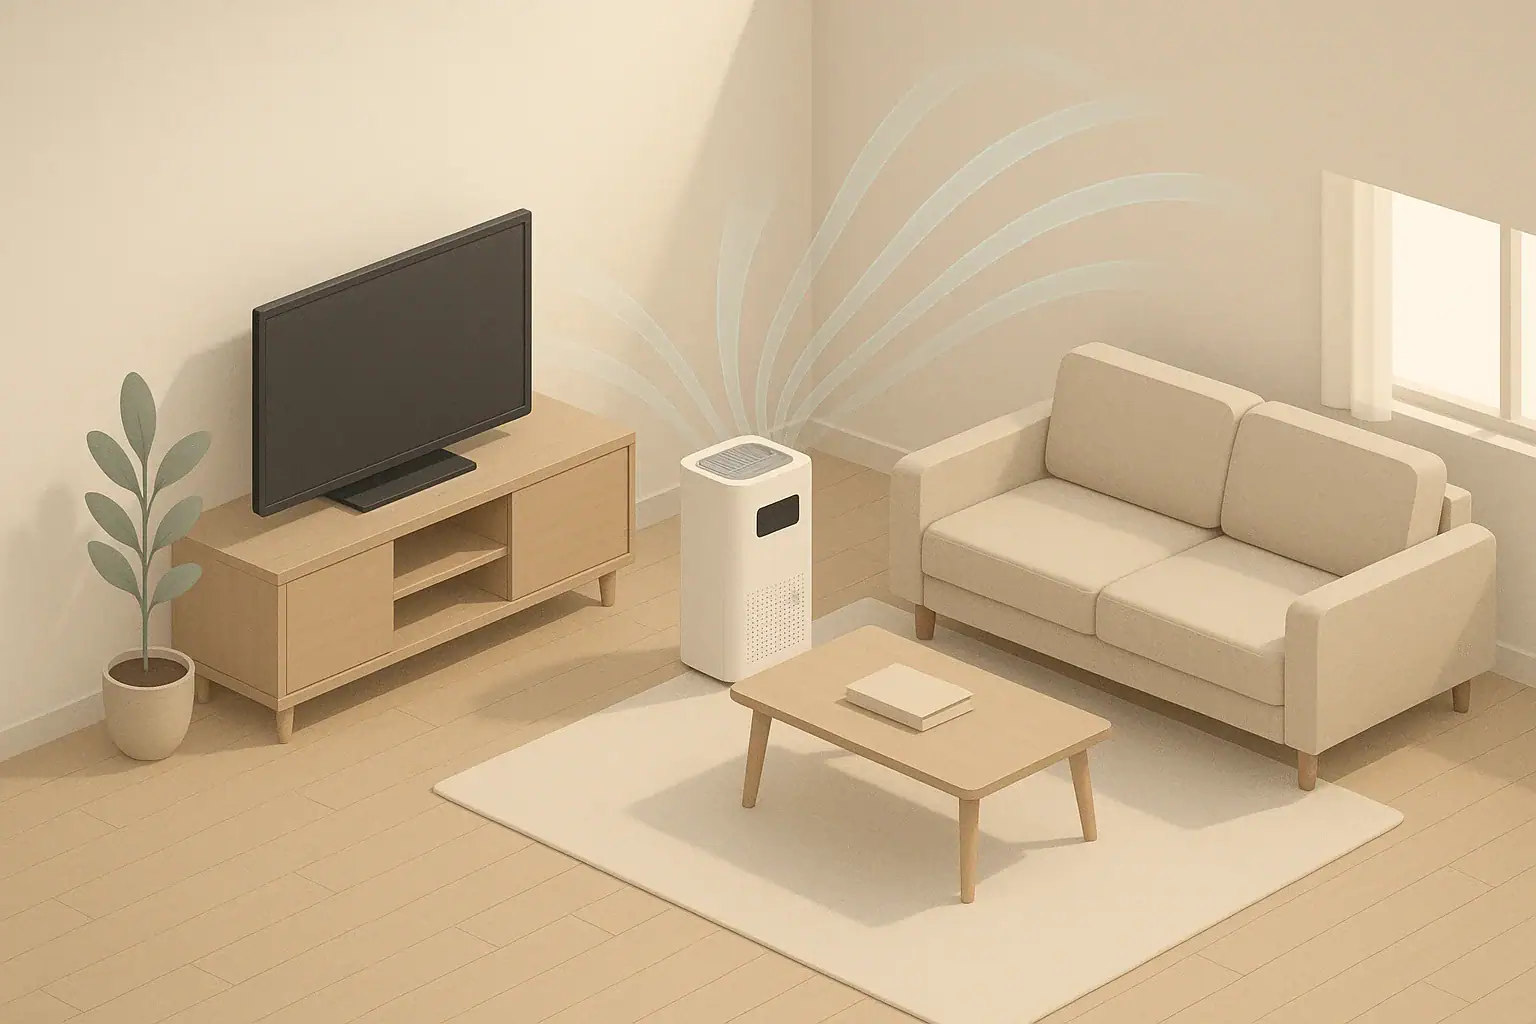
HEPA H13 vs H14: What the Ratings Mean, When H14 Matters, and When H13 Is Enough

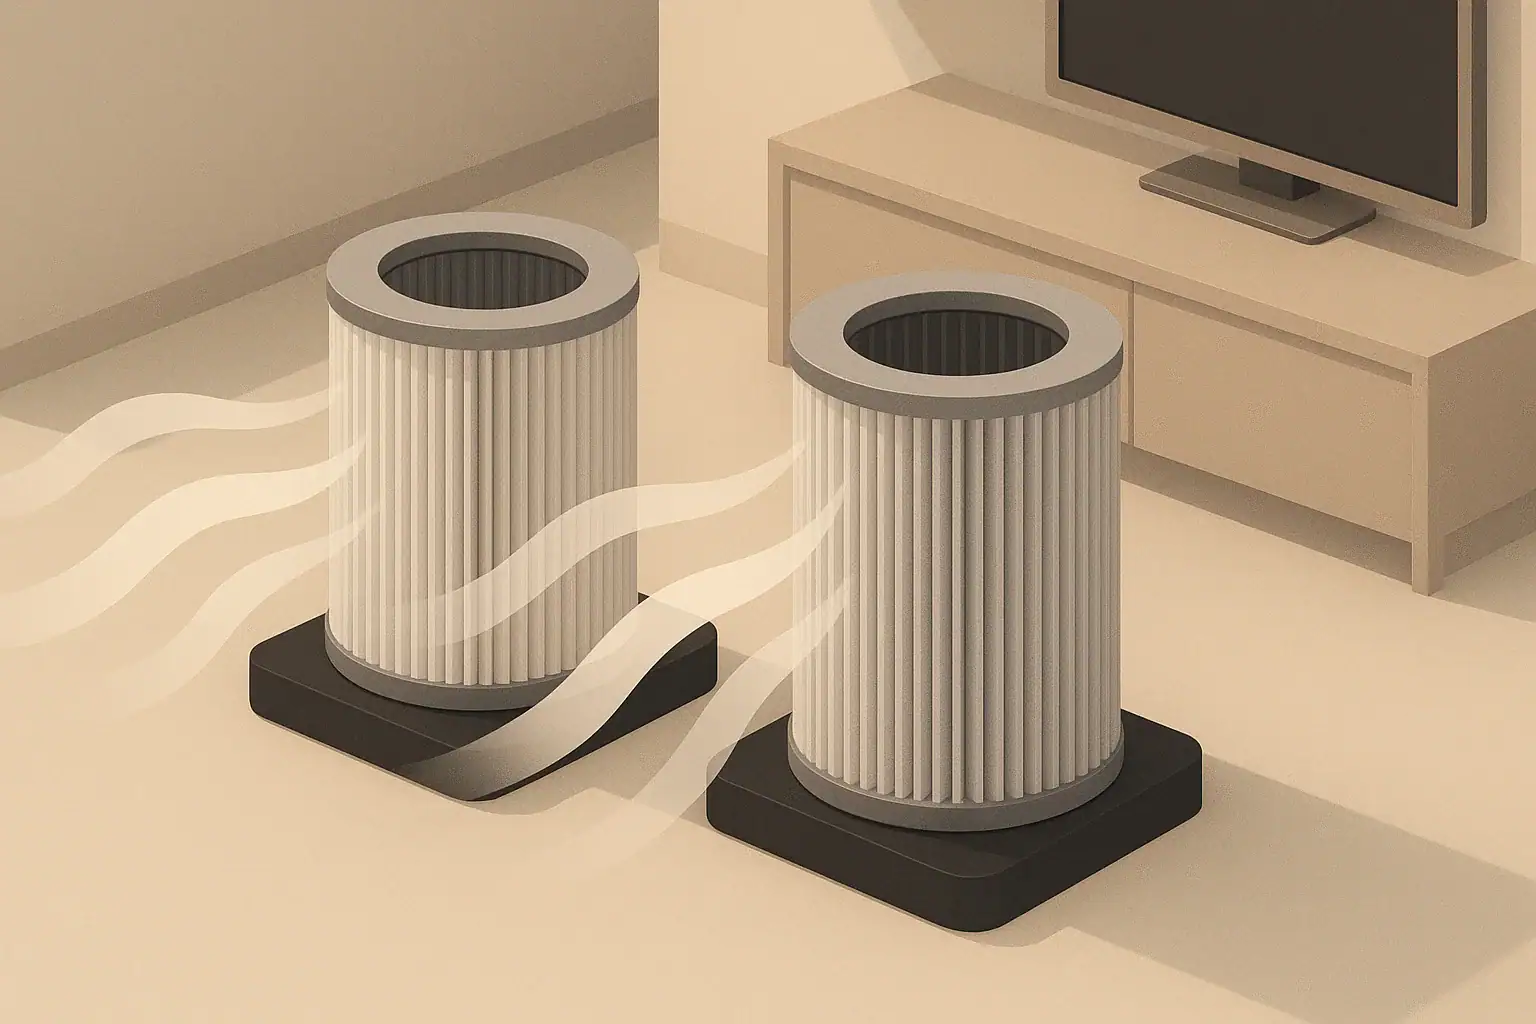
Isometric comparison of two HEPA filters with airflow

HEPA H13 is enough for most homes and offices, while HEPA H14 mainly matters in critical or high‑risk spaces that need extremely clean air. Both are very high‑efficiency HEPA filters, but H14 captures a bit more of the hardest‑to‑filter ultrafine particles in a single pass. In real rooms, airflow, run time, and proper installation often matter more than choosing H13 vs H14 on the label.

This guide explains what HEPA H13 and H14 ratings really mean, how they affect clean air delivery, and how to decide which level makes sense for your situation. You will see practical examples, typical use cases, and the trade‑offs in cost, noise, and energy use. By the end, you should be able to look at any “medical‑grade HEPA” or “H13/H14” claim and quickly judge whether it fits your air quality goals.

What HEPA H13 and H14 Mean (and Why It Matters)

HEPA H13 and H14 are high‑grade classifications defined in standards such as EN 1822 and ISO 29463. They describe how efficiently a filter removes particles at its most penetrating particle size (MPPS), typically around 0.1–0.3 microns. This is the size range that is hardest for filters to capture.

In simple terms:

  • H13: At least about 99.95% efficient at MPPS
  • H14: At least about 99.995% efficient at MPPS

The numerical difference looks tiny, but it represents roughly a tenfold reduction in the small fraction of particles that slip through. That extra “9” of efficiency is why H14 is used in cleanrooms, some hospital zones, and other high‑risk environments.

For typical indoor air quality needs—such as allergies, smoke, or general fine dust—H13 already removes the vast majority of particles when paired with adequate airflow and run time. The key question is not only “How efficient is the filter media?” but “How much clean air does the whole system actually deliver into the room?”

Key Concepts: How HEPA H13 and H14 Filters Work

HEPA filters are made from a dense mat of fibers, not a rigid screen with uniform holes. Air weaves through the fibers, and particles are captured in several ways:

  • Inertial impaction: Larger, heavier particles (like coarse dust) cannot follow the air stream around fibers and crash into them.
  • Interception: Mid‑sized particles follow the air flow lines but pass close enough to fibers to touch and stick.
  • Diffusion: Very small particles move randomly (Brownian motion) and bounce into fibers more often.

The “most penetrating” size range sits between these mechanisms, where none of them is especially strong. H14 filters use denser fiber packing or different construction to reduce how many of these “slippery” particles get through.

However, denser media usually means more resistance to airflow (pressure drop). To maintain the same clean air delivery rate:

  • The fan must be stronger, or
  • The device must run at higher speed (often louder), or
  • The actual airflow will drop, reducing room‑level cleaning.

This is why a well‑designed H13 system can outperform a poorly designed H14 system in real‑world use, even though H14 media is technically more efficient.

Filter class Single‑pass MPPS efficiency Particles allowed through (out of 10,000) Typical use case
H13 ≈ 99.95% Up to about 5 Homes, offices, clinics, general clean air needs
H14 ≈ 99.995% Up to about 0.5 Cleanrooms, some hospital areas, high‑risk labs
Approximate comparison of HEPA H13 vs H14 single‑pass efficiency. Example values for illustration.

Both H13 and H14 are extremely effective across a wide range of particle sizes:

  • Larger particles (>0.3 microns): dust, pollen, many mold spores, pet dander fragments
  • Fine particles (PM2.5 range): smoke, traffic pollution, combustion particles
  • Submicron particles: some bacteria and fragments, many virus‑carrying droplets and droplet nuclei

In practice, both grades can dramatically reduce indoor particle levels as long as the system moves enough air and is sealed properly.

Real‑World Examples: When H13 Is Enough and When H14 Helps

Deciding between HEPA H13 vs H14 is easier when you map the rating to a specific problem and room type. Below are common scenarios and how each class fits.

Example 1: Allergies in a bedroom

  • Goal: Reduce pollen, pet dander, and dust mite debris.
  • Room: 150 ft² bedroom with average ceiling height.
  • Best fit: H13 with enough clean air delivery to reach roughly 4–5 air changes per hour.

In this case, the limiting factor is usually air changes per hour and keeping the unit running, not the difference between H13 and H14. An H13 unit that quietly runs overnight on a medium speed will often provide excellent symptom relief.

Example 2: Urban apartment near a busy road

  • Goal: Lower fine particulate pollution (PM2.5) from traffic and outdoor air.
  • Room: Open‑plan living room and kitchen.
  • Best fit: H13 or H14, but priority is high airflow and long runtime.

Both H13 and H14 capture fine pollution effectively. The bigger impact comes from choosing a unit that can turn over the air in the space several times per hour and running it whenever outdoor pollution is elevated.

Example 3: Home workshop or hobby room

  • Goal: Reduce fine dust, fumes, or particles from sensitive work.
  • Room: Small workshop or studio.
  • Best fit: H13 for general control, H14 only if extremely low background particle counts are needed.

Here, source control (local exhaust, masks, wet methods) and ventilation should come first. A HEPA system is a useful second layer. H14 may be justified if the work demands near‑cleanroom conditions and the system is sized and sealed correctly.

Example 4: High‑risk medical or lab space

  • Goal: Maintain very low particle concentrations for infection control or sensitive processes.
  • Room: Isolation area, procedure room, or lab.
  • Best fit: H14 or higher, within a professionally designed system.

In such spaces, the incremental step from H13 to H14 can be important because even a small number of residual particles may matter. These systems are usually engineered with strong fans, carefully sealed housings, and measured air changes per hour, not just upgraded filters dropped into consumer devices.

Scenario Typical goal Practical HEPA choice What usually matters most
Bedroom allergies Reduce pollen and dander H13 Quiet operation, steady runtime, proper room sizing
Traffic pollution Lower PM2.5 H13 or H14 High CADR, long daily runtime, sealed windows when needed
Light home workshop Reduce fine dust H13 Source control, ventilation, pre‑filters for coarse dust
Critical lab or isolation room Very low particle counts H14 or higher Engineered airflow, pressure control, professional design
Typical real‑world use cases for HEPA H13 vs H14. Example values for illustration.

Common Mistakes and Troubleshooting HEPA Performance

Many people upgrade to a higher HEPA rating but see little improvement because other parts of the system are limiting performance. These are frequent issues to watch for and how to spot them.

Mistake 1: Focusing only on filter grade, not airflow

  • Symptom: Unit has an H14 filter but the room still looks hazy or measured particle levels stay high.
  • Likely cause: Airflow is too low for the room size, or the unit runs only a few hours per day.
  • Fix: Increase fan speed, extend runtime, or choose a system with higher clean air delivery for the same room.

Mistake 2: Poor placement and blocked airflow

  • Symptom: Clean air seems localized near the device; far corners of the room stay dusty.
  • Likely cause: Unit is placed in a corner, behind furniture, or under a desk.
  • Fix: Move it to a more open location, away from walls and obstacles, to encourage mixing of room air.

Mistake 3: Bypass leaks around the filter

  • Symptom: Visible dust streaks or discoloration around the filter frame; strong air stream from the device but modest air quality improvement.
  • Likely cause: Gaps between the filter and housing allow unfiltered air to bypass the media.
  • Fix: Reseat the filter carefully, check gaskets, and ensure the access panel is fully closed and latched.

Mistake 4: Overused or clogged filters

  • Symptom: Airflow drops, fan noise changes, or the unit feels weak on settings that used to move a lot of air.
  • Likely cause: HEPA media is heavily loaded with particles, increasing resistance.
  • Fix: Replace the HEPA filter and clean or replace pre‑filters as recommended.

Mistake 5: Expecting HEPA to solve every air problem

  • Symptom: Odors, gases, or humidity‑related issues persist even though particles are reduced.
  • Likely cause: HEPA targets particles, not gases or moisture.
  • Fix: Combine HEPA with ventilation, humidity control, and other filtration media when needed.
Observed issue Probable cause Simple check
High readings on an air quality monitor despite HEPA Insufficient airflow or runtime Increase fan speed for 30–60 minutes and recheck levels
Strong airflow, but little improvement in dust Bypass leaks or open windows introducing new dust Inspect seals and close nearby windows or doors
Unit suddenly louder and moving less air Filter heavily loaded with particles Check and replace HEPA and pre‑filters if visibly dirty
Odors remain even when particles drop Gaseous pollutants not captured by HEPA Consider additional filtration or increased ventilation
Common HEPA troubleshooting cues and quick checks. Example values for illustration.

Safety Basics for Using H13 and H14 HEPA Systems

High‑efficiency filters are generally safe to use in homes and workplaces, but there are a few safety‑related points to keep in mind, especially as filter density and fan power increase.

  • Electrical load and heat: Systems designed for H14 may use more powerful motors. Ensure the outlet and circuit can handle the rated power draw, and keep vents clear so heat can dissipate.
  • Filter integrity: Do not cut, wash, or modify HEPA filters unless the manufacturer explicitly allows it. Damaged media or disturbed fibers can reduce efficiency and release captured dust.
  • Handling used filters: Treat old HEPA filters as dusty items. Handle them gently, avoid shaking, and place them in a bag or container before disposal to limit re‑release of particles.
  • Noise exposure: Running a high‑powered unit on maximum speed in small rooms for long periods can be noisy. If you need higher fan settings, consider limiting time spent very close to the device or relocating it to reduce direct noise exposure.
  • Ventilation balance: HEPA recirculates and cleans indoor air but does not add fresh air. In tight spaces, balance filtration with periodic ventilation to control carbon dioxide and indoor pollutants that HEPA does not capture.
  • Moisture and mold: Avoid placing HEPA units where they will pull in large amounts of moist air from bathrooms or damp basements without addressing the moisture source. HEPA captures mold spores but does not correct underlying humidity problems.

Used correctly, both H13 and H14 systems are a safe part of a layered strategy that also considers ventilation, humidity control, and source reduction.

Maintenance and Lifespan: Getting Full Value from H13 and H14

Both H13 and H14 filters gradually load with particles, increasing resistance and reducing airflow. Keeping up with maintenance is essential if you want the high rated efficiency to translate into real‑world performance.

How often to replace HEPA filters

Replacement intervals depend on several factors:

  • Outdoor air quality and local pollution events
  • Indoor activities such as cooking, candles, or smoking
  • Daily runtime and fan speed
  • Whether pre‑filters are used and cleaned regularly

In relatively clean environments with moderate use, HEPA filters may last many months. In dusty or high‑pollution areas, or when running at high speeds for long hours, they may need replacement sooner. H14 media, being denser, can reach higher resistance more quickly at the same load.

Practical signs a filter is nearing end of life

  • Noticeable drop in airflow at familiar fan settings.
  • Fan noise changes as the motor works harder.
  • Visible darkening or patchy discoloration on the intake side of the HEPA (if viewable).
  • Air quality monitor shows slower improvement after you switch the unit on.

Role of pre‑filters

A washable or replaceable pre‑filter that captures hair, lint, and coarse dust can greatly extend HEPA life. Cleaning or swapping the pre‑filter on schedule keeps the HEPA layer focused on the fine particles it is designed to capture.

Storage and seasonal use

  • If you store a unit for a season, remove heavily used filters rather than leaving them in a damp or unconditioned area.
  • Store replacement filters in a dry, sealed bag or box to protect them from dust and humidity before use.
  • When restarting after storage, visually inspect the HEPA and pre‑filters and consider starting with a lower fan speed for the first run to check for abnormal noise or vibration.

Practical Takeaways and Specs to Look For

Choosing between HEPA H13 vs H14 is easier when you focus on your air quality goal and the performance of the whole system, not just the filter label.

  • For most homes and typical offices, H13 with good airflow and long runtime is usually the best balance of performance, noise, and cost.
  • H14 becomes more relevant in high‑risk or critical environments where even a small number of remaining particles can matter.
  • Real‑world results depend heavily on room size, placement, sealing, and maintenance.

Specs to look for when comparing HEPA systems

  • Filter class: Confirm H13 or H14, and avoid vague terms like “HEPA‑type” for serious particle control.
  • Clean air delivery (or equivalent airflow data): Check that the system can provide enough clean air for your room volume and target air changes per hour.
  • Fan speeds and noise levels: Look for a setting you can tolerate continuously, especially for bedrooms or offices.
  • Seal quality and construction: Gaskets, tight‑fitting filter frames, and solid housings reduce bypass leakage.
  • Pre‑filter design: Washable or easily replaceable pre‑filters help protect the HEPA and reduce long‑term costs.
  • Filter replacement access: Filters that are easy to access and swap encourage you to maintain them on time.
  • Power consumption: Compare wattage at the fan speeds you will actually use, especially for 24/7 operation.
  • Room integration: Consider size, weight, and how easily you can place the unit where airflow will not be blocked.

If you are unsure whether to choose H13 or H14, start by sizing the system correctly for your room and usage pattern. In many cases, a well‑sealed H13 unit that you run consistently will deliver cleaner air than an undersized or poorly maintained H14 system.

Frequently asked questions

Which specs and features should I check when comparing H13 and H14 air purifiers?

Look beyond the filter class to the system’s clean air delivery rate (CADR) or equivalent airflow data for your room size, fan speed options and noise levels, seal quality to prevent bypass, and the presence of a pre‑filter. Also check filter access and expected replacement costs plus power consumption for the fan speeds you will use regularly.

Why doesn’t upgrading to H14 always improve my room’s air quality?

H14 media is more efficient per pass but also more restrictive to airflow; if the fan and housing aren’t designed for it, overall clean air delivery can be lower. Common real‑world limits include low airflow, poor placement, bypass leaks, and insufficient runtime, all of which can negate the benefit of a higher filter class.

Are H13 and H14 filters safe to use in homes?

Yes; both are safe when used as intended, but pay attention to electrical load and ventilation balance, avoid modifying filters, and handle used filters carefully to limit dust release. High‑powered systems can be louder and draw more current, so follow the manufacturer’s safety guidance and ensure proper installation.

How often should I replace H13 or H14 filters in typical home use?

Replacement intervals vary with outdoor pollution, indoor activities, daily runtime, and whether you use a pre‑filter; many home units run months to a year before replacement. Replace sooner if you notice reduced airflow, changed fan noise, visible darkening of the media, or slower improvements on an air quality monitor.

Can HEPA H13 or H14 filters remove odors and gases?

No; HEPA media captures particles but does not remove most gases or odors. To address odors, look for systems that add activated carbon or other gas‑phase sorbents and combine filtration with ventilation.

Is it worth choosing H14 for allergy relief or infection prevention at home?

For most allergy or everyday infection‑risk scenarios, a correctly sized and well‑maintained H13 system with good airflow and runtime is sufficient; H14 is generally reserved for high‑risk or professionally engineered spaces. H14 may be justified for immunocompromised occupants or specialized home settings, but the overall system design and operation matter more than the label alone.

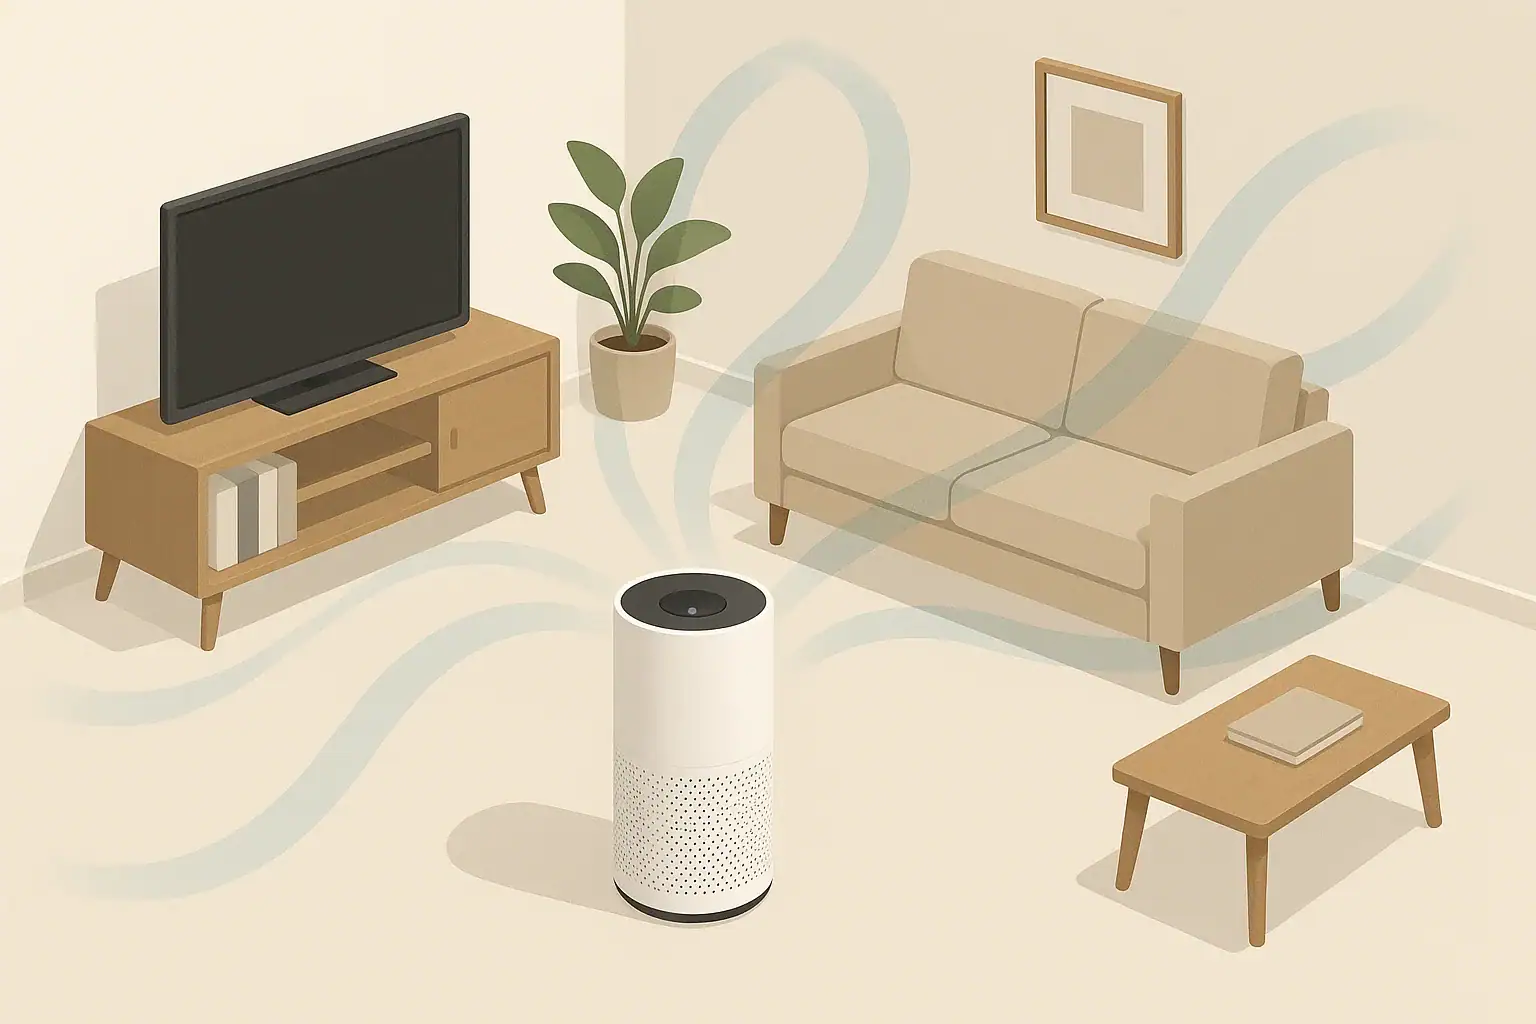
True HEPA vs HEPA-Type: What the Labels Really Mean for Your Air

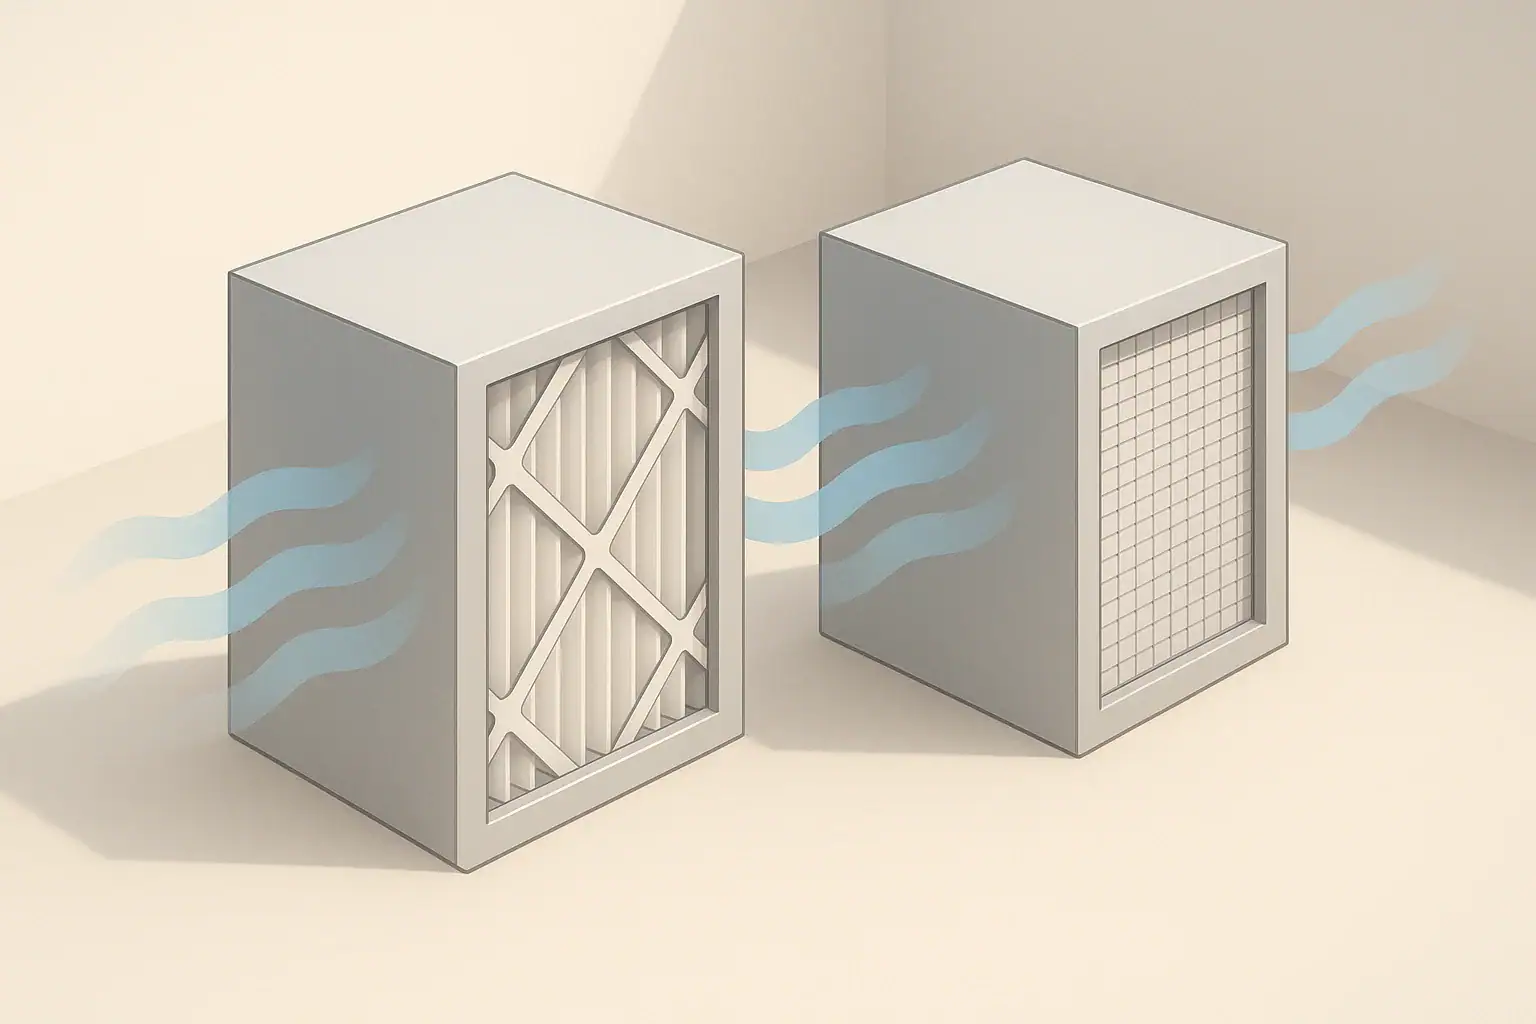
Isometric illustration comparing two generic air filters

True HEPA filters are tested to capture at least 99.97% of 0.3 micron particles, while HEPA-type filters usually have lower or undefined efficiency, especially for the finest dust, smoke, and allergen-sized particles. In practice, that means a True HEPA purifier is typically more reliable for asthma, allergies, and smoke, while HEPA-type is better thought of as an upgraded dust filter.

Because packaging often uses vague wording like “HEPA-like” or “captures up to 99% of particles,” it can be hard to know what you are really getting. This guide breaks down what the labels mean, how HEPA filtration works, and how to read the specs so you can match the filter type to your real indoor air problems.

You will also see concrete examples, comparison tables, and a checklist of specs to look for before you buy or replace an air purifier filter. The goal is to help you make a practical decision, not just decode technical jargon.

What True HEPA and HEPA-Type Really Mean (and Why It Matters)

HEPA stands for High Efficiency Particulate Air. It is a performance standard, not a material or a brand name. In most residential contexts, a filter is considered HEPA-level if it can:

  • Capture at least 99.97% of particles that are about 0.3 micrometers (μm) in diameter under defined test conditions, and
  • Maintain that efficiency at a specified airflow and pressure drop.

The 0.3 μm size is called the “most penetrating particle size” (MPPS) because it is the hardest size to capture. If a filter performs well at 0.3 μm, it will usually perform as well or better for both smaller and larger particles.

In everyday shopping, you will see two broad groups of labels:

  • True HEPA (or HEPA H13/H14, HEPA-grade): Indicates that the filter media has been tested to a recognized HEPA efficiency at or near 0.3 μm.
  • HEPA-type / HEPA-like / HEPA-style: Suggests “similar to HEPA,” but with no guaranteed efficiency at 0.3 μm and often tested only on larger particles.

This difference matters most when you care about the smallest particles that stay suspended in the air for a long time and reach deep into the lungs. Those include smoke, fine dust, and many allergen fragments. For mainly visible dust and lint, HEPA-type can still help, but it is not equivalent to True HEPA.

Key Concepts: How HEPA Filtration Works

Both True HEPA and HEPA-type filters use a dense mat of fibers to capture particles from the air. The difference is how efficient that mat is at stopping the most difficult particle sizes.

Core HEPA Performance Standard

In general indoor air applications, a HEPA filter is expected to:

  • Capture at least 99.97% of 0.3 μm particles in a single pass
  • Be tested at a specified airflow (for example, a certain number of cubic feet per minute)
  • Operate within an acceptable pressure drop so the fan can still move enough air

Some standards further divide HEPA into classes like H13 and H14. These classes describe minimum efficiencies for ultrafine particles at very specific test sizes and conditions. For homes, you will more often see “True HEPA” without a class number, but the idea is the same: a defined, tested minimum performance.

How Fibers Capture Particles

Inside the filter, air moves through a tangled web of fibers. Particles are captured by several physical mechanisms:

  • Inertial impaction: Larger particles (like coarse dust) cannot follow the air streamlines around fibers, so they crash into the fibers and stick.
  • Interception: Medium-sized particles follow the air stream but pass close enough to a fiber that they touch it and adhere.
  • Diffusion: Very small particles move randomly (Brownian motion) and wander into fibers, where they are captured.

These mechanisms overlap. Efficiency is high for very small and very large particles, and lowest around 0.3 μm, which is why that size is used for rating.

True HEPA vs HEPA-Type in Concept

From a design standpoint, True HEPA filters generally use denser media and tighter seals, which:

  • Increase capture of fine particles
  • Increase resistance to airflow (the fan has to work harder)

HEPA-type filters often use looser media that is easier to push air through but does not stop as many of the smallest particles per pass. They may still capture a high percentage of larger dust and lint.

Typical differences between True HEPA and HEPA-type filters in home use. Example values for illustration.
Feature True HEPA HEPA-Type
Rated efficiency ≈99.97% at 0.3 μm Often 85–95% at ≥1–2 μm (or not specified)
Fine smoke / PM2.5 High removal per pass Moderate or unknown removal
Visible dust & lint Very effective Usually effective
Airflow resistance Higher (denser media) Lower (easier airflow)
Noise at same clean air output Often higher fan speed/noise needed Often lower fan speed/noise
Best suited for Allergies, asthma, smoke, pollution General dust reduction, light use

Real-World Examples: When the Difference Shows Up

On paper, the difference between 95% and 99.97% might not sound dramatic. In a real room, it can be noticeable—especially over hours of breathing the air.

Typical Indoor Particle Sizes

Common indoor contaminants span a wide size range:

  • Visible dust and lint: Often tens of micrometers (μm) across
  • Pollen grains: Roughly 10–100 μm
  • Mold spores: Commonly 2–10 μm
  • Pet dander fragments: Often below 5 μm, some near 1 μm
  • Fine smoke particles: Frequently below 1 μm
  • Traffic-related fine particles (PM2.5): Less than 2.5 μm, many far smaller

True HEPA filters are designed to be efficient across this entire range, including the submicron fraction that makes up much of PM2.5. HEPA-type filters usually do well on the larger end of this list but may let more of the finest fraction pass through.

Example 1: Seasonal Allergies in a Bedroom

Imagine a small bedroom where the main triggers are pollen and pet dander:

  • A True HEPA purifier can significantly reduce both the larger pollen grains and the smaller dander fragments that stay airborne longer. Over several hours of continuous operation, the overall allergen load in the room air drops noticeably.
  • A HEPA-type purifier may still capture a large portion of pollen, because pollen is relatively big, but may be less effective on the smallest dander fragments. Symptoms might improve, but not as much as they could with a verified HEPA-level filter.

Example 2: Wildfire Smoke Infiltrating a Living Room

During a smoke event, most of the concerning particles are in the fine and ultrafine range:

  • With True HEPA, each pass through the purifier removes a large fraction of those fine smoke particles, so the indoor haze and odor decrease more quickly and stay lower while the purifier runs.
  • With HEPA-type, visible haze may still improve, but the smallest smoke particles responsible for deep lung penetration may be removed more slowly or less completely.

Example 3: Light Dust Control in a Home Office

In a relatively clean home office where the main annoyance is visible dust settling on surfaces:

  • A HEPA-type purifier that moves a lot of air can noticeably slow dust buildup on desks and equipment.
  • Upgrading to True HEPA may still help, but the difference might be smaller than in the smoke or allergy examples, especially if no one in the room has respiratory sensitivities.
Example scenarios where True HEPA vs HEPA-type makes a bigger or smaller difference. Example values for illustration.
Scenario Main particles of concern True HEPA impact HEPA-Type impact
Wildfire smoke Submicron smoke, PM2.5 Strong reduction in fine particles Moderate; may leave more fine particles
Seasonal pollen & dander 10–100 μm pollen, 1–5 μm dander High reduction across sizes Good on pollen, weaker on smallest dander
General dust control Coarse dust >10 μm Very effective Usually effective enough
Near busy road Traffic-related fine particles Better PM2.5 reduction Variable; depends on actual efficiency

Common Mistakes and Troubleshooting HEPA Performance

Even with a True HEPA filter, it is easy to set up a purifier in a way that limits its real-world benefit. The same is true for HEPA-type units. Watching for these common mistakes can help you get closer to the performance promised on the box.

Mistake 1: Assuming Any “HEPA” Label Means True HEPA

Marketing phrases can be confusing. Examples that often indicate HEPA-type rather than True HEPA include:

  • “HEPA-style filtration” with no particle size listed
  • “Captures up to 99% of airborne particles” without stating the size
  • “Traps particles as small as 2 microns” but no mention of 0.3 μm

Troubleshooting cue: If your main concern is smoke, fine dust, or asthma triggers and the packaging never mentions 0.3 μm or 99.97%, treat it as HEPA-type performance and adjust expectations.

Mistake 2: Undersizing the Purifier for the Room

Even the best filter media cannot help if too little air passes through it. Common signs that a purifier is undersized include:

  • Odors or smoke lingering for hours despite continuous operation
  • Dust still settling quickly on surfaces
  • Noticeable improvement only when you sit very close to the unit

Troubleshooting cue: Check the clean air delivery rate (often expressed as a clean air delivery rate). If it is designed for a much smaller room than you are using, consider moving it to a smaller space or adding a second unit.

Mistake 3: Running Only on the Quietest Fan Setting

Low fan speeds are quieter but move less air. For many purifiers, the highest or second-highest speed is needed for meaningful particle reduction during active pollution events (like cooking or nearby fires).

Troubleshooting cue: If you only ever use the lowest speed, try running a higher speed for a few hours when pollution is worst, then dropping back to a lower setting to maintain cleaner air.

Mistake 4: Ignoring Filter Seals and Bypass

Air naturally takes the path of least resistance. If there are gaps around the filter frame, a portion of the air will bypass the media entirely. Signs of bypass include:

  • Visible dust streaks around the edges of the filter
  • Strong odor at the air outlet even with a new filter installed
  • A filter that looks unusually clean while the room still seems dusty

Troubleshooting cue: Make sure the filter is fully seated, any gaskets are intact, and the access panel closes tightly. If parts are warped or damaged, performance can drop regardless of the media rating.

Mistake 5: Letting Filters Load Until Airflow Collapses

As both True HEPA and HEPA-type filters load with dust, they become harder to push air through. Symptoms of an overloaded filter include:

  • Fan noise changing pitch as it works harder
  • Noticeably weaker airflow at the outlet
  • Dust buildup on surfaces increasing again after previously improving

Troubleshooting cue: If performance drops and the filter looks heavily loaded, replacement or cleaning (if allowed by the manufacturer) often restores airflow and overall effectiveness.

Safety Basics Around HEPA and HEPA-Type Use

HEPA filtration is generally considered safe for home use, but there are a few safety-related points to keep in mind when choosing and operating a purifier.

Airflow and Breathing Comfort

True HEPA filters can be more restrictive, so some units use stronger fans to maintain adequate airflow. This is usually not a problem, but in very small rooms you may notice drafts or noise if you sit directly in the airflow path.

  • If the air feels uncomfortably strong, angle the outlet away from seating or move the unit slightly farther from where you sit or sleep.
  • Avoid blocking the intake or outlet with furniture or curtains, which can strain the motor and reduce performance.

Electrical and Overheating Considerations

Any device that runs for many hours should be used with basic electrical safety in mind:

  • Place the purifier on a stable, flat surface where it cannot tip over.
  • Keep vents clear of fabric, paper, and other materials that might block airflow.
  • Do not cover the unit while it is operating, and avoid running it in enclosed cabinets or tight corners with no space around it.

Filter Handling and Dust Exposure

When replacing a heavily loaded True HEPA or HEPA-type filter, some of the captured dust can be released if you shake or squeeze it.

  • Turn the purifier off before opening the filter compartment.
  • Handle used filters gently and avoid banging them to “clean” them unless the manufacturer specifically allows it.
  • Consider wearing a simple mask if you are sensitive to dust and must handle a very dirty filter.

Ozone and Add-On Technologies

HEPA media itself does not produce ozone. However, some air cleaners combine HEPA or HEPA-type filters with additional technologies that may generate ozone or byproducts. If you are sensitive to respiratory irritants, focusing on mechanical filtration (HEPA) without active chemical or ionizing add-ons is often the safer choice.

Maintenance and Long-Term Use

Whether you choose True HEPA or HEPA-type, consistent maintenance has a major impact on how well the purifier works over months and years.

Filter Replacement Timing

Typical replacement intervals for home HEPA-style filters range from several months to about a year, depending on:

  • How many hours per day the purifier runs
  • Indoor particle levels (pets, smoking, cooking, outdoor pollution)
  • Whether a washable pre-filter is used to catch larger dust

Signs that replacement may be due include reduced airflow, increased fan noise, or visible heavy loading on the filter surface.

Pre-Filters and Multi-Stage Systems

Many purifiers place a coarse pre-filter in front of the main True HEPA or HEPA-type media. The pre-filter captures hair, lint, and larger dust, which:

  • Extends the life of the main filter
  • Helps keep airflow more stable over time

Cleaning or replacing the pre-filter on schedule can meaningfully improve long-term performance, especially in homes with pets or visible dust problems.

Storage and Downtime

If you plan to store a purifier for a season (for example, only using it during wildfire season):

  • Inspect the filter before storage; if it is near the end of its life, consider replacing it before the next season.
  • Store the unit in a dry area to avoid moisture exposure that could affect the filter media.
  • When bringing it back into service, run it on a higher speed for a while to flush any stale air from the housing.

Monitoring Performance Over Time

You do not need specialized instruments to notice when performance changes. Simple observations help:

  • Compare dust buildup on surfaces before and after starting regular purifier use.
  • Pay attention to how quickly cooking odors or smoke clear when the unit is running.
  • Note any change in allergy or asthma symptoms when the purifier is in regular use versus off.

These practical checks can tell you if the current filter type and maintenance schedule are working for your home.

Practical Takeaways and Specs to Look For

When comparing True HEPA vs HEPA-type, it helps to think in terms of your main air quality goals, not just the label on the box.

When True HEPA Is Usually Worth It

  • You are dealing with smoke from wildfires, cooking, or nearby traffic.
  • Someone in the home has asthma, allergies, or other respiratory sensitivities.
  • Outdoor PM2.5 levels are frequently elevated and you want a clearer reduction indoors.
  • You want the best possible filtration in bedrooms where you spend many hours each night.

When HEPA-Type May Be Acceptable

  • Your main concern is visible dust, lint, and larger debris on surfaces.
  • No one in the home has severe respiratory sensitivities.
  • You prioritize lower noise and cost over maximum fine-particle removal.

Specs to Look For Checklist

Use this checklist when you review product descriptions or replacement filter packaging:

  • Filter type wording
    Look for “True HEPA” or a clearly stated HEPA class (such as H13) if you need high performance; treat “HEPA-type,” “HEPA-like,” and “HEPA-style” as lower or undefined efficiency.
  • Efficiency and particle size together
    Prefer claims like “99.97% at 0.3 μm.” Be cautious with claims that list only a percentage (for example, “99%”) without a particle size.
  • Room size or clean air output
    Confirm that the unit is sized for your actual room. A HEPA filter in an undersized purifier will not clean a large space effectively.
  • Fan speeds and noise
    Check that the purifier can run at a higher speed when needed, and that the noise level is acceptable for where you plan to use it.
  • Filter replacement schedule
    Note the recommended replacement interval and estimated cost so you understand the long-term upkeep for either True HEPA or HEPA-type media.
  • Pre-filter presence
    A washable or replaceable pre-filter can significantly extend the life of the main filter, especially in homes with pets.
  • Seal quality and construction
    Look for mentions of gaskets, tight-fitting frames, or sealed filter compartments that limit bypass around the media.

By focusing on these concrete specs—and matching True HEPA or HEPA-type performance to your actual indoor air concerns—you can choose an air purifier that delivers realistic, noticeable improvements in everyday use.

Frequently asked questions

Which product specifications and features matter most when choosing between True HEPA and HEPA-type?

Prioritize a stated efficiency at a test size (for example, “99.97% at 0.3 μm”), the clean air delivery rate (CADR) or recommended room size, and filter class if provided. Also check seal quality, presence of a washable pre-filter, fan speed range, noise levels, and the expected replacement interval and cost. These specs together determine real-world performance more than marketing terms alone.

How can I tell if my air purifier is undersized or not working for the room?

Signs include odors or smoke lingering, dust continuing to settle quickly, and noticeable improvement only when you sit near the unit. Compare the purifier’s CADR or recommended room size to your actual room and consider adding a second unit or moving it to a smaller space if it is undersized.

Are HEPA and HEPA-type filters safe to use around children, pets, and people with respiratory issues?

Mechanical HEPA filtration itself is generally safe and does not produce ozone. Avoid units that add ionizers or ozone-generating technologies if occupants are sensitive; follow electrical safety guidance, keep vents clear, and perform regular filter maintenance to minimize any dust release during handling.

Can I clean or reuse a True HEPA filter to save money?

Most True HEPA filters are designed to be replaced rather than washed; washing or aggressive cleaning can damage the media and reduce efficiency. Some units include washable pre-filters meant for reuse—cleaning those can extend the life of the main filter, but follow the manufacturer’s instructions for the primary HEPA element.

Will a True HEPA filter make a big difference during wildfire smoke compared with HEPA-type?

Yes—True HEPA filters are much more effective at removing submicron smoke particles (PM2.5 and smaller), so they reduce indoor haze and fine-particle exposure more quickly and thoroughly. HEPA-type filters may improve visible haze but often remove fewer of the smallest, most health-relevant particles.

What simple maintenance steps help keep an air purifier performing well over time?

Replace the main filter according to the recommended schedule, clean or wash any pre-filter regularly, check for tight seals around the filter frame, and avoid blocking intakes or outlets. Running the unit at higher speeds during pollution events and storing it in a dry place when not in use also helps maintain performance.

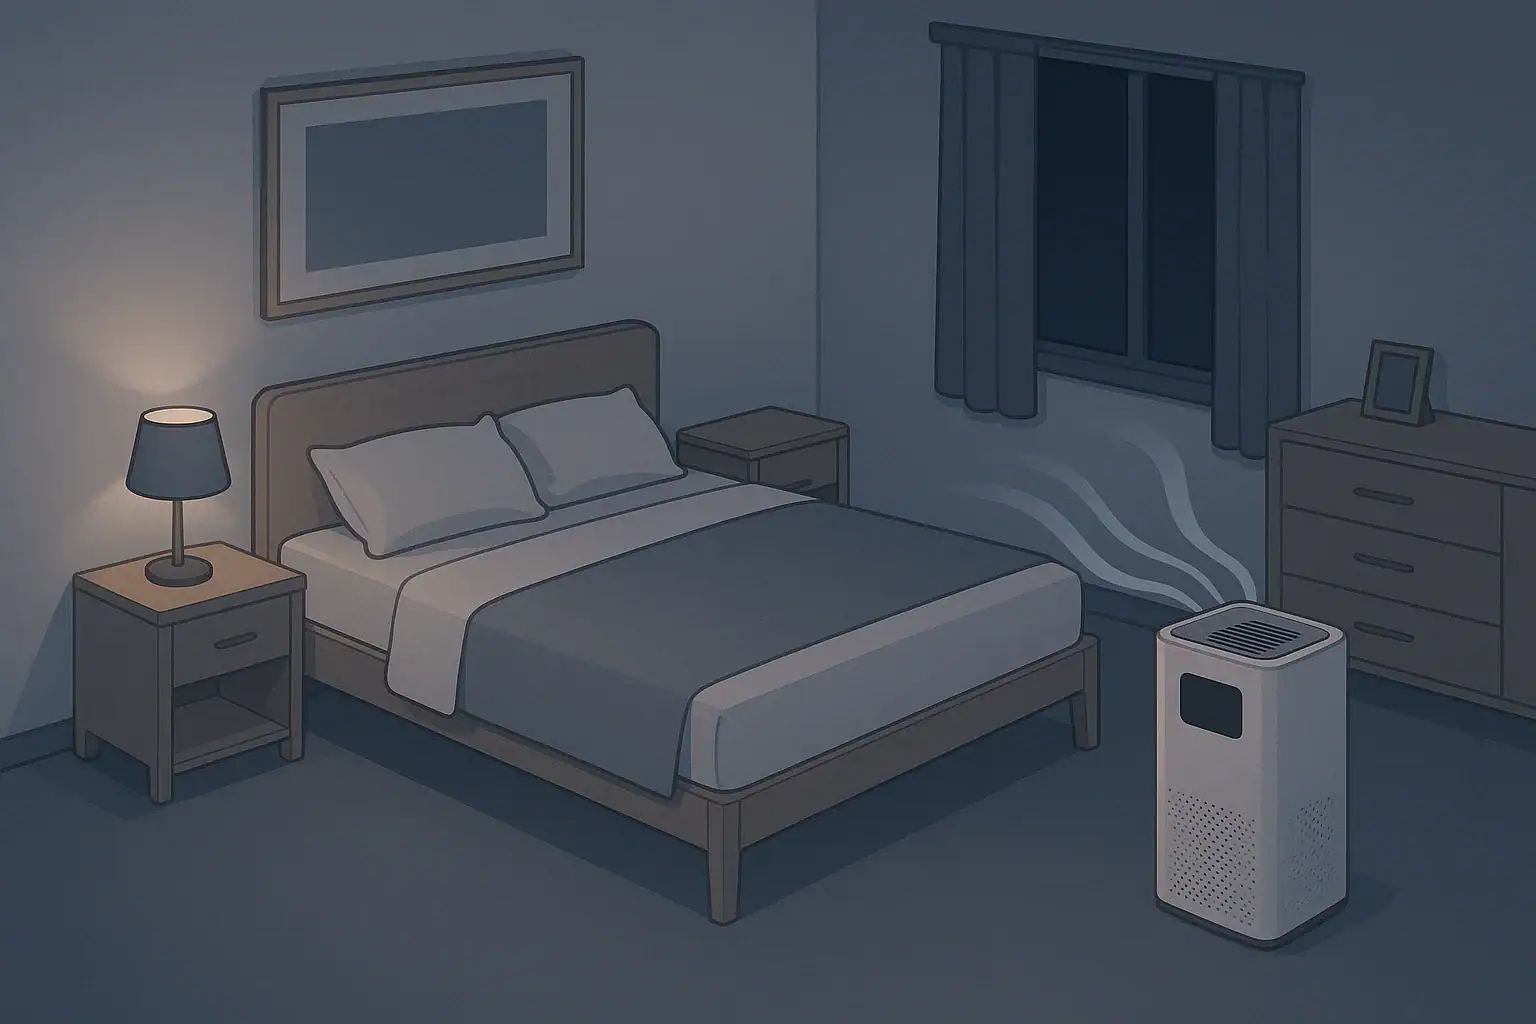
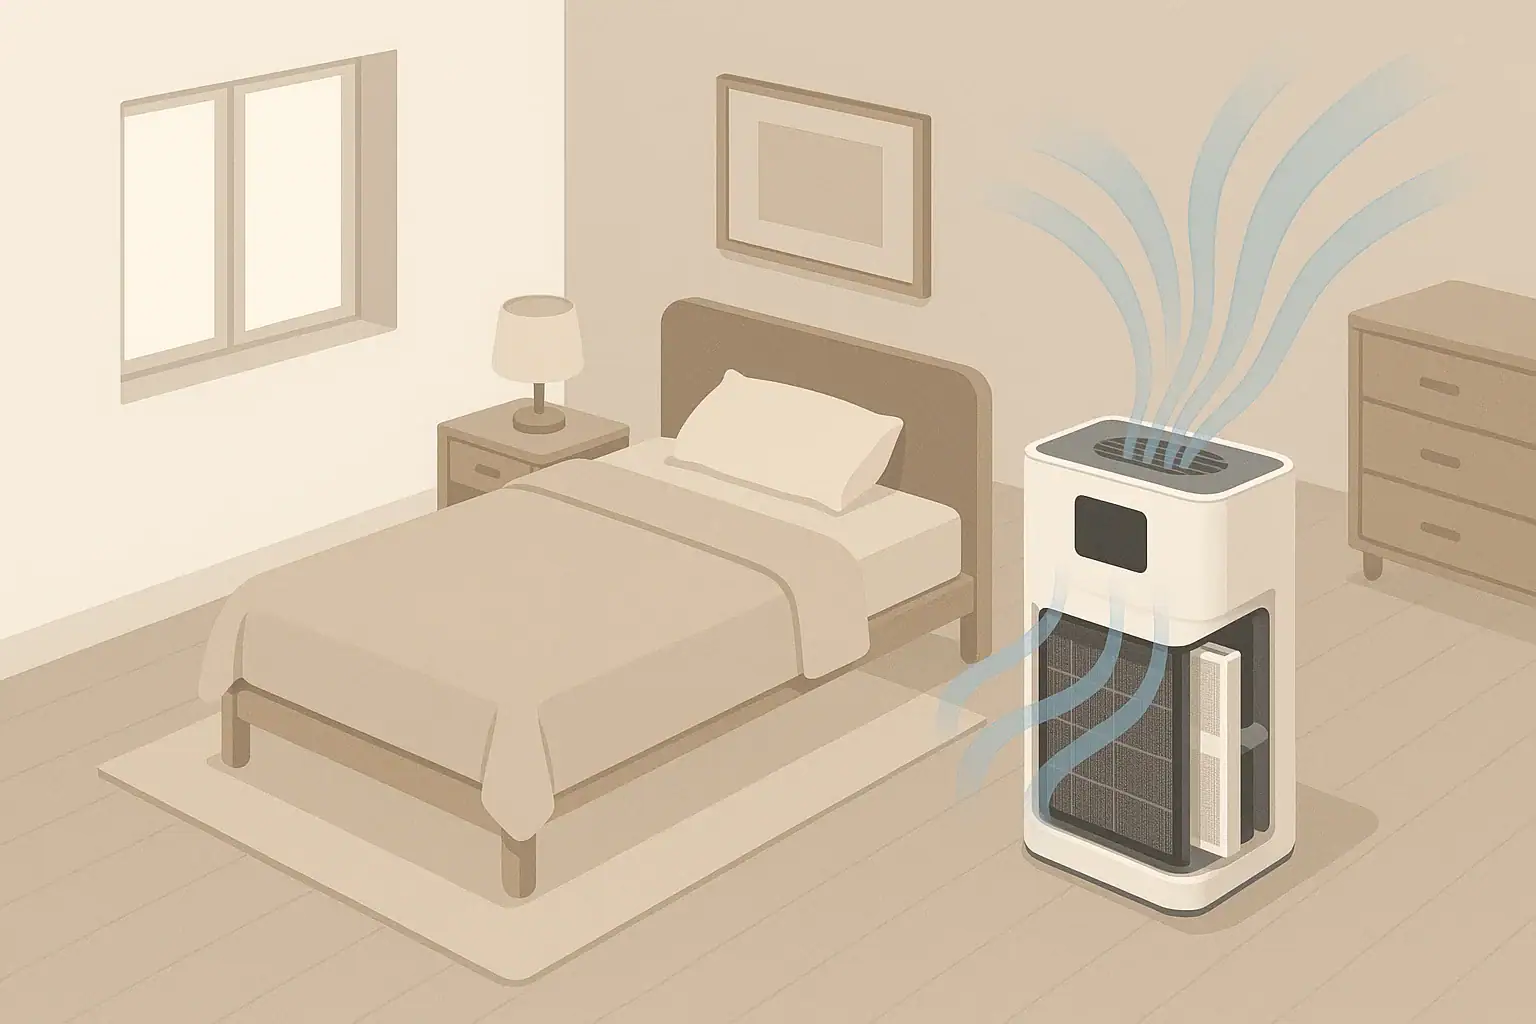
Air Purifier Noise for Sleep: What dB Levels Are Quiet Enough?

Isometric bedroom with quiet air purifier running beside bed

For most people, an air purifier is quiet enough for sleep when it stays around 25–35 dB at the pillow and has a smooth, steady fan sound. That range usually gives you cleaner bedroom air without the fan noise becoming the thing that keeps you awake.

When you bring an air cleaner into the bedroom, you are adding a constant new sound: fan hum, airflow, and sometimes mechanical tones. Whether that becomes relaxing white noise or a nightly annoyance depends on both the decibel (dB) level and the character of the sound. Understanding air purifier noise for sleep helps you choose the right model, fan speed, and placement so you get enough filtration without sacrificing rest.

This guide explains what different dB levels actually feel like at night, how to read noise specs, and how to troubleshoot a purifier that sounds too loud. You will also find safety basics, long-term maintenance tips, and a practical checklist of specifications to look for when you want quiet, effective bedroom filtration.

What Air Purifier Noise Means for Sleep (and Why It Matters)

Noise from an air purifier is mainly the sound of the fan pushing air through filters. In a bedroom, that sound can be helpful or disruptive. The goal is not silence at any cost, but a combination of low-to-moderate noise and smooth sound quality that fades into the background while you sleep.

Most bedroom air purifiers are rated somewhere between about 18 dB on the lowest setting and 55–60 dB on the highest. Because the decibel scale is logarithmic, a purifier that is 10 dB louder can feel roughly twice as loud to your ears. That is why the difference between 28 dB and 35 dB can feel small during the day but surprisingly big at night in a quiet room.

Why this matters for sleep quality:

  • Light sleepers are more likely to wake up from changing or higher-pitched sounds, even if the dB level is not extreme.
  • People with allergies or asthma may need higher fan speeds for adequate filtration, so they must balance noise tolerance with health needs.
  • Different homes have different background noise. A “quiet” air purifier in a city apartment can feel too loud in a rural bedroom.

Thinking about air purifier noise in terms of both volume and sound character makes it easier to choose settings that support deep, continuous sleep.

Key Noise Concepts: dB Levels, Distance, and Sound Character

To judge whether an air purifier will be quiet enough for sleep, it helps to understand a few basic sound concepts: decibel levels, how distance changes what you hear, and the difference between smooth and irritating noise.

Decibels and Typical Bedroom Ranges

Decibels (dB) describe sound intensity. Most home appliance specs use dB(A), which weights frequencies roughly the way human hearing does. At night, even small changes in dB can matter because the rest of the room is so quiet.

Noise level at pillow (dB) What it typically feels like at night Sleep impact for most people
Under 25 dB Almost silent, faint airflow if you listen closely Rarely disturbing; may feel like the unit is off
25–30 dB Very soft whoosh or hum Comfortable for nearly all sleepers
30–35 dB Gentle white noise, clearly audible but smooth Often ideal balance of masking and quiet
35–40 dB Noticeable fan sound Fine for many; may bother very light sleepers
40–45 dB Prominent hum, similar to a louder bathroom fan Can disturb light sleepers in quiet homes
Over 45 dB Loud fan noise, dominates the room Better for short, intensive cleaning than overnight use
Typical perceived bedroom noise from an air purifier at different dB levels. Example values for illustration.

Manufacturers usually measure noise about one meter (roughly three feet) from the purifier in a test room. At your pillow, the level will depend on how far the unit is from the bed, how sound reflects off walls and furniture, and how quiet your home is overall.

Distance and Placement Effects

In simple terms, moving a purifier farther away generally makes it sound quieter. In open space, every time you double the distance, sound level drops by roughly 6 dB. Real rooms are more complicated because of reflections, but a few practical rules hold:

  • Placing the purifier 6–10 feet from the bed usually sounds much softer than 2–3 feet away.
  • Putting it in a corner or tight alcove can make noise feel sharper due to reflections.
  • Pointing the air outlet away from your head often reduces high-frequency hiss at the pillow.

Sound Character: Steady vs. Fluctuating, Low vs. High Pitch

Two purifiers at the same dB(A) can feel very different at night because of sound character:

  • Steady noise (constant fan speed, smooth airflow) tends to be easier to sleep through and can act like white or pink noise.
  • Fluctuating noise (auto modes that ramp up and down, rattles, intermittent buzzing) often causes micro-awakenings.
  • Lower-pitched whoosh is usually more soothing than a high-pitched whine or whistle, even at the same dB.

Because dB ratings do not describe pitch or fluctuations, you may need to experiment with fan modes and placement to get a sound profile that feels genuinely sleep-friendly.

Real-World Bedroom Examples and Use Scenarios

How quiet your air purifier needs to be for sleep depends heavily on your environment and sensitivity. These examples show how the same purifier can feel very different in different bedrooms.

Quiet Suburban or Rural Bedroom

In a detached home on a quiet street, nighttime background noise can be as low as 20–30 dB. In this setting:

  • A purifier running at 25–30 dB will be clearly audible but still soft.
  • A setting around 30–35 dB may sound like gentle white noise and help mask creaks or distant outdoor sounds.
  • Speeds that push noise above 40 dB can feel intrusive, especially for light sleepers.

People who prefer very quiet bedrooms often run a slightly larger purifier on its lowest or second-lowest setting to keep noise down while still maintaining enough airflow.

City Apartment or Noisy Neighborhood

In a city apartment near traffic, elevators, or neighbors, the baseline noise may hover around 35–45 dB or higher. In this case:

  • A purifier at 30–35 dB may be barely noticeable over background city sounds.
  • A steady 35–40 dB fan noise can act as sound masking and make sudden noises less disruptive.
  • Short periods at 40–45 dB may be tolerable if they help with heavy pollution or smoke events.

People who already use a separate white noise machine sometimes replace or supplement it with a purifier running at a moderate speed, as long as the sound is smooth and consistent.

Nurseries, Kids’ Rooms, and Shared Bedrooms

Children and babies can be more sensitive to sudden, sharp sounds but may sleep well with steady background noise. In shared bedrooms, you also have to respect the lightest sleeper in the room.

  • For infants and toddlers, many caregivers aim for 20–30 dB near the crib, or slightly more if used as gentle white noise.
  • For school-age children, 25–35 dB usually provides a comfortable mix of filtration and sound masking.
  • In shared adult bedrooms, a purifier that can run below 35 dB on a usable setting offers more flexibility for different noise preferences.

Example Nighttime Settings in Different Rooms

Bedroom type Typical background noise Suggested purifier setting for sleep Notes
Rural or very quiet suburban 20–30 dB Low or sleep mode (roughly 22–30 dB) Keep unit 6–10 feet from bed; avoid auto modes that ramp
Typical suburban 25–35 dB Low to low–medium (about 25–35 dB) Use slightly higher speed if you prefer more masking noise
Urban apartment facing street 35–45 dB Low–medium or medium (about 30–40 dB) Steady fan noise can help cover traffic and hallway sounds
Nursery 25–35 dB Low or sleep mode (about 20–30 dB) Avoid frequent speed changes; keep unit out of reach
Shared adult bedroom 25–35 dB Lowest setting that maintains comfort (roughly 25–33 dB) Adjust based on the lightest sleeper’s preference
Example purifier settings and noise ranges for different bedroom situations. Example values for illustration.

Common Noise Problems and Troubleshooting Mistakes

Even a purifier that looks quiet on paper can sound loud or irritating in real life if it is used or maintained incorrectly. Many of the most common issues are simple to diagnose and fix.

Common Mistakes That Make Purifiers Seem Louder

Watch for these habits that often push noise above a sleep-friendly level:

  • Running on maximum speed all night in a small bedroom, even when lower speeds would provide enough filtration.
  • Placing the unit too close to the bed, so the fan noise and airflow hit your ears directly.
  • Using auto mode overnight, causing sudden speed changes when the sensor detects minor dust or movement.
  • Positioning in corners, alcoves, or directly against walls, where sound reflections and vibrations can amplify noise.
  • Ignoring filter maintenance, which can force the fan to work harder through clogged filters.

Troubleshooting Unwanted Noises

If your air purifier seems too loud for sleep, or has developed new noises, use these cues to narrow down the cause:

  • Rattling or buzzing: Often caused by loose panels, mis-seated filters, or the unit vibrating on a hard surface. Try reseating filters, tightening panels, and placing the purifier on a stable, non-hollow surface.
  • Whistling or high-pitched hiss: Can indicate partially blocked air inlets/outlets or filters that are overdue for cleaning or replacement. Check for curtains, furniture, or walls too close to vents.
  • Sudden surges in fan speed: Usually linked to auto or turbo modes reacting to particles. Switch to a fixed low or sleep mode at night to keep speed steady.
  • Vibration through floors or furniture: Common on lightweight tables or thin floors. Move the unit to a heavier surface or add a soft pad underneath.

Quick Adjustments to Reduce Nighttime Noise

Before assuming you need a different purifier, try these simple changes:

  • Run the purifier on high for 30–60 minutes before bed with the door closed, then switch to low for the night.
  • Increase the distance between the purifier and your head by a few feet and avoid direct airflow at the bed.
  • Turn off auto or sensor-based modes overnight so the fan speed stays constant.
  • Rotate the unit slightly so the strongest airflow is not pointed directly at hard walls or furniture surfaces.

Safety Basics When Running an Air Purifier While You Sleep

Most modern residential air purifiers are designed to run continuously and are generally safe to use overnight. Still, a few safety practices are worth following when the device will be on for many hours while you are asleep.

Electrical and Placement Safety

  • Use a dedicated, grounded outlet when possible, and avoid daisy-chaining multiple high-draw appliances on the same power strip.
  • Keep cords tidy and out of walkways to prevent tripping hazards during nighttime bathroom trips.
  • Maintain clearance around air inlets and outlets (often at least a few inches on all sides) to prevent overheating and maintain airflow.
  • Avoid blocking vents with bedding, curtains, or furniture, especially in small rooms where fabrics can shift during the night.

Filter and Air Quality Safety

  • Follow filter replacement schedules to prevent buildup of dust and particles inside the unit, which can affect both performance and hygiene.
  • Do not modify filters or use improvised materials that are not designed for the purifier, as this can change airflow, noise, and filtration performance.
  • Be cautious with added features such as ionization or similar functions if anyone in the room is sensitive to byproducts; use standard mechanical filtration for the most predictable results.

Safe Use in Nurseries and Around Children

  • Place the purifier where children cannot tip it over or block vents with toys or blankets.
  • Secure cords so they are not accessible for pulling or chewing.
  • Keep the unit outside the crib area and aim for gentle airflow across the room, not directly on the child.

Maintenance and Long-Term Noise Control

Air purifiers tend to get louder over time if they are not maintained. Dust buildup, clogged filters, and worn parts all increase resistance to airflow and force the fan to work harder. A simple maintenance routine helps keep both noise and indoor pollutants under control.

Routine Tasks That Help Keep Noise Low

  • Pre-filter cleaning: Many units have a washable or vacuumable pre-filter. Cleaning it regularly (often every 2–4 weeks in dusty homes) keeps larger particles from clogging the main filter and raising fan noise.
  • Main filter replacement: Follow the manufacturer’s recommended interval, adjusting for heavy use or high pollution. An overdue filter can make the purifier louder and less effective.
  • Exterior dusting: Wipe down intake and outlet grilles so dust does not restrict airflow.
  • Check for loose parts: Every few months, inspect panels, filter doors, and screws for looseness that could cause rattles.

Maintenance Issues That Often Create Extra Noise

Observed noise or symptom Likely cause Simple action to try
Fan sounds strained or louder than usual on same setting Clogged pre-filter or main filter Clean pre-filter and check if main filter is due for replacement
New rattling or buzzing appears Loose panel, misaligned filter, or unstable surface Reseat filters, tighten panels, and move unit to a solid, level surface
Whistling or sharp airflow noise Blocked air inlet/outlet or object too close to vents Clear at least several inches of space around all vents
Noise increases after several months without cleaning Dust accumulation inside housing and grilles Unplug unit and gently vacuum or wipe accessible grilles
Loud vibration at certain fan speeds only Resonance with furniture or floor Reposition purifier or place a soft pad or mat under the base
Common maintenance-related noise issues and simple corrective actions. Example values for illustration.

Long-Term Use Strategies for Quiet, Effective Filtration

To keep both noise and pollutants under control over months and years:

  • Choose a purifier sized slightly larger than your bedroom so it can run on lower, quieter speeds while still achieving several air changes per hour.
  • Schedule filter checks on a calendar or reminder app rather than waiting for performance to drop.
  • Reassess placement if you change furniture, add rugs, or move the bed, as room acoustics and airflow paths will change.

Practical Takeaways and Specs to Look For

When you are choosing or adjusting an air purifier for sleep, it helps to have a simple set of targets. The idea is to get enough clean air for your bedroom size while keeping noise in a range your household can comfortably tolerate.

Key Takeaways for Quiet Sleep

  • Aim for 25–35 dB at the pillow for most sleepers; this usually means using low or sleep mode in typical bedrooms.
  • Use higher speeds before bedtime to quickly clean the air, then switch to a quieter setting for the night.
  • Favor steady, low-pitched fan noise over modes that frequently ramp up and down.
  • Placement matters: a few extra feet from the bed and avoiding corners can noticeably reduce perceived noise.
  • Regular filter maintenance helps keep both noise and pollutants under control over the long term.

Specs to Look For When You Want Quiet Bedroom Filtration

When you compare air purifiers for nighttime use, focus on these practical specifications and features:

  • Noise rating at low or sleep mode: Look for published minimum noise in the 20–30 dB(A) range if you are sensitive to sound.
  • Noise rating at usable medium speed: For sound masking and higher airflow, check that medium speed stays below about 40 dB(A) if you plan to sleep with it on.
  • Clean Air Delivery Rate (CADR) and room size rating: Choose a model rated for at least your bedroom size so it can run on quieter speeds while still cycling the air several times per hour.
  • Dedicated sleep or night mode: Helpful for limiting fan speed, dimming lights, and avoiding sudden noise changes.
  • Number of fan speeds: More speed steps give you finer control to find a comfortable balance between noise and airflow.
  • Stable, sealed filter design: Good sealing reduces bypass leaks and rattles from loose panels.
  • Clear maintenance schedule: Easy access to pre-filters and main filters makes it more likely you will keep the unit clean and quiet.

By combining realistic dB targets, thoughtful placement, and routine maintenance, you can use an air purifier as a nighttime ally: quietly cleaning the air while you sleep, instead of becoming another source of bedroom noise.

Frequently asked questions

Which air purifier specs and features matter most for quiet nighttime use?

Look for a low published noise rating on sleep or lowest mode (ideally in the 20–30 dB(A) range), a CADR and room-size rating that matches your bedroom so the unit can run at lower speeds, and a dedicated night mode or multiple fan speeds for fine control. Also favor sealed filter designs and easy access to pre-filters to reduce rattles and maintenance-related noise over time.

How can running a purifier overnight make it seem louder than it actually is?

Common causes include running at unnecessarily high speeds, placing the unit too close to the bed, using auto modes that ramp the fan, or operating with clogged filters that force the fan to work harder. Simple fixes like increasing distance, switching off auto modes at night, and cleaning filters usually reduce perceived loudness.

Is it safe to run an air purifier all night?

Yes—most modern residential air purifiers are designed for continuous operation and are safe to run overnight when used according to the manufacturer’s instructions. Practice basic electrical and placement safety: use a grounded outlet, keep vents clear, secure cords, and follow filter replacement schedules to maintain performance and hygiene.

How far should I place my air purifier from the bed to minimize noise without losing effectiveness?

Placing the purifier about 6–10 feet from the bed typically reduces perceived noise while still allowing effective room circulation for typical bedroom sizes. Keep the outlet pointed away from your head and avoid tight corners or alcoves where reflections can amplify high-frequency sounds.

What types of purifier noises suggest maintenance or a problem?

Rattling or buzzing often indicates loose panels or mis-seated filters; whistling or high-pitched hiss can point to blocked inlets/outlets or overdue filter cleaning; strained fan sounds may mean filters are clogged. Inspect and reseat filters, tighten panels, clean grilles, and reposition the unit to a stable surface to troubleshoot these issues.

Do Air Purifiers Help With Smoke and Odors? What They Can (and Cannot) Do

Isometric living room with air purifier cleaning smoky air

Air purifiers can significantly reduce smoke and many odors in a room, but they cannot erase every smell or health risk on their own. For wildfire smoke, cooking smoke, and general indoor smells, the right combination of particle filtration and gas-phase media often makes the air look clearer and smell cleaner, especially in a properly sized room.

However, smoke and odors are made up of both particles and gases, and no single device captures every component perfectly. Understanding what air purifiers are good at, where they fall short, and how to use them alongside ventilation and source control will help you get realistic results. This guide walks through how air purifiers handle smoke and smells, practical examples from everyday homes, common mistakes, safety basics, and the key specs to look for before you buy.

What “Smoke and Odor Control” Really Means (and Why It Matters)

When people ask whether an air purifier helps with smoke and odors, they are usually dealing with one of a few situations:

  • Seasonal wildfire smoke drifting indoors.
  • Lingering cooking fumes after frying, broiling, or searing.
  • Smell from fireplaces, candles, incense, or tobacco.
  • General musty or stale odors in a closed-up home or apartment.

All of these involve two main pollutant types:

  • Particles: Soot, ash, tar droplets, and fine aerosols that make air look hazy and contribute to PM2.5 levels.
  • Gases and vapors: Volatile organic compounds (VOCs) and other odor molecules that remain in the air as invisible gases.

Smoke and odor control matters for more than comfort. Fine particles can reach deep into the lungs, and high levels of smoke are linked to irritation and longer-term health risks. Strong odors can also signal poor ventilation or ongoing pollutant sources. Air purifiers are one tool to lower exposure indoors, especially when outdoor air is poor or when you cannot immediately remove the source.

How Air Purifiers Work on Smoke and Odors

Most home air purifiers are recirculating devices: they pull room air in, pass it through one or more filters or media, then push the cleaned air back out. For smoke and smells, two technologies matter most.

Particle Filters for Visible Smoke and Haze

High-efficiency particle filters are designed to capture very small particles suspended in the air. For smoke, this includes soot, ash, and tar droplets in the fine (PM2.5) and ultrafine ranges. When particle filtration is effective, you typically notice:

  • Less visible haze in the room after a smoke event.
  • Lower readings on a particle monitor, if you use one.
  • Less dust-like residue settling as quickly on surfaces.

Performance depends on both filter efficiency and airflow. A highly efficient filter in a weak fan will clean slowly; a strong fan with a poor filter will push a lot of air but not remove enough particles.

Gas-Phase Media for Odors and VOCs

Most odors are caused by gases that pass straight through particle filters. To address these, many air purifiers add gas-phase media such as:

  • Activated carbon: A porous form of carbon that holds gas molecules on its surface.
  • Other sorbents: Media designed to target specific gases, sometimes blended with carbon.

These materials work by adsorption, not by sieving like a particle filter. Effectiveness depends on:

  • The mass of media (more media generally means more capacity).
  • Contact time (air should not rush through too quickly).
  • The chemistry of the odor (some compounds are harder to capture).

When the gas-phase media are undersized or saturated, you may see clear air but still notice strong smells, especially from cooking, smoke, or pets.

Other Technologies You May See

Some purifiers include extra features:

  • Pre-filters: Capture larger dust and hair, protecting the main filter.
  • Ionizers or electrostatic collectors: Charge particles so they stick to plates or nearby surfaces.
  • UV-based systems: Aim to inactivate microbes but do not directly remove smoke or most odors.

These can be useful in specific cases, but they do not replace the need for strong particle filtration and meaningful gas-phase media when your primary goal is smoke and odor reduction.

Real-World Examples: What to Expect in Typical Rooms

How well an air purifier handles smoke and odors depends on room size, device capacity, and how you operate it. The examples below assume doors and windows are closed and the purifier is running on a higher setting.

Example 1: Wildfire Smoke in a Bedroom

During a wildfire event, outdoor air may be visibly hazy and smell smoky. Indoors, you might notice:

  • A smoky smell when you wake up.
  • Scratchy throat or irritated eyes.
  • Fine ash dusting on window sills over time.

A correctly sized purifier with a high-efficiency particle filter can often lower indoor particle levels substantially compared with outdoors. You may notice:

  • Visible haze clearing within tens of minutes to an hour after closing windows.
  • Less smell over a few hours as gas-phase media gradually adsorb some smoke compounds.
  • More comfortable breathing in the room where the purifier is running continuously.

Example 2: Cooking Odors in an Open Kitchen–Living Area

After pan-frying or broiling, it is common to have both visible smoke and strong odors. A purifier can:

  • Clear visible particles faster once cooking is done and the source is off.
  • Reduce the intensity and duration of lingering cooking smells.

However, if the space is large and open, a single small purifier may not keep up. You might still smell fried food hours later, especially in nearby fabrics and upholstery. Using a range hood that vents outdoors, plus an air purifier, usually works better than relying on the purifier alone.

Example 3: Occasional Indoor Smoking

In a room where someone occasionally smokes, a purifier with both particle and gas-phase filtration can:

  • Lower the concentration of airborne smoke particles while it runs.
  • Reduce—but rarely eliminate—the smell of smoke afterward.

Even with a strong purifier, smoke residue can still deposit on walls, curtains, and carpets. If smoking continues in the same space, filters will load quickly and odors may become embedded in surfaces.

Room Size and Capacity Comparison

The match between purifier capacity and room size is one of the biggest factors in real-world performance. The table below shows illustrative values for how sizing affects expectations.

Room type Approx. area Purifier capacity match Typical smoke/odor result
Small bedroom 120 sq ft Purifier rated for small rooms Noticeable particle reduction and moderate odor reduction within 30–60 minutes after a smoke event.
Medium living room 250 sq ft Purifier rated for medium rooms Good particle control; odors fade but may still be detectable on fabrics for several hours.
Open-plan living / kitchen 400+ sq ft Only a small-room purifier Visible haze may clear slowly; strong cooking or smoke odors can linger much longer than expected.
How purifier capacity relative to room size affects smoke and odor control. Example values for illustration.

Common Mistakes and Troubleshooting Smoke and Odor Problems

Many people are disappointed with air purifiers for smoke and smells because of a few predictable missteps. Recognizing these patterns makes troubleshooting easier.

Mistake 1: Expecting a Particle-Only Purifier to Remove Odors

Symptom: Air looks clear, but the room still smells smoky or like last night’s dinner.

Likely cause: The purifier has a good particle filter but little or no gas-phase media.

What to do:

  • Confirm whether the unit includes a substantial odor or carbon filter, not just a thin deodorizing layer.
  • Combine filtration with ventilation (open windows when outdoor air is acceptable).
  • Clean fabrics and soft surfaces that may be holding smells.

Mistake 2: Undersizing the Purifier for the Space

Symptom: The purifier runs, but smoke or odors seem to hang around for hours.

Likely cause: The device’s clean air capacity is too low for the room volume or open layout.

What to do:

  • Measure the floor area and consider ceiling height to estimate room volume.
  • Use a purifier rated for at least the size of the room, ideally more during heavy smoke periods.
  • For open-plan spaces, consider confining the purifier to a smaller “cleaner-air room” by closing doors.

Mistake 3: Running the Purifier Only When You Notice a Problem

Symptom: You turn the purifier on during smoky or smelly events but still feel like it is “too late.”

Likely cause: Short run times mean the air does not pass through the filters enough times to make a difference.

What to do:

  • Run the purifier continuously during wildfire smoke or other ongoing sources.
  • Use higher fan speeds at the start of an event, then reduce speed once air is clearer.
  • Keep doors and windows closed when outdoor air is poor so the purifier is not constantly chasing new smoke.

Mistake 4: Ignoring Filters Until They Look Dirty

Symptom: The purifier is on, but performance has dropped and odors no longer fade.

Likely cause: Particle filters are clogged, and gas-phase media are saturated, even if they do not appear obviously dirty.

What to do:

  • Follow recommended replacement intervals, shortening them after heavy smoke exposure.
  • Pay attention to changes in odor control; if smells linger longer than before, gas-phase media may be spent.
  • Keep pre-filters clean to avoid overworking the main filter.

Common Mistakes and Fixes at a Glance

Problem you notice Probable mistake Practical fix
Room still smells smoky after hours of use No or minimal gas-phase (carbon) media Add or upgrade to a unit with substantial odor media and combine with ventilation and cleaning.
Visible haze clears very slowly Purifier too small for room volume Use a higher-capacity unit or confine the purifier to a smaller, closed-off room.
Purifier sounds louder and airflow feels weak Particle filter heavily loaded with smoke and dust Replace the main filter and clean pre-filters according to instructions.
Odors return quickly after turning unit off Saturated gas-phase media or strong surface reservoirs Replace odor media and clean or launder fabrics and soft furnishings.
Typical smoke and odor complaints, likely causes, and straightforward fixes. Example values for illustration.

Safety Basics When Using Air Purifiers for Smoke and Odors

Air purifiers are generally safe household appliances, but there are a few safety and health points to keep in mind, especially when using them heavily for smoke events.

Avoiding Unwanted Byproducts

Some technologies can generate byproducts if not designed or used carefully. When choosing and operating a purifier:

  • Be cautious with devices that intentionally generate reactive gases or strong oxidizers for “odor removal.”
  • Use ionizing or electrostatic features according to instructions and only if you are comfortable with their operation.
  • Remember that the core need for smoke and odors is strong particle and gas-phase filtration, not chemical reactions in the air.

Electrical and Placement Safety

During wildfire season or extended smoke events, purifiers often run around the clock. To use them safely:

  • Place units on stable, flat surfaces where they cannot tip easily.
  • Keep cords away from walkways and under rugs to prevent tripping or overheating.
  • Do not block air inlets or outlets with curtains, furniture, or bedding.
  • Leave adequate space around the unit so it can pull and push air freely.

Health Expectations and Sensitive Groups

For people with asthma, allergies, or other respiratory conditions, lower indoor particle levels can make a noticeable difference in symptoms. Still:

  • Do not treat an air purifier as a substitute for medical care or medications.
  • Use purifiers as part of a broader plan that includes source control, ventilation when possible, and cleaning.
  • Create at least one “cleaner-air” room for sensitive individuals during heavy smoke episodes.

Maintenance and Long-Term Use for Smoke and Odor Control

Keeping an air purifier effective over time requires more than just turning it on. Smoke and odors are particularly hard on filters, so maintenance matters.

Filter Replacement Timing

For particle filters:

  • Heavy smoke exposure can shorten filter life compared with normal dust-only conditions.
  • If airflow feels weaker or the unit sounds strained, the filter may be loaded.
  • Follow recommended replacement intervals, but be prepared to change filters sooner after major smoke events.

For gas-phase (odor) media:

  • Odor filters usually do not look dirty when spent.
  • If odors that used to fade quickly now linger, the media may be saturated.
  • Track how often you deal with heavy smoke or strong smells to estimate a realistic replacement schedule.

Routine Cleaning Practices

Simple cleaning steps help your purifier maintain performance:

  • Vacuum or gently wash reusable pre-filters as instructed to keep airflow strong.
  • Wipe intake and outlet grilles with a dry or slightly damp cloth to remove dust buildup.
  • Check that nothing has shifted to block air circulation around the unit.

Off-Season Storage

If you primarily use a purifier during wildfire season or for occasional events:

  • Store it in a dry, clean area away from strong odors that could load the filters.
  • Seal the unit in a bag or box if it will sit unused for many months to limit dust buildup.
  • Inspect filters before the next smoke season and replace them if they smell stale or musty.

Practical Takeaways and Specs to Look For

Putting everything together, air purifiers can be very helpful for smoke and odors when used realistically and as part of a broader indoor air quality strategy. They are most effective when you:

  • Control or relocate smoke and odor sources whenever possible.
  • Use a purifier that is properly sized for the room where you need relief.
  • Run the unit long enough and at high enough speed during events.
  • Replace particle and odor filters often enough to maintain performance.

Specs to Look For in an Air Purifier for Smoke and Odors

When you are comparing models for wildfire smoke, cooking fumes, or general odor control, focus on these practical specifications and features:

  • Particle filter efficiency: A high-efficiency filter designed to capture fine and ultrafine particles, with a good seal so air cannot bypass it.
  • Gas-phase media mass: A substantial amount of activated carbon or similar media, not just a thin, lightly coated pad.
  • Clean air capacity appropriate for your room: Look for information that indicates suitability for your room size; larger or open spaces need higher capacity.
  • Multiple fan speeds: High speeds for clearing smoke quickly, lower speeds for quieter continuous use.
  • Noise level you can live with: A setting that is quiet enough for sleep or work, so you will actually run the purifier.
  • Filter access and cost: Filters that are easy to replace and realistically affordable at the intervals you will need, especially if you face frequent smoke seasons.
  • Simple controls or automation: Timers, auto modes, or clear indicators that help you keep the unit running when it matters most.

Used this way, an air purifier will not remove every trace of smoke or odor, but it can make a noticeable difference in comfort and exposure during both everyday activities and severe smoke events.

Frequently asked questions

Which specifications most affect an air purifier’s ability to remove smoke and odors?

Particle-filter efficiency, the amount and type of gas-phase media (for example, activated carbon), and the unit’s clean-air capacity (airflow/CADR and a good filter seal) are the main factors. Fan speed options and correct sizing for the room determine how quickly and effectively the device will reduce smoke and odors.

Why does the room still smell even after running my air purifier?

Often the unit removes particles but has little or no gas-phase media, or the carbon is already saturated; odors can also be held in fabrics and other surfaces. Combining a purifier with substantial odor media, ventilation when outdoor air is acceptable, and cleaning of soft furnishings usually reduces lingering smells.

Are air purifiers safe to run continuously during wildfire smoke?

Yes—most particle-and-carbon recirculating purifiers are safe for continuous operation when used per the manufacturer’s instructions and with proper placement and electrical precautions. Avoid devices that produce ozone or other reactive gases and ensure good ventilation and stable placement for long run times.

Can an air purifier remove smoke odors embedded in furniture and carpets?

Air purifiers help remove airborne molecules but generally cannot remove odors already adsorbed into fabrics, carpets, or walls; those typically require cleaning, laundering, or professional treatment. Addressing the source and cleaning contaminated surfaces speeds odor removal.

How soon should I change filters after a major smoke event?

Heavy smoke shortens filter life; replace particle filters sooner if airflow drops or the unit sounds strained. For gas-phase media, replace when odors that used to fade quickly begin to persist, since spent media often look clean despite reduced capacity.

Will a single small air purifier protect an open-plan kitchen and living area from cooking smoke and odors?

A small purifier may reduce particles and odors locally but often cannot keep up in large, open-plan spaces; you need a unit sized for the full volume or multiple units. Using a venting range hood while cooking provides much better immediate control of smoke and odors.

Air Purifier Placement: Where to Put It for Best Results

Isometric living room with air purifier and airflow paths

The best place to put an air purifier is in the room where you spend the most time, in an open spot with several inches of clearance on all sides and the clean-air outlet aimed toward your breathing zone. Good placement matters just as much as filter quality if you want real-world results, not just a high rating on the box.

Air cleaner placement affects how much of the room’s air actually passes through the filters, how quickly pollutants are reduced, and whether the purifier is quiet and comfortable enough to run all day. Smart positioning can improve performance, reduce dead zones, and help you get closer to the device’s advertised coverage and CADR without increasing fan speed.

This guide explains how to place a portable air purifier in different rooms, how to avoid common mistakes, and what to adjust if you are not seeing the air quality improvement you expected.

What Air Purifier Placement Really Means (And Why It Matters)

Air purifier placement is simply the position and orientation of the unit within a room: how far it is from walls, doors, and windows; how close it is to people and pollution sources; and whether air can move freely around it. Because purifiers work by pulling in dirty air and pushing out cleaner air, any placement that blocks that airflow reduces how much air is cleaned per hour.

Good air purifier placement helps you:

  • Lower particle and gas levels where people actually breathe, not just in one corner.
  • Use the room’s natural airflow (fans, HVAC, open doors) instead of fighting it.
  • Balance effectiveness with noise and drafts so the unit can run for long periods.
  • Extend filter life by avoiding extreme hotspots such as right next to stoves or heavy smoke.

Poor placement, on the other hand, can make a strong purifier behave like a weak one. A device hidden behind a couch or pressed into a tight alcove may clean only a small pocket of air, leaving the rest of the room unchanged.

Key Airflow Concepts for Smarter Air Purifier Placement

Most portable air purifiers follow the same basic pattern: air enters through intake grilles, passes through filters, then exits through an exhaust vent. Where you put the unit determines how well that cleaned air mixes into the room.

Clearance and airflow basics

  • Leave breathing room: Aim for at least a few inches of space on all sides and a clear path for the exhaust. If intake vents are on the back or sides, avoid pushing the unit tightly against a wall.
  • Keep the top clear: If the purifier blows air upward, do not place objects on top of it or under low shelves that block the outlet.
  • Think in 3D: Air moves up, down, and sideways. Corners, alcoves, and heavy curtains can trap air and reduce circulation.

Room size, coverage, and realistic expectations

Manufacturers usually rate purifiers for a certain room size. That rating assumes ideal, open placement with good mixing. If you put the unit in a hidden or cramped location, the effective coverage shrinks.

Room type Typical floor area (sq ft) Suggested placement zone Notes for better coverage
Small bedroom 100–150 3–8 ft from bed, open floor beside or at foot of bed Angle exhaust toward pillow area without creating a direct draft.
Medium living room 180–300 Near center of seating zone, a few ft from walls Avoid tight corners; use low fan plus ceiling fan for mixing.
Home office 100–200 Beside desk or along side wall Place between you and printers or other emission sources.
Open-plan area 300–600+ Near main seating or work cluster Consider more than one unit for far corners or separate zones.
Typical room sizes and priority placement zones for portable air purifiers. Example values for illustration.

Height: floor vs. elevated placement

  • On the floor: Works well for most units, especially larger models designed to sit on the ground and pull in heavier particles that settle low.
  • On a sturdy table or dresser: Useful in bedrooms to bring clean air closer to your face, or in homes with pets to reduce direct intake of hair and debris.
  • Avoid near the ceiling: Very high placement can trap clean air above the breathing zone and reduce effectiveness.

Working with existing airflow

  • Use, do not fight, your HVAC: Place the purifier where it can catch air moving from supply vents toward the center of the room.
  • Fans on low: A ceiling or floor fan on low speed can help mix clean air without overpowering the purifier’s airflow.
  • Doors and windows: Open doors connect rooms and help spread clean air; open windows can either dilute indoor pollution or bring more in, depending on outdoor conditions.

Real-World Air Purifier Placement Examples by Room

Translating general rules into specific room layouts makes placement decisions much easier. Use these examples as starting points, then adjust for your furniture and habits.

Bedroom placement scenarios

  • Standard bedroom: Place the purifier 3–8 feet from the head of the bed, on the floor or a low table, with the exhaust aimed roughly toward the side of your pillow. Keep curtains and bedding away from the intake vents.
  • Small bedroom with limited floor space: Use a compact unit on a dresser or stable shelf, at or slightly above mattress height, angled so the airflow crosses your sleeping area without blowing directly on your face.
  • Shared bedroom or nursery corner: Position the purifier between beds or between the bed and crib, giving equal access to both sleeping zones while keeping cords out of reach of children.

Living room and family room examples

  • Couch-centered layout: Place the purifier on the floor 3–6 feet in front of or beside the main seating area, not behind the couch. Aim the exhaust toward the center of the room.
  • Living room open to kitchen: Put the purifier near the boundary between the two spaces, closer to the seating area than to the stove, so it can catch cooking particles that drift out without being exposed to high heat or grease.
  • Pet-heavy living space: Place the unit where it can pull in air from pet beds and high-traffic areas, but not so close that fur and dander immediately clog the intake. A slight elevation can help.

Home office and hobby room examples

  • Desk-focused office: Put the purifier on the floor beside your desk or just behind it, with the exhaust sweeping across your breathing zone.
  • Printer or craft area: Place the purifier between you and equipment that generates particles or odors, such as laser printers, 3D printers, or painting tables.
  • Small workshop corner: Elevate a compact unit on a sturdy bench or shelf so the intake stays above the heaviest settled dust, but still close to where you stand or sit.

Special situations: open plans, basements, and entryways

  • Open-plan home: Focus first on the area where you sit or work most. If the room is very large, consider one purifier near the seating area and another closer to bedrooms or a frequently used workspace.
  • Basement with musty odors: Place the purifier in the occupied zone (near a sofa or desk), away from visibly damp walls or floors. Use it alongside dehumidification and moisture control rather than as a standalone solution.
  • Entryway or hallway buffer: In a small apartment, a purifier in a wider hallway near the front door can help intercept smoke, exhaust, or hallway odors, provided it does not block walking paths.
Scenario Better placement choice What it improves
Bedroom with purifier behind headboard Move to open floor beside bed, 3–6 ft from pillow Unblocks intake, delivers clean air directly to breathing zone.
Living room unit hidden behind couch Shift to visible spot near coffee table edge Improves circulation through seating area instead of trapped corner.
Purifier next to stove in small kitchen Relocate to adjacent dining area Reduces heat and grease stress on filters while still catching cooking particles.
Hallway unit in narrow corridor Move into main room near door Improves safety and airflow, reduces tripping risk.
Example adjustments that improve air purifier effectiveness and comfort in common home layouts. Example values for illustration.

Common Air Purifier Placement Mistakes and How to Fix Them

Many people set an air purifier down once and never move it again, even if the results are disappointing. Small adjustments often solve the problem.

Hiding the purifier for aesthetics

Problem: The unit is placed behind furniture, inside a cabinet, or under a table with low clearance to keep it out of sight.

What you may notice: Little change in dust on surfaces, lingering odors, or air quality readings that barely improve.

Fix: Move the purifier into a more open, visible location. You can still choose a spot that looks tidy, such as beside a console or next to a bookcase, as long as the intake and exhaust are unobstructed.

Blocking vents with objects or textiles

Problem: Books, plants, or decor are stacked on top of the purifier, or curtains and blankets hang across intake grilles.

What you may notice: Louder fan noise at the same speed, a hot or strained feeling from the unit, or a noticeable drop in airflow from the exhaust.

Fix: Clear at least several inches around all vents. Tie back curtains, move furniture a little farther away, and keep the top of the unit free of objects.

Putting the purifier too close to strong sources

Problem: The purifier sits right next to a smoker, incense burner, candle cluster, or heavily used stove.

What you may notice: Filters clog or discolor quickly, odors seem intense near the purifier, or people sitting nearby still experience irritation.

Fix: Place the purifier at a moderate distance with a clear line between the source and the seating area. This allows some dilution while still intercepting pollutants before they spread throughout the room.

Ignoring room airflow patterns

Problem: The unit is tucked into a dead corner while most air moves along another path, such as from a window to a door or between HVAC vents.

What you may notice: Clean air seems to stay near the purifier, but odors or stuffiness linger in the main occupied area.

Fix: Observe where air naturally moves (you can use a light tissue or incense stick to visualize airflow if it is safe to do so). Relocate the purifier into that path so it can treat the main flow of room air.

Troubleshooting checklist when results are disappointing

  • Is the purifier in the same room where you spend the most time?
  • Are all vents clear of furniture, curtains, and decor?
  • Is the exhaust aimed toward, not away from, the occupied area?
  • Is the unit sized appropriately for the room and fan speed set high enough?
  • Have you tried moving it a few feet and rechecking dust, odor, or monitor readings?

Safety Basics for Air Purifier Placement

Safe placement protects people, pets, and the purifier itself. Most portable units are straightforward to use, but a few precautions go a long way.

Electrical and cord safety

  • Plug the purifier directly into a wall outlet when possible, not into overloaded power strips.
  • Route cords along walls or behind furniture to reduce tripping hazards, especially in hallways and children’s rooms.
  • Do not run cords under rugs or where they can be pinched by doors or furniture.

Avoiding water, heat and damage

  • Keep purifiers away from sinks, bathtubs, showers, and humidifiers that could splash water onto the housing or filters.
  • Do not place units directly beside heat sources such as radiators, space heaters, or stoves.
  • Avoid locations where they can be knocked over easily, such as at the edge of narrow tables or in very tight walkways.

Child and pet considerations

  • In homes with small children, avoid placing purifiers where controls are at eye level and easy to press; consider slightly higher placement or child-lock features if available.
  • Keep intakes out of reach of curious pets that might shed directly into the grille or chew on cords.
  • Ensure the unit is stable enough that a bump or tug on the cord will not tip it over.

Filter and emissions awareness

  • Follow the manual for filter replacement; overly clogged filters can strain the motor and reduce airflow.
  • If your purifier has any feature that can generate reactive gases (such as certain ionizing or oxidizing modes), follow all manufacturer guidance about room size, distance, and run time.
  • If you ever notice unusual odors, excessive heat, or rattling noises, switch off the unit and inspect it before continuing use.

Long-Term Use, Maintenance, and Seasonal Placement Tweaks

Placement is not a one-time decision. As seasons, activities, and room layouts change, your optimal setup may change too.

Routine maintenance that affects placement

  • Filter changes: Replace or clean filters on schedule so the purifier can maintain good airflow in its chosen spot.
  • Dusting the housing: Wipe intake and exhaust grilles regularly; thick dust on the outside is a sign that airflow is being restricted.
  • Noise checks: If a previously quiet unit becomes louder in the same location, check for obstructions or filter issues before moving it.

Adjusting placement with the seasons

  • Allergy season: Prioritize bedrooms and main living areas where you rest and spend time with windows closed.
  • Winter heating: Use the purifier near areas where dry, heated air enters the room, but not directly against radiators or heaters.
  • Summer cooling: Coordinate with fans and air conditioning so the purifier sits in the path of circulating air rather than in a stagnant corner.

Storage and temporary relocation

  • If you move the purifier to another room temporarily (for example, after cooking or cleaning), return it to your primary room once the short-term source is gone.
  • When storing a unit, clean the exterior, remove or protect filters according to the manual, and keep it in a dry area away from extreme temperatures.
  • After storage, check for dust buildup and verify that the fan spins freely before placing it back into regular use.

Practical Takeaways and Specs to Look For

Effective air purifier placement is about matching the device’s airflow to your real life: where you sleep, sit, work, and cook. A well-placed midrange purifier can outperform a poorly placed high-end model in everyday use.

  • Start with the room where you spend the most continuous time, usually the bedroom or main living area.
  • Give the purifier open space and a clear line of sight to your breathing zone.
  • Watch how air naturally moves through the room and place the unit in that path.
  • Revisit placement whenever you rearrange furniture, change seasons, or add new pollution sources.

Specs to look for that influence placement

When you compare purifiers, certain specifications can make placement more flexible and effective.

  • Clean Air Delivery Rate (CADR): Higher CADR gives you more flexibility in placement within a room, since the unit can process more air per hour.
  • Recommended room size: Match this to your actual room; if your room is near the upper limit, prioritize more central, open placement.
  • Air intake and exhaust direction: Check where the vents are so you can plan clearance (front, sides, back, top) before deciding on a corner, wall, or table.
  • Noise levels at each fan speed: Lower noise at medium or high speeds makes it easier to keep the unit close to beds and desks without discomfort.
  • Physical dimensions and weight: Slim or lighter units are easier to position between furniture or move between rooms as needs change.
  • Control location and indicators: Front or top controls and visible filter-change lights help when the unit sits against a wall or beside furniture.
  • Cord length: A longer cord provides more options to avoid running extension cords across walkways.

By pairing the right specifications with thoughtful placement, you can turn a simple portable air purifier into a reliable part of your overall indoor air quality strategy.

Frequently asked questions

What specs or features should I prioritize when choosing an air purifier for effective placement?

Look first at the CADR and the manufacturer’s recommended room size so the unit can process enough air for your space. Also consider filtration type (true HEPA for particles, activated carbon for gases), intake/exhaust layout, noise levels at usable fan speeds, and physical factors like cord length and dimensions that affect where you can place it.

How close should an air purifier be to walls, furniture, or beds for best performance?

Give the unit several inches of clearance on all sides so intakes and exhausts are not blocked; many recommendations suggest keeping it a few feet from beds to direct clean air toward the breathing zone. Avoid pushing the purifier tightly against walls or hiding it behind furniture, which reduces effective airflow and coverage.

Is it okay to hide an air purifier behind furniture to keep my room looking tidy?

Hiding a purifier is a common mistake because blocked intakes or exhausts sharply reduce cleaning performance. Instead, choose a tidy but open spot—beside a console, along a wall with clearance, or near seating—so airflow remains unobstructed while still fitting the room’s aesthetic.

Are there safety concerns I should consider when placing an air purifier?

Yes. Keep purifiers away from water sources, direct heat (radiators, stoves), and areas where they could be knocked over, and avoid running cords under rugs. Follow the manual for any modes that produce reactive gases and observe filter-replacement schedules to prevent motor strain.

Will a single air purifier work in an open-plan area, or do I need multiple units?

It depends on the total square footage and the unit’s CADR; large open-plan spaces often require multiple purifiers to eliminate dead zones and cover separate seating or sleeping areas. If you only have one unit, place it near the main occupied zone to maximize benefit.

Should I place my air purifier on the floor or elevate it on furniture?

Both options can work: floor placement is effective for heavier, settling particles, while elevating the unit brings clean air closer to the breathing zone and can help with pet hair or desk setups. Avoid placing it too high near the ceiling where cleaned air may not mix into the occupied area.

How to Choose the Right Air Purifier for Your Room Size (With CADR & ACH)

Isometric living room with air purifier and airflow ribbons

The right air purifier size for your room is the one that can fully filter your room’s air volume at least 4–5 times per hour without being too loud or inefficient. To get there, you match your room’s square footage and ceiling height to the purifier’s Clean Air Delivery Rate (CADR) and your target air changes per hour (ACH).

When people say an air cleaner is “not working,” the most common reason is that it is undersized for the actual room volume or open floor plan. Marketing terms like “large room” or “whole home” are vague; what matters is whether the purifier can move enough clean air for your real space. This guide walks through simple measurements, example calculations, and practical checks so you can size an air purifier correctly for bedrooms, living rooms, and open-plan areas.

What “Right Size” Air Purifier Really Means (And Why It Matters)

Choosing an air purifier for room size is about balancing three things: how big the room is, how clean you want the air to be, and how fast you want it cleaned. The “right size” purifier can keep up with your room’s air volume without having to run at maximum speed all the time.

If your purifier is too small, it may run constantly and still leave dust, pollen, smoke, or pet dander hanging in the air. You might notice musty or smoky smells that never fully clear, or allergy symptoms that only improve a little. On the other hand, an oversized unit can cost more up front, take up more space, and be noisier than needed if you do not use its capacity wisely.

Room size affects how quickly particles and odors are reduced. A purifier that is perfect for a 150-square-foot bedroom can struggle in a 350-square-foot living room with high ceilings. To avoid guesswork, you will use a few technical ideas—room area, ceiling height, CADR, and ACH—to translate your space into a realistic capacity target.

Key Sizing Concepts: CADR, ACH, and Room Volume

Once you know your room size, you can connect it to purifier performance using CADR and ACH. These numbers turn vague labels like “small room” and “large room” into something measurable.

Step 1: Measure Room Area and Volume

Start with the floor area in square feet:

  • Room area (sq ft) = length (ft) × width (ft)

Example: A bedroom that is 12 feet by 15 feet has an area of 180 square feet.

For irregular rooms, break the space into rectangles, calculate each area, and add them together. If a living room flows openly into a dining room with no real separation, treat it as one combined space. Closed doors to other rooms can usually be ignored for sizing.

Next, account for ceiling height by calculating volume:

  • Room volume (cubic feet) = area (sq ft) × ceiling height (ft)

Example: A 180-square-foot room with 9-foot ceilings has a volume of 1,620 cubic feet. Taller ceilings mean more air to clean, so a stronger purifier or higher CADR is needed for the same ACH.

Step 2: Understand CADR (Clean Air Delivery Rate)

CADR is a standardized measure of how much filtered air a purifier delivers, usually in cubic feet per minute (CFM). Many products list separate CADR values for:

  • Smoke (fine particles, similar to PM2.5)
  • Dust
  • Pollen

For room sizing, the smoke or dust CADR is usually the most relevant because it reflects performance on fine particles that stay airborne longer. Higher CADR means the purifier can clean more air per minute.

Step 3: Understand ACH (Air Changes per Hour)

Air Changes per Hour (ACH) tells you how many times per hour the purifier can theoretically clean the room’s full air volume. It directly links CADR to room size:

  • ACH = (CADR × 60) ÷ room volume

This formula converts CADR (cubic feet per minute) into cubic feet per hour, then divides by room volume. A higher ACH means faster reduction of airborne particles, as long as the purifier is running.

Step 4: Choose a Target ACH for Your Needs

Your ideal ACH depends on how clean you want the air and what you are trying to remove:

  • 2–3 ACH: Basic freshness in relatively clean environments.
  • 4–5 ACH: Common target for allergies, moderate dust, or urban air pollution.
  • 5–8 ACH: Often used for asthma, wildfire smoke, or high outdoor pollution events.

For most bedrooms and living spaces where the goal is better day-to-day air quality, 4–5 ACH is a practical baseline.

Step 5: Use CADR and ACH Together

To find the CADR you need, rearrange the formula:

  • CADR = (ACH × room volume) ÷ 60

Once you have a target CADR, you can compare it to product specs instead of relying on vague “room size” labels.

Room area (sq ft) Ceiling height (ft) Room volume (cu ft) Target ACH Minimum smoke/dust CADR (CFM)
120 8 960 5 80
180 9 1,620 5 135
250 8 2,000 4 134
350 9 3,150 5 263
500 9 4,500 5 375
Typical room sizes with example CADR targets for common ACH levels. Example values for illustration.

Real-World Room Size Examples and Layout Scenarios

Abstract formulas are helpful, but it is easier to choose an air purifier when you see how sizing works in real rooms. These examples show how room size, ceiling height, and use case interact.

Example 1: Small Bedroom or Home Office

Scenario: 10 ft × 12 ft bedroom used for sleep and remote work.

  • Area: 120 sq ft
  • Ceiling height: 8 ft
  • Volume: 120 × 8 = 960 cubic ft
  • Target ACH: 5 (for allergy support and nighttime comfort)
  • Required CADR ≈ (5 × 960) ÷ 60 = 80 CFM

A purifier with a smoke or dust CADR around 80 CFM or higher should be able to maintain clean air in this space. In practice, you might choose a unit with a bit more capacity so it can run on a quieter medium speed overnight.

Example 2: Medium Living Room

Scenario: 14 ft × 18 ft living room where the family spends evenings, with occasional cooking odors drifting in from a nearby kitchen.

  • Area: 252 sq ft (rounded to 250 for simplicity)
  • Ceiling height: 9 ft
  • Volume: 250 × 9 = 2,250 cubic ft
  • Target ACH: 4 (general comfort and moderate dust)
  • Required CADR ≈ (4 × 2,250) ÷ 60 = 150 CFM

Here, a purifier rated around 150 CFM or higher is appropriate. If the room has a high-traffic entryway or is connected to a hallway that is usually open, consider stepping up slightly in CADR to compensate for more air exchanging with other spaces.

Example 3: Large Open-Plan Area

Scenario: Combined kitchen, dining, and living space with cooking, pets, and some outdoor smoke during wildfire season.

  • Area: 500 sq ft
  • Ceiling height: 9 ft
  • Volume: 500 × 9 = 4,500 cubic ft
  • Target ACH: 5 (due to cooking particles and smoke)
  • Required CADR ≈ (5 × 4,500) ÷ 60 = 375 CFM

In this case, you can either use a single very high-capacity purifier or place two smaller units in different zones (for example, one near the seating area and one closer to the kitchen). Multiple units often give more even coverage in L-shaped or open layouts.

Example 4: High-Ceiling Room vs. Standard Ceiling

Two rooms with the same floor area can require different purifier sizes:

  • Room A: 200 sq ft with 8 ft ceilings → volume = 1,600 cubic ft
  • Room B: 200 sq ft with 12 ft ceilings → volume = 2,400 cubic ft

If both target 5 ACH:

  • Room A CADR ≈ (5 × 1,600) ÷ 60 ≈ 133 CFM
  • Room B CADR ≈ (5 × 2,400) ÷ 60 = 200 CFM

Room B needs roughly 50% more CADR than Room A even though the floor area is identical. This is why simply matching square footage to a box label can be misleading in homes with high or vaulted ceilings.

Scenario Key room details Pollution level Suggested strategy
Small bedroom 120 sq ft, 8 ft ceiling, door usually closed Light dust, seasonal pollen Single purifier sized for 5 ACH; prioritize low noise at night
Medium living room 250 sq ft, 9 ft ceiling, open to hallway Moderate dust, occasional cooking odors Medium CADR unit for 4–5 ACH; place near seating area with clear airflow
Open-plan space 500 sq ft, 9 ft ceiling, kitchen plus seating Cooking particles, pet dander, outdoor smoke High CADR unit or two smaller purifiers; focus on zones where people stay longest
High-ceiling great room 300 sq ft, 12 ft vaulted ceiling Similar to rest of home Upsize based on volume; consider ceiling fan to improve mixing
Common room scenarios and practical sizing strategies based on volume and use. Example values for illustration.

Common Sizing Mistakes and Troubleshooting Signs

Even with the right formulas, it is easy to misjudge air purifier room size. Recognizing common mistakes and warning signs helps you correct course without replacing your entire setup.

Mistake 1: Trusting Only the “Maximum Room Size” on the Box

Many manufacturers list a single maximum room size that assumes a relatively low ACH (often near 2 ACH). That may be enough for mild odor control, but not for allergies, asthma, or smoke events.

Warning signs:

  • Allergy symptoms improve only slightly even with the purifier on high.
  • Fine dust or pet hair still settles quickly on surfaces.
  • Smoke or cooking odors linger longer than 30–60 minutes.

Fix: Use the CADR and ACH calculations for your actual room volume. If your current unit is undersized, consider moving it to a smaller room and using a higher-capacity purifier for the larger space.

Mistake 2: Ignoring Ceiling Height and Open Layouts

Relying only on floor area can under-size purifiers in homes with tall ceilings or open-plan layouts. Air flows freely between connected spaces, effectively increasing the volume the purifier must handle.

Warning signs:

  • Air feels cleaner near the purifier but not in distant corners.
  • Particle readings (if you use a monitor) differ noticeably across the room.

Fix: Recalculate based on full volume, including any areas that are always open. You may need to reposition the unit more centrally, add a second purifier, or choose a higher CADR.

Mistake 3: Poor Placement and Blocked Airflow

Even a correctly sized purifier can underperform if it is hidden behind furniture or pushed into a corner.

Warning signs:

  • Visible dust accumulates on one side of the room more than the other.
  • Air from the outlet hits a wall or furniture immediately.

Fix:

  • Place the unit where both intake and outlet have several inches of clearance.
  • Avoid tucking it under low shelves or behind sofas.
  • Position it closer to where people spend the most time, not in an unused corner.

Mistake 4: Running Only on the Quietest Setting

Most purifiers reach their rated CADR only on the highest fan speed. If you always use the lowest speed, you might be getting far fewer air changes than you expect.

Warning signs:

  • The room feels fresh only when you briefly run the fan on high.
  • Odors clear eventually but much more slowly than expected.

Fix:

  • During high-pollution times (cooking, smoke, vacuuming), use higher speeds temporarily.
  • Consider a slightly oversized purifier so your target ACH can be reached at a medium, quieter speed.

Mistake 5: Underestimating Pollution Sources

Two same-size rooms may need different purifier capacities if one has smoking, frequent frying, multiple pets, or nearby traffic pollution.

Warning signs:

  • Persistent odors even when the room volume and CADR technically match.
  • Visible haze during cooking or wildfire events that never fully clears.

Fix: Increase target ACH, add a second unit, or combine purification with better source control (for example, using range hoods, reducing indoor smoking, or closing windows during high outdoor pollution).

Safety Basics When Using an Air Purifier in Any Room Size

Most modern air purifiers are straightforward to use, but sizing and placement choices can affect safety and comfort, especially in bedrooms and children’s rooms.

Electrical and Placement Safety

  • Plug the purifier directly into a wall outlet rather than into overloaded power strips.
  • Ensure the power cord does not create a tripping hazard across walkways.
  • Keep the unit on a stable, level surface where it cannot be easily knocked over.
  • Maintain the manufacturer’s recommended clearance around air intakes and outlets to prevent overheating.

Filter and Ozone Considerations

  • Follow the manual for filter replacement intervals; clogged filters can reduce airflow and strain the motor.
  • Avoid using any optional ionizing or ozone-generating modes if you are sensitive to respiratory irritants, especially in small, tightly sealed rooms.
  • Do not attempt to wash or vacuum disposable HEPA filters unless the manual specifically says they are washable; this can damage fibers and reduce filtration efficiency.

Safe Use in Bedrooms and Children’s Rooms

  • Choose a noise level that does not disturb sleep; a unit that is too loud may be turned off at night, reducing protection when you need it most.
  • Position the purifier so air flows across the room rather than directly at a sleeping child’s face at very close range.
  • Ensure small children cannot easily access or play with the controls or tip the unit over.

Long-Term Use, Filter Maintenance, and Seasonal Storage

Once you have a purifier matched to your room size, consistent maintenance keeps its performance close to the original CADR rating over time.

Filter Maintenance and Performance

  • Pre-filters: These capture large dust and hair. Clean or replace them on the schedule in your manual, or more often in homes with pets.
  • HEPA or particle filters: These remove fine particles such as pollen, pet dander, and smoke. Replace them when the indicator light suggests, or sooner if you notice reduced airflow or persistent odors.
  • Gas/odor filters: Activated carbon or similar media can help with odors and some gases. Their lifespan depends heavily on pollution levels and may be shorter in homes with heavy cooking or smoking.

Running a purifier with clogged filters effectively reduces its CADR, so your carefully calculated ACH may no longer be accurate until filters are replaced.

Runtime Strategy for Different Room Types

  • Bedrooms: Many people run purifiers continuously at a low or medium speed, increasing to high briefly before bedtime to quickly clean the air.
  • Living rooms and open areas: Continuous use on a moderate speed is helpful if you have pets, dust, or outdoor pollution. For occasional use, run on high for 30–60 minutes before gatherings.
  • Home offices: If you only occupy the room during the day, you can run the purifier mainly when you are present, with a higher speed for the first part of the day.

Seasonal Storage Tips

  • Before storing, wipe down the exterior and replace or remove filters according to the manual.
  • Store the purifier in a dry, clean area to prevent mold growth inside the housing.
  • When you bring it back into service, inspect the interior for dust buildup and verify that the fan spins freely without unusual noise.

Practical Takeaways and Specs to Look For

By this point, you have the tools to match an air purifier to your room size using room volume, CADR, and ACH instead of guesswork. A correctly sized purifier should quietly maintain clean air in your most-used spaces with minimal manual adjustment.

Step-by-Step Sizing Summary

  1. Measure your room’s length, width, and ceiling height.
  2. Calculate area (sq ft) and volume (cubic ft).
  3. Choose a target ACH based on your needs (4–5 ACH for most allergy and comfort goals; higher for smoke or asthma).
  4. Use CADR = (ACH × volume) ÷ 60 to find your minimum smoke/dust CADR.
  5. Compare that CADR to product specs, and adjust upward for high ceilings, open layouts, or heavy pollution sources.
  6. Place the purifier for good airflow, maintain filters, and adjust fan speeds based on real-world comfort and noise.

Specs to Look For on the Box or Product Sheet

  • CADR ratings: Look for clearly listed smoke and/or dust CADR values that meet or exceed your calculated target.
  • Recommended room size: Use this only as a rough check; confirm with your own volume and ACH calculations.
  • Noise levels (dB): Check noise at low and medium speeds, especially for bedrooms and offices where quiet operation matters.
  • Fan speed options: Multiple speeds or automatic modes help balance cleaning power with noise and energy use.
  • Filter type and replacement interval: Confirm that filters match your needs (fine particles, odors) and that replacement timing is realistic for your budget.
  • Power consumption (watts): Lower wattage at your typical fan speed can reduce long-term operating cost, especially if you run the purifier 24/7.
  • Dimensions and weight: Make sure the unit fits comfortably in your intended location with enough clearance for airflow.

When you combine these specs with a clear understanding of your room’s size and layout, you can choose an air purifier that is powerful enough to keep your air cleaner, yet quiet and efficient enough to use every day.

Frequently asked questions

Which specifications or features should I prioritize when choosing an air purifier for my room?

Prioritize CADR (smoke/dust) to ensure the unit can meet your ACH target for the room’s volume, plus noise levels at the speeds you’ll use most. Also check filter type and replacement intervals, fan speed options, and physical size so the unit fits and performs well in your space.

Why isn’t my air purifier improving air quality even though it’s rated for my room size?

Common causes include poor placement, blocked airflow, clogged filters, or relying on a “room size” rating that assumes a low ACH. Verify CADR against actual room volume, ensure clearance around the unit, replace filters as needed, and run higher speeds during pollution events.

Can air purifiers pose any risks, and how can I minimize them?

Most HEPA-style purifiers are safe when used according to instructions, but avoid modes that intentionally generate ozone and follow electrical and placement guidance. Keep units stable, plug them into appropriate outlets, and replace filters on schedule to prevent reduced performance or mechanical strain.

How should I size an air purifier for an oddly shaped or open-plan room?

Break oddly shaped spaces into rectangles to calculate total floor area and use the average or actual ceiling height to get volume, or treat connected areas as one combined volume for ACH calculations. For very open plans, consider multiple units placed in different zones to achieve even coverage.

Is it better to use multiple smaller purifiers or one large unit in an open-plan area?

Multiple units often provide more even coverage and reduce dead zones in L-shaped or multi-zone spaces, allowing placement near high-use areas like the kitchen or seating. A single high-CADR unit can work if its airflow effectively reaches all occupied zones, but multiple units offer flexibility and redundancy.

How often should I replace filters to keep the purifier’s CADR accurate?

Follow the manufacturer’s recommended intervals, but expect shorter lifespans in homes with pets, smoking, or heavy cooking. Inspect pre-filters monthly and replace HEPA or carbon filters when indicator lights suggest, if performance drops, or if persistent odors return.

Best Air Purifiers for Allergies: How to Use CADR, HEPA, and Carbon Specs

Isometric bedroom with air purifier capturing dust and pollen

The best air purifiers for allergies are units with a high enough CADR for your room, a true HEPA filter, and at least a basic activated carbon layer for odors and gases. When these three pieces are sized and used correctly, an air cleaner can noticeably lower airborne pollen, dust, pet dander, and mold spores in the spaces where you spend the most time.

This guide explains how to read CADR ratings, what “true HEPA” really means, and when carbon filters matter so you can match a purifier to your allergy triggers and room size. Instead of generic advice, you will see concrete room examples, simple calculations, and common mistakes to avoid.

Use this as a practical buying and setup checklist for allergy air purifiers in bedrooms, nurseries, home offices, and open living areas, whether you are dealing with seasonal allergies, pet allergies, or allergic asthma.

What Allergy Air Purifiers Do and Why CADR, HEPA, and Carbon Matter

An allergy-focused air purifier is a portable appliance that pulls room air through filters to remove airborne particles and some gases. For allergies, the main goal is to reduce your exposure to inhaled triggers while you are indoors, especially during sleep and long periods in one room.

Indoor air regularly contains a mix of allergens and irritants:

  • Pollen that drifts indoors through doors, windows, or on clothing
  • Pet dander and saliva proteins from cats, dogs, and other animals
  • Dust mite debris and fragments from insect pests
  • Mold spores from damp areas or outdoor air
  • Fine particles from cooking, candles, or outdoor pollution (PM2.5)

Three core specs determine how well an air purifier can handle this mix:

  • CADR (Clean Air Delivery Rate) – how quickly the purifier can reduce particle levels in a given room size.
  • True HEPA filtration – how efficiently it captures very small allergen particles and fine dust.
  • Activated carbon – how effectively it reduces odors and some gases that can irritate sensitive airways.

When CADR is matched to room size, the HEPA filter is genuinely high efficiency, and carbon capacity fits your odor and gas concerns, an air purifier becomes a strong support tool alongside cleaning, humidity control, and medical treatment.

Key Concepts: CADR, HEPA Filtration, and Activated Carbon

Understanding a few technical terms makes it much easier to compare air purifiers for allergies without relying on marketing language.

CADR: How Much Clean Air You Actually Get

CADR is a standardized measure of how quickly an air purifier reduces three types of particles in a test room: smoke (very fine), dust, and pollen (larger). Each CADR value is expressed in cubic feet per minute (CFM). Higher numbers mean more filtered air per minute and faster cleanup after a spike in allergens.

For allergies, CADR connects directly to how many air changes per hour (ACH) you get in a room. ACH tells you how many times per hour the purifier can process a volume of air equal to the room volume. A useful target for allergy relief is:

  • 4–5 ACH for typical seasonal or dust allergies
  • 5–8 ACH for more severe allergies or allergic asthma in bedrooms

To estimate the CADR you need, you can use a simple formula:

  • Room volume (cubic feet) = length × width × ceiling height
  • Required CADR (CFM) ≈ room volume × desired ACH ÷ 60
Room type Approx. size (ft²) Ceiling height (ft) Target ACH for allergies Estimated CADR needed (CFM)
Small bedroom 120 8 5 ACH ≈ 80 CFM
Medium bedroom 180 8 5 ACH ≈ 120 CFM
Large living room 300 9 4 ACH ≈ 180 CFM
Open studio space 450 9 4 ACH ≈ 270 CFM
Typical CADR ranges for common room sizes when targeting several air changes per hour. Example values for illustration.

For allergies, the smoke CADR is usually the most useful single number because it reflects performance on small, hard-to-capture particles similar in size to many allergen fragments and pollution.

True HEPA Filtration: The Core of Allergy Performance

HEPA (High Efficiency Particulate Air) filters are dense mats of fibers designed to capture tiny particles as air passes through. For allergy relief, look for:

  • True HEPA or equivalent high-efficiency rating – designed to capture a very high percentage of fine particles at a specified small size.
  • Clear efficiency data – published filtration efficiency at small particle sizes, not just vague “HEPA-type” or “HEPA-style” claims.

HEPA filters trap allergens using three main mechanisms:

  • Interception – particles follow the airflow and brush against fibers, sticking to them.
  • Impaction – larger particles (like pollen) cannot follow the air stream around fibers and collide with them.
  • Diffusion – very small particles move randomly and are more likely to hit and stick to fibers.

The combination allows a good HEPA filter to capture pollen grains, pet dander, mold spores, and fine dust mite debris that remain suspended in air.

Filter Seals and Housing: Preventing Bypass Leaks

Even a high-grade HEPA filter can underperform if air leaks around it instead of being forced through it. For allergies, system design matters almost as much as the filter media itself. Helpful design cues include:

  • Gaskets or foam seals around the filter edges
  • Rigid frames and secure latches that keep filters seated tightly
  • Consistent CADR ratings that confirm the fan, housing, and filter work well together

Activated Carbon: Comfort and Odor Control

Activated carbon is a porous material that adsorbs certain gases and odors. It does not remove solid allergens like pollen or dust, but it can improve comfort for people whose symptoms are triggered or worsened by smells or chemical irritants.

Common uses of carbon filters include:

  • Reducing pet, cooking, or musty odors
  • Lowering some volatile organic compounds (VOCs) from paints, cleaning products, or new furnishings

Carbon filters come in different forms:

  • Thin coated sheets – lightweight, basic odor control.
  • Thicker granular or pellet carbon – more capacity for persistent odors and gases.

If your main issue is sneezing and congestion from pollen or dust, a simple carbon layer is usually enough. If you also react strongly to smells or fumes, a thicker carbon stage can be more useful.

Real-World Allergy Scenarios and How to Size a Purifier

Translating specs into everyday use makes it easier to choose the right purifier for allergies in your home.

Example 1: Seasonal Allergies in a Small Bedroom

Room: 10 ft × 12 ft bedroom with an 8 ft ceiling (960 cubic feet). The sleeper has strong spring pollen allergies and wakes up congested.

  • Target ACH: 5–6 (because the bedroom is used 7–9 hours per night).
  • CADR calculation: 960 × 5 ÷ 60 ≈ 80 CFM minimum.
  • Practical choice: a purifier with a smoke CADR in the 100–150 CFM range so it can run on a medium or low setting overnight and still hit the target ACH.
  • Other factors: quiet operation on medium speed, true HEPA filter, basic carbon layer for musty or outdoor odors.

Example 2: Pet Allergies in an Open Living Area

Room: Combined living and dining area of 18 ft × 20 ft with a 9 ft ceiling (3,240 cubic feet). A dog or cat spends most of the day here.

  • Target ACH: at least 4 to keep dander and hair fragments under control.
  • CADR calculation: 3,240 × 4 ÷ 60 ≈ 216 CFM.
  • Practical choice: a purifier with a smoke CADR around 250–300 CFM to compensate for open doorways and occasional high shedding.
  • Other factors: large true HEPA filter, stronger pre-filter to catch hair and larger dust, more substantial carbon if pet odor is a concern.

Example 3: Dust and Mold Sensitivity in a Home Office

Room: 11 ft × 14 ft office with a 9 ft ceiling (1,386 cubic feet), located near a bathroom with occasional humidity issues. The user has dust mite and mold sensitivities and spends most of the workday here.

  • Target ACH: 5–6 because of long daily exposure.
  • CADR calculation: 1,386 × 5 ÷ 60 ≈ 116 CFM.
  • Practical choice: a purifier with smoke CADR around 150–200 CFM to allow quieter operation and handle occasional spikes when doors are opened.
  • Other factors: continuous operation on low or medium, attention to humidity control in the adjacent bathroom, and regular cleaning to manage settled dust.

Placement Tips in Real Rooms

Across these examples, placement makes a noticeable difference:

  • In bedrooms, position the purifier within a few feet of the bed, not buried in a corner behind furniture.
  • In living rooms, place it where airflow is not blocked by sofas or cabinets, ideally near the center of activity.
  • Keep a few inches of clearance on all sides of the intake and outlet so the fan can circulate air effectively.
  • Run the unit continuously on a comfortable speed instead of only turning it on when symptoms flare.
Situation Key allergy trigger Helpful purifier settings Notes
Spring pollen in bedroom Pollen, outdoor dust Medium during day, low at night Close windows; start purifier 1–2 hours before bedtime.
Pet dander in living room Pet dander, hair Medium or high when pets are active Use brush or vacuum on furniture to reduce settled dander.
Dusty home office Dust mite debris Continuous low or medium Combine with weekly dusting and HEPA vacuuming.
Musty basement room Mold spores, odors Medium, 24/7 Address moisture source; purifier cannot fix dampness alone.
Example purifier usage patterns for common allergy scenarios. Example values for illustration.

Common Mistakes That Reduce Allergy Relief

Even a high-quality air purifier can give disappointing results if it is used incorrectly. Watching for these issues can help you troubleshoot weak performance.

Using a Purifier That Is Too Small for the Room

Symptom: Allergy symptoms improve only slightly, or only when you sit very close to the purifier.

Likely cause: CADR is too low for the room volume, especially in open floor plans or rooms with high ceilings.

Fix: Recalculate room volume, check the purifier’s smoke CADR, and aim for at least 4–5 ACH. In some cases, it is more effective to move an undersized unit into a smaller room (like a bedroom) and add a second unit for larger spaces.

Running on the Quietest Setting Only

Symptom: Air still feels dusty after cooking, cleaning, or opening windows; allergy flares after these activities.

Likely cause: The fan stays on the lowest speed, which may not provide enough airflow to handle spikes in allergens.

Fix: Use medium or high speed for 30–60 minutes after high-particle activities, then drop back to a quieter setting. If noise is still an issue, consider a purifier with a higher CADR so it can deliver more clean air at lower noise levels.

Blocking Airflow with Furniture or Clutter

Symptom: The purifier runs, but dust seems to settle nearby and air in the rest of the room does not feel cleaner.

Likely cause: The intake or outlet is blocked by a wall, curtain, or furniture, creating a small pocket of cleaned air instead of circulating through the whole room.

Fix: Move the unit so air can flow freely around it, and avoid pushing it directly against walls or into tight corners unless the design specifically allows it.

Ignoring Filter Replacement and Pre-Filter Cleaning

Symptom: Airflow feels weaker over time, noise increases, or odors linger even when the purifier is on.

Likely cause: Clogged pre-filters or HEPA filters restricting airflow and reducing effective CADR.

Fix: Follow the recommended replacement schedule, clean washable pre-filters on time, and pay attention to filter indicator lights or noticeable discoloration.

Expecting the Purifier to Handle All Allergens

Symptom: Allergy symptoms persist despite good purifier specs and continuous operation.

Likely cause: Large amounts of allergens remain in carpets, bedding, and soft furnishings, or there are ongoing moisture problems feeding mold growth.

Fix: Combine air purification with regular vacuuming (ideally with a HEPA vacuum), washing bedding in hot water, using dust mite covers, and controlling indoor humidity.

Safety Basics When Using Air Purifiers for Allergies

Most mechanical HEPA and carbon-based air purifiers are straightforward to use safely, but a few details matter for people with respiratory conditions.

Be Cautious with Ozone and Certain Add-On Technologies

Some devices incorporate ionizers, plasma, or other technologies that can produce small amounts of ozone or byproducts. For people with asthma or sensitive lungs, even low-level ozone can be irritating.

  • Prefer units that focus on mechanical filtration (pre-filter, HEPA, carbon) as the primary cleaning method.
  • If a purifier has an ionizing or similar mode, check whether it can be turned off and rely on the HEPA and carbon stages instead.

Placement and Electrical Safety

Basic electrical safety helps avoid accidents:

  • Place the purifier on a stable, level surface where it cannot be easily knocked over.
  • Avoid running the cord under rugs or where it can be pinched by furniture.
  • Keep the unit and cord away from standing water, humidifiers that can spill, and very wet areas.

Filter Handling and Dust Exposure

When you change filters, you are handling material that has captured a lot of dust and allergens.

  • Turn the purifier off and unplug it before opening the housing.
  • Remove filters slowly to avoid shaking loose dust back into the room.
  • Consider wearing a simple mask or positioning yourself upwind if you are highly sensitive.
  • Place used filters directly into a trash bag, seal it, and dispose of it promptly.

Children, Pets, and Air Outlets

For homes with children or pets:

  • Choose locations where curious hands or paws cannot easily block vents.
  • Ensure outlet grilles are secure and small enough that fingers cannot reach moving fan blades.
  • Do not place the purifier where pets are likely to chew the cord or knock the unit over.

Maintenance and Long-Term Use for Allergy Control

Consistent, low-effort maintenance keeps an allergy air purifier working at close to its rated CADR for years.

Typical Filter Lifespans

Actual lifespans depend on dust levels, smoking, pets, and fan speed, but general ranges look like this:

  • Pre-filters: clean or replace every 1–3 months.
  • Carbon filters: replace every 3–12 months, depending on thickness and odor load.
  • HEPA filters: replace every 6–24 months, depending on usage hours and dust levels.

Simple Maintenance Routine

A basic schedule for an allergy-focused purifier might include:

  • Monthly: vacuum or wash pre-filter (if washable), wipe dust from the housing and vents.
  • Every 3–6 months: check carbon filter for odor breakthrough or discoloration.
  • Annually or as indicated: replace HEPA filter when airflow drops or indicator lights signal.

Recognizing When Performance Is Dropping

You do not need instruments to spot many performance issues. Common signs include:

  • Airflow from the outlet feels weaker at the same fan speed.
  • The unit sounds strained or louder than usual.
  • Odors linger longer than they used to with the purifier running.
  • Allergy symptoms worsen even though your routine has not changed.

Storage and Seasonal Use

Some people run purifiers mainly during peak allergy seasons and store them the rest of the year. If you do this:

  • Clean or replace filters before storage so the unit does not sit full of damp dust.
  • Store in a dry, indoor space to avoid moisture damage or mold growth in the filter media.
  • When you bring it back out, inspect filters for any musty smell or visible mold spots and replace if needed.
Maintenance task Suggested frequency What to look for Action if there is a problem
Clean pre-filter Every 1–3 months Visible dust layer, reduced airflow Vacuum or wash (if allowed) and let dry completely.
Check carbon filter Every 3–6 months Persistent odors, dark discoloration Replace if odors break through quickly.
Replace HEPA filter Every 6–24 months Clogged appearance, weak airflow, indicator light Install a new HEPA filter; do not wash unless explicitly allowed.
Clean housing and vents Monthly Dust buildup on grilles Wipe with a dry or slightly damp cloth; avoid getting water inside.
Basic maintenance tasks that help keep allergy air purifiers performing well. Example values for illustration.

Putting It All Together: Practical Takeaways and Specs to Look For

When you line up CADR, true HEPA filtration, carbon capacity, and room size, an air purifier can be a strong part of your allergy management plan. The goal is not perfection, but noticeably lower airborne allergen levels in the rooms where you sleep and spend the most time.

Use the points below as a quick reference when comparing models or checking whether your current purifier is set up effectively.

Quick Specs to Look For in an Allergy Air Purifier

  • Room match: Calculate your room volume and target at least 4–5 air changes per hour based on the purifier’s smoke CADR.
  • True HEPA filter: Look for clearly stated high-efficiency filtration, not just “HEPA-type” wording.
  • Sealed design: Filters that seat firmly with gaskets or tight frames to minimize air leaks around the filter.
  • Carbon stage: At least a basic carbon layer for general odors; thicker carbon if you are sensitive to smells or VOCs.
  • Noise levels: A fan speed that delivers your target ACH at a noise level you can tolerate overnight (often in the low-to-mid 30 dB range for bedrooms).
  • Multiple speeds or auto mode: Ability to run higher during the day or during spikes, then lower at night.
  • Filter access and cost: Easy-to-access filters with clear replacement intervals and reasonable long-term cost.
  • Physical size and placement: Footprint that fits the room while allowing several inches of clearance for airflow.

Combined with regular cleaning, humidity control, and medical guidance, a well-chosen and properly sized allergy air purifier can significantly reduce airborne triggers such as pollen, dust, pet dander, and mold spores, helping you breathe more comfortably indoors throughout the year.

Frequently asked questions

Which specs and features matter most when choosing an air purifier for allergies?

Focus on a high enough smoke CADR for the room to achieve 4–8 ACH, a true HEPA filter with published efficiency, and a sealed housing to prevent bypass. Noise levels, multiple fan speeds, and at least a basic carbon layer for odors are also useful practical features.

Can running an air purifier only on its quietest setting reduce its effectiveness?

Yes. The lowest fan speed may not move enough air to reach your target ACH, especially after activities that spike particles (cooking, cleaning). Run a higher speed for 30–60 minutes after spikes, then reduce to a quieter setting for continuous use.

Are ozone-producing air cleaners safe for people with respiratory conditions?

Ozone and some ionizing technologies can irritate lungs and worsen asthma or allergies, so mechanical filtration (pre-filter, HEPA, carbon) is generally safer. If a unit has an ionizer or ozone mode, use the HEPA/carbon stages without that mode for sensitive individuals.

How often should I replace filters to keep allergy protection effective?

Typical schedules are: clean pre-filters every 1–3 months, replace carbon filters every 3–12 months depending on odor load, and replace HEPA filters every 6–24 months based on use and dust levels. Watch airflow, odor breakthrough, and indicator lights to adjust timing for your environment.

Where is the best place to put an air purifier for allergy relief?

Place it near where you spend most time (for bedrooms, within a few feet of the bed; for living rooms, near the central activity area), keep intake and outlet clear of obstructions, and allow several inches of clearance on all sides. Continuous operation on an appropriate setting improves steady protection.

Do I need a carbon filter if my main issue is pollen or dust?

Carbon filters do not remove pollen or dust but can help with odors and some gases that worsen symptoms for sensitive people. If your primary triggers are pollen and dust, prioritize HEPA and CADR; add carbon if odors or VOCs are also a concern.